Trying to etch glasses but I have no idea where to start. Any pointers on a scale or grid that is a good place to start for glass?
A search of the forum reveals a lot of discussions that may help you: Search results for 'etch glass' - LightBurn Software Forum
Yeah, the search tool brings up all kinds of good stuff.
Since I have a 80w OMT which would be pretty similar to yours, I’ll point you to this thread…
About 4 posts down I mumble about the settings i used for some wine glasses.
Emphasis Mine:
LOL, I wonder why…
Thanks been reading that one. Maybe I am focusing wrong with it I am still extremely new. but 400 at 17% and nothing is happening.
So I have done a beam alignment, focus test, but at that setting nothing happens on the glass. I am sure I have missed a step in the “Before you begin” section
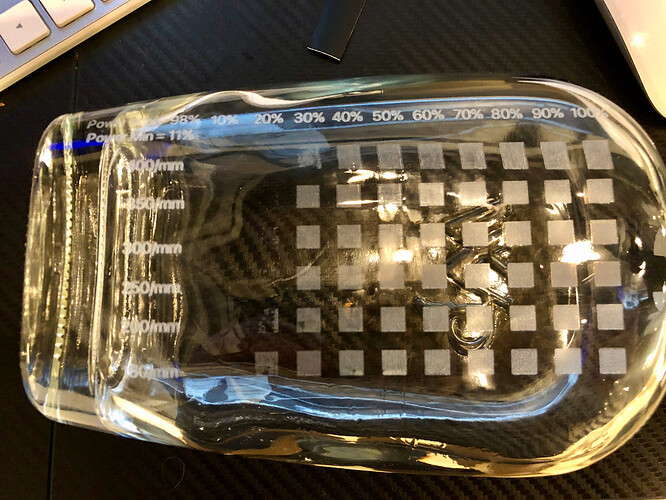
Ran a power scale on a flat whiskey bottle and I just do not get why I require such high power to see results.
It is hard to read in the photo Max Power 98% Min Power 11% on the Ruida. The steps are 400mm/sec then down by 50mm/sec and the Power is graduated from 10% to 100% in 10% increments
Are you sure you’re well focused?
It doesn’t really look like it.
How are you verifying good focus?
I am not 100% sure how. On wood the autofocus seems to work good. If I use the focus tool from OMTech it does not seem much different but I agree I feel like focus is the problem. Any tips on how to verify focus? A ramp test? I have the Z axis so a focus test should work but I am not totally sure how to read it.
Ok, it does not appear that LightBurn is controlling the Z axis. I can tell it to autofocus but it does not raise or lower the bed so my focus test is a waste of time.
I still do my focus test the old fashioned way.
I made some acrylic step gauges with 1/2mm steps, and I put a piece of white paper on the bed, pick a step on the gauge that I assume will be a little too long on focus, set the controller for a low power level (like 12%) and use the pulse button to zap a spot.
Move the X axis over a little on the paper, adjust z height to the next lowest step on the block and zap the paper again. Repeat as necessary until you think you’ve gone through the focus point and a little past and have a row of little holes.
Inspect the row of holes you’ve made with a magnifying glass and pick the one with the smallest cleanest hole. THAT is best focus. Mark that step on your gauge.
Repeat for each focal length lens you have…
Well I learned one thing today. If OMTechs YouTube channel tells you to press the tape on the mirror. You really better clean it after you line it up. WOW! Talk about a laser! It’s night and day power difference. I feel so dumb for not cleaning them and the lens after alignment.
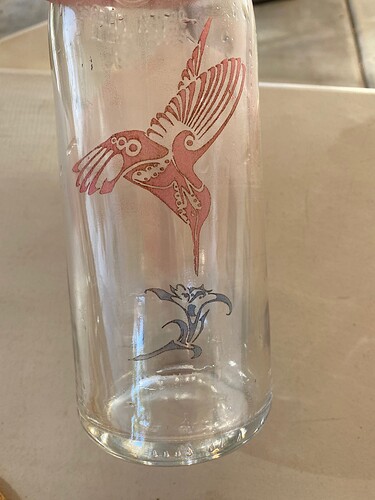
I use my Ortur 15W laser to etch glass. First thing is to clean the glass with acetone, the spray the area with “Cold Galvenizing Compound”, this is 93% zinc. I have done a number of bottles using this method, both clear glass and green glass. Works great for me.
Regards to all
Barry
Without photos, it didn’t happen…
Once I cleaned off the zinc coating I rubbed alumilite dye in the “frosted” area that the laser created.
What do you feel the best advantage is of the Cold Galvanizing Compound is? Cleaner Edges, More Frosting of the etch? What are the speeds/sec and Power of your laser?
On glass it keeps the diode light from shinning through and causes the glass to be etched. I have also used this method on ceramic tile. The zinc will be etched into the tile. My laser is the Ortur Laser Master 2, 15W. Also, there are a number of videos on YouTube that show how to use different methods to engrave everything from glass to preparing painting canvas to engrave.
This topic was automatically closed 30 days after the last reply. New replies are no longer allowed.

