Hi everyone,
I have a small problem with the rotary axis on my machine and I am hoping someone can help. I am using Lightburn 1.0.04 and a Ruida RDC6445S controller. The ‘steps per revolution’ won’t change for the rotary axis regardless of what I put into Lightburn and I have read elsewhere that some controllers won’t accept a rotary input. Is this true with the RDC6445S?
Also does anyone know of a simple fix for this other than changing the Y axis steps value in the controller itself whenever I change to the rotary axis.
Thanks
Doug
Silly question but you are writing the new inputs you make in lightburn to the controller?
Yes I was. I was making the changes in the Machine Settings panel and they were then showing in the Rotary Setup panel after writing them to the controller. I have enabled the rotary in the Laser Control panel and the Rotary setup panel so don’t know why the settings won’t change in the Ruida controller.
On my machine, Lightburn read that data from the controller I did not set it. So it must have been set for it to show up in the rotary menu.
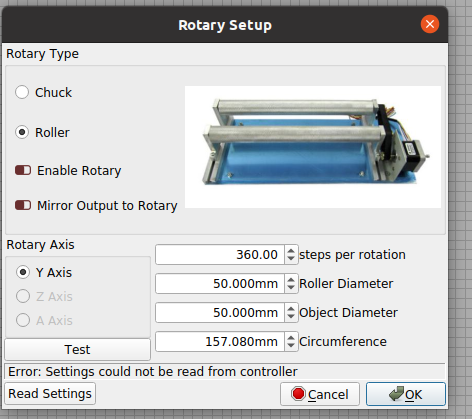
This is my ‘Tools → Rotary setup’ with the machine not connected. The ‘read’ of the machine fails.
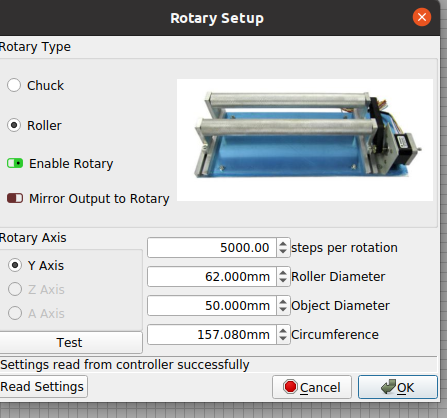
This is the same with the machine on-line. Notice at the bottom below the ‘test’ it advises you of the status that it had a successful read from the controller. Notice the roller is 62 the correct value that is stored in the Ruida.
Something isn’t making sense here…

That’s the same results I got. It seems the data is being written to the Ruida but it is not recognising it. Makes me think there is a setting in the Ruida somewhere but I haven’t been able to find anything.
I think it makes you confirm something is not configured properly.
If it’s reading it from the controller, that’s what is in the controller. Which kind of leaves us with no question here…?
What’s it actually doing or not doing?
![]()
I have done some more research on other forums and it seems this is a long standing problem with some versions of the controller firmware.
The data is being written to the controller OK but the controller is not changing to the rotary function despite being told to do so. The controller Function menu shows that the rotary axis is enabled. Ruida website doesn’t list any firmware uploads or upgrades for my controller (RDC6445S) but I am not giving up.
I am hoping someone out there in CNC land has had similar experience and may know of a fix.
Cheers
What happens on the U axis when you enable the rotary?
Don’t know. I don’t have the U axis connected, From what I understand, the rotary axis will only work on the Y axis. Can it be made to work with the U axis?
I’ve read that some of the 6445’s run on the Y and some run on the U depending on the firmware.
There appear to be a number of people using the U axes for a rotary. If you search the forum there are a number of threads on it.
I have just gotten the driver from Amazon.
What driver did you order? I’m looking at the DM542S.
Here’s the discussion I bookmarked for future use.
This one from Amazon
This is the ‘supplied’ driver
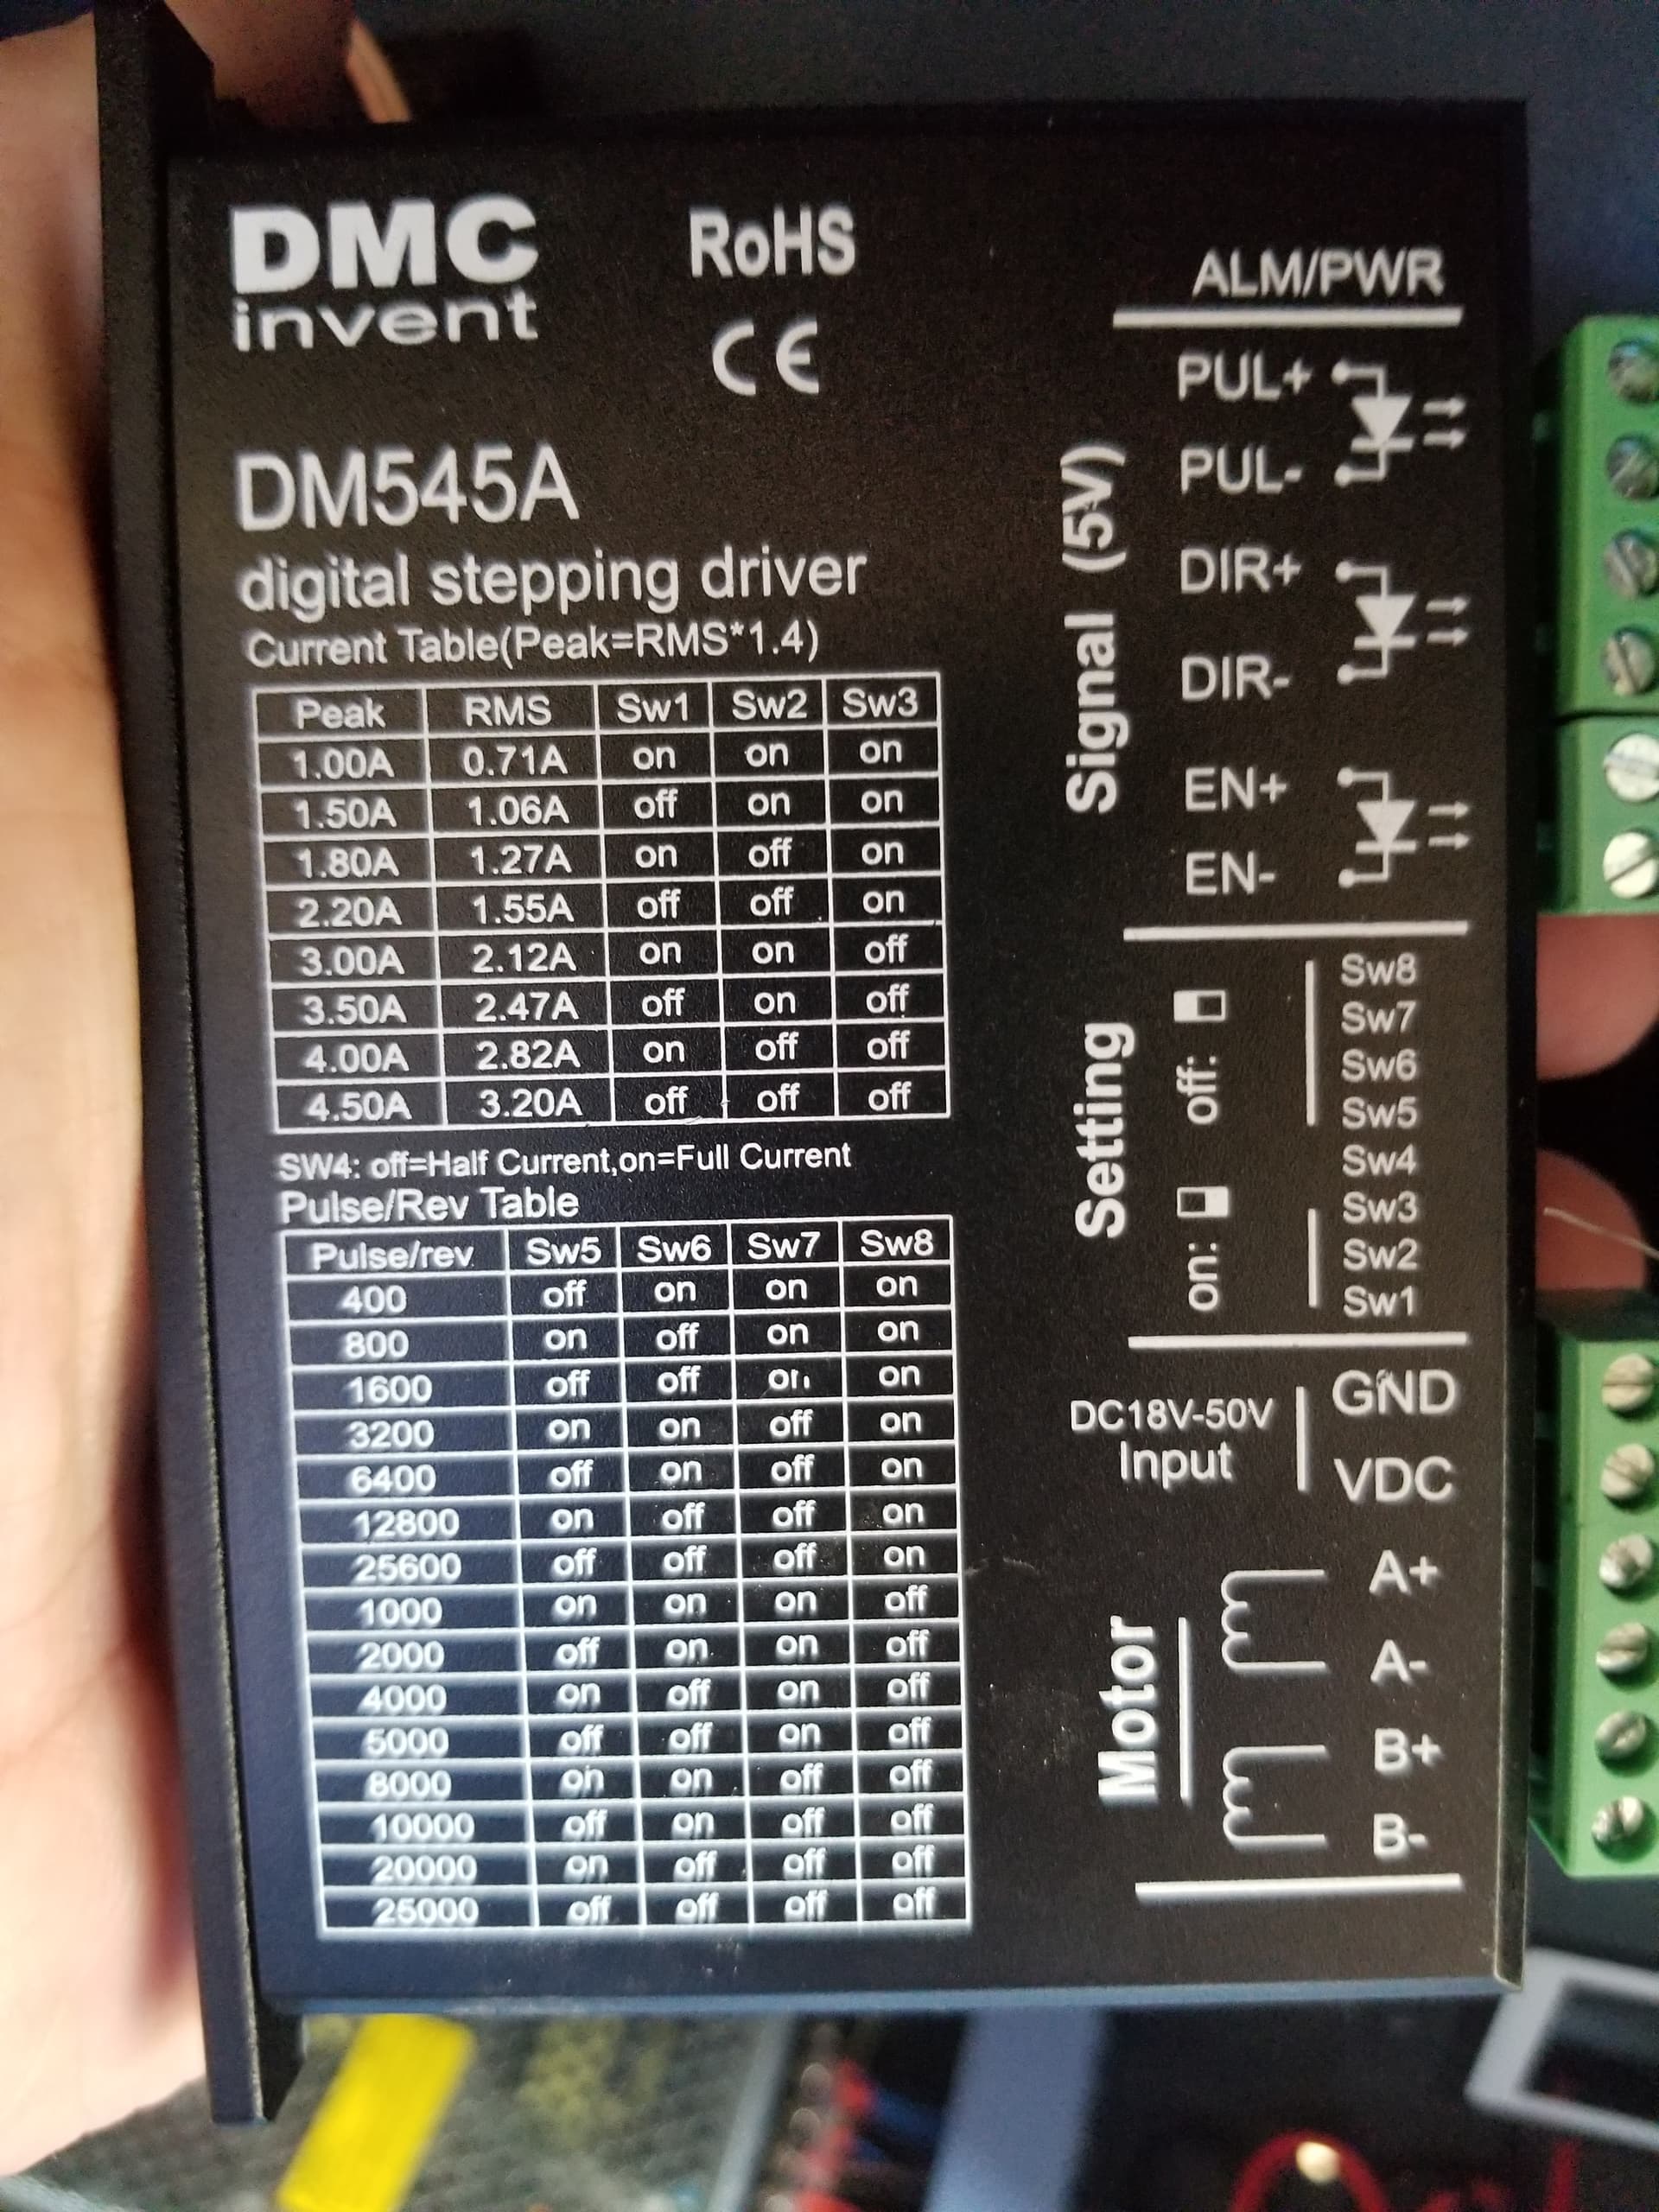
It was low cost, but I haven’t installed it yet. Have some 18 gauge wire showing up in a few days.
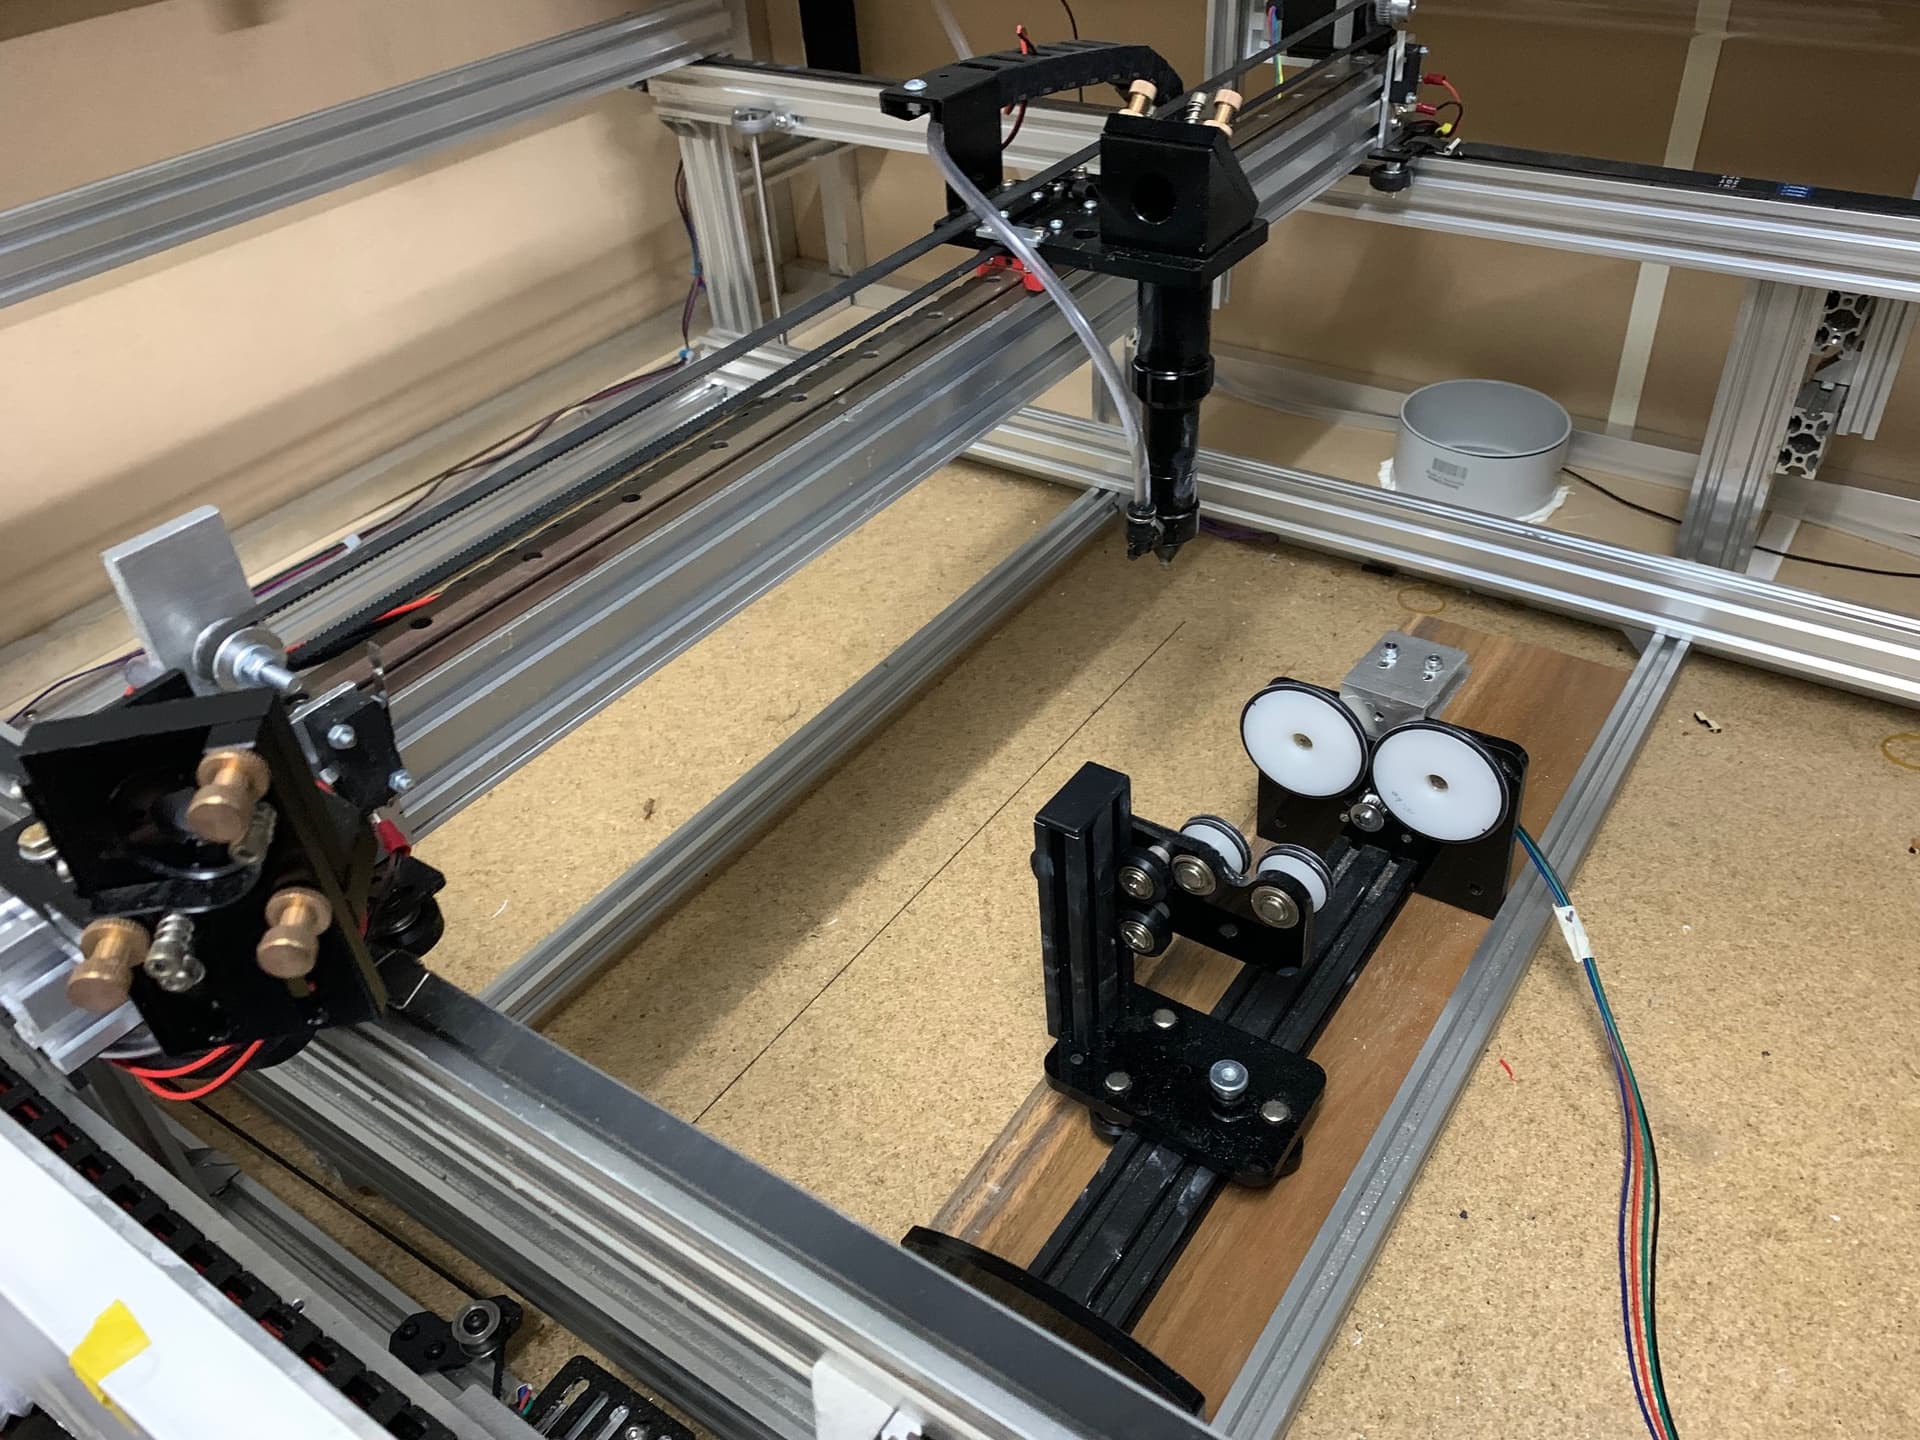
This is mine driven off Y.
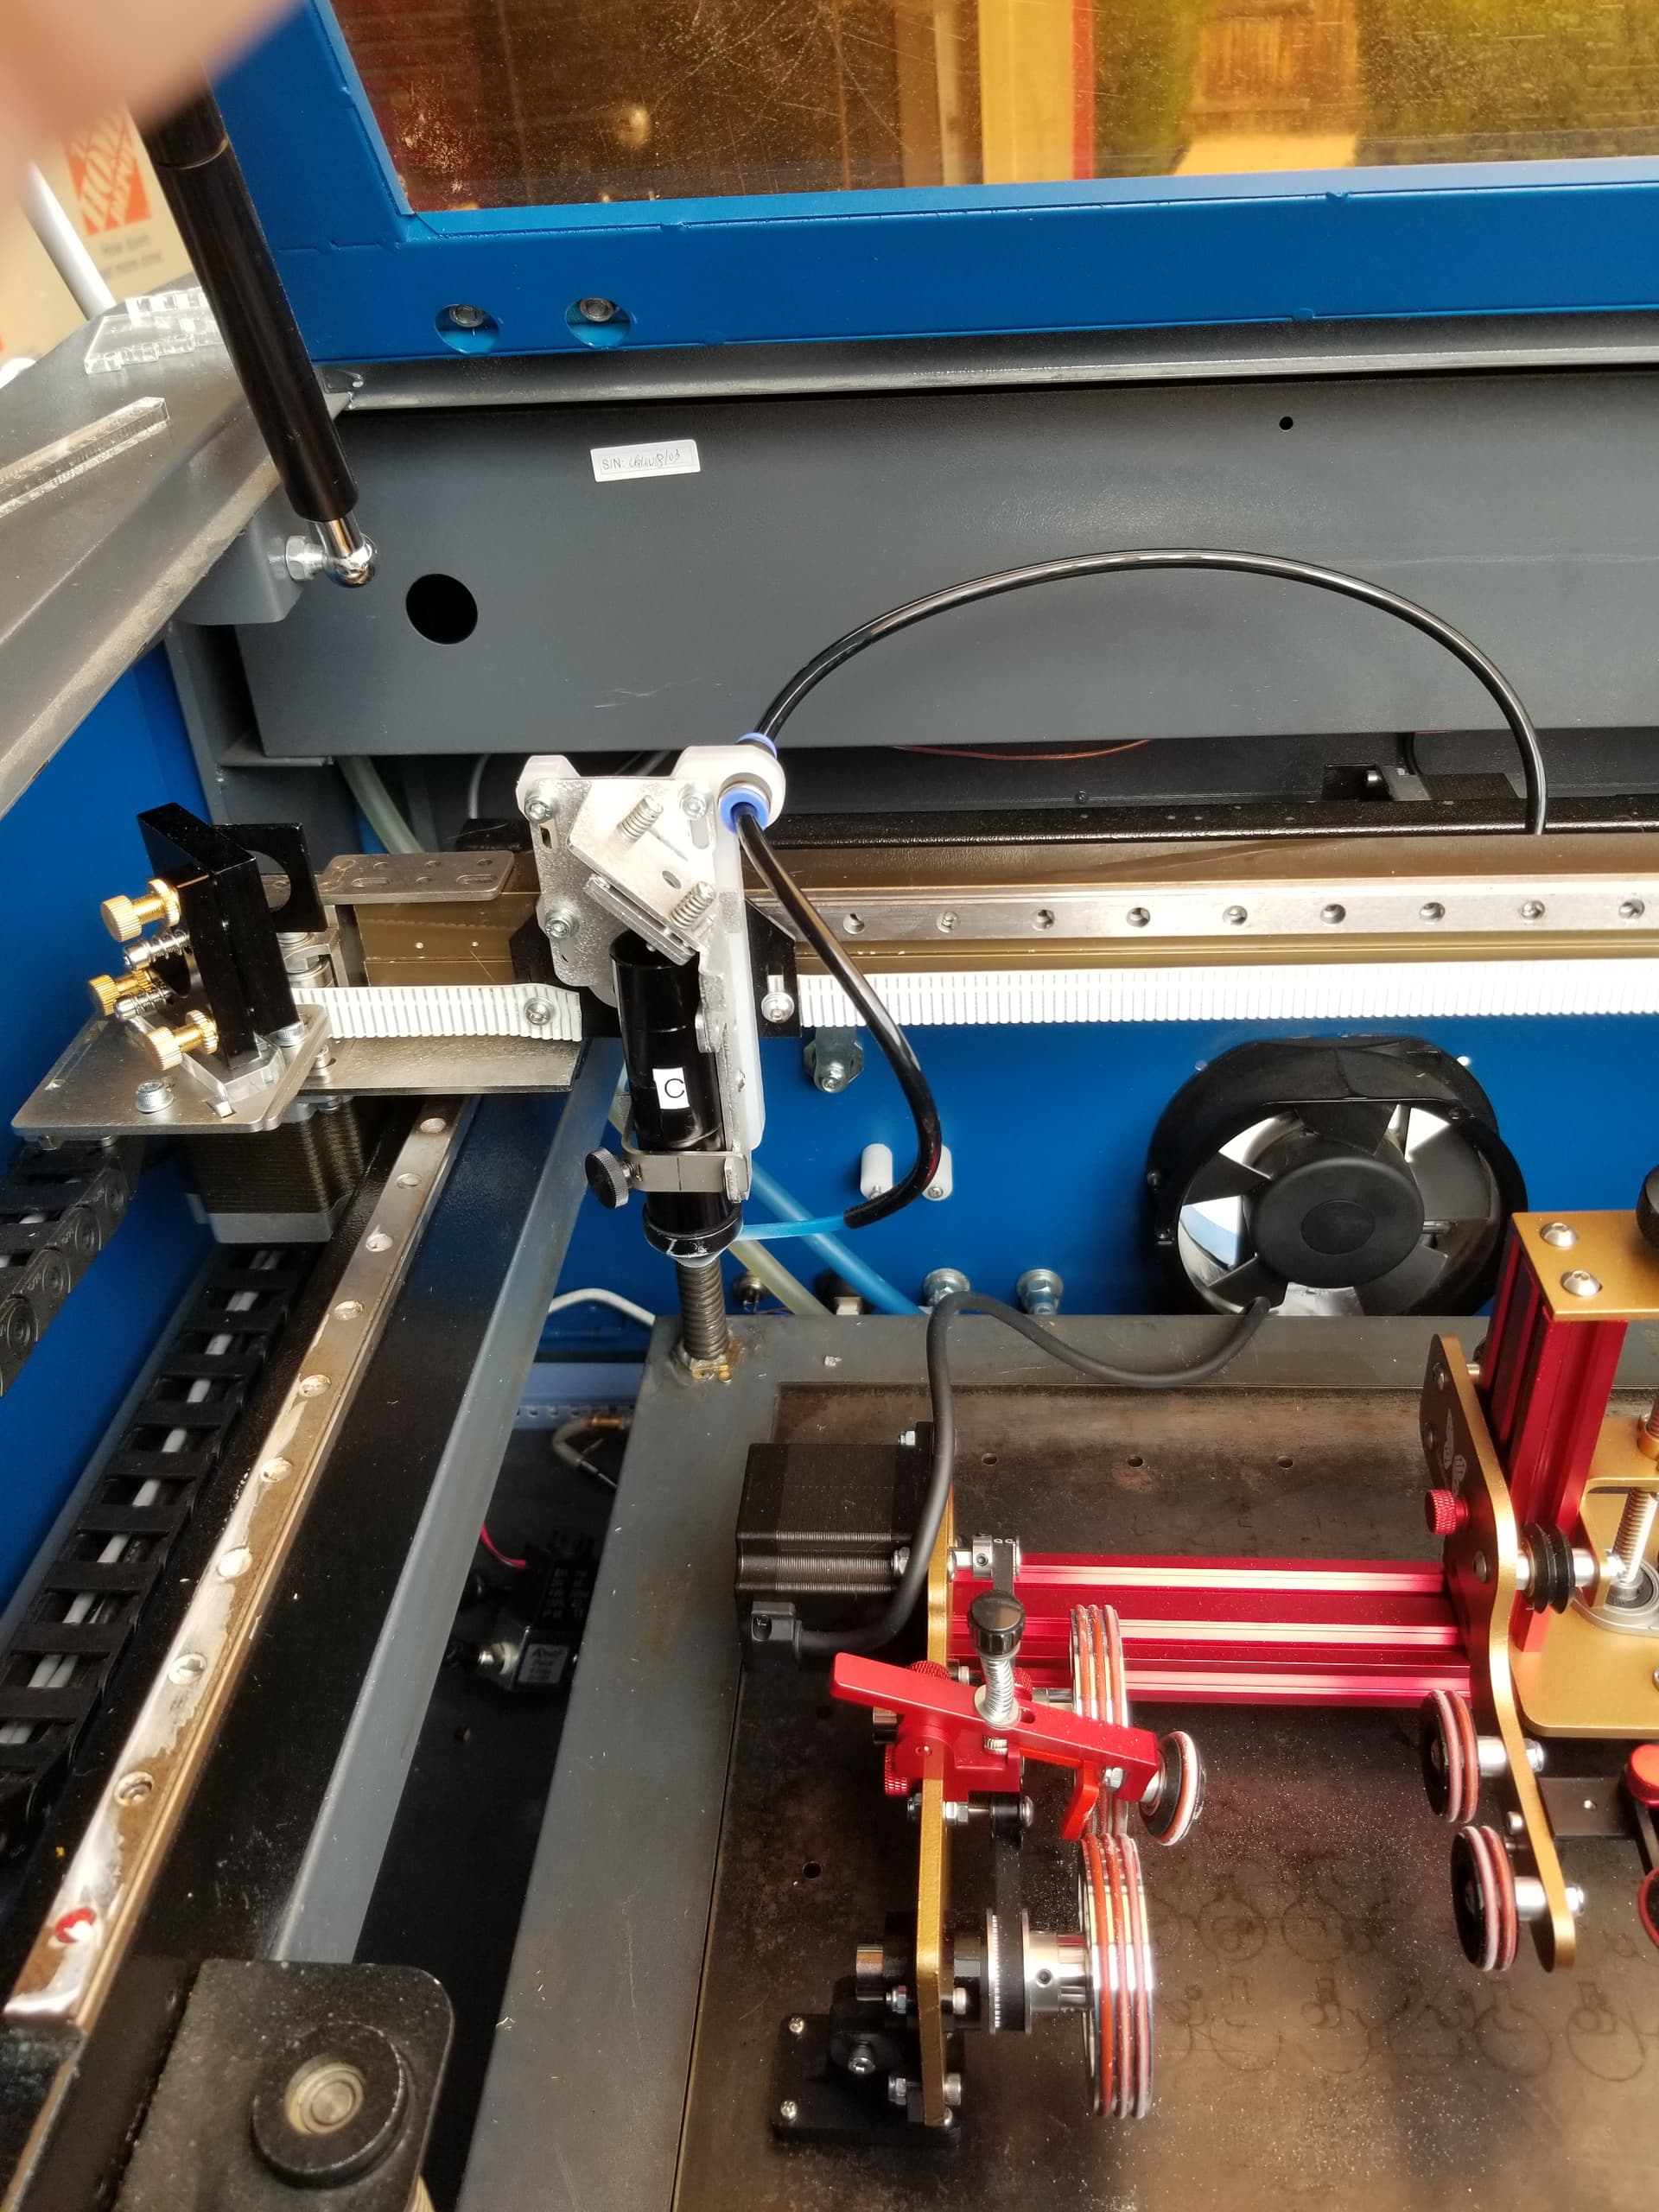
It’s a PiBurn, what type do you have?
Its from Mansfield customs. I have a 6445 from Lightobject. They say I can run it on the Y but I haven’t installed it yet. I’m thinking it will be the U like all the rest.
Thanks. I will connect up the U axis. Fingers crossed
Set up the U axis and, lo and behold, it works! Now I can toggle the rotary on and off from within Lightburn. A big thank you to everyone.
Now I just have to fix the slipping problem with the rotary fixture.
Cheers
Great that it was an easy task. Have the parts, just haven’t gotten around to it yet. Still working on a jig for alignment.
When you fix the slipping problem, let us all know 
I like to engrave detail, so I had to drop all the acceleration values. I think mine are down about 20mm/s on the Y axes. And some porcelain cups just refuse to stick. Too much mass to change direction so quickly.
Will do. Stay tuned
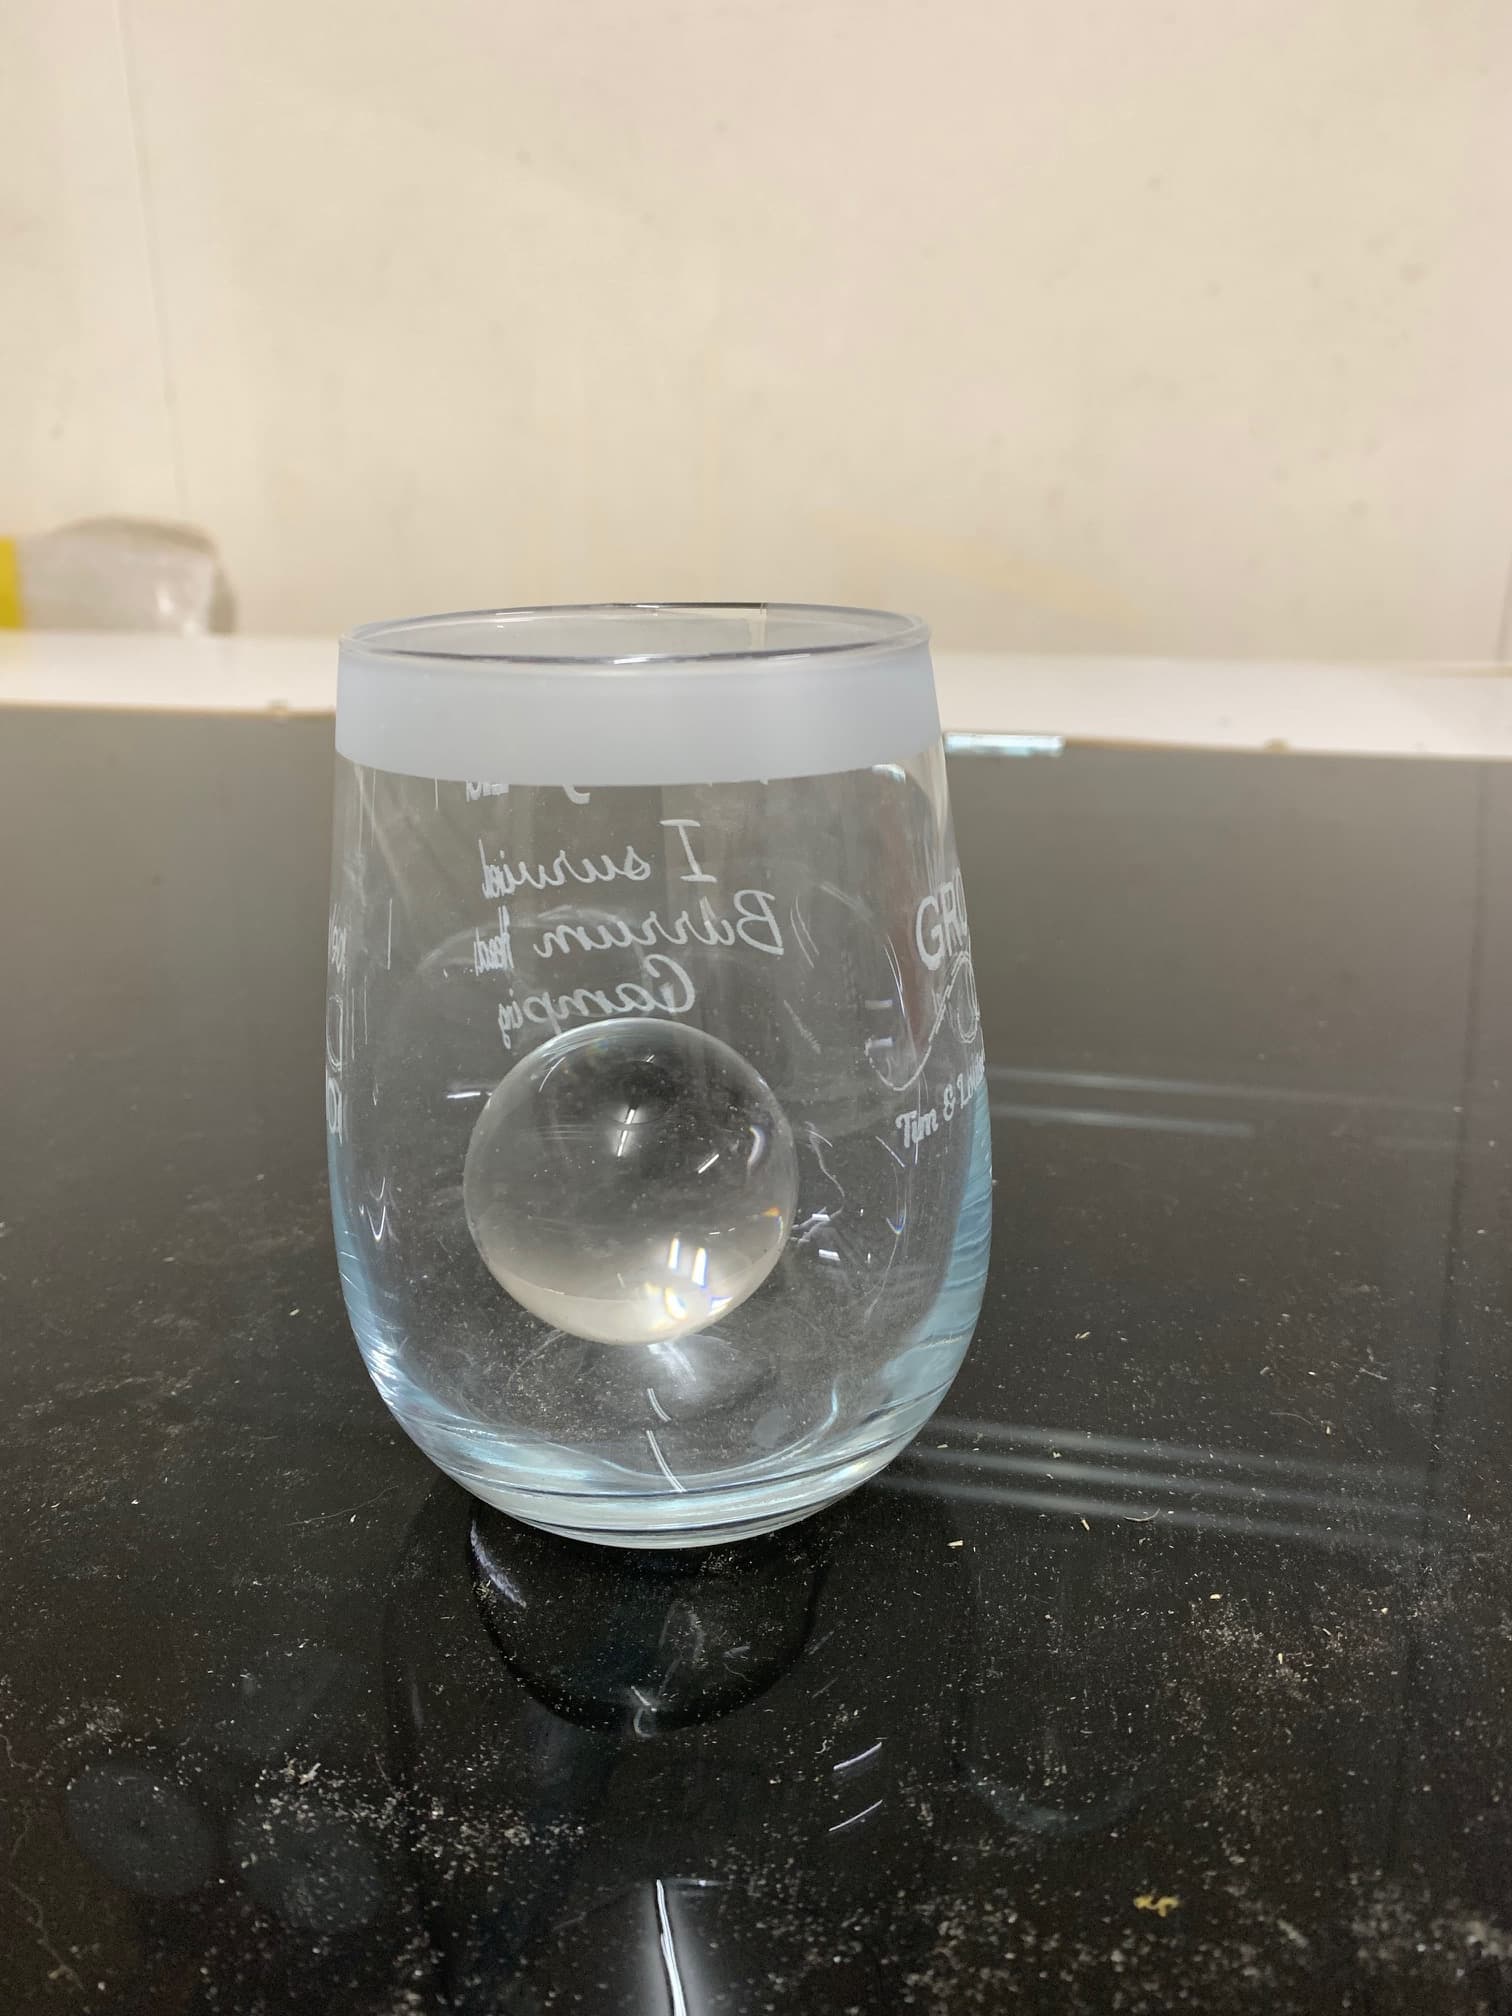
Fixed the slipping problem for the most part but different glass ware behaves differently because of their shape. Stemless wine glasses seem to be the most troublesome.
I use a strip of tape (either masking or sellotape) around the top rim of the glass for grip on the drive wheels and then weigh it down with a glass ball. Works with most glasses. Instead of tape you can use a rubber band but haven’t found one the right size.
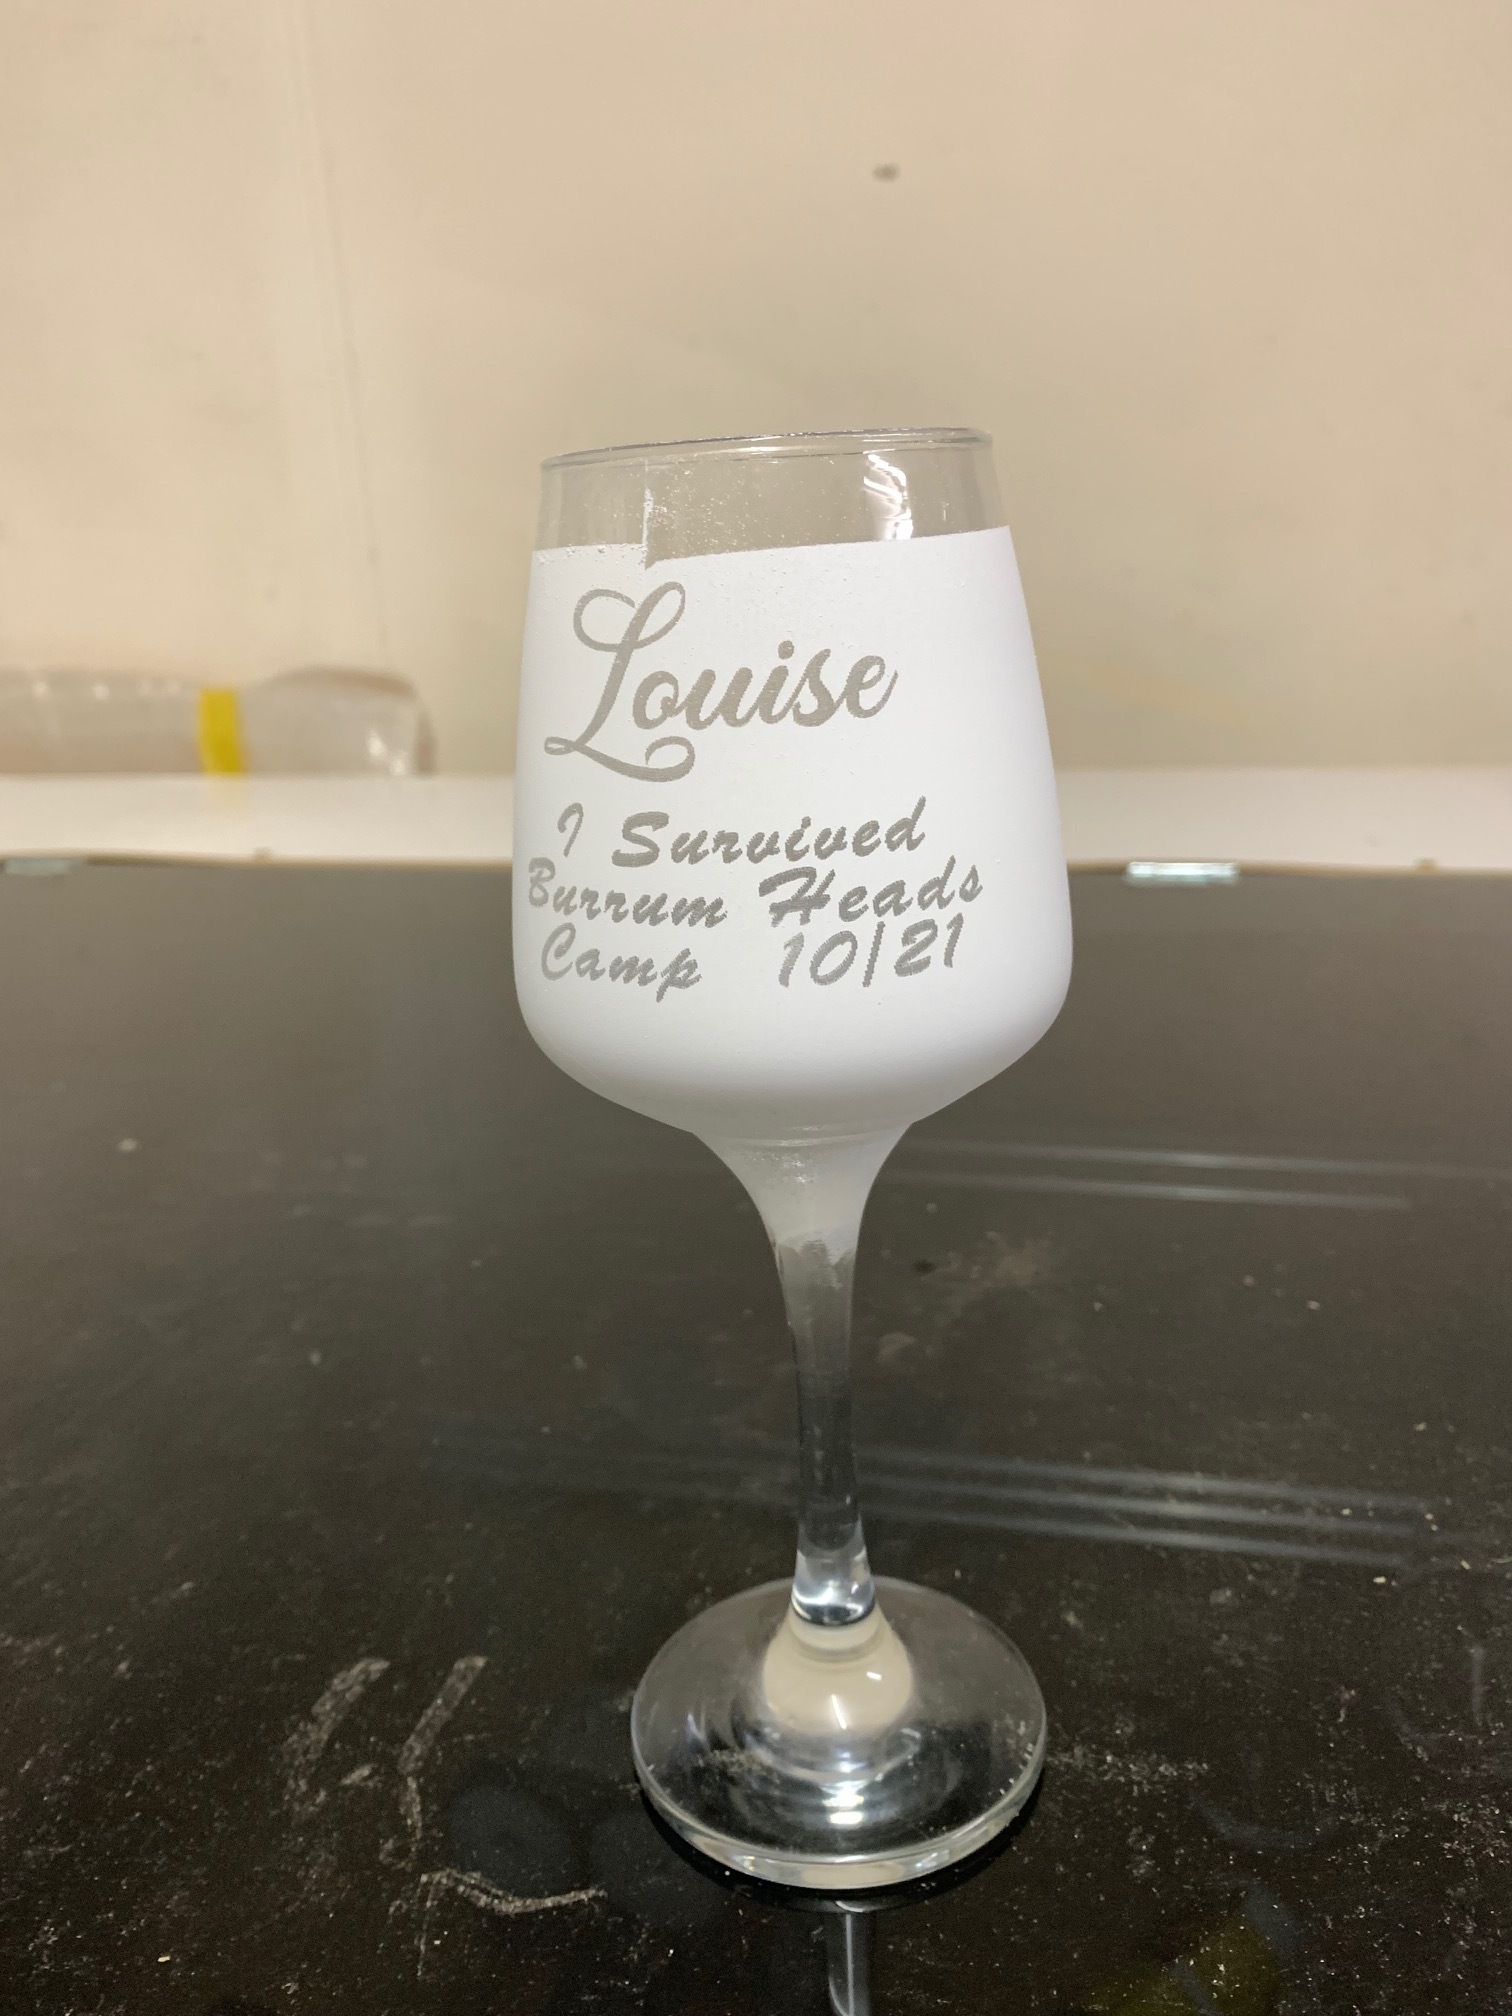
I spray the glass with spray-on chalk before etching. Works a treat and washes off very easily with water.
Have found that it is most important that the longitudinal axis of the rotary attachment is aligned. If the two sets of wheels are off even slightly the glass will act like a screw.
Still playing with power and speed settings. If anyone wants any more detail let me know.
Cheers

interesting creation. Rather different with an extra mirror.
How difficult was the alignment of the frame?
Looks good, like to see the electronics end and tube, hint hint…