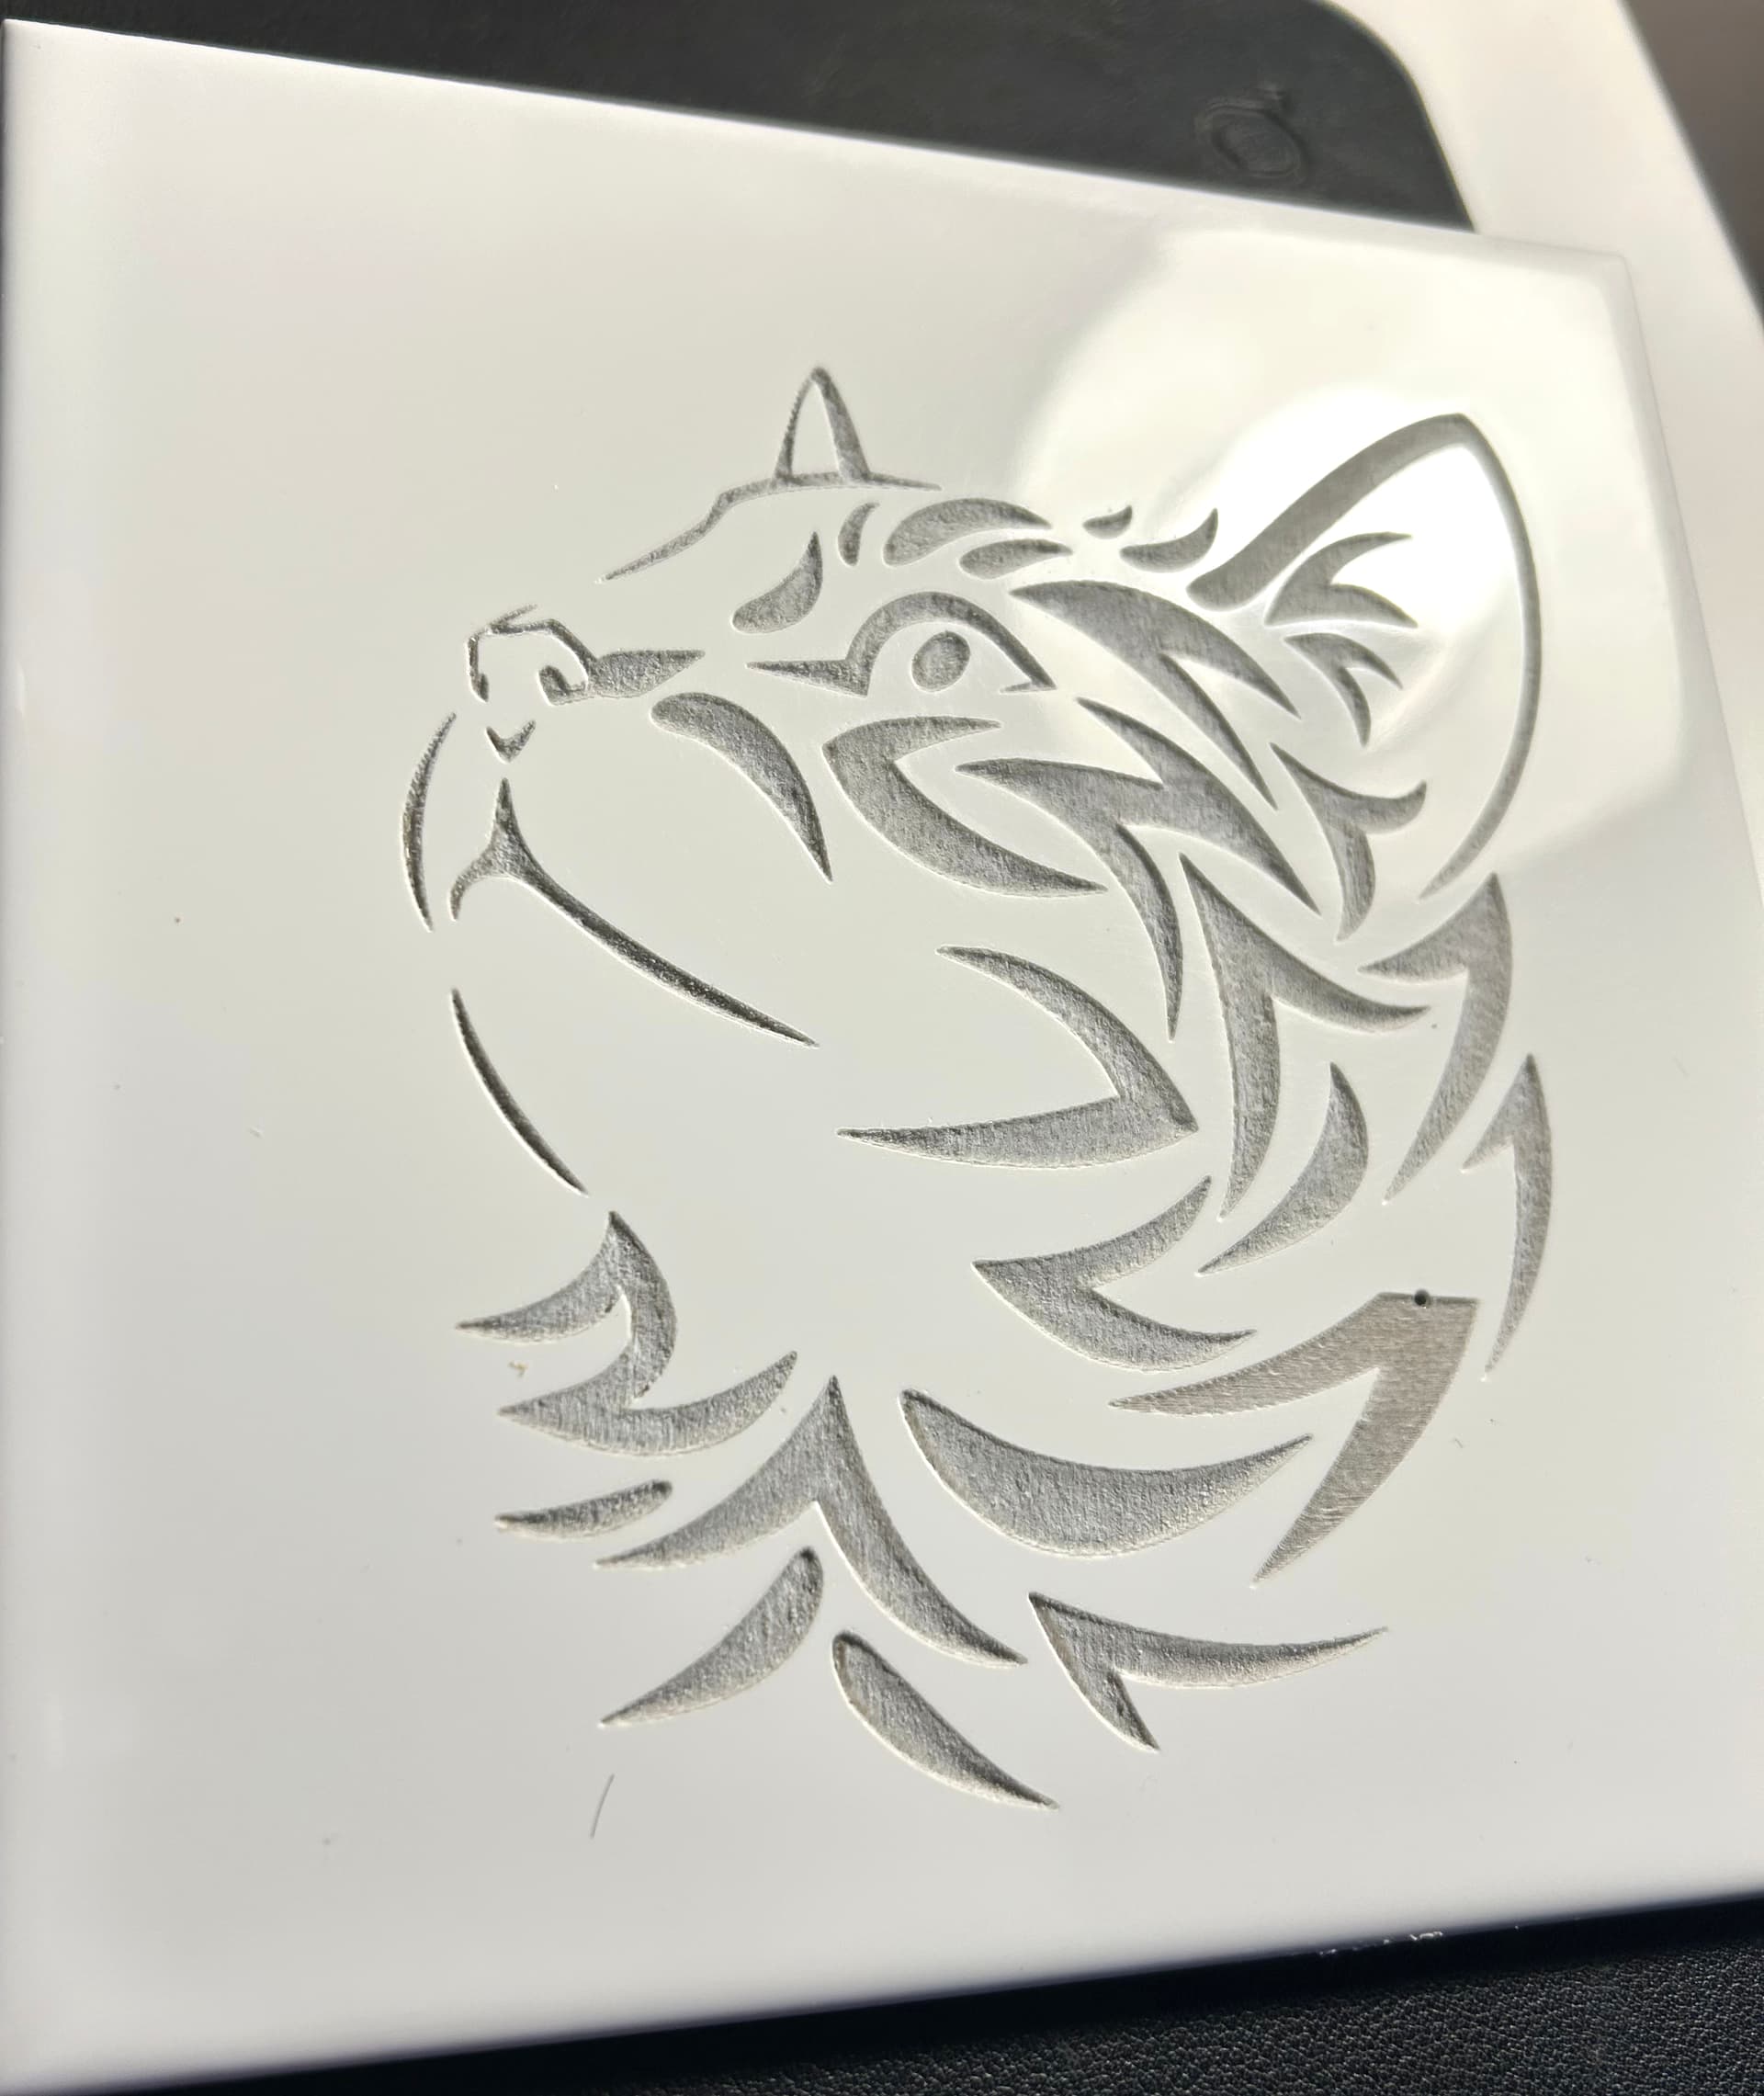
This is a 6-inch plain white ceramic tile, which was engraved using the Sculpfun SF-A9 40W. I wanted to discover what was needed for an engraving without using titanium dioxide or laser-engraving paper. The power was set to 40W at 100% and the traversal speed was set to 1000mm/min. I used a digital caliper to ascertain the depth of the burn. The engraving depth varied from 0.19mm to a maximum of 0.55mm. The burn time was 1 hour and 11 minutes.
The pinhole is where the Sculpfun tilt sensor stopped the proceedings. It is the result of the five seconds to cross the room, open the enclosure, and hit the emergency stop button when hearing the tilt alarm. I was unsuccessful in discovering how to turn the sensor off. Sculpfun were unwilling to discuss the matter with me. I intend to fill the engraving with powder coating paint and gently heat the tile from underneath. This will give me access to the colours I want to use.
Thank you. It raises an interesting point. I think pre-warming the tile will prevent me from filling the engraving with the powder properly. ( it is probably worth an experiment though) If the tile is warm, it may prevent the powder from spreading. I like to fill the grooves then spread the paint with a straight edge.
This is far more accurate than just pouring the powder on top and then grinding down any surplus paint. Also very gently heating the tile from underneath with a heat gun should melt the paint powder in the bottom of the groove first. Then I expect it will slowly melt the top surface when it reaches the correct temperature. I think this may help to reduce the bubbling effect I have seen with too much heat.
Thanks. My powder coating is electrostatic and very low melting point. But gentle heating is going to be over the whole tile for this pattern. Maybe a small kiln/microwave will do the trick.
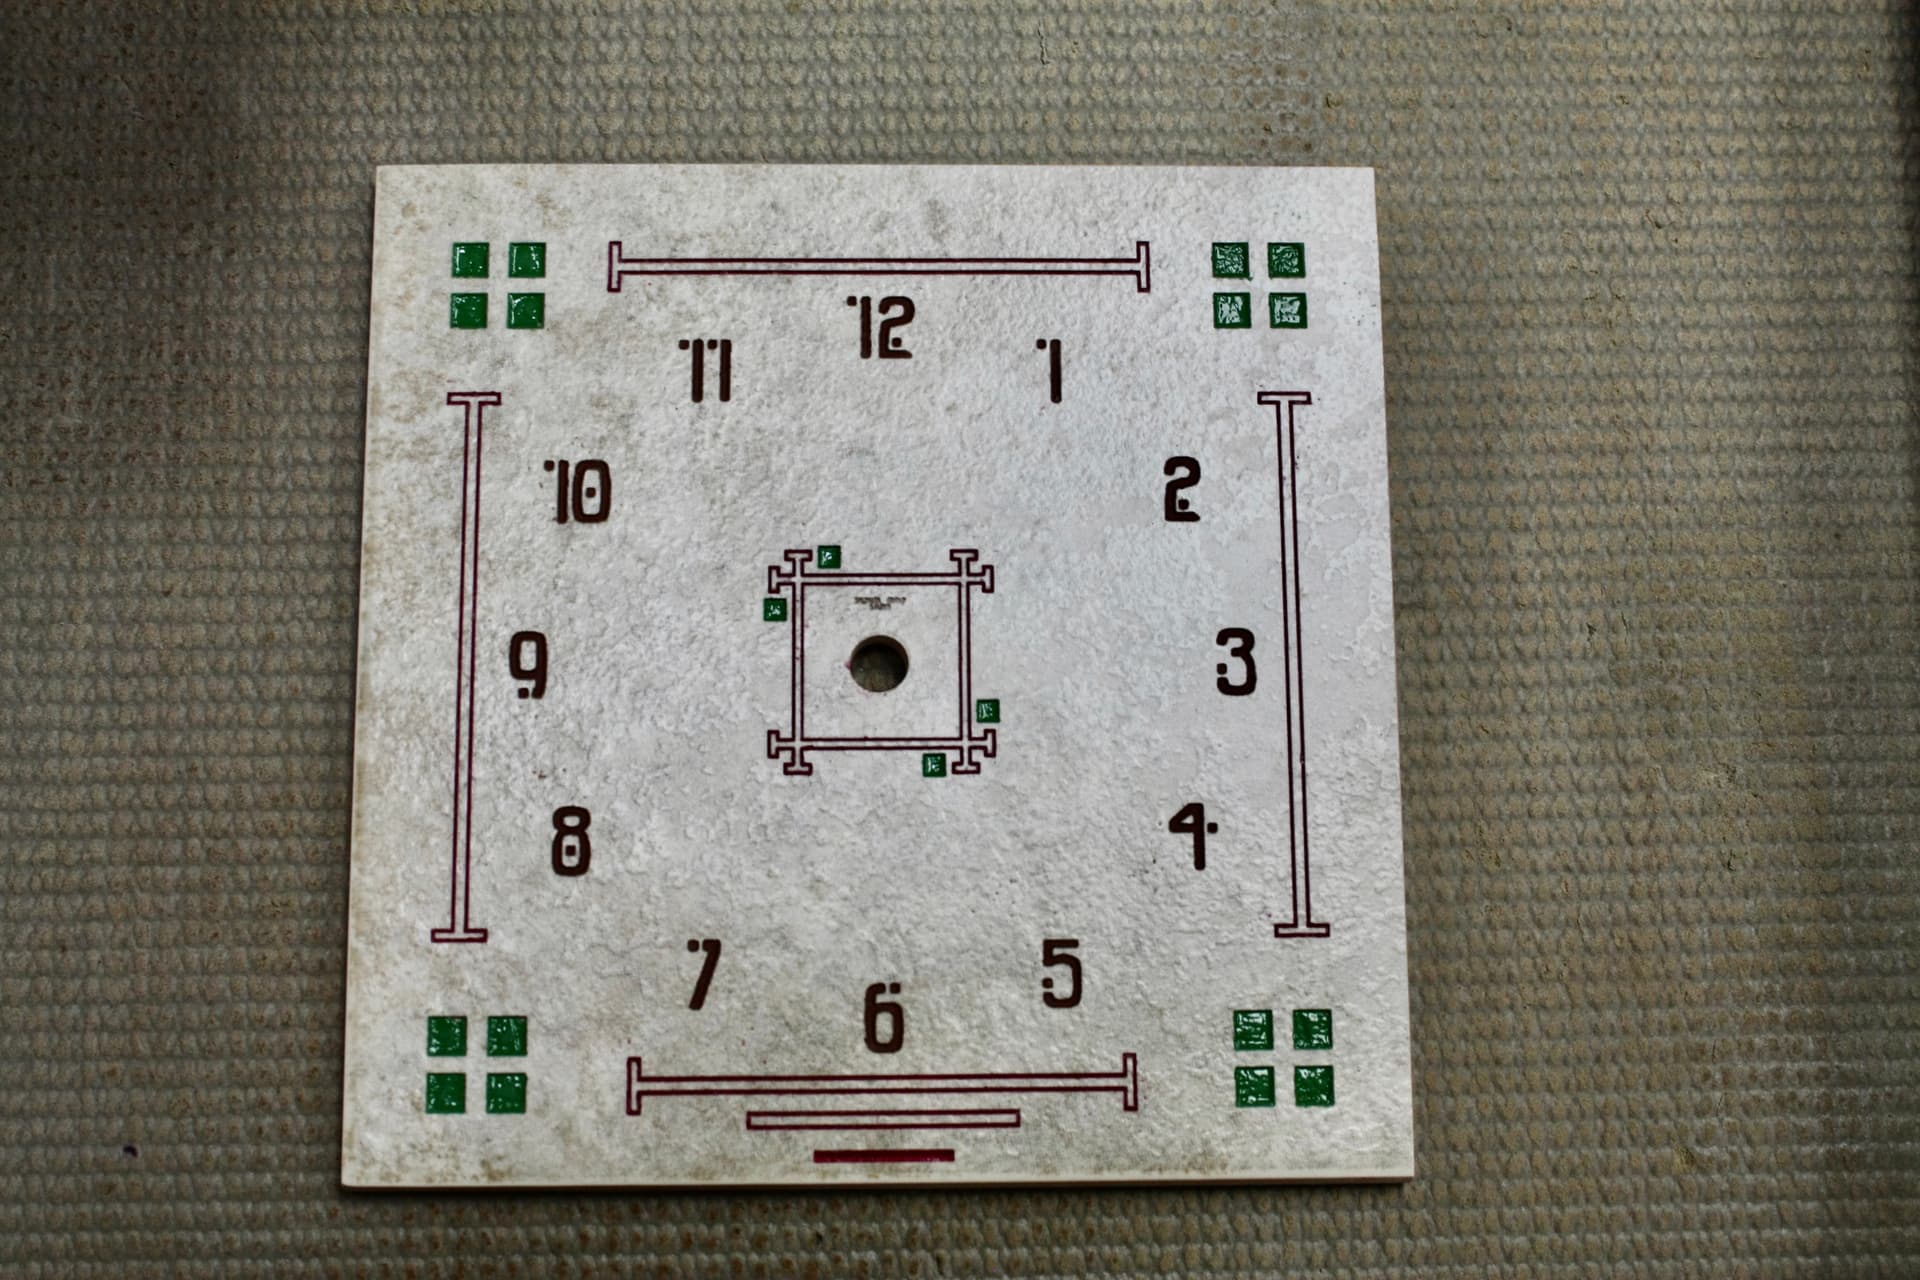
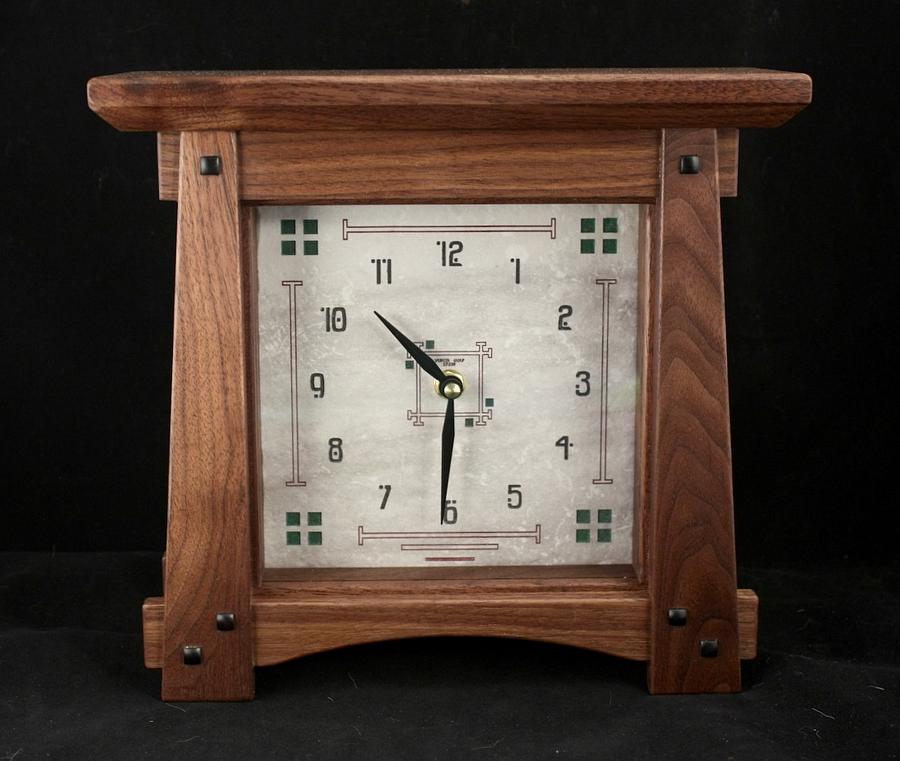
I’ve done similar deep etching on tile with my 10W diode. The depth allows for acrylic paint fill so colors besides TiO2 black can be achieved as with this clock face:
Hi Jeff, thanks!
I believe I was getting down about 1/16" (1.5mm) with two passes at 80%. Don’t recall offhand the speed, but probably 8mm/s (I can look this up later if you really need the specifics, not at the machine at present).
The tile etched easily, but tiles are different base materials. I don’t think this tile was porcelain (high temp). Just a texture-glazed tile from a home center. I have done the standard “cheap” white glaze bathroom tiles as well. but didn’t try going as deep.
This is great! I have the SF-A9 and about 100 4" tiles. We can call it the NNWT method (Not NWT)?
Have you tried any kind of detail work, like from an image? I like this idea with using power coat paint as a fill-in. That stuff comes in colors. My Emeril air fryer will come in handy.
Got one of these too. Looks like your clock face has decent detail. I am anxious to get started experimenting. I never considered doing tiles without a coating, anthough I started the Fried Some Rocks! thread. I just figured white would not work. Thank you all for giving me a new process to work with!
I don’t think you can easily do an image since the tile deep-etch is very binary, either a pit or not.
The detail is good, but I was pushing the limit on some areas like my logo directly above the clock hub at 12 O’clock.
When I do images on tile, I just use Rustoleum 2x and pre-process the image at image-R.
I have no experience with a C02 or fiber, but with their higher heat and better focus, finer detail may be possible.
Sorry, yes you have a point with the various image types that are binary.
With my diode, I don’t think I could get the pixel density for a decent image, but now I have to try!
If the “dark” pixels could be filled, color could be anything.
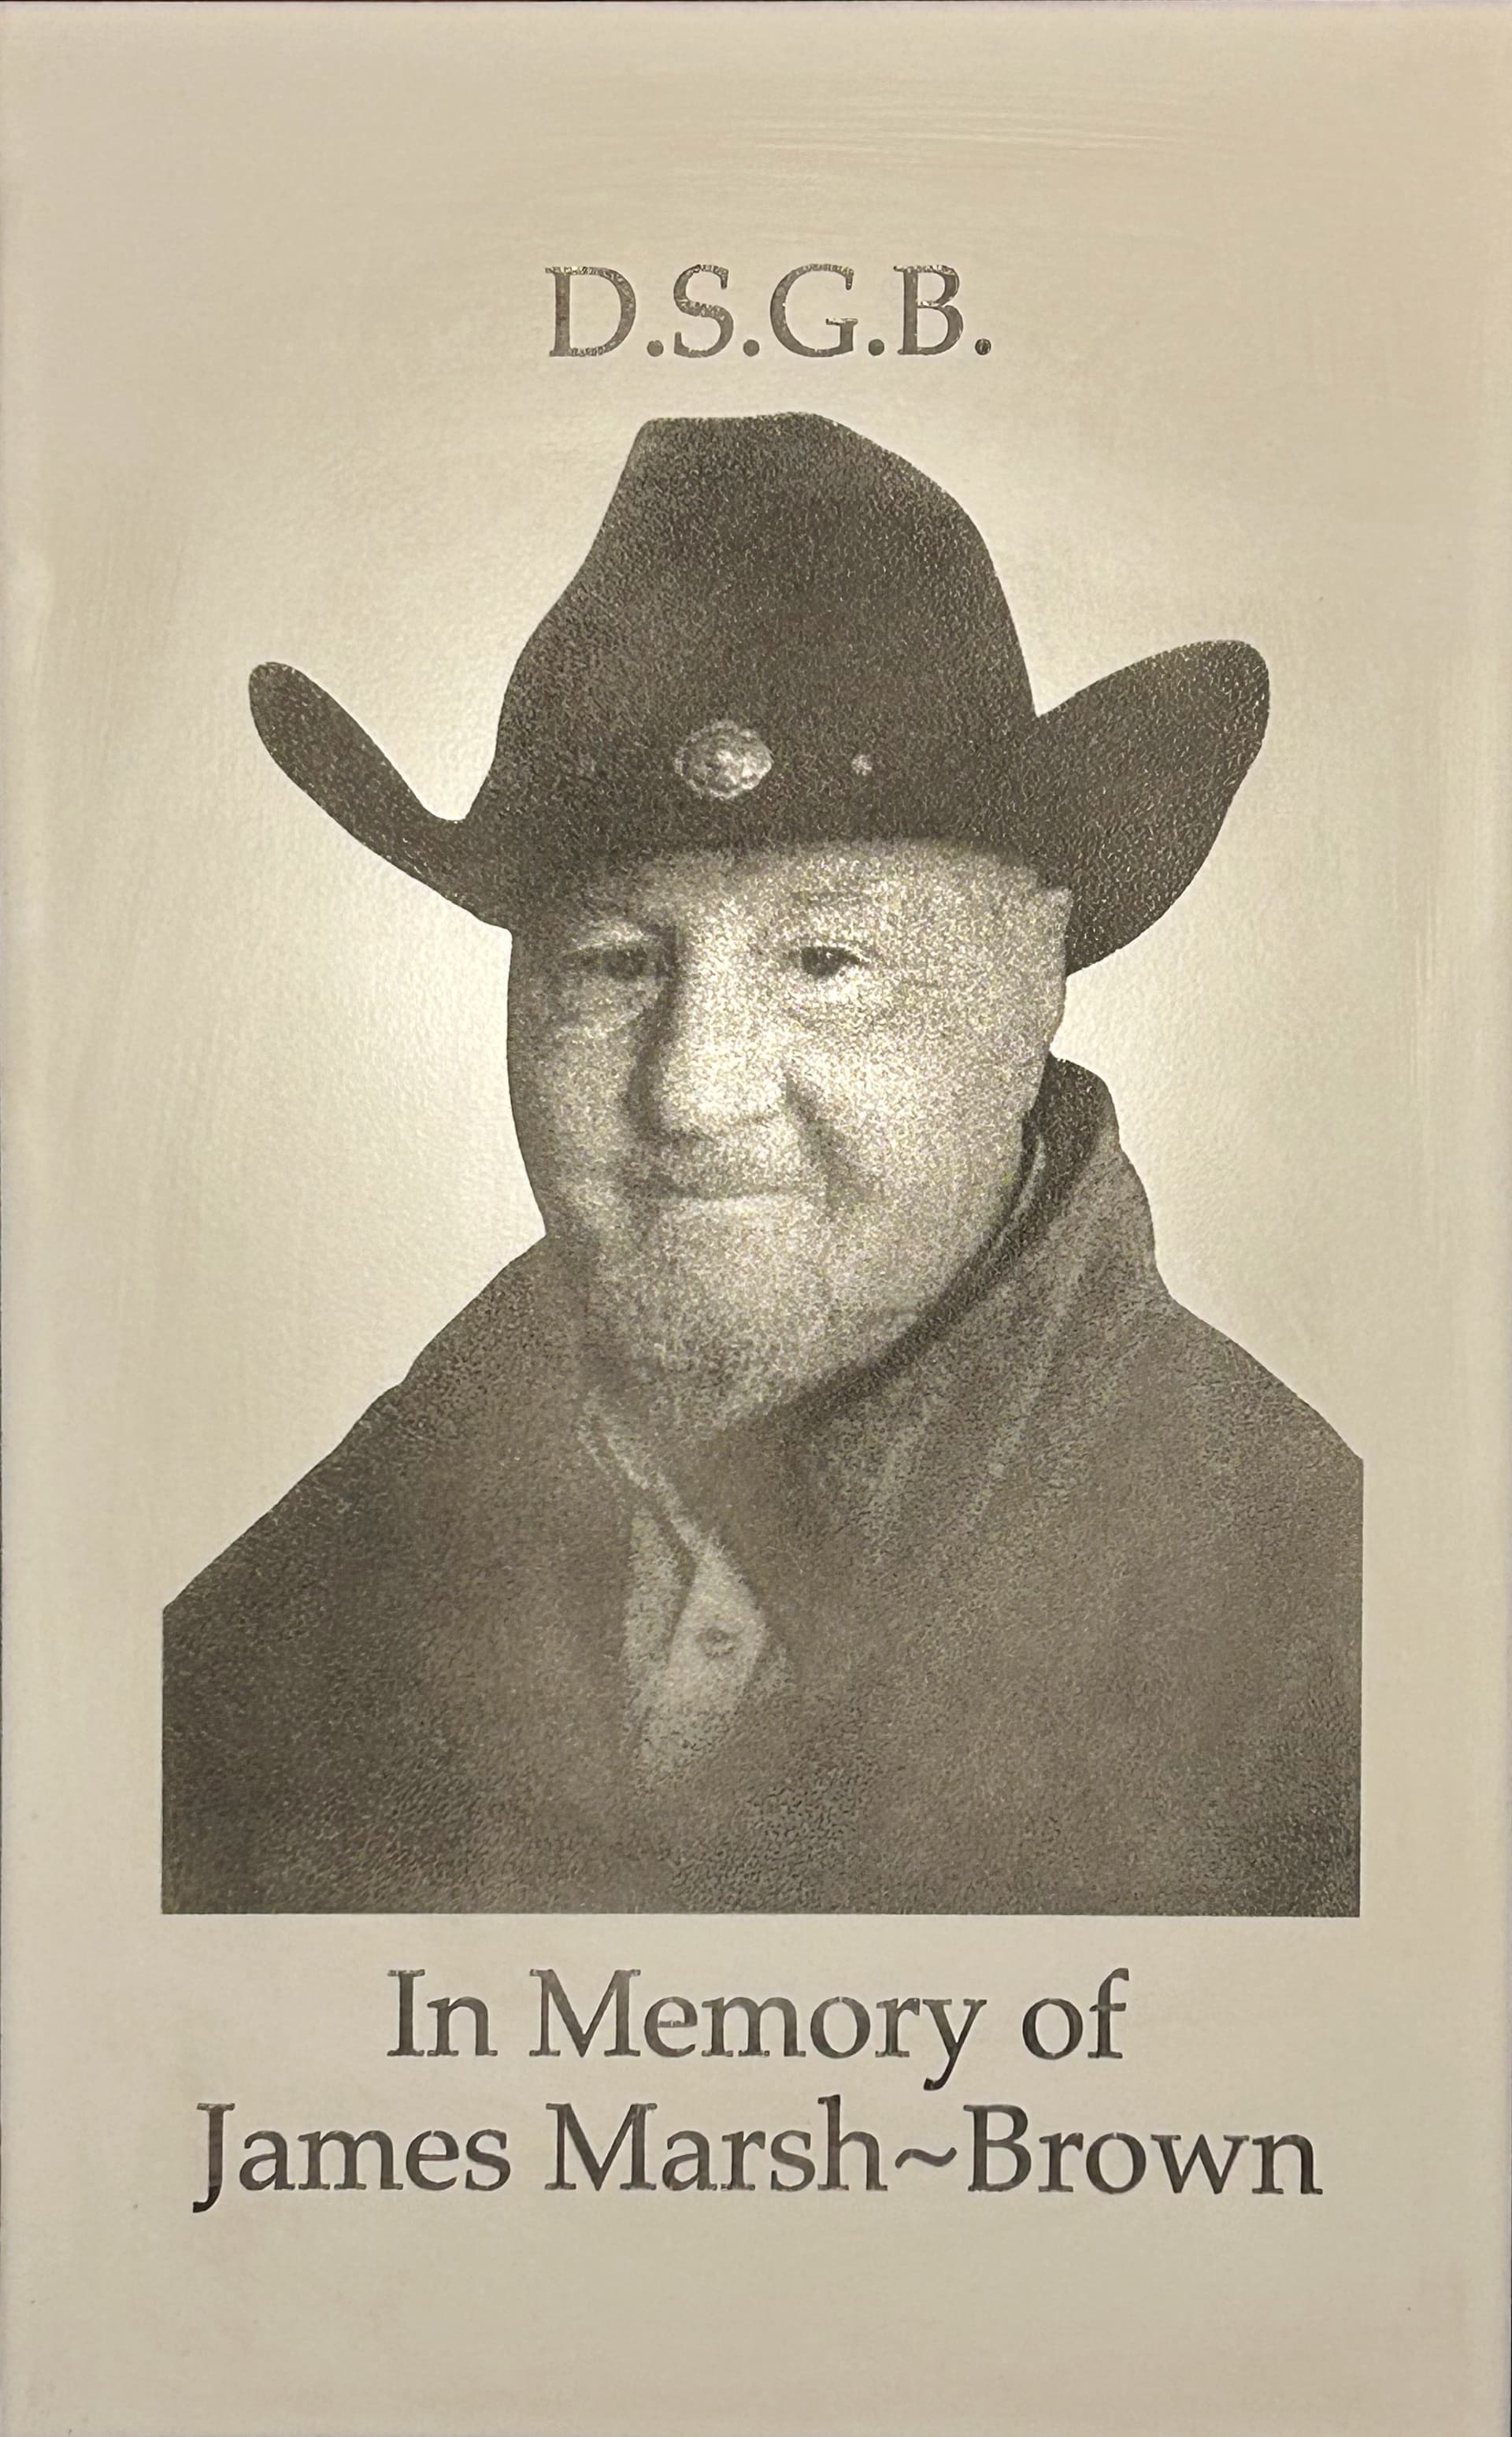
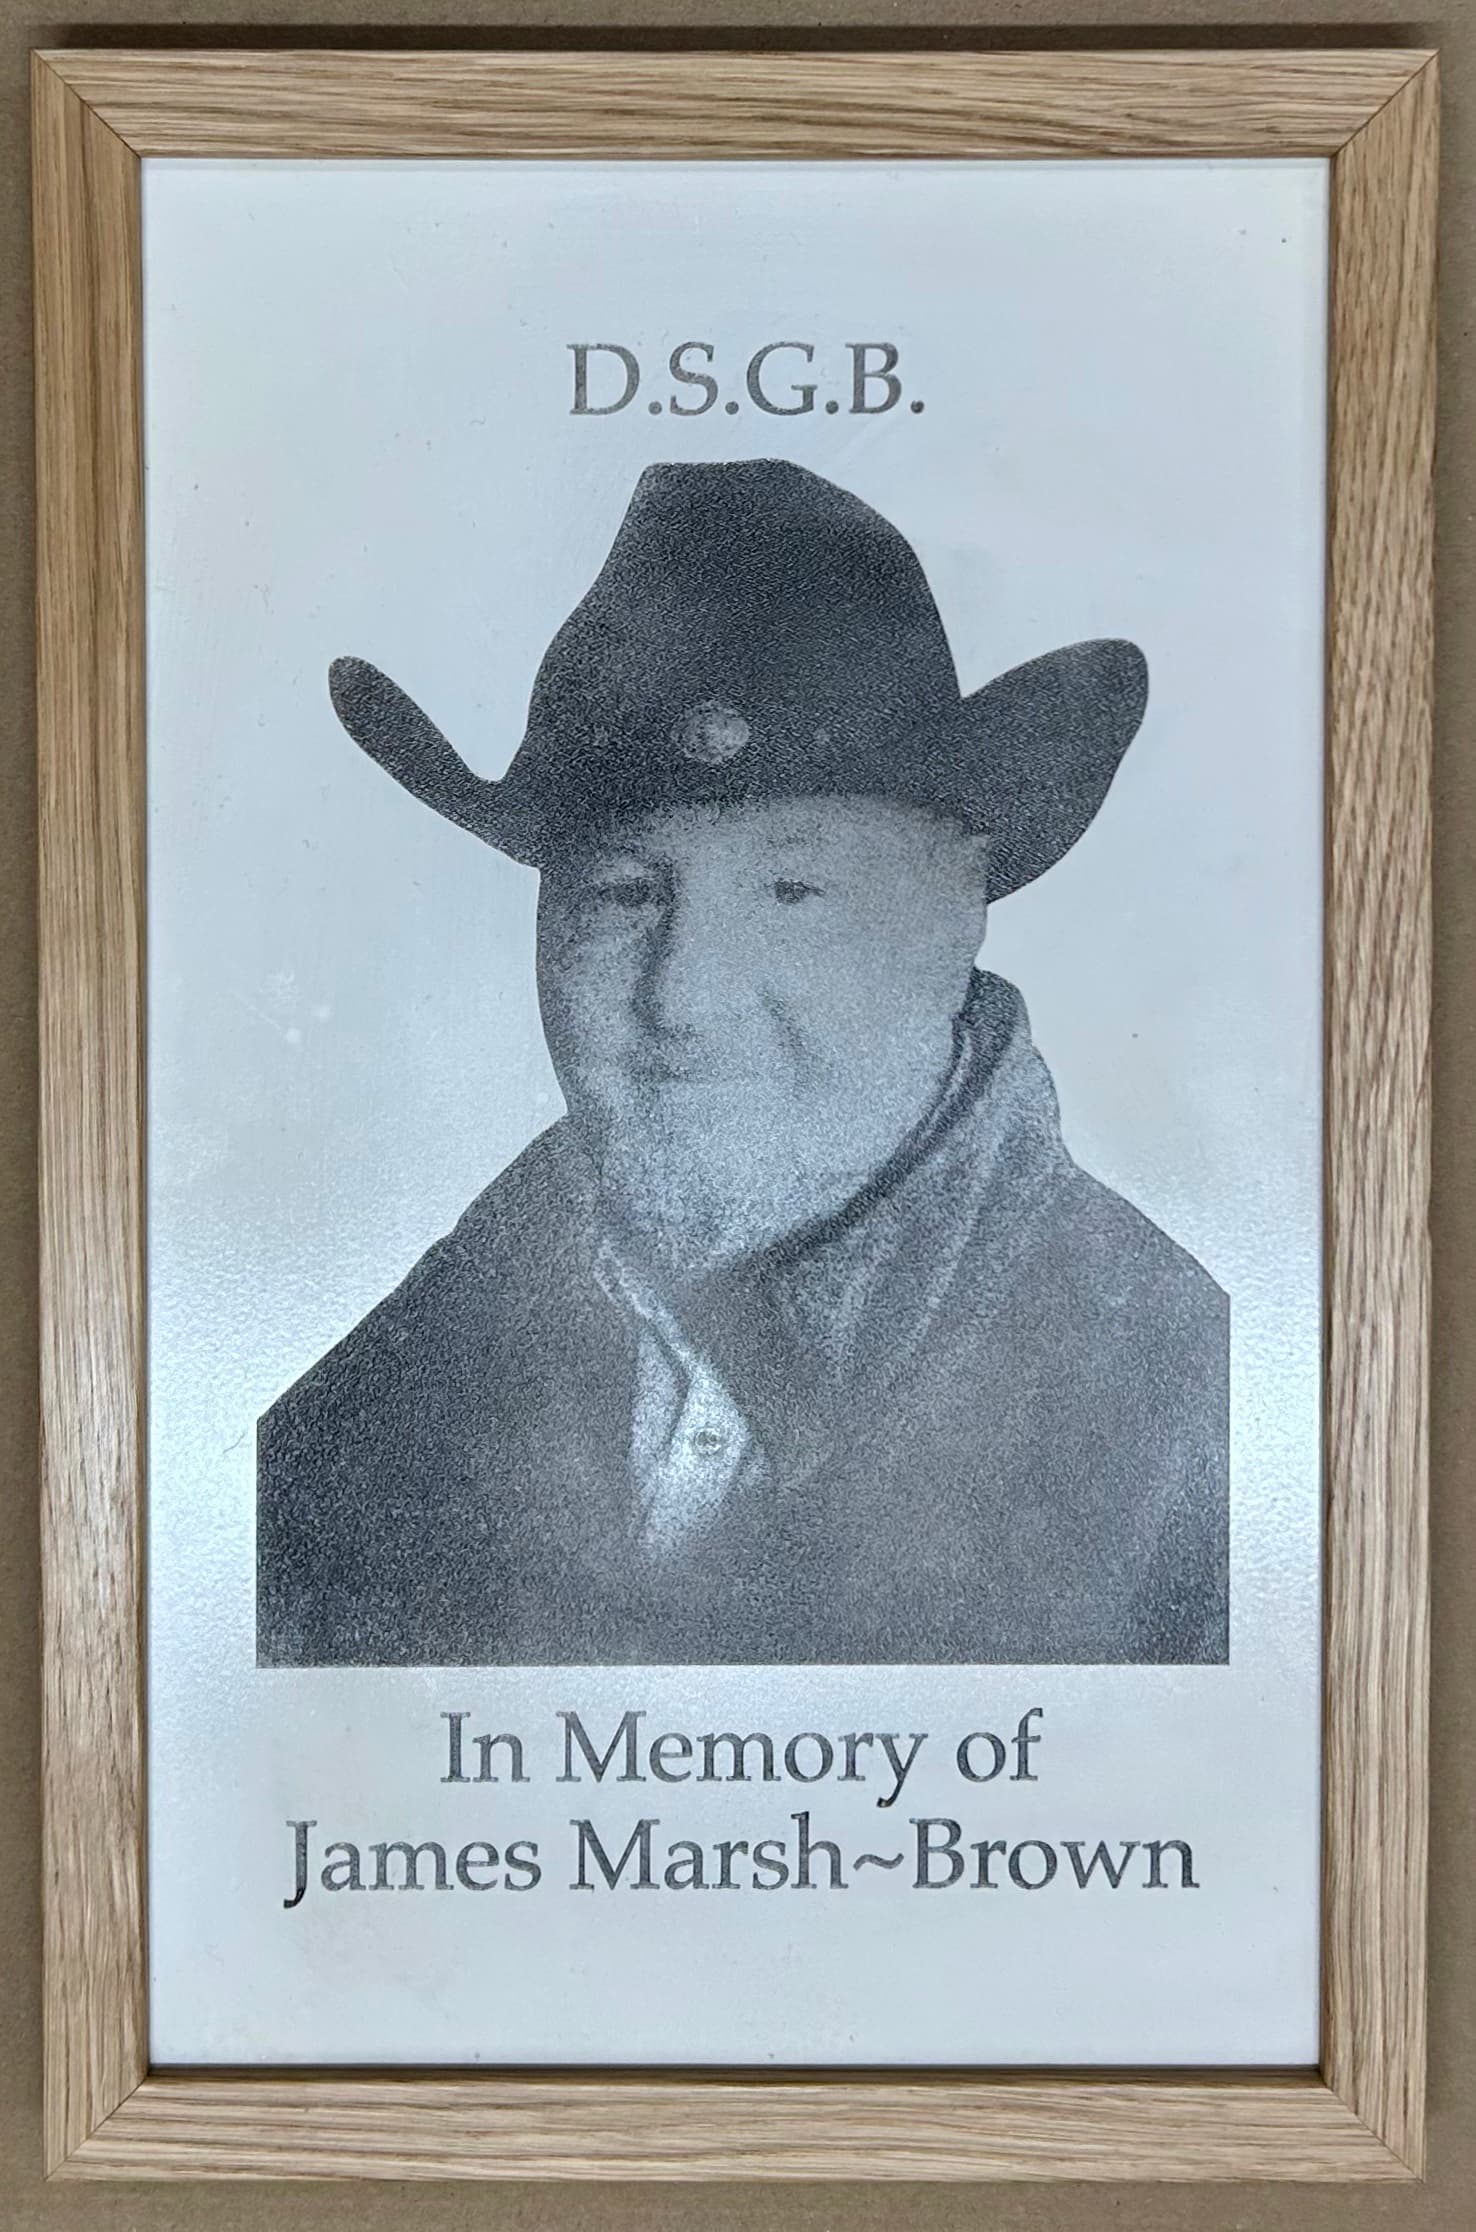
Further to this issue of disabling the tilt sensor, I have run a one-hour job without any stoppages. The image is a 400 x 250mm matt white ceramic tile, which is not complete. It could use a little additional black paint on the text. With an ash frame and some picture hanging components, it will be finished.
40 Watts at 80% power, burning Rust-Oleum Painter’s Touch Matt White spray paint. The traversal speed was 6,000mm/min. Paint removed with an acetone wipe.
Nice just got a Longer B1 40w and I will give it a try. If not I will continue to use a mixture of titanium powder water and craft glue ratio 1-3- and apply with a sponge brush 2 light coats one north and south and one east and west. Easier and cheaper than spray paint and water clean up.
Always good to find easier and cheaper. The cleanup can be tiresome, and I get through a fair amount of acetone. I want to try the laser masking paper, but have not yet found a good source in the UK.
The completed job is done now. A finish of clear varnish to the tile and beeswax to the frame. Hardboard backing to hold the tile in place and sealed in with a very sticky frame tape.
I ran that tile at 80% and 5mm/sec, 2 passes. Air flow at about 10L.
Different tile base materials (ceramic/porcelain/etc.) will make a difference but I too was surprised at the ability. I think the air flow has a big effect as the tile material gets fractured and the air clears out the waste.