Setting Origin Problems

I am starting to feel like purchasing this Opt Laser PLH3D-XT series laser head was a very poor investment. This is obviously not my first time using the Forums for advice on using this thing, but it may be my last. To give some context to the situation, last week, I spent the better part of three days just getting the machine to speak to Lightburn and then getting it to home correctly, which was very frustrating. It seems to me that the Lightburn manual is anything but intuitive and was purposely written for people with a working knowledge of using lasers with CNC machines, which I do not.

Anyway, my current setup is as follows (Pics will be attached as well):
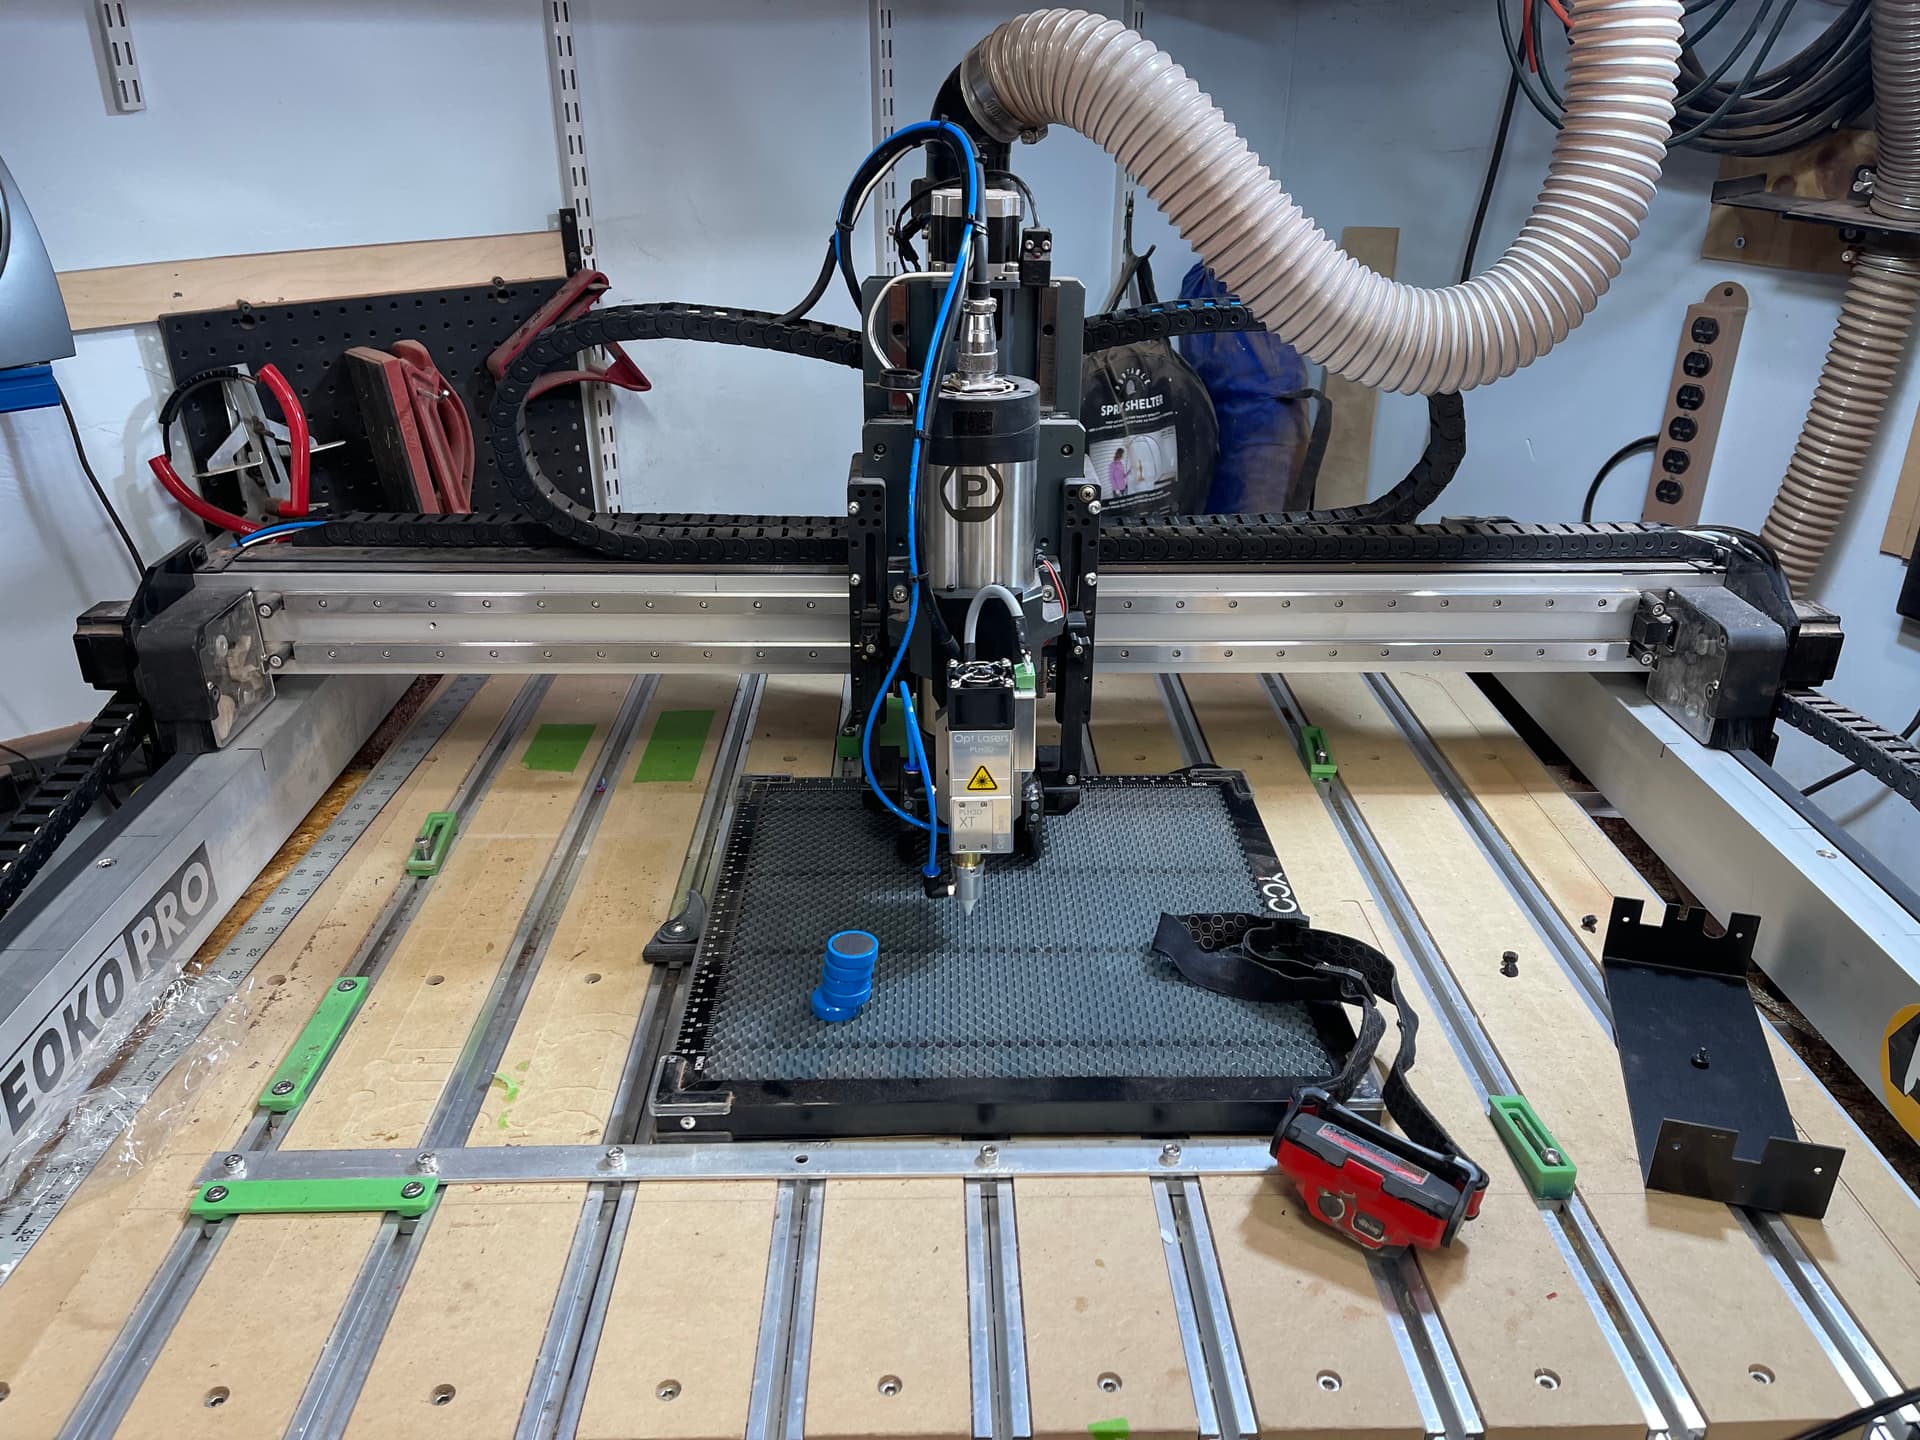
Machine - Shapeoko Pro XXL (31 X 31 Cutting Surface)
Control Board - Carbide Motion 3.0c
Spindle - PwnCNC 80mm Spindle mounted on the Shapeoko HDZ plate
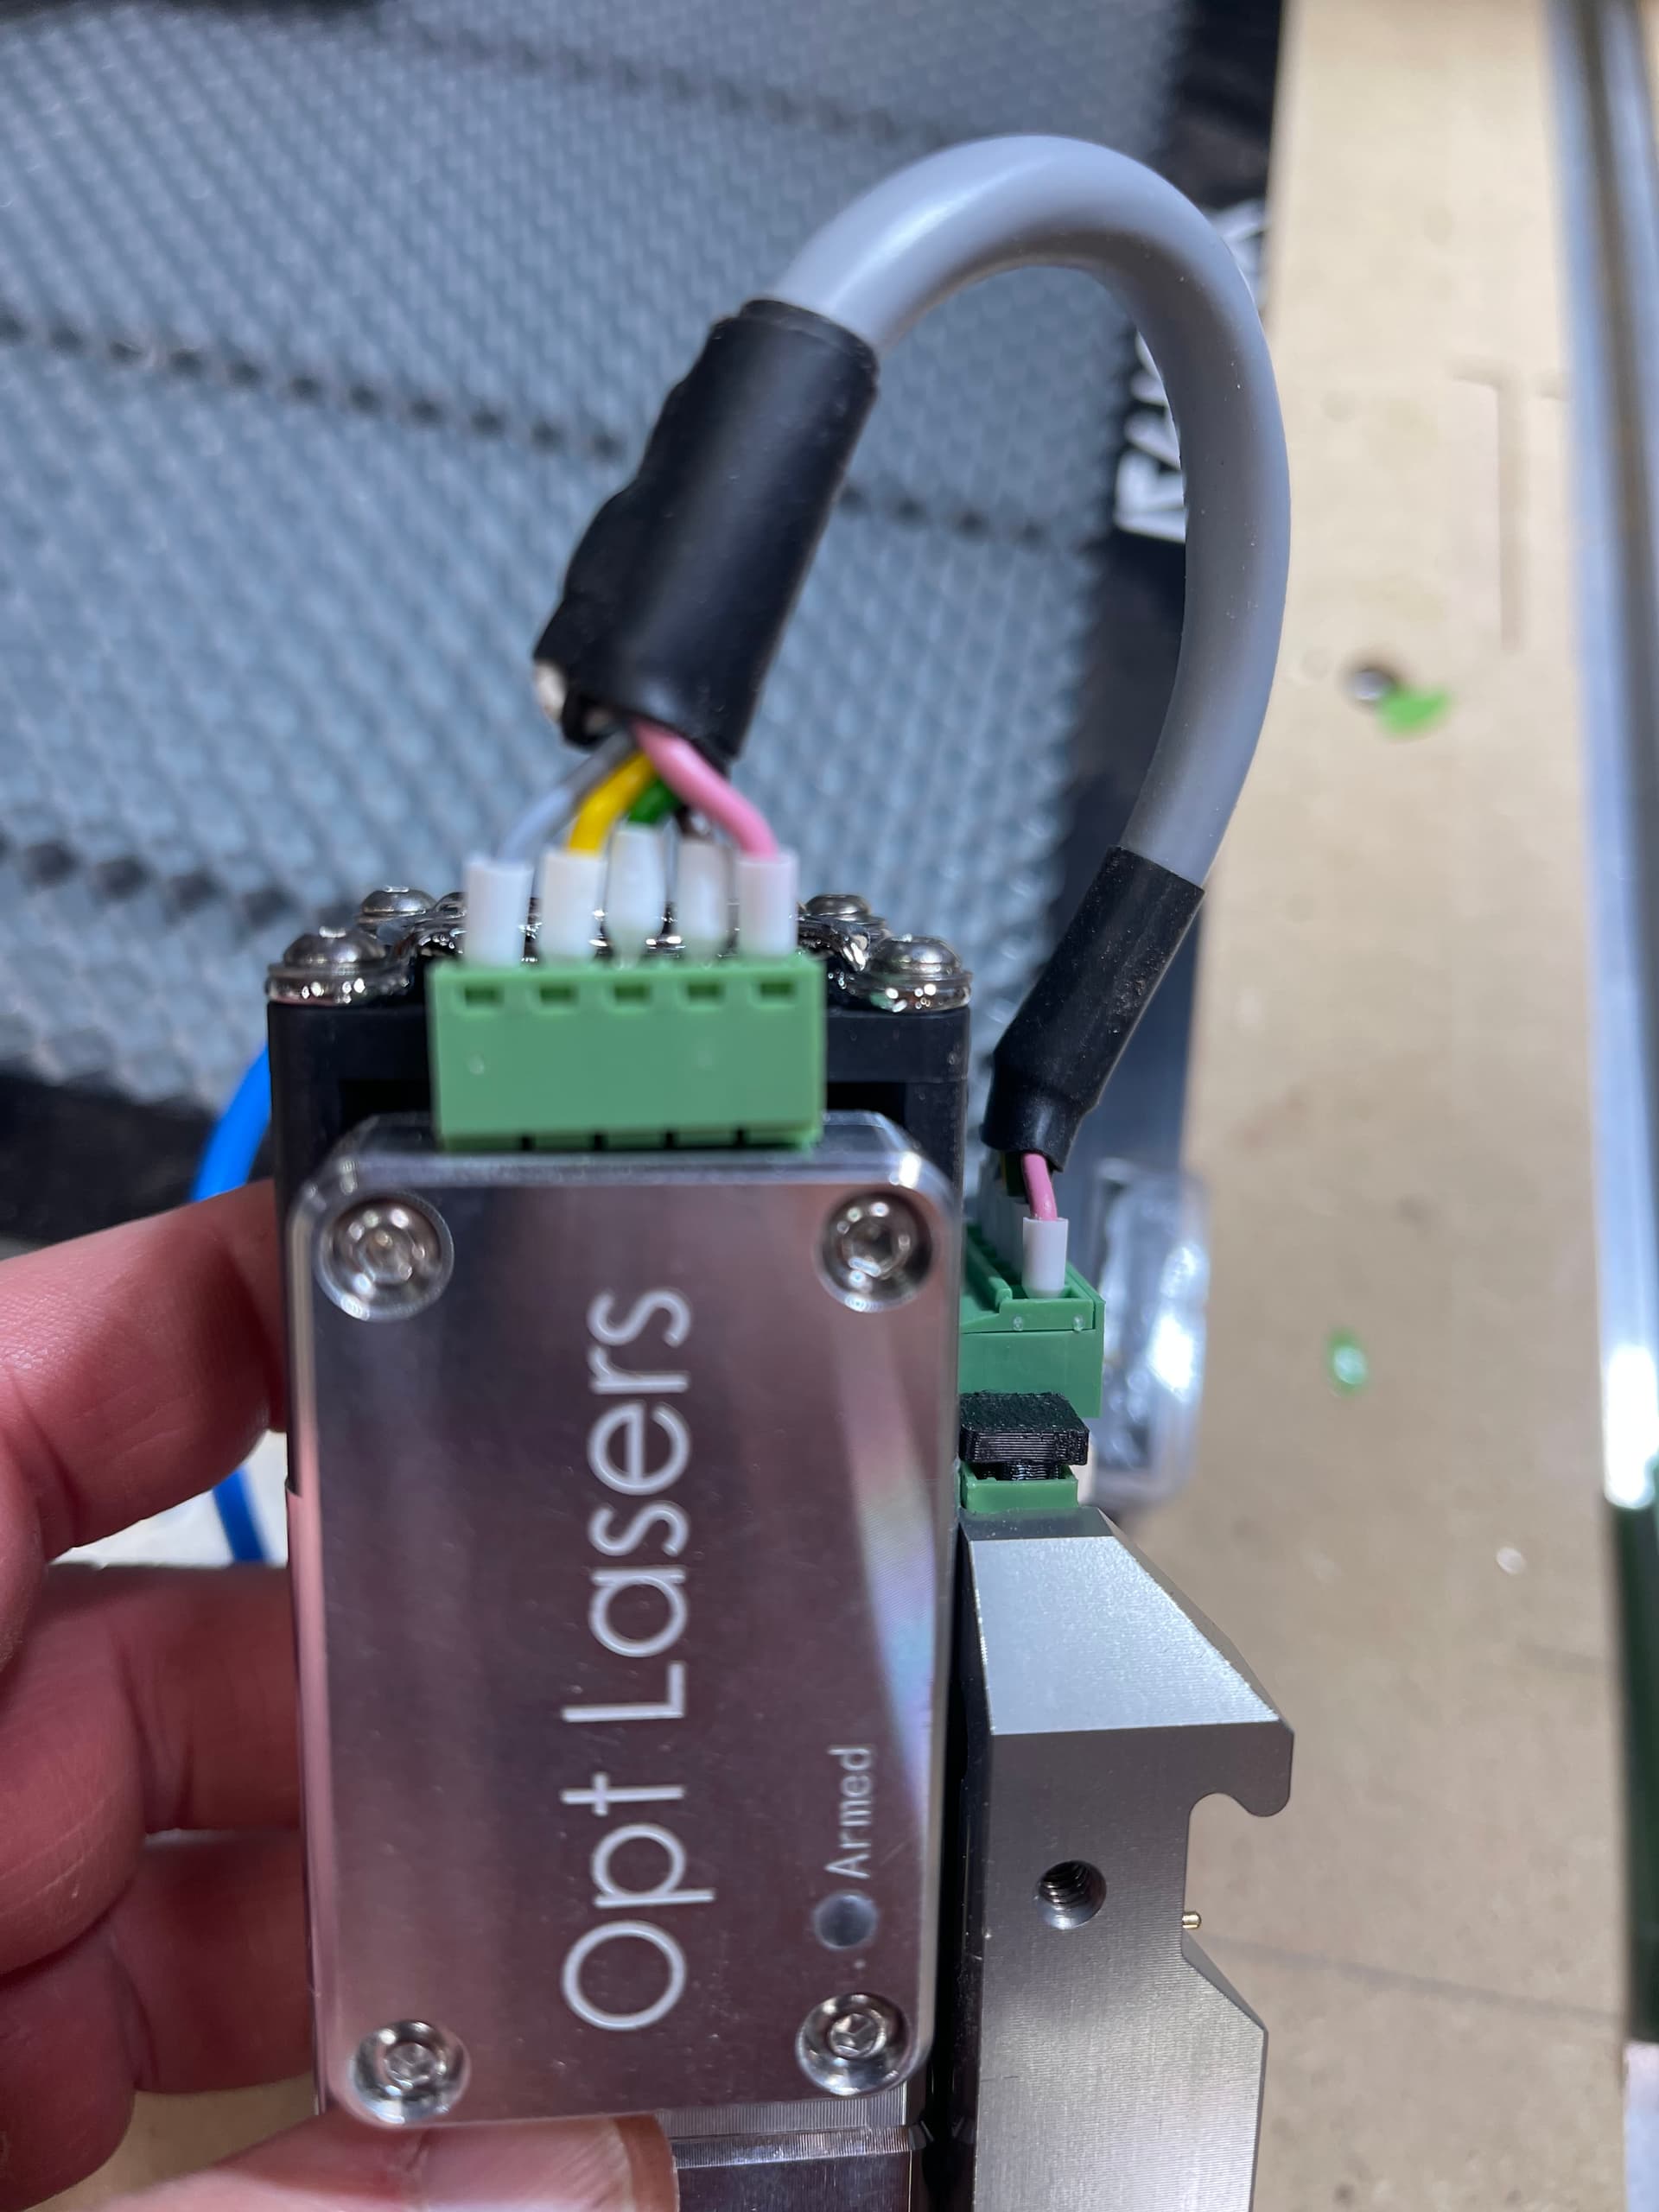
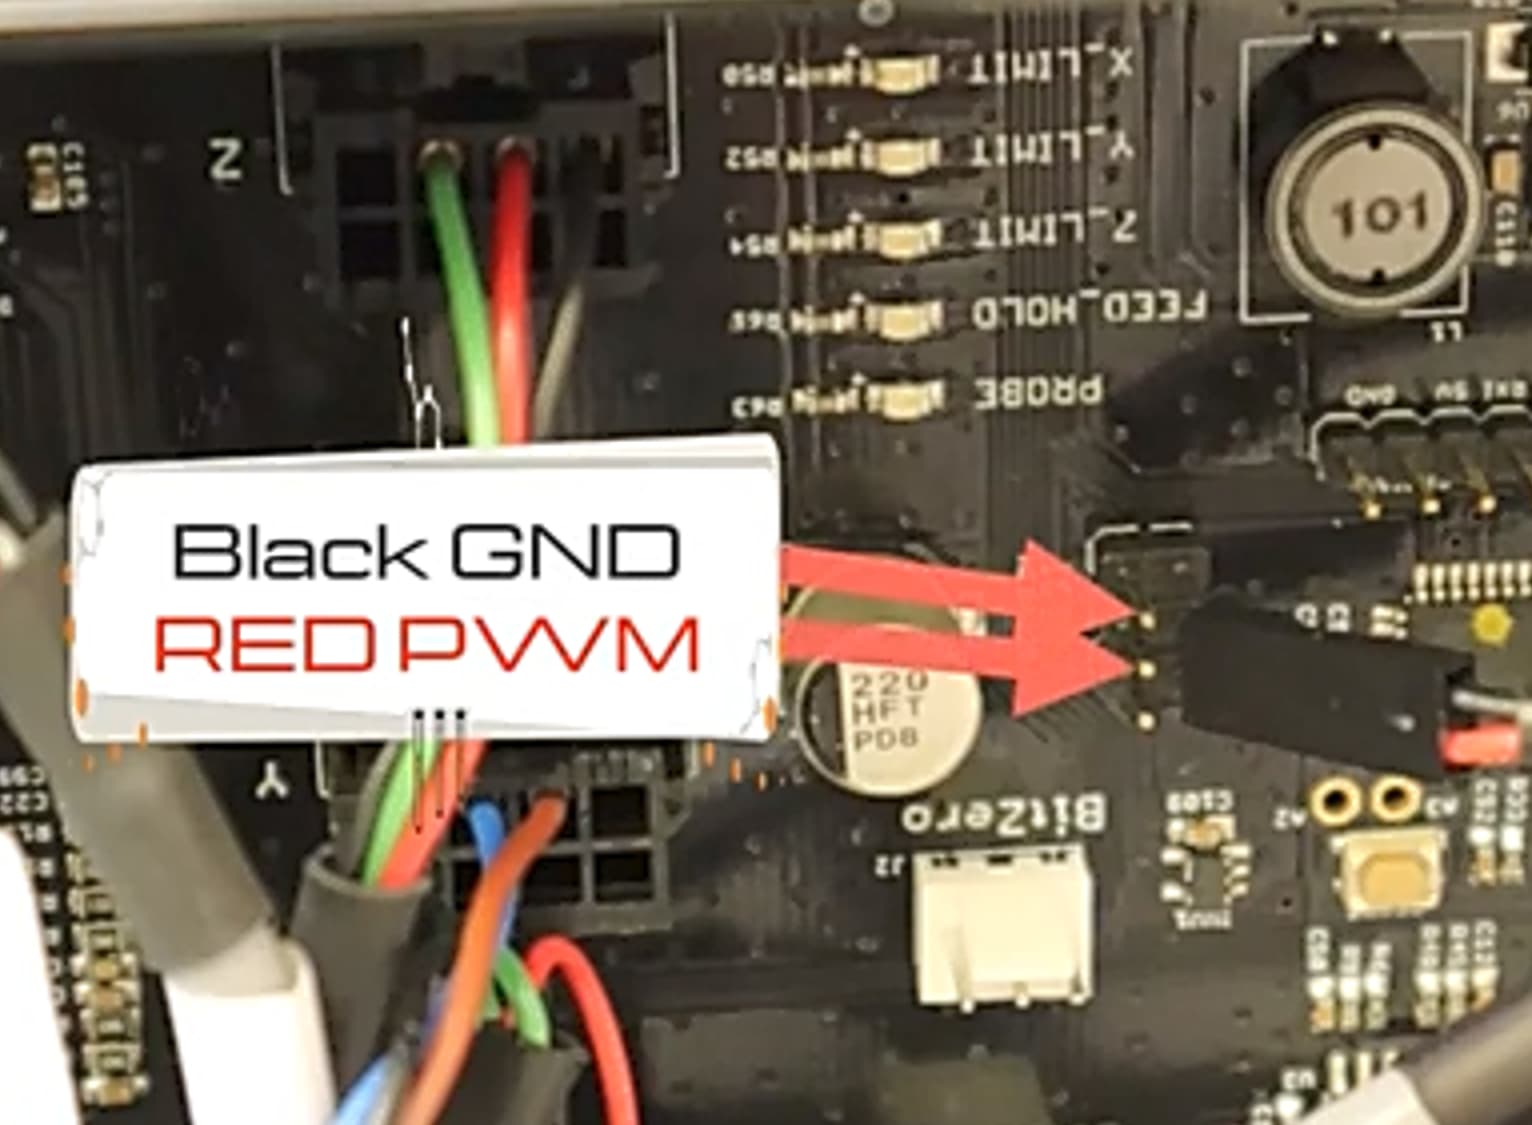
Laser-Opt Laser PLH3D-XT series
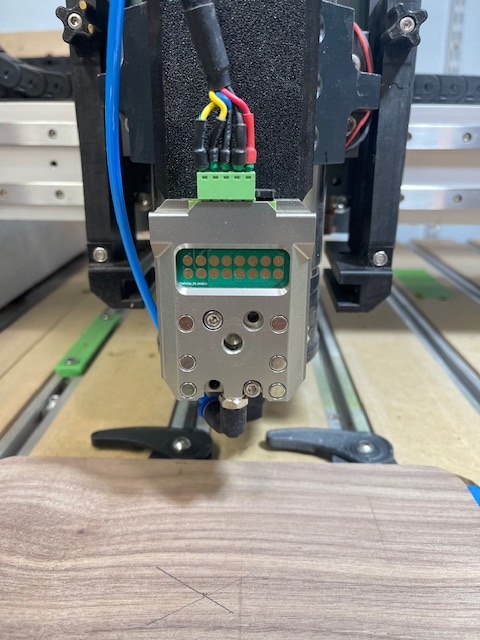
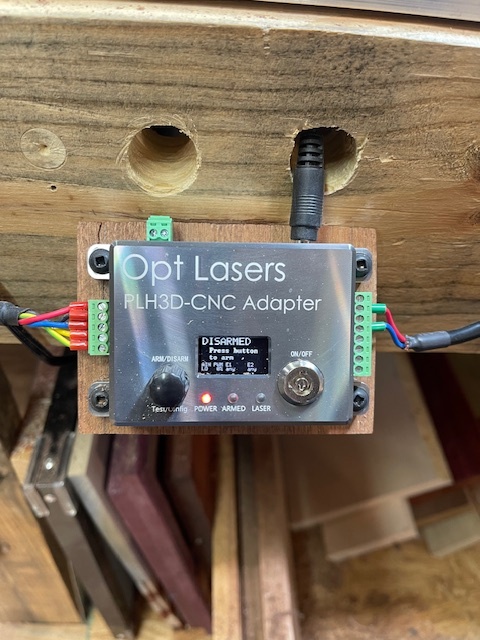
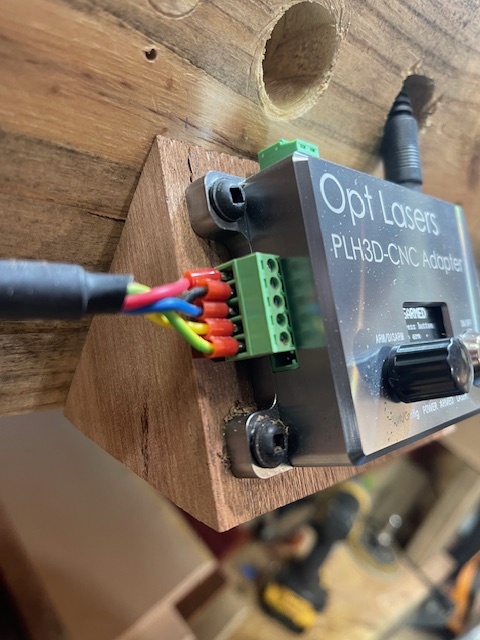
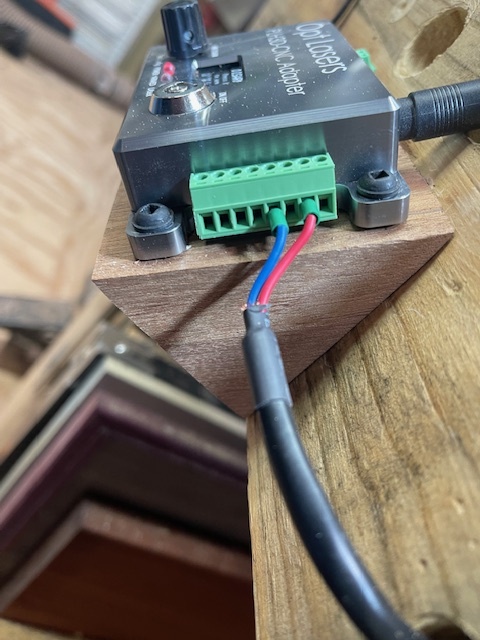
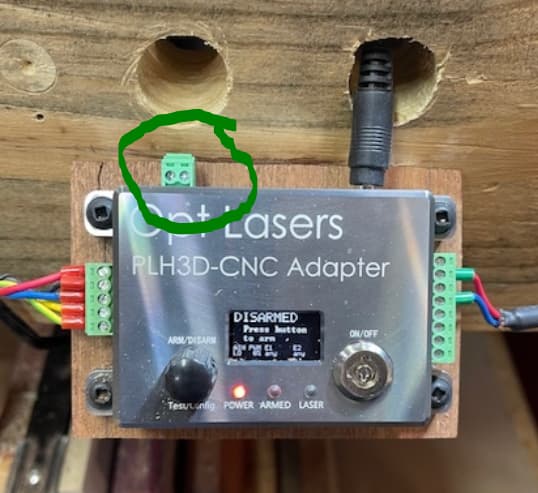
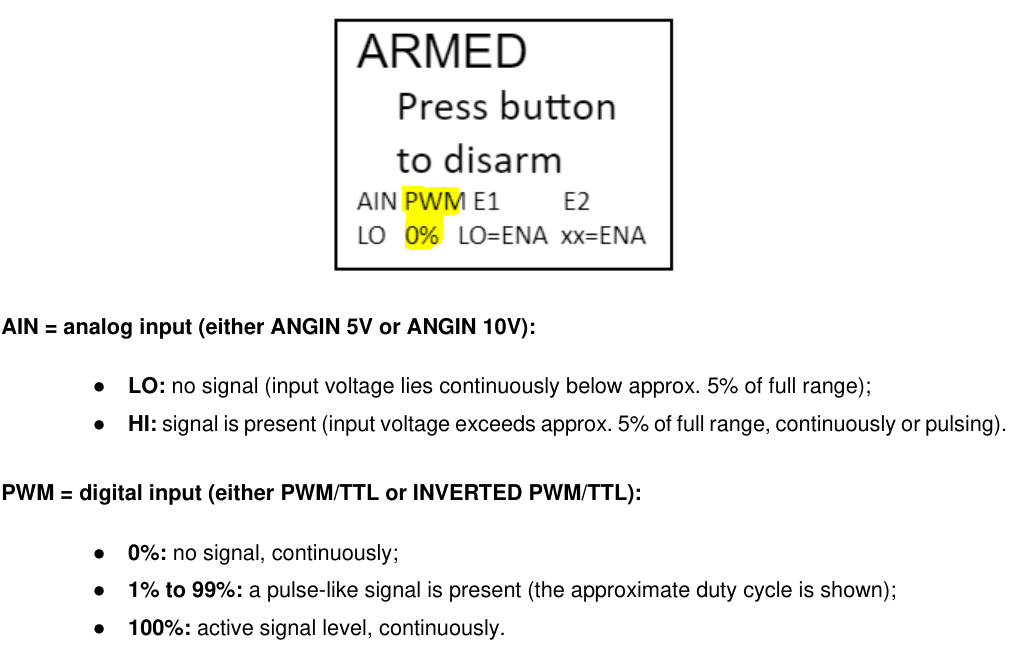
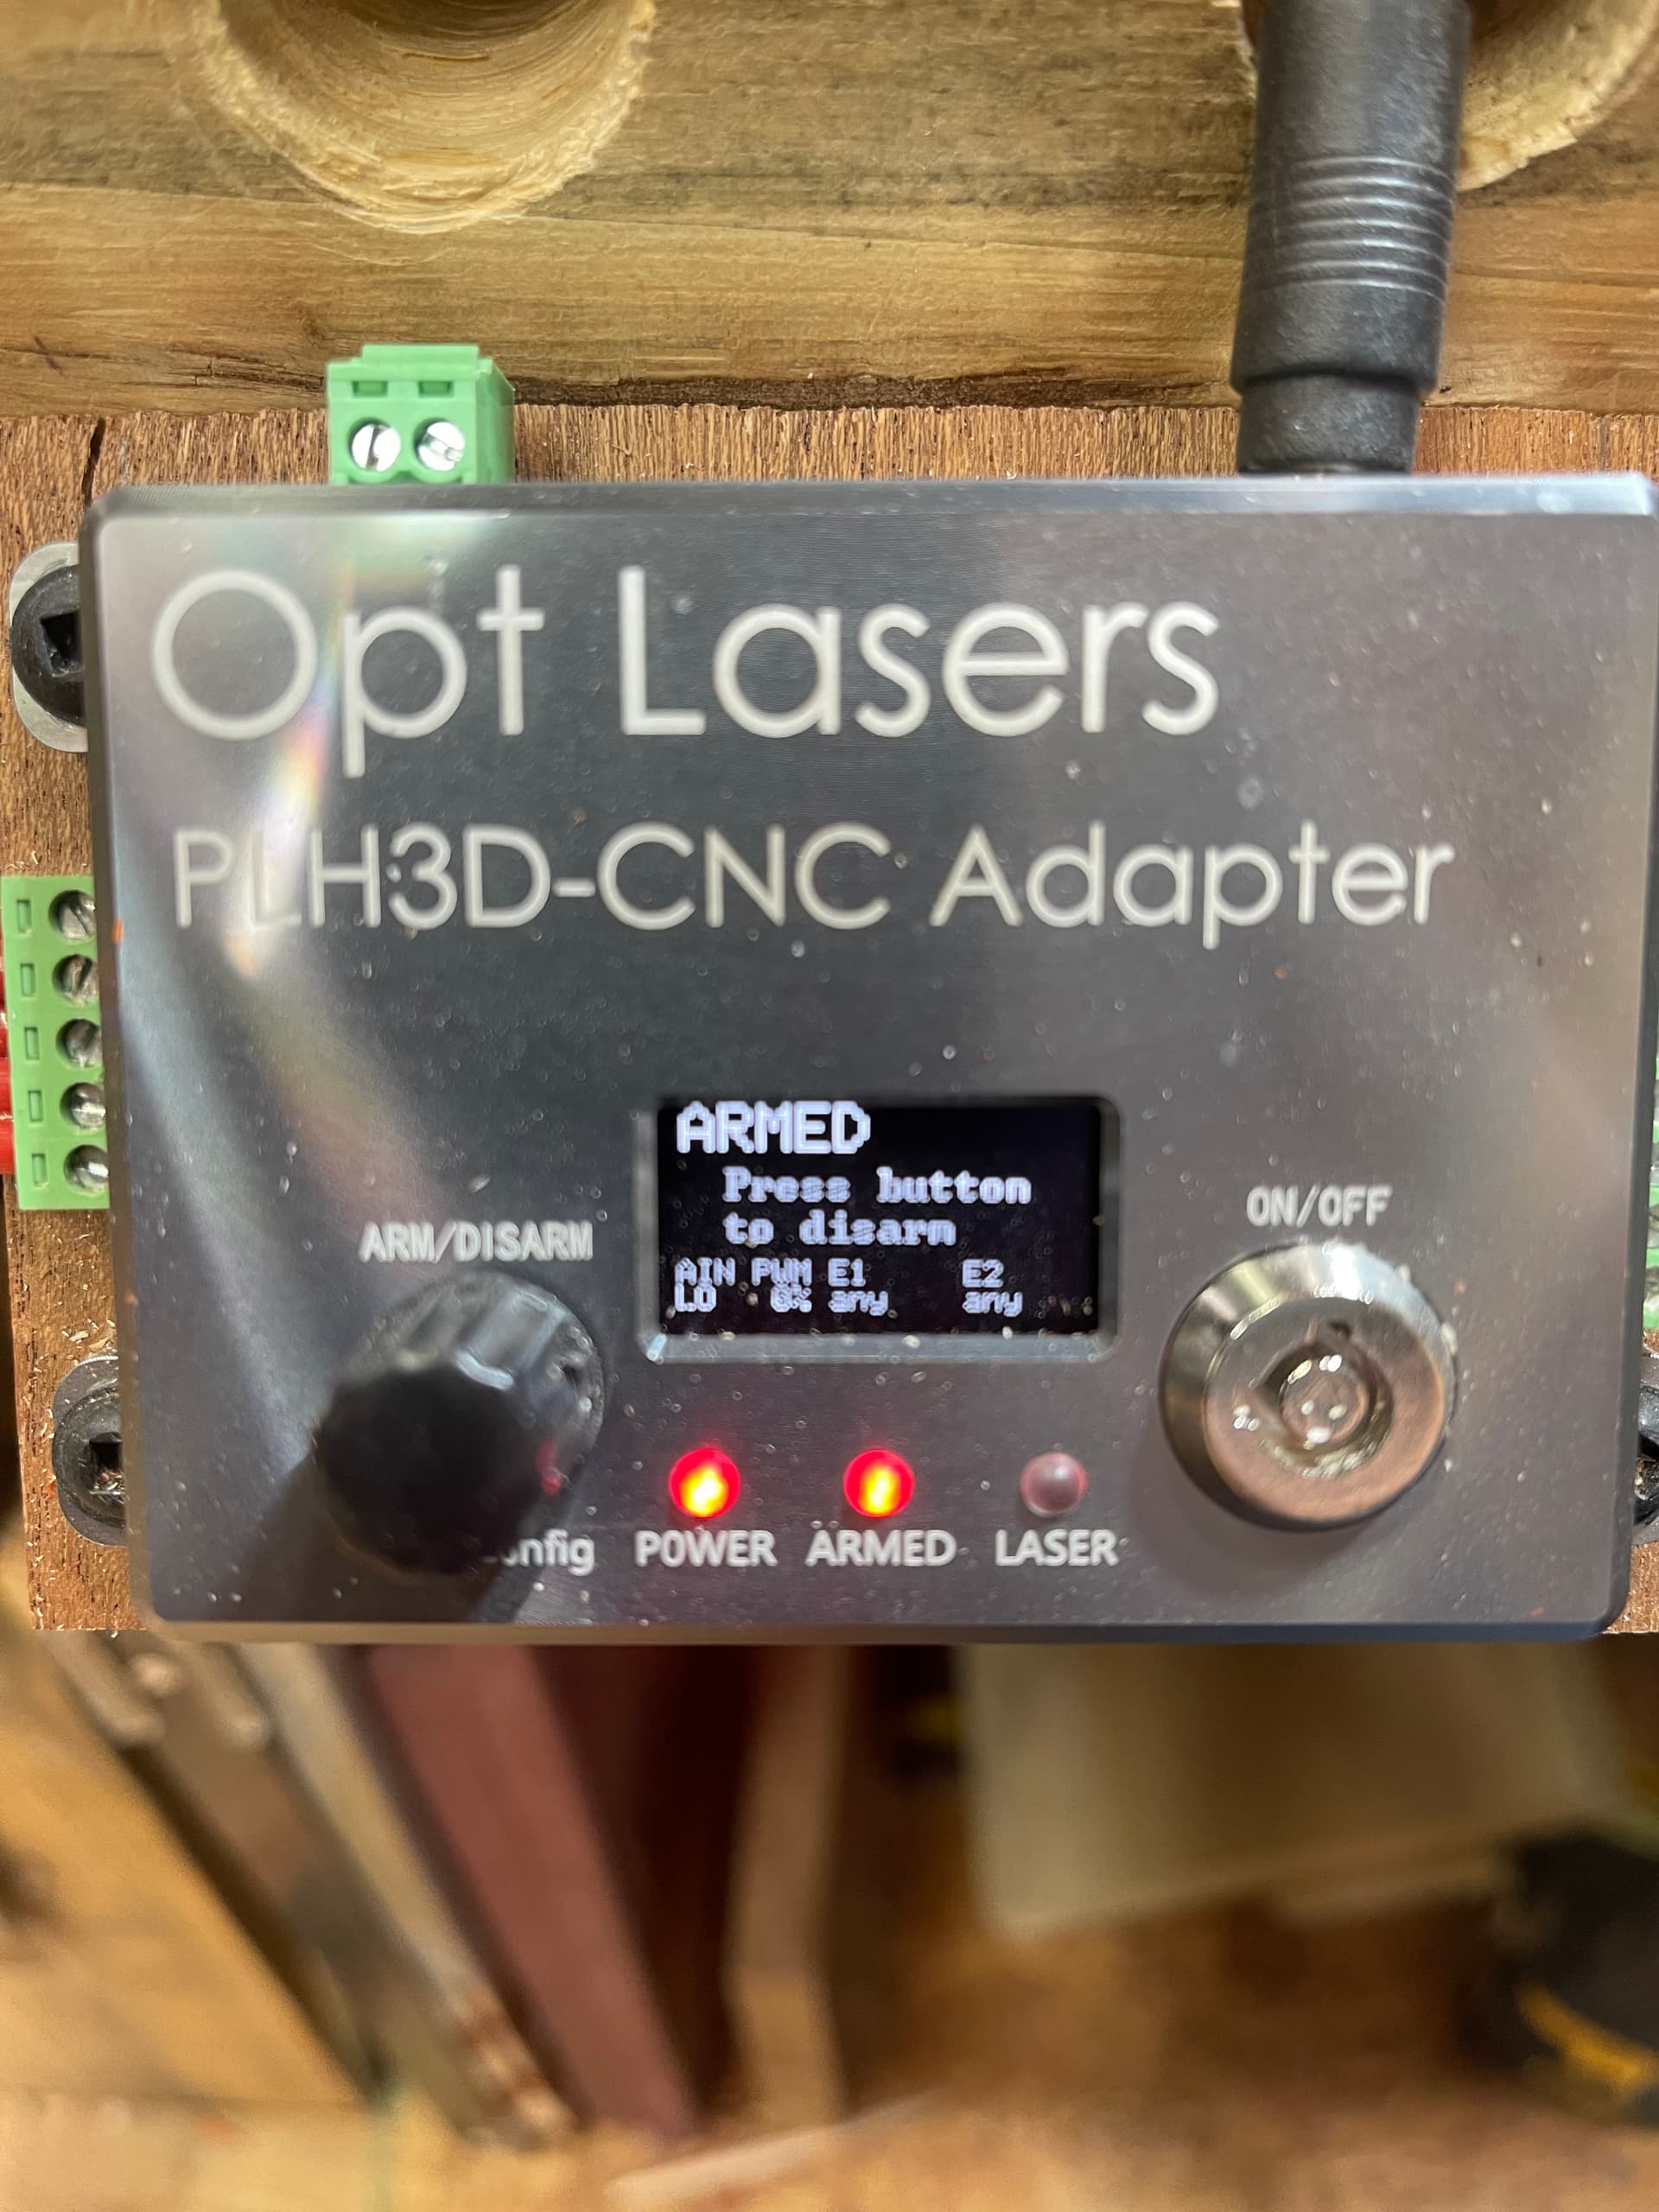
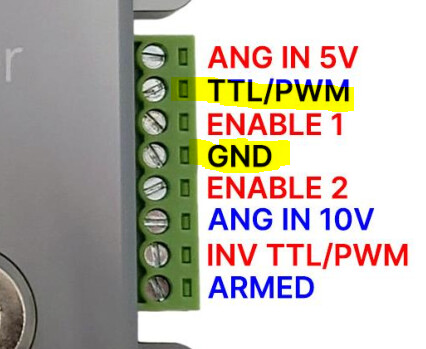
Laser Controler - PLH3D-CNC Adapter

I have done nothing but read through the Lightburn online manual and watched the setup and tutorial videos multiple times. Still, I cannot get a few essential settings to act correctly, and I would very much appreciate the advice of anyone with applicable insight and/or the necessary technical knowledge I need to employ to use this thing as intended.

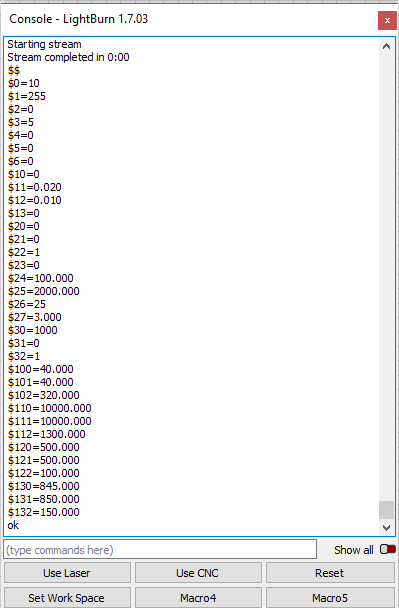
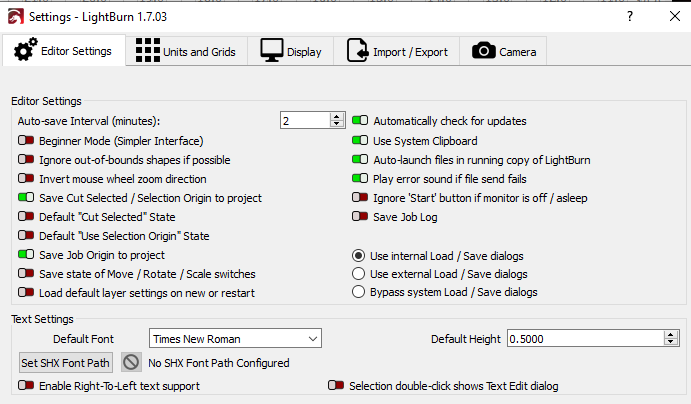
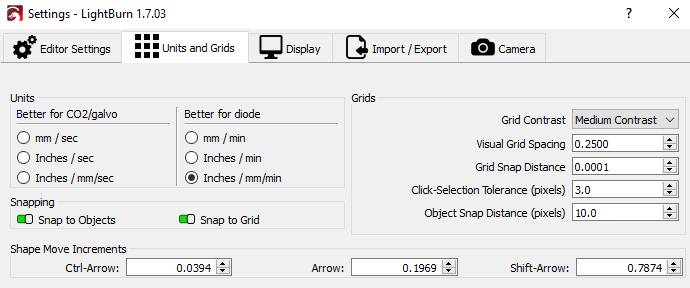
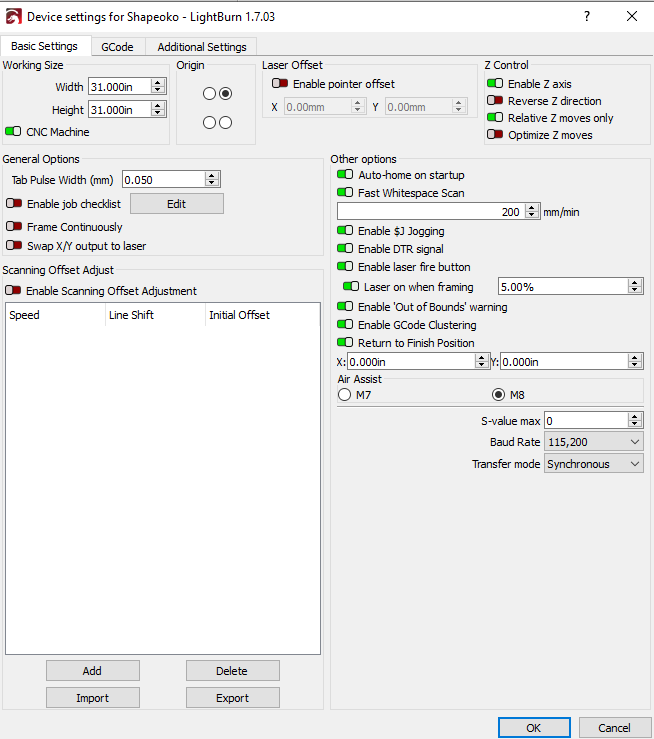
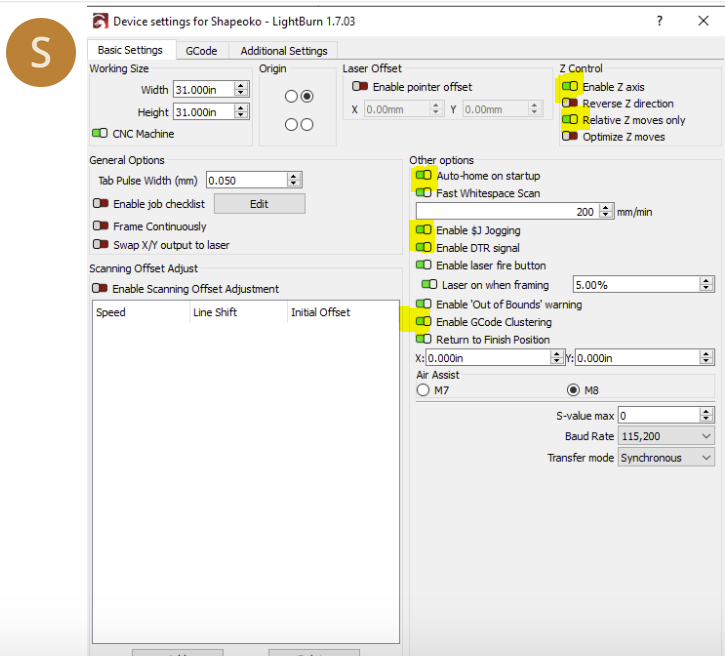
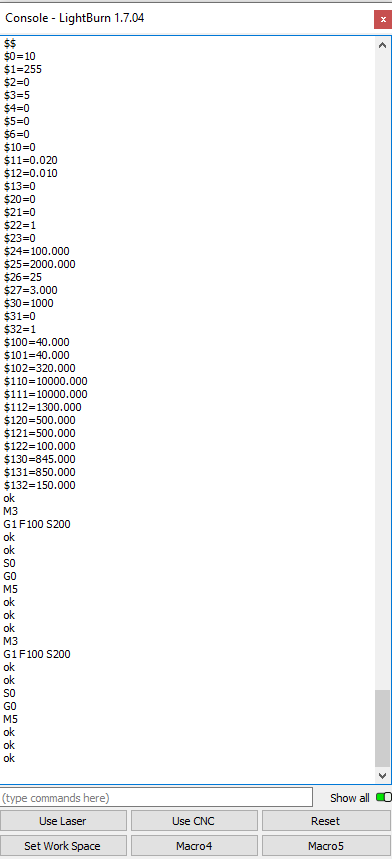
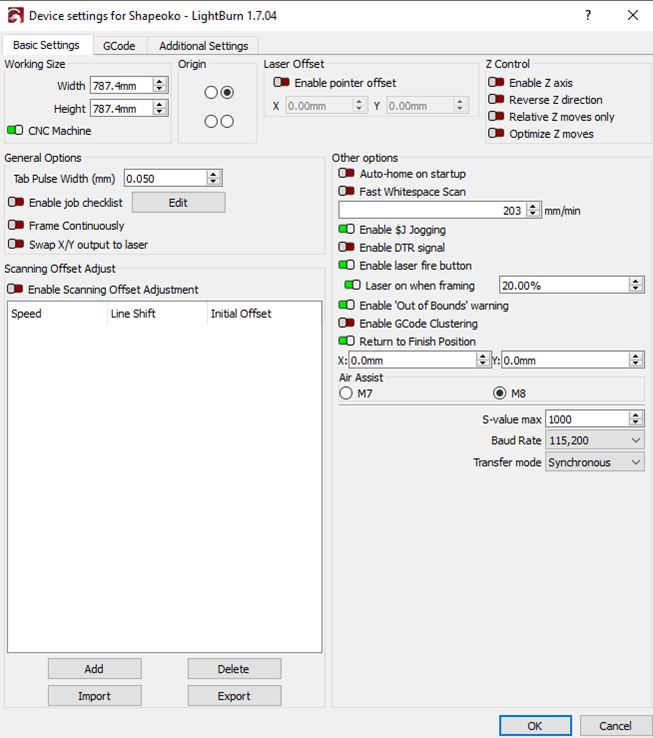
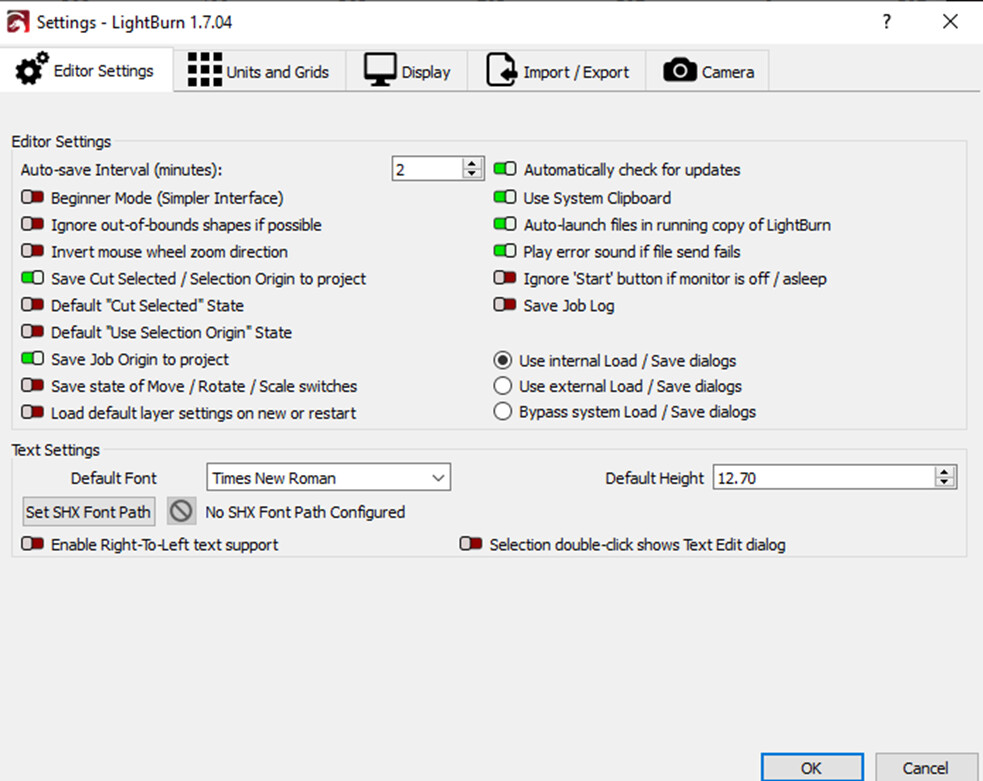
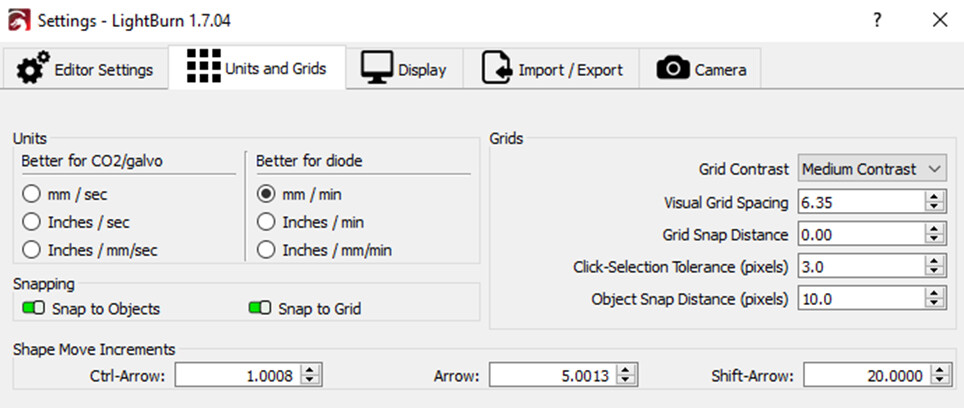
First, I have changed the settings from mm to inches, so if Lightburn sees that as a problem, please let me know. But there is the issue that every time I close Carbide Motion and open Lightburn after clicking the Use Laser Macro, which is set with the following $ codes:
$10=0
$32=1
$30=1000
G10 L2 P1 X-29 Y-29

I then find it necessary to periodically enter $RST=# because the move buttons inexplicably become unusable. I have not been able to repeat this error consistently, so I cannot pinpoint what is causing it. There does not seem to be any rhyme or reason for why it happens. While we are on the topic of the move buttons, it looks like I am missing a few features there as well.

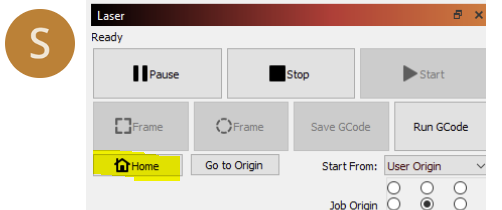
The manual shows that there should be a Set Origin and a Clear Origin button like, depicted below:

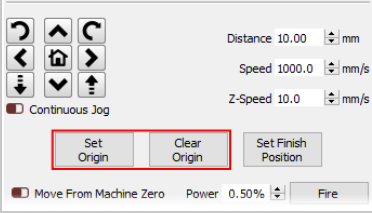
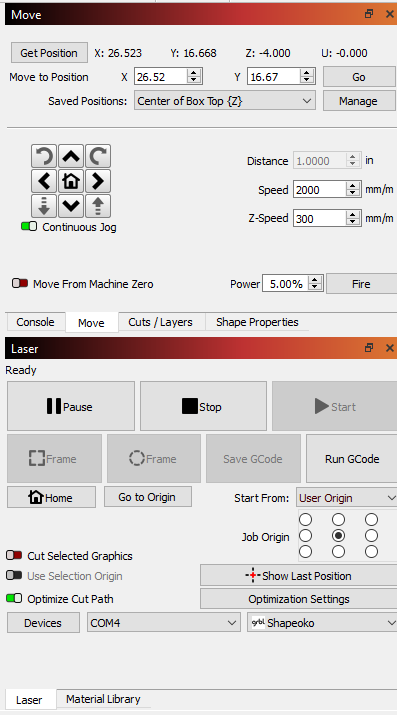
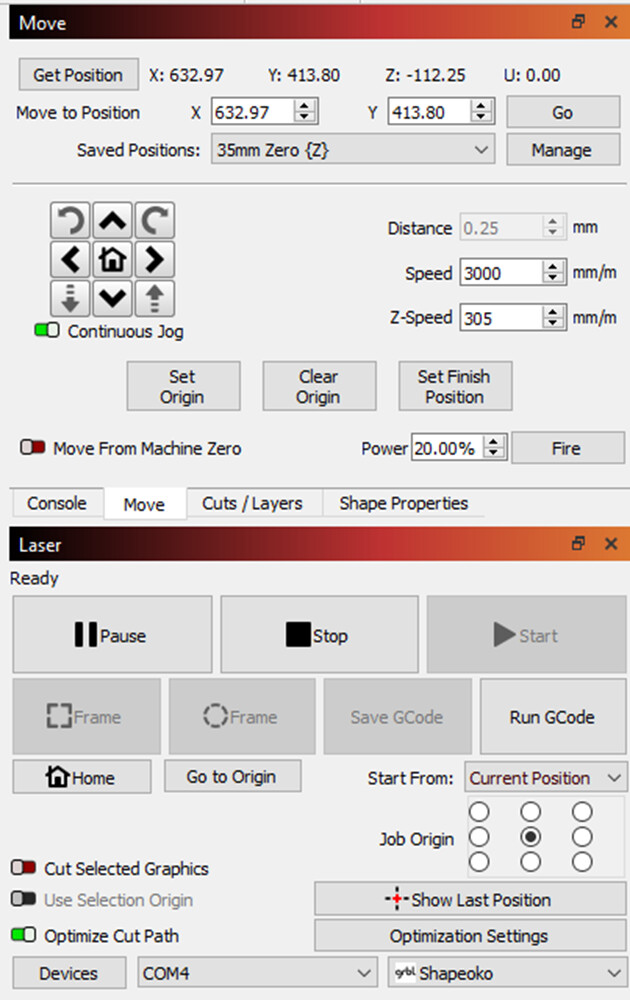
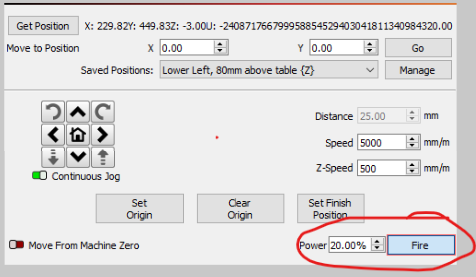
However, I have neither. My Move Button dashboard looks like this:

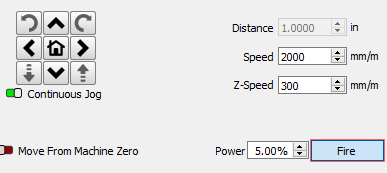
As you can see, there is no Set Origin or Clear Origin, and the manual does not address this issue other than saying to check with your manufacturer, which I have. They told me to check with Lightburn; can you see the frustration?

Next, I have an issue with the Fire Laser button in Lightburn. I don’t know if this is a Lightburn issue or an Opt Laser issue, so I hope someone out there knows the answer. Although the Fire Laser button is visible, it does not work for me. Before framing a simple project (yes, the Laser On While Framing button is toggled on), I ensure the laser is turned on, and armed like the instructions say, but nothing happens when the Fire Laser button is pressed. The machine moves around the boundary as if framing, but the laser is not on. I can hold the button on the Opt-Laser CNC Controller to activate the laser, but it will not activate via the Lightburn software.

To sum up the issues I am having this week:

  1. Workspace issues
  2. Set and Clear Origin Buttons
  3. Fire Laser

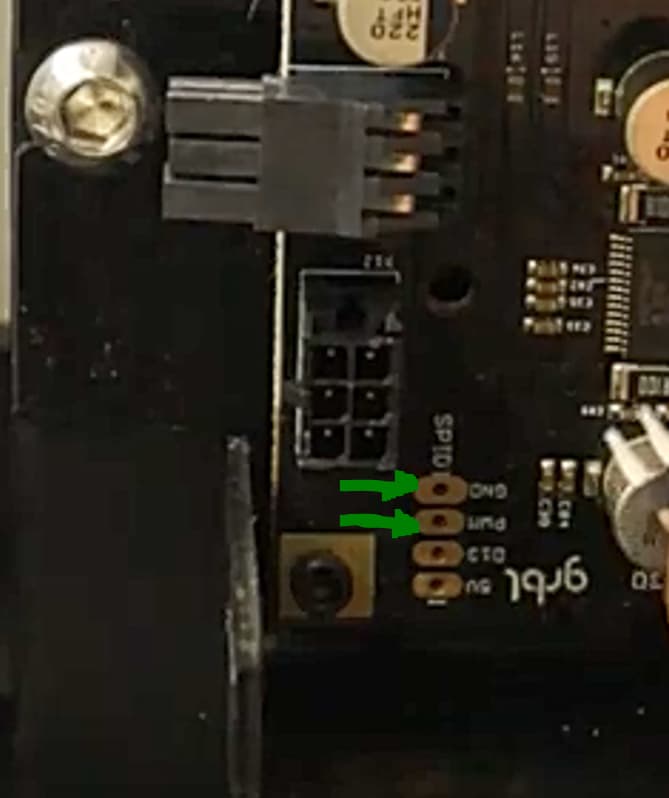
I have attached screenshots of my Move dashboard as well as the machine and device settings tabs and then pics of my actual hardware. I have had good luck with these forums, and I hope this will be the same. I know it is probably that I am inexperienced and don’t know what I am doing, so please, if anyone can set me straight, I would appreciate it. Thanks for reading and I look forward to your replies.


As a start change to mm keep $13=0.

The macro for laser should contain only:
$10=0
$13=0
$20=0
$32=1
$30=1000
But you need to revert as per your CNC needs.
.
Disable the highlighted toggles:


.
In console enter $RST=#
Enter $# and check the outputted WCS are zero.
Power cycle (power and USB) your Shapeoko and laser, wait 30 seconds and reconnect.
Click the changed macro ($10=0 $13=0 $20=0 $32=1 $30=1000)
Click the home button

Set your PLH3D-XT controller to work.
Draw a square, with your laser glasses on click frame. Place a piece of cardboard on the framing space set to 20% power and run a cut test.

Report back.

If the laser is off when framing click show all then click frame and post the console output.

Thanks for the reply. I changed my settings as you suggested and ran a test. Everything works fine now except for the Fire button. I still can’t get Lightburn to operate my laser. Other than that, I think I am ready to go. I will keep digging. I can’t believe Opt Laser, Lightburn, and Shapeoko are completely incompatible, so there has to be an answer somewhere.

1 Like

Sorry for the late reply.
Enable Console Show all then in the move window click Fire 2 times and you should get a similar output.

Thanks for replying. I did as you suggested. After arming my laser and doing a test fire, I toggled the “show all” and hit the fire button twice as you suggested. I received the following results in the console:

Unfortunately, the laser still will not fire. I have sent another message to Opt Laser asking them for help, but I don’t think they can if it is a settings issue. The last time I contacted them, they said that my physical connections looked correct, so I am not sure what is going on. I am ready to return this laser and forget about trying to use one at all. This has been so frustrating.

Just so I can say I did, I have attached screenshots of the current device and machine settings. I know you already went over them, but I wanted to make sure you see them after the changes to see if there is something I missed that might prevent the laser from firing. Thank you for your help.


With your laser protection glasses on:

  1. Type $31=1
    Press fire one time.
    Press fire again.
  2. Type $31=20
    Press fire one time.
    Press fire again.
    Type $31=0.

Report back if the laser emits light.

I completed the sequence twice, and the laser failed to fire both times. However, it does fire when I do a manual test by holding the button on the CNC adapter, so I know it works. For some reason, it isn’t playing well with Lightburn, which makes no sense to me. I don’t know where to go from here.

If you have a voltmeter you can look at the lasers pwm input or the control boards pwm output. It should vary by % of 5V. 20% power should produce 20% of 5V which is 1V…

Some of these boards are 3.3V boards, most laser modules will work with this, as 3.3V represent a high state. The same power works here, 20% would be 20% of 3.3V or about 0.66V.

The 3.3V boards won’t directly drive a dc excited glass co2 tube lps without a voltage translator.


That should tell you if you are getting a signal to the laser module.

Good luck

:smile_cat:

Just to clarify did you already run some jobs successfully?
If so try LaserGRBL to check fire button:

Nope. I have been unable to run anything because I can’t get the laser to fire. In fact, I just now got it to where the gantry doesn’t slam the X-axis into the side rails, but that problem reared its ugly head again last night as I was messing around with it.

Ok, Thank you. I do have a meter and know how to use it, so I will take a look and see. If, for some reason, the results are not optimal, would you happen to have any suggestions on how I should proceed besides buying a new machine?

I am not sure what Laser Grbl or how to use it. Being the novice I am, I am only just getting a grasp of the regular GRBL, so please forgive me for appearing ignorant on the issue.

Someone from LightBurn suggested I change $130 and $131 to my new working size of 762mm, which I did. Also, they suggested I set the soft limits ($20 and $21) to =1, which I also did. Unfortunately, after making those changes, I continually receive the following error, which I can’t clear:

ALARM:1
Hard limit triggered. Machine position is likely lost due to sudden and immediate halt. Re-homing is highly recommended.
[MSG:Reset to continue]

Grbl 1.1f [‘$’ for help]
[MSG:‘$H’|‘$X’ to unlock]
$X
[MSG:Caution: Unlocked]
ok

I believe your CNC controller has another PWM output, after checking with a voltmeter check 2nd output and if you need to redirect “pins” with Carbide.
Also check if the laser adapter is correctly setup.

Thank you. That gives me something to do over the X-Mass break. I will let you know how it goes. BTW, someone else also suggested to check the voltage as well.


.
I think you forgot the jumper wire.

It’s in there; you just can’t see it because of the angle the pic was taken to begin with.

1 Like

When you click Fire does the laser adapter show any PWM info?

So here’s something crazy; it just might be a clue. Since I am currently working on a CNC project, I had to quickly close Carbide Motion before opening Lightburn to check the settings on the laser interface. I docked my laser to the magnetic docking station and did the usual macro thing to ensure I was in laser mode, but I failed to turn off my spindle VFD before doing so. When I hit the fire button in Lightburn, the spindle began turning but the laser did not fire.

Thinking I did something wrong, which I did by not turning off the VFD, I restarted the whole procedure the correct way by disabling Carbide Motion and the PwnCNC spindle VFD and reopened Lightburn. Upon opening Lightburn, the laser auto-homed to the back right corner as usual. Next, I clicked the Use laser macro and checked $$ to ensure I was in laser mode. I moved the gantry to the middle of the table and armed the laser then pressed the fire button. Again, nothing happened as usual. However, after reading your last post about the CNC adapter screen, I looked at the screen and noticed that it read 0% (photos attached).

According to the image you posted, it looks like I have more investigating to do on the connections and the voltage. I connected the PWM cable to the Carbide Motion control board just as the Opt Laser techs told me to, but they might not have had it correct either. I can find plenty of pins on the board that supply power; I just do not know how to identify the correct pin. I am not an engineer and only have limited knowledge of how to trace circuits on a board.

Check if these pictures help.


One more troubleshooting step:

Turn off adapter.

Place your voltmeter tips at PWM and GND.


With your laser safety googles on.
In Console window
type M3S10
Click STOP.

Type M3S50.
Click STOP.

Type M3S100.
Click STOP.

Type M3S150.
Click STOP.

Type M3S250.
Click STOP.

Register the values if any.