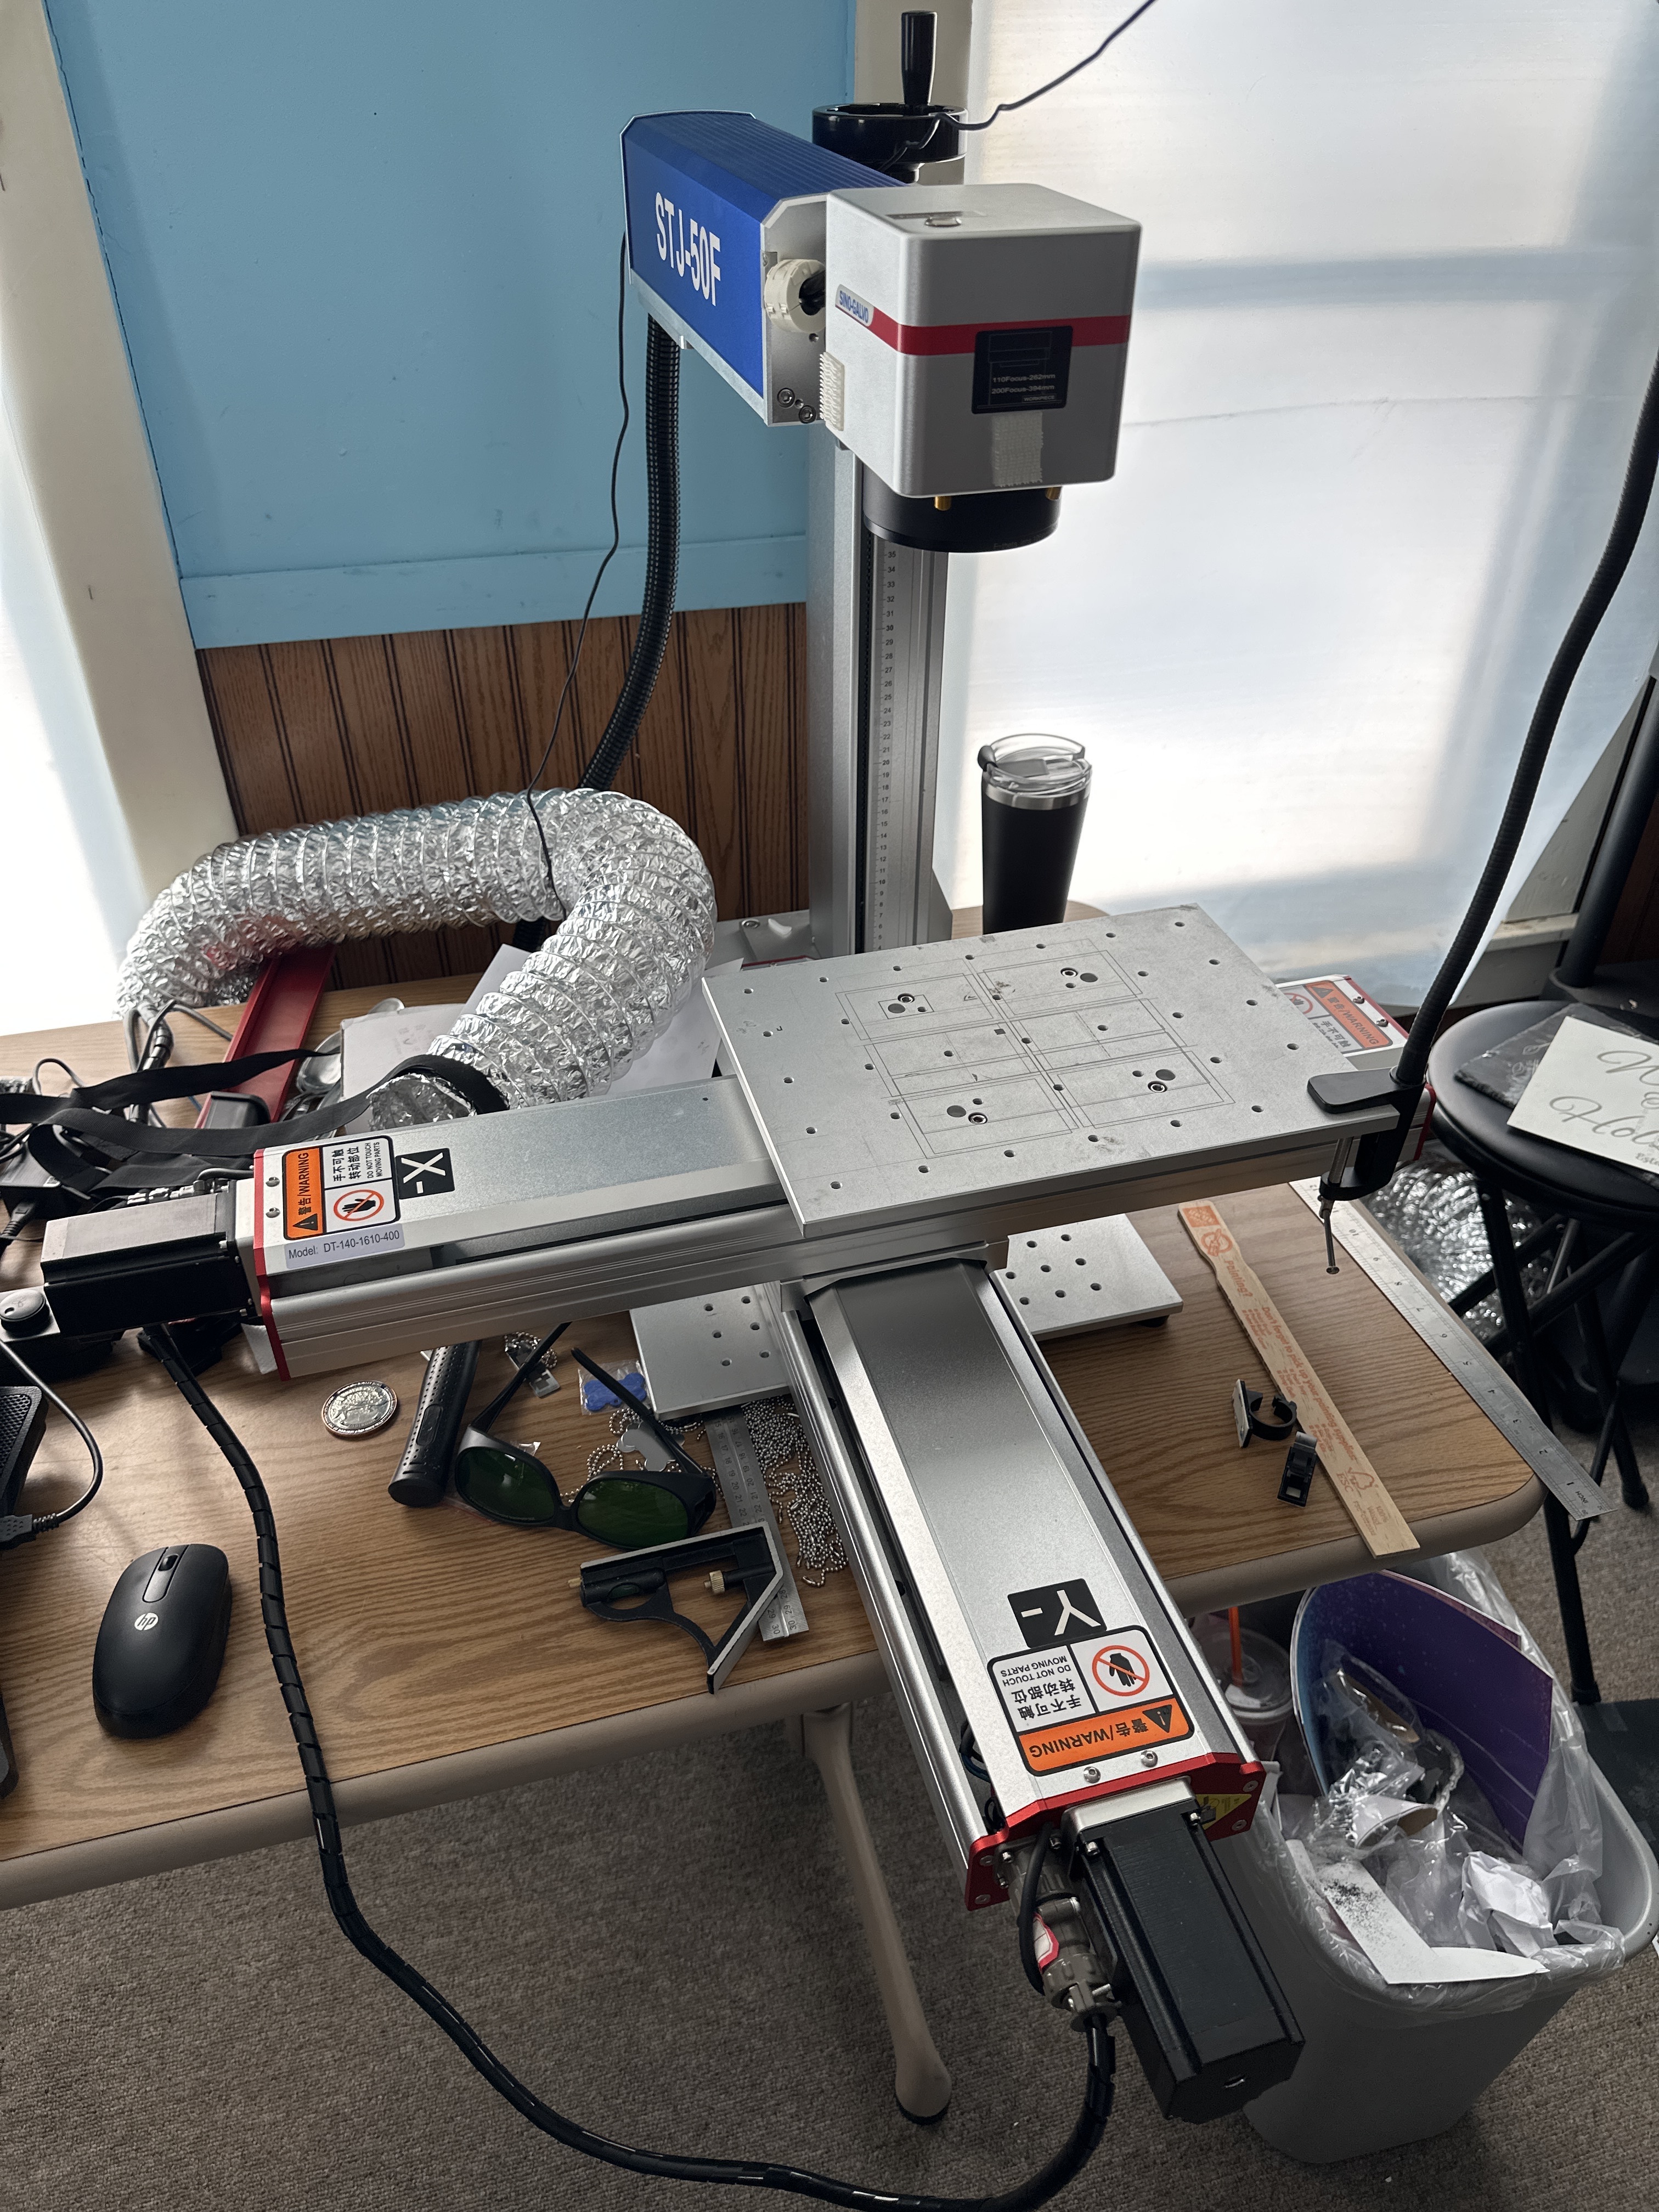
Hello, I’ve been using my STJ-50S machine using EzCad2 for the past 6 months, I have an XY axis moving table, not rotary, that I’ve been using no problem during that time. Now that I’ve transitioned to Lightburn I was able to migrate all the settings I was using before, but I lost the option to control/move my table, and Lightburn only shows options for Rotary , not horizontal XY movements, is there any way I could install/set up/ add/ control my moving table ???
3 Likes
… Only a side question, is it used for "mass production / parts shifts? It looks very advanced almost like a milling machine.
As far as I know it only supports a rotary or a single external axes.
I’m not 100% certain, but my EZCa2 board is a lite and only has one external axes. The higher priced ones for EZCad2 have two… I’d guess you have a more expensive model…
I know the Lightburn people are looking at supporting a Z axes on the fiber, but I don’t know how they sit with dual axes…
Maybe @Rick could chime in and maybe give us some wonderful news ![]()
Out of curiosity, what does this buy you?
![]()
2 Likes
Split Marking - very much like using a rotary, but on two axis, yes. We are familiar, yet have not played with this hardware directly. On the list to investigate further, but that will take some time. ![]()
3 Likes
Main reason for buying it was to be able to do jobs as big as 400x400 while using a smaller objective lens like a 75mm, you get all of the benefits of a smaller diameter lens without compromising working area since I usually do 20 mm splits, the axis move the table accordingly, it works for deep engraving fast and even cutting, but I have to say, it’s a big waste of money if what you are planning on working has any shape other than squared / rectangle, because by using the moving table to do jobs that big, you are not able to project your design on the table. I bought it with the intention of doing full size guns at once without having to move it from part to part of the gun, surprise, it won’t work.
And switching to Lightburn now basically makes that moving table a very expensive relic with no use whatsoever, at least until the programmers decide to work on that and enable the option to add it
Hello! I have been readin carefully your post because I am looking to make something similar to what you have done. Maybe I could suggest you a solution for the table that you are not able to use now due to the fact that Lightburn do not support XY axys moving. I am planning to build external XY axis with DDCS V3.1 controller. This is a controller for CNC routers, but is easy to set up, and writing a few lines of Gcode can achieve what you are looking for. Hope this can help to you
Does this board support a galvo head?
![]()
Hello! It is not a board. It is a complete stand alone controller for CNC machines. Usually small CNC machine used a board + Computer and Mach3 Software. This controller came to replace Computer + Mach3 Software. The way I made it to work is as follow. You have to set up the design in Lightburn and use the signal reserved in BJJCZ board for the pedal. Then from DDCS V3.1 you will send a pulse with and M command that start the engraving. When engraving is finished BJJCZ board will send a pulse to the CNC controller telling that the task is finished. Then the CNC controller moves to the next position and send another pulse to BJJCZ board to start marking again. You have to connect the drivers of the XY table to the CNC controller. If you know some about G code I can send the example of the few lines that need to be written. To connect the CNC controller with BJJCZ board you will need 2 Electronic Relays. https://nvcnc.net/pdf/NVCNC_DDCSV3.1_EN.pdf
1 Like
I’ll have to think on this one… Not sure I follow how the hardware works.
Thanks for the pdf
![]()
If you need help to operate it just let me know it is very easy. I have them in 2 CNC little routers in my factory/ Now I am waiting for a new XY table from China. Once I receive it I can show you how I have connected it to the BJJCZ board. This controller can be bought on Aliexpress or Taobao. It should cost less than 200U$D https://www.aliexpress.us/item/3256803390239262.html?spm=a2g0o.detail.pcDetailTopMoreOtherSeller.1.235c6AXn6AXnbu&gps-id=pcDetailTopMoreOtherSeller&scm=1007.40050.354490.0&scm_id=1007.40050.354490.0&scm-url=1007.40050.354490.0&pvid=9c0cecce-264d-4973-bbf2-59accc4d508d&_t=gps-id:pcDetailTopMoreOtherSeller,scm-url:1007.40050.354490.0,pvid:9c0cecce-264d-4973-bbf2-59accc4d508d,tpp_buckets:668%232846%238114%231999&pdp_npi=4%40dis!USD!264.29!185.00!!!264.29!185.00!%402101c9ac17225484694577109e0152!12000026348929013!rec!US!!ABXZ&utparam-url=scene%3ApcDetailTopMoreOtherSeller|query_from%3A
2 Likes
Were you able to connect and set up such a configuration? If so, can you provide details and a connection diagram?
Ive done some experimenting with this for my xyz setup, but in LB I can only assign the foot pedal to start or stop, and sending a second pulse to start doesn’t shut it off, holding it down starts but letting it off doesn’t stop it. What do you do different?
My work around is to put an M9 right after the M7 or M8 and add a second contact to available pin 1 XORG0 on the BJJCZ board., so M8 M9 turns it on, and M7 M9 turns it off. Only reason for the M9 is to turn off the relays (same as letting off the footswitch) once started or stopped.
Ill have to experiment some more see how to do both with just the footswitch contacts, you have given me some homework.
Hello Good afternoon!
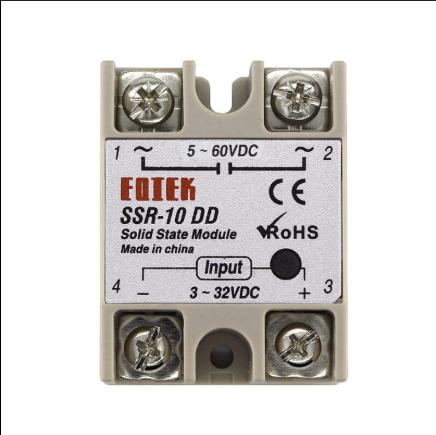
Let me remember. I do not use the foot pedal. I start the machine from the software with mouse. The signal of the foot pedal I use it to tell the machine that the moving of the table is finished then the machine knows that can start marking again. I did it lot of time ago because I adapted a feeding device made with a label cutting machine. So the controller of the cutting machine when finished the feeding process send a signal to laser machine to tell it that can start marking again. And the laser machine when finish marking, send a pulse to the cutting machine to start the feeding process. What you will need are 2 SSR (Solid State Relay) Because the laser machine controller works with 5V, and DDCS V3.1 works with 24V. I will send you a picture of them I think I have in my drive.
Yep, got the 2 SS relays. I am going about it differently, (until I read yor post) having the CNC turn the laser on and off.
Using an Arduino Uno for the board. Maybe you tapped into the ready light for the pulse back to the board, I could see that working. Back to reading poor Chinese translations of the I/O ports descriptions.
Hello!
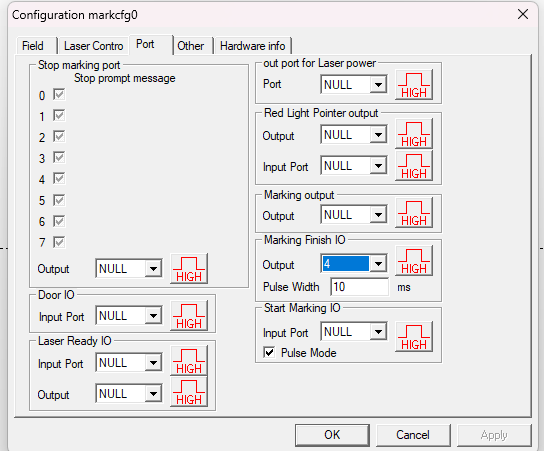
I don’t have exact same card as yours, mine is for only one axis. But as far as I could see in the user manual, the foot pedal is connected to a pin called remark, and you have to use one of the general output, and configure it via F3 → Port → Asing the Pin Port Used to the signal Marking Finish, this will tell your external controller that is time to move the axis.
Mine has one axis extension like yours.
Footswitch on mine is connected to GIN15 pin #9
I’ll do some digging around to see how to configure one of the outputs, Pin 2 or 10 which ever is not already in use. Looks like your config above it is pin 2 (Output 4)
Question, do you remember how you connected the marking finish to the CNC board? did you run that through a relay as well or direct?
Hello!
I used SS relays, because the working voltage of Laser board is 5V, and the working voltage of CNC controller is 24V, so I used Fotek SSR-10DD, this way no problem for the different voltage in the boards
1 Like
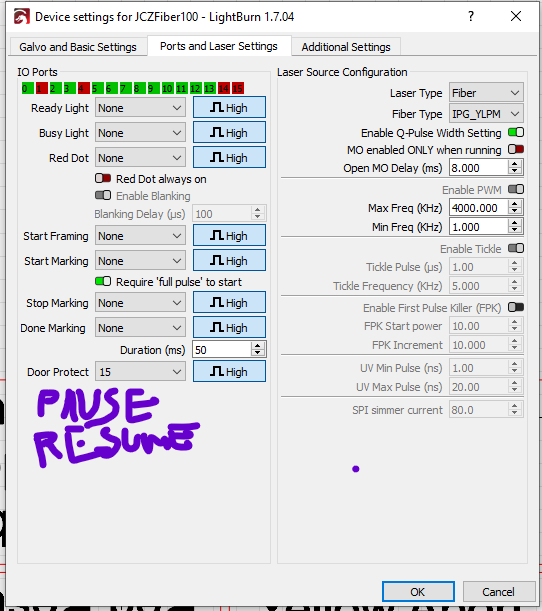
Working on an automation project, may add light to this thread. I could use Pause and Resume ports. Put it in the feature request, maybe get some votes.
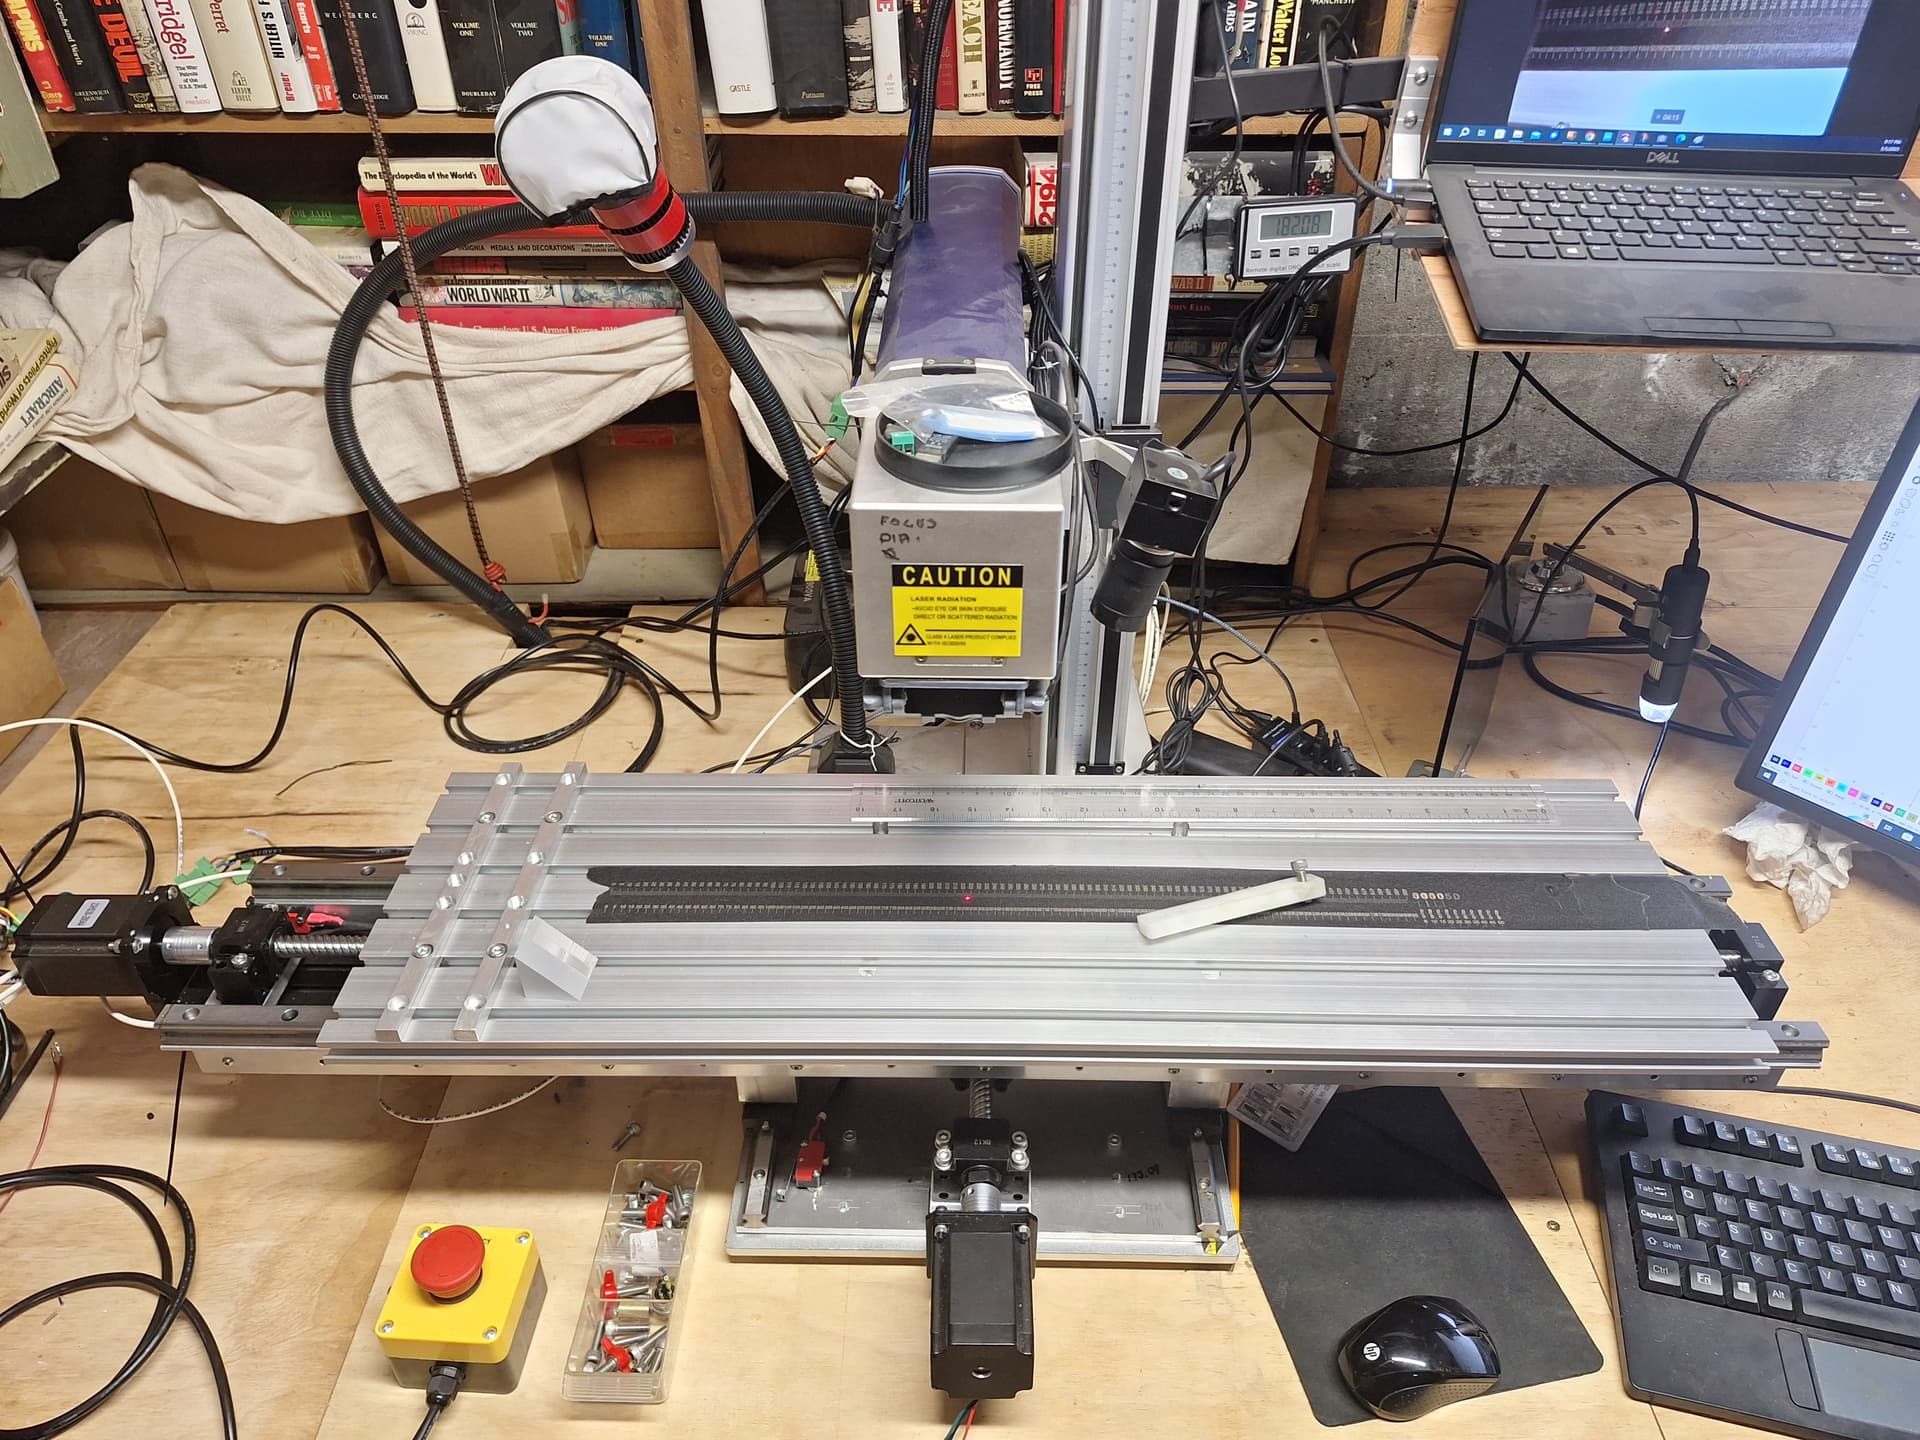
Got the XY table mounted, getting late last night but ran some calibration tests after making sure the Z drive didn’t slam the lens into the table at 2000 mm/min when running focusing macros. Any project like this need the big red button at the ready. Built a 3 axis controller only using it for Y and Z for first tests, running X off the rotary port on the laser.
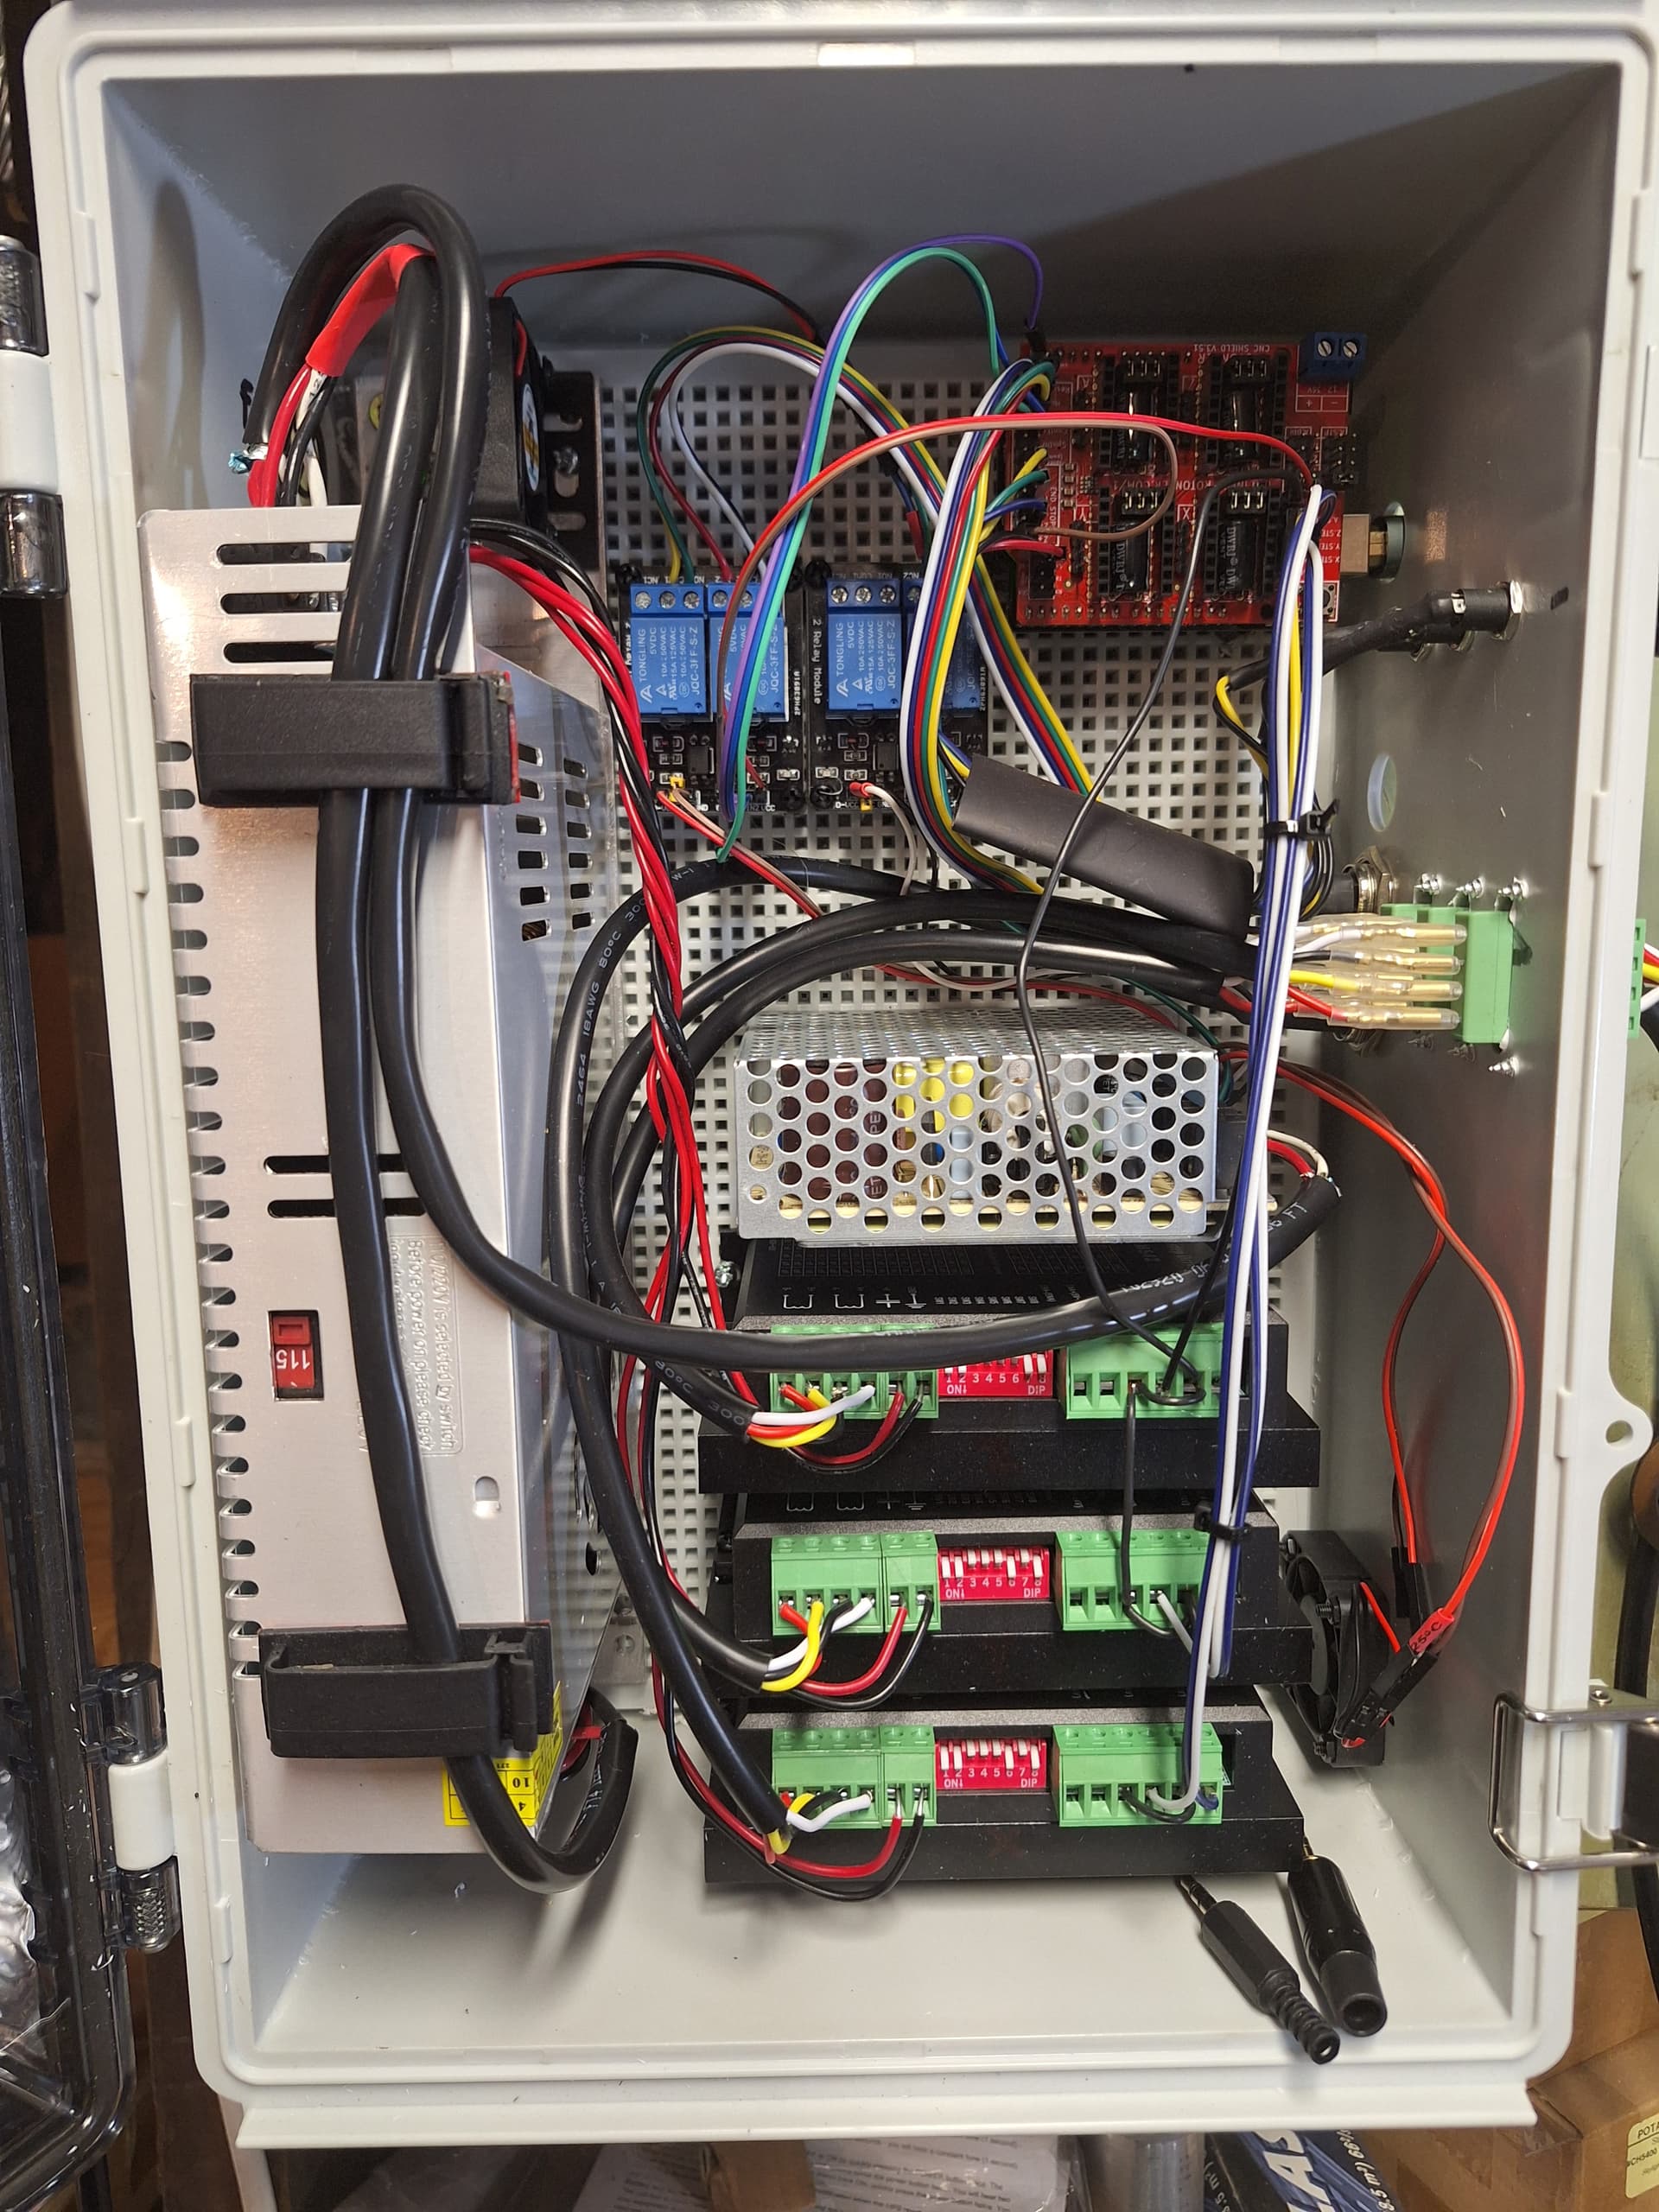
The controller. Arduino Uno based w/ 48V PS for the Microstep drivers, 5/12 V PS for relays and fans, etc. 4 Opto-coupled JVCC type relays so coil power is completely isolated from the board and rest of system. Relay 1 and 2 are wired to a 5 pin aviation plug and driven by the A4 and A5 pins on the UNO (M7, M8, M9 G-Code calls) I’ll connect these to IO 14 and 15 on the BJJCZ board near future. Second 5 pin connected to the board’s Pause and Resume pins, however the BJJCZ board is not compatible so now just for future, as are relay 3 and 4.
First test 2 min video, running repeat marking / dynamic text. Dead on over 450 mm:
https://firearm-videos.sixguns.com/channel/Albroswift/video/56/xy-table-first-run-repeat-marking
1 Like