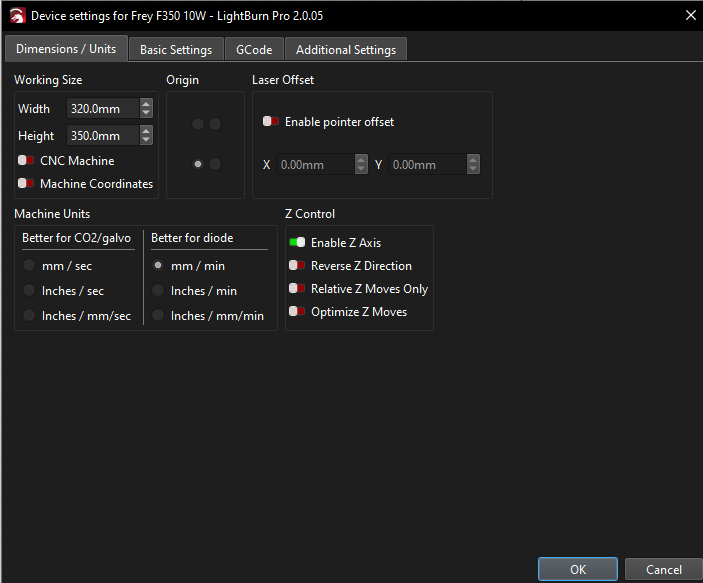
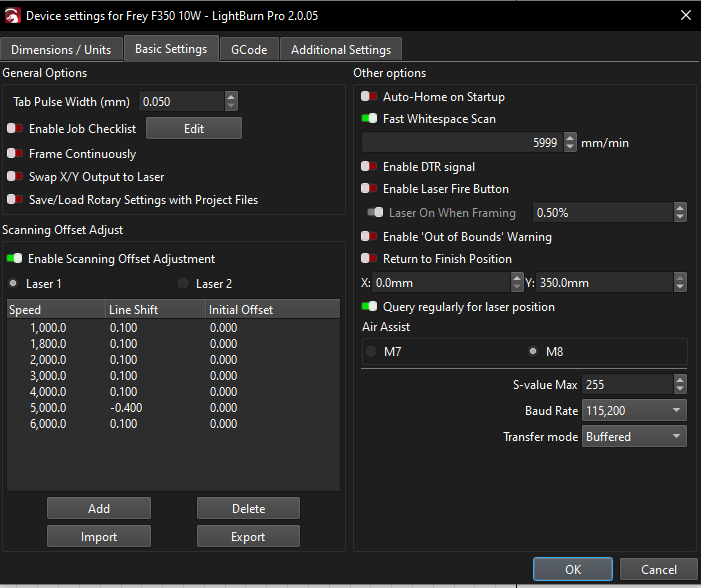
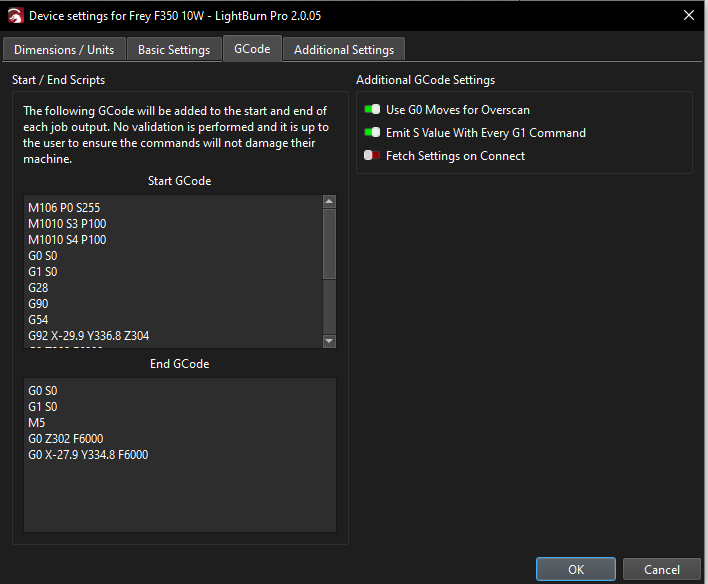
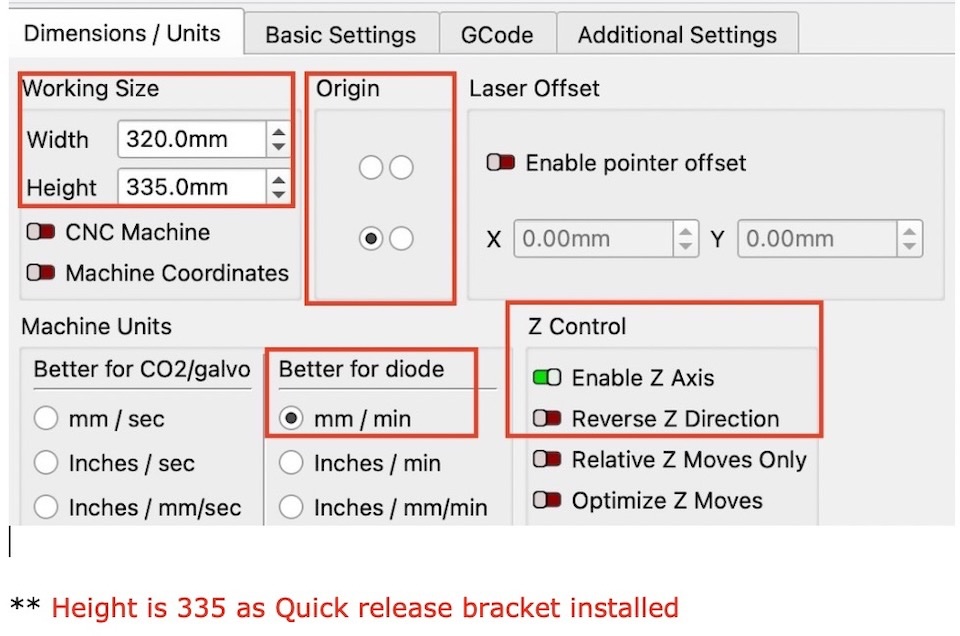
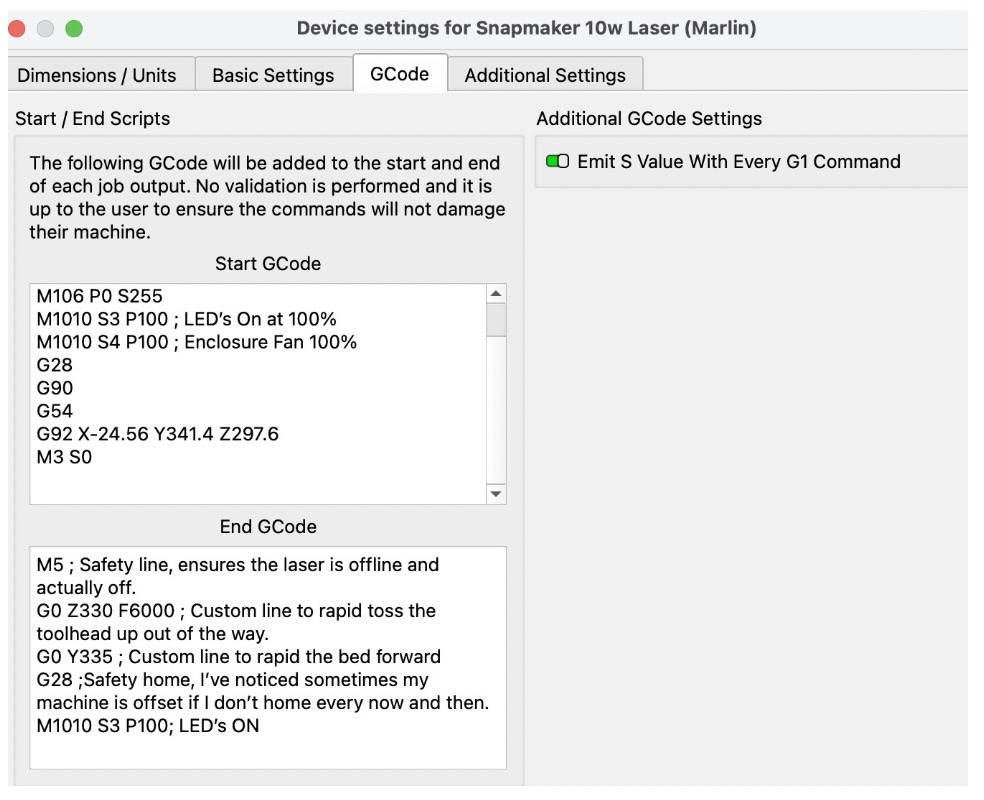
Can anyone help with the device setup (manual) and the Start & End GCodes I need. Especially how to calculate the absolute work origin calculation i.e. G92 X-23.5 Y335 Z287.9
Cheers. I managed to sort that, but it was all the option in “Device Settings” especially the GCodes especially the absolute coordinates caluation. The Z one can be a tough one
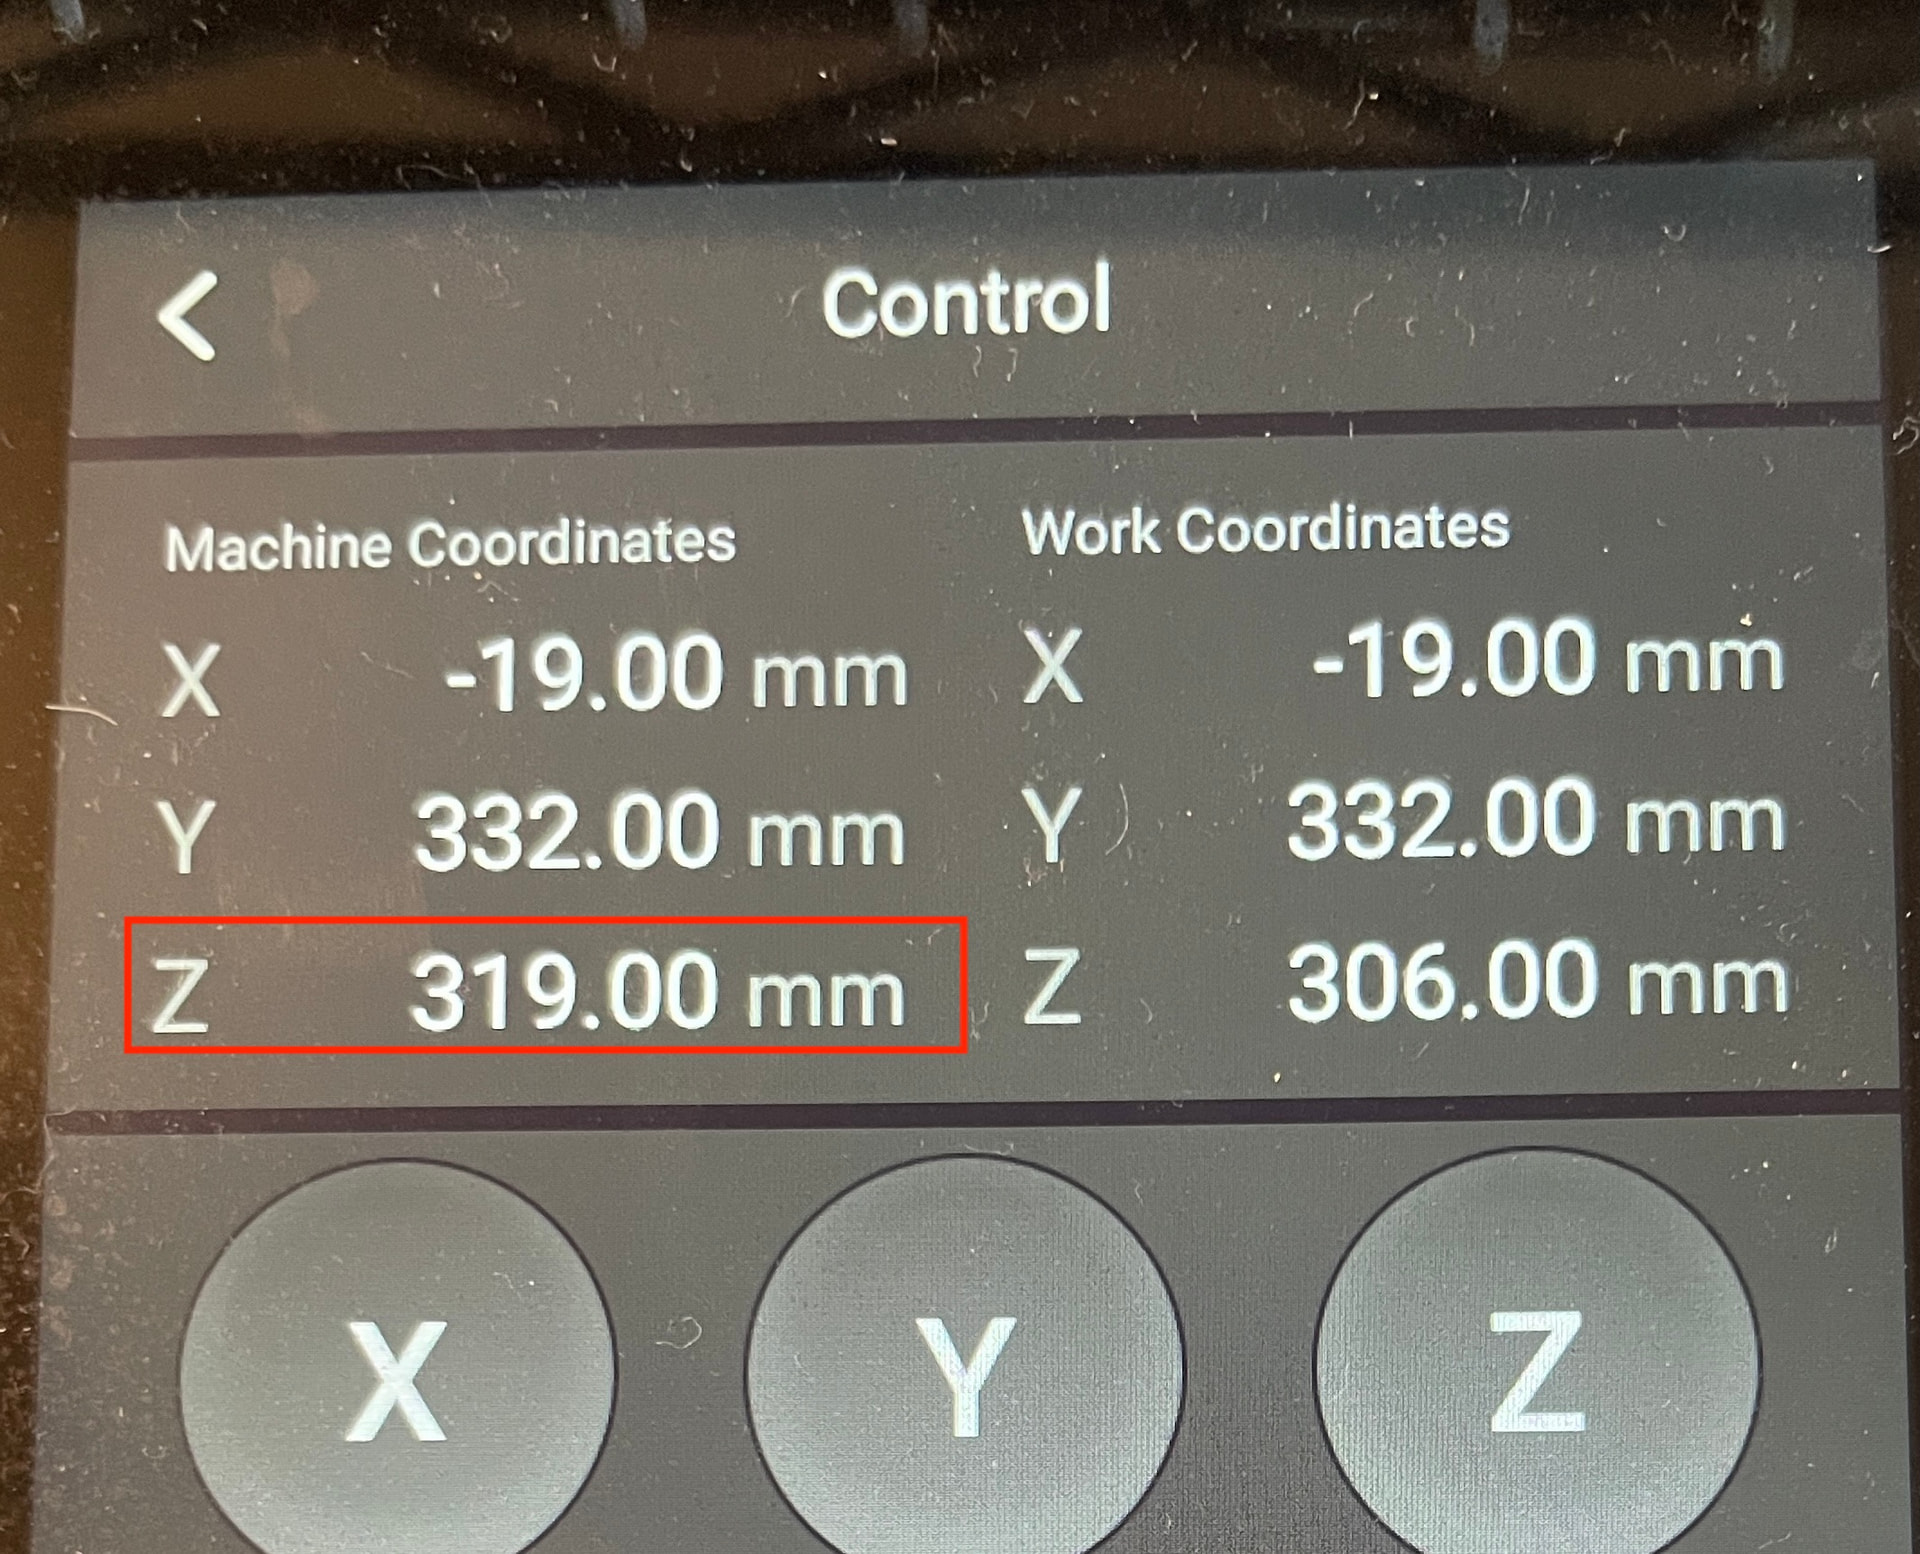
With the 10W, start a project, then do a manual focus (where it asks you to touch the toolhead to the material) but just touch it to the bed and hit next. When it moves up to set X/Y origin, back out to the main screen and record the Z from there. It should be around 30mm-ish.
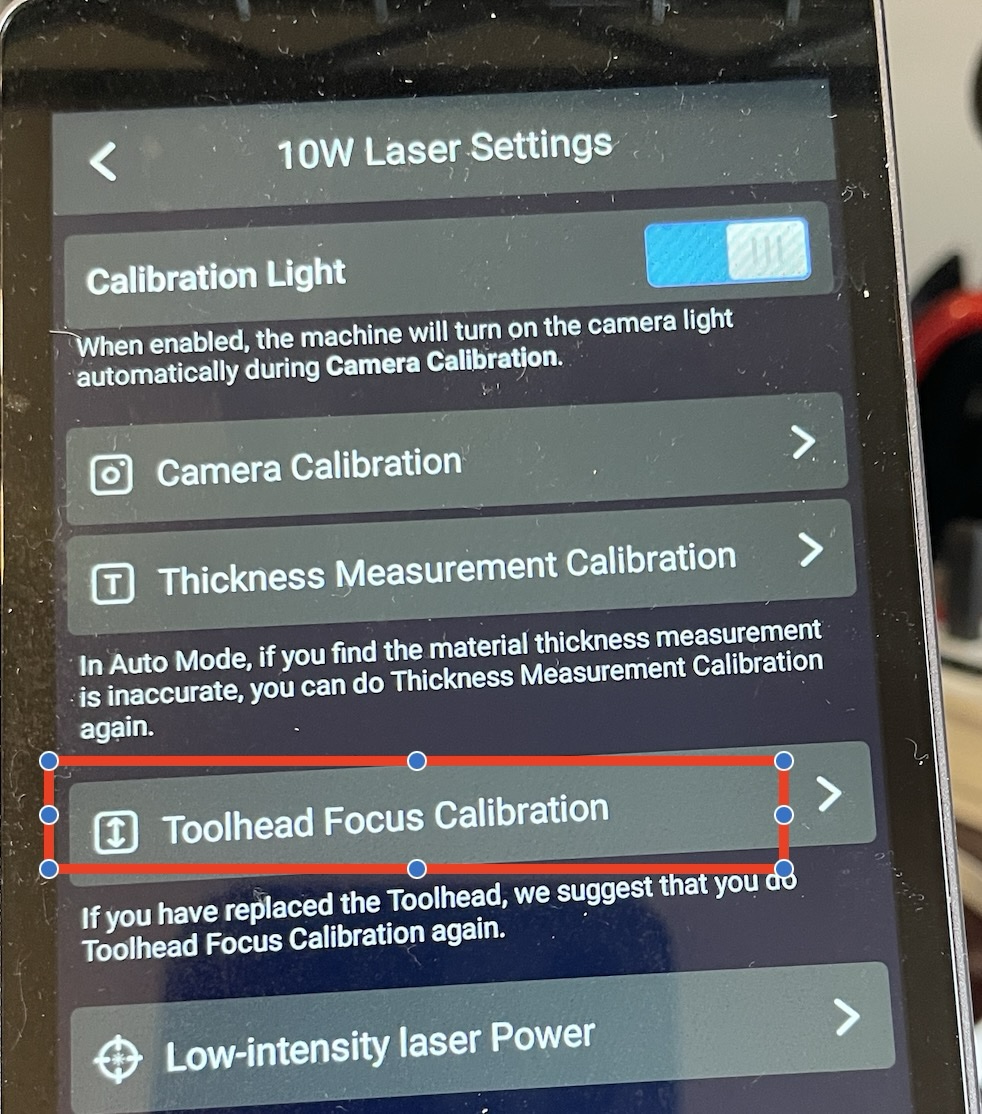
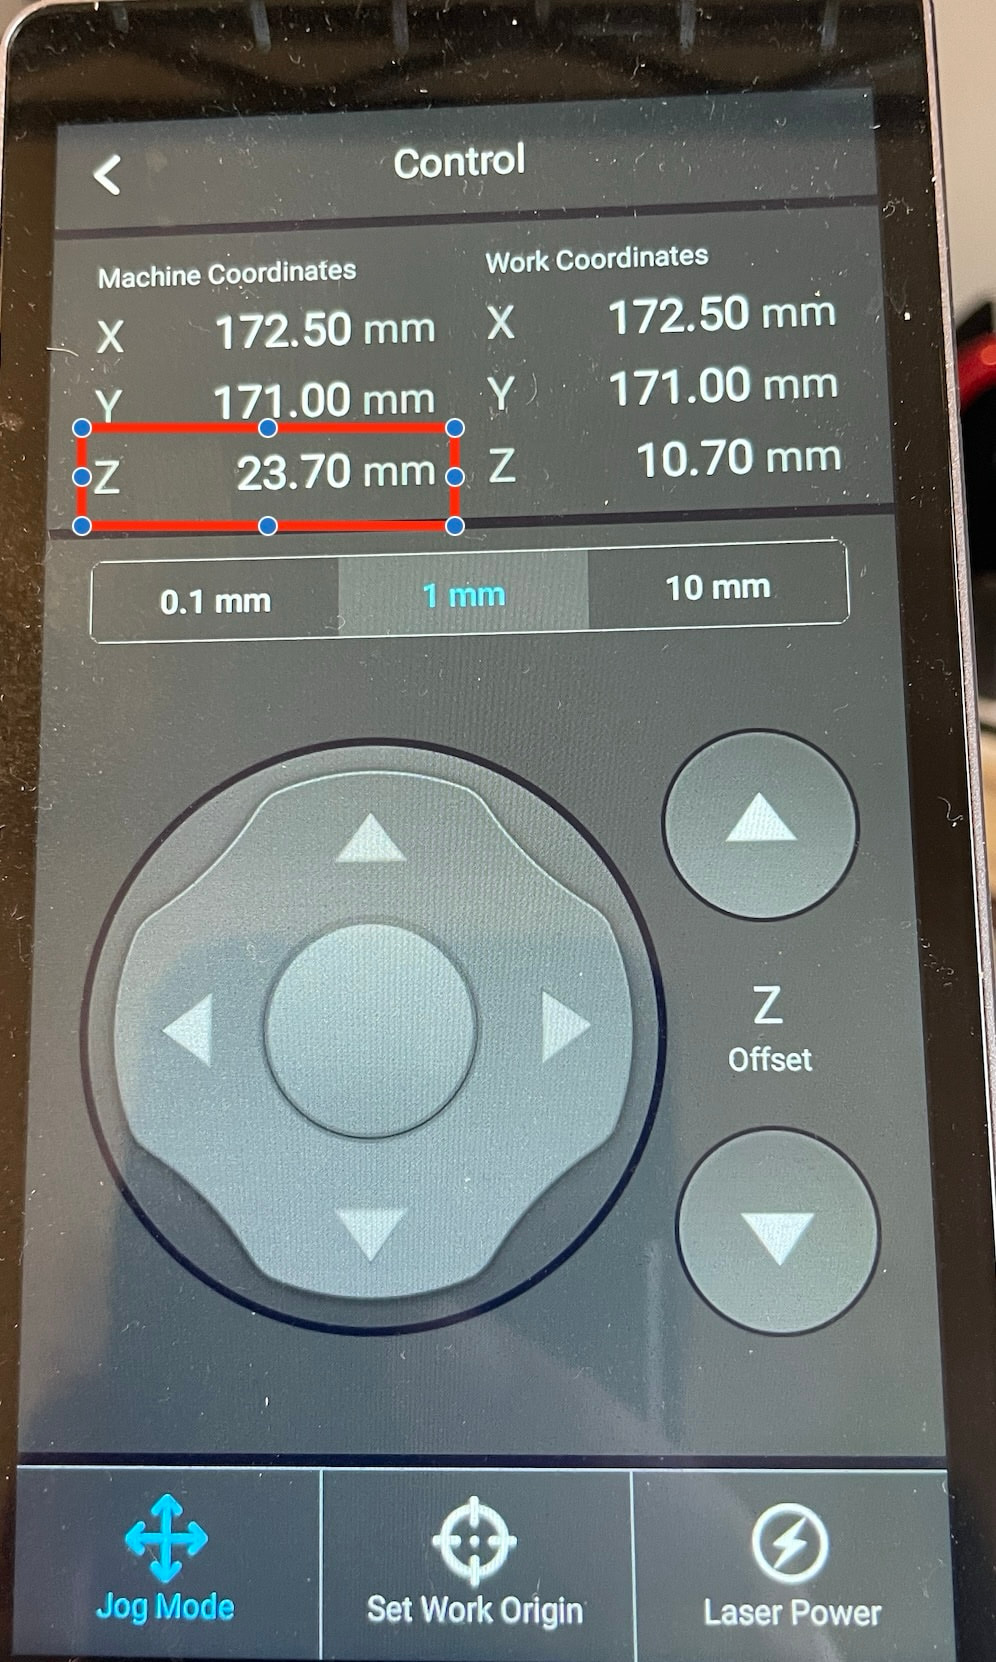
Thanks for coming back. Sorry to be a pain, I assume you mean on the Snapmaker touchscreen. Where is the manual focus. I have the Toolhead focus Calibration but once it set it doesn’t move. If I go back to the Control it shows 23.5mm (Quick release tray installed so that be why its not 30mm)
Quick release shouldn’t change the focus height. Yes, I mean on the touchscreen. To do a manual focus, do some project in Luban, doesn’t matter what it is, we’re not actually running it fully. Load it onto the USB drive, then on the touchscreen, click start > select the file you just put on it > when it offers to focus, click manual instead of auto (auto uses the laser). It’ll prompt you to move the toolhead down to touch your material. Touch the nozzle to the bed directly, click next and it’ll move up.
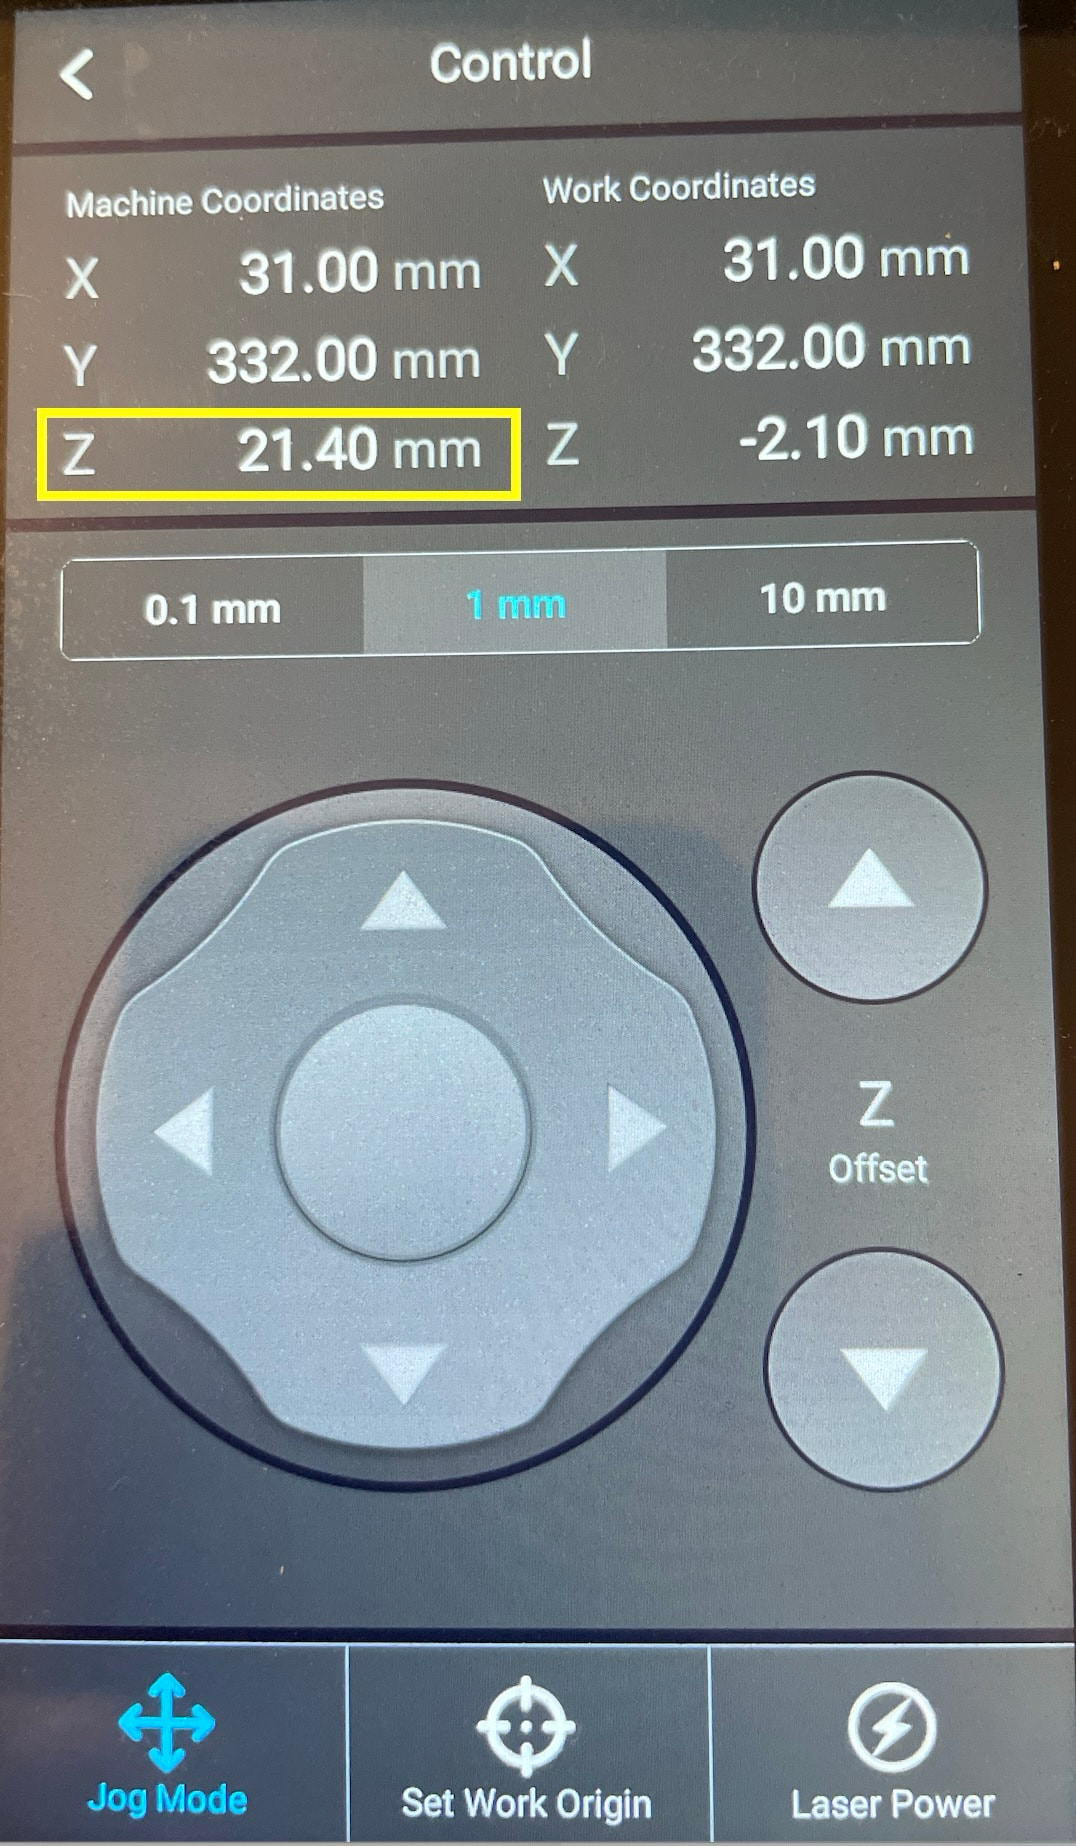
Afterwards, tap back all the way to the home screen, then check the movement screen.
EDIT: Also you’re not being a pain, it can be confusing.
That’s fine. Now you know the actual height of focusing on the bed. Could be a difference in manufacturing. I have a really early unit. Plug that in and test it out!
I would love to see this if you don’t mind. I have been going through this exact same thing, and was ready to give up and decided to search for help one more time (I hadn’t in a month or so and came across your post).
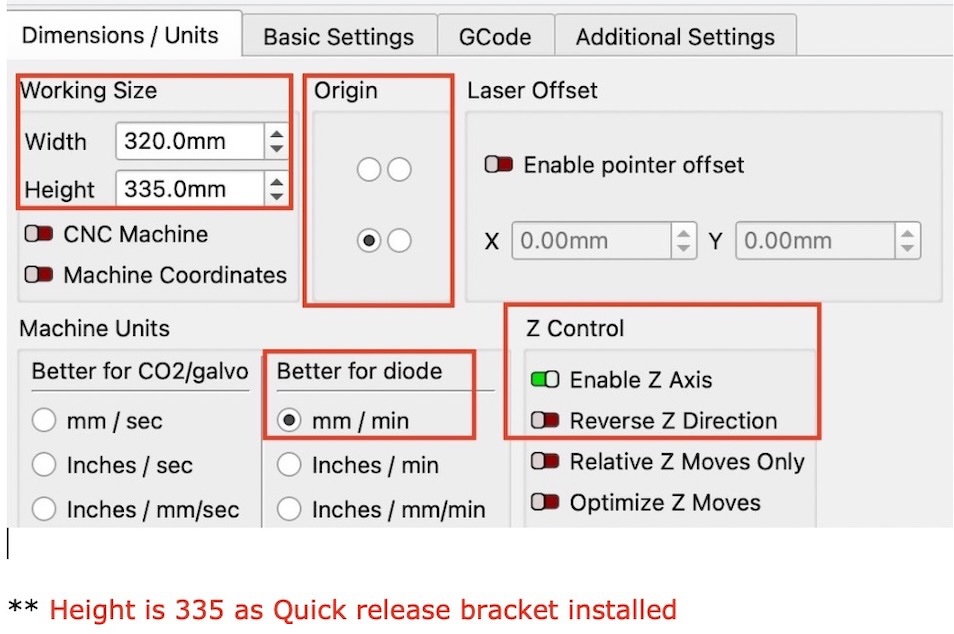
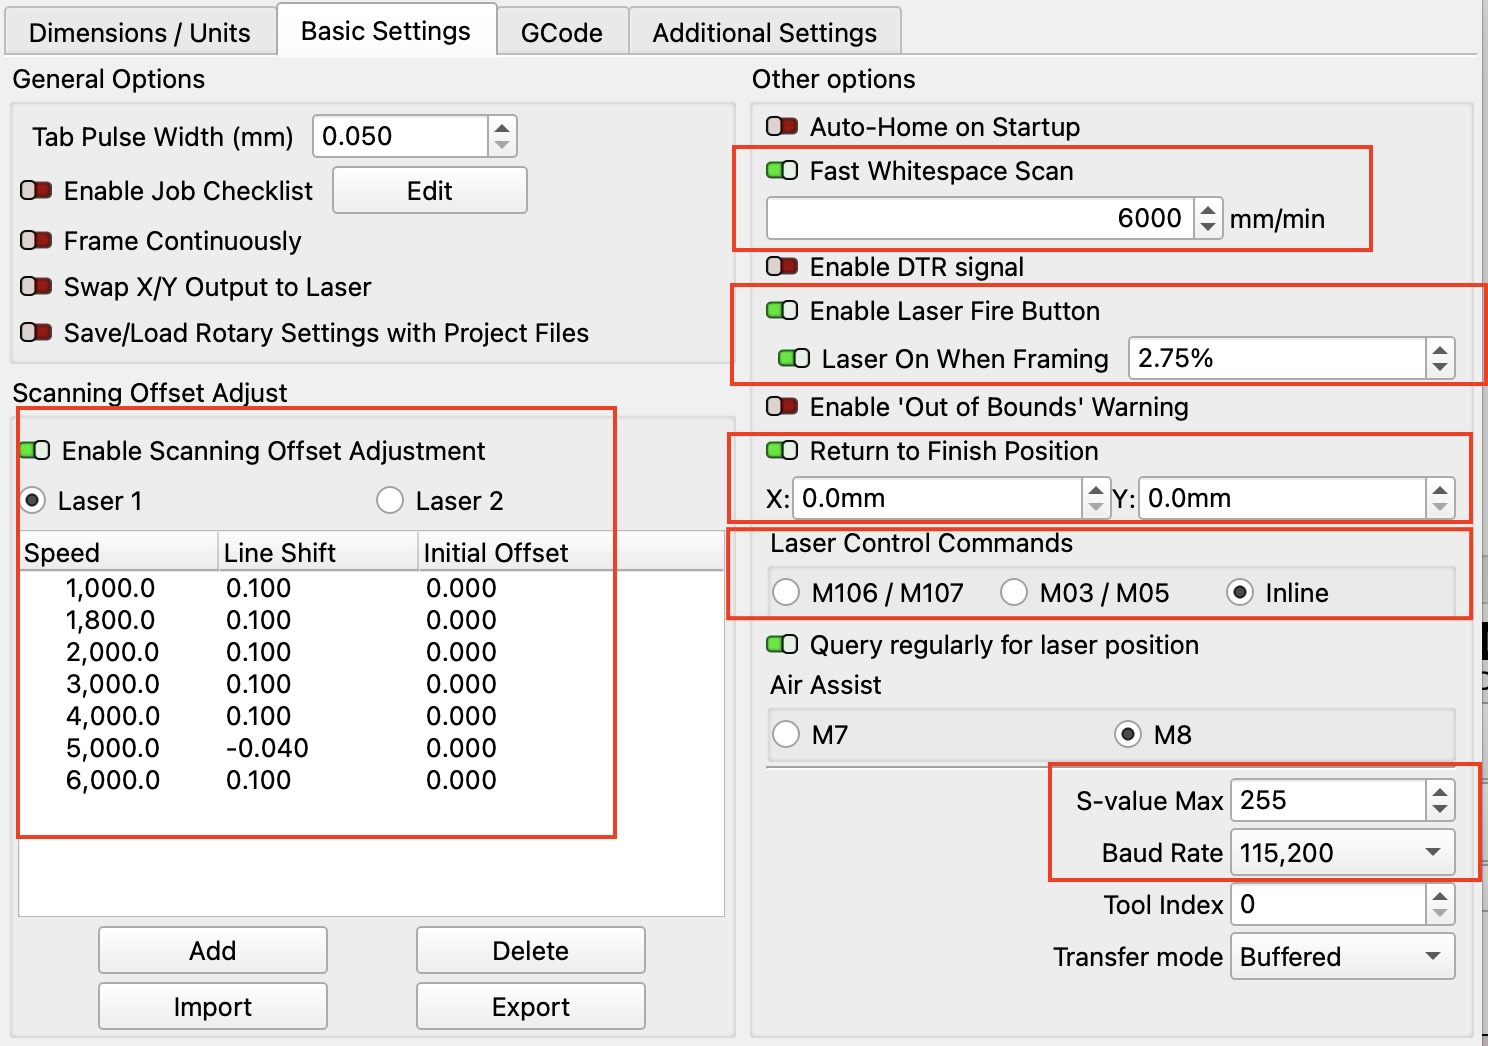
I doubled up on one of the photos … here are my settings as you getting slightly different settings with the Marlin control. The Move information works with Marlin control i.e. Get position
I used Snapmaker Marlin profile and I didn’t use any start or end gcodes. On the 10W laser module the focal height is 10mm above the little plastic shroud. so you can z down to your material, use your calibration card if you want, and then on the touch screen you z up 10mm and you are at your focal height. I start from current position, test fire to see job origin and test fire laser while framing, then if it’s good i hit start and done.
Did you guys use other device setups? I have an issue with mine and was wondering if anybody had the same. With the SM Marlin profile the gcodes get saved with a call to fire as:
M3 P10 S25.5
Not sure why they are both used but the documentation says that if they are both on one line then P10 takes precedent.
But M3 P10 and M3 S25.5 should be the same on the snapmaker machine right? Not mine and I don’t know why. If I shoot M3 P10 in console and then M3 S25.5 right after, the laser dims. My SValue max is set at 255 so it should be working correctly. Marlin doesn’t have a $$ command so I can’t see what the power setting is on my machine but after a bunch of test fires to see what my Svalue is sitting at, I’ve determined that M3 S47 is the same laser level as M3 P10. It’s as if my snapmaker’s range is like 0-470.
I started testing this because I noticed my material test seemed pretty dark compared to what the exact same toolhead was firing on my snapmaker Ray. I thought it was a Ray issue. When attached to the Ray, lightburn uses a grbl profile and my svalue is at 1000.
Not sure where to go from here. I wondered if I inadvertently changed the power setting on the snapmaker and should factory reset it.


 I have a really early unit. Plug that in and test it out!