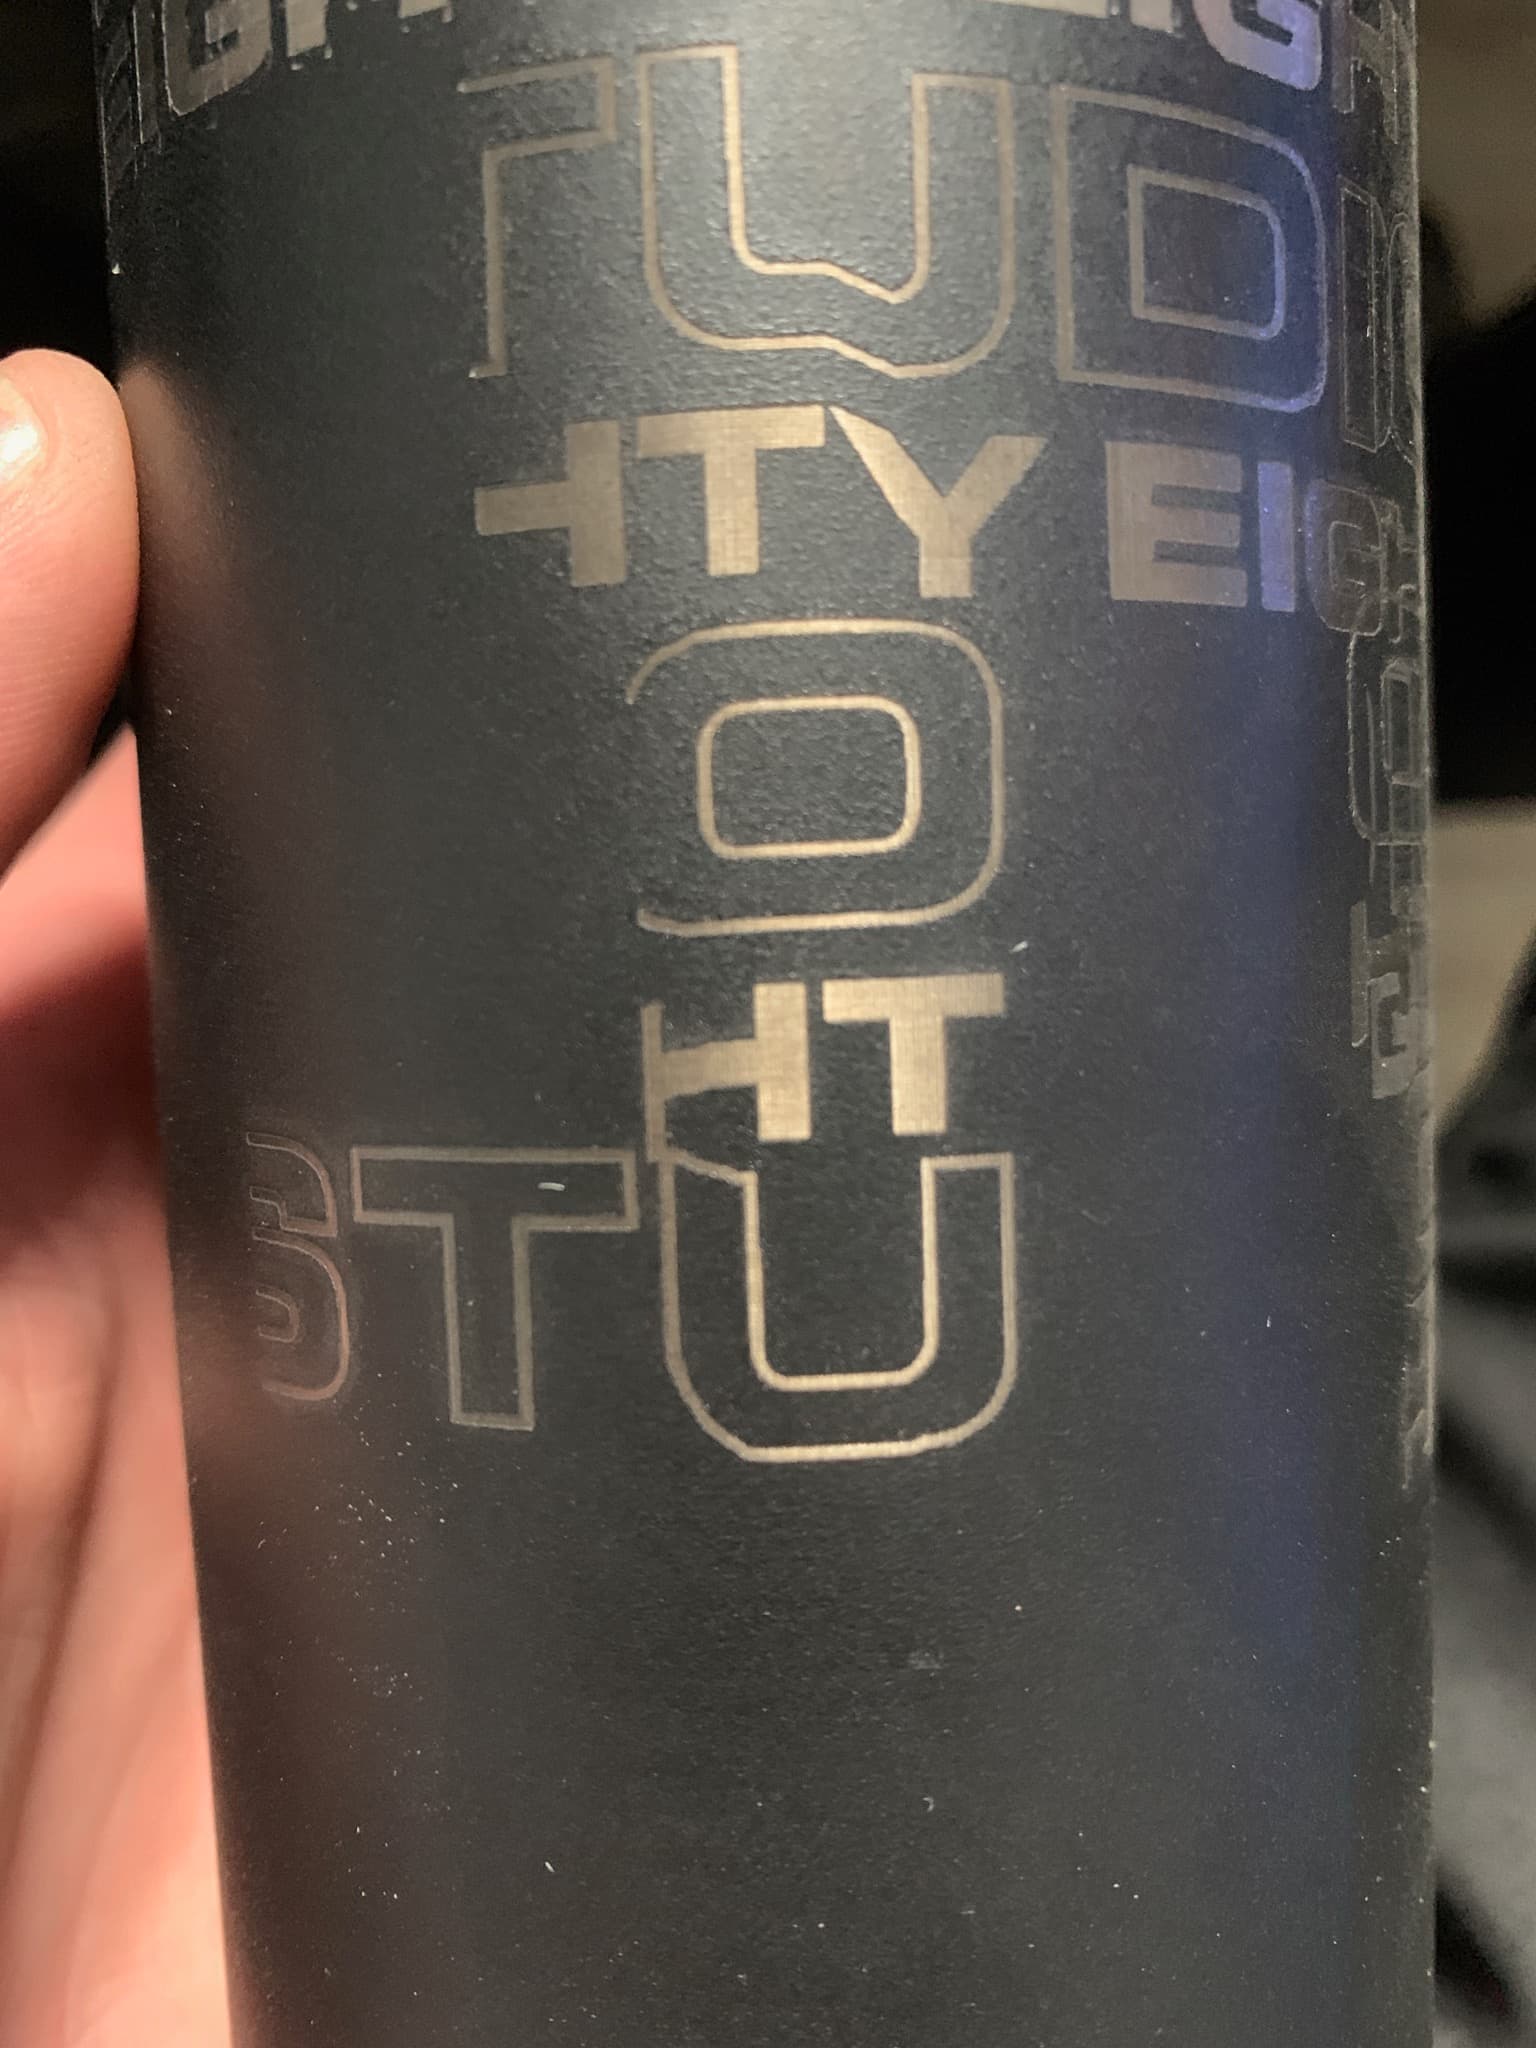
I am coming across and issue where every time I try to engrave a tumbler on my rotary, the text is skewed. I have done just about every test I can find to make sure that the problem is not my rotary but I have not found a solution. Any suggestions?
Assuming you’re scanning along the Tumbler’s axis, then it appears that the tumbler is shifting in the rotary. Putting stops at the ends or a hold down roller in the inside of the Tumbler will help address this.
If you’re scanning along the rotation axis then I have no idea how this could happen.
I am scanning along the rotation axis. Oddly enough, when I engrave at low speed (115mm/s) it causes this shifting, but if I crank it up to 325mm/s it engraves perfectly. I do not understand. So I have a temporary fix, but my engraving looks much better at lower speed.
I would guess that the faster scan gives the tumbler less time to shift… Try putting stops at both ends. Just make sure the stop doesn’t restrict rotation.
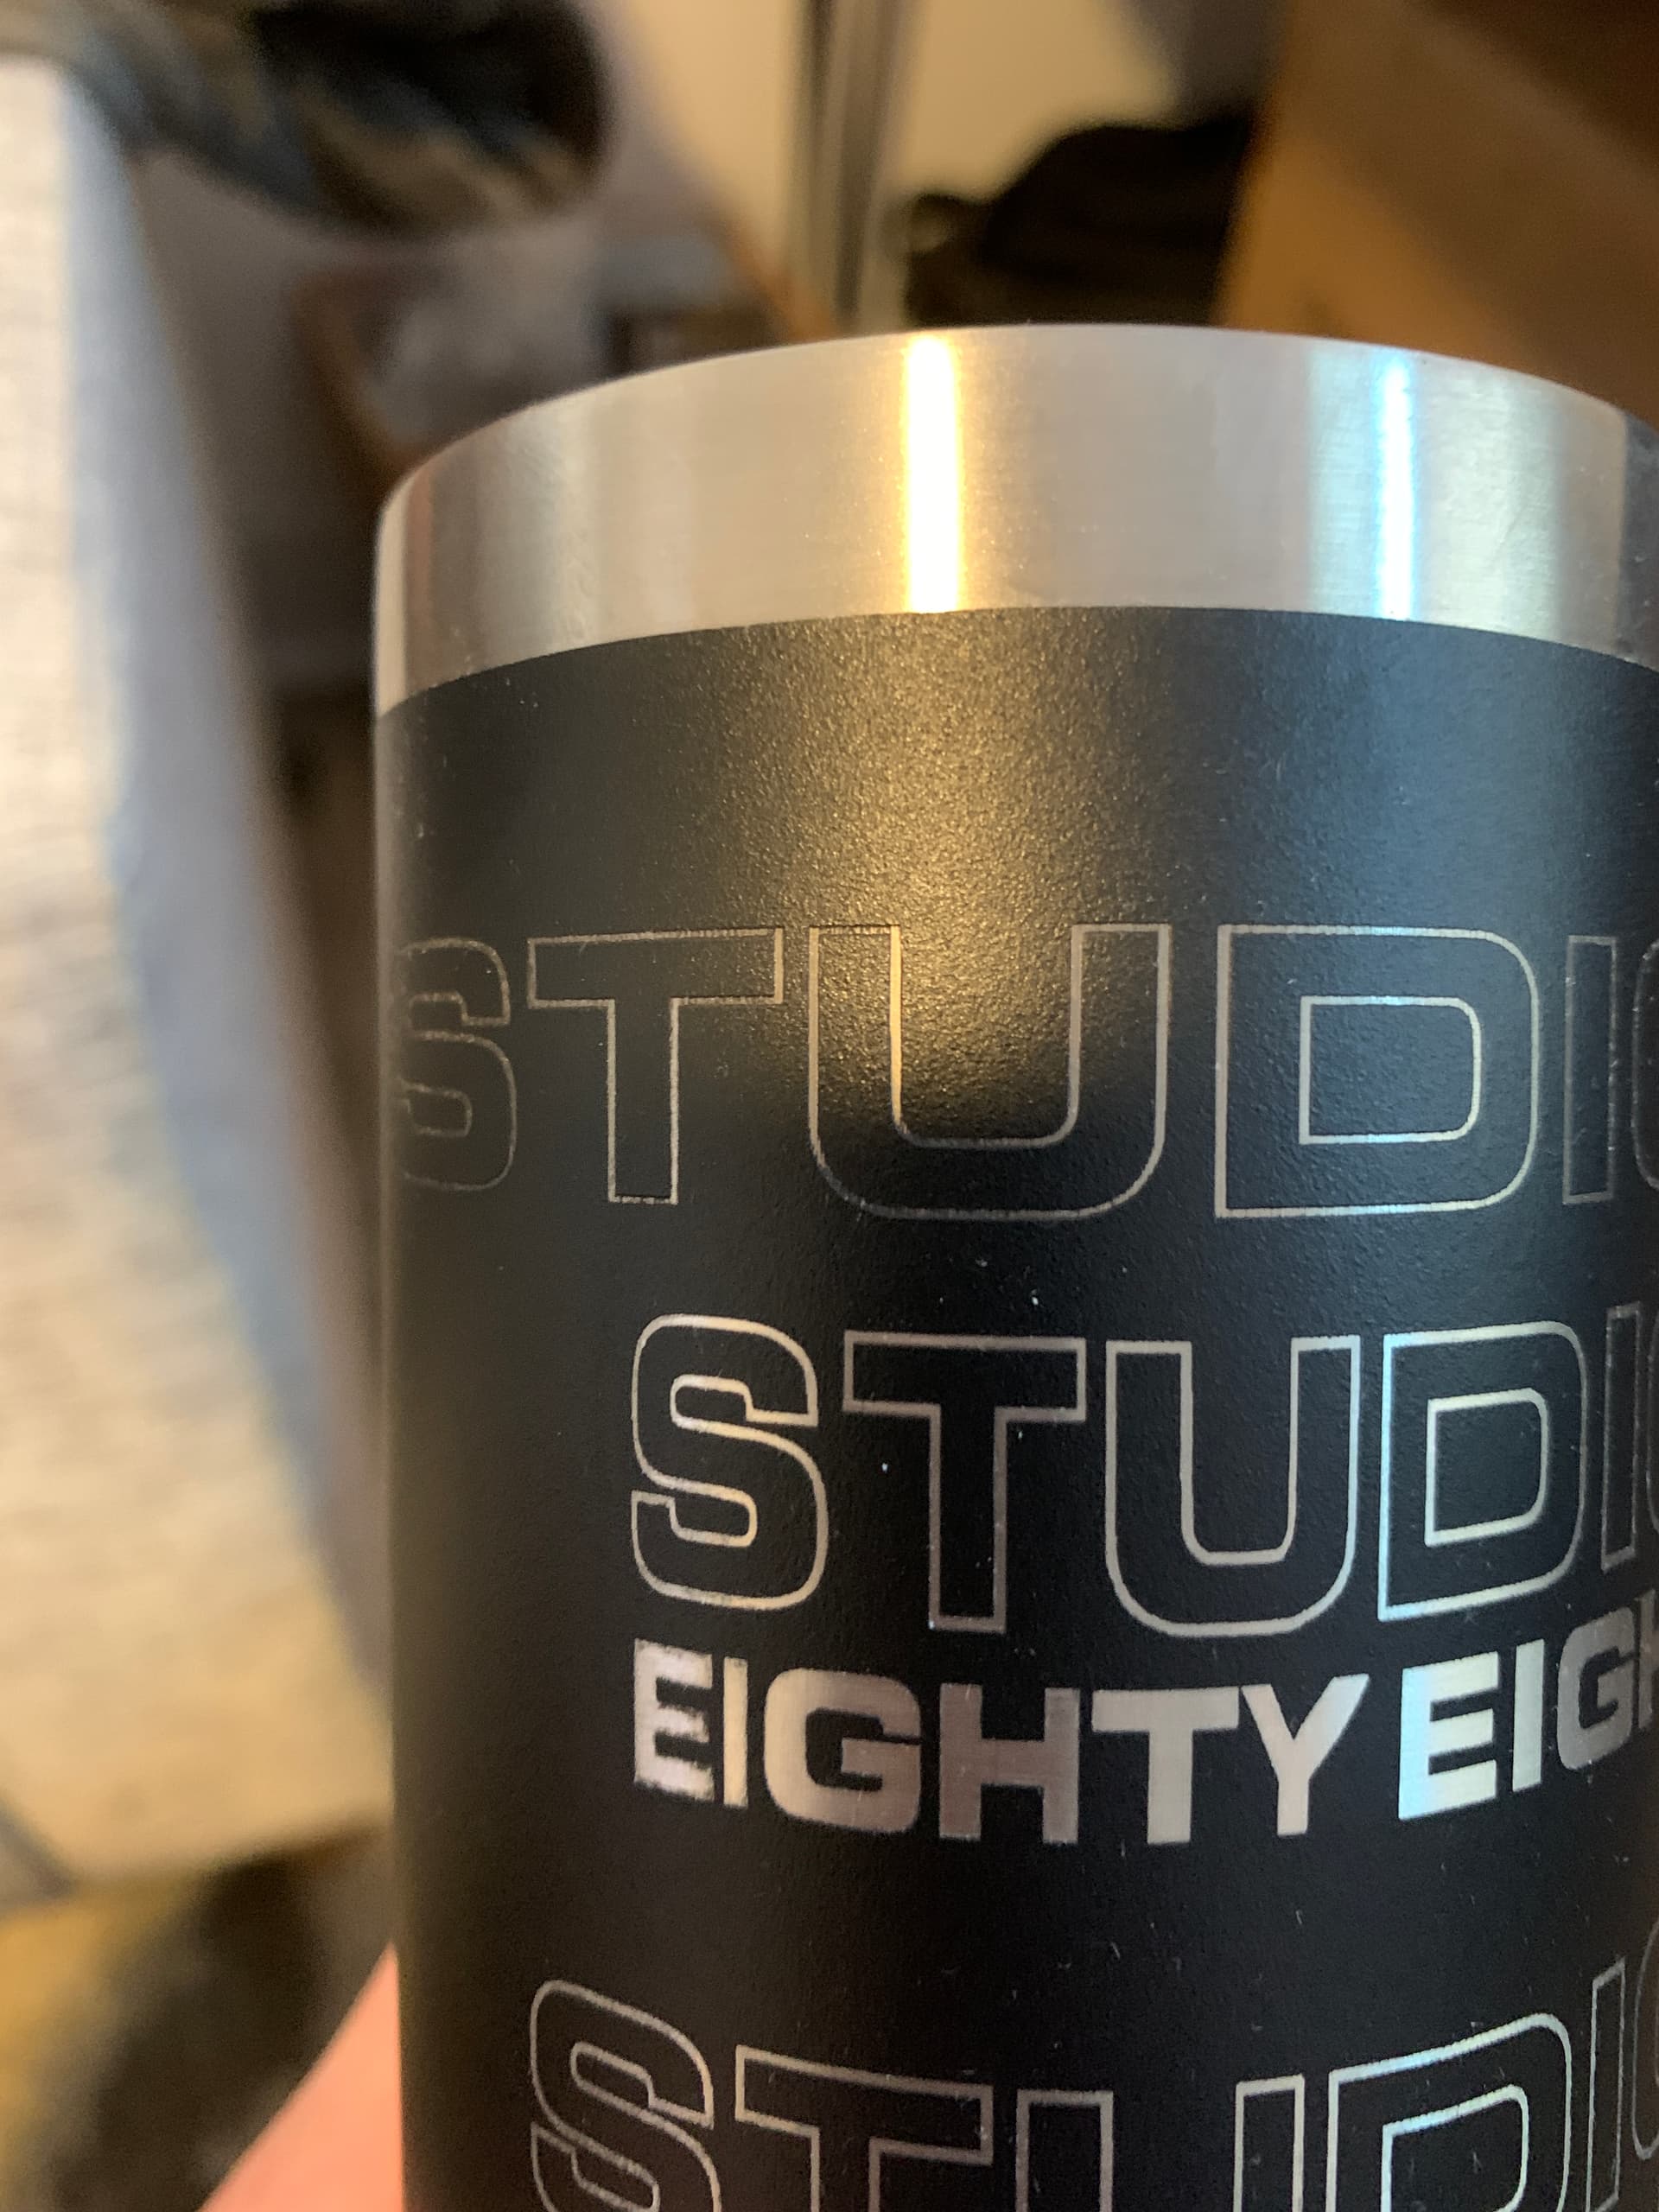
Is that photo a metal tumbler and you are removing the outer rubberish black costing with the laser? Amazing! What brand of tumbler?
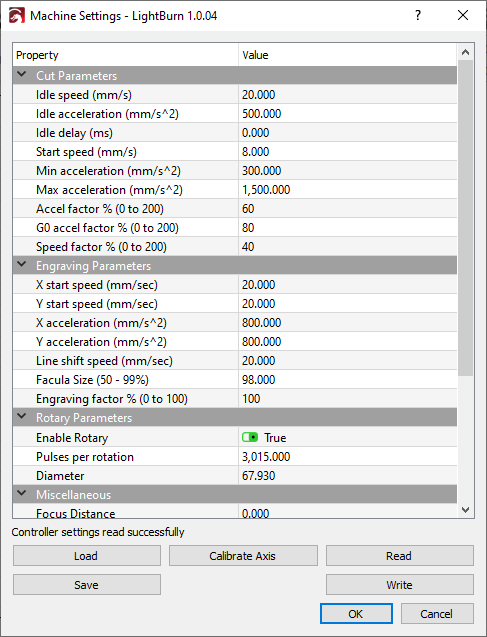
In addition to stepper motor speed, there is also an acceleration setting that can really help on the rotary turns. If the majority of the weight of the glass is on the idler (non-powered) wheels (ie, wine glass top), abrupt acceleration can cause a variety of issues with jumping/skipping/sliding.
Your tumbler looks uniform weight, so im guessing there is nothing to prevent it from sliding up and down the rotational axis but you ensuring that it’s level?
If you don’t have a good way to secure it, sometimes you can purposely make it slightly tilt and use gravity in your favor by putting a stop at the end of the glass so it will naturally want to slide towards the stop when rotating. Watch out for the rims of cheap glasses are not always on plane with the bottom, so the bottom is a safer bet to be the low point usually. The metal tumbler is probably perfect for this though.
With some wine glasses, I remove 1 of the 2 “traction” rubber gaskets on the idler wheels and it acts like a track for the wine glass base to ride in. It can’t shift along rotary axis at all this way.
Yes that is a photo of a metal tumbler. Yeti is the brand.
I have my lasre engraving right now on a test run so I cannot see the machine settings… but is the stepper motor speed in there? I have been adjusting the x and y axis acceleration. It has slowed the overall time to engrave by alot but it seems to be more accurate.
The tumbler is uniform in weight, and I actually just put a bag of sand to weigh it down.
Rotational axis is level. I do have a stopper in place, and the tumbler naturally stays next to it as the wheels turn. That is a great trick that you mentioned for wine glasses. I will have to remember that. I wish i had something that would allow me to use that trick for this yeti.
Still having issues with the skewed text though. It seems like when i slow the acceleration down, that usually helps with the skewed text. But then I have an issue with gaps between lines… I increase the DPI when that happens, but still have some. I am at 900 DPI now and experiencing that… it truly does not make sense. Too add to it, I have taken my laser out of focus just slightly, so that the beam becomes wider. That actually helped quite a bit, but again… with all of the solutions I have mentioned, I still can’t get a dependable engrave each time.
Here is a picture of what the engrave looks like after increasing DPI to 900, weighing the tumbler with a bag of sand, slowing the x and y axis acceleration to 800 (started at 3000 maybe?), everything is level, etc.
Your laser system is incapable of producing a dot or beam of this size, so you are going to waste a lot of time trying to produce anything at that resolution. After running some ‘Interval’ or scan gap tests, you will likely find good results in the 300 DPI range.
Slowing the acceleration, weighing the tumbler down and running the job at a slower speed provided a visible improvement to your output.
That’s great to know - I am sure that will save me a ton of time. I really appreciate that input.
Any guesses to why the tumbler randomly skews/shrinks text? If you look at my most recent picture, the second logo from the top was actually the first try at engraving this cup… which turned it into a test cup. the width of the logo should be what you see at the top. My only guess would be something to do with the wheels it is sitting on - which is why I weighed it down.
Second question for you - are my engraving settings where they should be? Can I adjust the line shift speed higher or lower (or any other setting) to eliminate the small lines left behind? It has been about a week of researching these issues… I desperately want to lock in settings that will be consistent.
The skew in the first photo suggests the glass moved along the X axis (Z of the glass if standing) OR your X axis has an issue where the machine misses or skipps stepper steps.
What machine/controller are you using?
Is it correct to say that you laser only draws vertical lines on the cup? Or are you lasering when the cup rotates, and drawing horizontal lines on the cup to make a design?
I am using a Ruida controller. Machine is Omtech 60 watt blue… I think 20x28inch bed.
I do believe there is an issue with the machine missing steps. In terms of steps per rotation, I am dialed in, I truly think I have that calculated accurately. Not sure exactly how those are related, but I felt like that was important to mention.
it is kind of difficult to describe how the machine is engraving, but i believe the answer to your last question is that the cup is being lit with the laser after rotation occurs, in a horizontal plan along the x axis.
ps, the rotation settings may not be right for 1:1 rotation distance in that file, i may have adjusted for a non cylindrical glass. i can’t test it right now but this should draw without skewing. (you may see stretching)
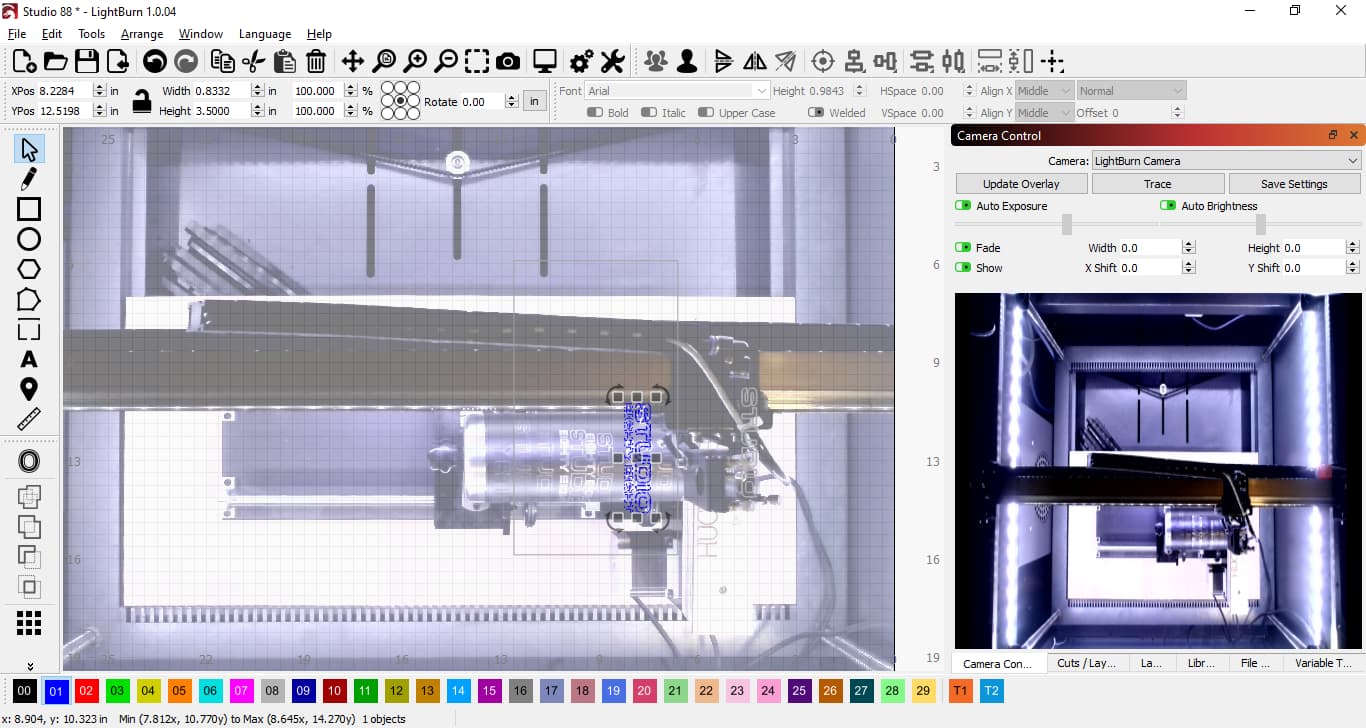
also, your screenshot suggests your laptop is 1368x720 screen resolution? lightburn (and most cad programs) are painful in this low resolution. i experienced that first hand the other day using my friend’s old MAC with lightburn.
trust me, you should buy a cheap monitor online that is minimum 1920x1080, but just get a 4k display at this point.
my analogy for the monitor resolution upgrade is like working with the surface area of a child’s desk in elementary school and then upgrading to a desk that a CEO would have. you will wonder how you got anything done before.
loaded your first rotary file now and doing a test run. Already significantly faster than mine.
Before I understood the “Start from” settings in relation to rotary engraving, I thought that a camera would be the ticket to aligning properly. Now I do some manual stuff before setting it in there, change the start from to current position, center it, and it helps tremendously.
Alright so the test just ended. Definitely a huge improvement. There is a little “shakiness” to it… I will post a pic here soon. But wow… what a big improvement. I may delete my offset settings to see if that is actually hurting it.
and I agree w you on the resolution… I plan to upgrade, but before doing that I need to get some sales done. I have spent plenty of money at this point already lol need to see that profit and loss sheet swing the other way!
i see you also pulled the honeycomb and the slats? i always run the rotary on the honeycomb. maybe that effects the stability of the glass vs my setup too?