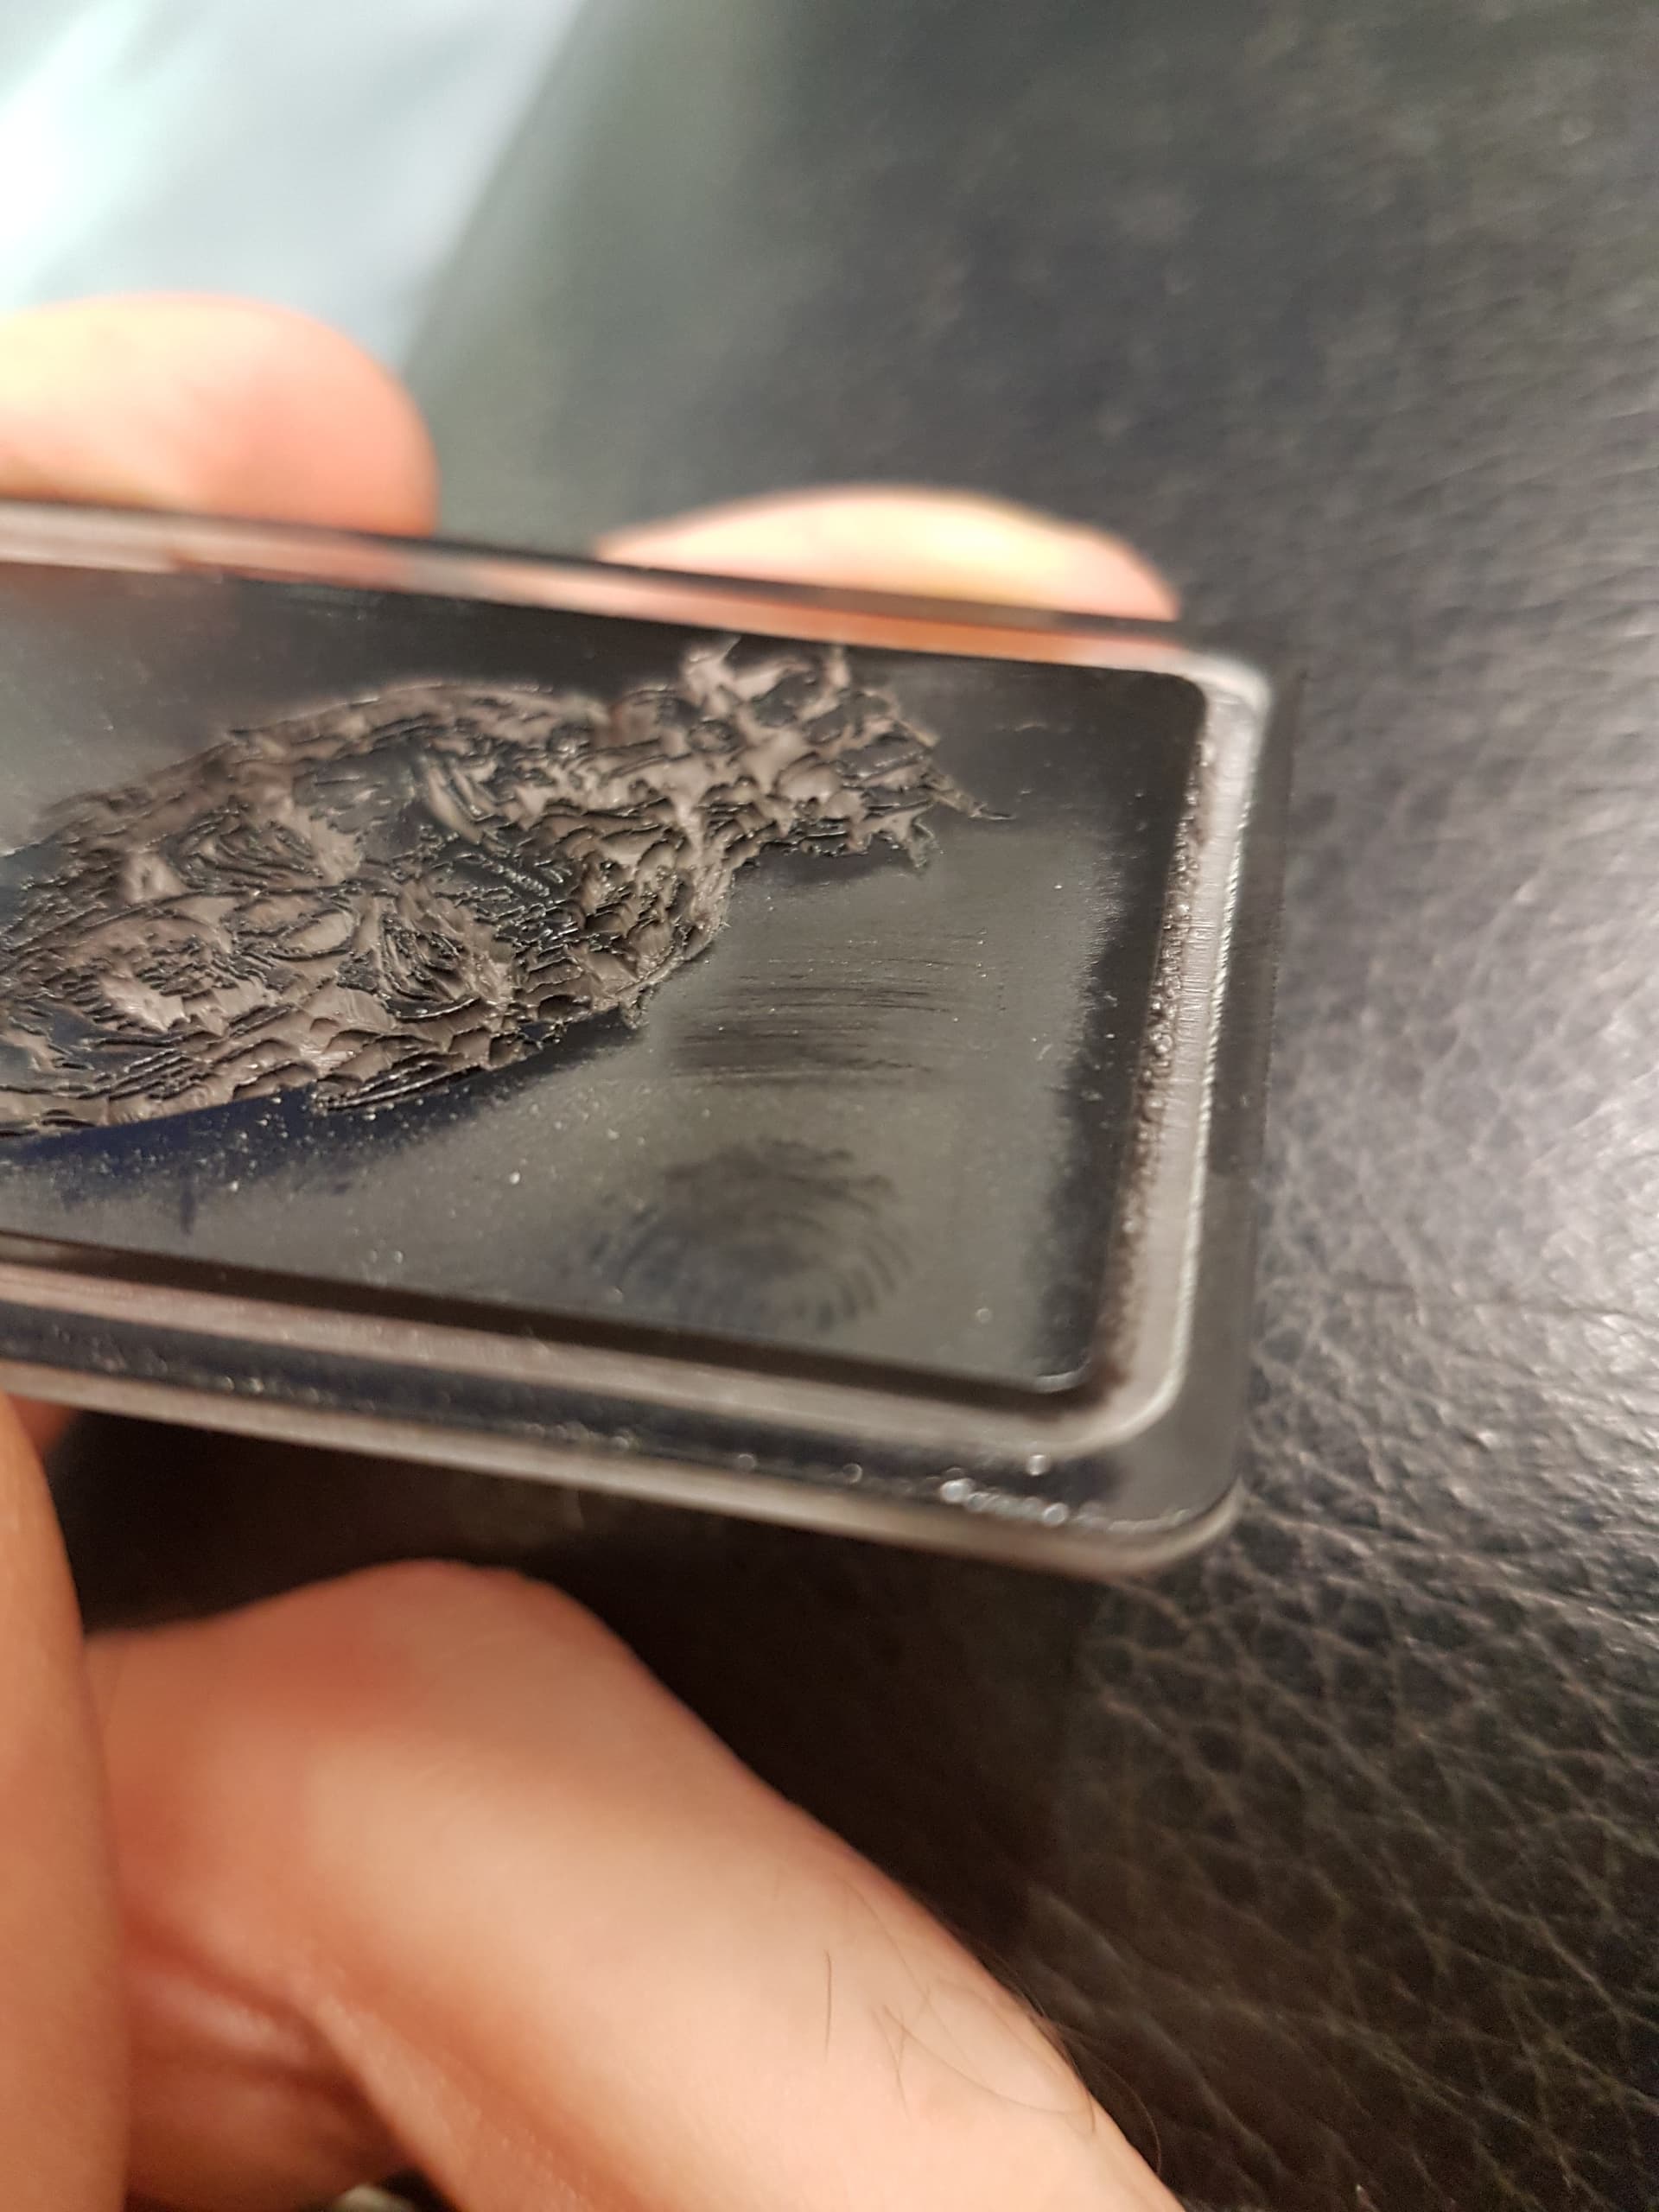
I’ve got this really annoying problem with my new machine im hoping someone can help me out with. Its a brand new Boxford BGL690 80w 900x600 machine yet on every engraving i do it has this weird ramping effect which ruins everything i try. The machine is perfectly aligned so i’m sure its a setting of some sort im missing. My old machine came to me 2nd hand (chinese KH5030) and engraved perfectly from the moment i bought it so im not sure if there is a settting to change with tthis new one to get it to engrave correctly. I’ve included a pic where you can clearly see the ‘ramping’ effect on the edges of the 'TEST
No ramp setting. Its at zero. Sorry, i should have mentioned that. I even tried it in rdworksv8 to see if i could alter the min/max settings to no avail, same issue. Its a big problem when engraving colour back acrylic for reverse engraving as it will leave an edge of the coloured material visible. Ruining the job. Perhaps its a reverse scan interval problem? I just dont know at this point.
How do you do that exactly? Sorry for my newb questions. I’m still using a usb drive to export the .rd file to from lightburn (or rdworks) to my new machine as my main pc is too far away from it at the moment. So as far as i am aware the machine operates based on a sttandard lightburn/rdworks output file as i have not messed with any machine settings on my new Boxford.
How do you have your machine set up in lightburn? That might be the issue. As far as the second question it’s in the layer settings. It’ll change the burn pattern to see if there is a X or Y issue.
I’ve simply just set the bed size, homing position, and laser head start location as i’ve not had the software connect directly to my new machine yet. It has a Ruida controller, same as my old chinese laser and this problem exists in both lightburn and rdworks when exporting the .rd file to a usb drive. I then just take the usb drive over the the machine, load it, then run the job. Thank you for your input by the way. It is most appreciated.
I will try what you suggest and post my results. At least i can sleep with something to try tonight. I’m one of those obsessive nutters who will wear a patch in the floor pacing until the problem is solved rather than rest. lol.
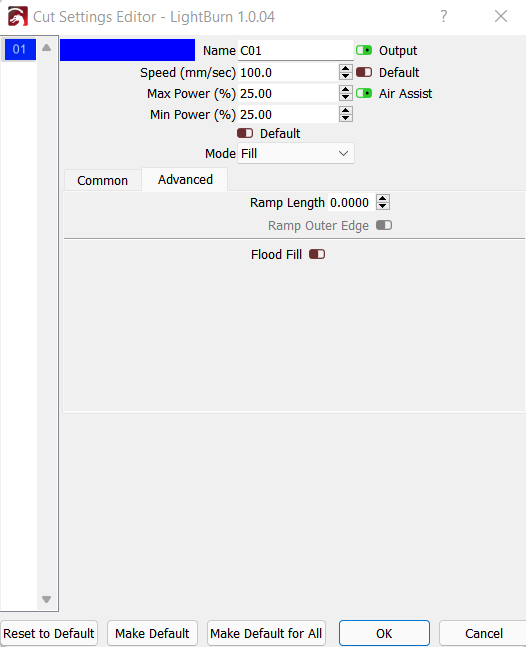
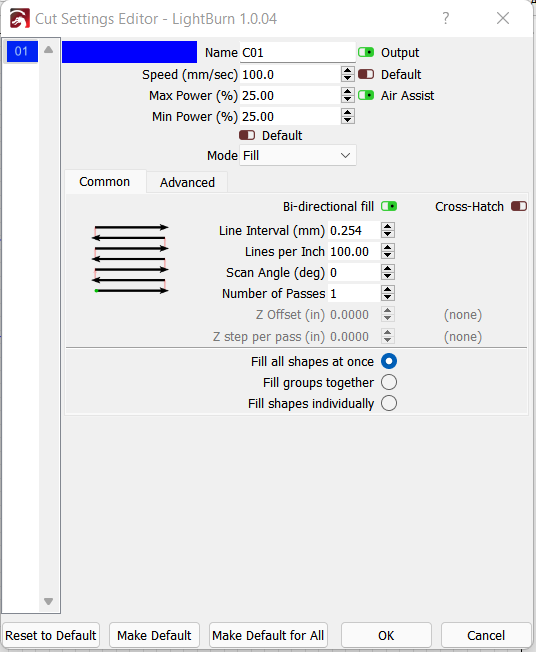
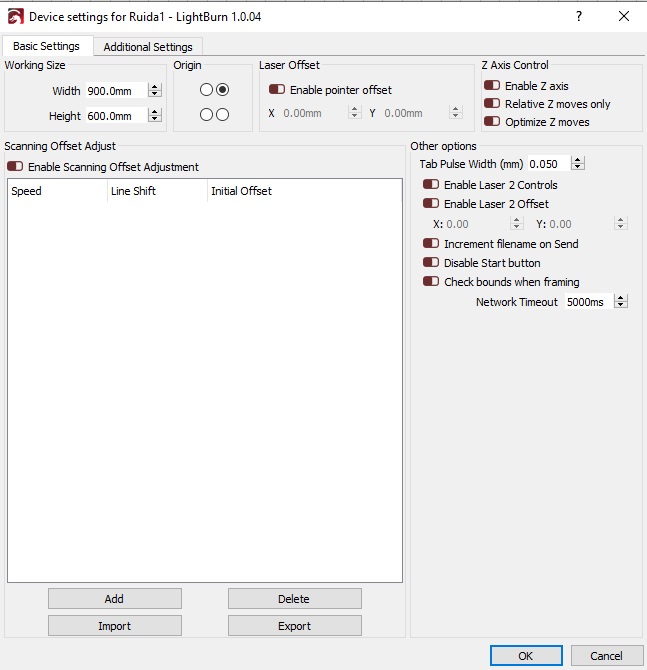
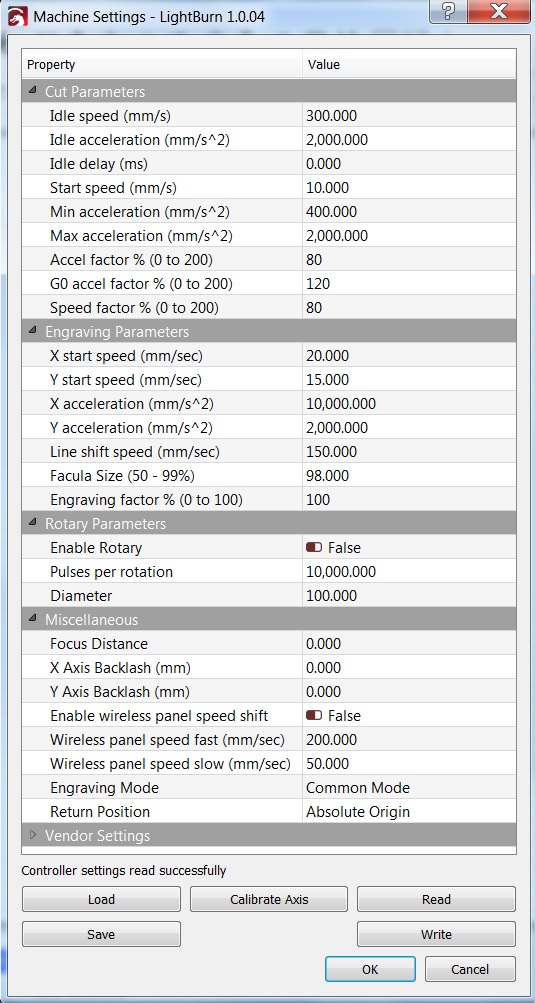
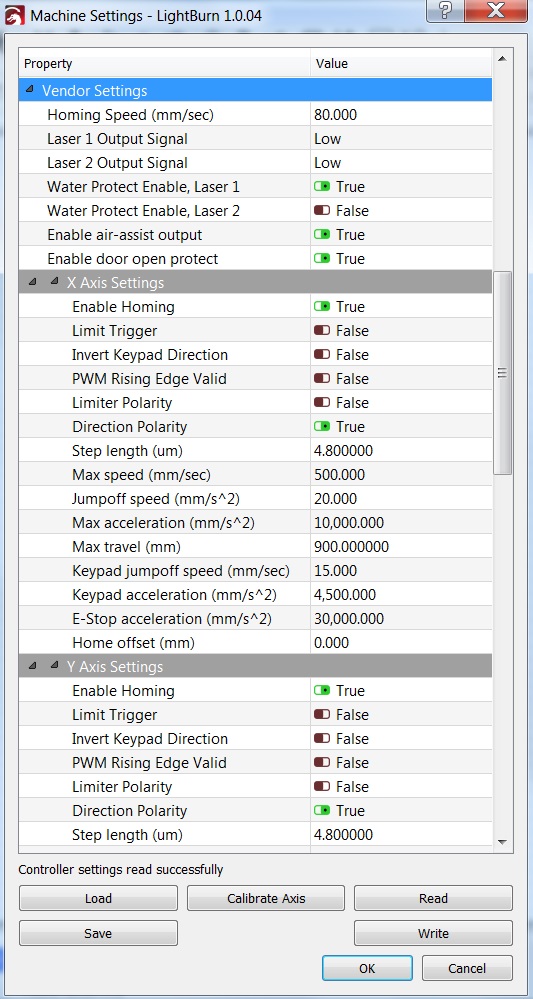
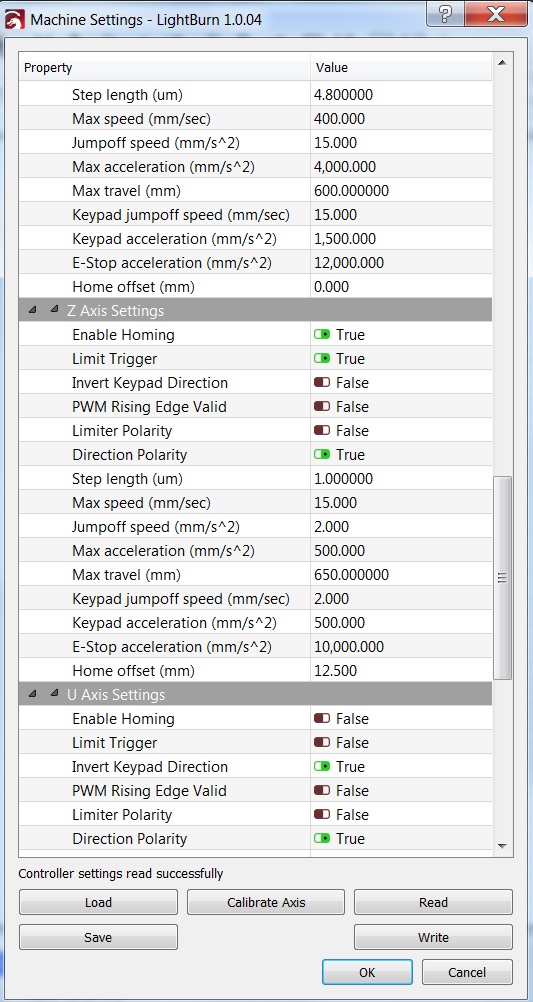
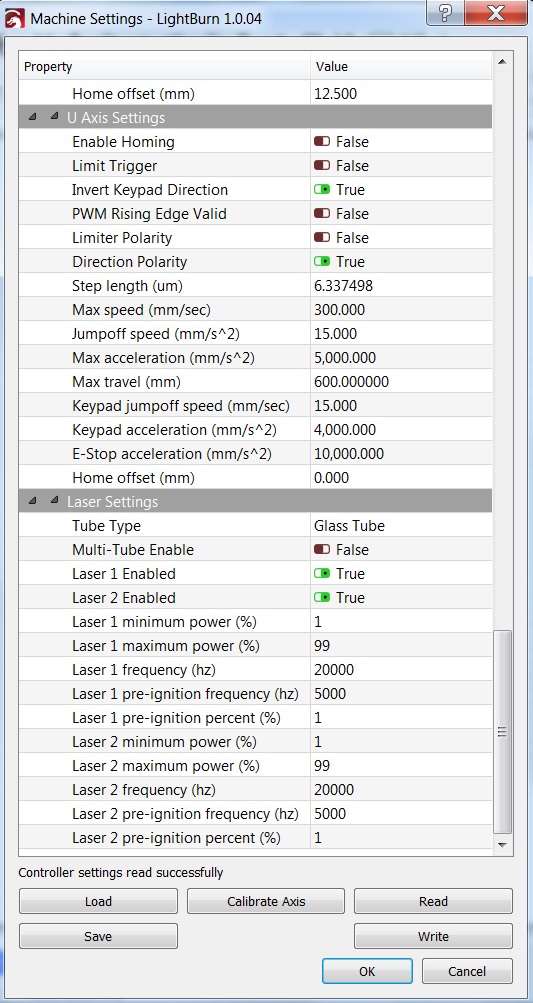
These are the only settings i can see without connecting to the machine directly. Im currently on my home pc where i also have lightburn installed. My machine is in another location witth another pc, also with lightburn on it with these exact same settings:
Its just dawned on me that i will need to connect to the machine in order to see the machine settings so i will do that also tomorrow. I was putting it off but i now realise its better connected directly.
It’s definitely better direct connect, but there is the Lightburn Pi bridge. I use it as my machine is in the garage and the pc at the other end of the house…
The sad part, is I’m trying to do just that so I can cut a piece of acrylic (for a cover) and make a grove for a ‘o-ring’ type gasket.
I just got a 5meter usb cable and did it that way, but thanks for that info it may come in handy in the future.
My new machine is in another place away from my home so ill have to take some screenshots of the setting when im next there. ((i stupidly forgot to do it today)
That said, i’ve managed to mess about with the scan offset to get it better, but these 'ramps still persist in everything i do.
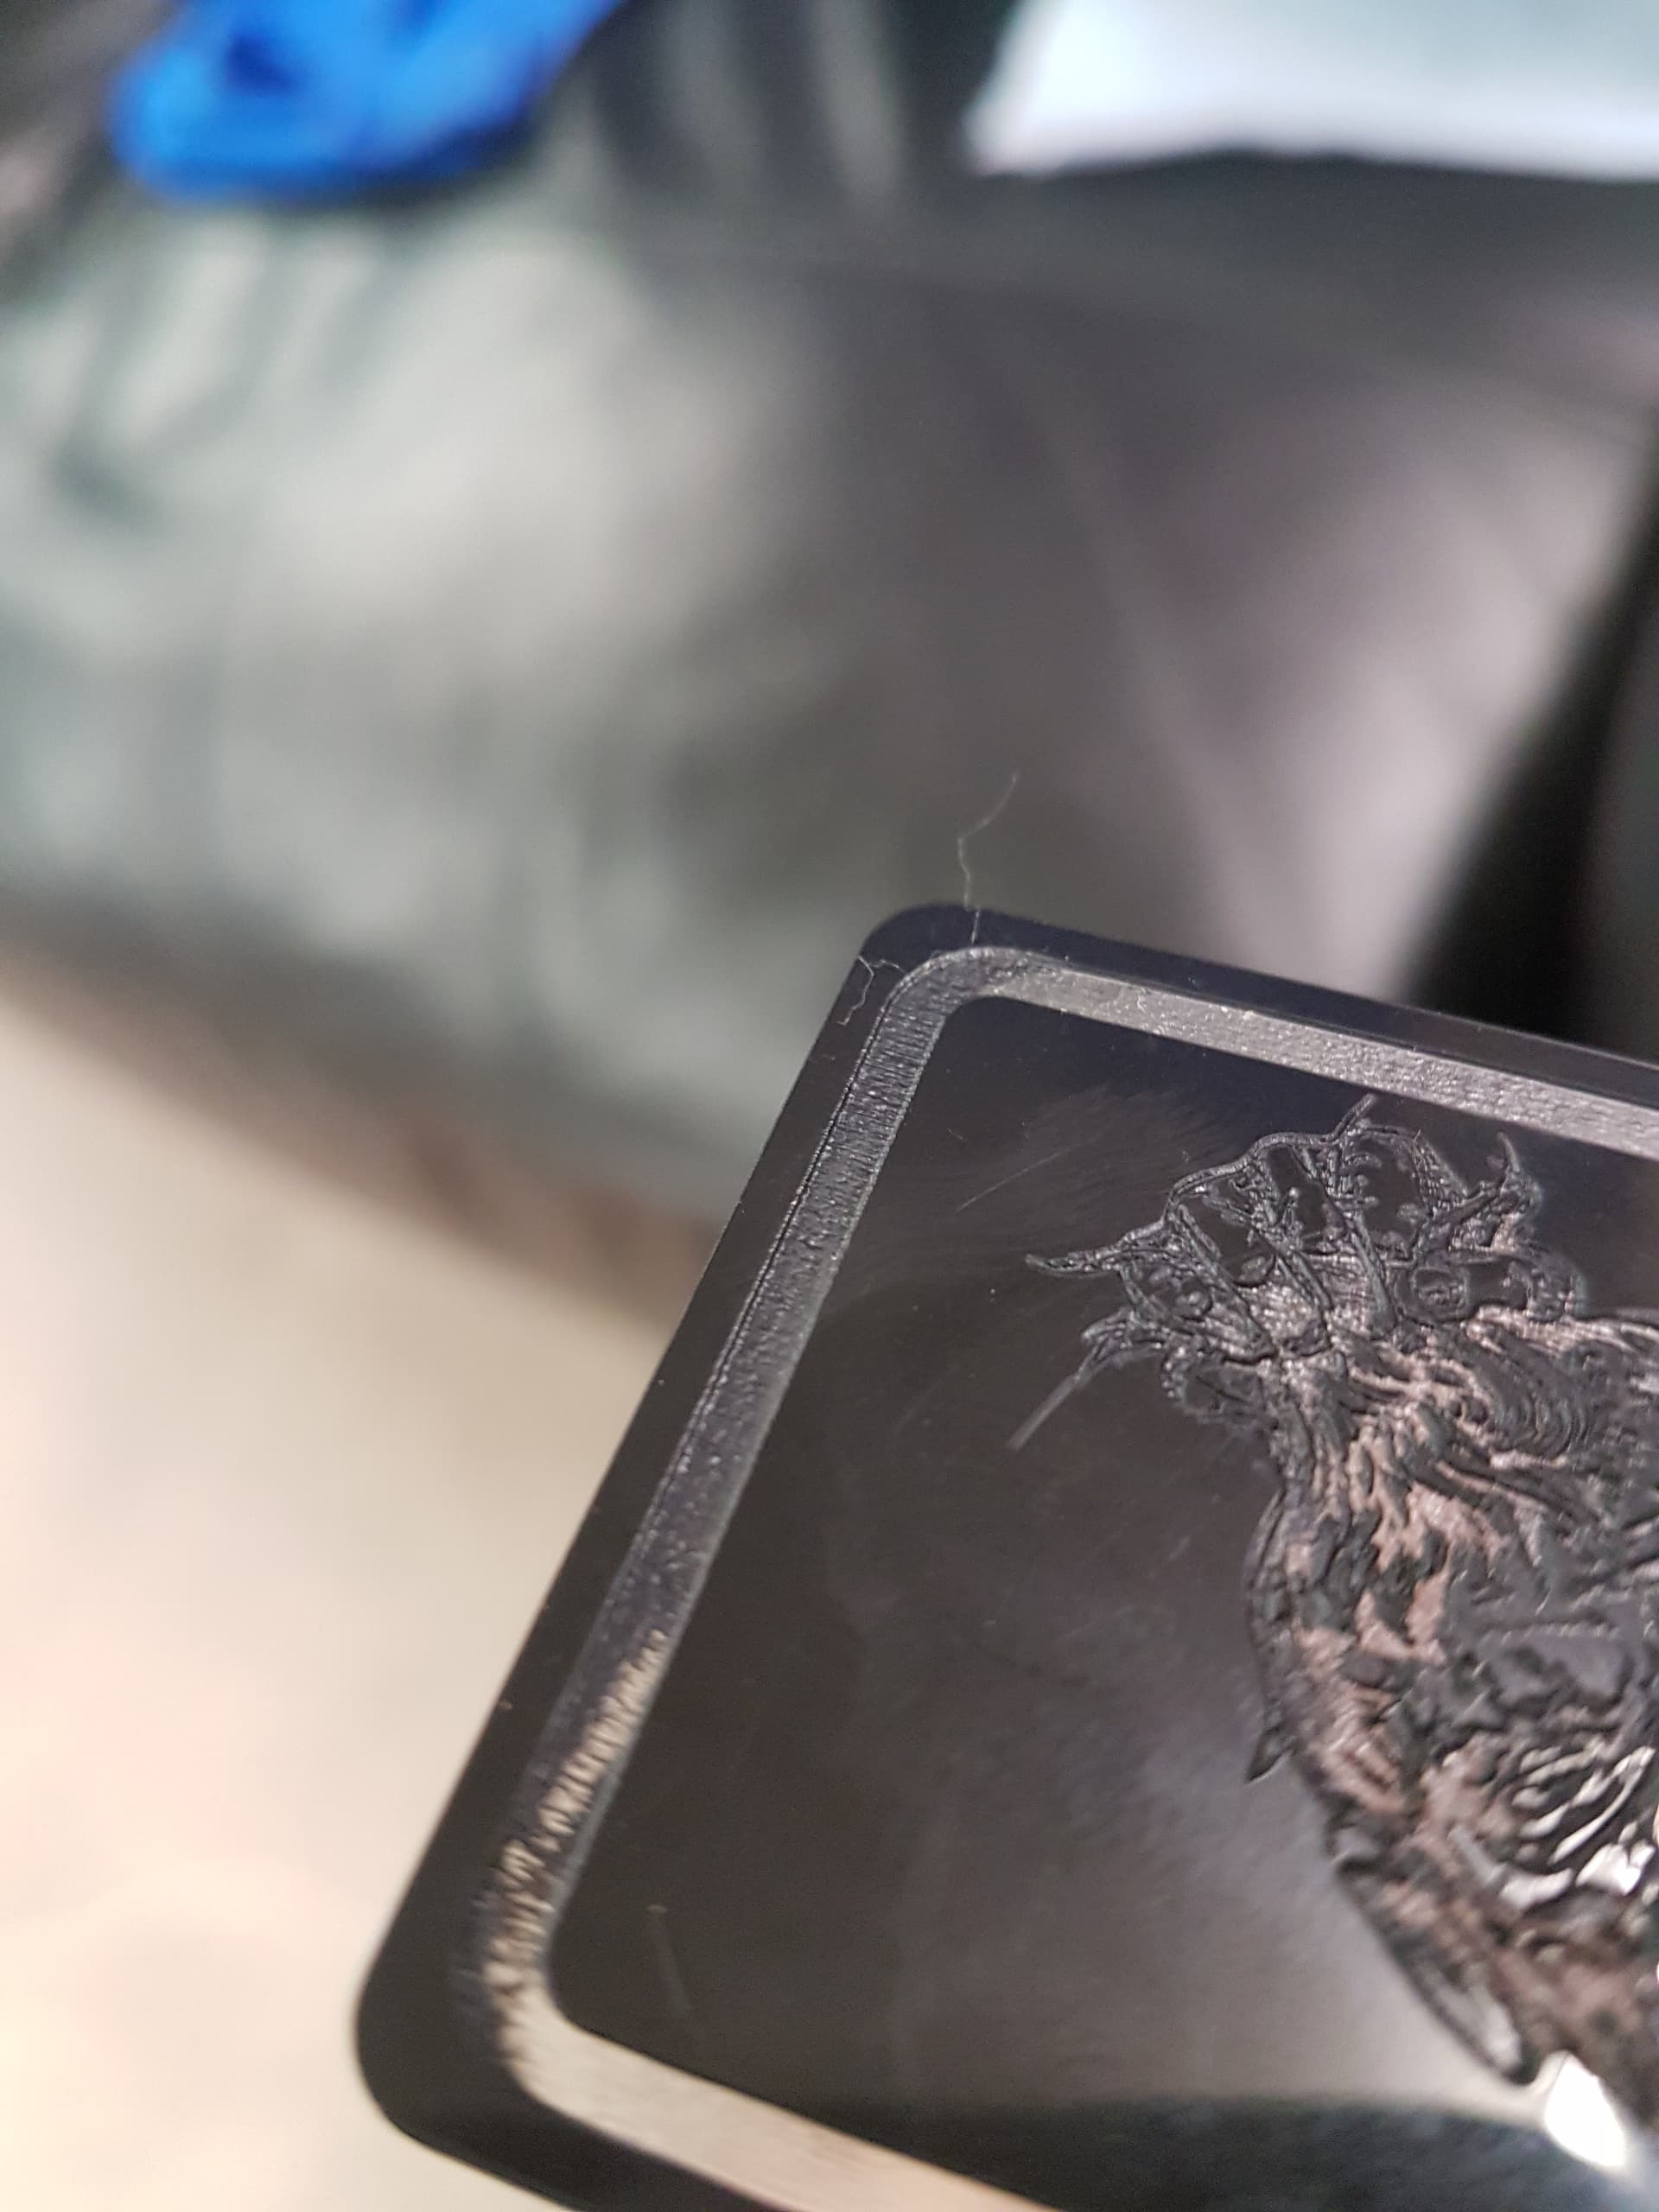
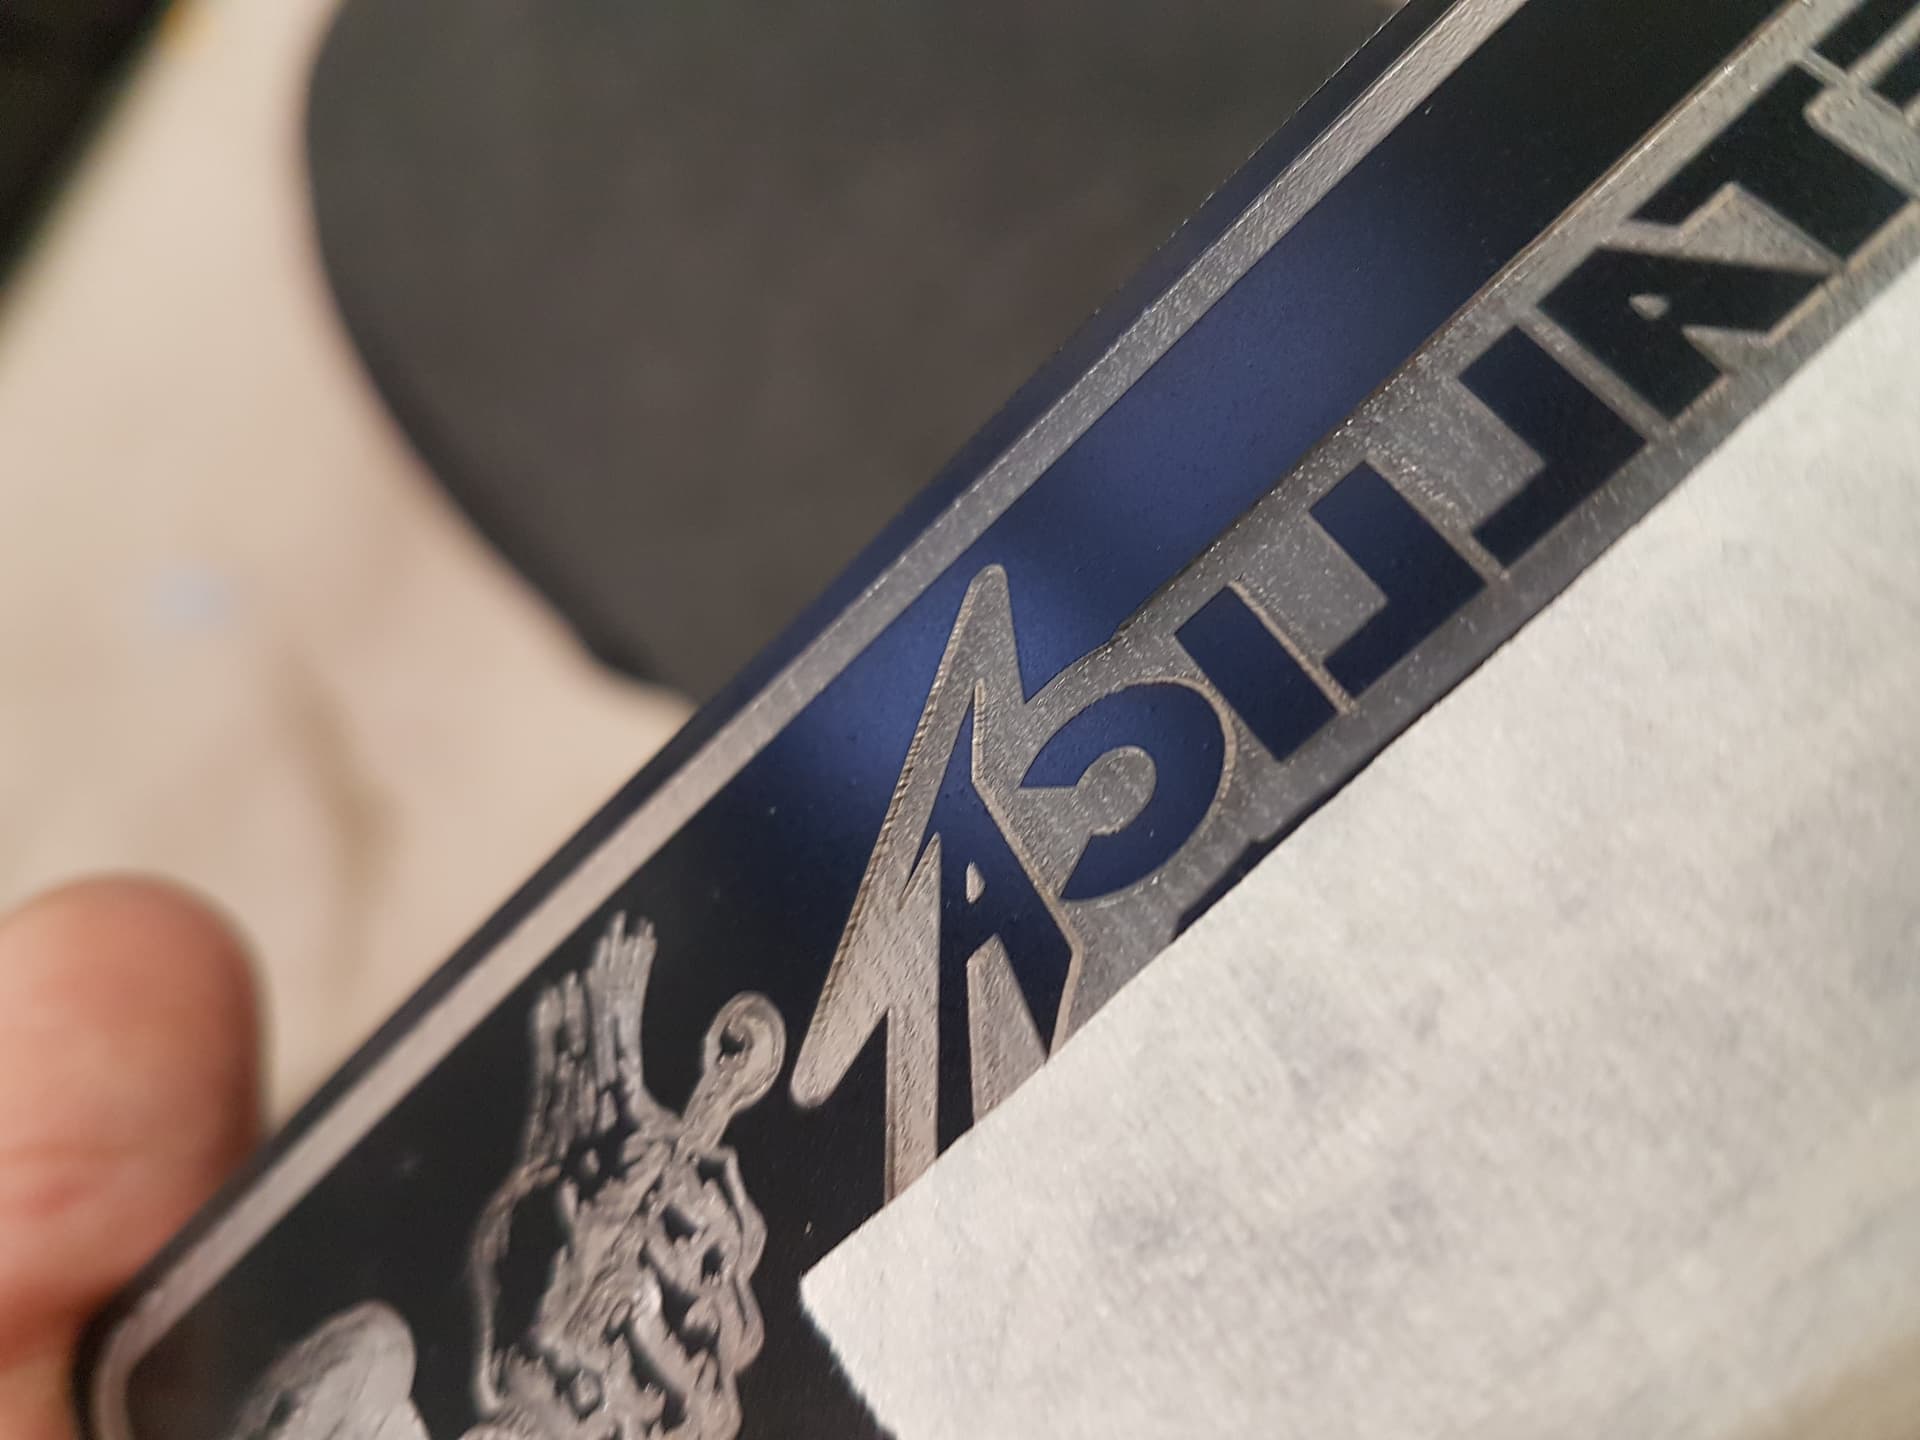
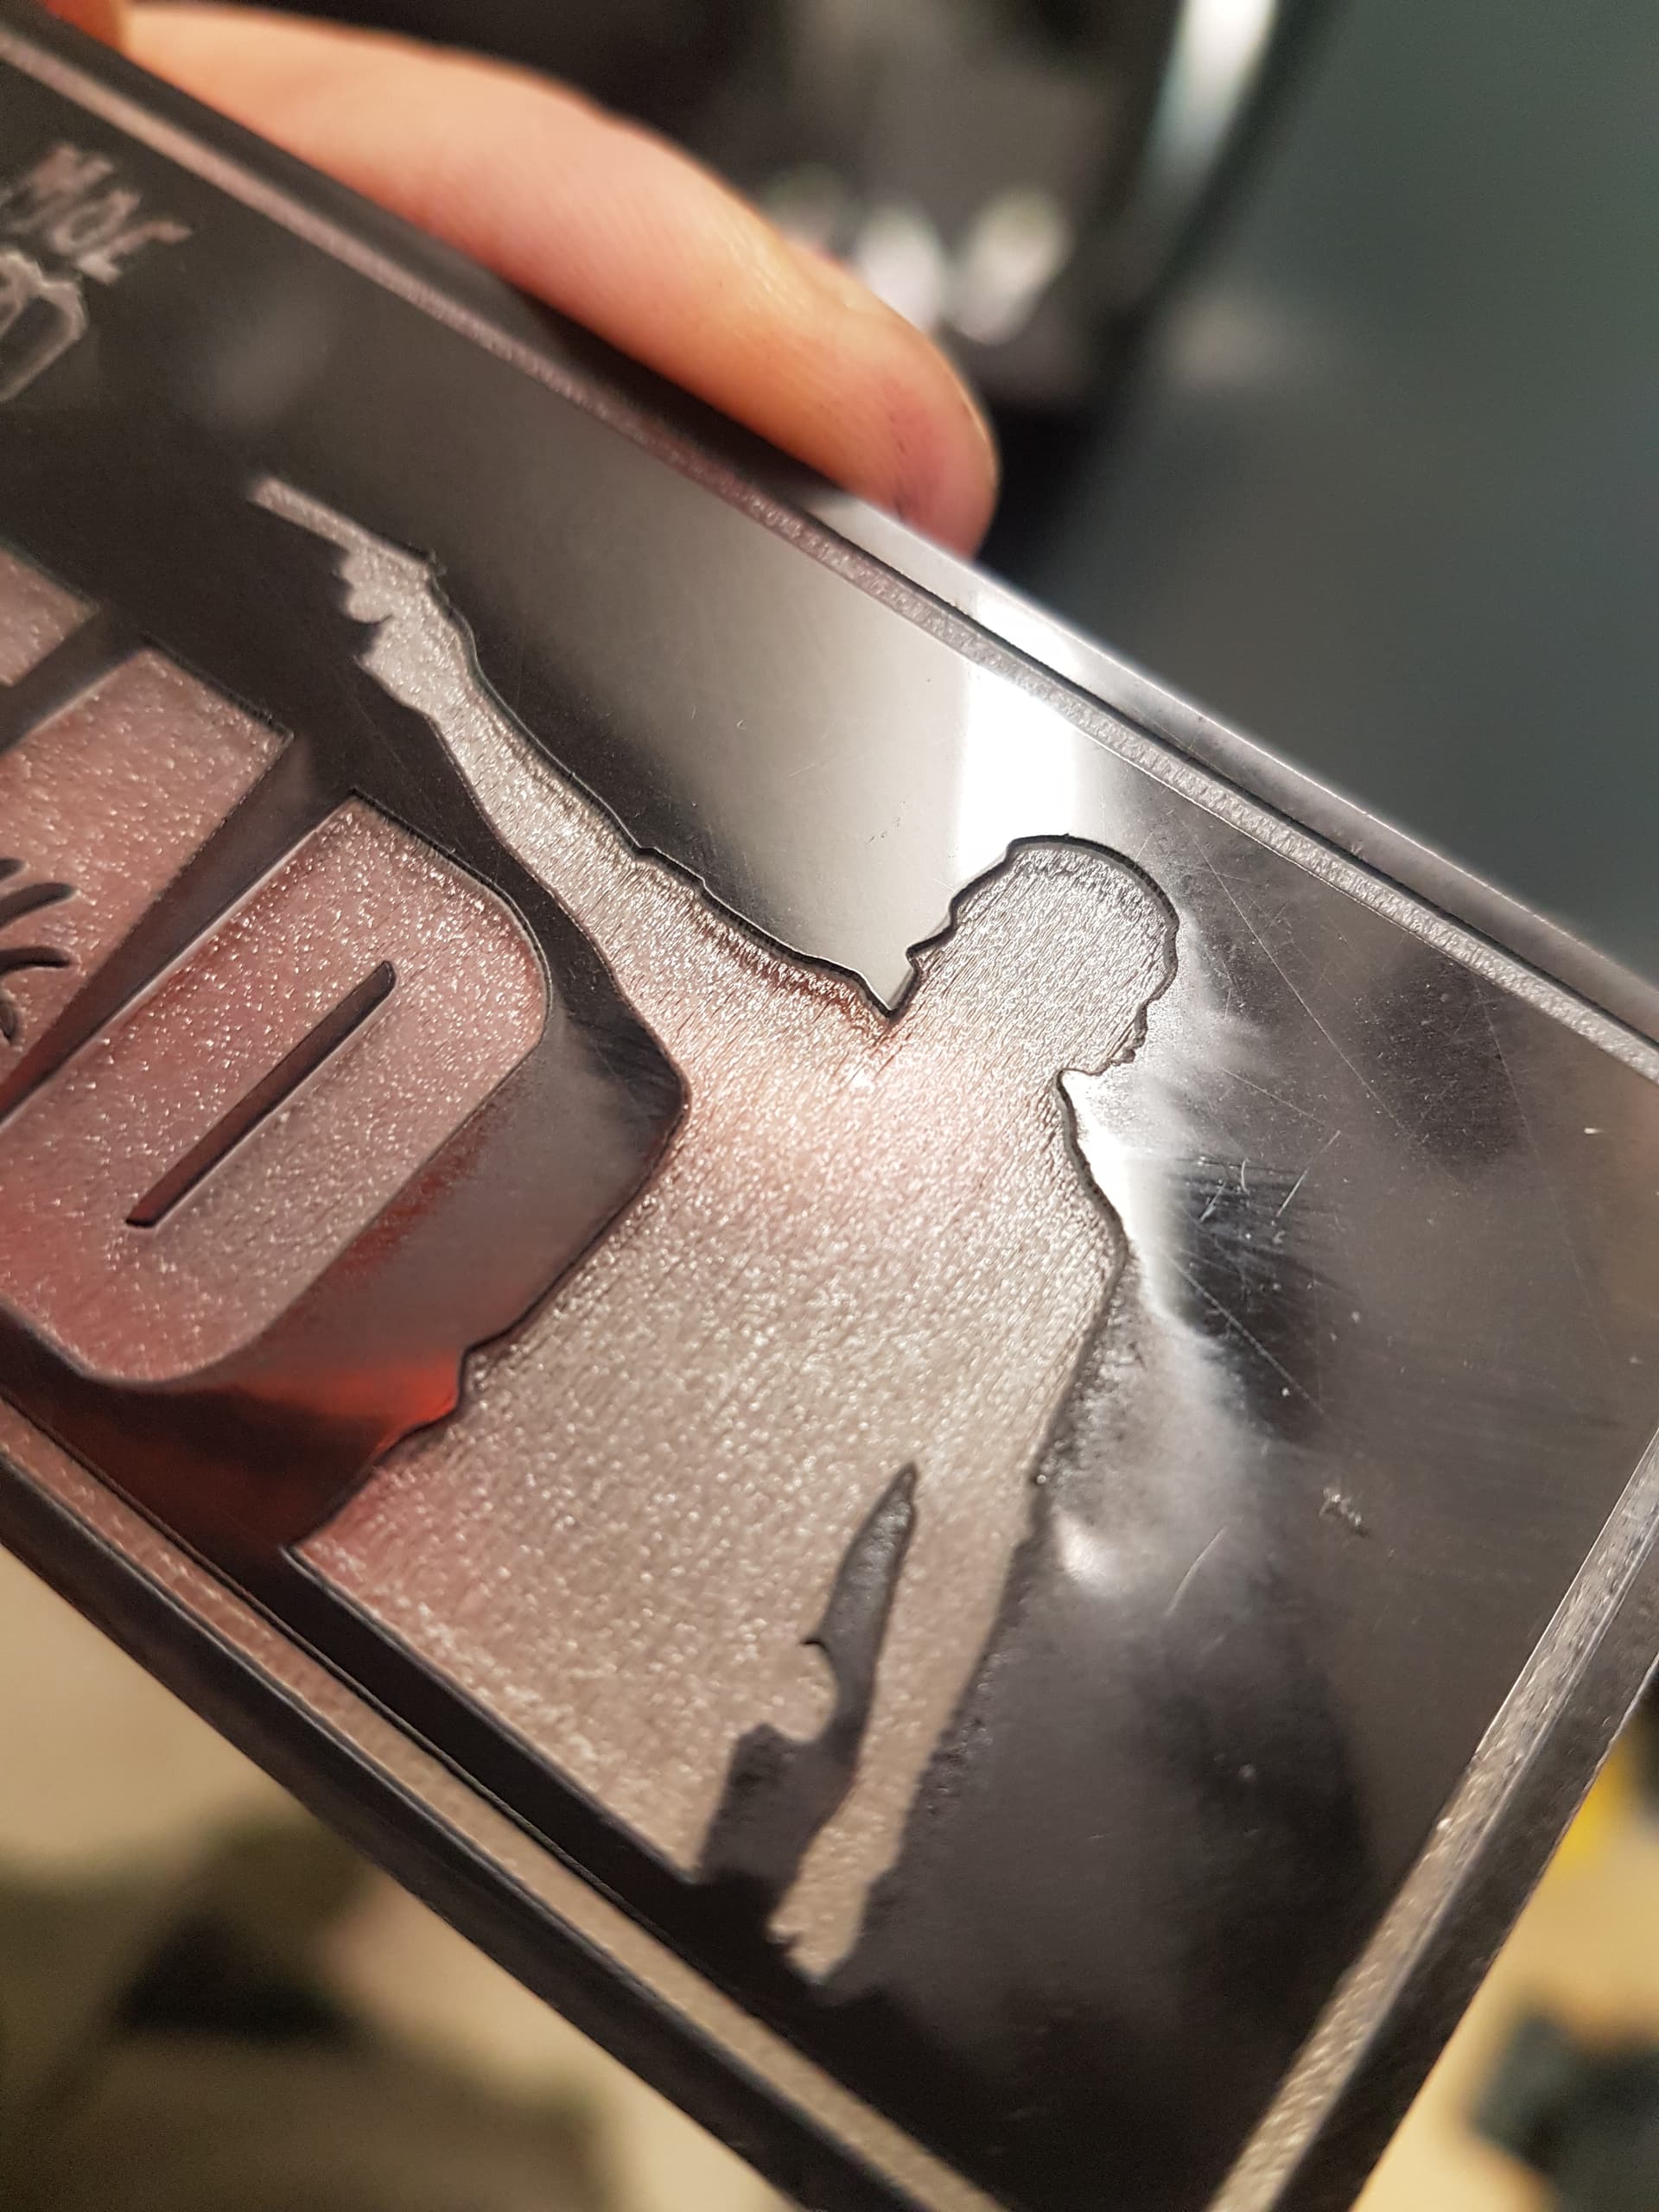
In this pic i have deliberately ruined a piece to show the ‘ramp’ effect (right hand side edge) on some reverse acrylic:
It could be that, or it could be the fact im trying to do this at 500mm/s. I’ve also done it at 200mm/s at much lower power but the problem persists. Min/max power is set the same and the ‘ramp’ setting is at zero so its really puzzling. My old chinese 40w machine does not have this issue so i’ll be looking at that machines setttings to see if i can get any insight as to whats wrong. I’m still yet to try the scan angle at 90deg but ill get to that tomorrow and post my results soon after.
I have played around with speed a little and found that i can minimise the ramp effect by going much slower, itt is always in one direction (please forget the Test pic in my first post, i mistakenly thought that test piece showed the ramping problem but it was in fact set that way once i checked)
Tthe issue i’m having is currently in one directtion and does not matter if the scan angle is set to 90deg it will still do it on the leading edge, as shown here:
Yes, that does make sense, thanks for that. I will give that a try. I am measuring with vernier calipers and a bit of guesswork when it comes to the required offset setting for my desired speed. The thing is, it doesn’t seem to have an effect on this ramping problem so thats why its got me stumped.