How do thicken lines in a Light Burn Image? I have searched the program and lookedfor answers in the forum but not finding what i’m looking for.
Use the offset tool with the direction set to “Both” and enter a very small offset. Then delete the center line by selecting “Delete original object” and burn it as a fill. If you have a closed shape like text, set the direction to “Outside” and turn off the “Delete original object” and turn off “Outer shapes only”.
Will has presented the practical answer but I’ll chime in with some theory.
A line in lasering is essentially infinitely thin. It represents a path more than an actual line thickness. Because of this the line thickness basically becomes the size of the laser dot… or more specifically the size of the mark created by the laser dot.
This is why you need to basically create wider areas that approximate the line shape you’re looking for.
As an alternative, you could defocus the laser to essentially widen the laser dot. This is another technique to get a wider “line” than what you otherwise get with a single line.
2 Likes
Thanks to both of you.
What I was trying to accomplish was a “perspctive” line drawing of a washer, like for a nut and bolt. I’m not filling anything but just wanted to give the view of the two edges of the washer and then the single edge on the opposite side. I’ve got it drawn, but want to make the lines thicker. Which is the best way to do this? Thanks, Pop Myers the Newbie=>)
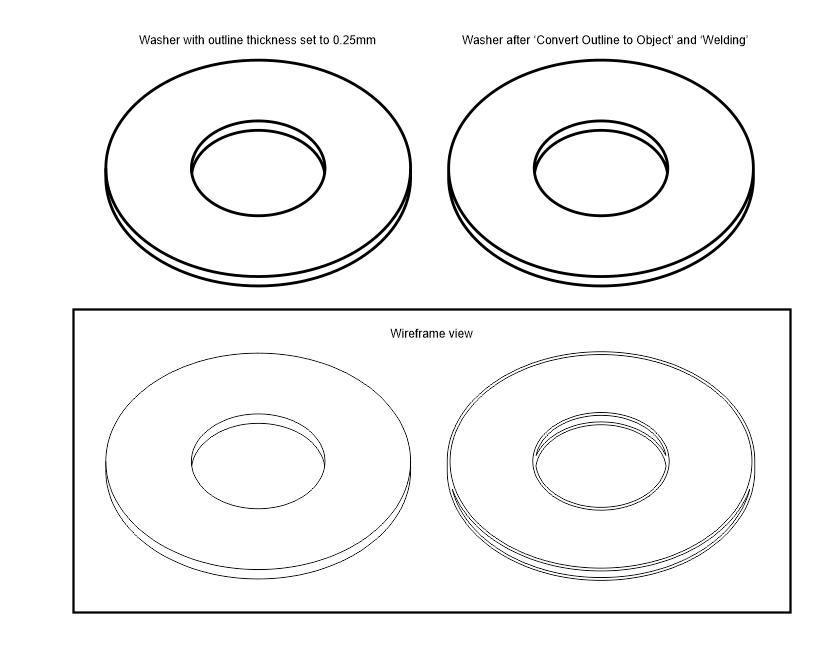
What @berainlb and @Will_vl have said is the right way to get what you want (if I interpret your question correctly). Here’s a screenshot of a ‘3D’ ‘wireframe’ view of a part and the same part offset as previously described.
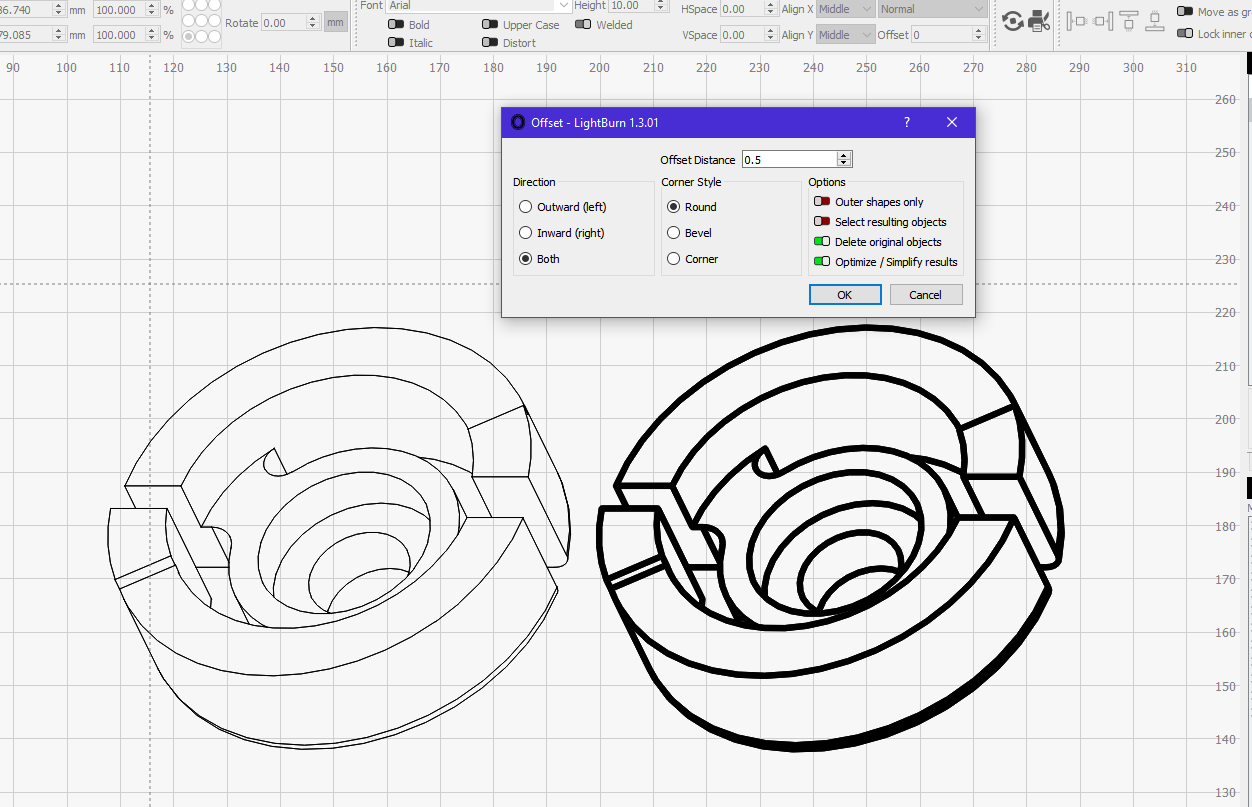
Is this the kind of result you’re looking for?
Yes Marcus. I’ve been a “novice” with Corel Draw through the years. Never been very good at it. But it did allow me to choose how thick I wanted a line to be. What you have shown is what I wanted to do, I’m just not advanced enough to be that elaborate. (What you have is great). I should mention I’m 70 and still trying to learn. Yes, I would like to make a washer in perspective with thick lines. I’m engraving a wooden box for a Washer Pitching Game, LOL!
1 Like
Great! Yes, me too. I started using CorelDraw at version 2 when it came out in '91 but I have never used it to its full potential. The graphic (which originated as a SolidWorks model & drawing) I posted showing before and after offsetting is really all you need to know. Just select the object and apply an offset as per my screenshot. You’ll want to adjust the offset value to suit your graphic but that should be all you need to do.
If you’d like to attach your LightBurn file containing your washer graphic I’ll see whether there are any problems applying an offset to it.
BTW, I’m 60 so I’m not all that far behind you ![]()

Would you mind uploading the LightBurn file itself?
By the way, I notice you’ve photographed the screen. It’s much easier to take a screenshot directly from your PC. You might have a key labelled ‘PrntScrn’ or similar on your keyboard. If you press this (you might have to hold down another key at the same time depending on your system) and this should invoke the Windows Snipping tool (or whatever the version on your system is called). You should then be able to choose between grabbing the whole screen, a single window, a rectangular area or a freeform area. There are various ways to invoke the tool but it depends on your system. Here’s a link to some Microsoft instructions. Otherwise just use your favourite search engine to find alternative methods. You get a much better result than photographing and it’s much easier too.
Washers.lbrn2 (467.5 KB)
See if this worked???
Like I said, I’m not too good at this stuff. I appreciate your patience with me.
I will try the “screenshot”. Thank You!
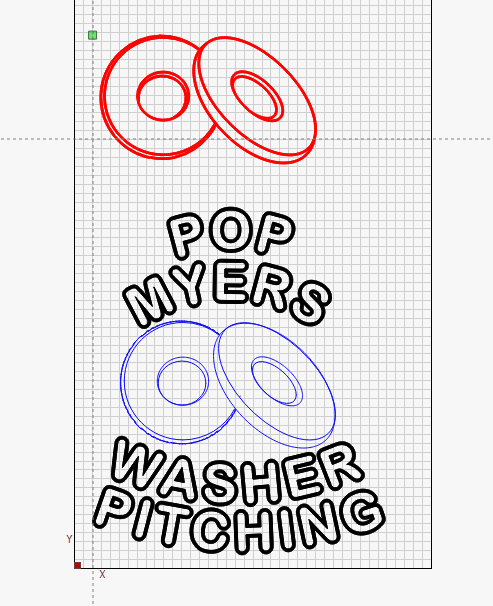
Oh, Some of the lines around the washer seem to be broke into pieces? I had to “delete” some of the pieces to make the one look like it was behind the other one.
Ok, here’s a modified version of your file. I duplicated the washers and worked on the copy so you can perform a comparison more easily. I had to do a bit of trimming to remove some of the outlines that should have been hidden along with some other edits. I then offset the vectors 1mm both sides and set the layer to Fill mode. Hope this helps.
Washers-MW mod.lbrn2 (475.9 KB)
I’ve just thought of an alternative method. If these are originated from CorelDraw you can set the line thickness to what you want then perform a ‘Convert Outline to Object’. Then all you need to do is bring it into LightBurn and set the layer to Fill (or Offset Fill).
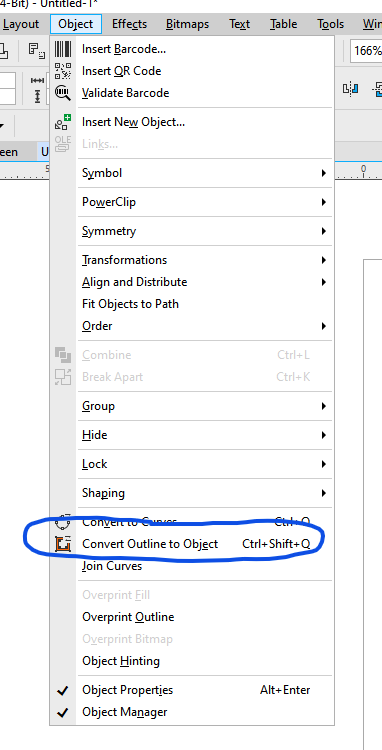
Oh, and you probably want to weld all the washer shapes together either in Corel or once it’s in LB.
No, these were created in lightburn
Ok, when I was working on the file I posted back I had a go at creating it from scratch but I found it much less fiddly to do it in Corel.
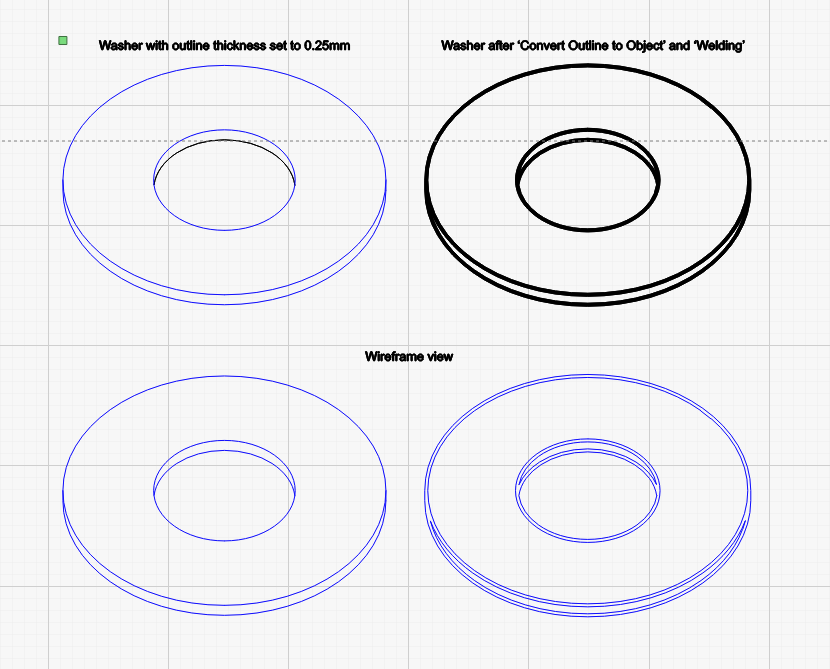
Screenshot from Corel:
Screenshot from LB of imported Corel graphic:
I’ve attached the CorelDraw 2018 file (let me know if you need it as an earlier version) as well as an LB file of the exported Corel graphic.I’ve had to append ‘.txt’ to the Corel file as the forum doesn’t allow uploading of .cdr files so you’ll just need to remove the dummy extension if you want to use it.
Washers.cdr.txt (573.5 KB)
Washers from Corel.lbrn2 (169.0 KB)
I’m Sorry you have gone to so much trouble. Thank you so much.
I am using my laptop in my shop with the engraver, and I don’t have Corel installed on my laptop. It’s in my house on my desk computer. So I can’t open the files on my laptop.
I think my Corel is version 3 from years ago.
I might be able to create it in Corel and send it to my email and then import it as a .jpeg???
I haven’t been able to figure out the screenshot on my laptop.
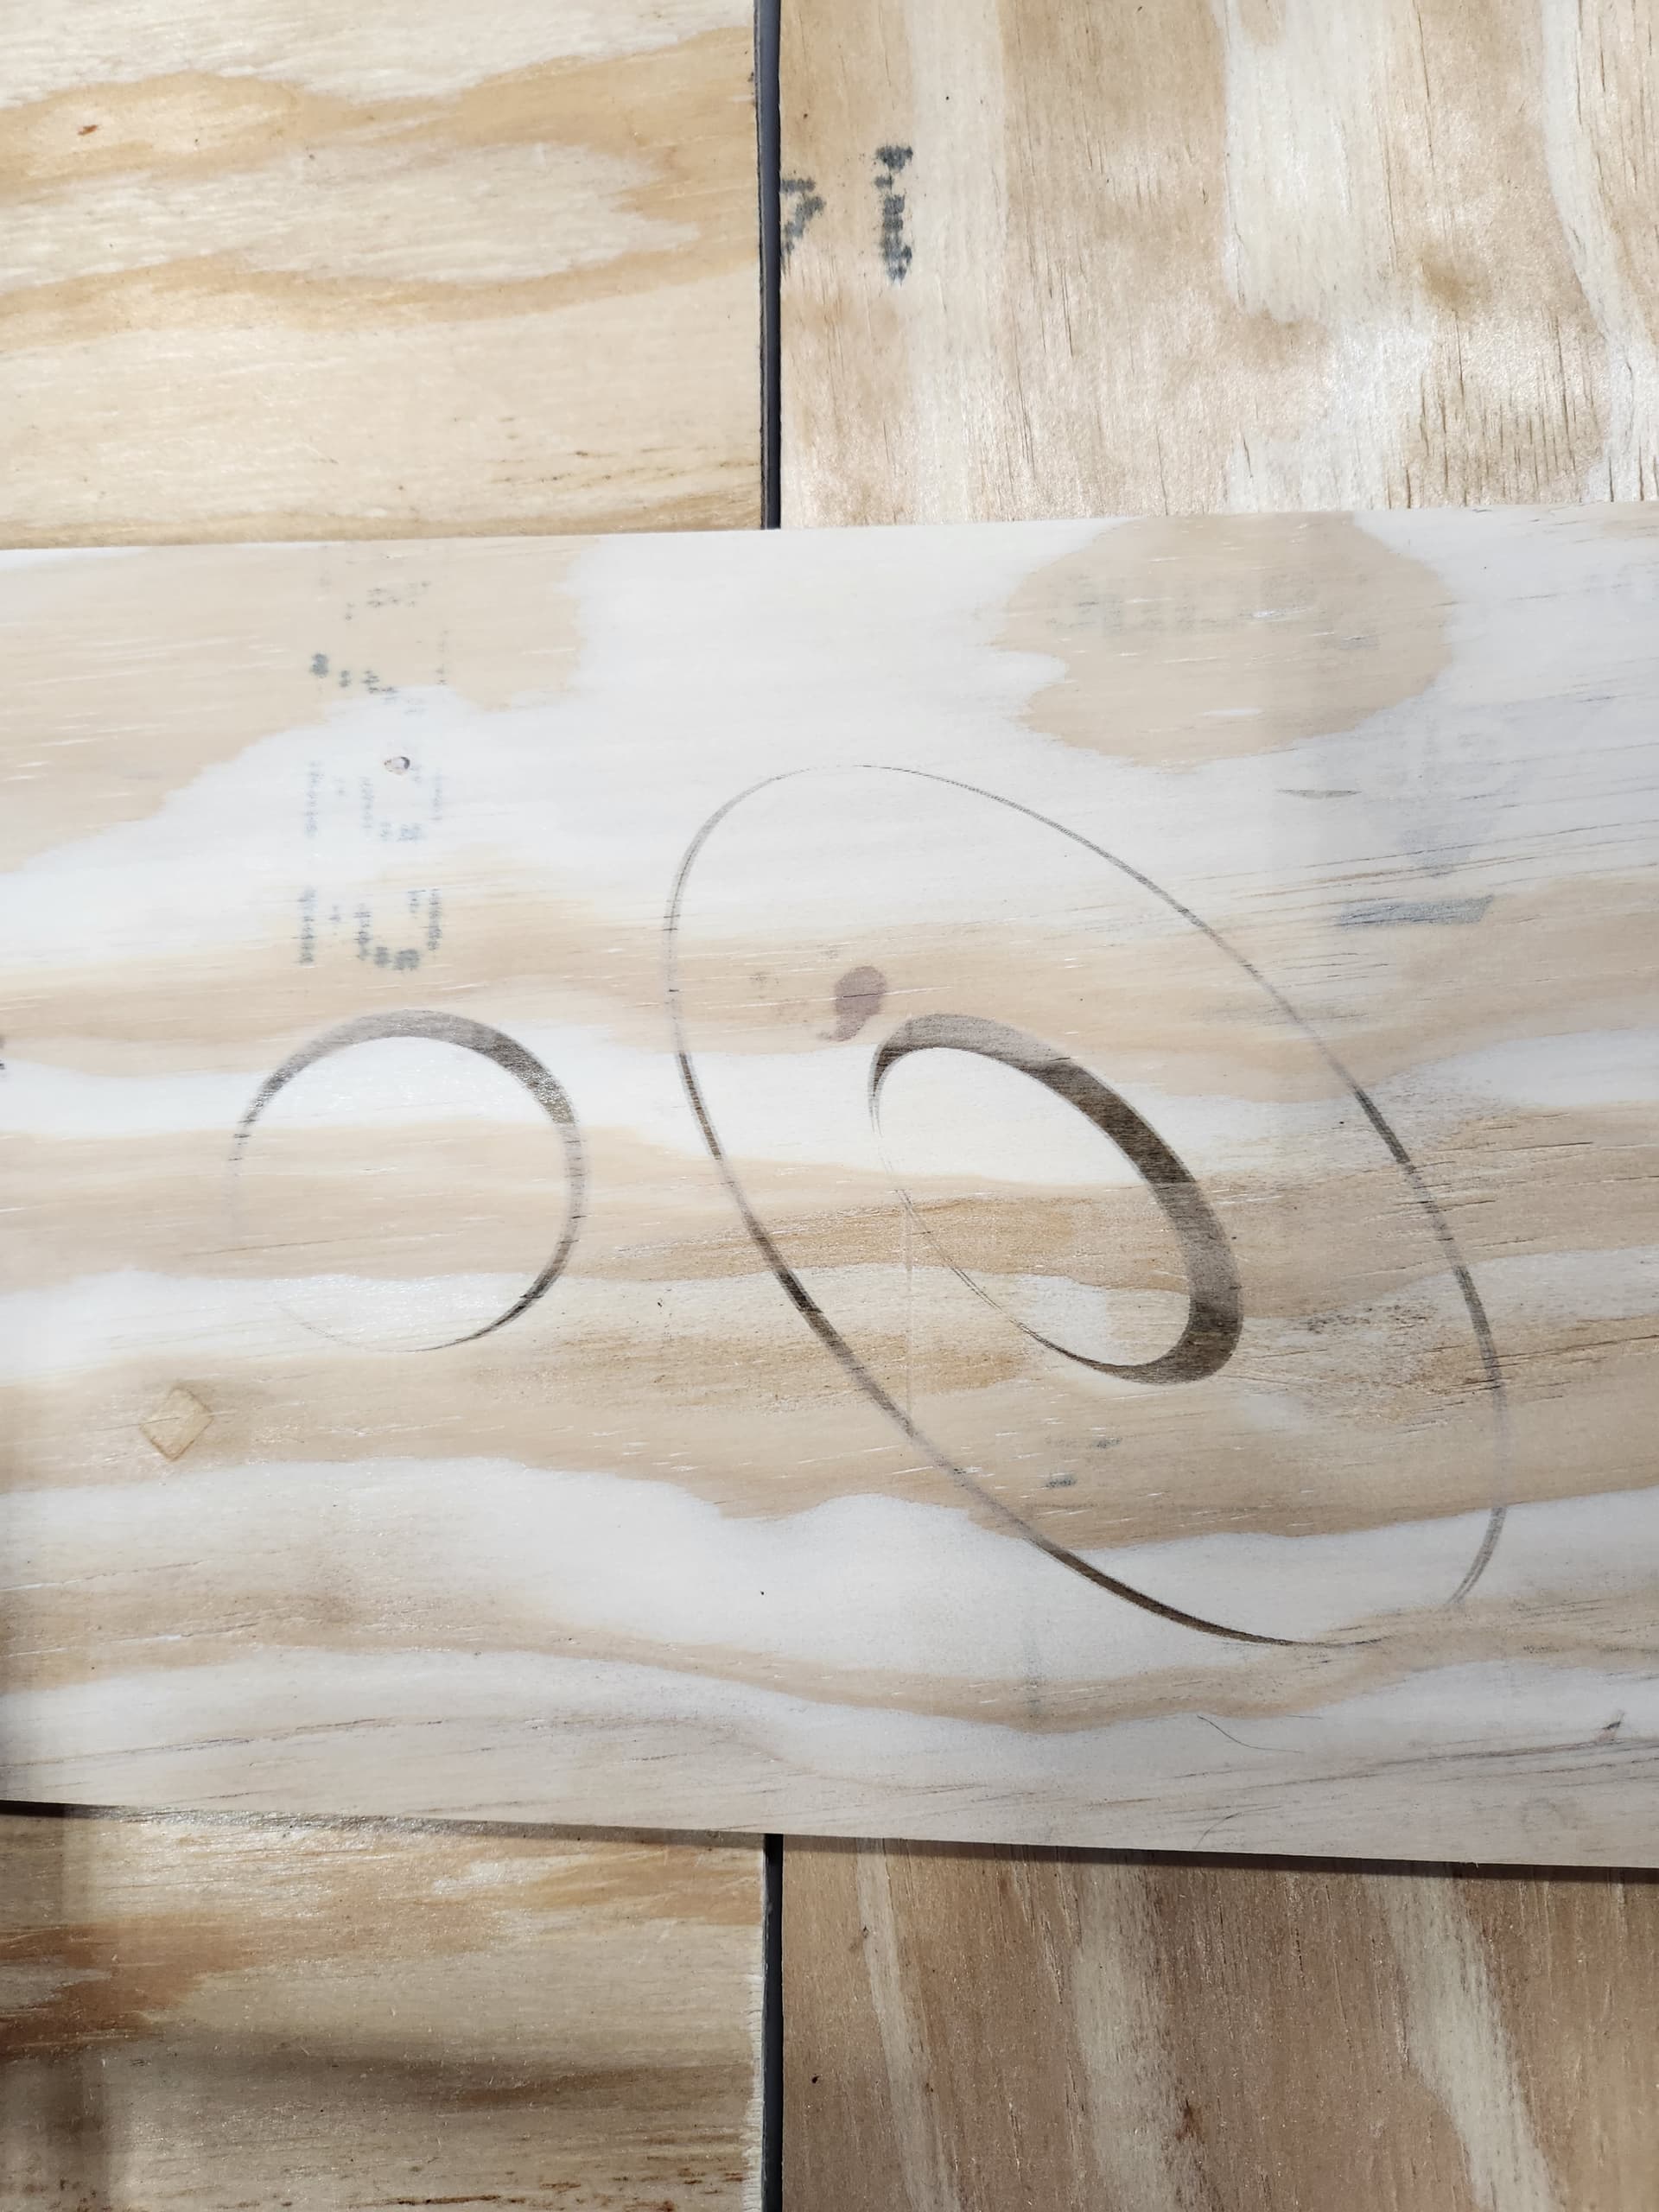
I am going to attach a couple of photos.
I have tried working with the offsets and fills. I watched one fella on YouTube and he said a person should use the “fill and line” choice in the fill dropdown box. Mine doesn’t have that option.
I am trying to get my laser to burn deeper and darker but no luck.

It’s no problem. Ok, that is an incredibly old version of Corel (1992), I’m surprised it works on modern hardware (are you sure it’s not X3?). Anyway, it’s usually best to use vectors whenever possible rather than converting to raster image formats such as jpeg. You can export from CorelDraw in .AI format as well as many other formats which LightBurn will import. Rather than emailing it to yourself you could use something like Google Drive (but I wouldn’t use a cloud drive for the actual LightBurn files as there are possible issues there).
A free alternative to CorelDraw is Inkscape but its interface isn’t as nice as CorelDraw and there would be a bit of a learning curve.
‘Fill & Line’ in this particular case isn’t relevant as ‘Fill’ mode will look just the same on-screen. It only makes a difference when you come to lasering. All it does is run around the outline after doing the fill and can give a crisper edge. The reason you don’t have that option in your drop-down is that it has been replaced with a far more versatile and powerful option: sublayers.
I can save CorelDraw files as far back as version 11 if that’s of any use to you.
I hit my maximum responses so I had to wait 2 hours to respond.
Yes, Mine is X3 but I’m running Windows 8.
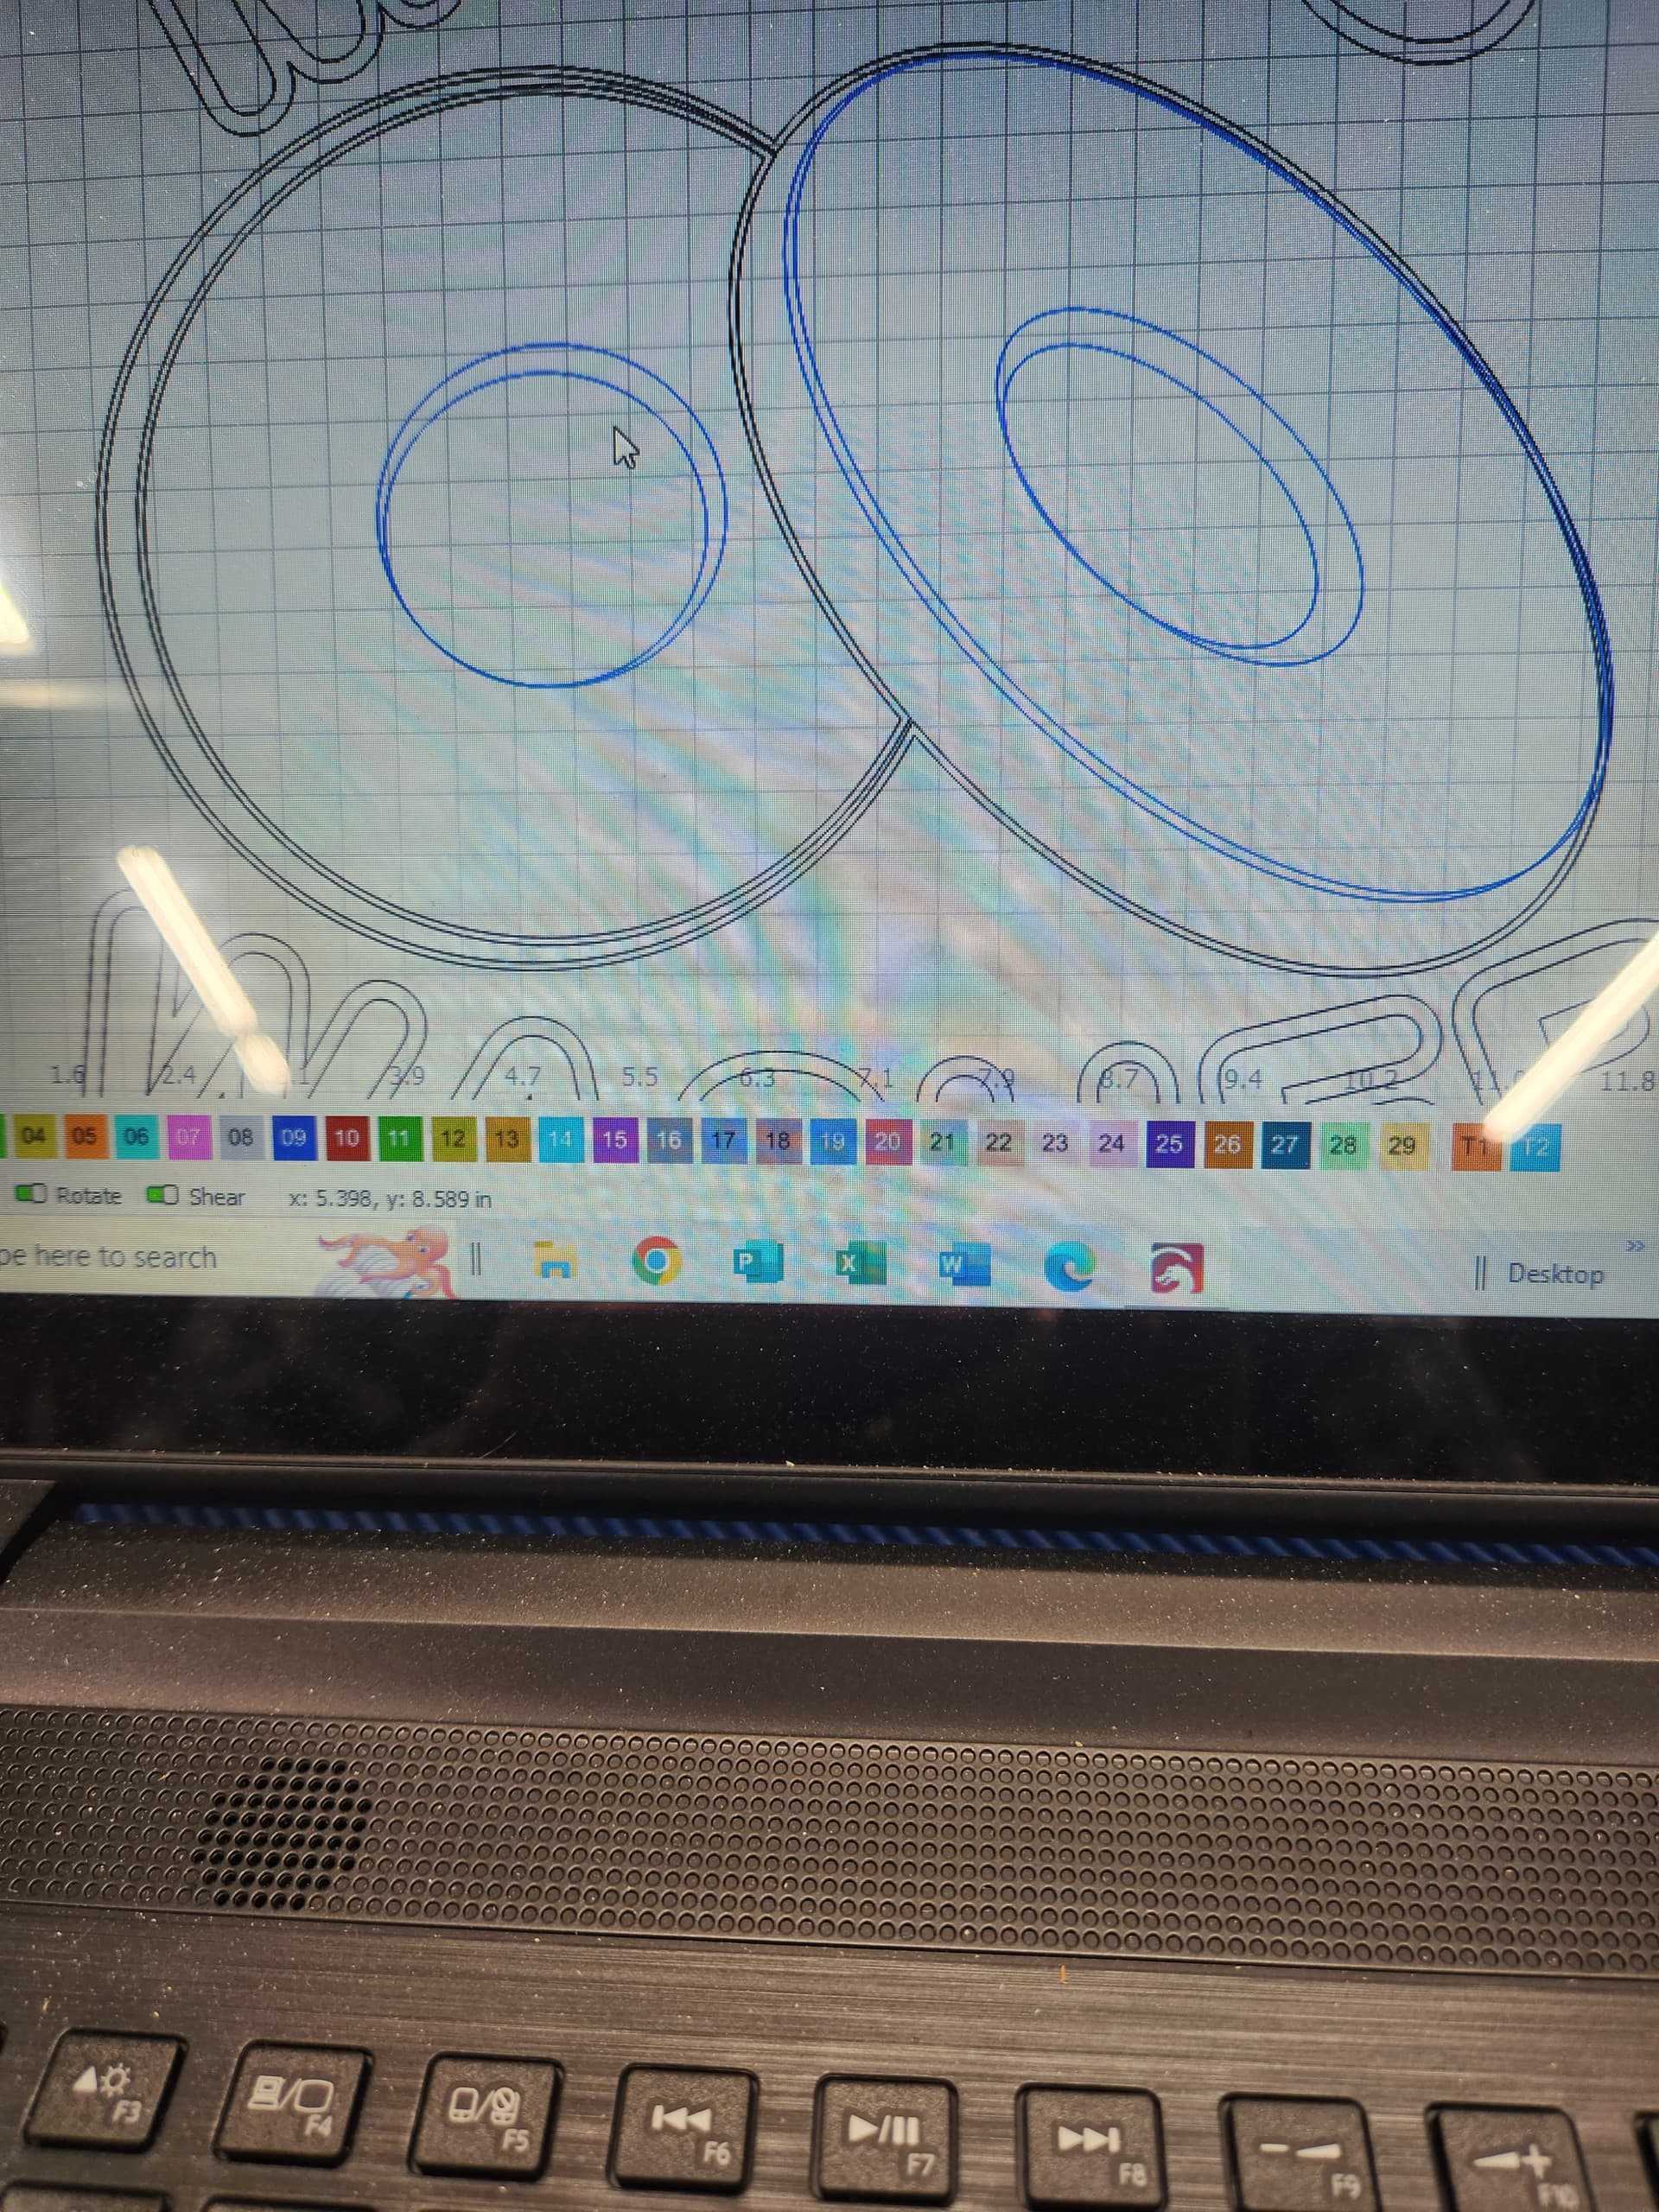
I hope you can see the photo I am attaching.
Part of my washers are in a Blue Layer and part are in a Black Layer.
Is there any way to get them in the same Blue Layer?
Also, I think I asked how can I darken the engraving of the Images and Text?
They are coming out really light and some of it isn’t burning/showing at all.
Maybe you can see what I mean in the previous photos…
THANKS AGAIN for your time and help!
No problem, I don’t know where you are in the world so thought you might have finished for the day. I’m off to bed in a minute as it’s 01:00am here in the UK and I need my beauty sleep ![]()
Yes, you can move anything to another layer. Just ‘window-select’ all your washer vectors and click the Blue 01 layer in the panel at the bottom of the screen.

This will move everything you’ve selected to that layer.
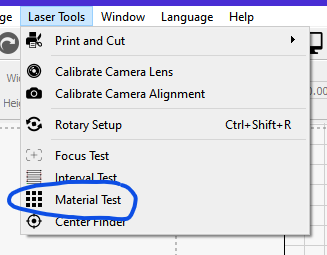
Yes, you did mention you’d tried to get it darker but you’d had no luck. Have you done a Material test to determine power and speed settings?
I’ve attached the CDR file again but this is in version 13 so you should be able to open it in X3. You might find it helpful in the future as a reference. Did you take a look at the LightBurn file I modified and attached to an earlier post?
I’m off to bed now so you won’t get any more responses until tomorrow.
Washers.cdr.txt (74.5 KB)