![]() I’m in the US. State of Arkansas. It’s 7:20 in the evening here.
I’m in the US. State of Arkansas. It’s 7:20 in the evening here.
Good Day to you,
Have you made any progress since last night?
Hello,
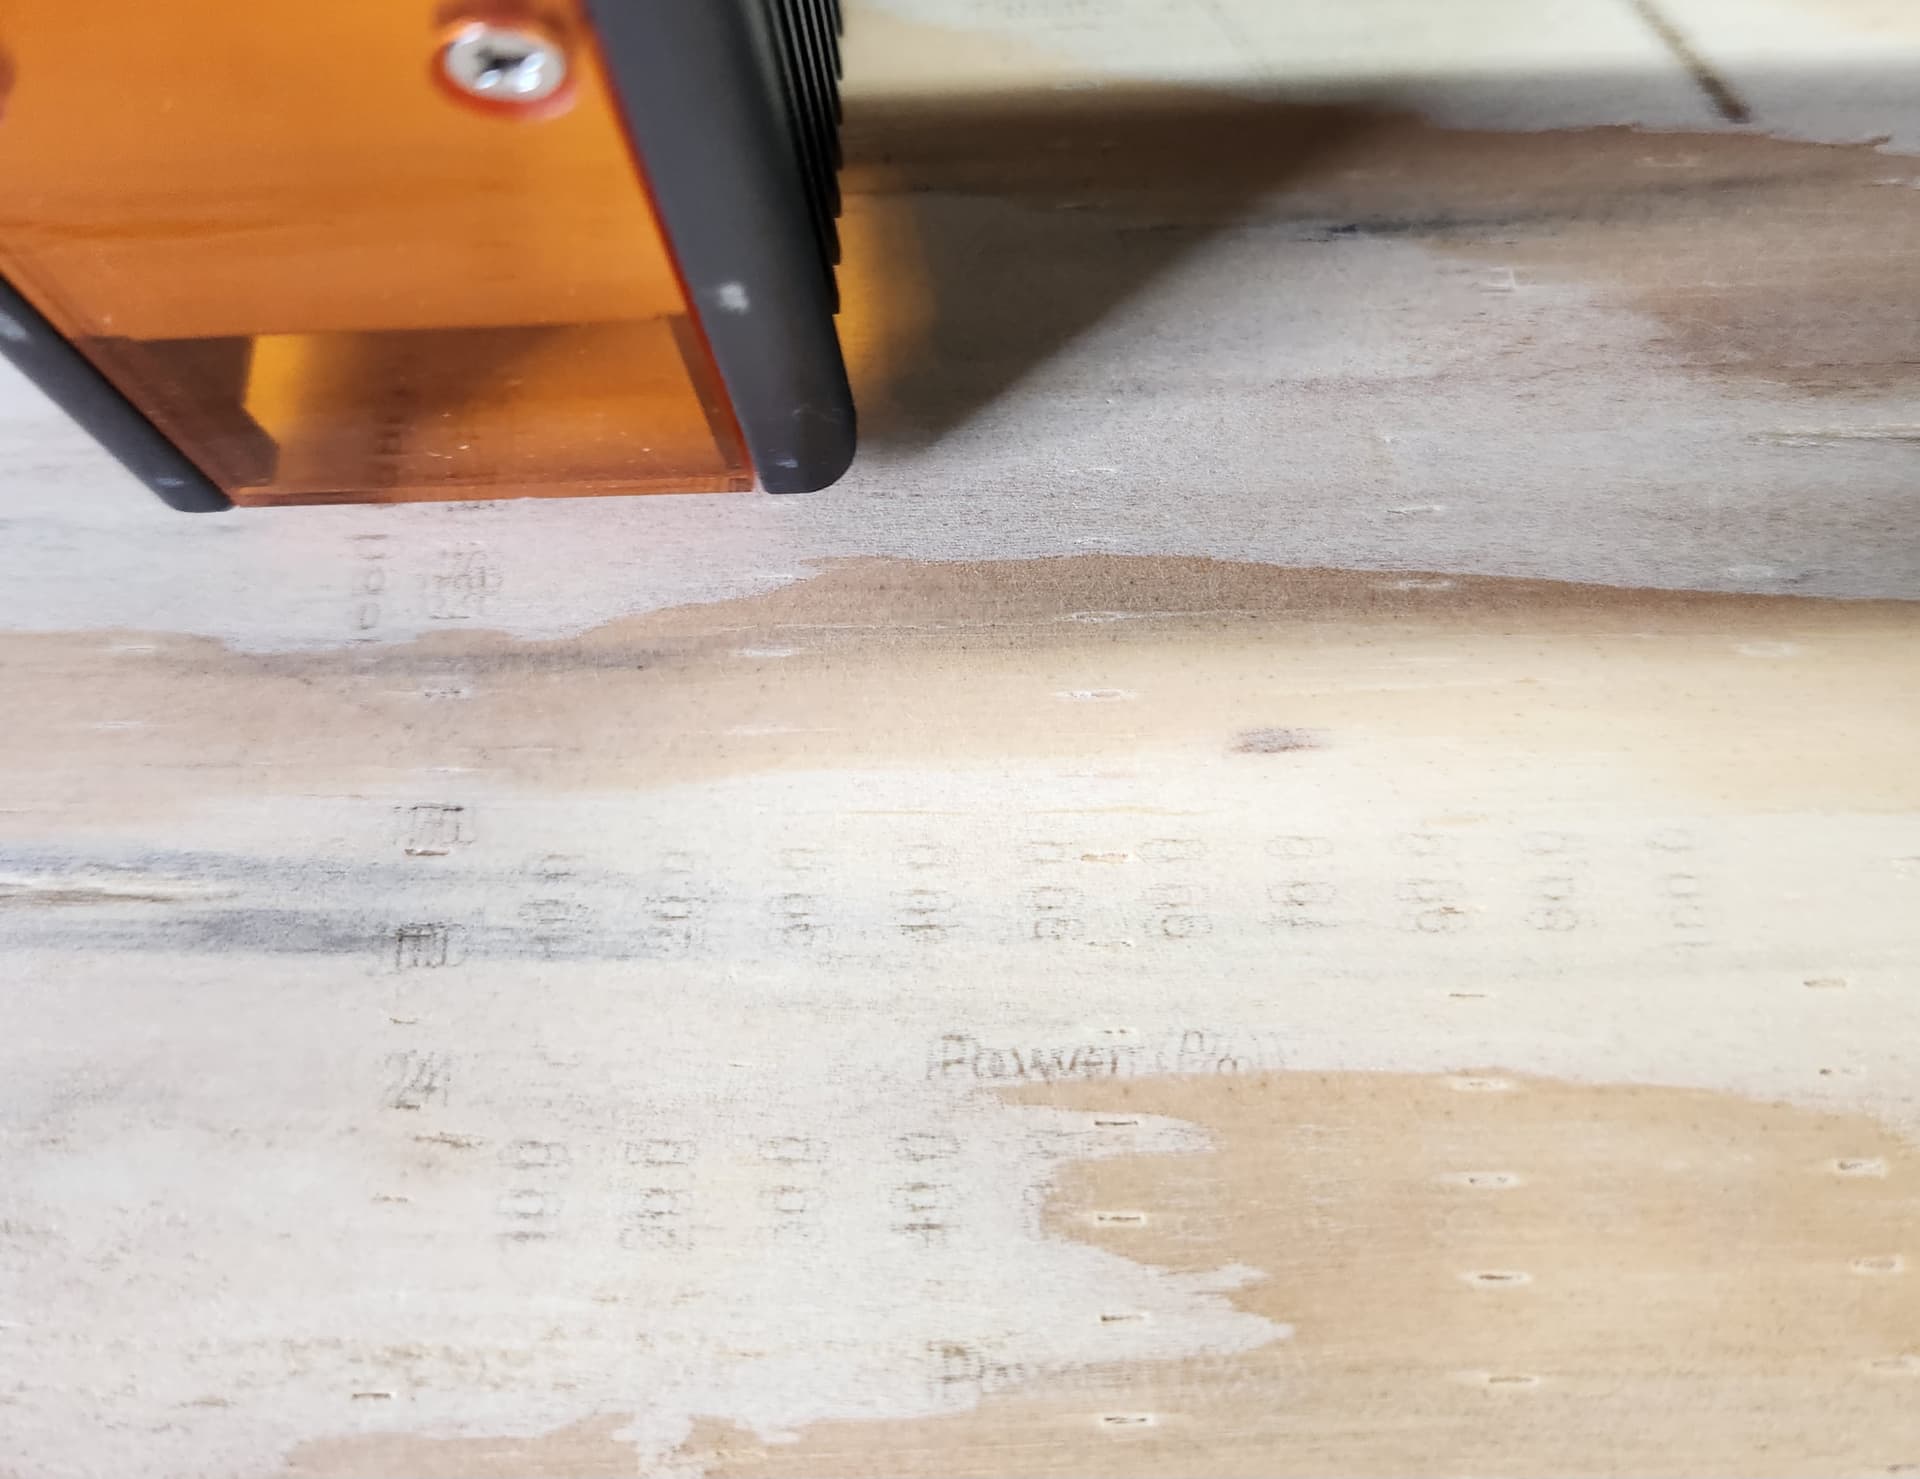
I am trying the “Material Test”.
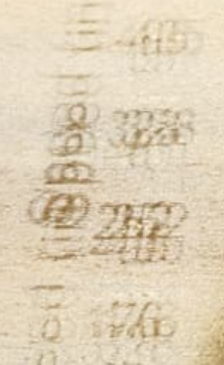
It isn’t burning the test very dark. If you zoom in or look closely you can see the Percentages.
I don’t know what to do???
I was able to get all the Washers in the Blue Layer. Thanks.
Increase the power settings and reduce the feedrates is what I’d suggest to begin with. Keep going until you get a good range from very dark/black to barely marking. Some materials are harder to mark than others and wood in particular can be very patchy depending on the grain/figure.

I’m still running the test. It doesn’t seem to be much difference but it is burning darker.
I think it will get darker the further it goes.
There is a big difference between the “Grid” numbers & words and the test blocks.
That’s looking better. It will probably take several iterations with various setting before you get a good range of shades.
Are you making a test, then moving it a little? These shouldn’t look like this from your posted photo…
From the computer screenshots are much easier to see and read… It should be easy to google screen shot for your machine and see how to do it… Greatest invention since the Internet… search engines…
Good luck
![]()
Hi Jack,
No I am running the test on a board I tried the “Offset Fill” on. That is why the circular lines.
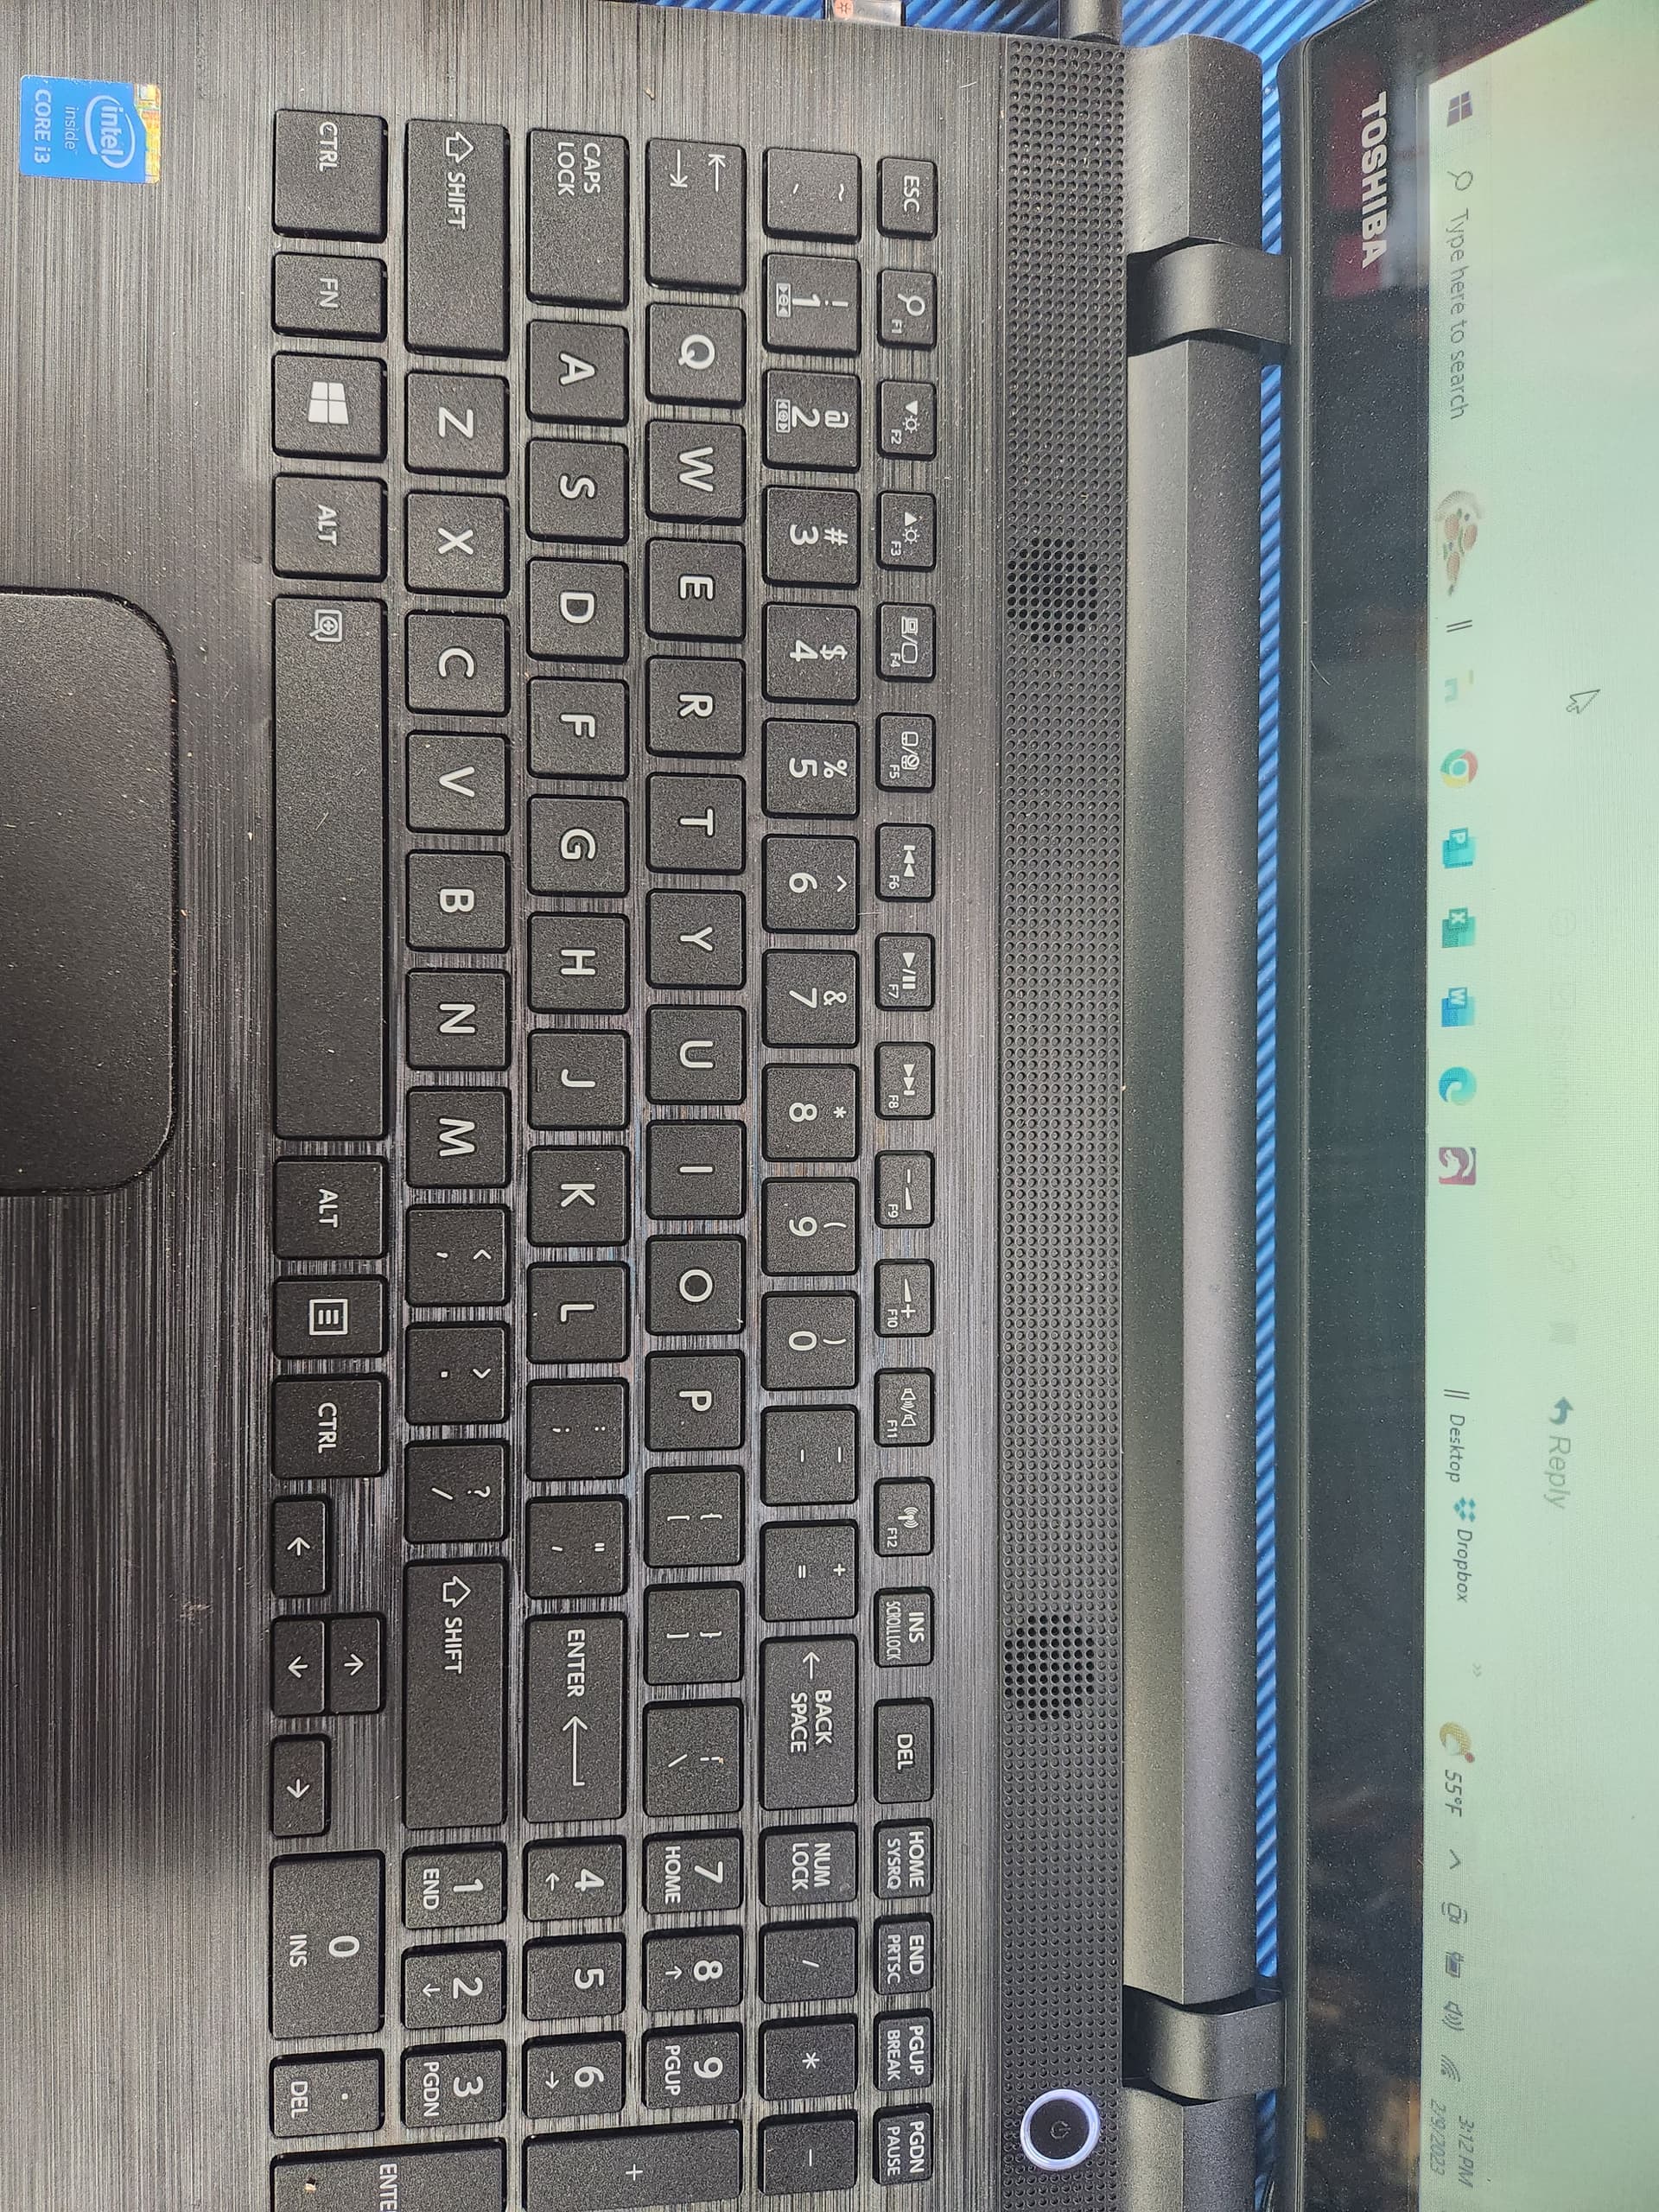
I have a button along the top that says “END/PRTSC” which I think means Print Screen But I haven’t figured out how to use it yet.
If you can tell me please do…
Thanks!
I doubt that you run the same OS that I do, so I’d probably not be much help.
I use the software that came with my machine. It’s called screenshot… for what it’s worth.
The easy way is to just press it and see what happens.
If you are editing a text file, it might apply the END (move cursor to end of line) function… press it and see what happens…
![]()
I remember you saying you’re running Windows 8 on a Toshiba laptop. If you could let us know the model number of the laptop we might be able to find out whether you need to press another key in combination with your END/PRTSC key to get a screenshot. Alternatively a photo of the laptop keyboard might suffice.
Marcus, I know it’s getting late there.
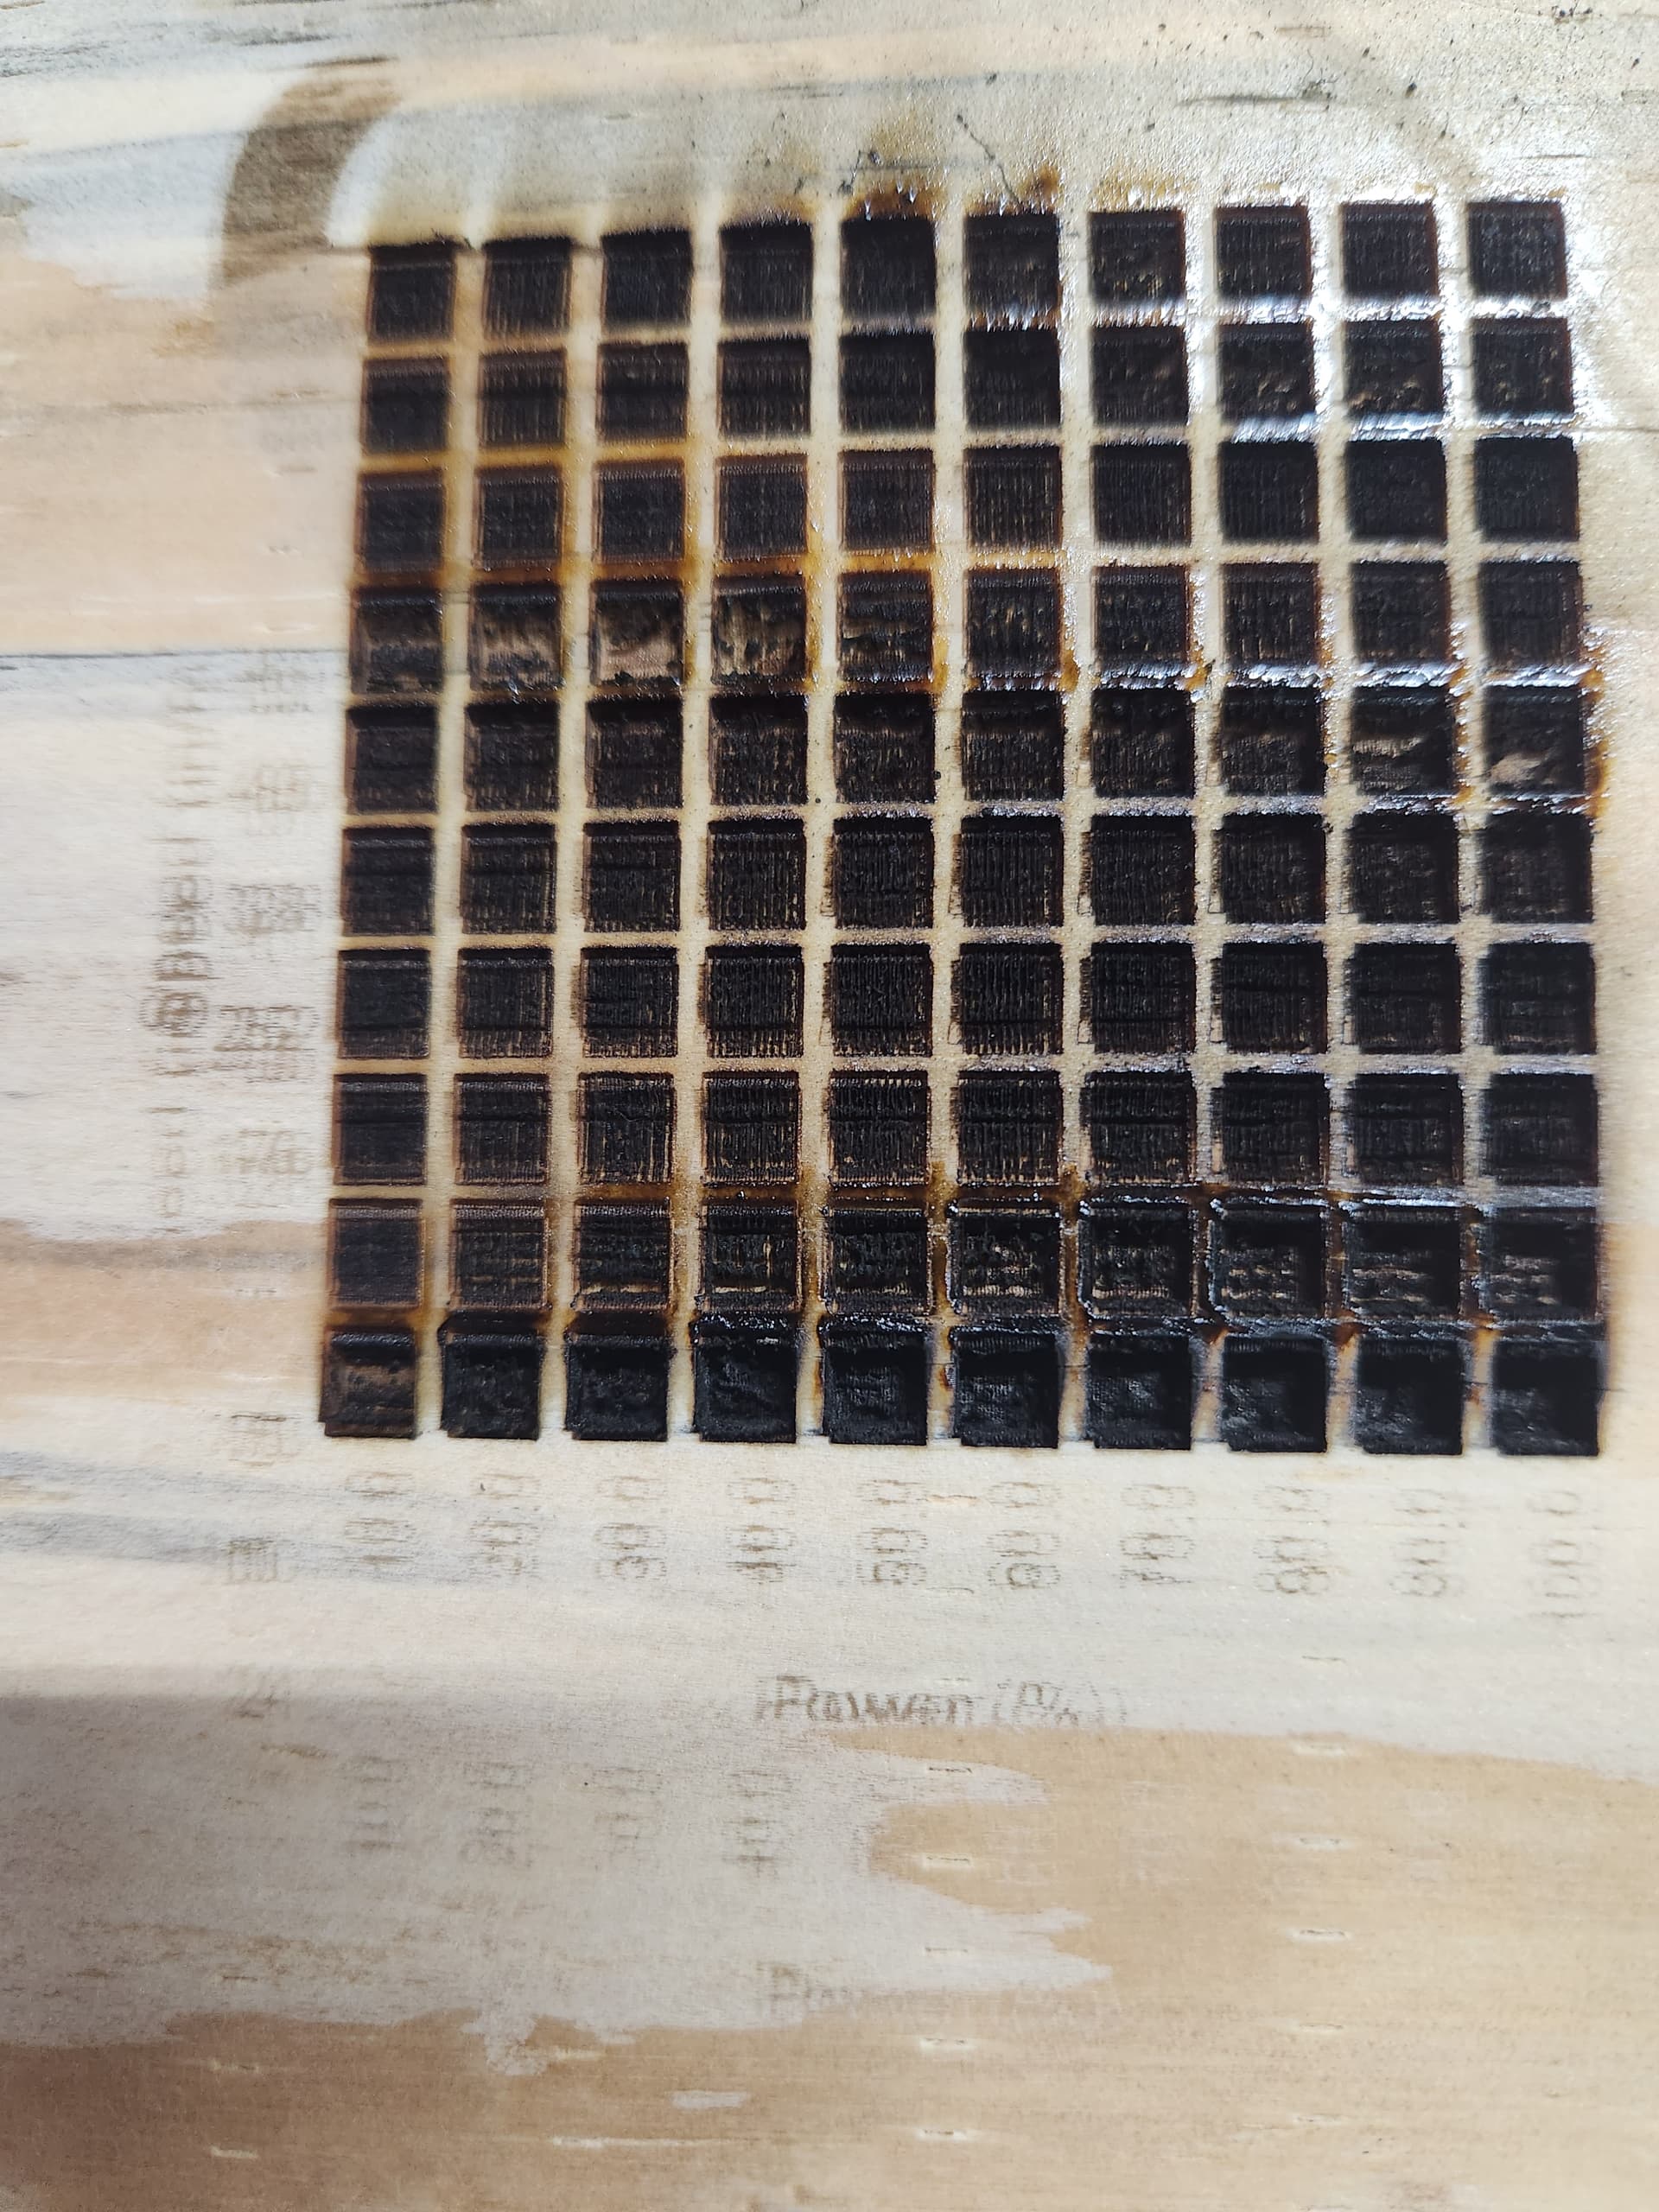
This is the finished test. I can’t tell a lot of difference in any of the squares and the Power Percentages & Speeds are really hard to read.
I have tried setting my power to 80 - 100 and my speed from 250 - 1000 and still doesn’t seem to burn very dark. Any suggestions?
Ok, all the squares are very burnt so you need to adjust the max and min power and max and min speed. If you leave the maximum power as it is for the moment but reduce the minimum power to something like 30%, leave the minimum speed as it is and increase the maximum speed by say 5x. If you can do a screenshot of the Material Test window we can probably help you better.
I’m still not sure how to do a ScreenShot!!!
If you can let us have a photo of your keyboard or the model of your laptop we’ll try to find out for you ![]()
EDIT: You could try holding down the ‘Windows’ key and press the END/PRTSC key.
FN+END/PRTSC maybe
Yep, that’s another combination I was thinking of. ‘Windows’+Shift+S works on Windows 10 but I’m not sure about Win 8.
I have tried holding the FN & the ALT & the CTRL & the SHIFT and clicking the END/PRTSC but nothing seems to happen.
If I was to try and put it in this post, how do I paste it in here?
Have you tried holding dow the ‘Windows’ key (the one between FN and ALT) and the PRTSC key. Another one to try is ‘Windows’+Shift+S.
EDIT: Oh you can just paste directly into a post.
That END/PRTSC key should work as a single press. Then come on here and press control and v
1 Like
It’s also possible that it doesn’t copy to the clipboard but instead saves the image in the Pictures\Screenshots folder.