I might be asking too much of the software but I am looking for advise on cutting through Plywood with very closely located shapes.
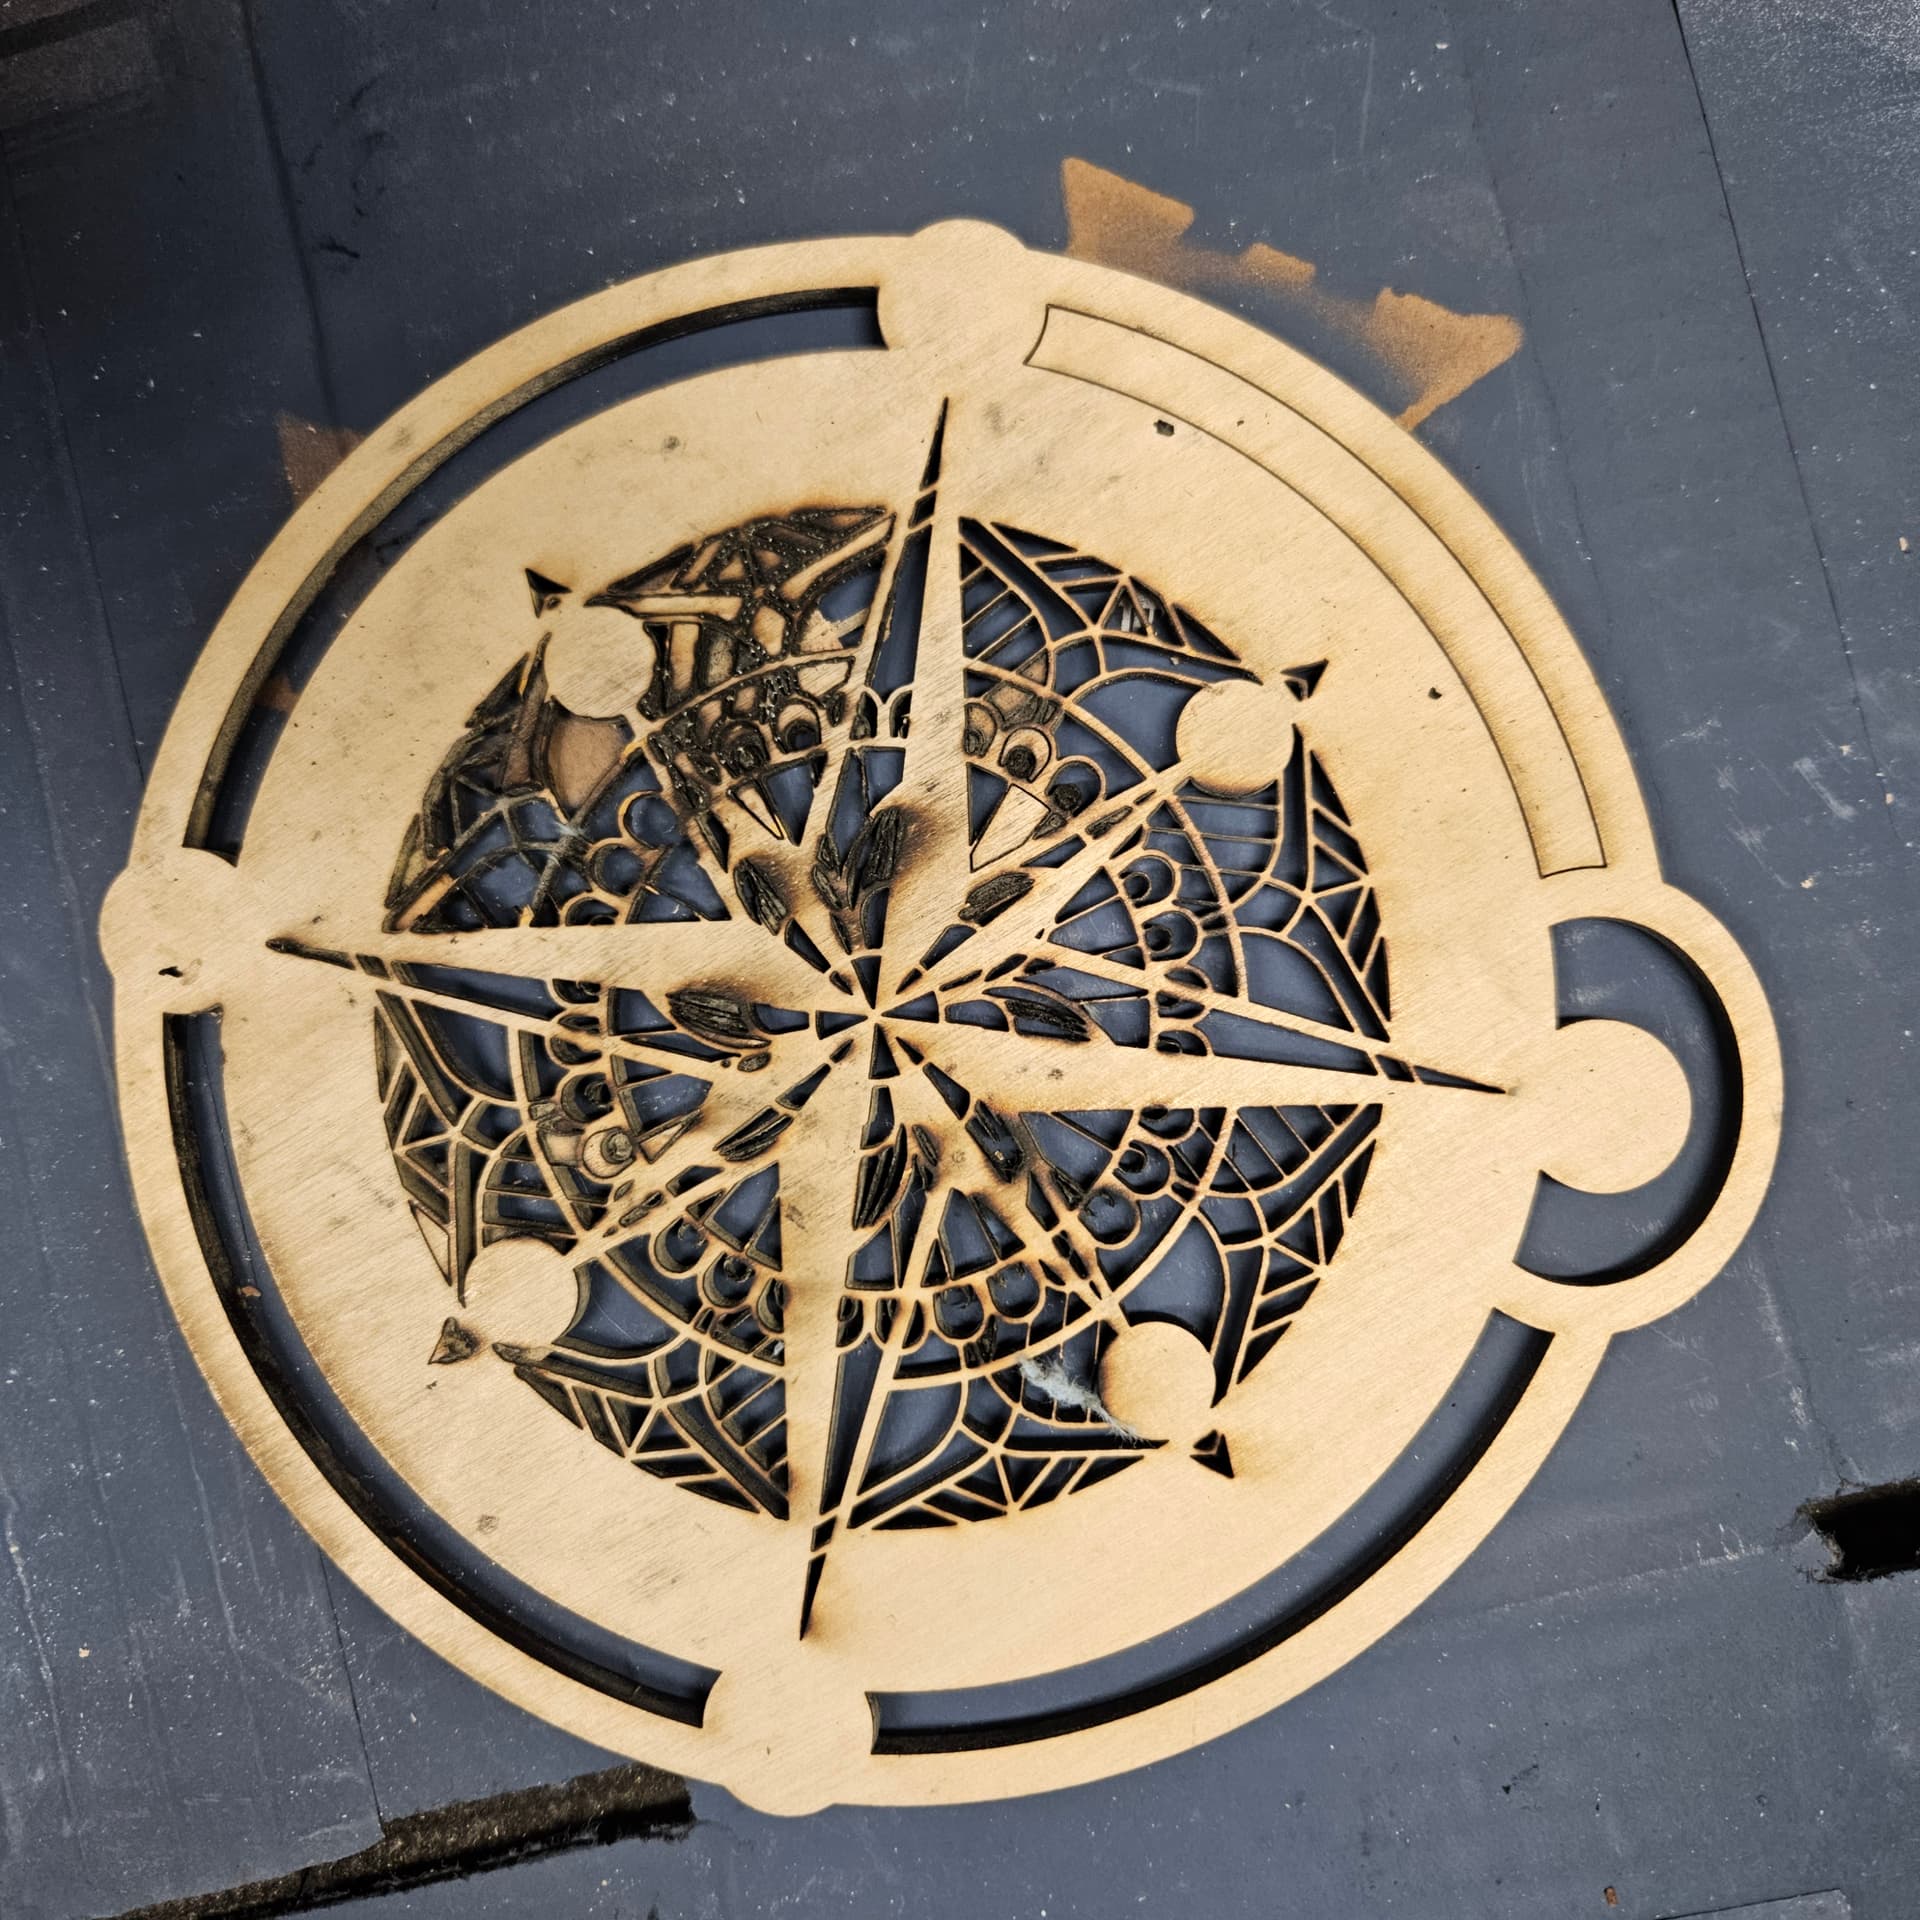
I have an 80w laser and I am trying to cut through plywood that is 5.2mm thick. The shapes are located very close to each other and I am getting varying forms of burn results. The images attached show the results using 20inches per minute at 65% power and 5 passes. The photo’s show the problem so my request for advise is to ask, is it better to cut at a lower power or faster speed but more passes to avoid this burning. As you can see part of the item is now charcoal yet other areas are OK. Help would be appreciated. As you can see many areas are cutting fine at the settings mentioned.

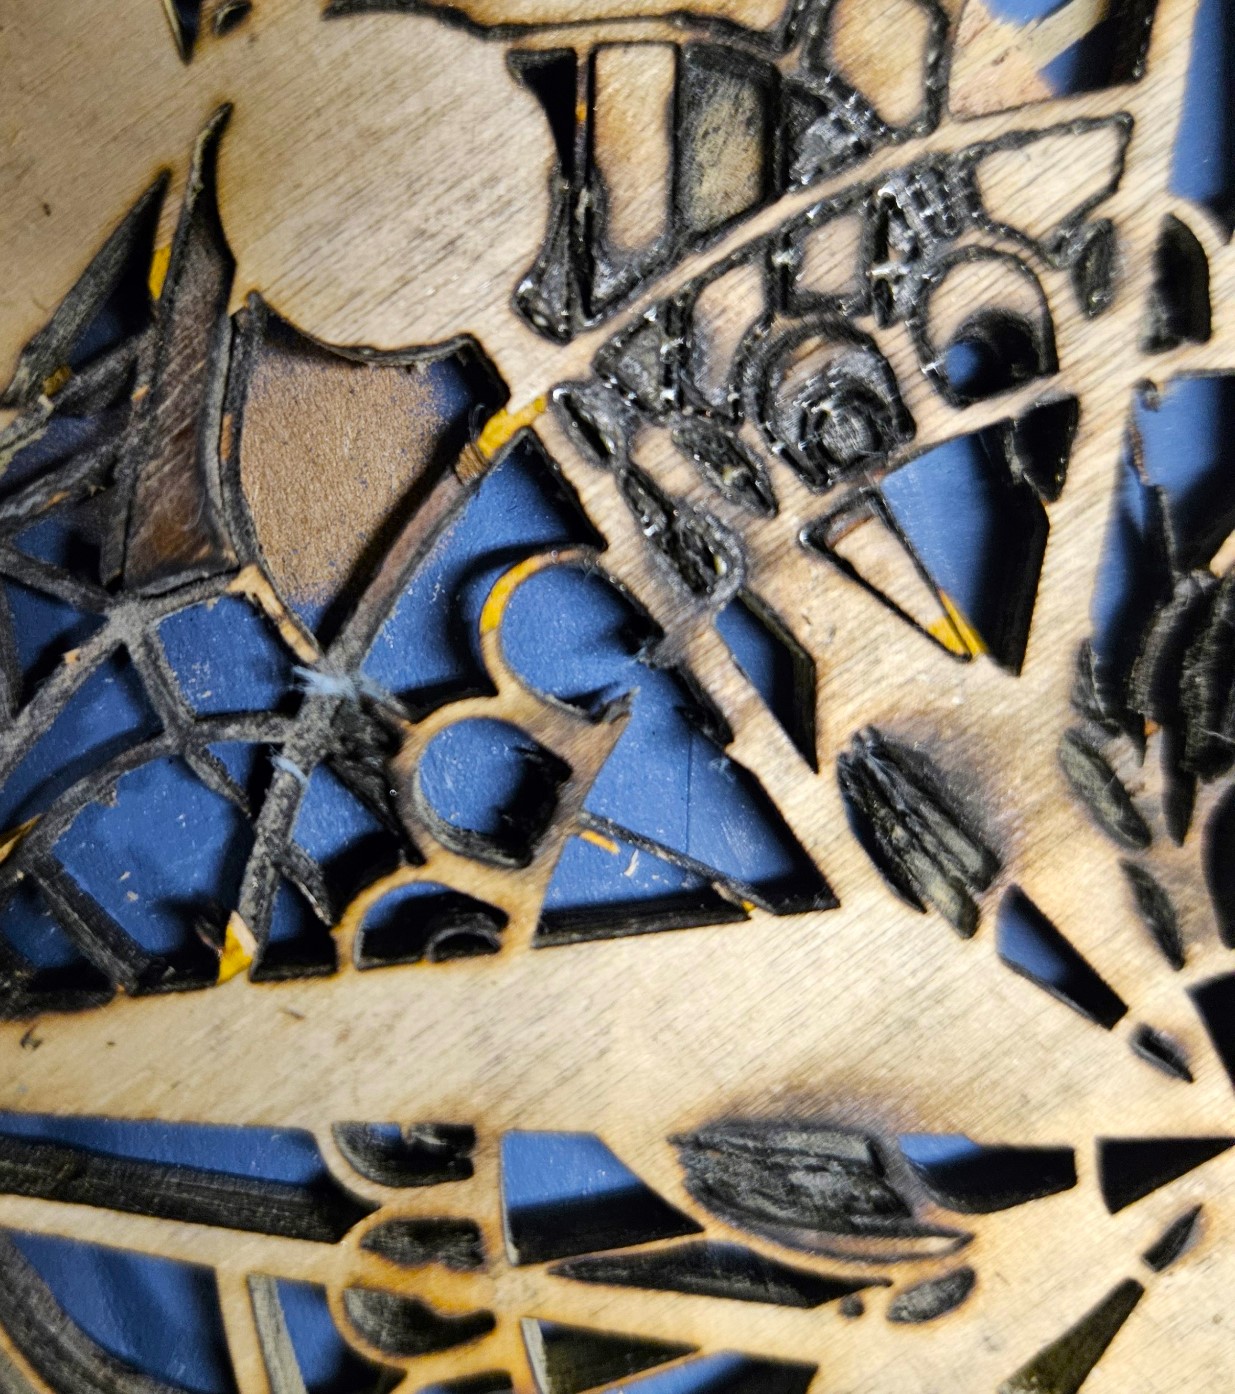
what I’ve found in cuts made that result in such burning is that the plywood has flaws in the inner layers preventing a normal burn through. As you’ve noted that most of your cuts are okay, the heavy burn spots are possibly due to inferior grade plywood. Even “laser grade” plywood can have these defects, but non-laser grade stuff will almost certainly have them.
The unfortunate aspect of this is that there is no way to identify the flaws prior to attempting the project, to the best of my knowledge.
2 Likes
Generally I get the best cuts from the fastest speed and highest power. I hope you are using a good air flow.
You didn’t mention your lens length. Most of these have a 2" stock lens, sometimes it’s 1.5"
Cutting a 5.4mm piece of ply with a 2" (50.8mm) lens needs to be accurately focused for the middle of the material… even then it’s too short of a lens for this application.
The 2" lens lens has < 2mm dof (depth of focus), so, technically, you are out of focus. At least for about 3mm of your material. The 1.5" (38.1mm) lens has a dof of about 1.07mm - even worse for this application …
If you wish to cut this thickness you should be using a 4" (101.6mm) lens that has a dof 7.5mm.
Have you set your machines lps for a proper current limit? Is there some reason you are only running @65% power? If it’s setup correctly you should be able to increase the power.
I run mine at 100% when I need to, which isn’t really too often … or I’d gotten a bigger machine ![]()
- focus to middle of material - even with a 4" lens
- fastest speed at highest power
- air assist
- get a longer lens
Any of this make sense?
Good luck
![]()
1 Like
Sorry to step in.
Exactly what happened to me with a diode laser and I came up with the below solution.
Don´t now if your cuts repeated 6 times each segment but instead of 6 passes use 6 cloned sublayers.
4 Likes
Thank you for this advice. This solution was the answer that worked.
Do you mind specifying what the solution was…?
![]()
1 Like
Instead of doing 6 passes of the cut, which means the laser stays over the image and keeps burning through each pass which in my case resulted in extremely burnt wood.
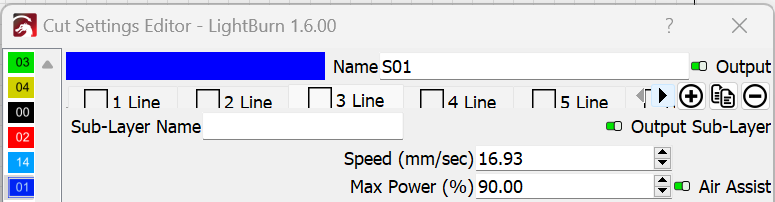
I changed the pass to one pass but if you noticed in the cut setting editor there is the ability to have a number of “line” passes for that particular layer (See attached.) So the secret is to go as fast as is appropriate and with a bit more power. This way the laser goes all around the image without burning and then comes back and does another round of the image and does it again. So instead doing 6 passes in that location it goes to all the locations and then starts again but no longer staying long enough to burn. So I did 6 separate lines for that one level. Hope that helps.