I’m trying to cut an image that is larger than the work area.I have imported the image and converted it to line.I have created a box the size of the finished product and moved the image to the box and scaled it.I’ve created boxes to cut the image in sections and created and placed registration marks.The first time I tried to cut the image by selecting the image and the cut line,then cut shapes the whole image disappeared.I tried it again and this time when I select image and cut line the “cut shapes” is not highlighted.Any advice?
In the Edit, Settings menu, on the File Settings portion, do you have the toggle for “Ignore out of bounds shapes if possible” turned on?
1 Like
Yes it’s on
I turned it off but "cut shapes still not highlighted
You said, “the image” - Are you trying to do this which an image, like a JPG, PNG, etc? Because that is not supported yet.
1 Like
Also, is your cutting shape a closed loop? (It has to be)
1 Like
I’m watching this video.I just tried it with text generated from Lightburn and the “cut shapes” is still not highlighted.I did it once but the whole image disappeared.
")
1 Like
You’re not being very clear - are you trying to use the text as the cutter or the thing to be cut?
Dirt simple version:
- Draw a circle, set the layer to fill
- Draw a square where you want to cut the circle
- Select the circle, then also select the square
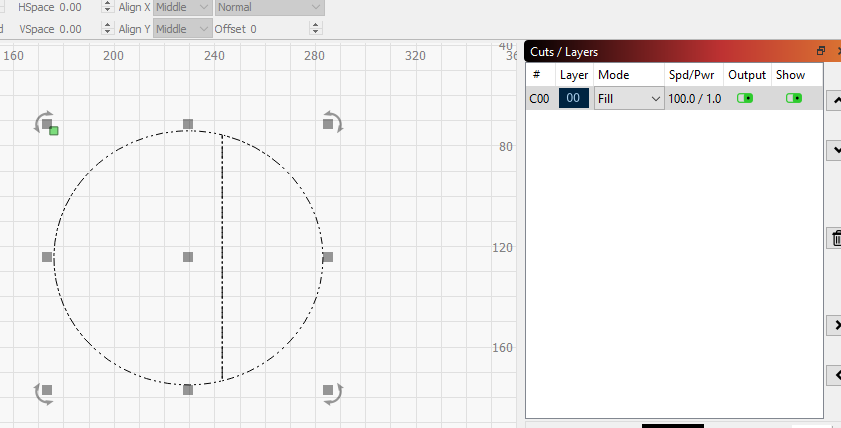
- Click ‘Cut Shapes’
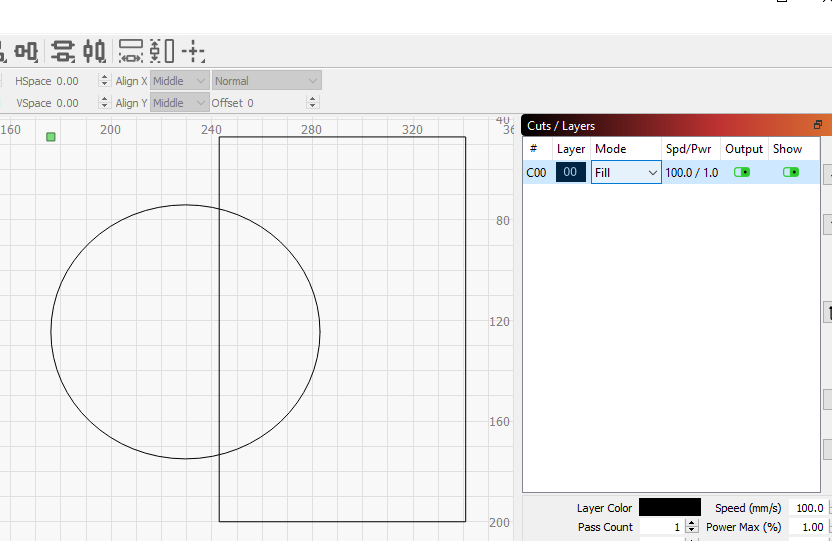
Result - Circle is split where the square cut it:
Thank you.That is not what I’m trying to do.I’m doing it exactly how it says in your tutorial.I’m cutting it in 3 pieces,no problems with that.The video is pretty clear.It’s the step where to cut the parts.
Thanks
You keep saying “it” and similar things, and giving absolutely no indication what “it” is. Show a picture of what you’re trying to cut, and what you’re trying to cut it with, and we can likely end all the speculation.
No need to be rude…don’t you know what’s in your own video?I’ll ask someone else

I wasn’t intending to be rude at all - I’m saying that you aren’t being clear in describing your issue, so I do not know how to help you.
I recorded the video, so yes, of course I know what’s in it. I wrote the code for the ‘Cut Shapes’ tool, so I know what’s in that too. I do not know what it is that you are trying to cut, or what shape you are trying to cut with it. If you could attach the file you’re trying to cut, and say something like “the red shape is the cutting tool, and everything else is what I’m trying to cut with it” I should be able to tell you what you’re doing wrong.
That’s just a picture. If you take a screen shot of it in LightBurn I’d be able to tell if it is vectors or an image, for example. If it’s an image, it won’t work with ‘Cut Shapes’, because that only works on vectors, as I mentioned here:
Somehow in the last 15 minutes I lost the color bar,the cutting box was red and the registration marks green.“it” is the welcome sign pictured above.I had it sized and added 2 boxes for each end just like the video.I clicked the image and the cut line,went to tools but “cut shapes” was not highlighted
Is this “welcome sign picture” made using vectors or is it a bitmap image?
1 Like
I have a PNG and a JPG.I just converted it to a vector sk1
If you were trying to cut a PNG or JPG file, LightBurn does not provide tools to do that yet.
This is what we have been trying to explain. ‘Print and Cut’ works exclusively with vector art at this point.
‘Print and Cut’ is documented here: https://lightburnsoftware.github.io/NewDocs/PrintAndCut.html
Some folks find reading about a feature works better for them than videos.
Thanks…it said nothing about it in the video