I’ve installed the Ultimate Air Assist per the instructions and it appears to be working as designed. While I was at it, I added controls/solenoid to the Exhaust Fan, wiring it to the “Status” terminal. Plus, for the Exhaust fan, the solenoid I used has a timer. I’ve set it to run for 15 seconds post cutting/engraving. I also utilized a DPST switch to swap between Auto and Manual.
So here’s the issue.:
The air assist pump runs and cuts off as needed following the finished run. No worries. It’s wired to the WND terminal as per the instructions.
However, for the exhaust fan, I wired it to the Status terminal, thinking that the Status circuit would be live for the whole time the project is underway. Then once the project is finished, the status circuit would drop power, releasing the solenoid after holding an additional 15 seconds, then the fan shold shutoff.
That’s not what is happening. Doesn’t matter if it’s in manual or auto, the fan cuts out after 15 secs, leaving the smoke to fill the bay.
I’m thinking about moving the fan’s solenoid’s wire from the Status terminal to the WND terminal so it would stay on. Just don’t have a warn fuzzy about doing it that way, but I can’t think of another way to make it work.
It seems like the solenoid’s clock starts ticking at the onset of being energized. Don’t know.
Any thoughts would be appreciated.
Actually, I think that’s what I do want. When the burning is underway, I want the exhaust fan to be running and continue running for around 15 seconds then shutoff.
I can play around with the duration with this delay solenoid.
I also soldered in the dip switch instead of bridging across the pads with solder as they recommended. This allows me to change the duration once I get all that figured out. Then maybe I’ll de-solder the dip switch and solder across at a latter time. Also, I did NOT solder across S6. See last pic in the item.
Understood.
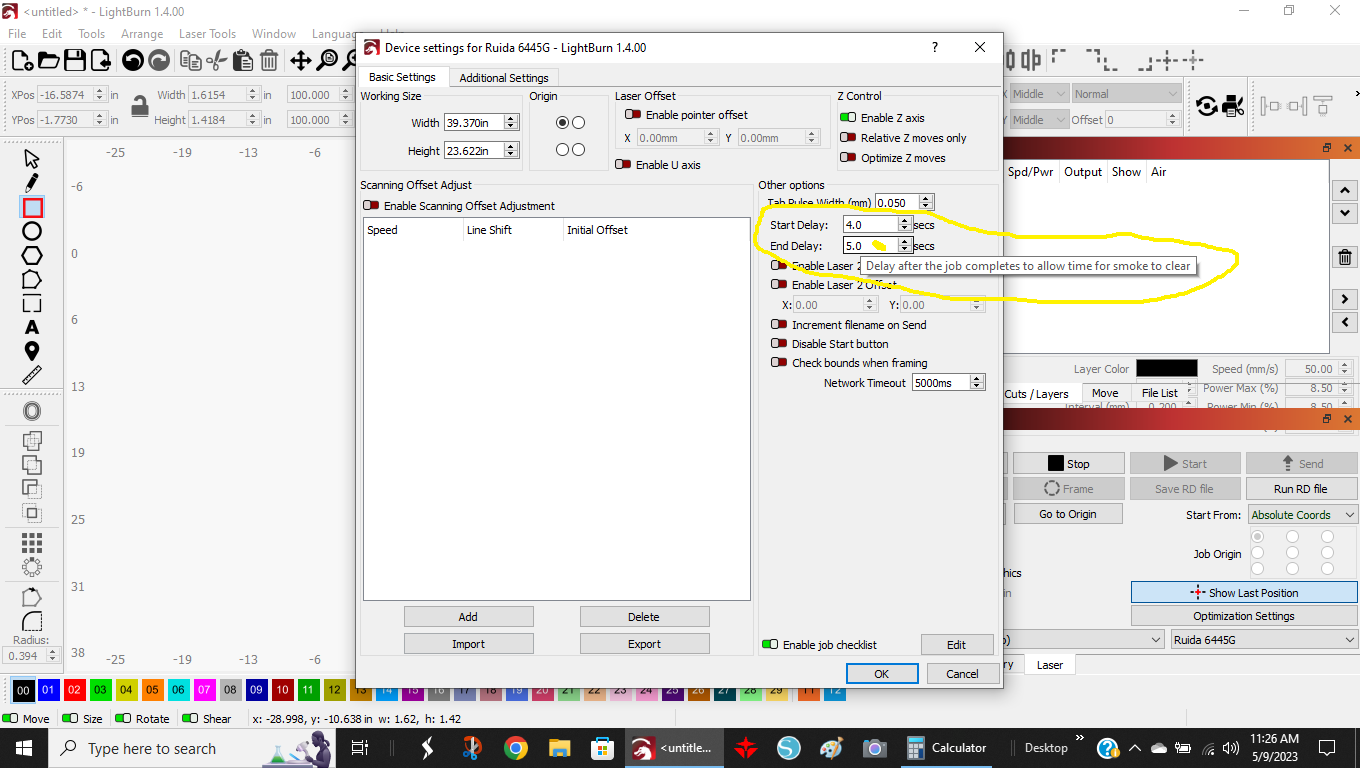
So I’m back to using the Status terminal but it sounds like I need to toss the delay solenoid and go with an SSR. I see there are settings in LightBurn for some delays. May have to utilize these instead.
Appreciate the help!
Can you send me a link to the delay you have… maybe it’s not wired up correctly?
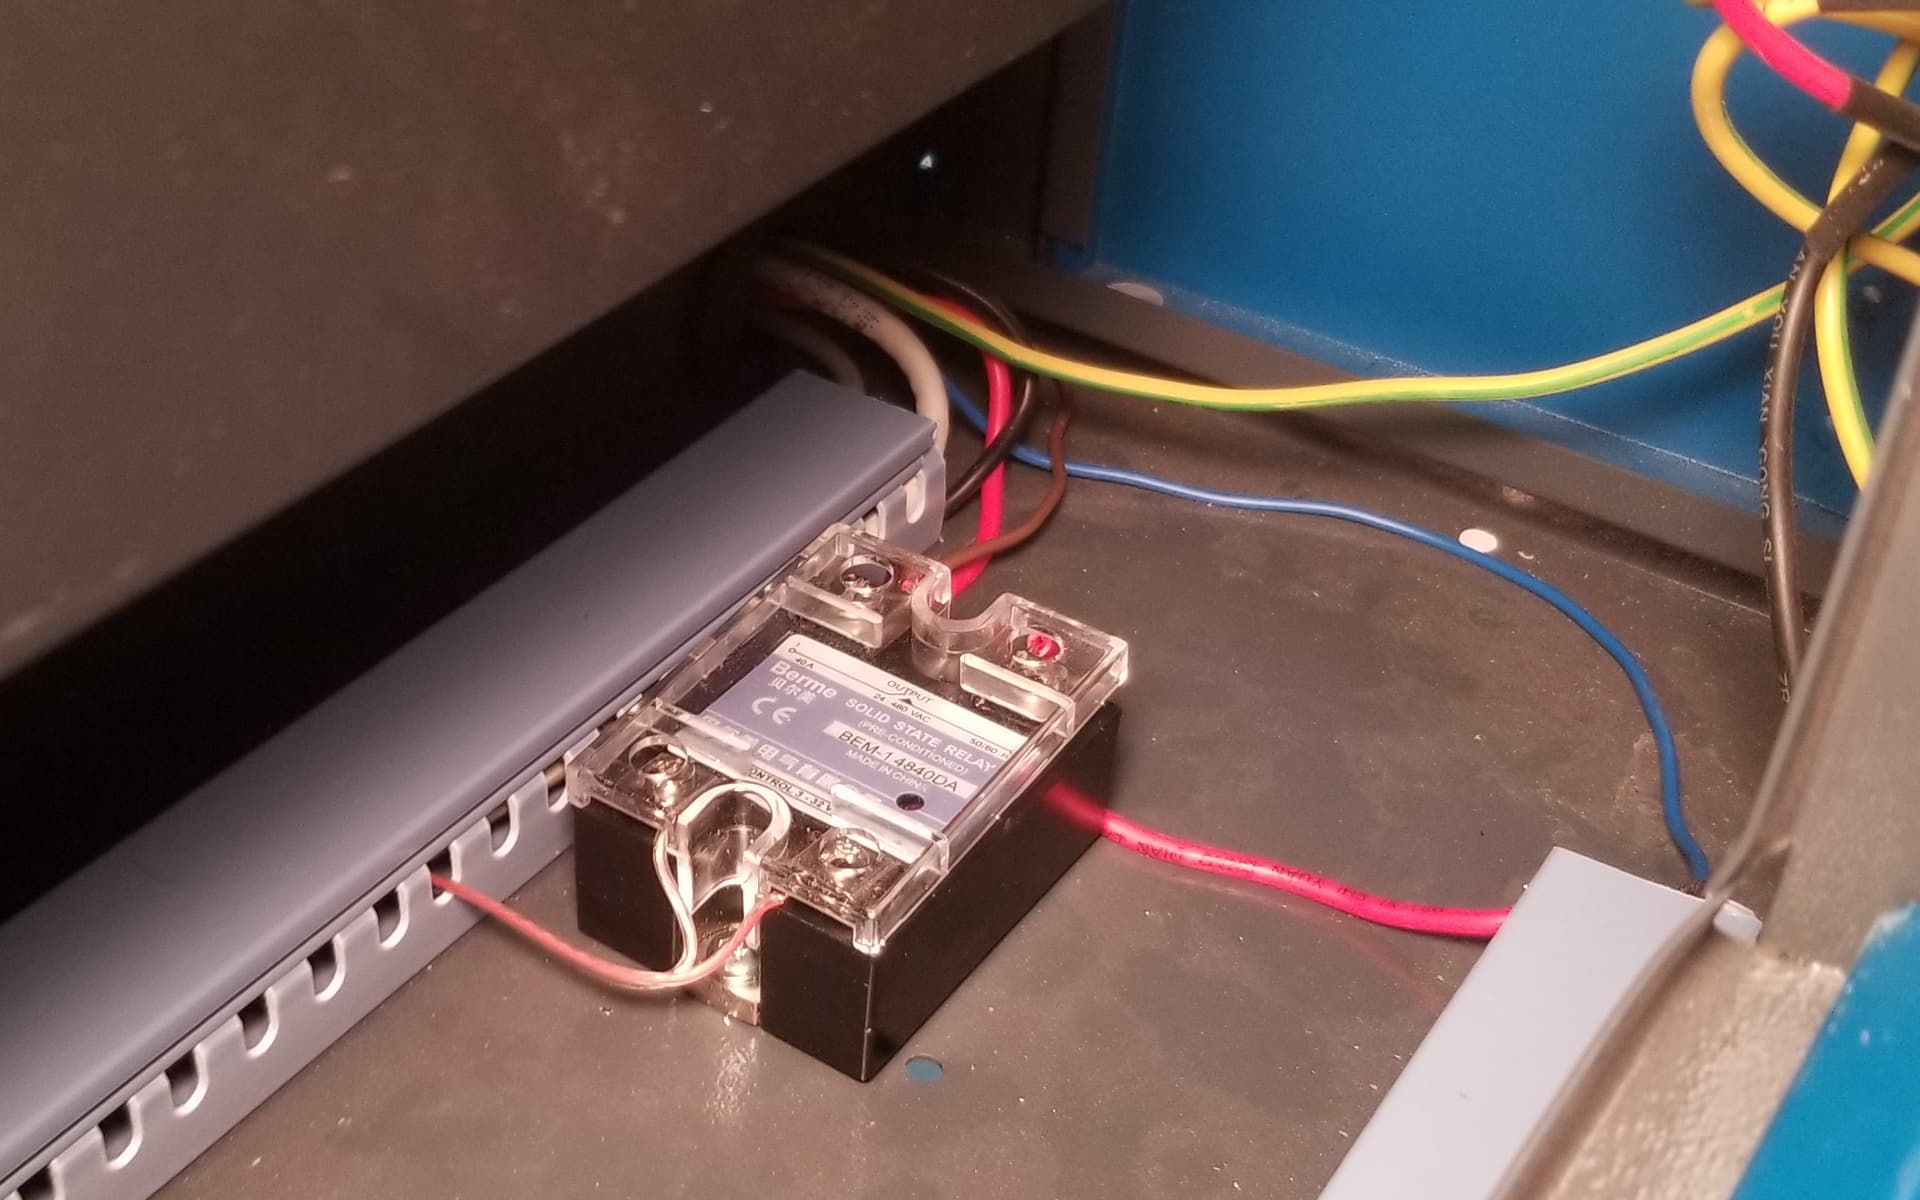
I use this ss relay from Amazon to drive my fan… it doesn’t draw enough current to really need a heat sink, but it’s bolted to the chassis. It’s enabled by the Status sink.
I looked over your schematic and everything looks good. The only thing I can think of is maybe the delay module is not working correctly. Did you try it offline before you installed it?
I did not, but I purchased two, so I’ll be testing the other one later today (maybe).
I’m currently putting in the Solid State Relay and hoping that LightBurn’s Delay protocol will handle as desired.
I’ll report back later today with the findings.
Appreciate everyone’s feedback.
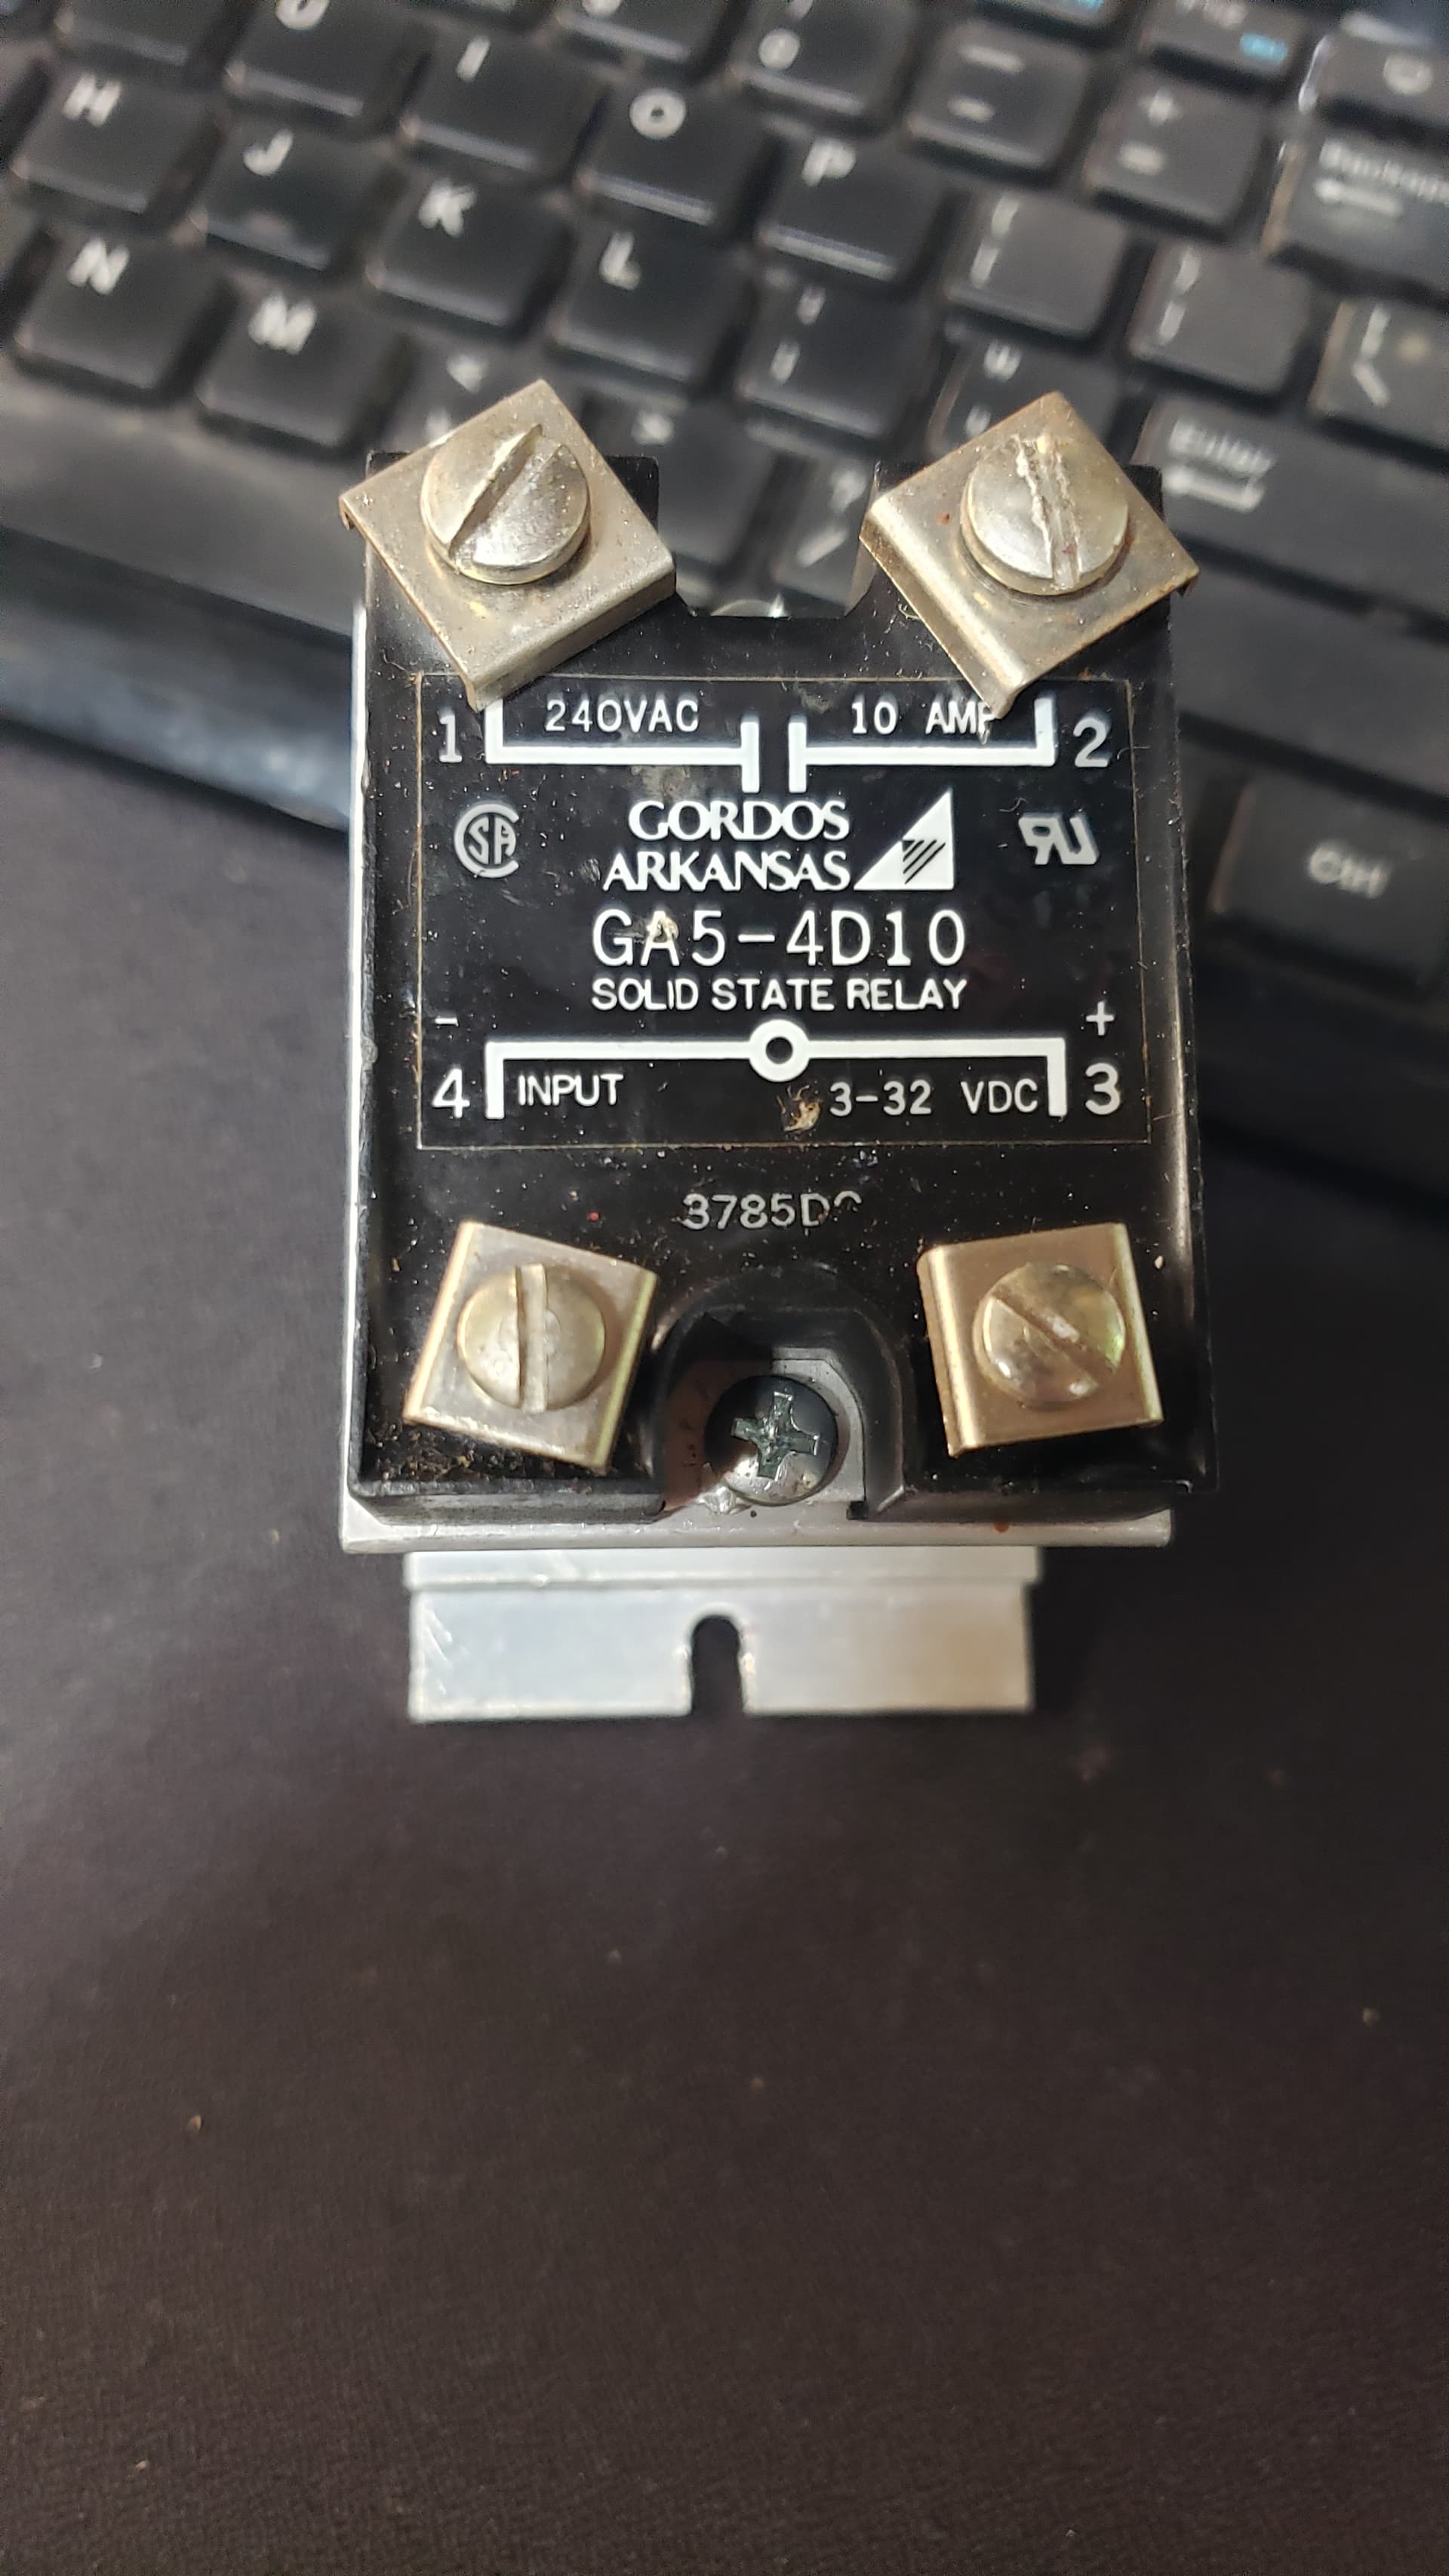
Well as luck would have it, the SSR I have in hand has failed “closed”!
Doesn’t matter if there’s a signal wire connected or not, the fan runs.
The only other one I have is a DC-DC which of course won’t suit the needs.
Need more chalk for the drawing board! Ha!
use (a machine) as a source of spare parts for another, similar machine.
I cannibalized my CNC Milling machine that had additional parts for future updates. (Updates that haven’t happened in 10 years, don’t judge, you know what I’m talking about) Ha!
Found the same SSR staring at me, yelling in fact, just wanted to be put in service.
Connected it as per the instructions below and it works wonderfully! Cheers!