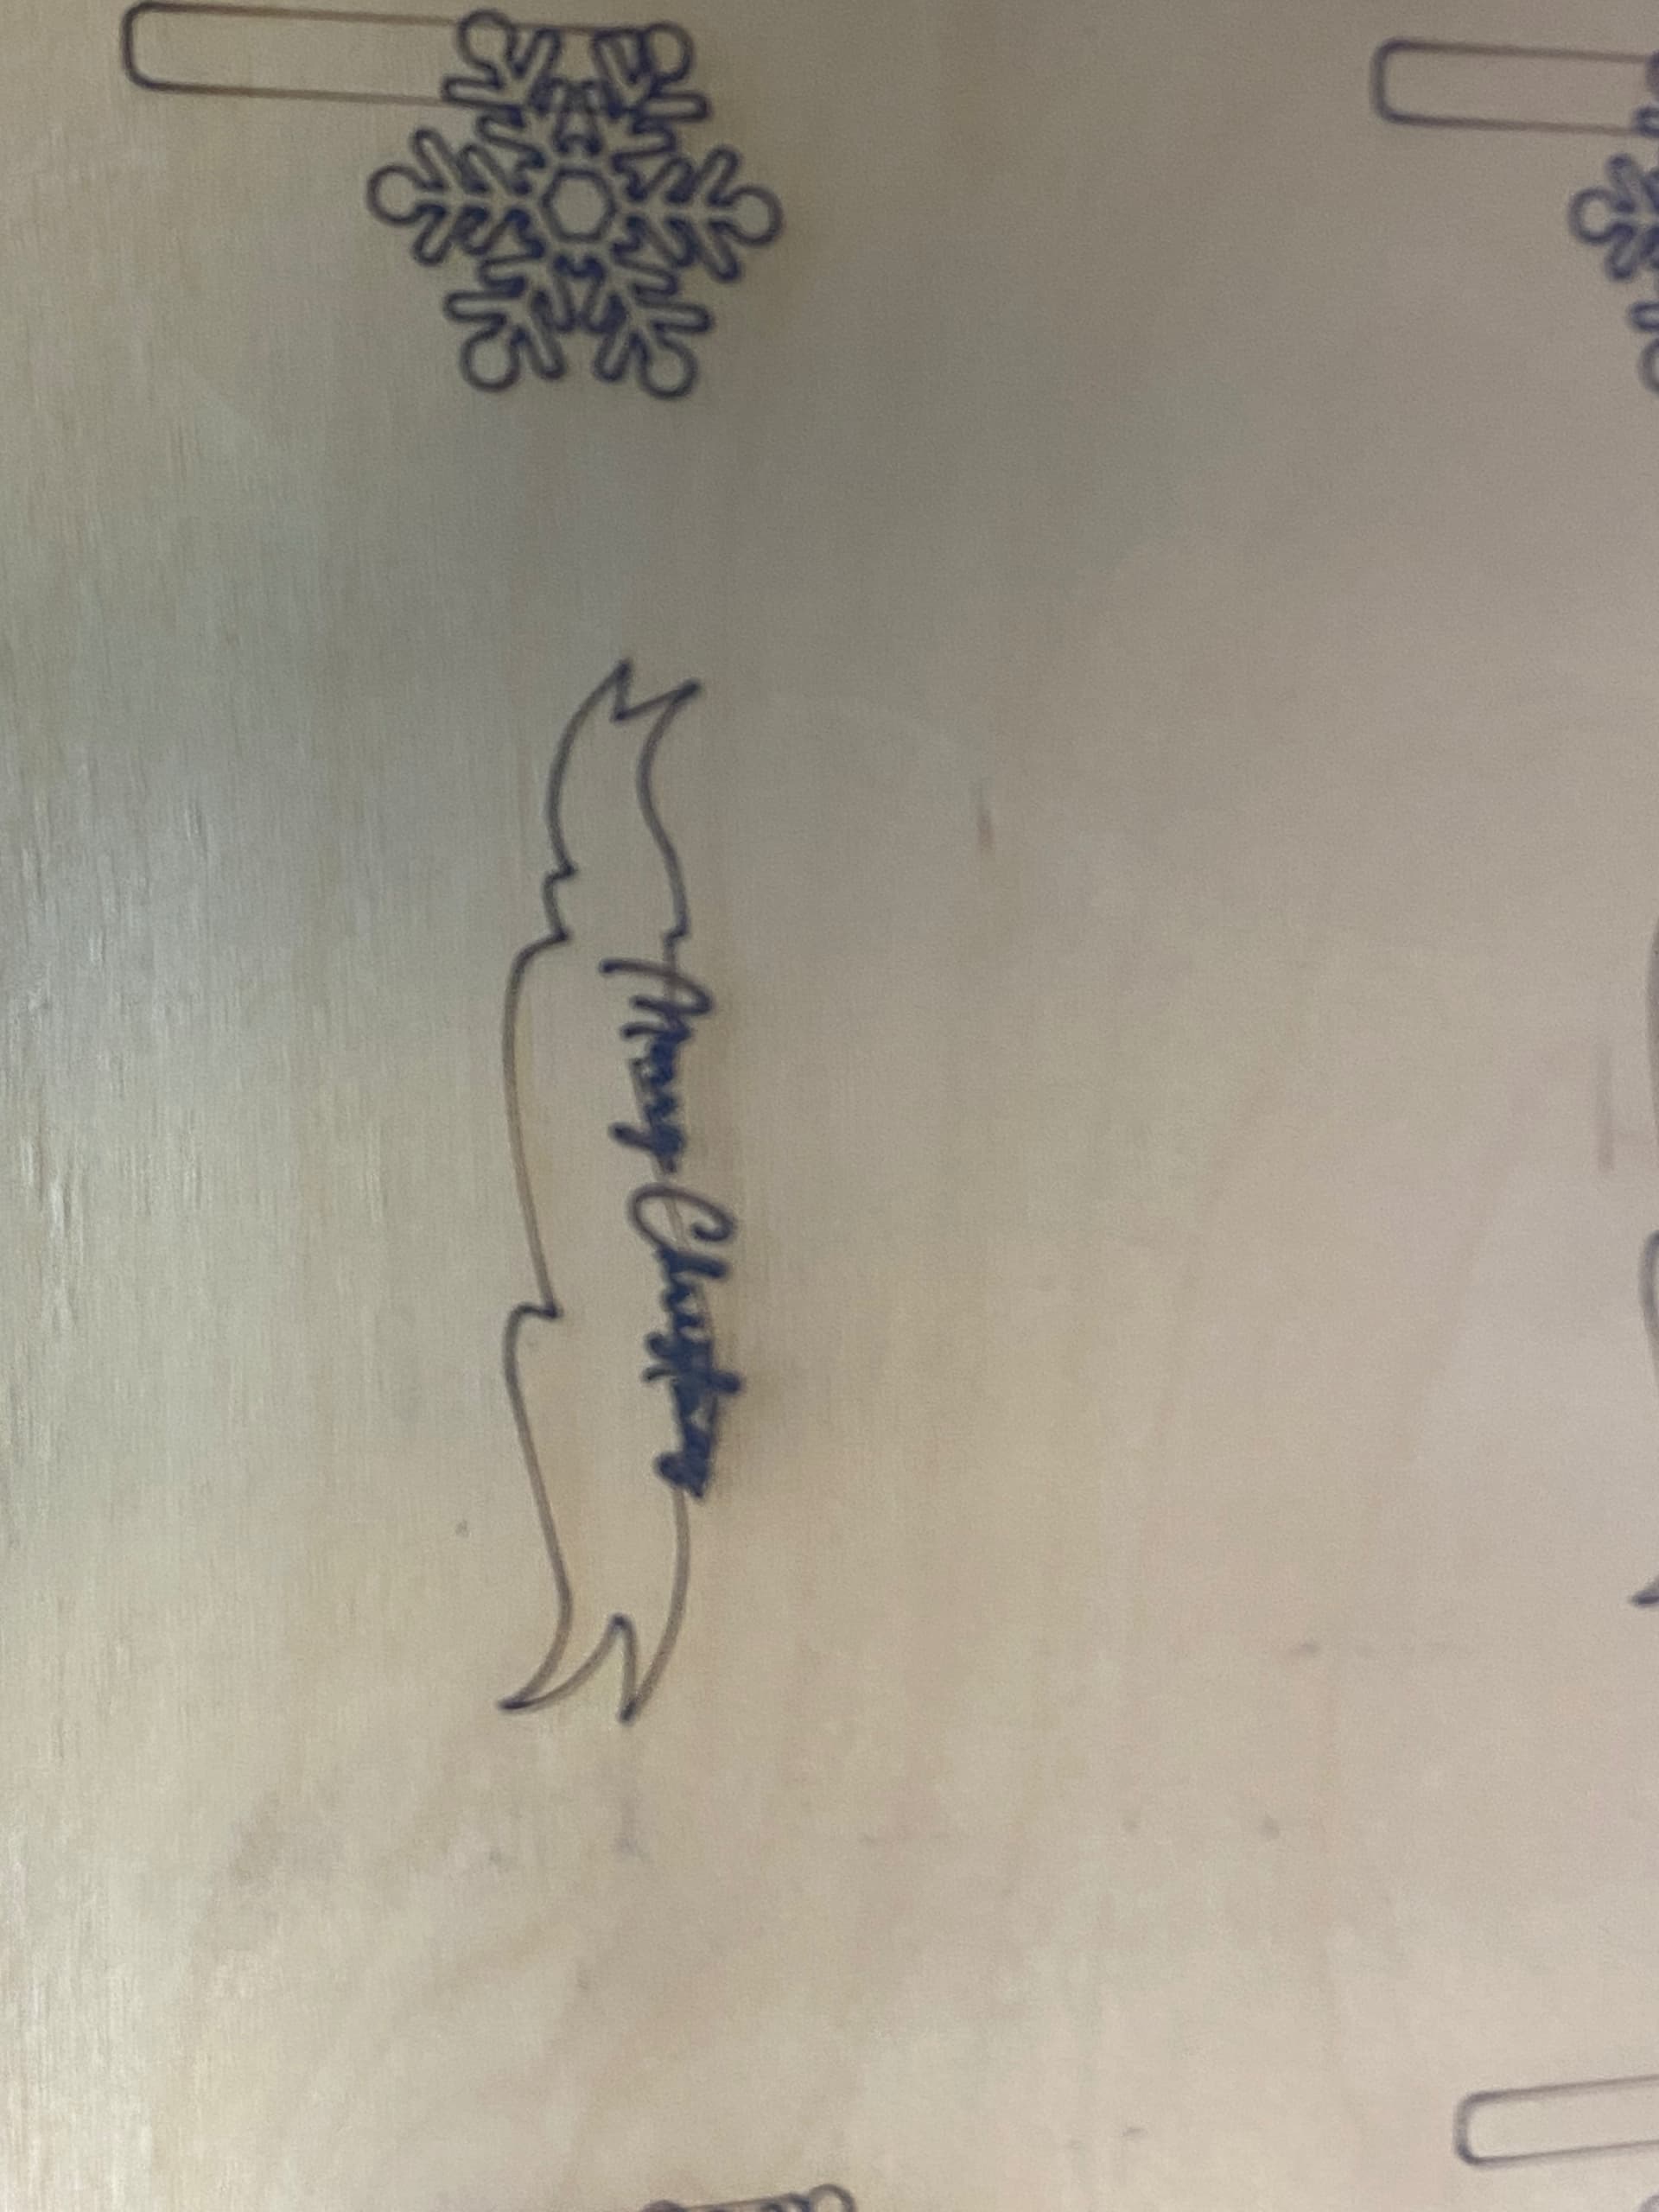
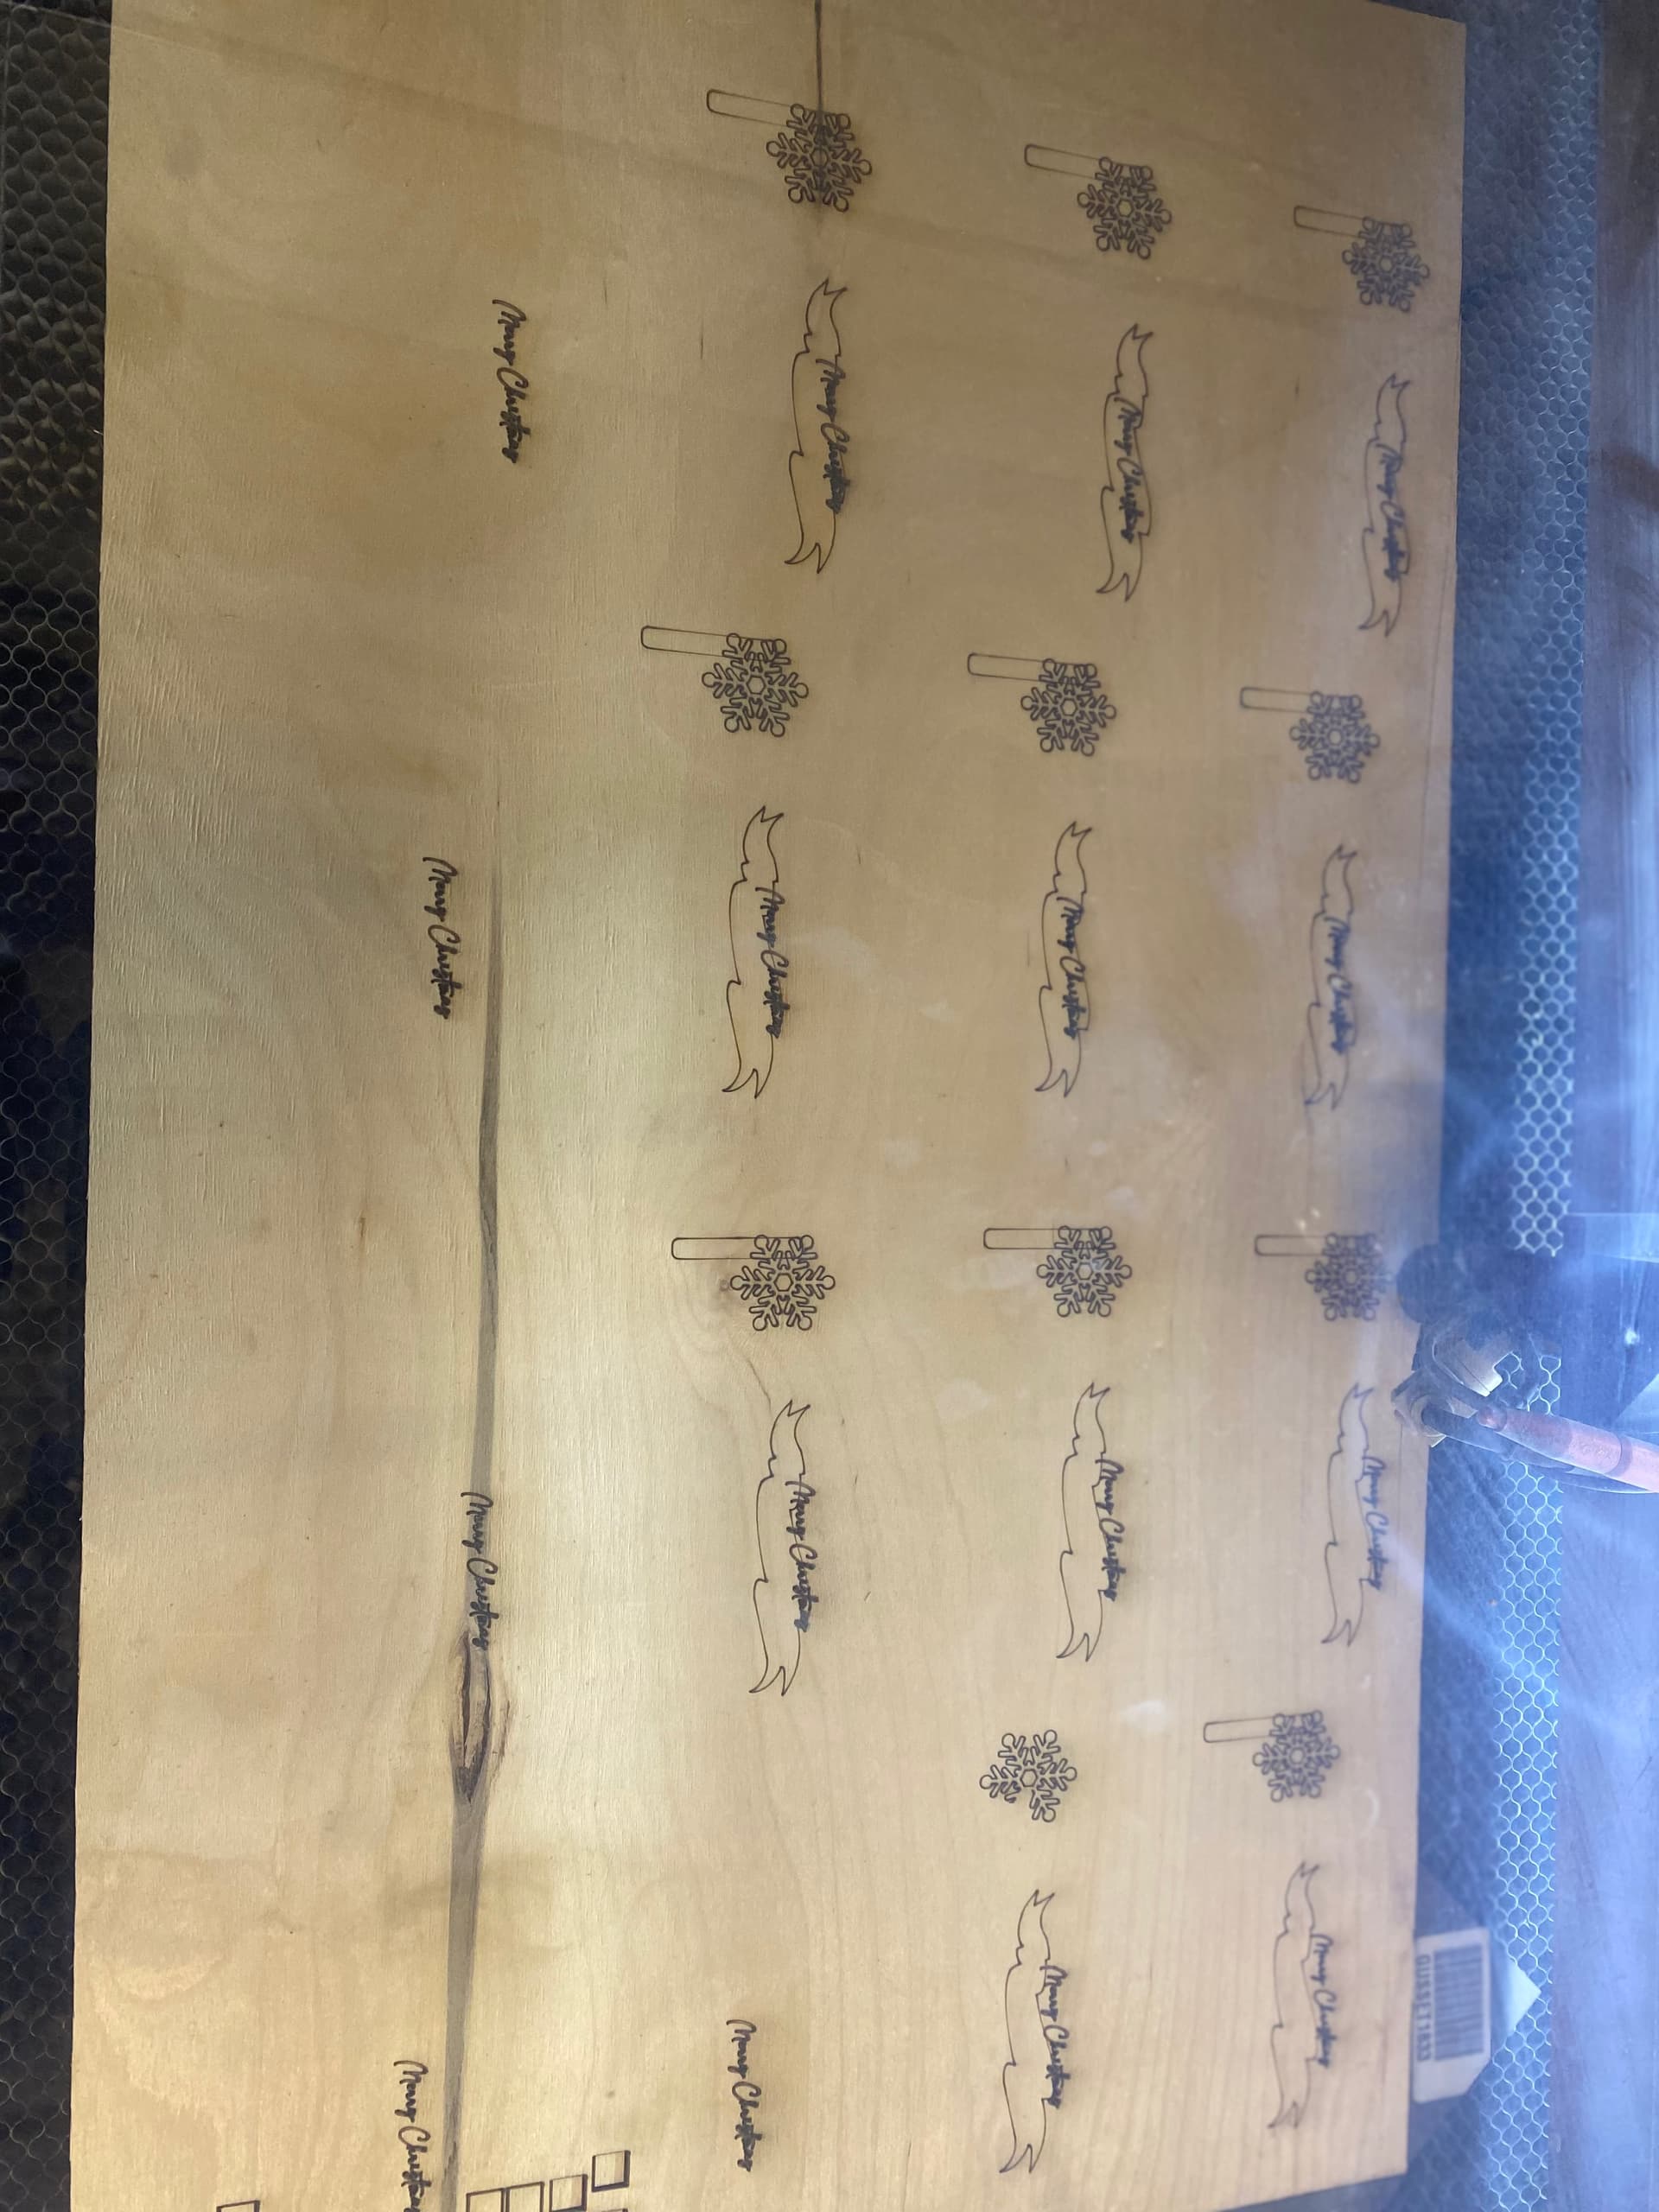
I have the FL 1390 and all of my graphics are lined up perfectly in lightburn. When the words are getting engraved first then secondly the banner encircles the words, It progressively gets offset to the point of no return. It seems as if my laser head isn’t going to the position that the computer is telling it to. This is very problematic. I have 3 jobs in line with deadlines so it’s getting stressful. Any help for me to fix this? Notice how it gets progressively offset from the upper left to bottom right.
Are you grouping the art?
If your Cuts / Layers settings are using a fill operation, small ‘lost motion’ steps can stack up and be challenging to detect.
Using Flood-fill for an operation like cursive writing is a common cause.
First test is to remove the fill operation (if present) and retest.
Hi Kris, I wasn’t aware that was important but I will test it grouped right now. I just tested it and it’s still off. I think the only thing I can do is to stop nesting multiple parts together and do them one at a time and cut and paste it and slide it over!- delete it and do the next one. I will have to do this 370 times though. ![]() lol seems to get the job done somewhat more accurately when I keep to one ornament at a time. I think it’s time to upgrade, lmk if you have any leads on a used engraver minimum 14x30.
lol seems to get the job done somewhat more accurately when I keep to one ornament at a time. I think it’s time to upgrade, lmk if you have any leads on a used engraver minimum 14x30.
I would select one… make sure its grouped up. Then click the Grid Tool and lay it out and tell me what happens. We do this all day lone with 5 lasers.
That is a good insight. I can see how that may have an issue. I am using cursive but the banner around the cursive is two vector lines. Those are overlapping the words. Is there a “how to” link to adjust what your speaking of?
I just tried nesting them together and that didn’t solve problems. Honestly, the guy I bought it from seem like he was smart enough to problem solve the issue but I don’t think he was able to get it. A short term solution is that I can not nest all of my patterns and keep it down to a minimal 6 x 6 cut out And do one at a time. Text him to get the job done but I will have to manually do this 100 times. And then 250 times for the next job. Arg! lol
Any leads on a good engraver? Ide leave today to pick it up in a commercial sspace and I have a trailer and truck. I’m in St.Paul Mn. [REDACTED]
Thanks for the feedback John, I was not using a fill, just a vector outline. I switched the cursive to a standard vector Rod type face and looks like after using the group and nesting feature it is still not marking properly. When I sampled this ornament I just did a one off and it made the cuts. I think I will have to manually cut and paste the small ornaments and slide it over for each burn as a temp fix. 350 ornaments to do atm though with assembly by Dec. 9.
Hi Kris, I did as you said and hrouped six and it did not perform properly. Then I did it at four and it was about 95% efficient. I then also changed the cursive to a standard serif font for more accuracy but the banner silhouette is cutting straight through the type it is off set. I’ve been using various engravers for several years around town but I’ve never had to do anything mechanical and this feels like it’s mechanical. Like the timing is off between motors or something. Hmm…
Can you email me the file? Let me fix it for you and then try it if you want?
[REDACTED]
Hey there! Just wanted to let you know we redacted your contact info in the post on your recent post.
Forums are frequently “crawled” for data like phone numbers and emails to add to spam/malicious contact lists, so we do it for your protection.
You’re absolutely more than welcome to Personal Message the original poster should you want to share your contact info.
Just a friendly reminder to play safe. Carry on.
1 Like
The next thing to try is the leading edge vs trailing edge setting in the ruida controller.
1 Like
Ok so I am scanning for the two symptoms that I currently know are problems. 1. If I home the job during the cutting program and then restart the job again, it never starts in the same position, it starts about 1/16th below for vector cuts. 2. If I nest my ornament parts into a 6x3.5 nest and group them, it will cut just fine. But if I duplicate it the grid feature for 8 at a time for example, the vector cutting gets way off course or misaligned. Lastly I would also say the rastering and vectoring can get off alignment as well sometimes. Is there a how to find and calibrate the ‘PWM Rising Edge Valid’?
I would test a large capital letter A with a fill layer and a line layer.
If it exhibited the symptom I would change the setting in the controller and retest.
It’s barely a calibration as it’s either ‘rising edge’ or ‘falling edge’ on a switch.
It’s not like people when you tell them to go on ‘Three’ and they kind of start around Mid ‘R’ give or take. Leading edge would be at the first sign of the T and trailing edge would be when the E goes silent.
This topic was automatically closed 30 days after the last reply. New replies are no longer allowed.