This is an example of a fill followed by a cut around the letter A:

The fill is slanted, but the cut appears to be correct.
If you have engraving that is slanting to one side, but cuts appear correctly, you likely have your motor pulse step polarity set incorrectly. On Ruida controllers, there’s a setting called ‘PWM Rising Edge Valid’ that you can change for each axis that tells the controller whether the rising edge or falling edge of a step pulse is what the motor driver is looking for. Toggling this may fix skewed engraving.
What is this setting and why does it matter?
A step pulse is a transition from low to high, or high to low. The controller will hold the line low, and pulse it high, or hold the line high, and pulse it low. The transition itself is what matters, and motor drivers will either look for a transition from low to high (rising edge) or high to low (falling edge) to accept as a ‘Step’.
If the laser controller believes that the motor driver is looking for the leading edge signal (when it transitions from low to high), it will pulse the line, and could change the direction line immediately after that. If the motor driver is waiting for the falling edge, it will see the direction change BEFORE the falling edge of the pulse, meaning that it will change direction one step too soon.
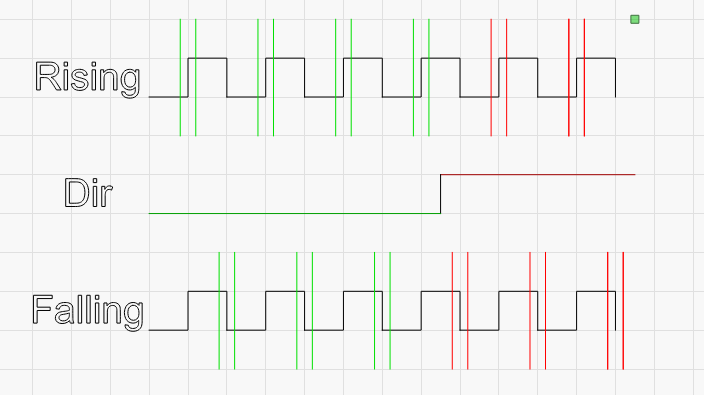
In the image above, the upper line of steps is interpreted as 4 steps in one direction, then two in the other. The lower line is interpreted as 3 and 3, and the only difference is which side of the step signal the driver is looking for.