LightBurn Software Forum
Weird dots all over my engraving
Community Laser Talk
kimmicks07
(Kimberley Grima)
July 3, 2022, 10:13pm
118
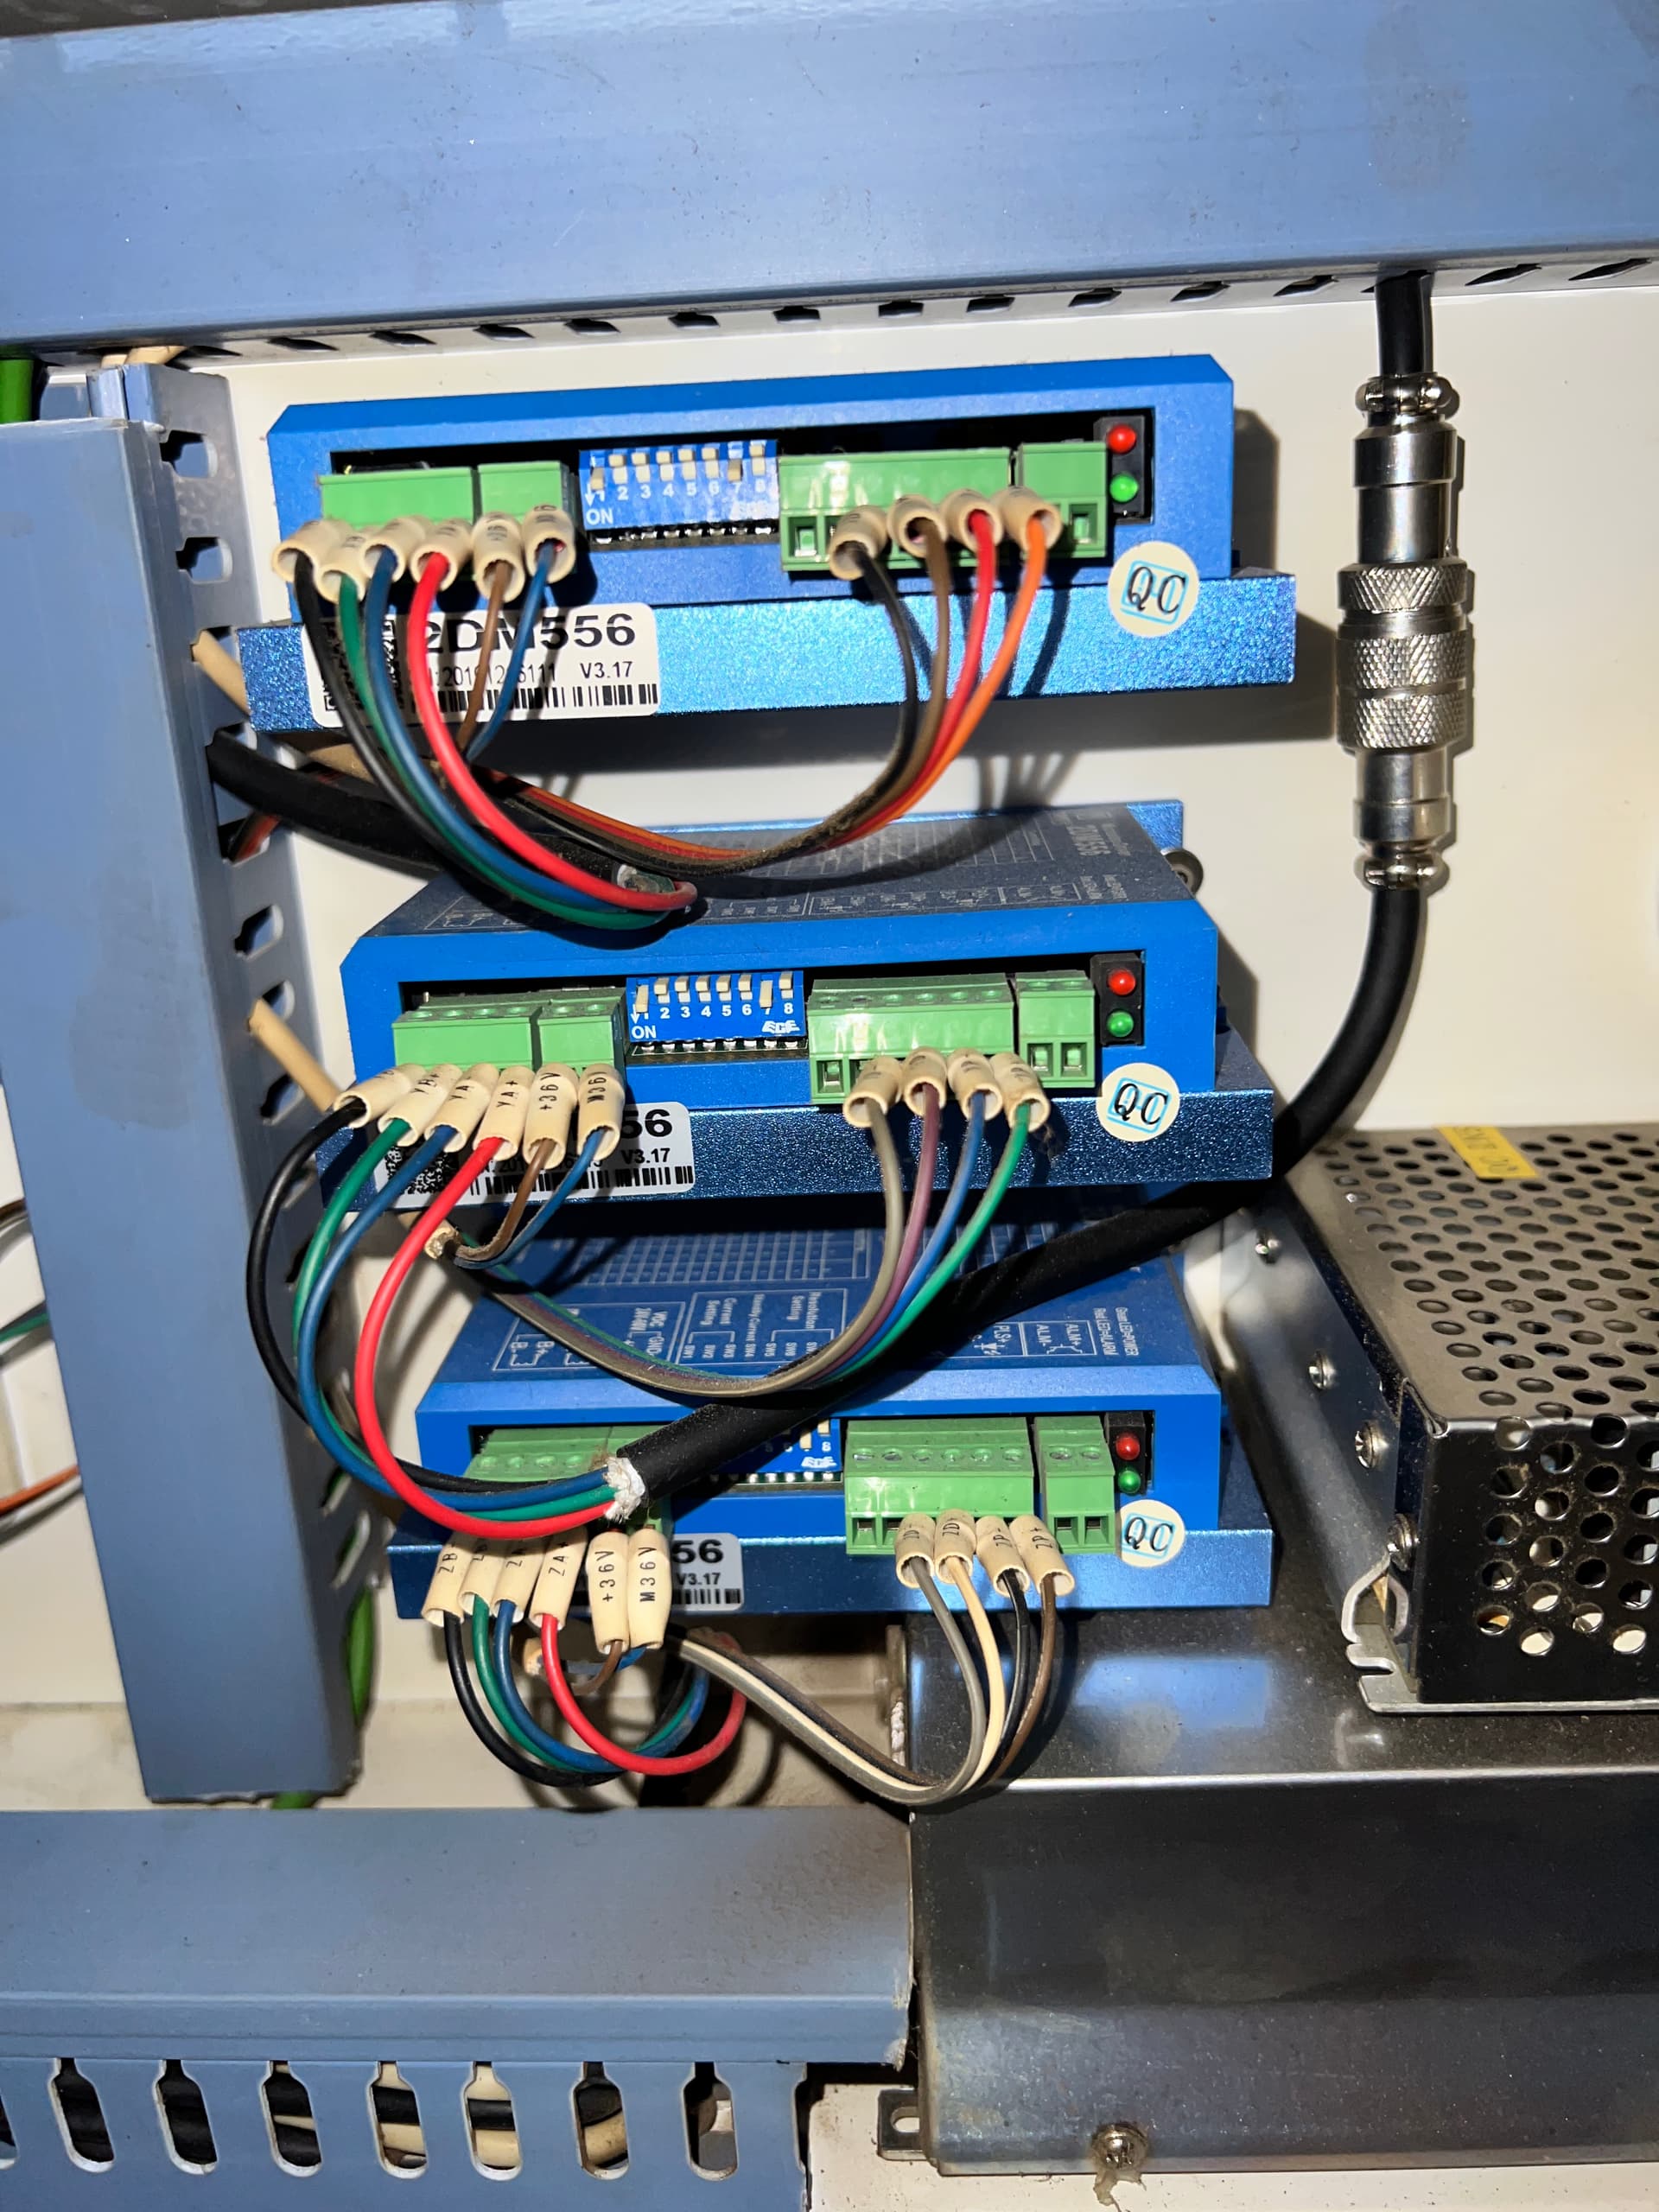
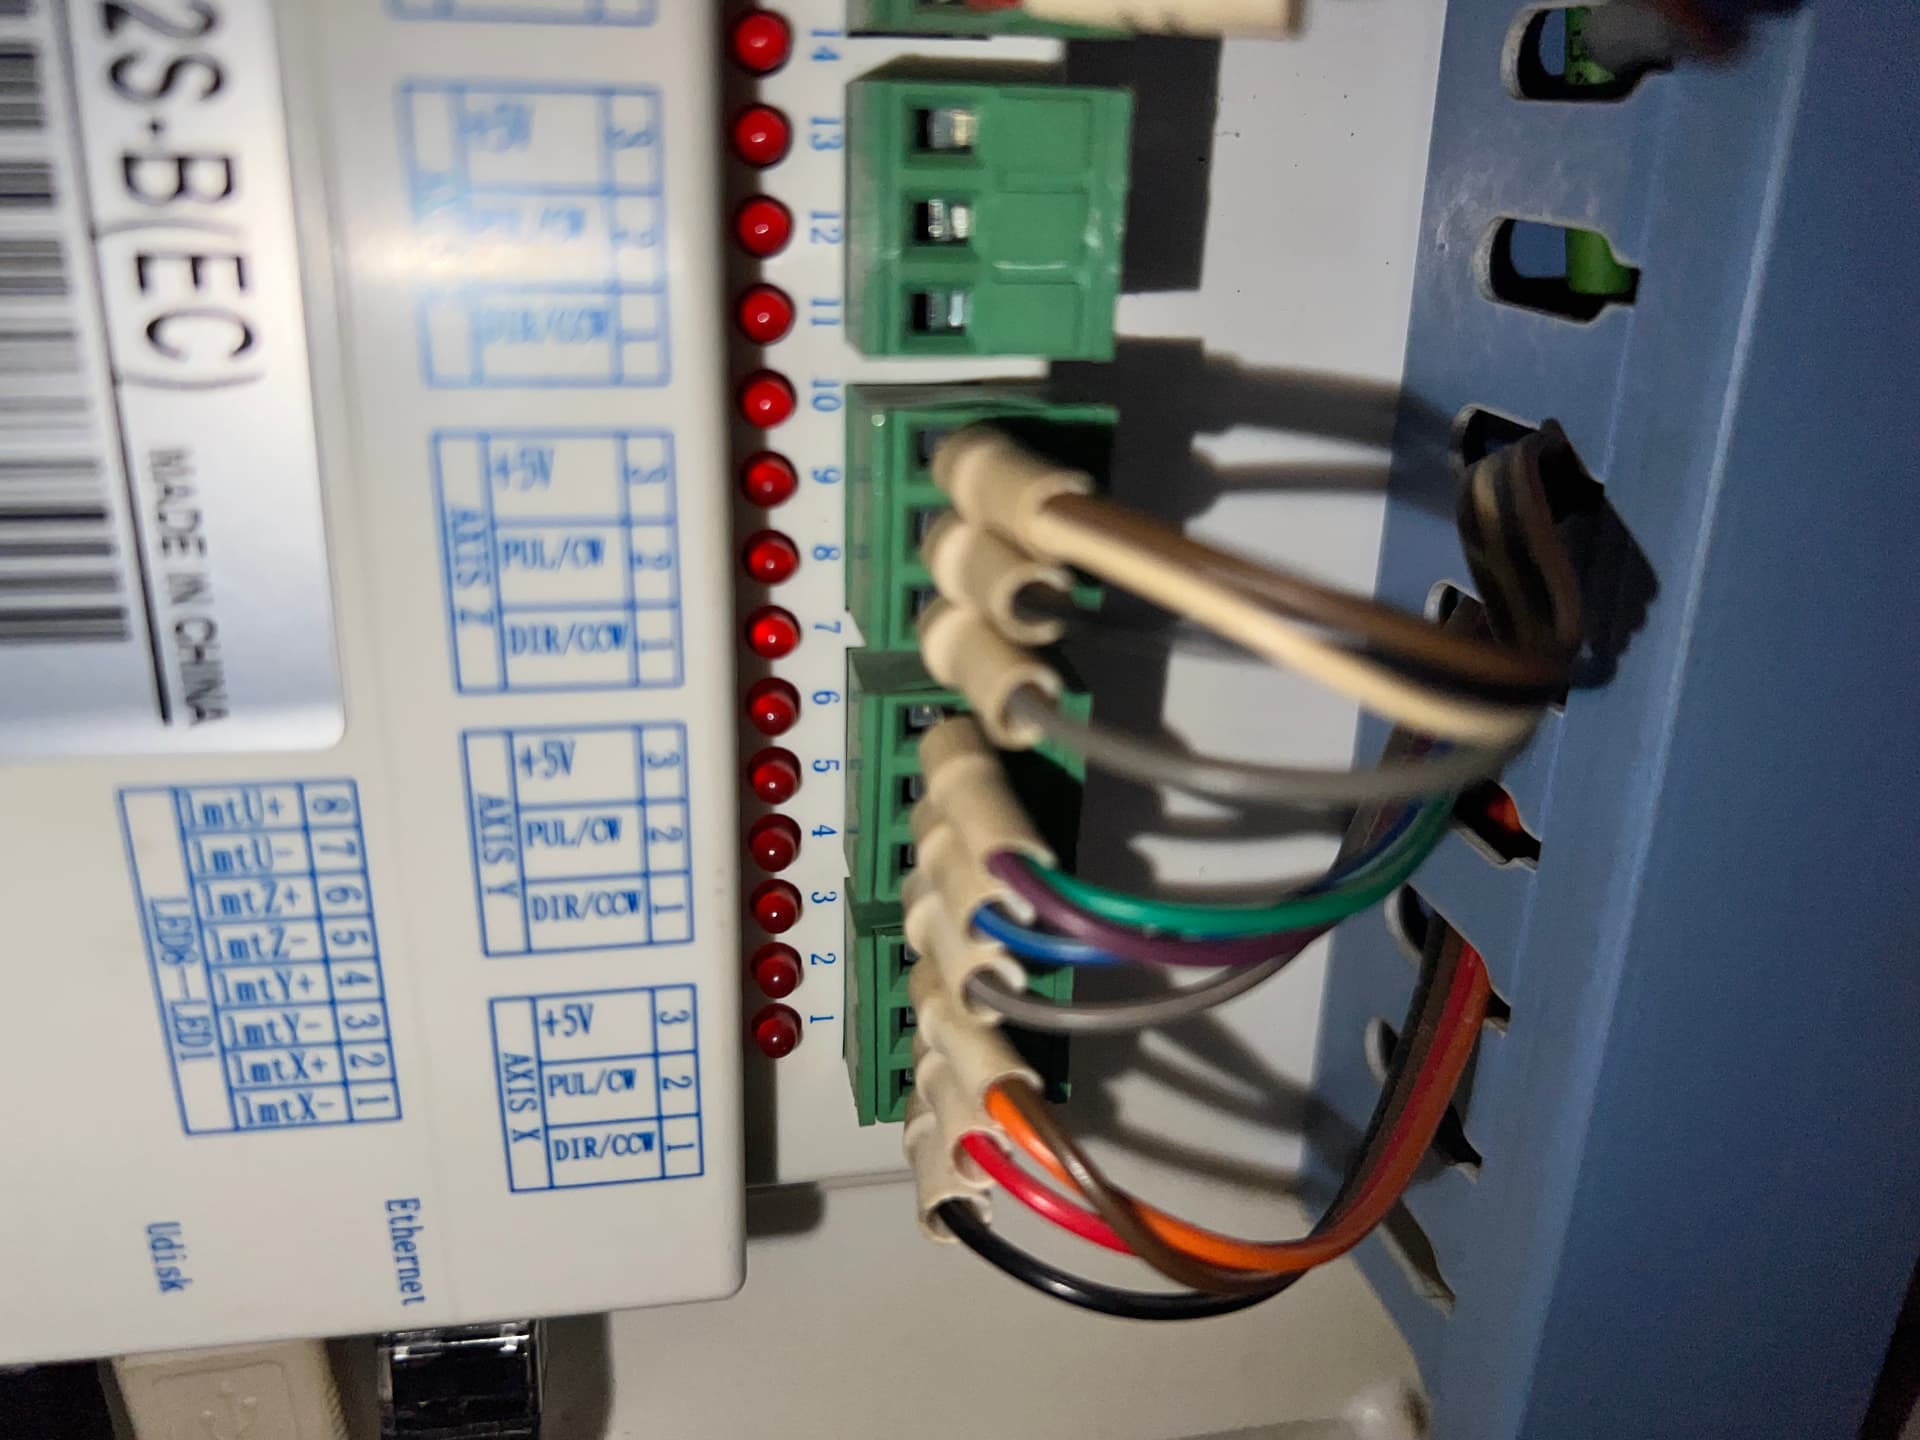
Here is my wiring
@Bklynghost
image
1920×2560 426 KB
image
1920×1440 171 KB
Adding motorized Z height to my 50w OMTECH
show post in topic