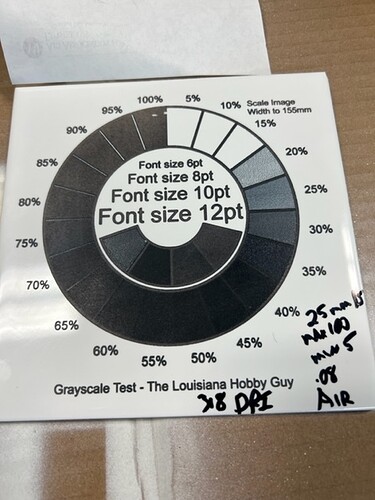
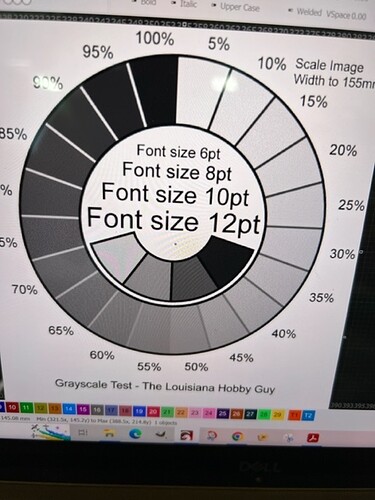
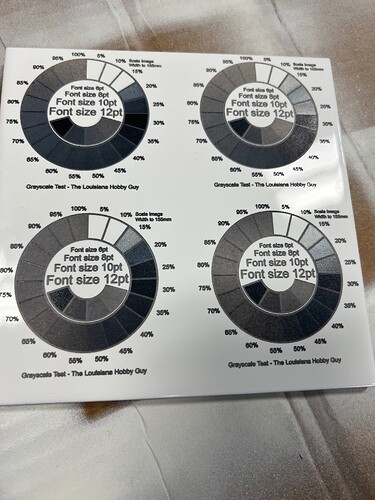
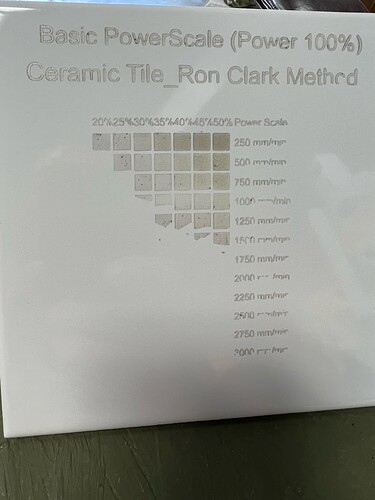
Looking to start lasering ceramic white tile. I downloaded the Louisiana Hobby Guy’s test card and ran some tests with the grayscale wheel to see if I could dial in settings. Using the NWT method with Rustoleum Heirloom White. So far, it seems like there’s no really good results to show the varying shades from 5% power to 100% power. Any ideas? Or is XTool D1/10W really only going to get me more of a black/white result and if I want to do photographs, I need to move to wood? PIctures attached. Next, I’m going to try the photos test card, then the raster card. Or just use LB’s test grid. Also attaching the test card image so you can see how my results are nowhere near the file image. In fact it seems like my results in the 40-50% range were darker than higher powers.
Hey Tim,
I could be completely wrong, as I am just starting my testing with my D1 Pro 20W, but I believe if you slow your speed or increase power too much, you burn through any chemical reaction that is happening with the metal in the white paint (I believe it’s titanium) and the surface layer of the tile. It’s as if you have gone too far and burned up any response from the paint. Your second tile https://forum.lightburnsoftware.com/uploads/default/original/3X/e/8/e8f182fbe13b21b37f8f6bc353232a537f7ef316.jpeg looks great and the last tiles look like you have a targeted range. If it were me, I would change your power settings starting from 20% (which appears to be your white point), to 22%, 24% and so on to the black point, which appears from the photo to be about 50% power mark and you should have a larger grayscale range. Please send me your feedback, I am curious if it works out for you. I am from the photographic world and this has been an interesting transition of outputs!!
Many use that method…
That should give you some information.
TiO2 (Titanium dioxide) is the molecule that melts and bonds to the surface. The second link is for a different way to apply it, rather than paint.
Good luck… don’t forget to post photos of the finished product and how you did it…
![]()
Thanks for the link to create unique test grids. That will be perfect so I can narrow down on the power/speeds that seem to work best, rather than spend an hour of time, most of which is wasted for power/speed I know are no good. Been working on slate coasters and wood etching for my wife, so haven’t gotten back to tiles in a while. Taking the day off work today to rearrange my workspace and low and behold a friend literally gave me an Omtech CO2 (SH G350) 50 watt, so now I need to rearrange and create a space for it…and learn CO2 vs. XTool 10W diode… I wish I was retired…LOL
Blockquote
I’m also playing with this technique.
In my opinion, there is a narrow range of heat that will work. Too little and the TiO2 in the paint doesn’t fuse and too much it’ll be burned off (hence the “white” at both extremes in power).
Perhaps you could achieve better gray scale range by first, determining what settings produce the best black, then try to do the gray scale tests with some sort of black/white processing (dithering, etc. like as used for news print). This lets the gray be determined by the density of the black spots.
Using greyscale is generally advised against as the heat required to adhere the TiO2 to the surface of the tile is too great to allow a good depth of shading. This is why almost everyone who does high detail photo engraving uses dithering.
How do you know which paints have the Ti02 in it? I’ve purchased white 2x paint and it doesn’t say that ingredient is in it.
I believe I used this site for Rust-oleum paints… They have their paint contents specified. TiO2 content is also listed…
![]()
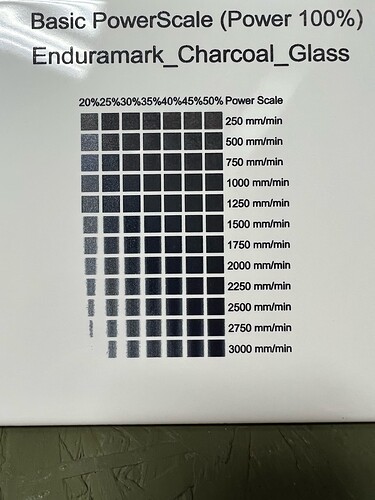
Created a unique test grid with the website below. Going for power from 20-50% in 5% increments and speed from 250mm/m to 3000 mm/m with my XTool D1, 10W, giving one more run on the Ron Clarke Method. I also bought some enduramark and will try that as well.
I didn’t like how small the generator file was, so I grabbed a corner handle of it and expanded it to cover more of the tile. Hoping it works. I do see that the first pass of lettering didn’t even score the glue so giving it a second pass in fill mode at a slower speed. Should be cleaning it off soon. fingers crossed.
https://www.o2creative.co.nz/laser/lightburn_basic_generator.php
I have some LBT100 that I use with the co2… with the led laser it won’t fuse it to the tile in my experience…
Let us know how it works out…
![]()
Not great results… I seem to be going backwards. I don’t know if it’s because I re-sized the file or not. I may go back to the full test grid on the Enduramark or just stick to wood and slate coasters…LOL But now, it’s personal. ![]()
Also attaching the test grid file. I don’t follow how to read the cut/layers to see how it cycles through the power settings, but the picture did seem to indicate it was doing what it was supposed to.
Ron Clark_Tile_targeted grid.lbrn2 (331.1 KB)
Putting the Enduramark in now. I saw it on Build Dad Build and he was impressed.
On the test file generator website, I wasn’t 100% sure if my laser only has max power, not min and max, but I can’t find anywhere that it would show min settings.
Doing a fill or image there is usually no minimum power setting.
The machine computes the overscan so there is no need for a minimum power.
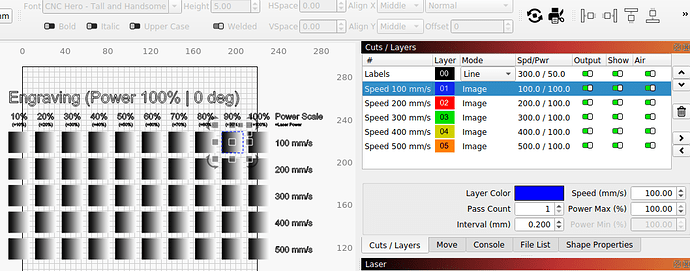
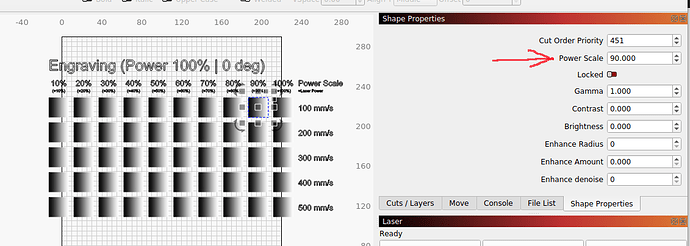
The grid uses the shape properties to vary the power levels. Select one of the shapes and go to the shapes properties tab in the cut/layers window.
![]()
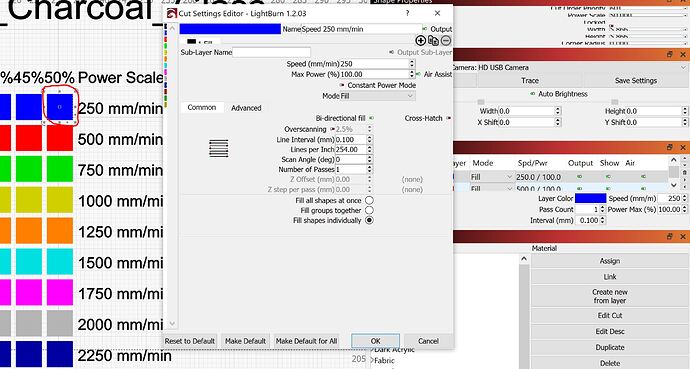
When I select the 50% power and 250 mm/min square, here are the properties. Max power shows 100%. I would have figured it would just say power = 50%
Here is a test pattern the top line is the blue layer and I’ve highlighted the 90% box…
The right-hand tab is ‘Shape Properties’ and contains a percentage of the layer value…
![]()
Thanks Jack,
I didn’t see that little shape properties tab. LB has so many cool tools. Just need to know where they are located…
Enduramark completed. Washed off with water and a magic eraser. I think I have options now… Pretty much exactly in-line with the original grid, only now narrowed down even further. Now to work on editing photos and getting the dithering dialed in.
Really appreciate all of your help!
I ran several speed and power combos. No air assist. 1000 mm/s at 30%, 500 mm/s at 25%, 2000 mm/s at 50%. Settled on 2000 mm/s pretty much just for time to finish the job since there wasn’t much of a difference in quality.
Then started playing with dot-width correction and the different dithering techniques. Dot width correction of 0.04 seemed to yield the best results for brightening the darker areas.
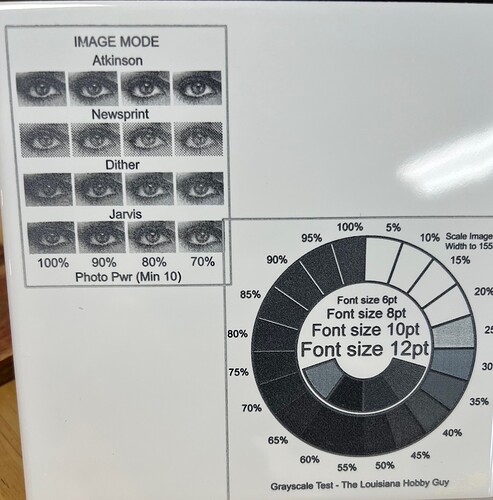
The photo was from online in color. Used Imag-R to crop, change to grayscale, resize and set to 300 DPI, then downloaded and imported into LB.
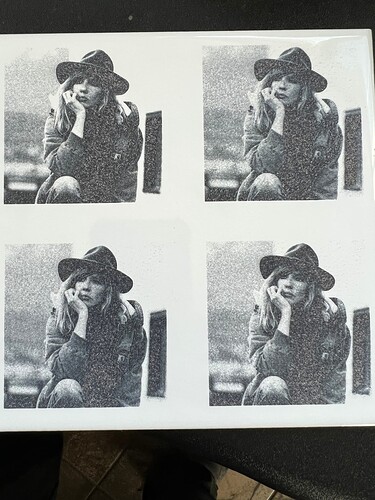
All of these are 2000 mm/s, 50% power, 0.04 DWC, no pass-thru. 2.5% over-scanning.
Starting top-left, clockwise. Atkinson, Dither, Stucki, Jarvis. I think the Stucki and Jarvis yielded the best results in the detailed/darker area like eyes. It’s very interesting to see how the image changes, depending on the angle viewed and amount of natural lighting.
Wondering what would happen if I did everything in LB or everything in Imag-R with pass-thru.
This topic was automatically closed 30 days after the last reply. New replies are no longer allowed.
