Has anyone else out there converted to Russ’s Lightweight head setup with the 24mm tube options?
I have fully converted my top rail 16mm tube to the new lightweight head with 24m tube and have about 6 different lens tubes setups.
Has anyone else out there converted to Russ’s Lightweight head setup with the 24mm tube options?
I have fully converted my top rail 16mm tube to the new lightweight head with 24m tube and have about 6 different lens tubes setups.
What advantages have you discovered to accompany the conversion?
well, the main reason I converted was beam alignment.
no matter what I tried when making the beam parallel to X and Y, M3 was too low and was clipping on the head.
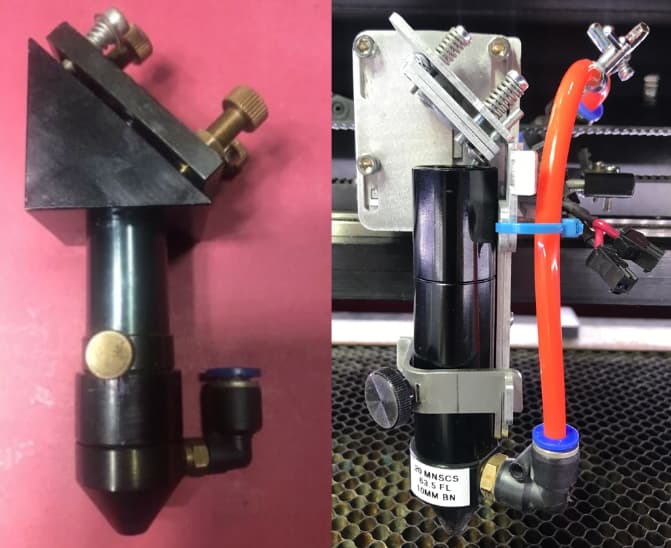
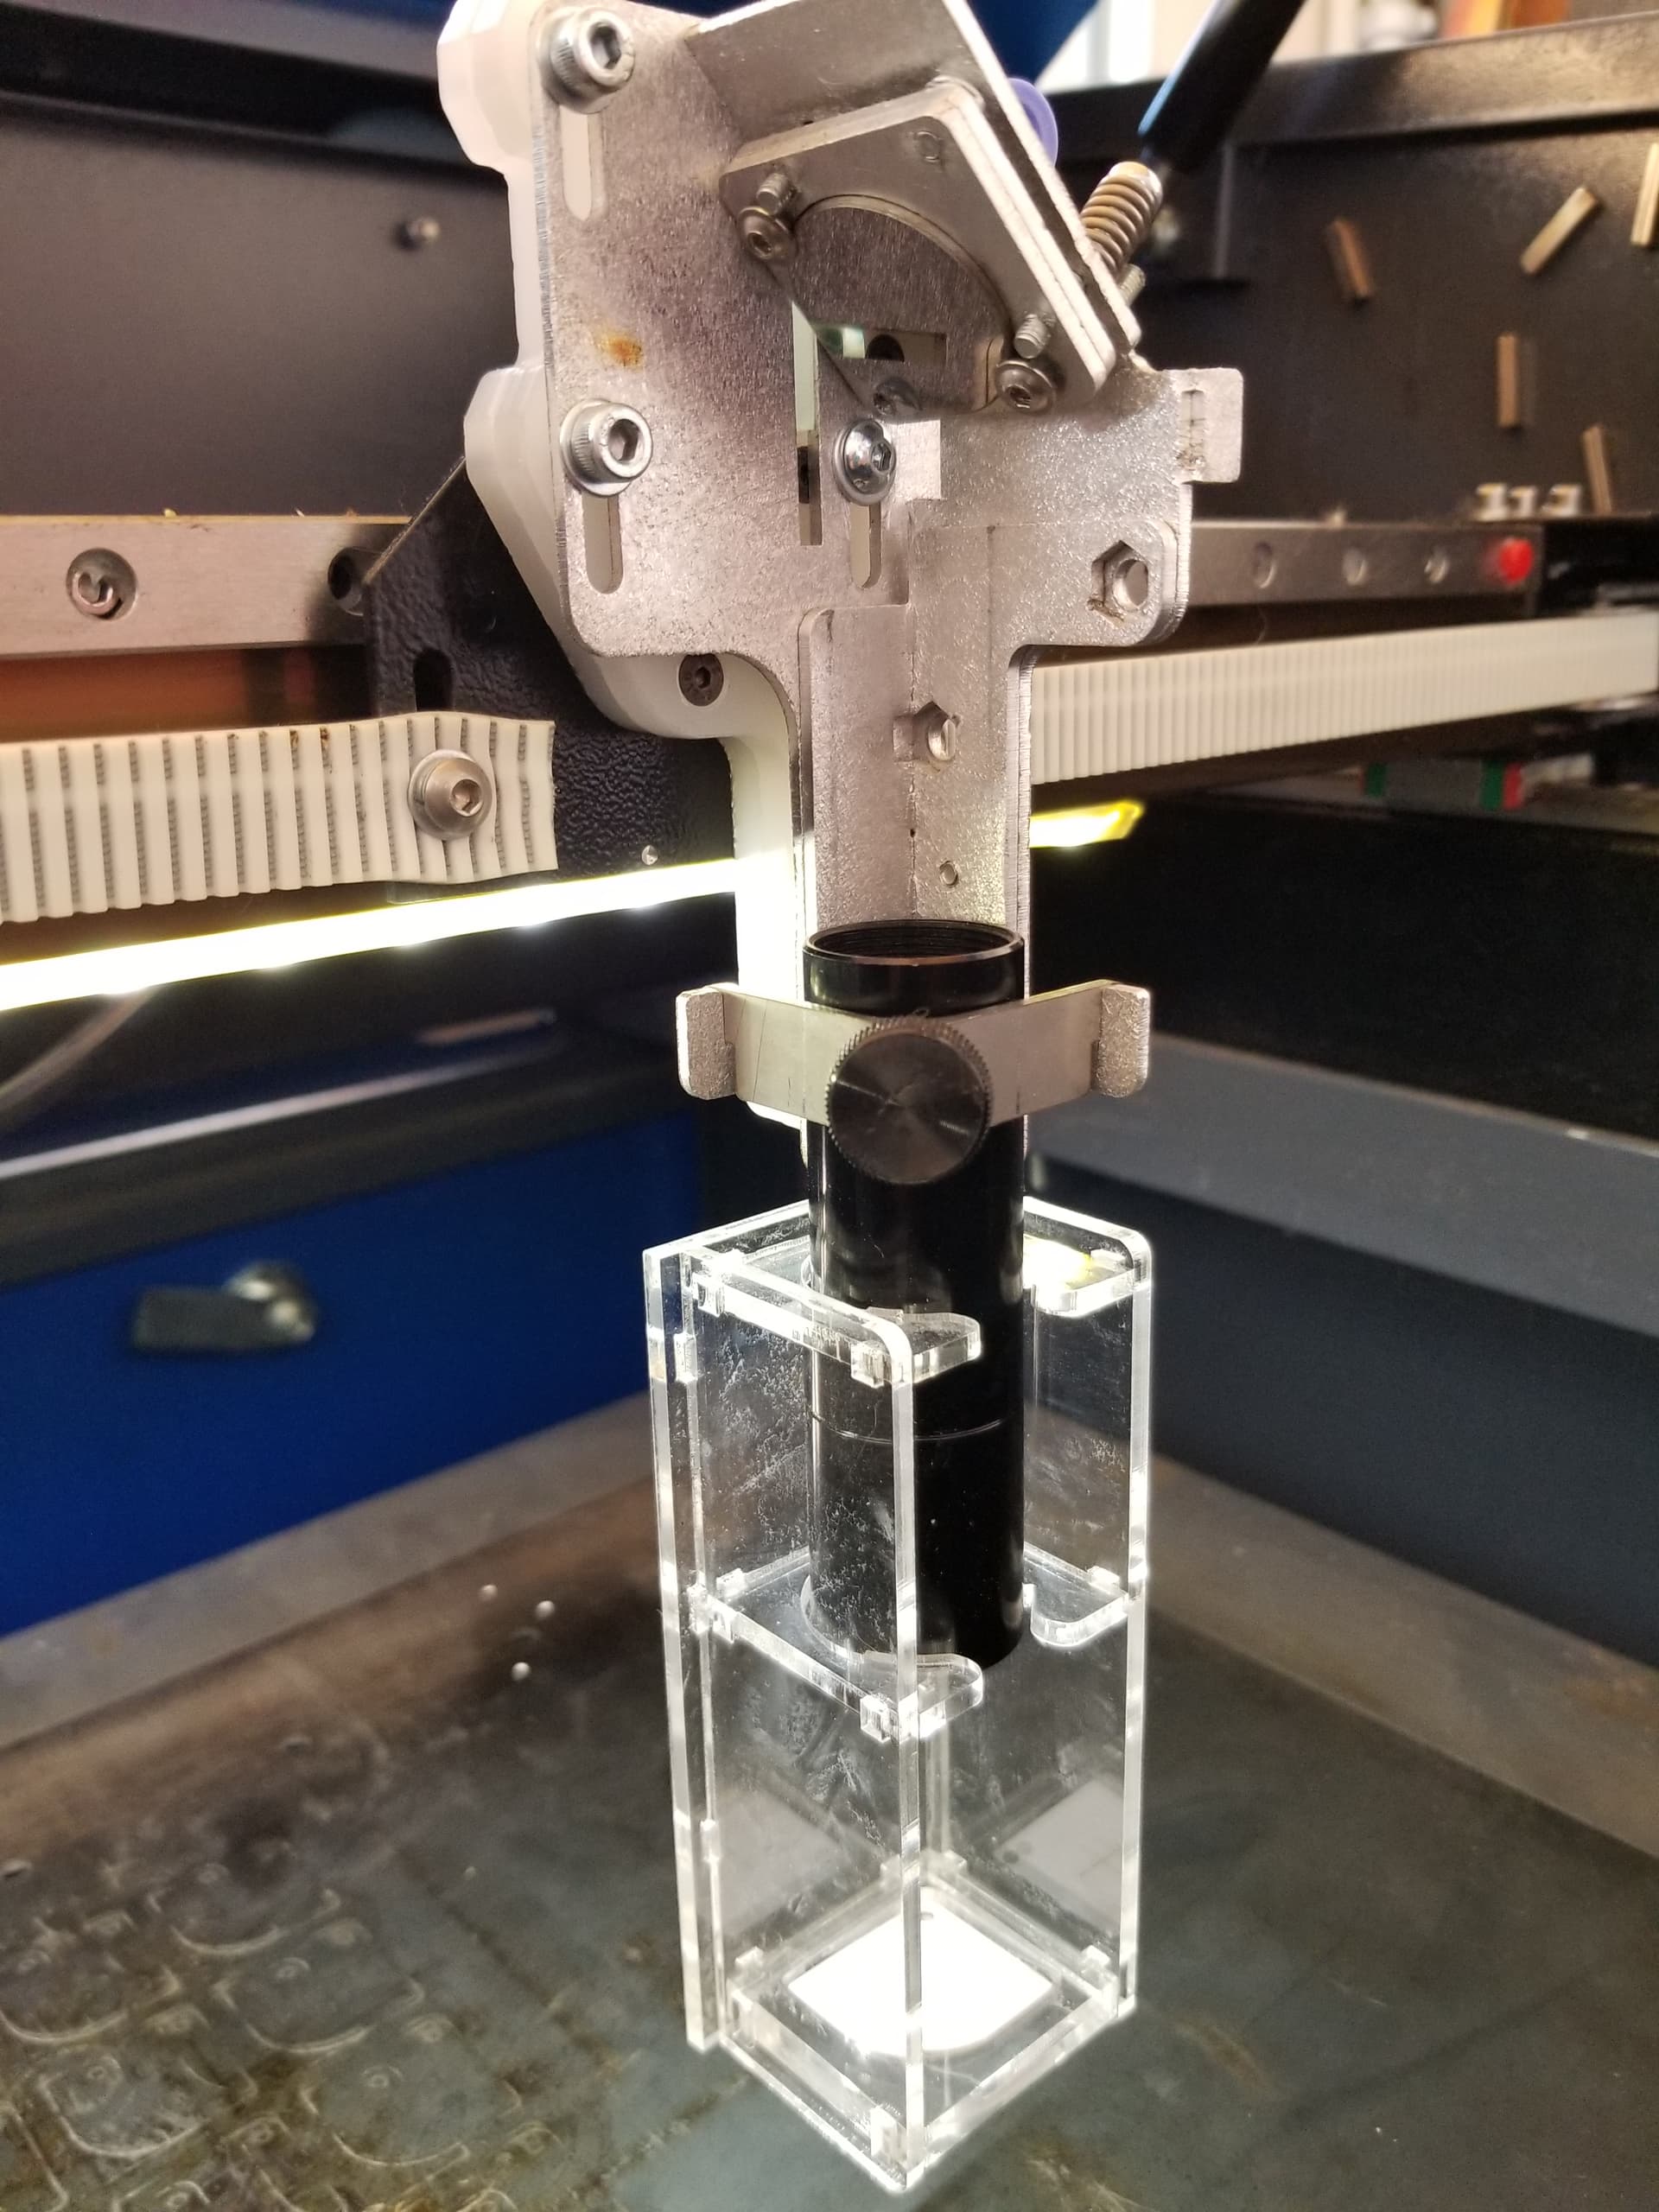
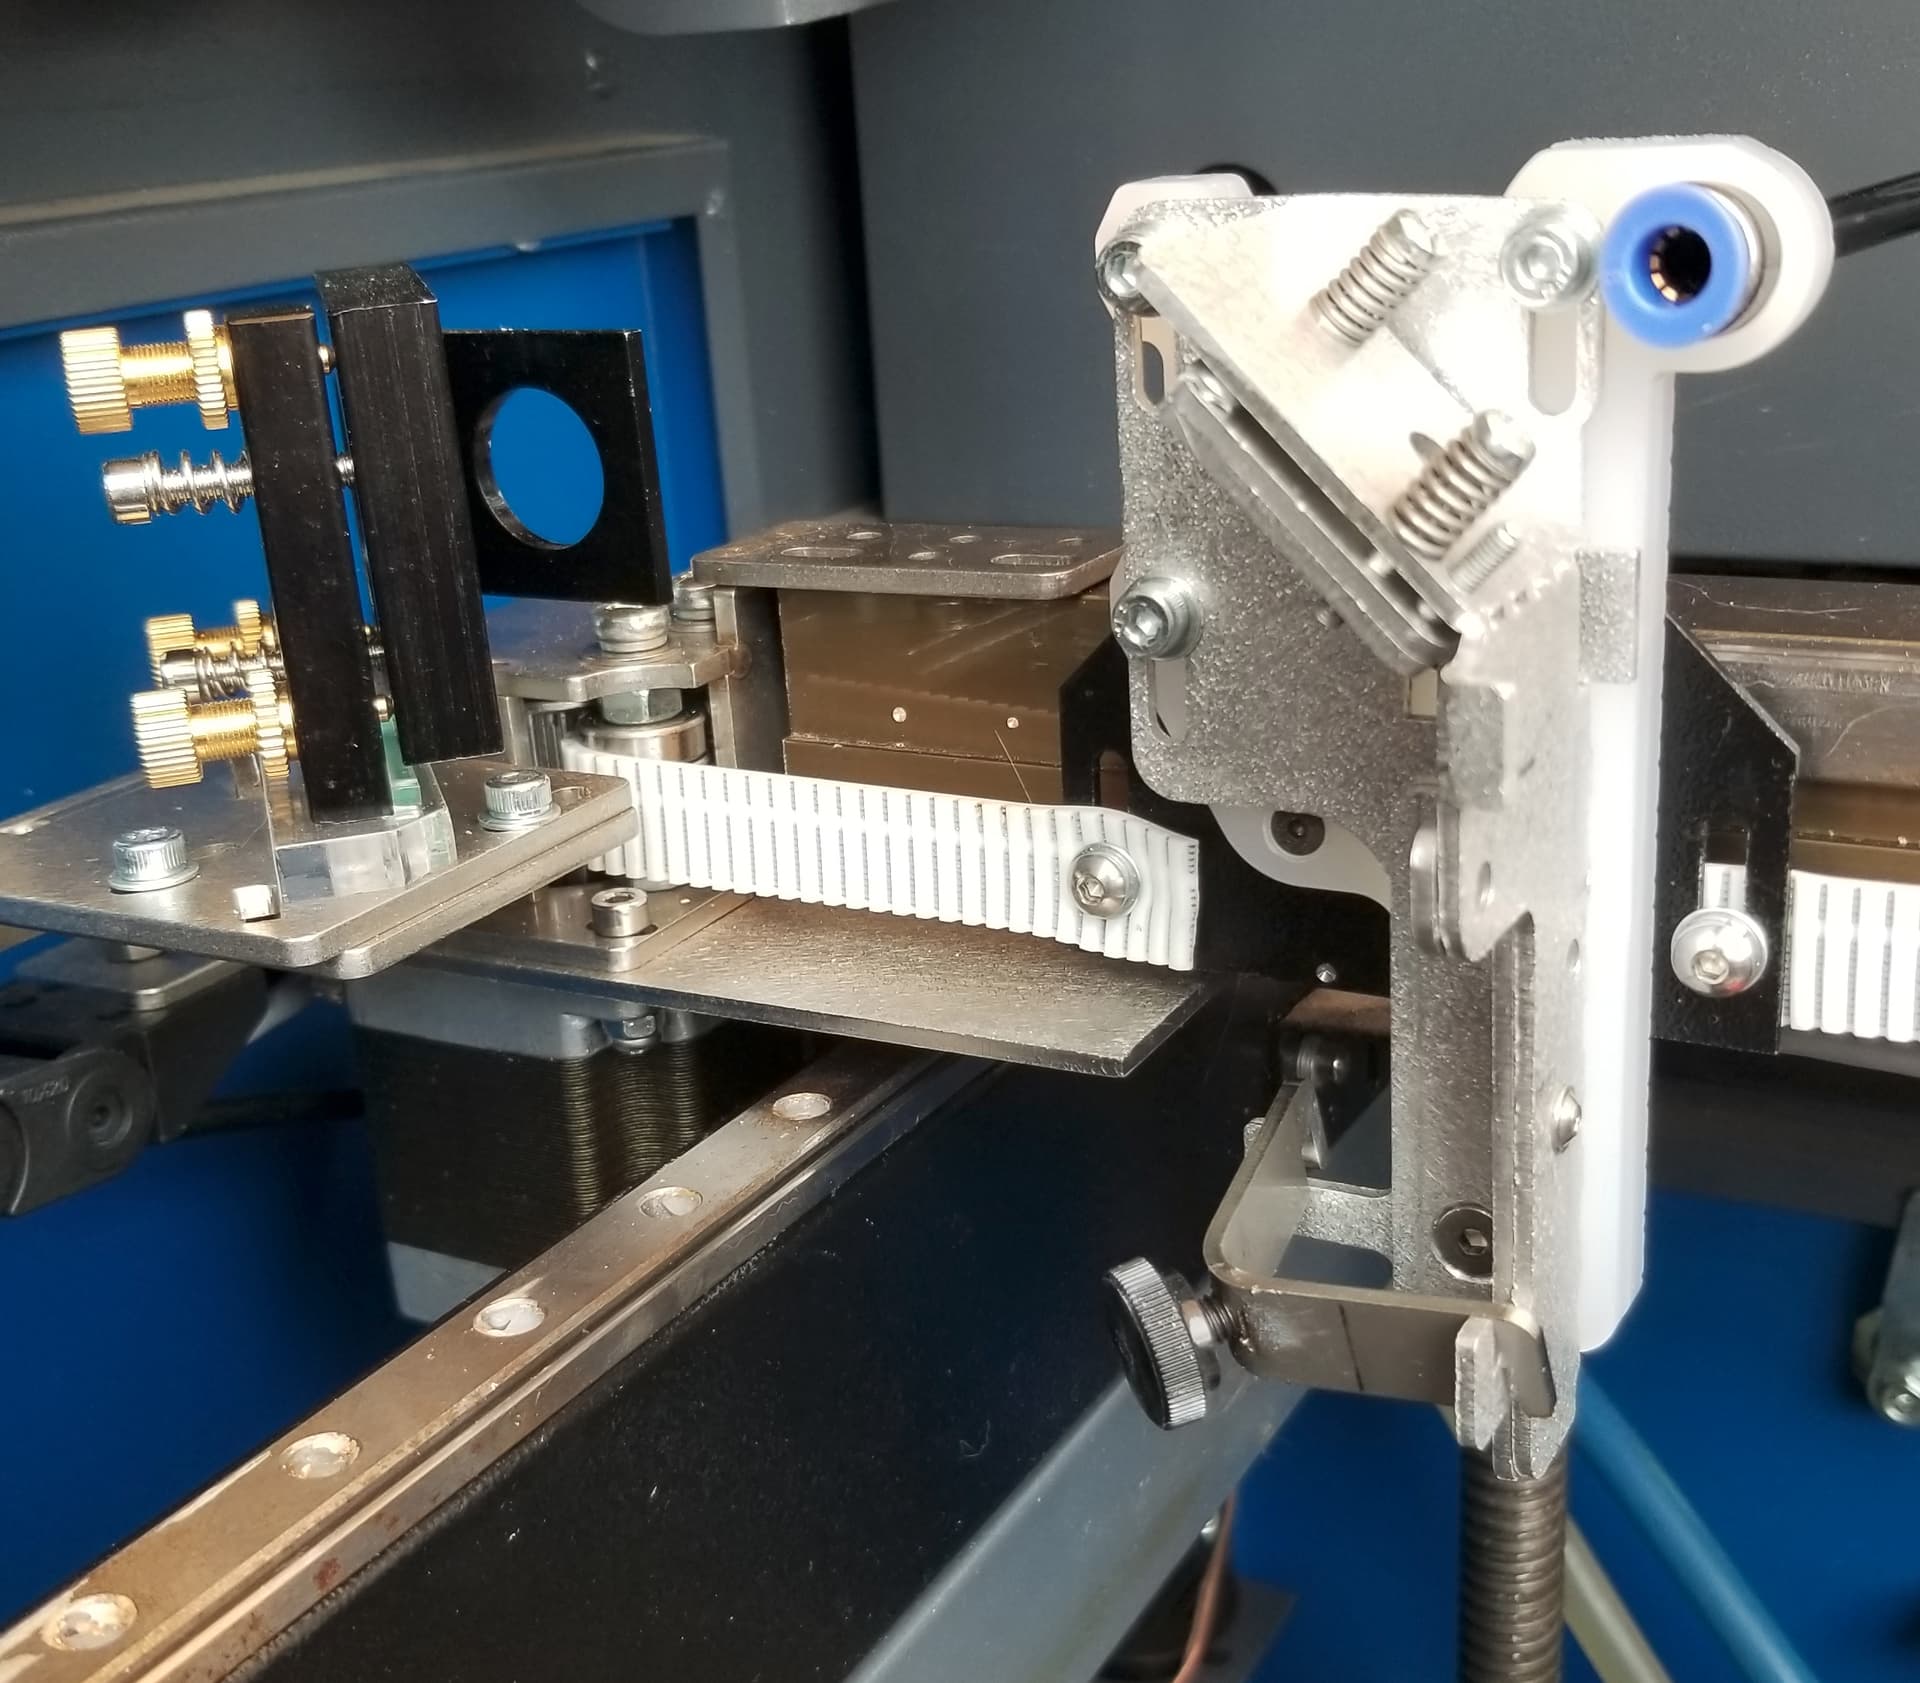
My new cloudray C series head mount is fully adjustable in Y and Z. It is specifically for a 15mm top rail, but I was able to modify it for the 12mm rail bearing.
I also have increased my speed. Prior I could only do about 400mm/s, but now I typically run 600, which saves me a lot of time on engraving, and has allowed me more contrast when needed for lighter burns.
WIth the longer adjustable 24mm tube, I can now easily do pass-thru getting below my front cross bar with my adj Z honeycomb. Prior to this change, my original 16mm tube with 18mm lens would not slide down low enough below front rail.
Before and After
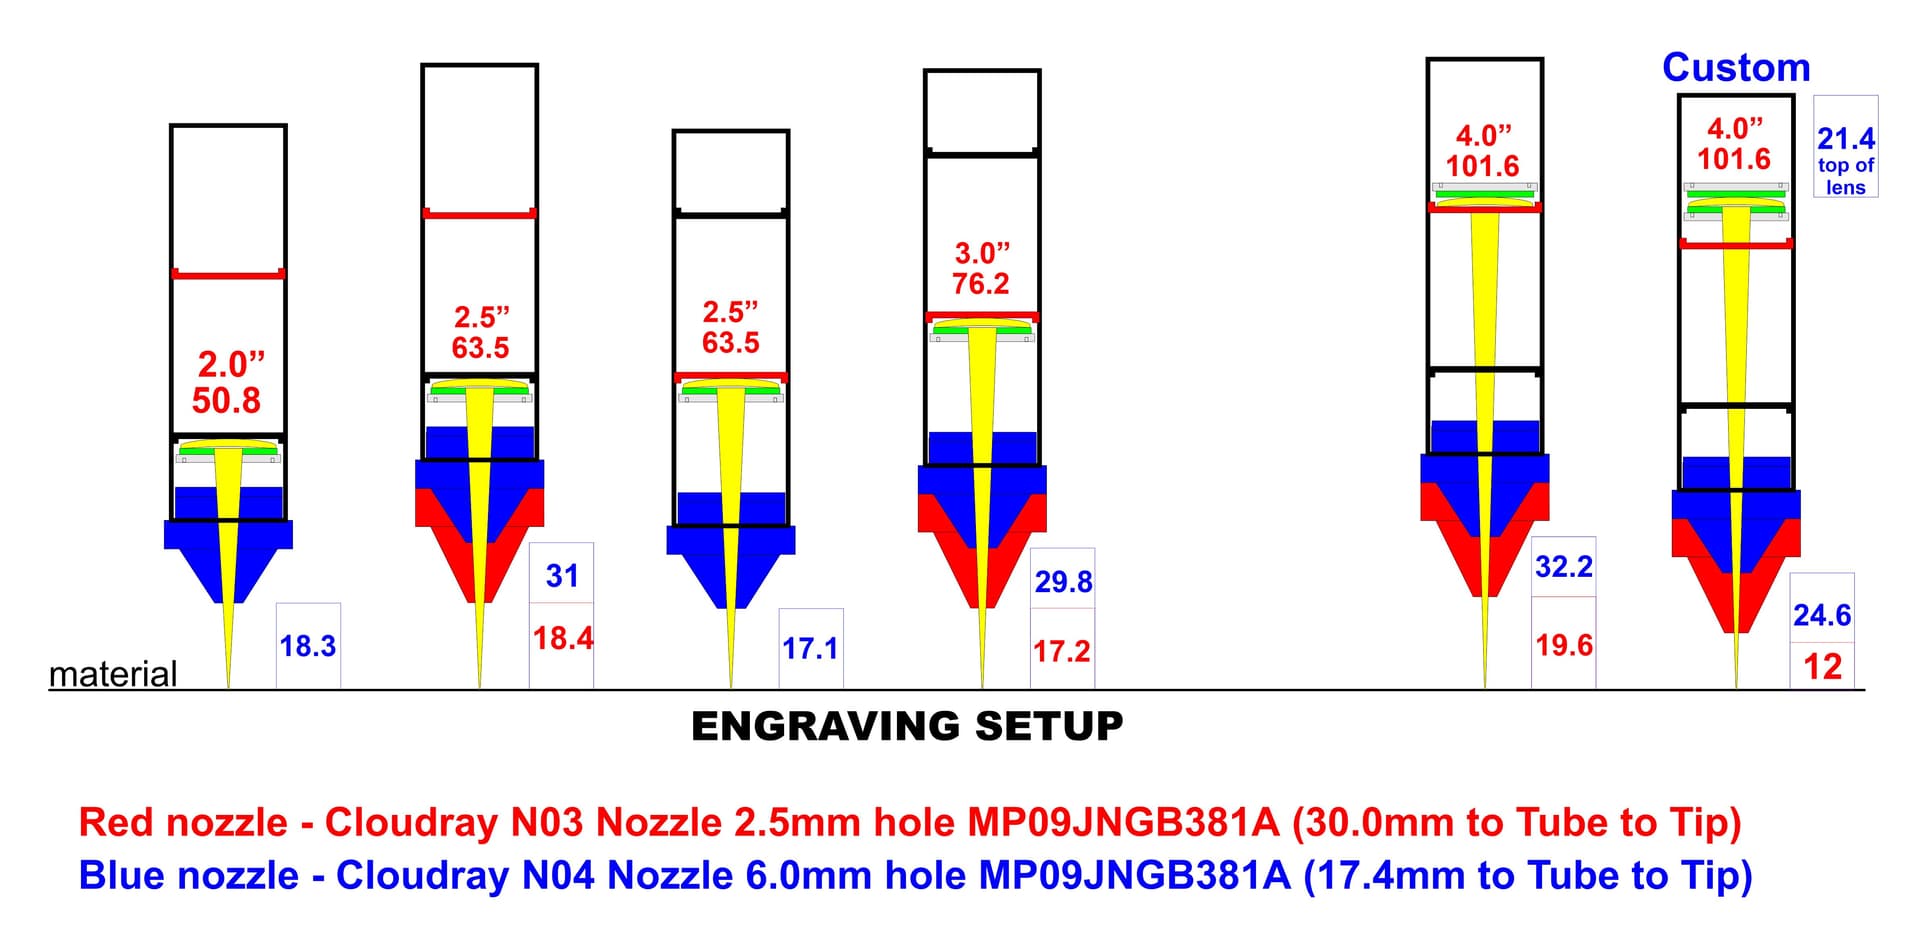
I’ve also come up with about 25 different lens setups with this new tube.
Factors of Diff Lens / Focal Lengths / Nozzles, Flat up / Down / Compound, etc.
I can see that there would be a few benefits to such a kit, but what I’ve found is that I’m uncertain how to determine the specs of my red/black to ensure the right kit is selected. I also have not found a link from which to order.
Talk to Russ Sadler, he is a great guy. I recently bought the lightweight head and mount from him for my red and black 60 watt CO2 with the Front facing belt. He was very helpful. I am still adjusting the mount, and may need to move it 1/4” to the left, as my graphic, when aligned by the camera, is that much to the right when engraved. But I will say, when I get it done, it will be a great addition.
Charlie
The adjustable head bracket is from CloudRay. Adj Bracket
You can also get the universal C series 24mm tube from CloudRay. 24mm Tube
You’ll have to email and get the actual LW head from Russ.
Here’s some examples of what I have been able to do with this tube, since you can flip it over and have different lengths (notice the red / blk lens stops). Also, if you use two locking rings, you can move it up or down to custom lengths.
Actual pulse distances will vary, but these are ballpark.
I have an 18 mm diameter lens and the mounting assembly for the nozzle brackets are horizontal, while it appears this lightweight version has a vertical bracket. It doesn’t look good for my red/black clone.
I got my order delivered super fast the next day from Russ and I am just waiting for the Cloudray half to come now from China. I will then set it up as per his videos. More than happy with my speed now but it will be insane after. I want it really just to improve alignment and the messing I have to do with my tube, as my laser has a gantry cover.
hey fred, send a pic of your gantry and lens tube.
Awesome Paul, agree Russ is great, but every laser mfg might need a tweak or 2. I heavily modified mine for the 12mm rail.
Do you have Red Dot now Paul, as hanging it off the side was a pain for me. Haven’t had any issues with the combiner, not any noticeable loss of power.
No, I have a 150w laser by Atacam, which is basically just a UK modified Senfeng 1390. Really happy with it but just needs a bit of pimping.
wow, thats some power, double my 80.
I was able to cut 3/4" ply with my 4" lens setup. 5mm/s @ 85 went thru on 1 pass.
If I ever buy a new tube, will get red dot built in.
I have Russ’s head, ‘rack & pinion’ and tube/mirror mount on mine. I like it very much.
Don’t get too excited with the ‘high’ speeds, your stock machine is probably capable of ‘out running’ your lps response time.
I’ve had mine up to 1650mm/s, great fun, but pretty useless, as far as I can tell. If you’re trying to do something, you need to keep the reality (physics) of what’s going on in perspective.
Lps are rated at 90% power <=1mS. Assuming the 1mS, the fastest it can respond is
1s/1000 =1ms… or you can do 1000 dots in one second.
1650mm/s is about 60 inches/s.
With a lousy 64dpi I’d have to put down 60inches * 64 dots = 3,840 dots, about 3.8 times faster than the supply can respond.
At 256dpi it’s 60 * 254 = 15,240 dots or over 15 times faster than it can respond…
What does it do when it’s driven faster than it can respond? I’m pretty clueless here, if you know any technical details, please tell us all… ![]()
I’ve set my pwm period to 1mS and the power at 50%.
At 500mm/s you get a brown line… At 1000mm/s you get a brown ‘dashed’ line… Speed and frequency allow you see the on/off of the pwm. Again, great fun, but not real helpful in life.
The real advantage is, my acceleration is up around 60,000mm/s^2 so very little overscan compared to the big original head. Spends more time working than changing direction.
Ease of alignment, this is a no brainer for anyone that’s dealt with the original Chinese machine… all of us.
Easy to swap lenses/tubes/nozzles.
I believe it runs cooler and more quiet, but have no supporting data, just a ‘hunch’.
One of the few heads that vertical alignment is made possible even with a bad table. I have a sloppy table, which makes the Z alignment difficult at best…
These need to be renamed back to the original format, which here is dxf.
mk2 targets and 3mm holder.dxf.txt (68.3 KB)
No drag chain. Reduces mass on both axes.
All details for lightweight head design .dxf.txt (411.1 KB)
ALL PARTS AND ASSEMBLY DIMENSIONS .dxf.txt (2.0 MB)
Lenses, tubes… similar to @CadJoe lens diagram.
Here ‘was’ his price list, don’t know if it’s changed.
Rack & Pinion side…
If you wish to pursue this, send me a pm and I’ll send you his email.
There is virtually no support from cloudray. These are Russ’s designs and he will help you.
I had an alignment issue and he re-designed it and sent me the parts/dxf via the ‘post’… even offered to his help via the phone.
Can’t say enough about him or what he’s done for the laser users in general.
![]()
Nice post Jack.
I’m working on coming up with a Rack / Pinion design for my top rail now. Thinking I might have to redesign my Stepper mount, or remount it on top of my smooth pulley mounts. Still working on best options for fully adjustable pulleys, so I can flip belt over. Just changing my idler pulley to smooth helped a bunch, but still see some banding around 40% power.
Main reason I posted this, so we can share ideas for this LW head setup.
Agree 100% about Russ. Just had some custom items made, doubled it to ship a set to Russ to use.
Interesting, so if no chain, what does your air tube do when head moves?
That plastic is ultra flexible just follows the head around. It’s secured to the center back of the X gantry.
Not the best video, but…
I need to do the idle pulley thing myself…
![]()
Ah, ok makes sense. I never removed the 5v cable for the Red Dot, so just have a female plug hanging there. Keep thinking I might need it for something down the road, like fan or wifi cam, or something.
What material is that? Like a Romark or IPI ?
Ahh, very cool. So after you engrave, you paint the back?