I mostly work on cutting airfoils, and do not need to close
my paths. I use Profili to generate my airfoils, leading edge
(LE) and trailing edges (TE) and spars. Other times I will use
Light Burn to modify the LE, TE, and spars.
When I add lines and shapes, I make sure they are paths.
Most of the time editing the airfoil with node tool will work
for the first few edits, and then it begins to have problems
with identifying the line with the pointer tool, and Trim, Extend,
Delete will not work properly.
Most of the time the node tool will do nothing. Other times it
deletes to much of the line.
I go through and make sure I have overlapping lines before I
trim a line or delete a node. I also have problems with extend.
Horizontal lines are easier than vertical lines (paths).
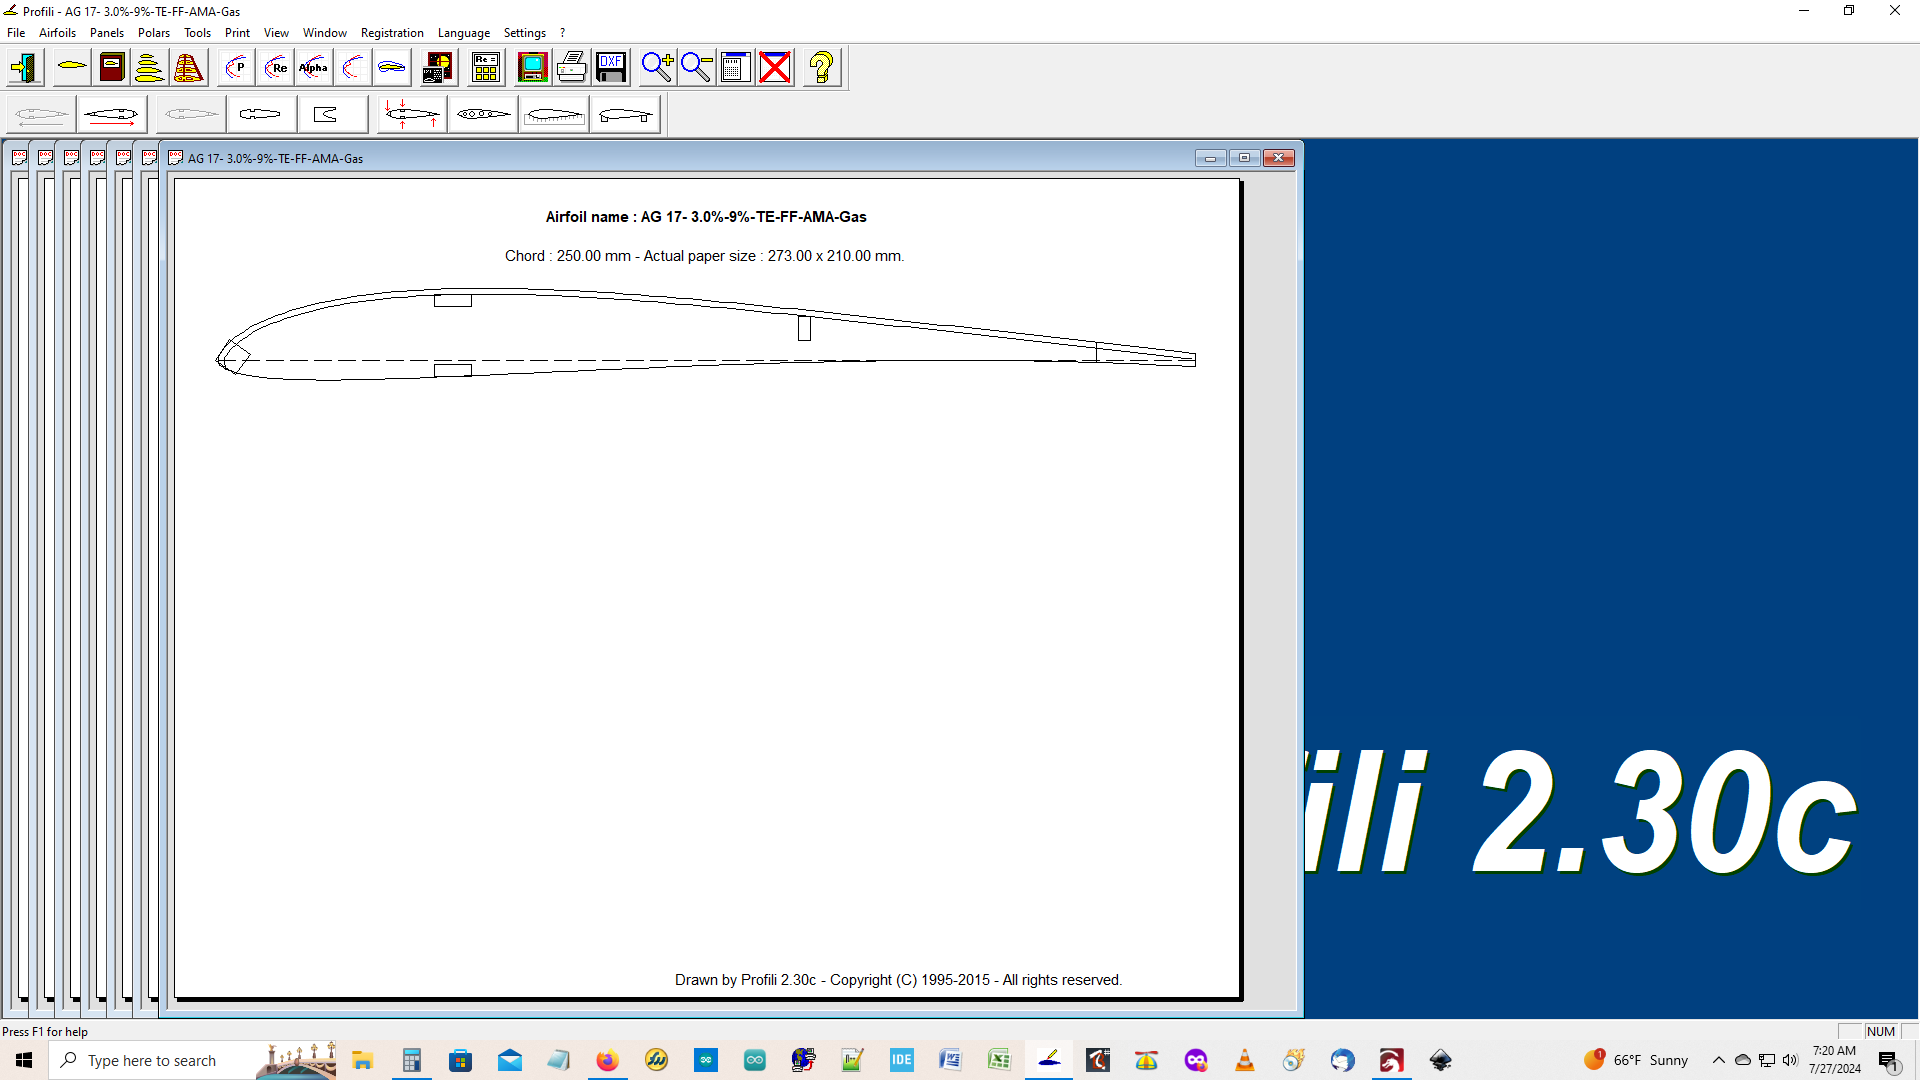
This airfoil has the Leading (LE) and trailing (TE) edges. The spars, and the 1/16” sheeting on the upper 30% of the airfoil. But 1/16” sheeting extends past the upper ~30%, and needs to overlap the spar at 30% and terminate.
Profili saves the file as a .dxf file. Sometimes I need to add a few shapes to change the LE, or create a foot on the TE to make building the wing easier. These shapes are converted to paths before I edit the airfoil.
The view of the airfoil in Profili before it was saved as a dxf file.
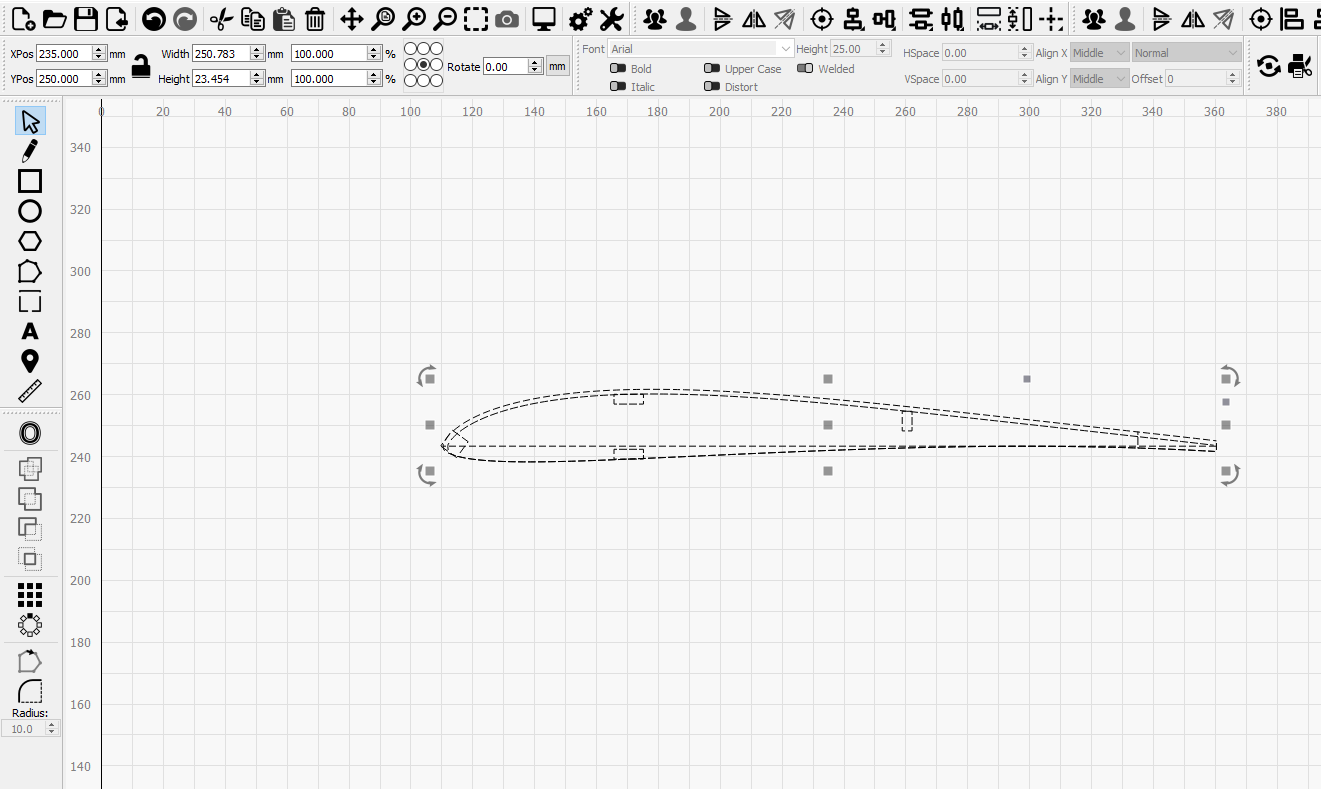
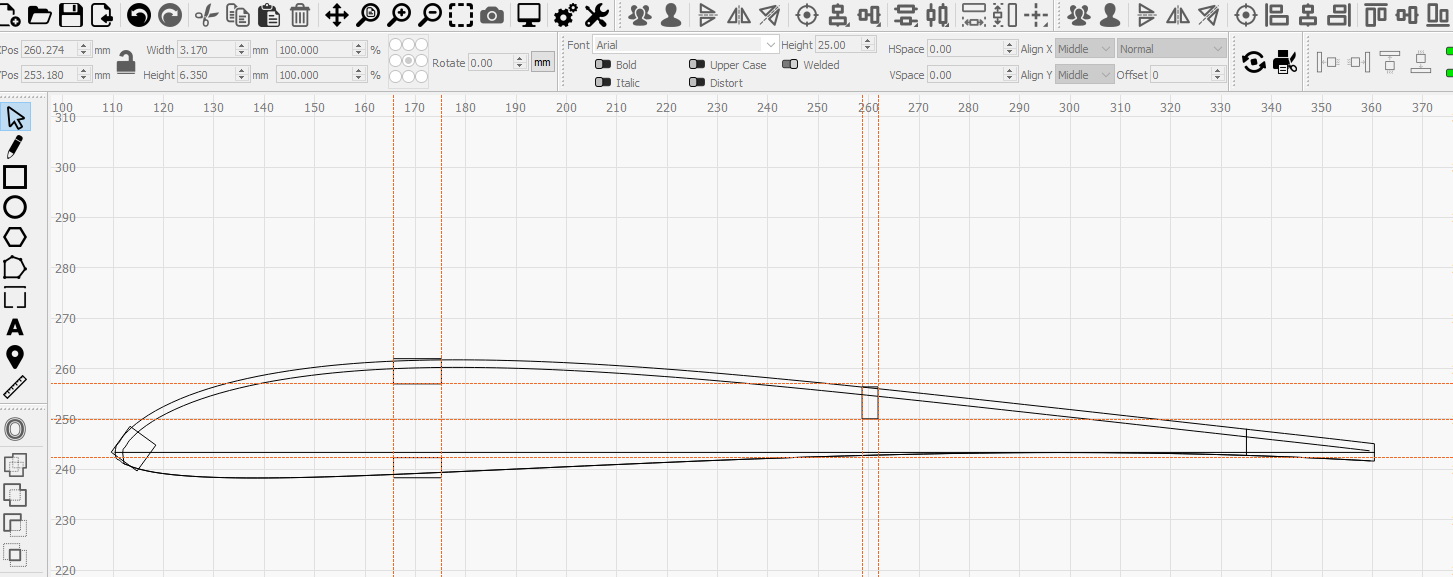
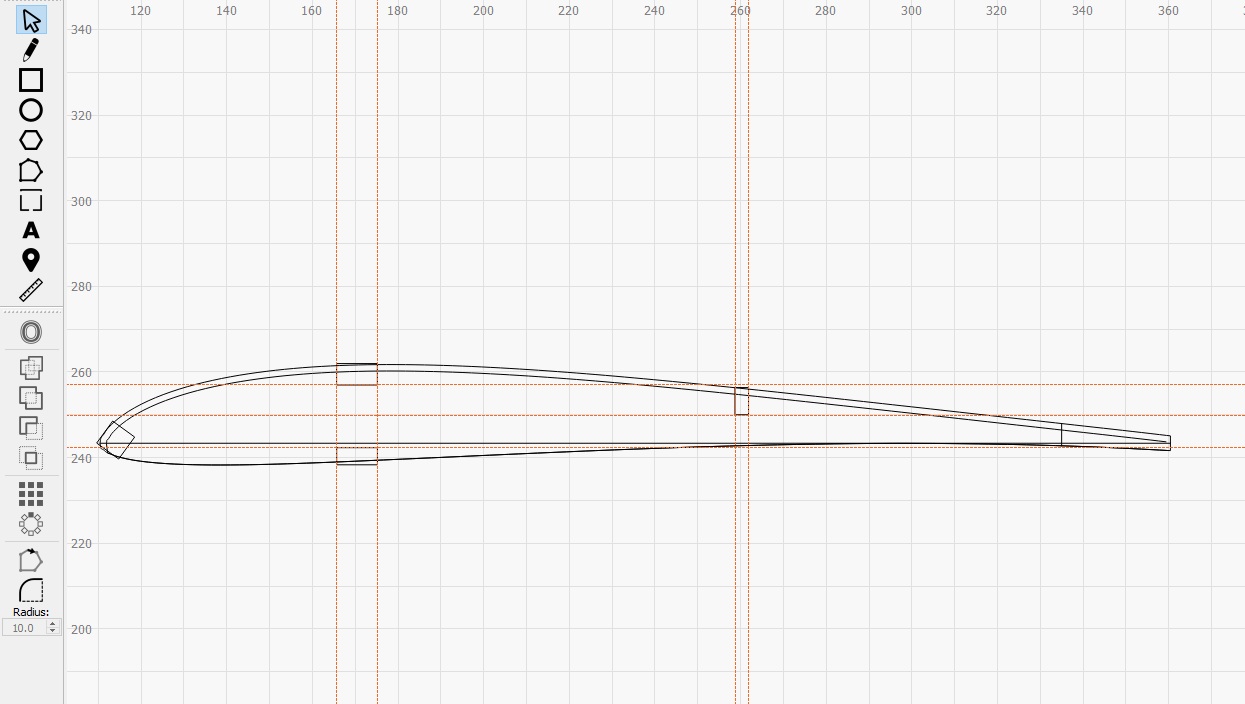
A view of the imported dxf file airfoil in LightBurn.
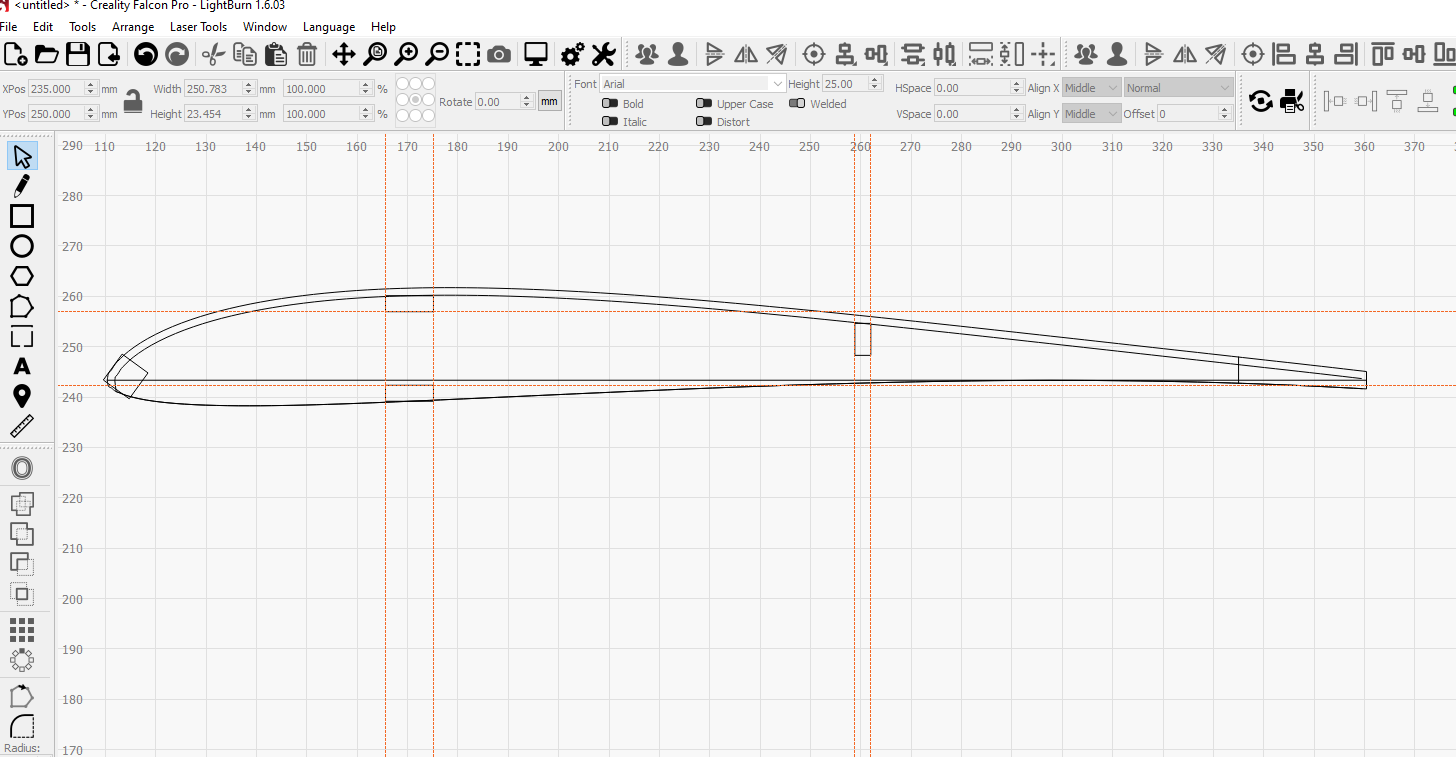
Use the guidelines to create a baseline for all of the spars, or shapes that need to be added.
Initially the spars may not intersect with lines that need to be trimmed.
The guidelines are used to mark the correct depth of the spars and then the height is increased to intersect with the top surface of the airfoil. Because LightBurn extends from the center outwards, the spar must be repositioned before it can be edited.
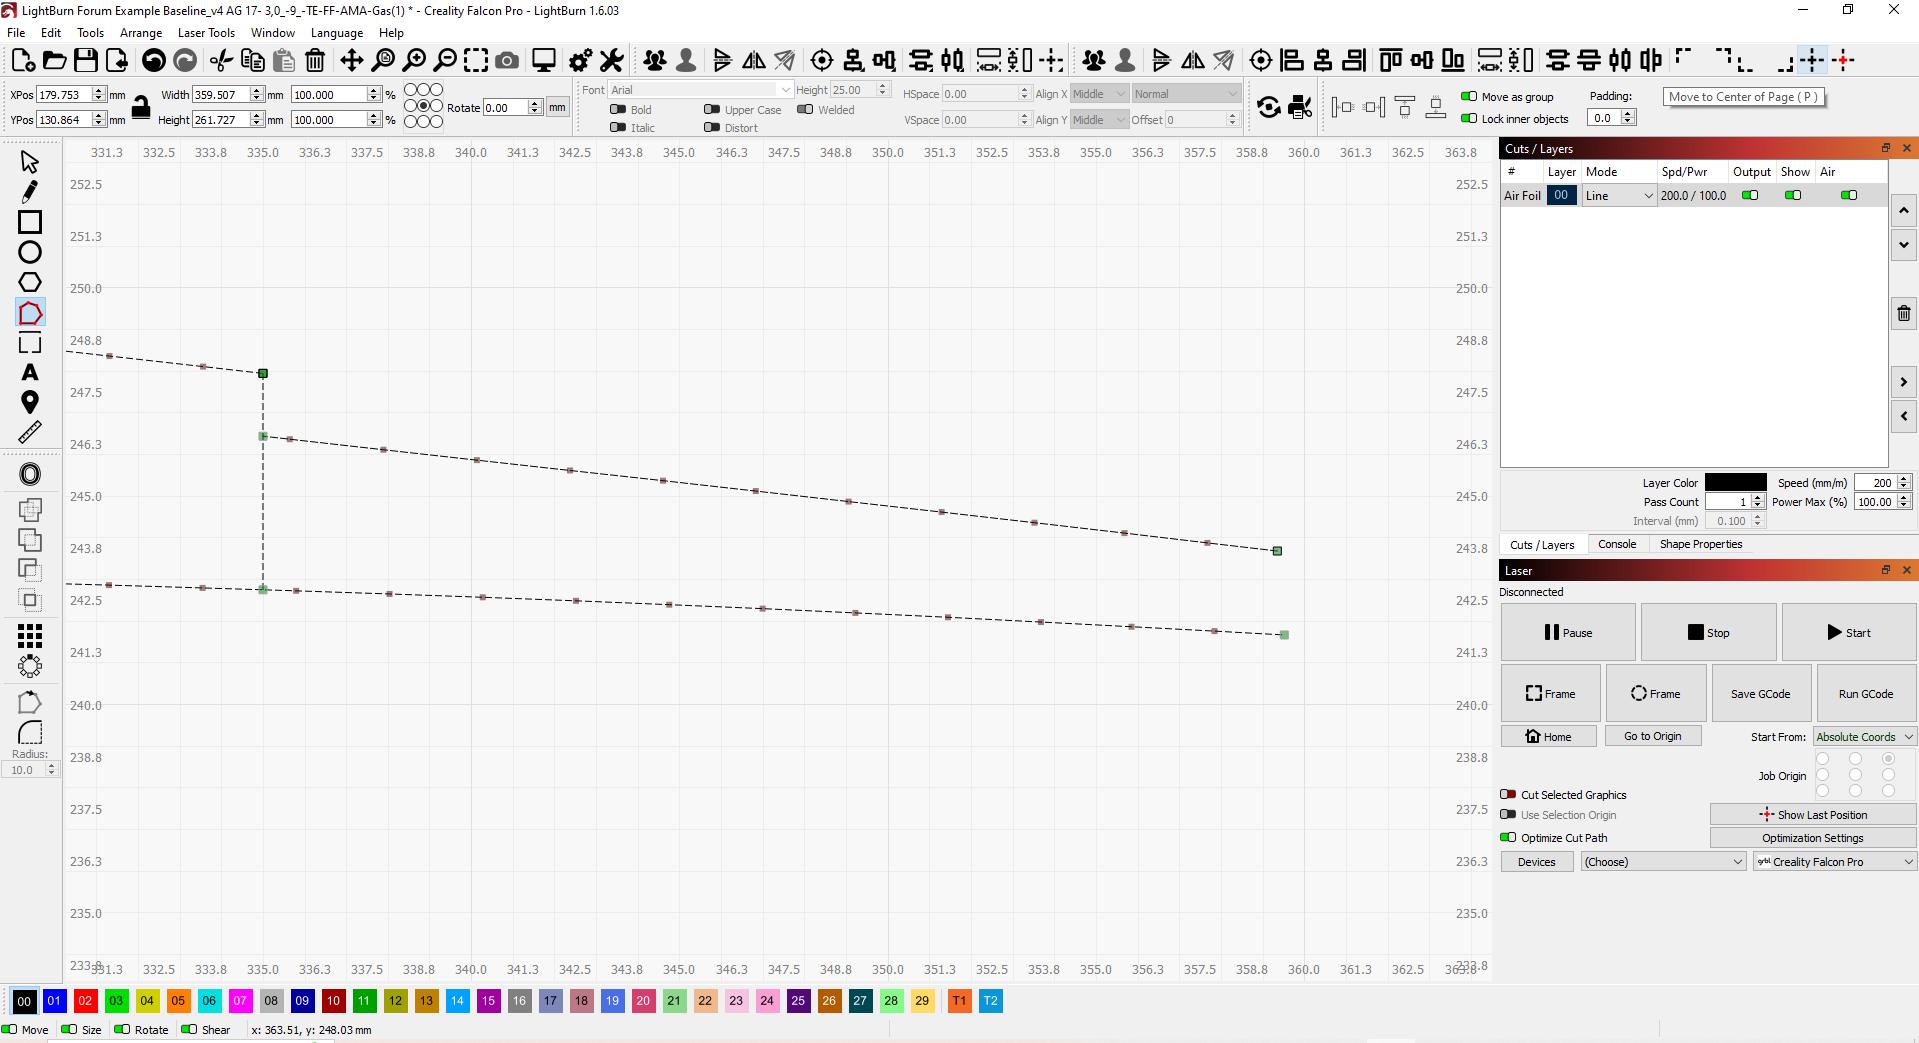
The airfoil with all the spars fixed so that the depths are correct after editing is complete.
A picture f the airfoil after the “Node Tool” is selected to prove they are all paths.
I was making progress. Sometimes I would point at the line I wanted to trim, and hit the “T” and it would work. Other times I would point at the line I wanted to trim, and click with the LH mouse button. Then I would point at the line I wanted to trim, and hit the “T” and it would work. Then I tried to reselect the area effected (Pic 8B) and tried again.
In pic 8C I started to remove the nodes individually with the “D” key and that worked until it took too much of the line.
In 8D I used the “E” key to complete the missing line.
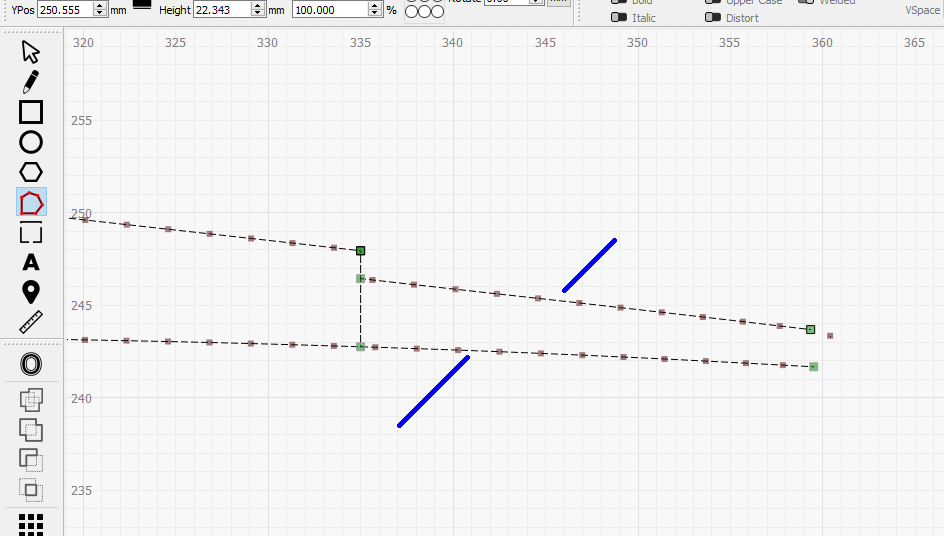
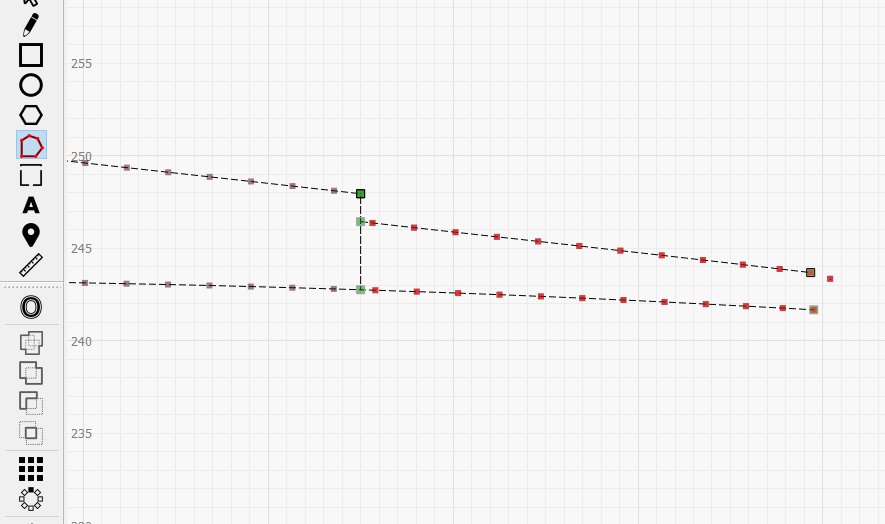
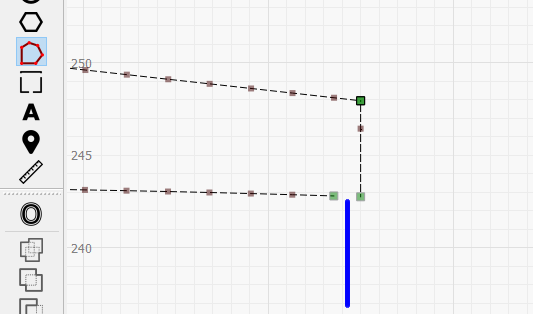
On picture #9 I was making progress using my mouse pointer and hitting the “T” key or clicking with the LH mouse button and then hitting the “T” key. I was in the process of trimming the end of the airfoil to make room for the trailing edge. Then I could not make any progress. This is another example of needing to repeatedly hit the “D” key to get rid of a line, and the line was cut short. Then I used the “E” key to fix it.
Last step. Select the completed airfoil and “Group” it.
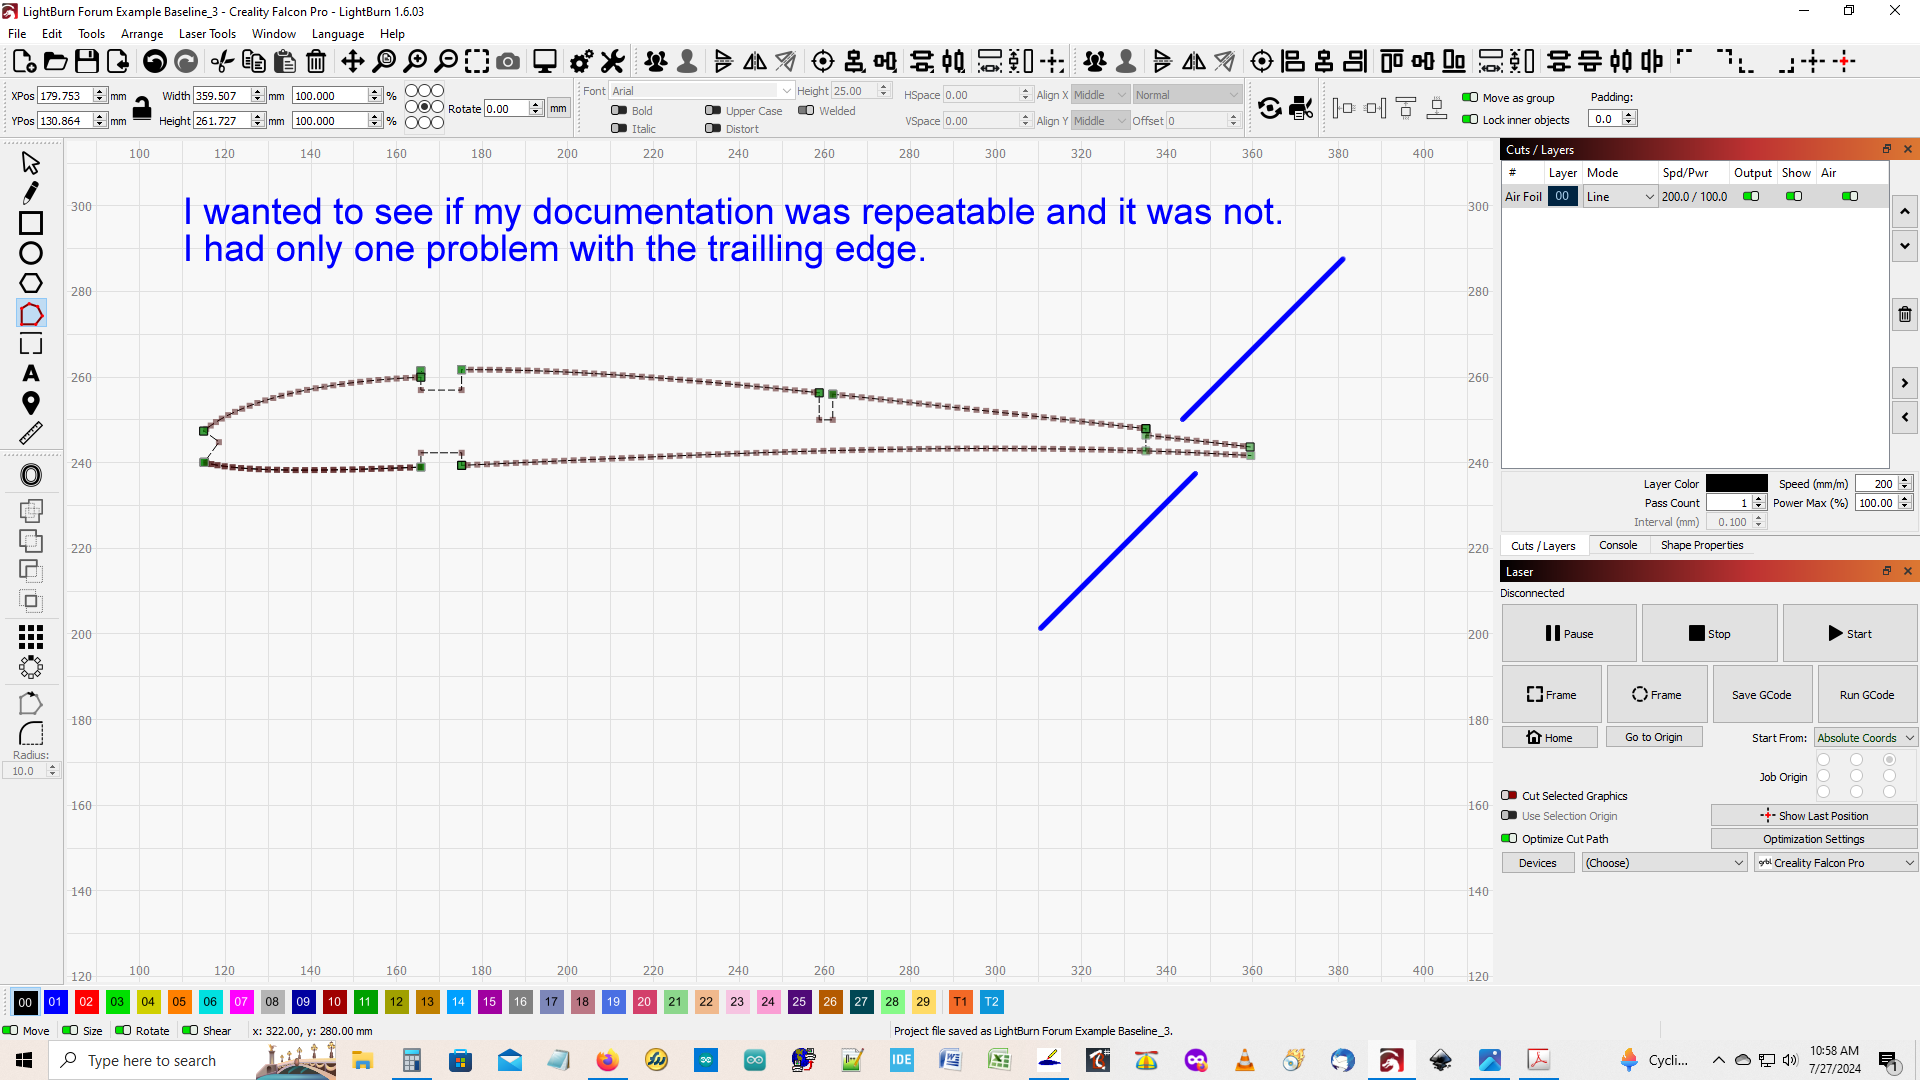
I wanted to test my lightburn file to see if the problem was repeatable? and it was not. The problem was similar, but I only had a problem with the TE. Not the LE like I did in the first example??
Another example without specific problems. It (the node tool) just doesn’t always work
or seem to have a clear procedure to trim lines from the airfoil. There are work arounds,
but after several months of watching videos, crawling through the forums and trying to
edit my airfoils, I still do not understand how to use it.
If someone has a list of procedures to follow, that would be great.
Does the pointer need to be on the line, or near the line? The pointer has a white outline that is invisible on a white background. Should I left click near the line.
Sometimes it is just physically difficult to hold the pointer in the correct location, and press the appropriate key (shaking is a problem for me). Can the line be selected, and then press a key
without doing 2 things at once?
You can temporarily disable the cursor “snap” by pressing CTRL key. Then the cursor will follow the mouse without being magnetically attracted to any spot.
There are controls for the Windows computer that will make certain keys “sticky”. Have you looked at the accessibility options for your computer?
I wonder if you are having difficulties because your DXF import uses short straight lines to approximate the curves. You might be better off using the imported lines as a reference, and redraw over the approximated curves with new curves in Lightburn. 049 Lil Lighting Airfoils Forum Example_RRU.lbrn2 (117.3 KB)
LightBurn does not always follow it’s own rules. I tried to improve lightburns ability to select a line by reducing my MS Win 10 cursor size, and that helped. Before it only worked if I pointed at the line. But at some point that breaks down and it doesn’t matter if where the cursor is.
I am uploading a different file and it fails at the trailing edge just like my first file example did. There must be a set of rules for the node tool to trim the lines on the trailing edge that are not being met.
Hard to understand what you are struggling with since you are jumping around.
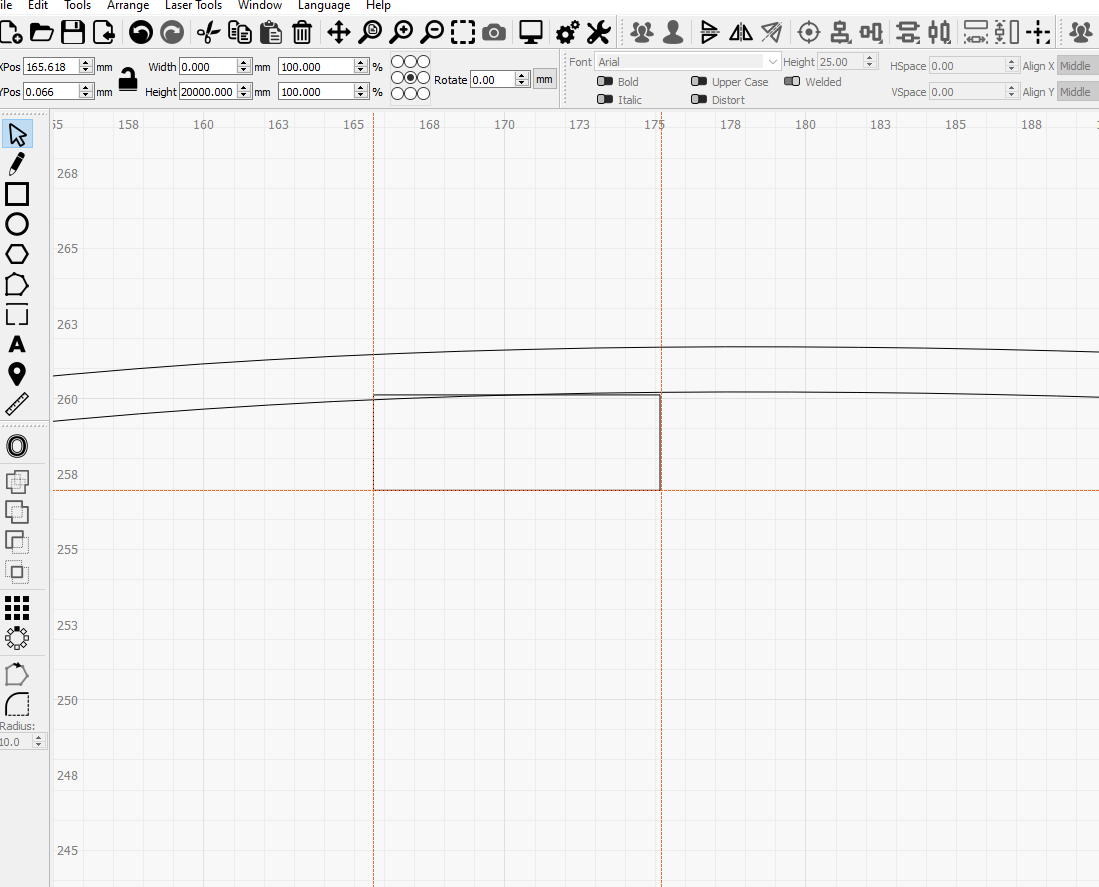
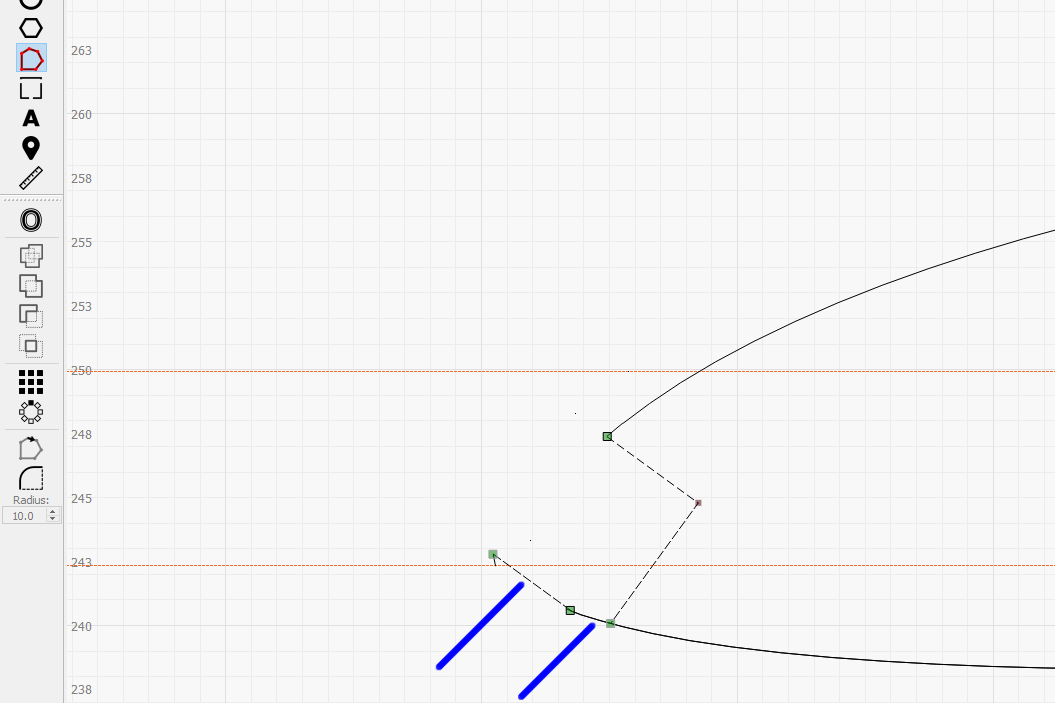
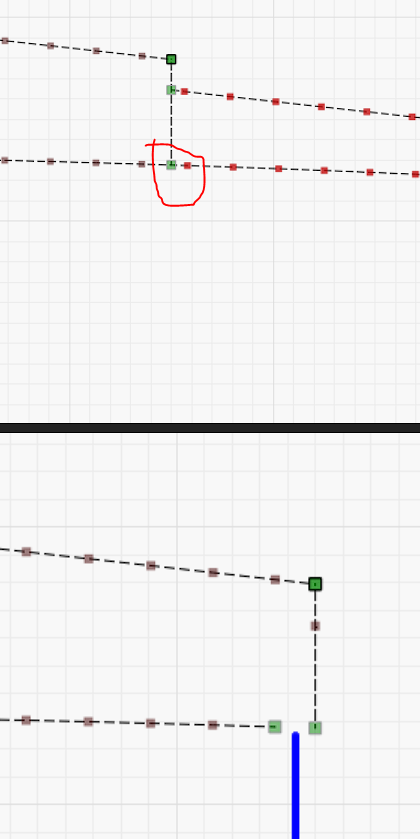
Seems one of the problems you are having is you need to insert some nodes, such as here.
You need to insert nodes in order to delete that section. I believe you will find that if you grab that line, it is not connected to the horizontal lines.
These end up being tool paths for the head (tool) to follow. These machines are not smart enough to determine what to do when they hit a Y, T or a split in the path.
A single node can be a connection for a tool path going to it and a tool path leaving it… Results in a single path through the node.
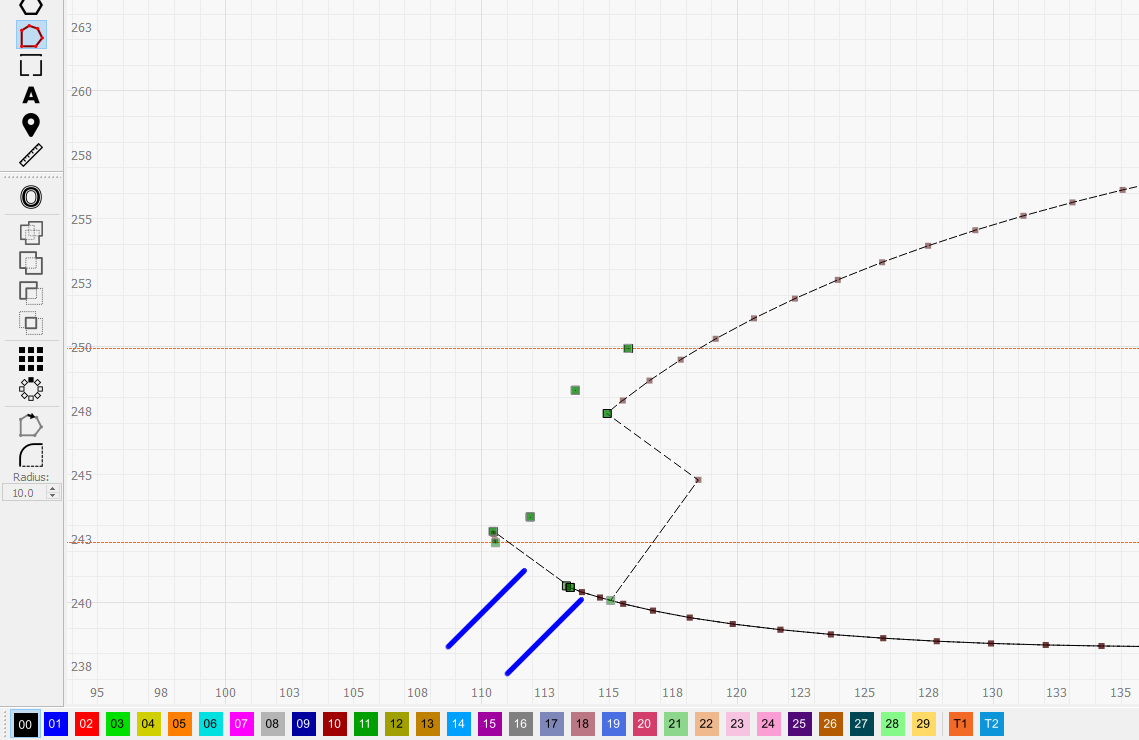
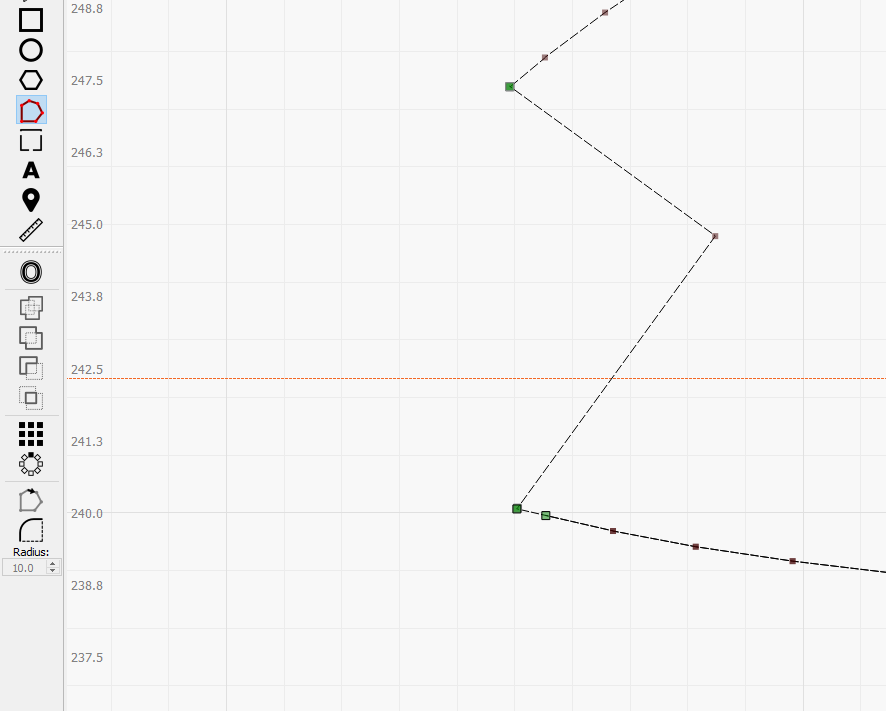
As with @Dskall suggestion, if you move the two horizontal lines a bit away, you can add two nodes and delete the center portion of the line.
Jack, I believe that the OP may be a more visual learner vs. the written word. I am hoping to get his example of a failure so we can show him step by step how to get past the blockage.