Working through Wifi QR Code tutorial - 2 problems

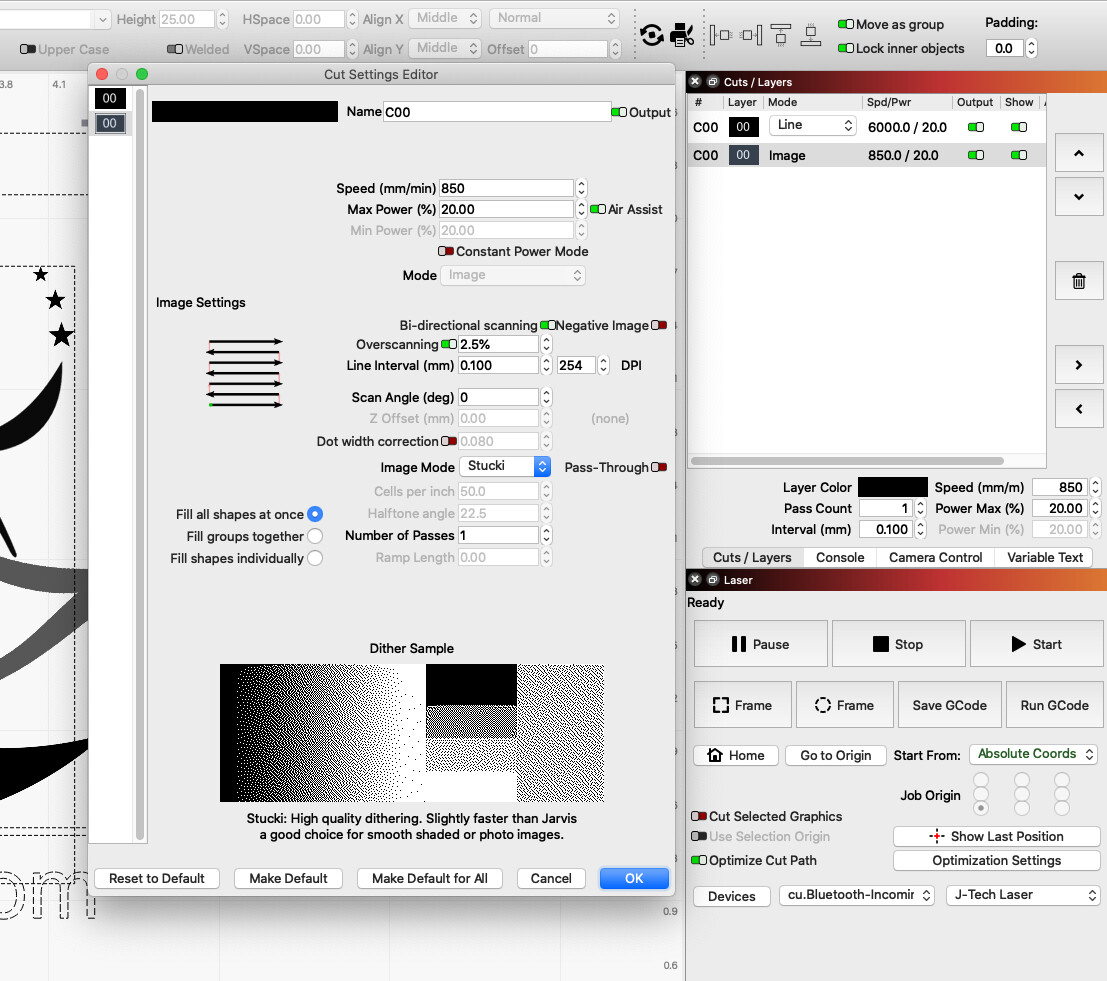
I’m trying to work through this tutorial to make a QR code for local wifi for visitors. I’ve run into 2 issues. The first is that, in the tutorial, the total time estimated to complete the project is about 5-6 minutes. So far my Shapeoko 3 with a JTech laser has been going for about 45 minutes and is only about 75-80% through doing the QR code. I set the speed to 3,000, but it seems like the Shapeoko won’t go that fast. (I’ve done simple tests and it seems to reach peak speed under 1,000 - is the Shapeoko really that slow?)

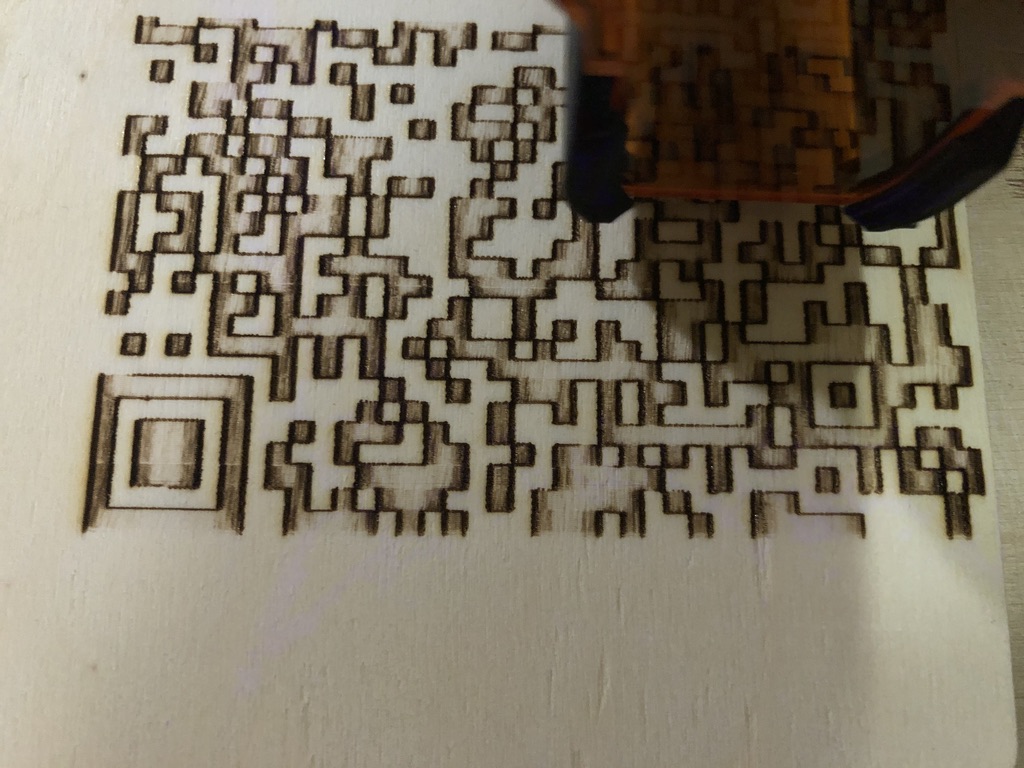
The other issue is the result print. This is part of the QR code:


For reference, here’s what it looks like in the preview:
Screen Shot 2022-07-28 at 3.50.54 AM
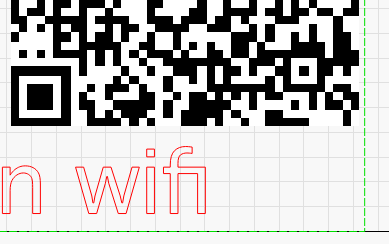
(By the way, the estimate on the Preview was about 25 minutes for my entire pattern.)

It’s outlining the dark spots in the QR code and not filling them in. I’m also wondering if the problem is it is only outlining them and the other markings are scorching, but that seems unlikely, since the scorched areas are only in where there should be black fill in the image.

So I have 2 issues, one is that my Shapeoko is extremely slow on this and the second is that, for some reason, the enclosed parts of the QR code image were not filling in. What do I need to do to fix these problems?

Also, in the TL;DR department, since this often comes up, I do not have my Shapeoko connected to any of the Macs by USB. I use a Raspberry Pi with a 7" touchscreen to control the Shapeoko. It’s in the middle of the floor, so I can’t run a USB cable, but I do have power lines and an ethernet line dropping down from the ceiling. (The run is too long for a USB to go above the ceiling.) I save my files from LightBurn and load them into UGS on the Pi and do the work that way. I was, when I first set up the laser and LightBurn, still using a Linux workstation down in the shop and did have a temporary USB cable (with a booster for the distance) connected from the computer to the Shapeoko. I tried a temporary USB cable for testing on my M1 Mac Mini, but LightBurn doesn’t see that.

(About the only way I can connect LightBurn directly to my device long term would be if I could do it over ethernet.)

Post your cut settings window for those layers, and post your layers window too.

Is this what you mean?


It looks like a similar project I created on the workshop Mac is okay.

After my comments about how to connect LightBurn on my Mac to the CNC, I did some research, found out there are issues with an M1 Mac and the USB connection to the CNC. I also found out about the LightBurn bridge. I’m thinking, since I have a Pi hooked up to my CNC, and it’s so easy to swap SD cards or USB sticks in a Pi, that maybe I should set up a bridge, connect with my Mac to that Pi, then get the settings from the CNC, to be sure I have the right info. Then I can import and copy the appropriate files to the Mac in my study, back in my house.

Yeah, that shows some obvious errors. If you’re engraving an image that’s only black and white, you should set it to threshold, not Stucki for ‘Image Mode’. Do you have ‘overscanning’ on for a reason?

No reason for overscan at al. Don’t know how it even got turned on.

The estimated speed is based on settings in the (Edit -) Device Settings window.
Once the Device Settings window pops up,select the Additional Settings tab and make sure those numbers all match. By confirming this, your estimated time to completion will be more accurate.

I had that same edge-artifact on my 3018 CNC based machine when I started.

The lead-screw CNC based machines are designed for heavier loads and have heavier moving parts, so yes… they are considerably slower.

You are also getting what looks like an edge-artifact caused by the cornering algorithm.

Because your laser has CNC origins the acceleration setting may be too low

The spindle is commanded to accelerate and decelerate and is limited physically by the mass of the spindle and it’s ability to push the spinning tool through the material.

Folks speed up for the laser but often overlook the acceleration.

To see if the acceleration is problematic you can bypass it by making the speed in the ‘Move’ window the same as your engrave speed… It’s a good test. This may slow it down too much but it may also show that the traverse speed and the acceleration are out of line and causing the artifact.

Apologies to those who have helped me. I do like to report back and specify what solved a problem I’ve posted about. I’ve been overwhelmed with all the new things I’m having to learn with my Shapeoko, the JTech laser, LightBurn, as well as two different 3D printers, and different slicers for them. That, along with helping my wife with a new business we bought (that she’s managing), took it’s toll. I also needed help with this situation.

This is something I need to solve, so I’ll be tackling it this week. I have a few things I want to get done within this week or so, which means I’ll have to figure out what was making things so slow (and there are some interesting suggestions here) and why the inside of some shapes were not burning. One thought is that it did not occur to me to watch the laser and see if the laser was actually cutting off and just etching outlines or if it could be something else.

(I know, to check if the beam is on, that means looking at it without glasses - I am NOT going to do that. I have used my phone to take videos of it when it’s working and have seen that the laser shows up on the phone, so I can see if it’s on or not by looking at my phone with my protective glasses on.)

This topic was automatically closed 30 days after the last reply. New replies are no longer allowed.