Well… I threw away the AutoFocusPen that comes on the Monport machines…
I did give it a chance… just too cumbersome to use and kinda limits your abilities…
Also did not like the Autofocus button in LB, as when my pen wiring went back on the
cable chain back and forth, Hit the LB autofocus button by mistake and the
bed crashed into the nozzle, thank goodness of the big RED emergency button…
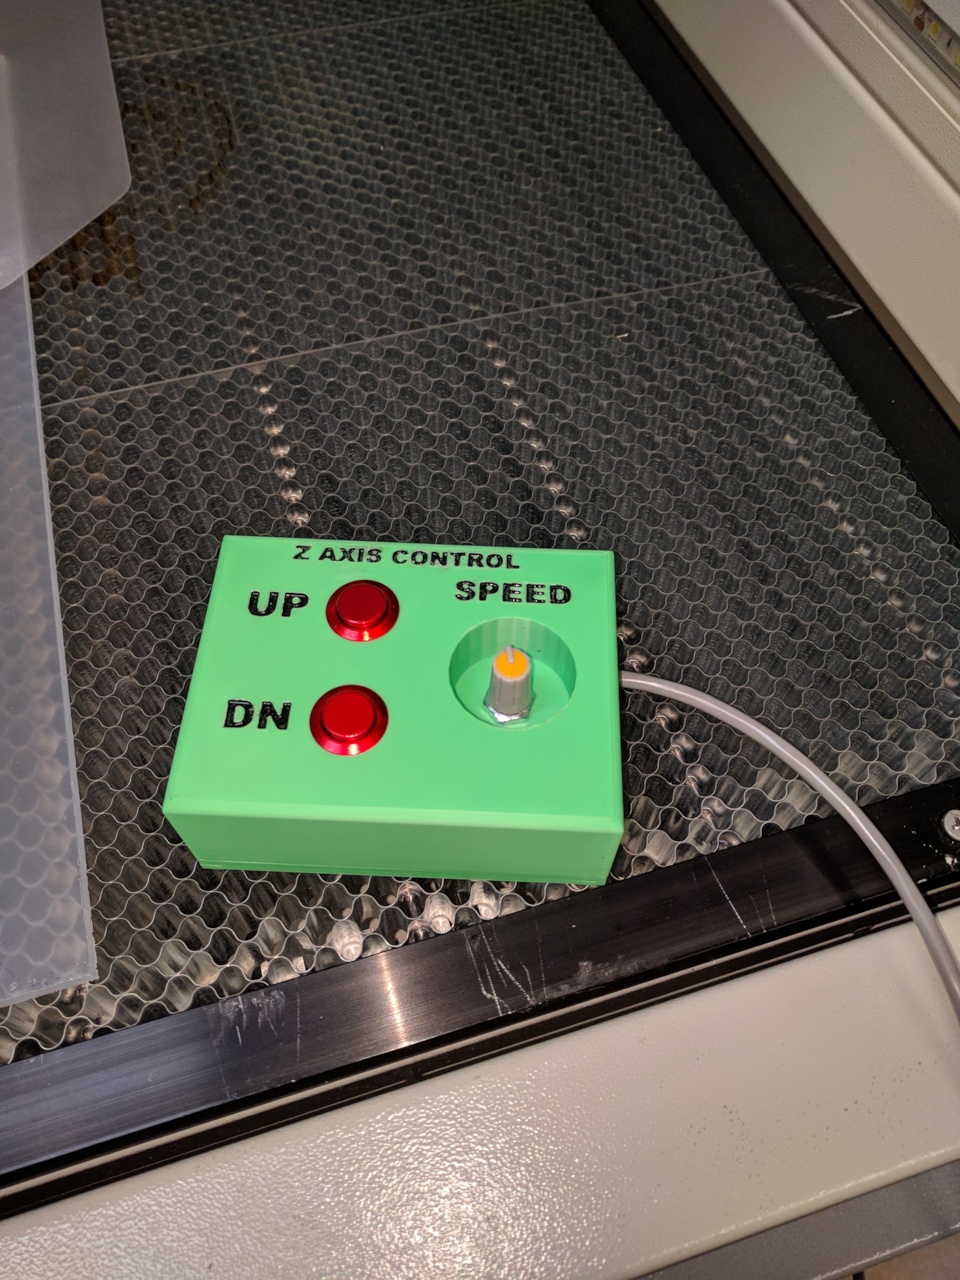
I put together a quick Arduino Nano controller in the 3D printed box I did with some nice RED metal 12mm buttons and also added a recessed control for the BED up and down speed. I like the recessed idea as it does not get in the way and maybe gets changed if bumped by mistake…
The software was a quick throw together looking for <300ms press that would initiate
a bed rise/lower pulse that I adjusted the pulses to give 1/2mm height adjust or there about…so it is easy to get that fine adjustment with a single press not worring about letting go of the button or holding it down to long… as you do with the Ruida buttons…
A Long press will use the SPEED adj value to raise and lower the bed, I have it set to the middle as that seems to be the best…(I played with the software to find the sweet spots for my personal taste…
I disconnected the Ruida controller from the Stepper driver module, mostly because I would have had to use Opto’s to isolate the two controllers and the fact that I did not
like the LB Autofocus button was a big plus for me. so now the Ruida has NO control on the z_axis.
I realize some folks like to use the software to do Bed Z up and down…but for me it is not a thing I do or even need to do automatically.
It is a 4 wire connect to the system, +5v / Grnd from the Ruida controller for power
and the PULSE / DIRECTION controls to the Stepper driver…
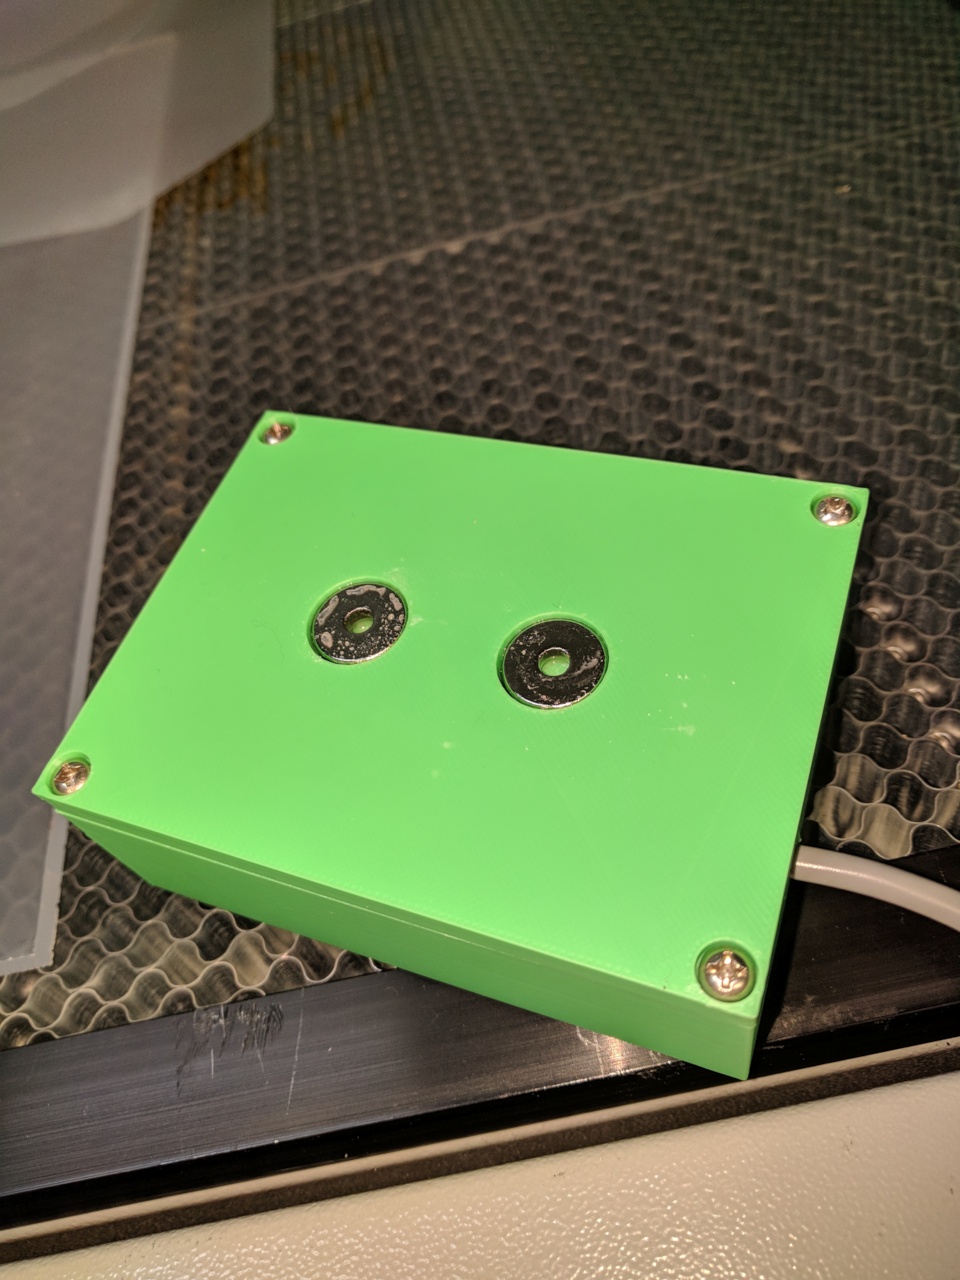
The bottom of the case has two magnets embedded to help hold it to the machine frame and not fall on the floor.
Pretty simple little design, and I like having the buttons on the bed while I adjust material and nozzle distance.
Fun project but mostly fixes the issue of reaching up and playing with the Ruida menu to control the bed height, and give a bit more control to get the Focal distance measurement closer than before…
My KT332N controller has a quick-n-easy jog / continue button in the middle of the arrow keys and can set a specific jog distance:
I set the jog distance to 0.2 mm, so it’s easy to move across the platform by holding the arrow key(s) in Continue mode, then sleaze up to a specific spot by pushing that middle button once and arrowing one step at a time.
It has separate up/down buttons for the platform height with the same jog distance, so tweaking the focus is straightforward.
I don’t have anything that requires 0.2mm adjustments
maybe if I was doing all the LENS stuff Russ gets into…
but hey, I would have to get another life…
My biggest gripe was the Ruida buttons…
and besides you know better than most…who does not like another project
OH X/Y I missed that…and yes I have it set up for 0.4 I believe…
had to cut some sheet cards for my son… was a couple weeks back…
I had done alot of testing with my 3" lens and found that while it does have
a generous FP cutting area… finding the sweet spot was a tedious route,
thru cutting and depth spotting to find the max energy at depth…
so getting that (actually 0.3mm) inc. on the Z- axis makes a big difference to setting
the sweet spot for cutting 10 and 15mm acrylic and getting a uniform cut line…
basically it lets me fine tune the speed and power to get a true cut for part drop out…
Thanks Jeremy…
After working with it for a few days now, loving it…
not dealing with the panel buttons is nice…
I may push the project forward a little when I get time and
incorporate the Optos to allow the Ruida Panel access to the Zaxis again…
but dont really have a need for programmed control at this point.
so It’s still an option…