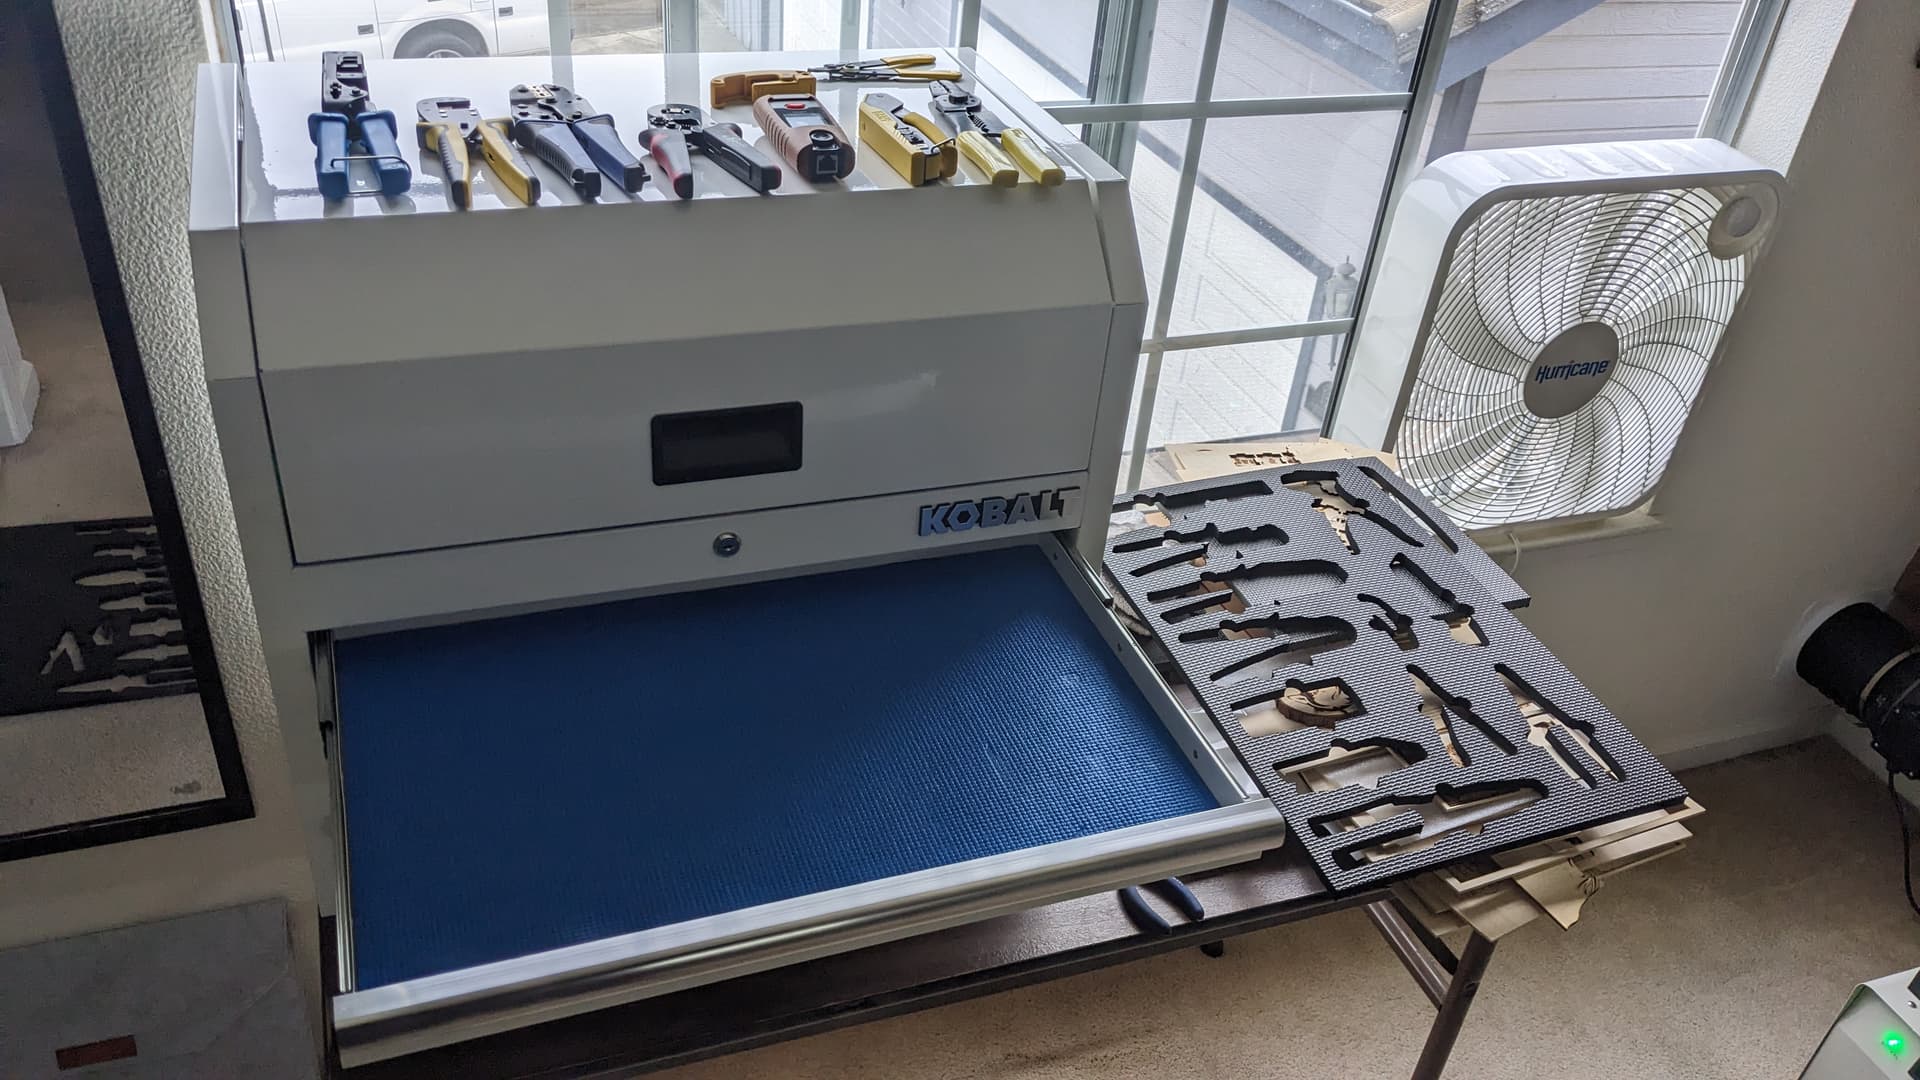
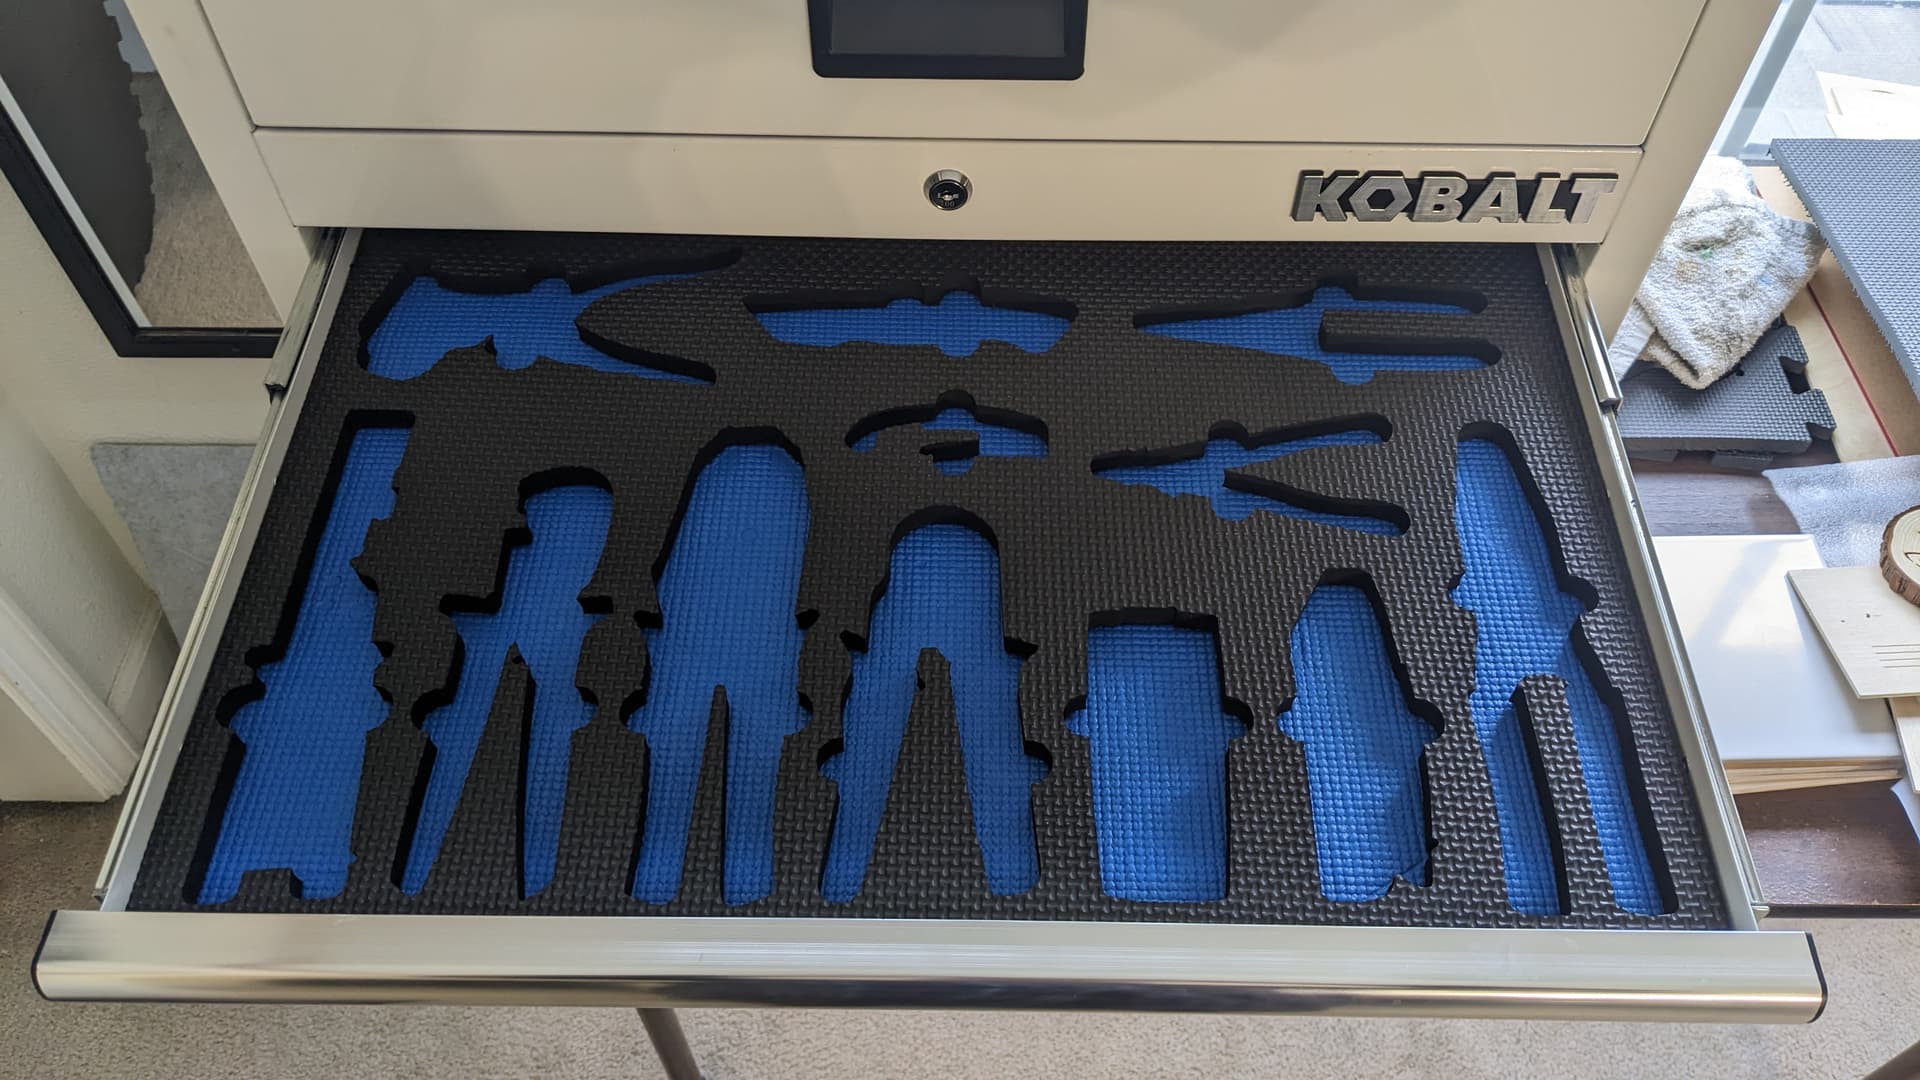
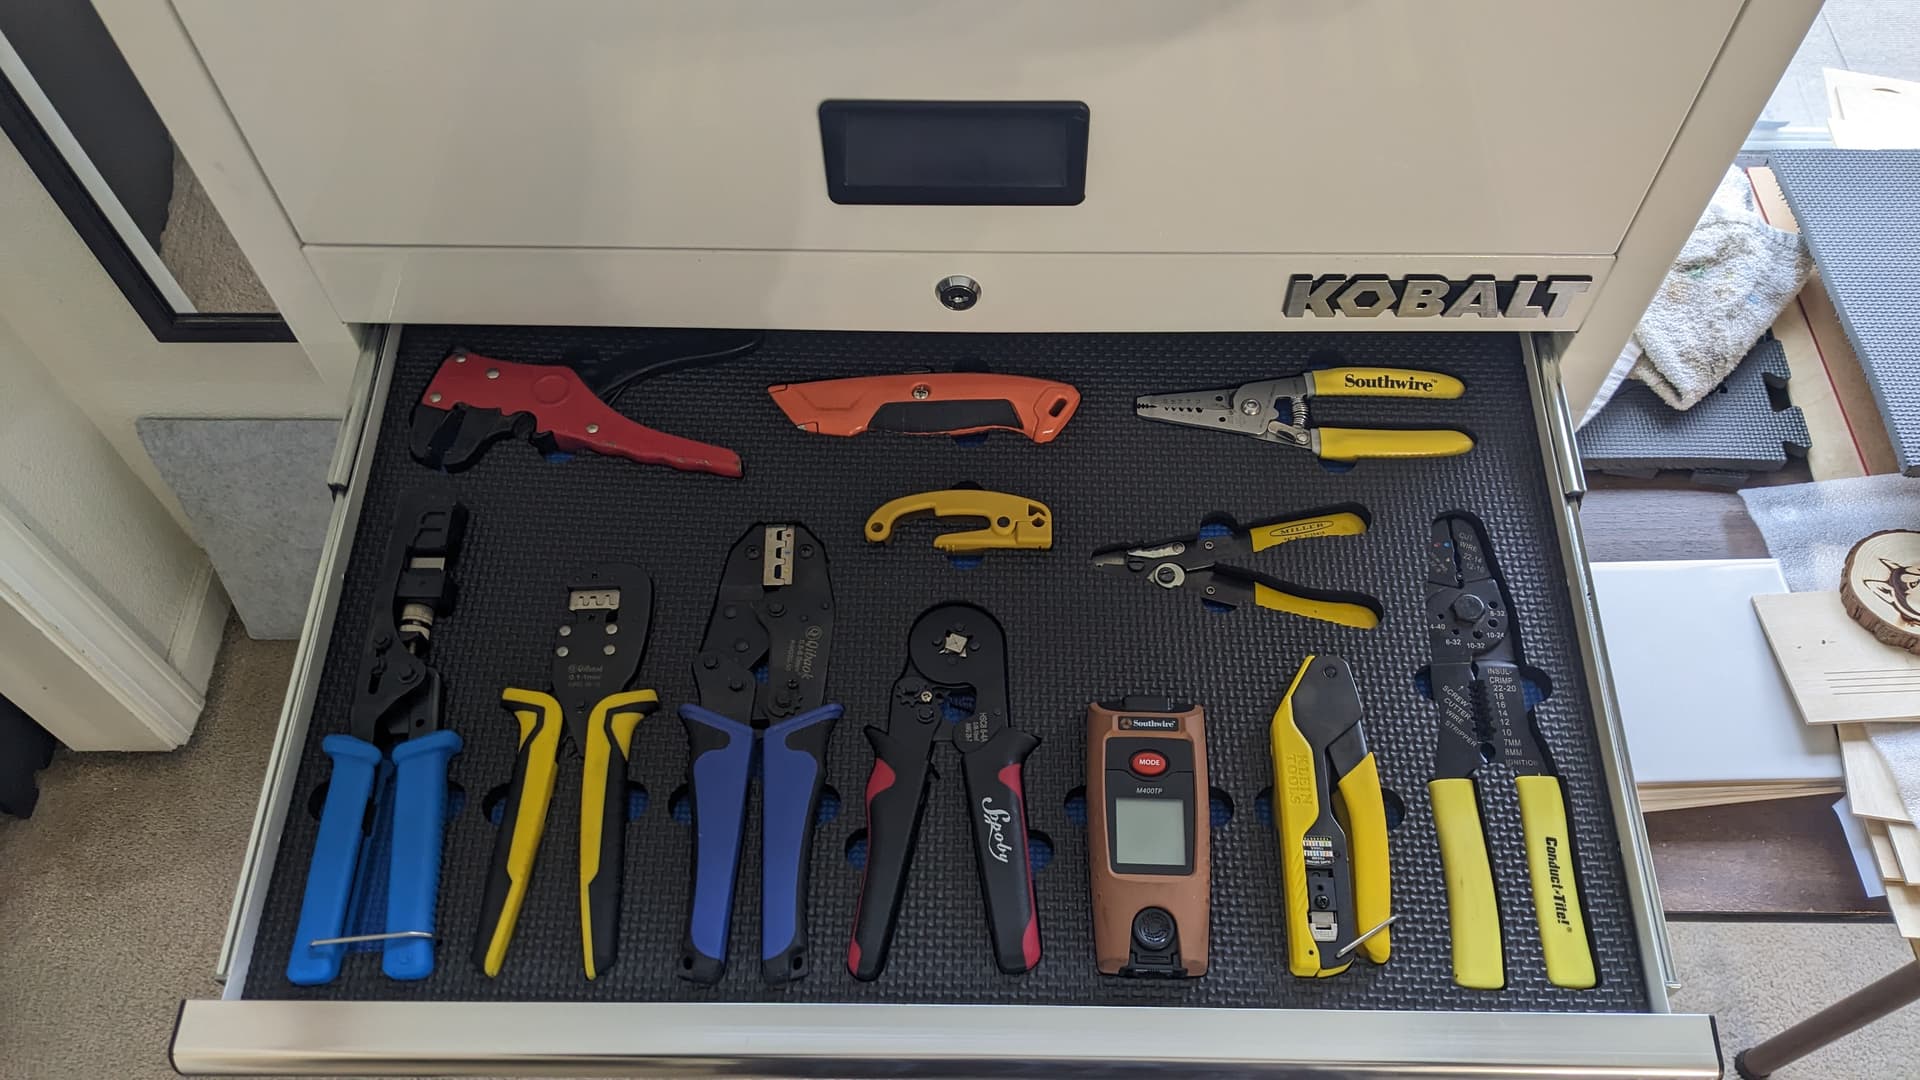
Lately, I’ve become obsessed with organization of tools and such. Friday I picked up a nice toolbox during Lowe’s Memorial Day Sale, and I’ve cut some foam drawer liners for my tools. The main foam is cut from 24x24 cushioned floor tiles, and I also ordered some thinner blue tool drawer liner for the bottom. I’m going with White and Blue for the Laser Lab Toolbox.
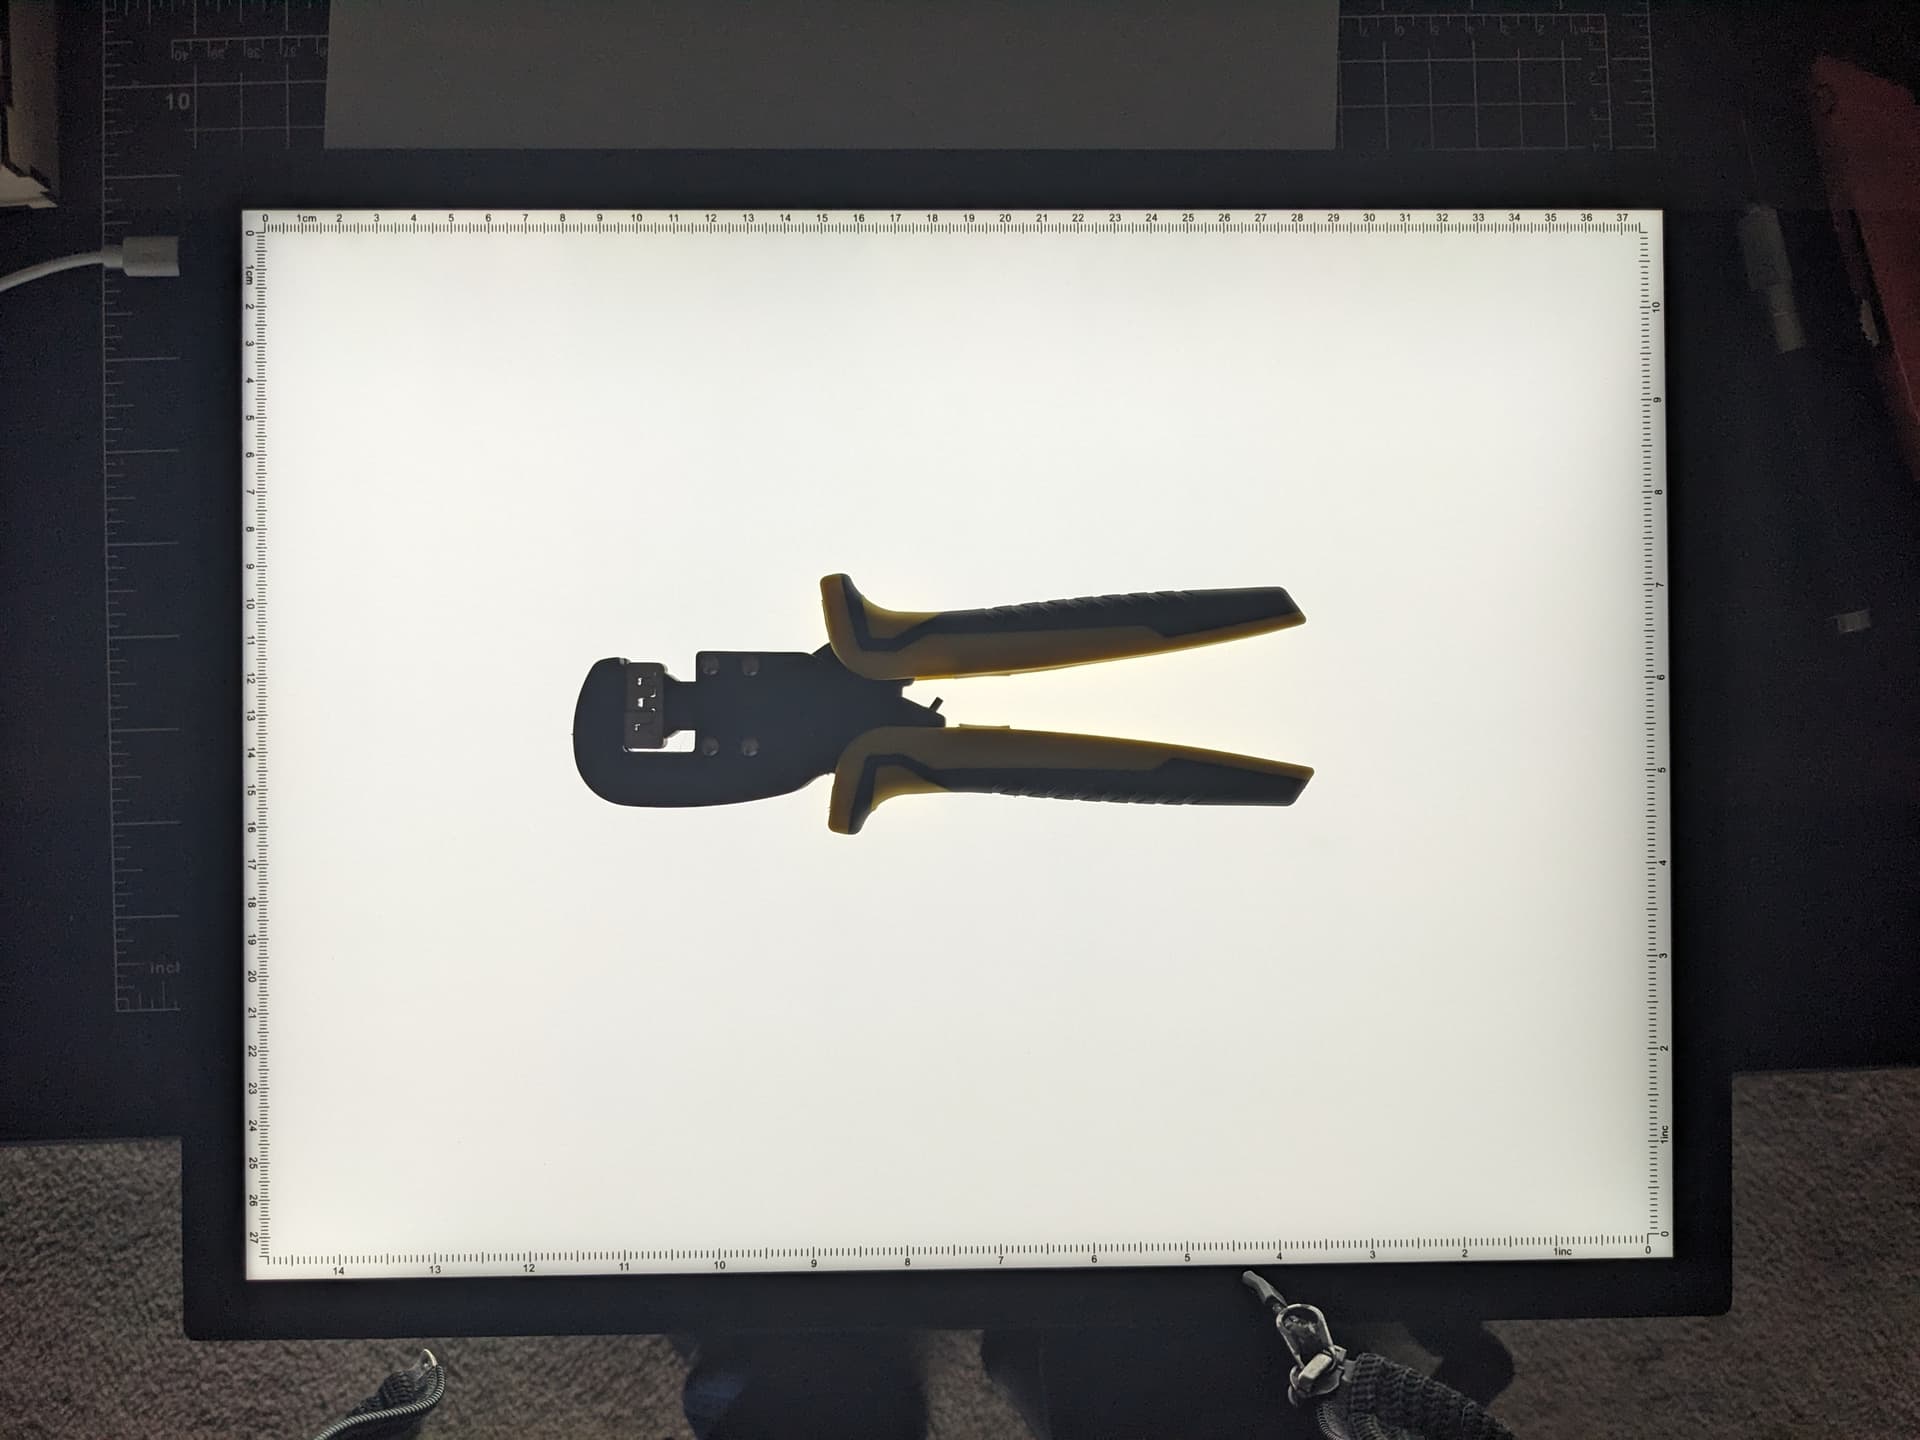
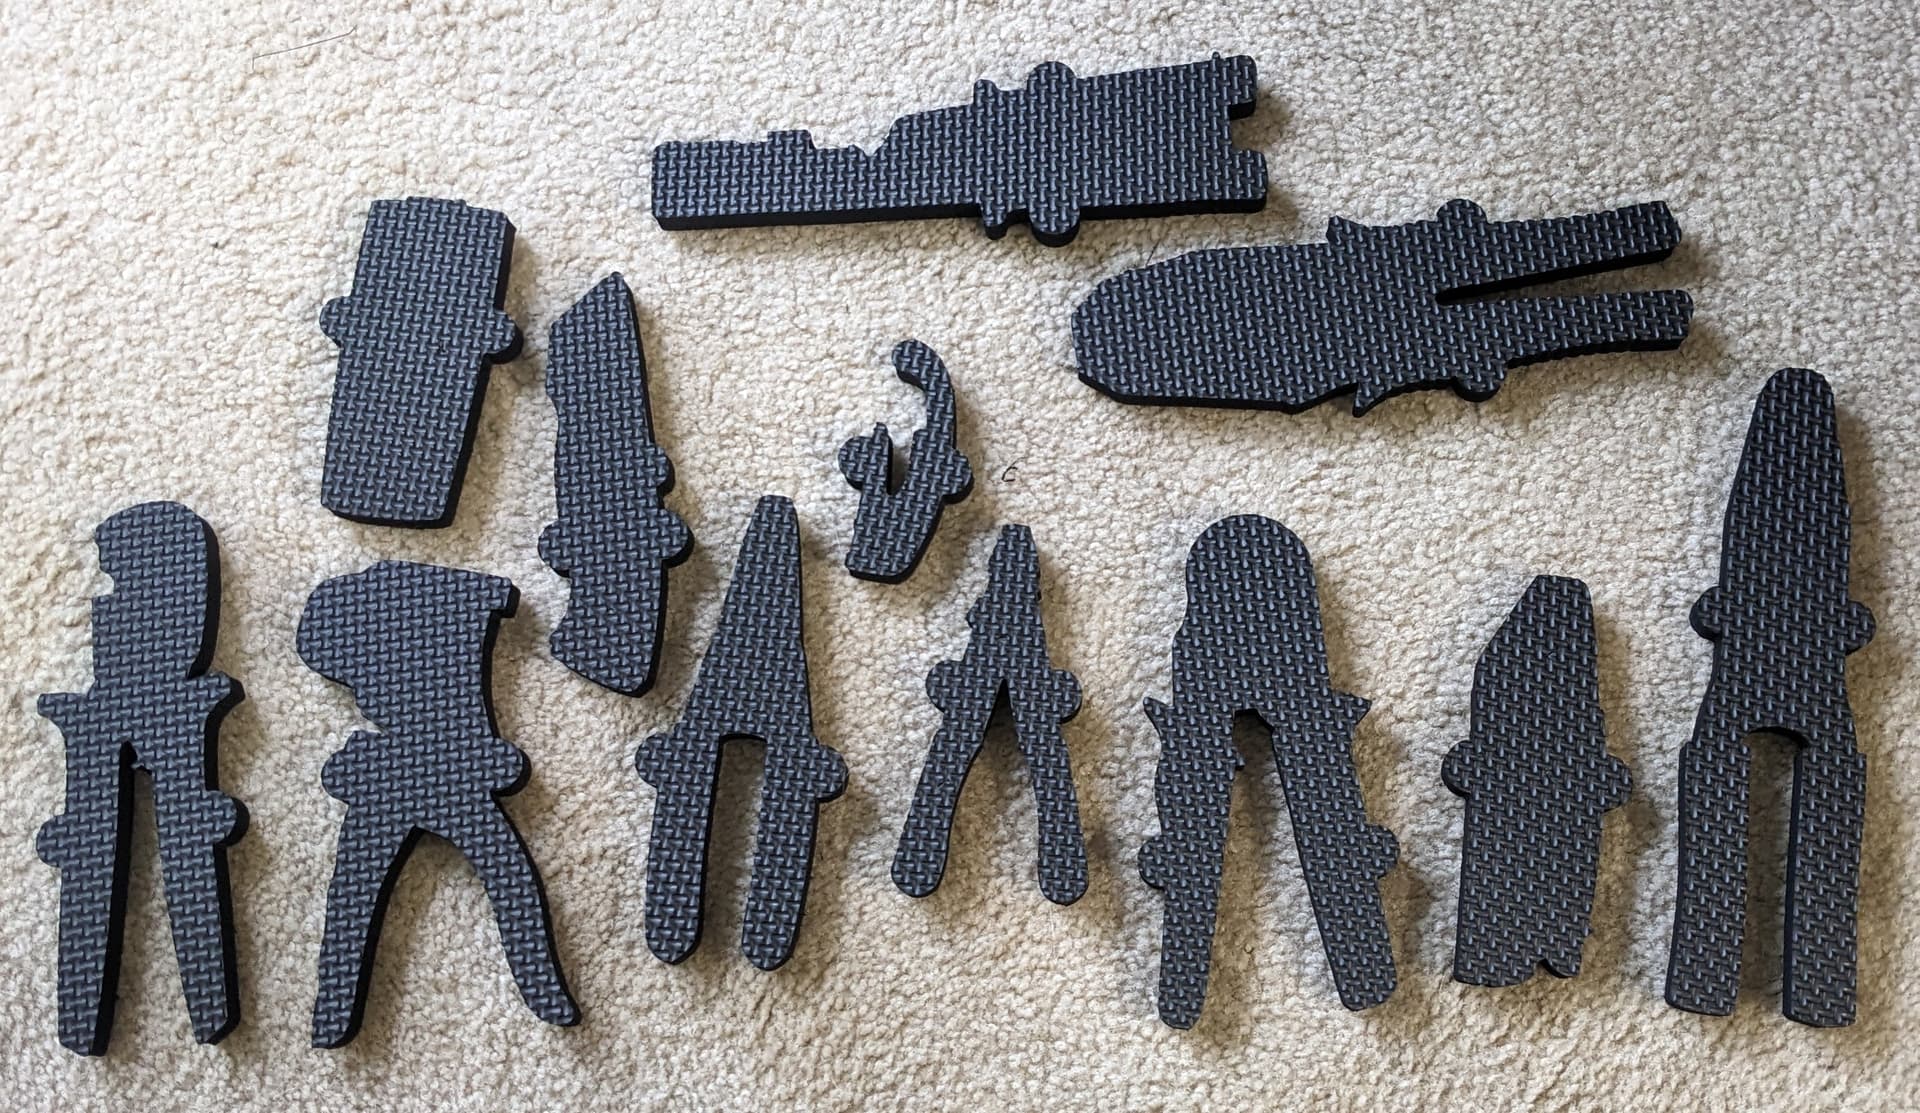
I have a pretty unique way of getting the silhouettes of the tools too. I lay them on a backlit drawing pad and snap a photo from directly above. Then I crop the photo and bring it into Lightburn and do an Image Trace. By using the backlight, it creates such stark contrast between the tool and the background that there is very little work for the Image Trace to do.
Scale the Trace as needed, then a little cleanup with the Node Editor, and then a quick offset to the outside and an extra 1/2mm or so. I then nest them as desired and add a couple small finger grip circles. Group them all together and do a Boolean Union to absorb the finger grips into the tool shapes.
Very nice application… would never work for my shop, unless I buy 2 or 3 more roll arounds! Great job! I like the lightbox idea, I do things like that that need to be traced, and I go through a lot of rig-a-ma-row to get the trace, your concept is simple, and works. Building a lightbox today, thanks!
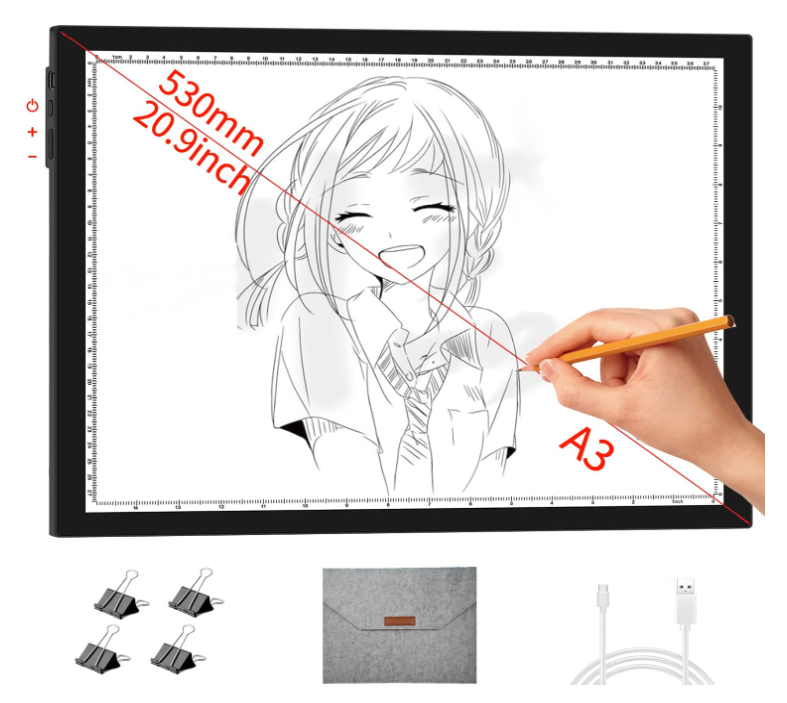
I went down the, “I’m just going to build a lightbox” process, and quickly discovered that by the time I gathered all the parts and pieces (even with the thought of using an old drawer as a starting point)… it got pricy quite fast. Instead, I found this really nice LED backlit tablet. USB powered, and came with it’s own case that would allow me to tuck it away on a shelf… thinner than a book or catalog.
The brightness is adjustable, to get the perfect silhouette. I’ve learned to do this in a darkened room also… giving the best contrast and not illuminating the object from above at all. The better this process is, the less work there is to cleaning up the Trace Image in Lightburn. It’s never taken me more than a couple minutes to get a clean outline of any item.
Actually, for $28.00 that’s quite a steal! And, believe it or not, my Prime membership expired last night… LAST NIGHT! Hmmm, I see a way to do the same thing for free. All I need to do is put my monitor on Full white, and walla, same thing. I have extra monitors so I could just lay one flat and get my image. In fact, I could set it to all black and get a shadow of a white object as well, or whatever contrarian color is needed to get the shadow. So my net cost is 0 dollars. Going to give that a try first.
Naw… easy-peasy.
Lightburn Image Trace makes it simple.
Take your silhouettes in a dark room with the backlight only as bright as it needs to be… it will almost trace itself. Also, keep as much distance between you and the object as you can (I set mine on the floor and shoot the picture from eye height)… that reduces any weird angles introduced by the camera lens, and you’re going to crop the rest of the stuff out anyway.
I made templates of the drawer perimeters and individually made silhouettes for the tools that I could import and arrange inside those drawer constraints, but I was photographing the tools from above, from as high as I could to attempt to collimate the dimensions on a white piece of paper with a known size so I could appropriately scale the image after the fact but I could never reduce the glare enough to make it easy for the trace to work. I had to modify the path a TON to get the glare artifacts out of it.
The backlight is genius, and I’ll definitely be using my SO’s LED lightbox for that purpose.
Added benefit: It’s got a metric scale rule on each axis and it’s large enough for even my largest tools.
I did the white paper thing for a few runs… but like you, I was having to do a lot of cleanup and adjustment of the Image Trace results. Once I went to the backlit pad, it only takes moments to crop, import, trace, and cleanup.
Don’t get hung up on scale until the last step. If your outlines are good, then when you are done with the shape, just measure any real world dimension of the tool and scale the outline to match. In fact, with that last tool drawer, I photographed 5 tools on the light pad at one time… as long as you pay attention to the results and keep them grouped, you can scale them all at once. I was excited to see the Metric and Imperial rulers on the side of my light pad too… but I have never used them for any point of reference. Just scale the results once they are in Lightburn. And if you are unsure about a cut, just use a piece of cardboard first, and adjust accordingly.
Problem is… there are so many tool variables, and not to mention all the Chinese knock-offs of every other tool. A library would be pretty difficult to maintain.
There is also an older piece of software called ToolKaiser that is designed for just this type of task, including an attempt at automated nesting. I have used it before, but it is a bit convoluted in the way it does things… between the “phone based app” that captures the tools, and their “PC desktop application” that does the image tracing and nesting. I found it hard to work with, and it has a monthly subscription. I talked with the originator of the software, and he’s a decent guy, but his price for an outright purchase of the software was really high (I personally can’t stand subscription software models).
Doing everything in a non proprietary way, with my camera and a great software like Lightburn, I can achieve similar or even better results.
Just thought I’d mention it.
I like it! Ashamed I was still considering the hot wire method.
Haven’t been using the LASER that long, so I still not thinking things through as much.
Going to look at various foams and see what workxs vs. costs.
I got my particular foam from Amazon.
They have multiple colors too, which could be kind of fun.
You can also pick up some tiles from Harbor Freight, but the Amazon ones are a little thicker.
Look for EVA foam, as it’s the stuff that’s safe to cut (with proper ventilation, of course).
Hello everyone
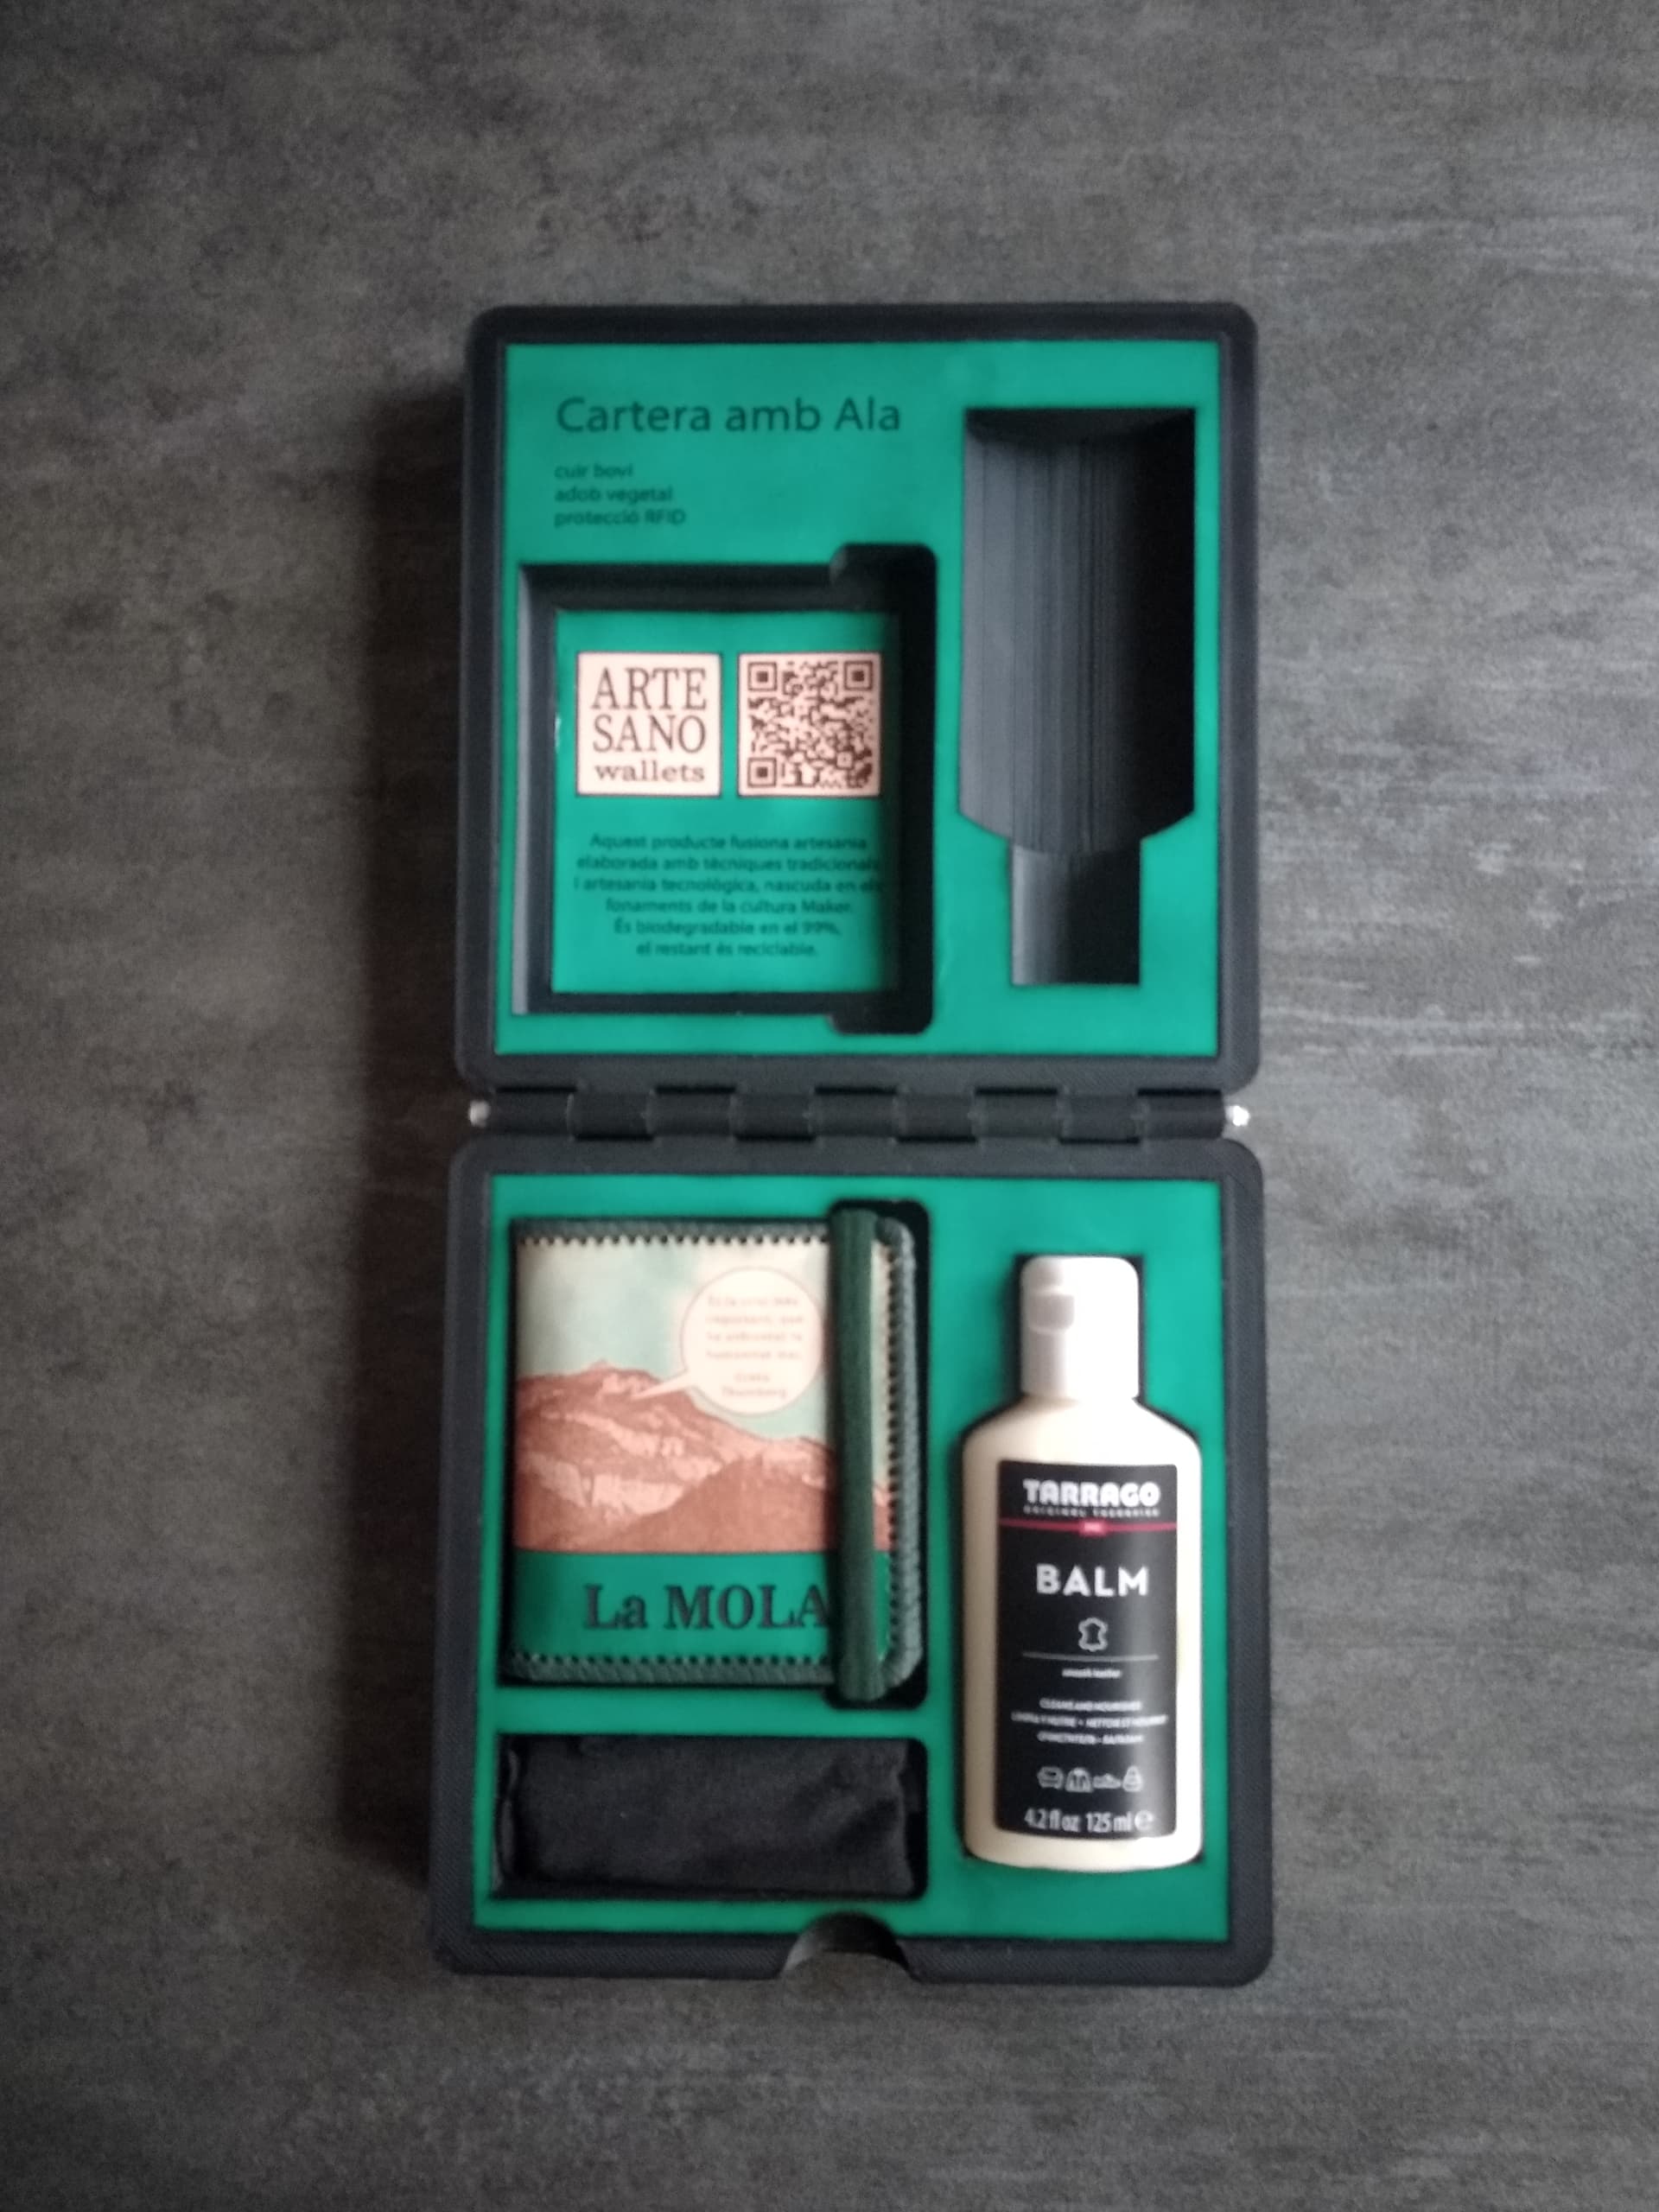
Lately some people are asking me for a case that is pretty and practical for the handbags I make, until now I have been making them a cardboard box. I have printed in 3d, a case with leather finishes to match the wallet and the most delicate thing has been to make the hole for the objects to be stored. A couple of objects have a simple geometry, being easily adaptable to the necessary measurements, the other has been somewhat more complicated and I have had to print and correct it a couple of times, trial and error is sometimes inevitable if we do not have the appropriate tools , which in this case would be a 3d scanner.
Greetings,
Great idea and I am sure to use it in the near future. But there is an even easier solution for obtaining the image in perfect contrast with it’s background. Provided you have access to an iphone with at least IOS-Version 16.0 of the firmware. After taking a picture of the item you only need to hold your fingertip a moment longer onto the image taken before. That completely knocks out the background around the person (or here: around the tool) and stores the cut out part directly in the clipboard from where you can transfer it via Mail, WhatsApp or AirDrop (Bluetooth) to another phone or computer, to use it in LightBburn.