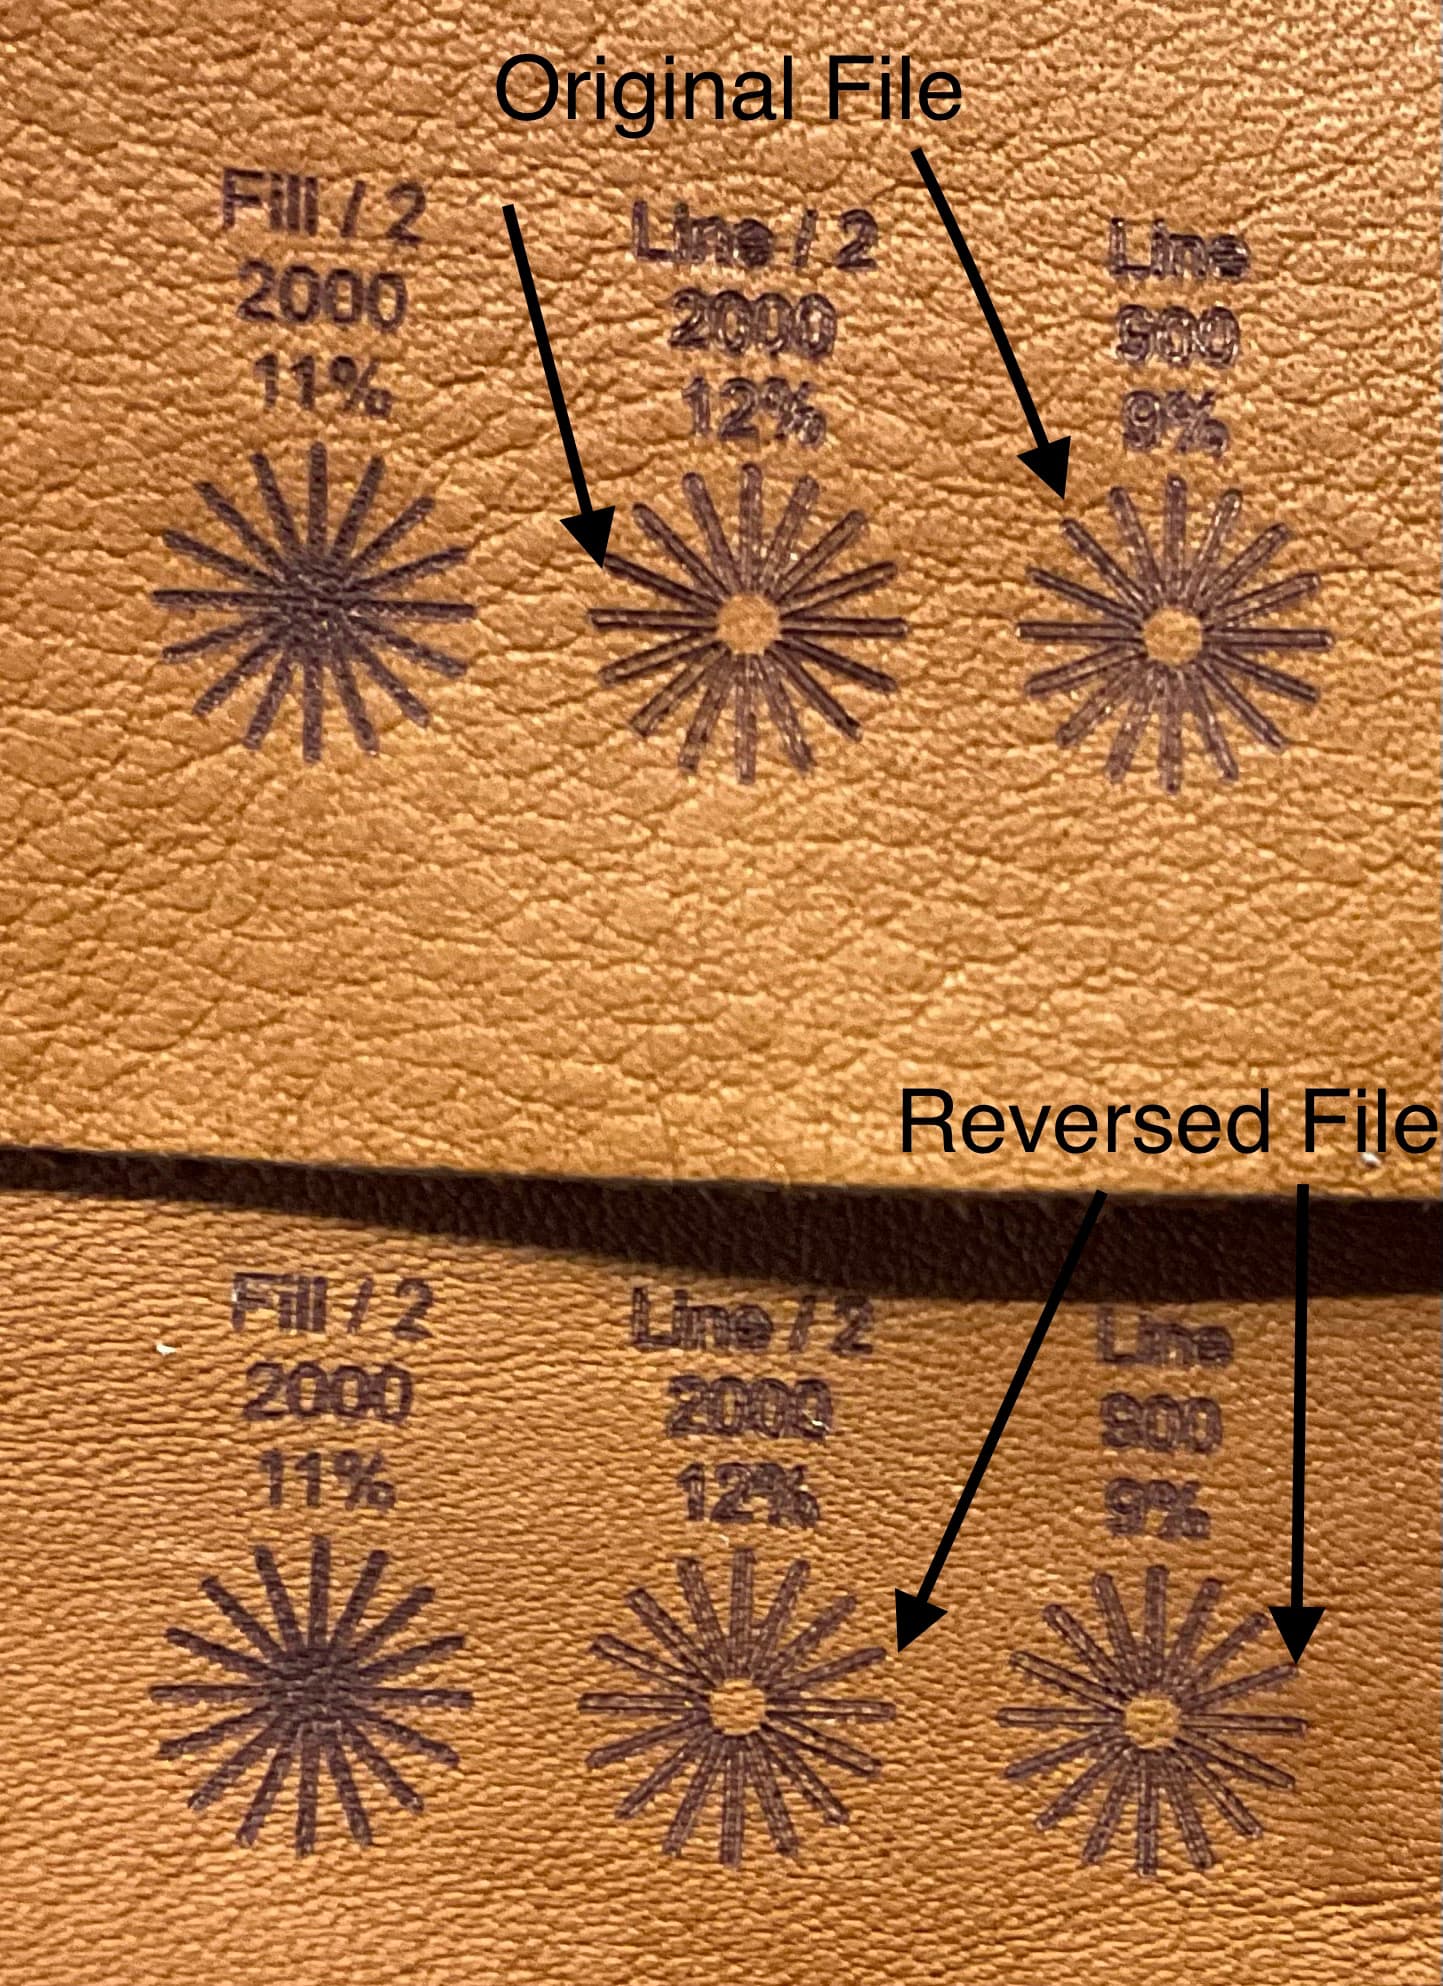
It was hard to tell from the photo what had changed or not. Try running this version of the test file. I didn’t deliberately change any cut settings but make sure they are correct. I’ve reversed the direction of the burn for the 2 line based tests. Confirm that you can see the difference in Preview. I want to see if the spacing changes at all.
I will test it tomorrow. After some tests today I have still the question why it is so repeatable. Even in the engraving in the middle it uses two repetitions and they are perfect, so no difference in the passes. This should eliminate the argument of an arbitrary mechanical issue like rocking of the laser head. So lets see what the reverse test will show.
It seams that reversing has mirrored the problem. I still have to double check, because I used a slightly unfocused Laser. This compensates the error but you are still able to see it.
For my designs i changed the mode to fill and use the group function to reduce engraving time. So I optimise the travel of the Laser to reduce unnecessary travel.
I will retest the files with a different material to reconfirmed the result.
If you’re confident that you’ve removed all mechanical looseness from the machine it may just be backlash that you’re dealing with.
You could test this possibly by dramatically reducing speed of the burn. If this is backlash then the burn shouldn’t improve or at least change the outcome no matter how slow you move. You could devise some test pattens specifically to test for backlash or for other remaining mechanical issues if you were inclined to further chase this down.
One other thing to try potentially is to use the “hide backlash” feature in Optimization settings.
I had the same issue, and admittedly some of the problem was due to acceleration settings , but I was pushing it a bit, but still after giving the settings some lower values, under very close inspection just engraving a circle at low power on slow speeds there was an appearance of a flat italic pen effect.
i checked re checked all potential mechanical issues all was good. I was confident my lens was clean and not causing any issues , just by the clarity of the focus spot under a usb microscope.
How ever after removing the small lens from its holder, and inspecting it under the same microscope it did show some not visible with just a magnifying glass, very minute particle deposits on the lens, almost under maximum magnification looked like uneven lens pitting.
They did take quite a bit of removing with a cotton but and lens cleaning tissue and solution to remove and more pressure than expected to remove.
To my surprise what was not visible with by looking at the focus and the lens clarity with a magnifying glass it solved the issue.
I was surprised but put the issue down to cutting some acrylic a few weeks earlier, with no air assist, the only conclusion I could come to was that some of the acidic gasses had found they way to the lens up the air assist nozzle.
So when using Acrylic and other similar materials, I will always now use a minimum amount of air flow to not allow and nasty vapours to get anywhere near the lens, even with a slight loss of glossing to the edge of the cut.
I did think of using an across the work area fan to also remove the vapours but am happy to just use a negligent amount of air assist.
I am sure this will not be the issue for many, but the uneven effect I was seeing did nearly drive me to despair in the quest of finding the issue, that seemed to appear with no obvious cause.
The appearance of the focus dot, before and after with the USB microscope seemed to be the same!
Hope this might help others, or at least be another possible cause to tick off the list.
Just to add rather than the faff of removing the lens from its holder being small and a fiddle, I just bought a replacement lens and will keep it just to use as a reference to compare for process of elimination to check, rather than go though the process having to remove the lens from the screw in mounting should the issue rear its head again.
I guess it is down to the lens being so small in diameter compared to larger lenses on Co2 setups as the percentage of and optical infringement will have a much greater effect on a lens that is 5 mm ish in diameter from one that is 50mm!