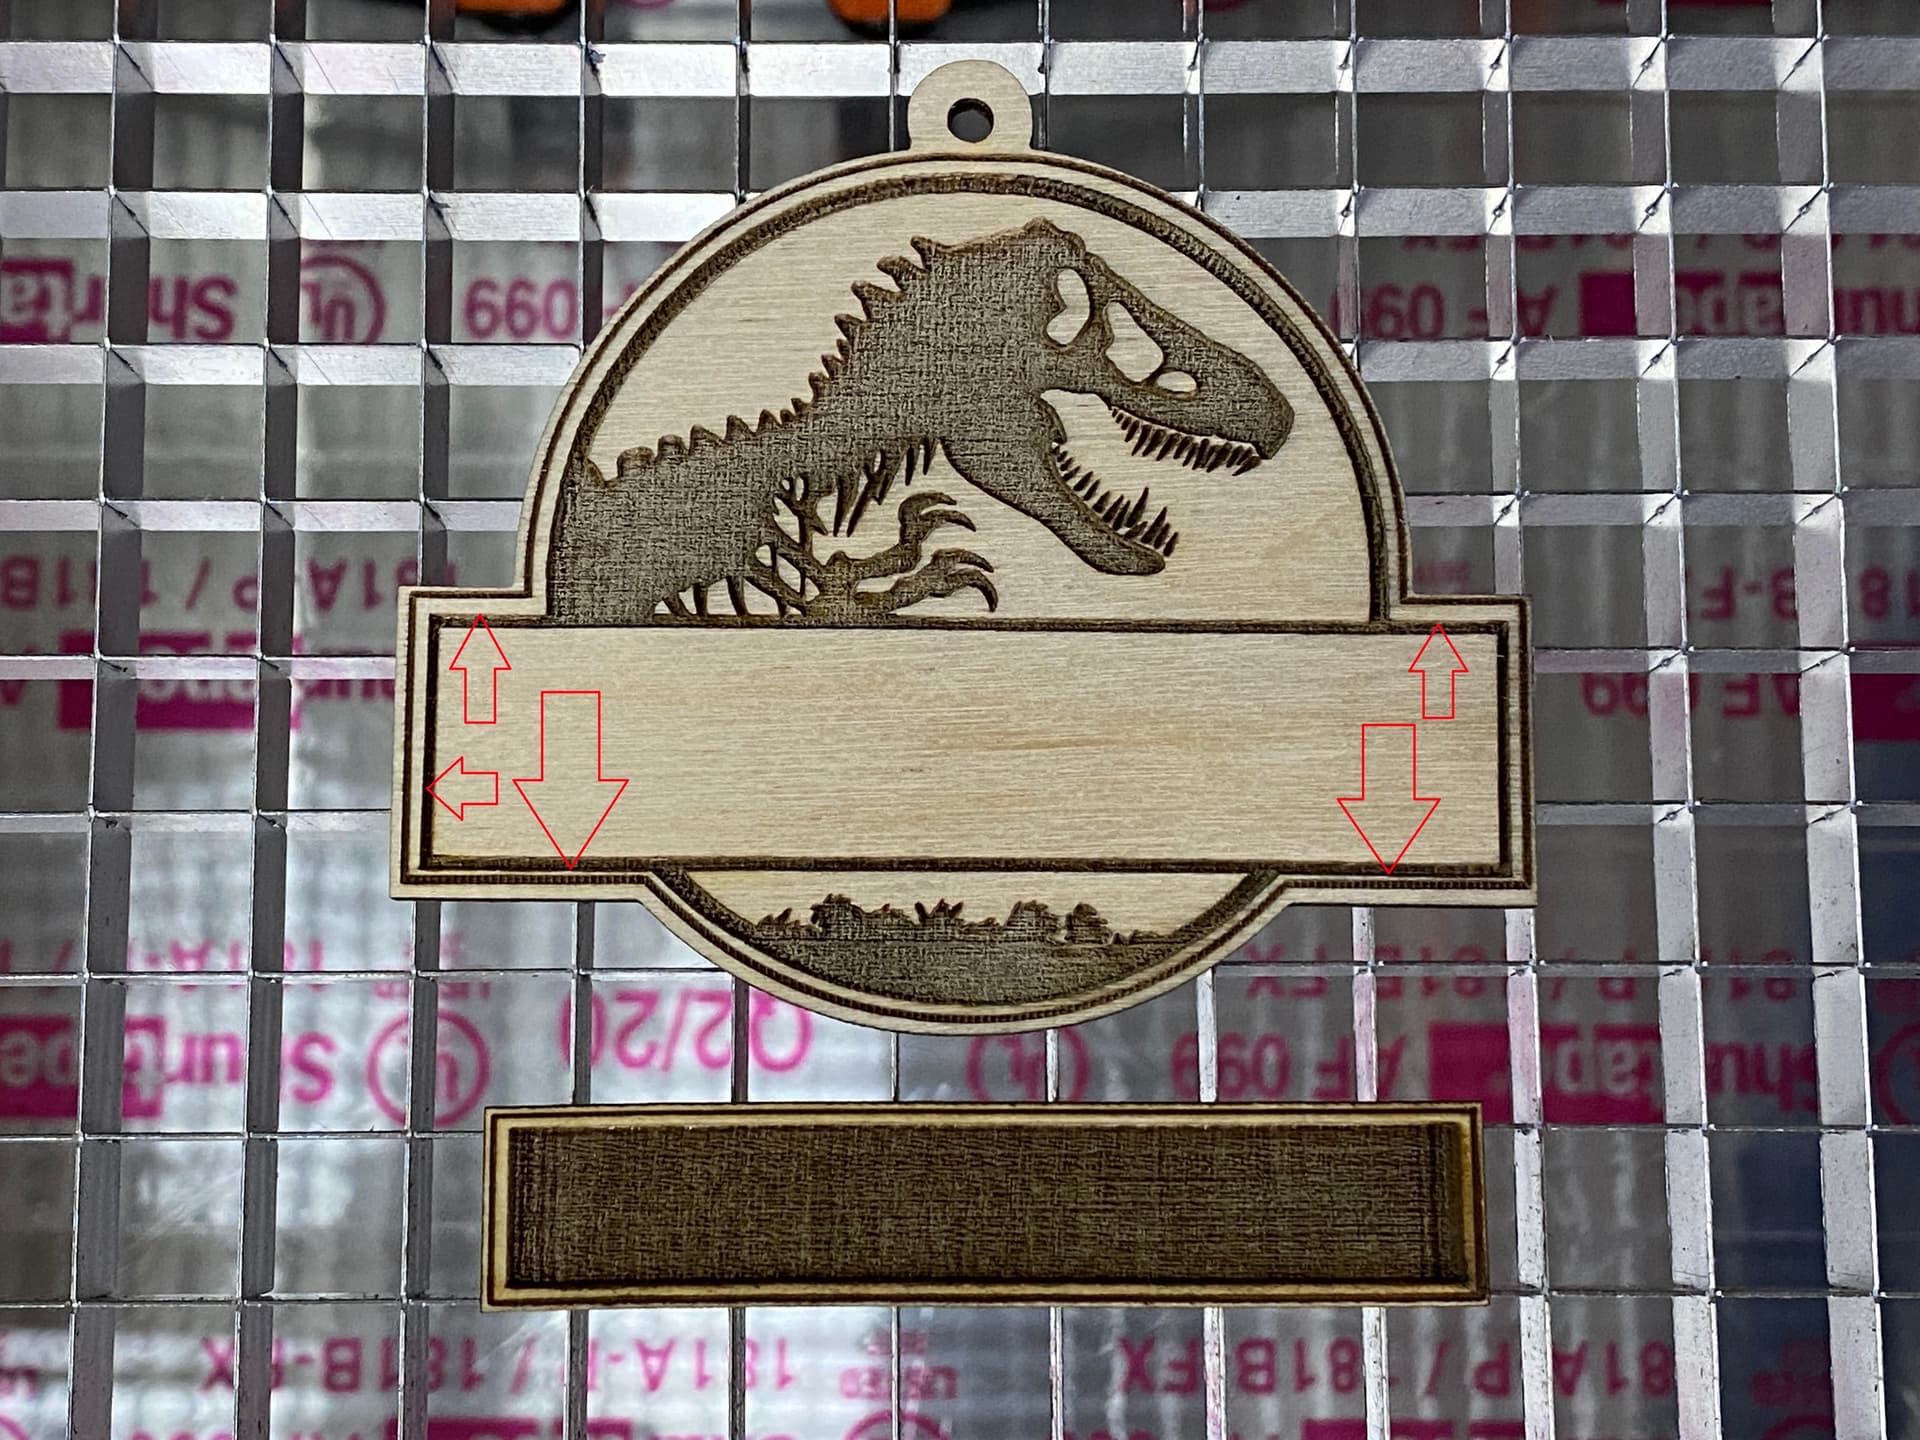
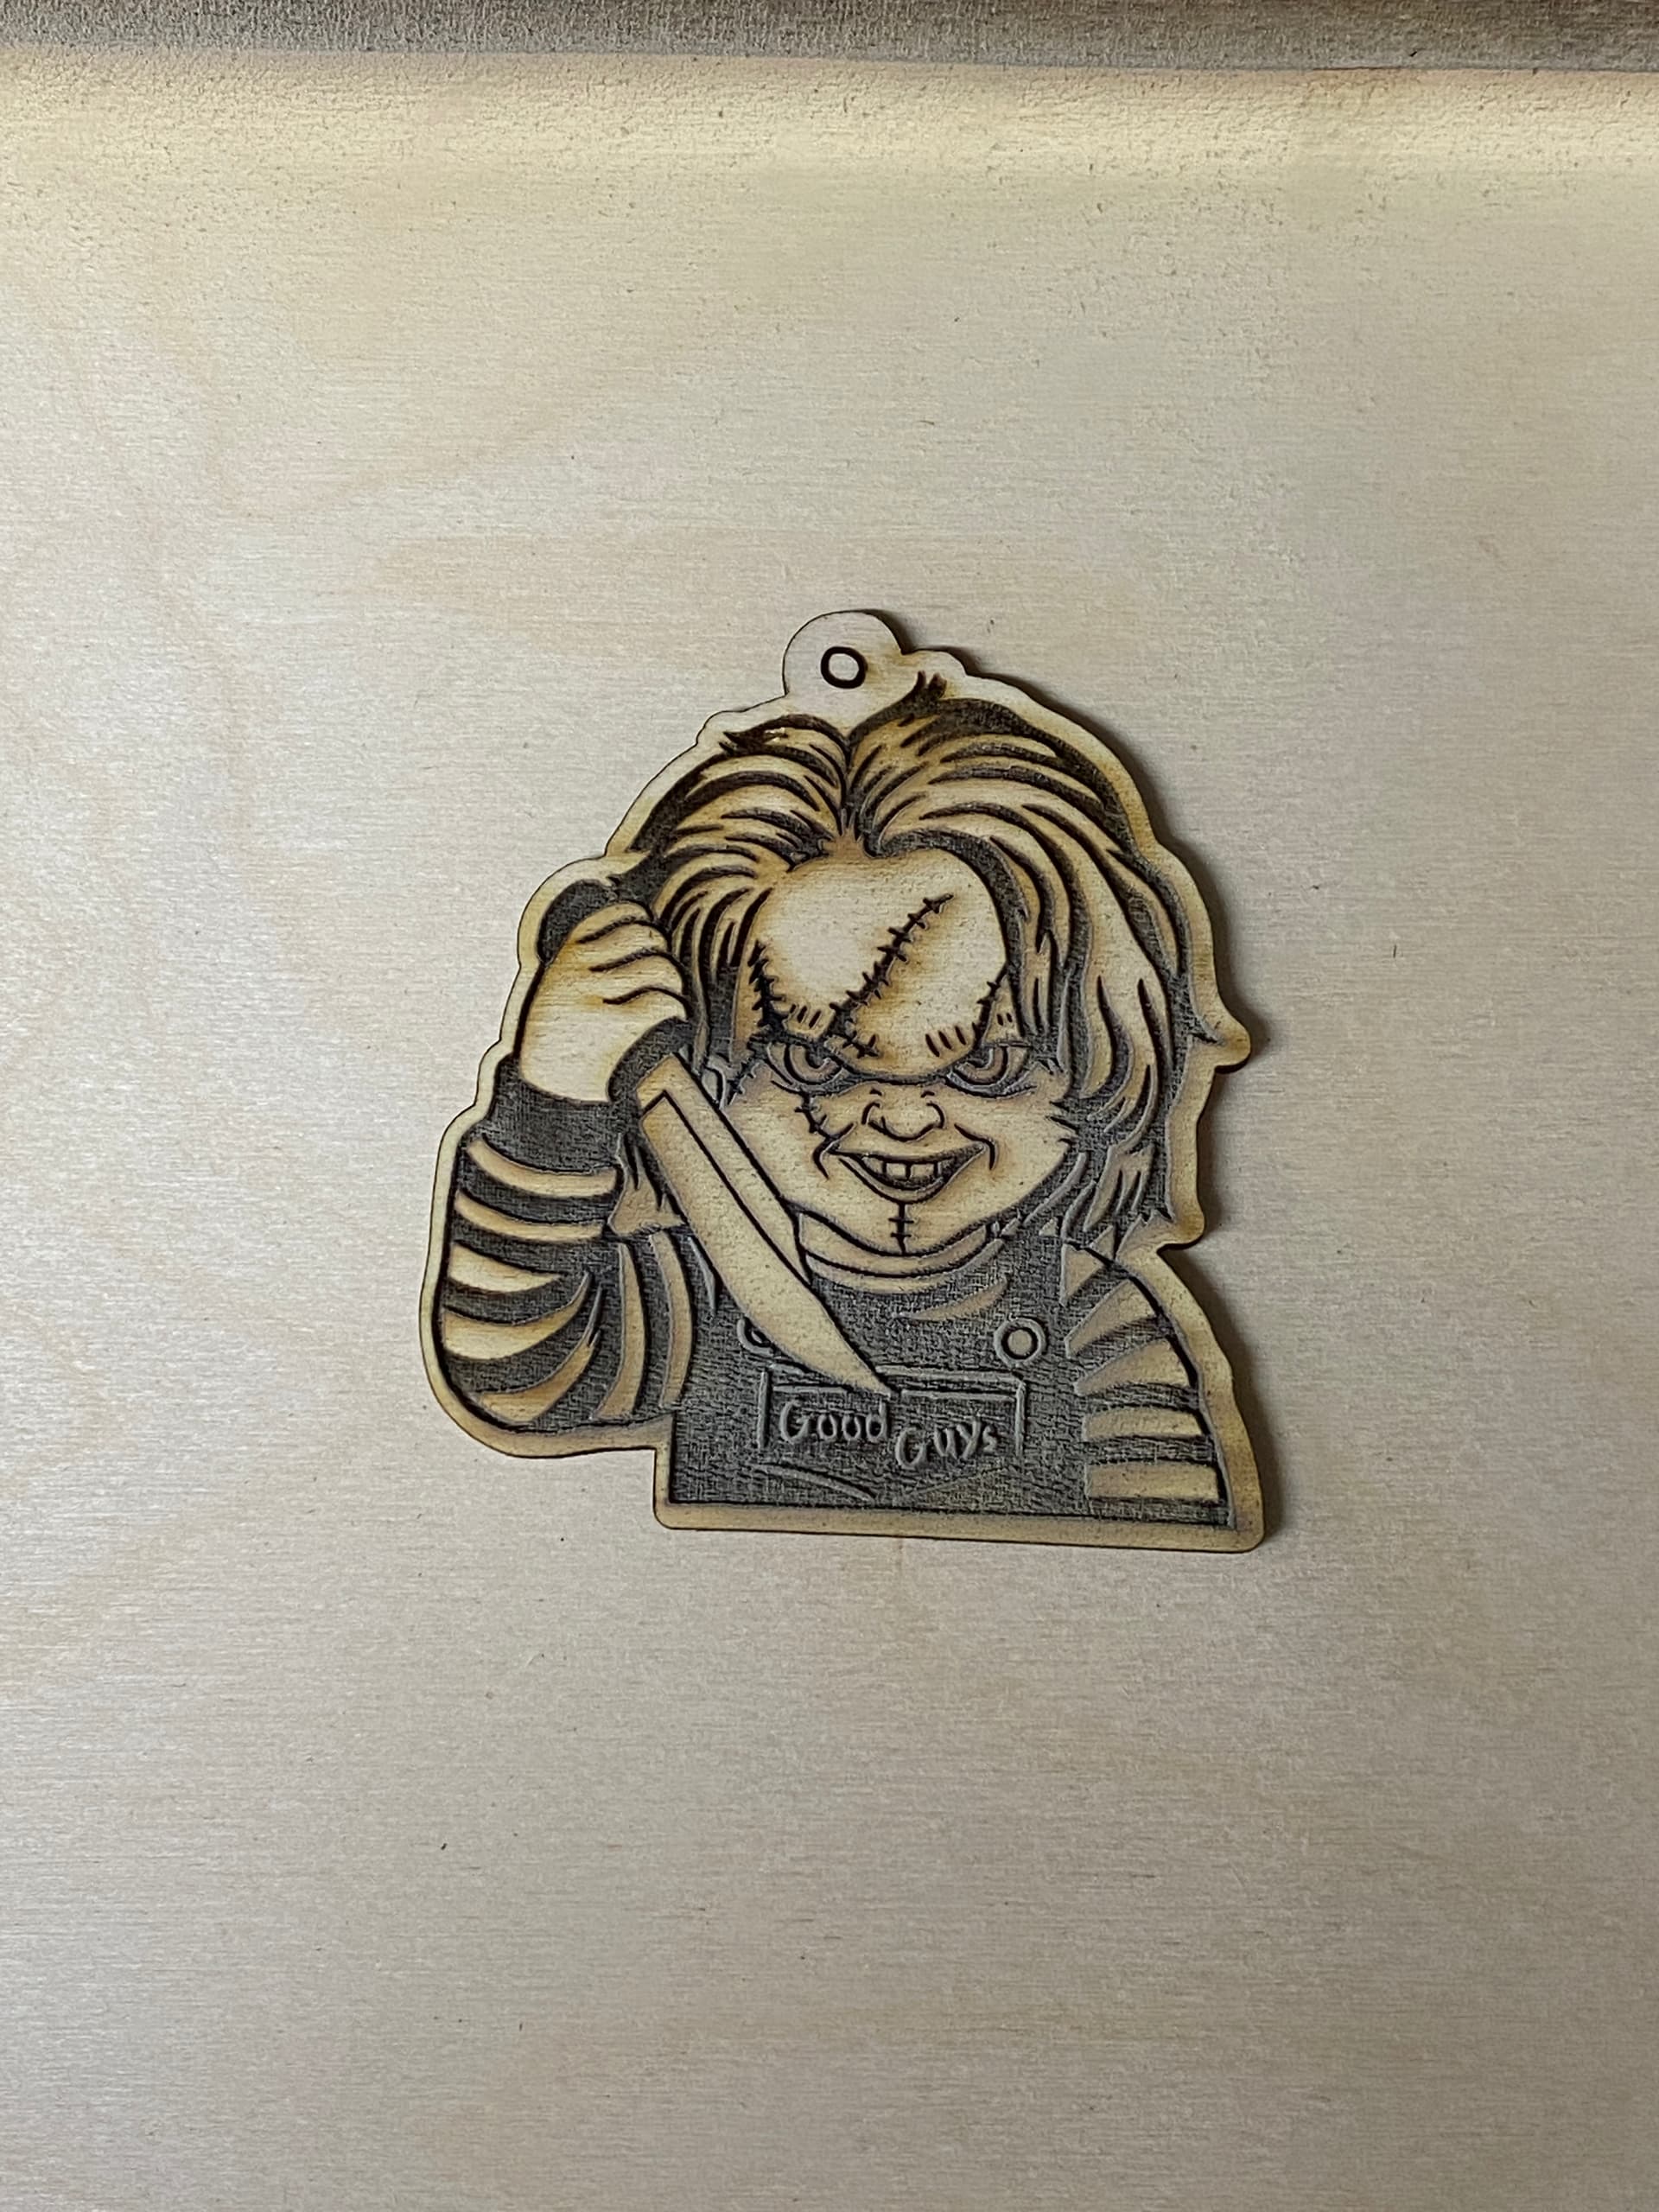
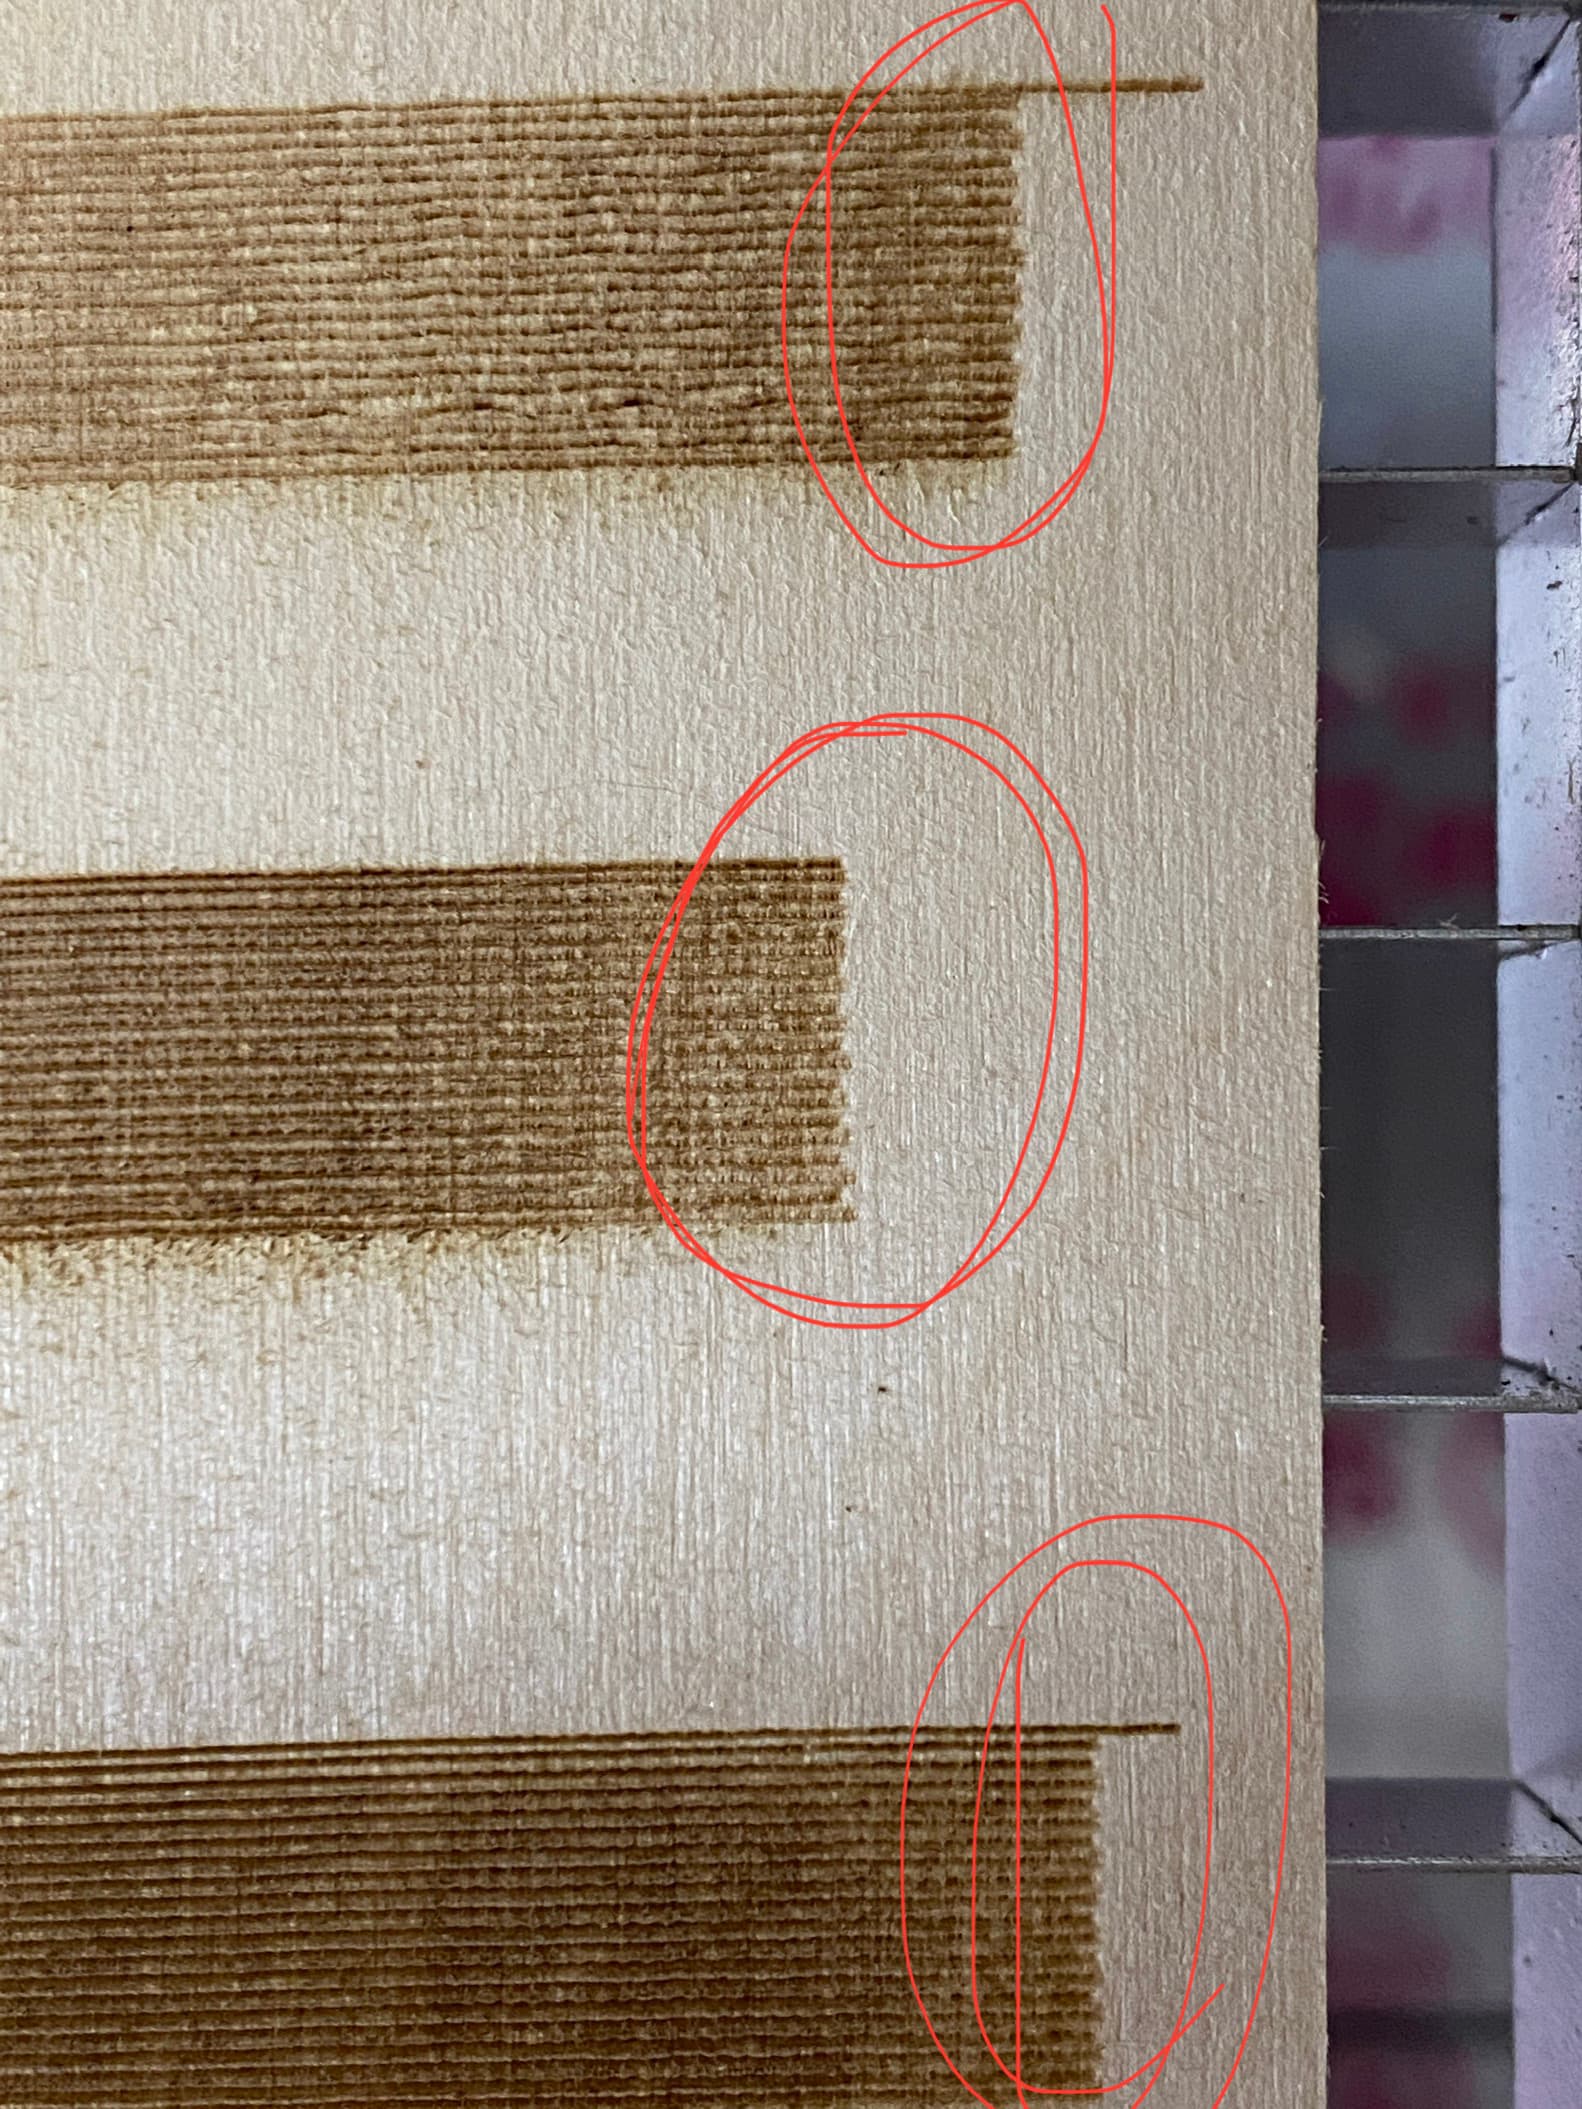
I’ll cut right to the chase, lines do not appear to be aligning with the infill that they surround. I have a complex shape (top in the photo) where the gaps around the infill should all be the same thickness. In the simple shape (bottom in the photo) the gaps are pretty much what they are supposed to be. You can also see the cut is very uneven around the outside of the ornament. I use this exact file on a K40 and I get results that match the LightBurn design file.
My initial thoughts are certainly are hardware problem. I do not know what tests to run to prove it. I have tinkered with a lot of settings and hardware. Here are the things I can remember:
Cut acceleration in half (now it is 950 mm/sec2)
Tightened belts
Reduced fill speed to 100 mm/sec
Reduced line speed to 15 mm/sec
Ensured pulley set screws are tight and on the flat portion of the stepper motors.
Tightened V-Slot wheels
Cleaned tracks of V-Slot (the laser has less than an hour of runtime on it)
Changed micro stepping to 1/16
Many other things that I don’t remember but needed to be done because the laser build was just completed.
This is a custom laser. I am running the most recent version of FluidNC, 3.5.1
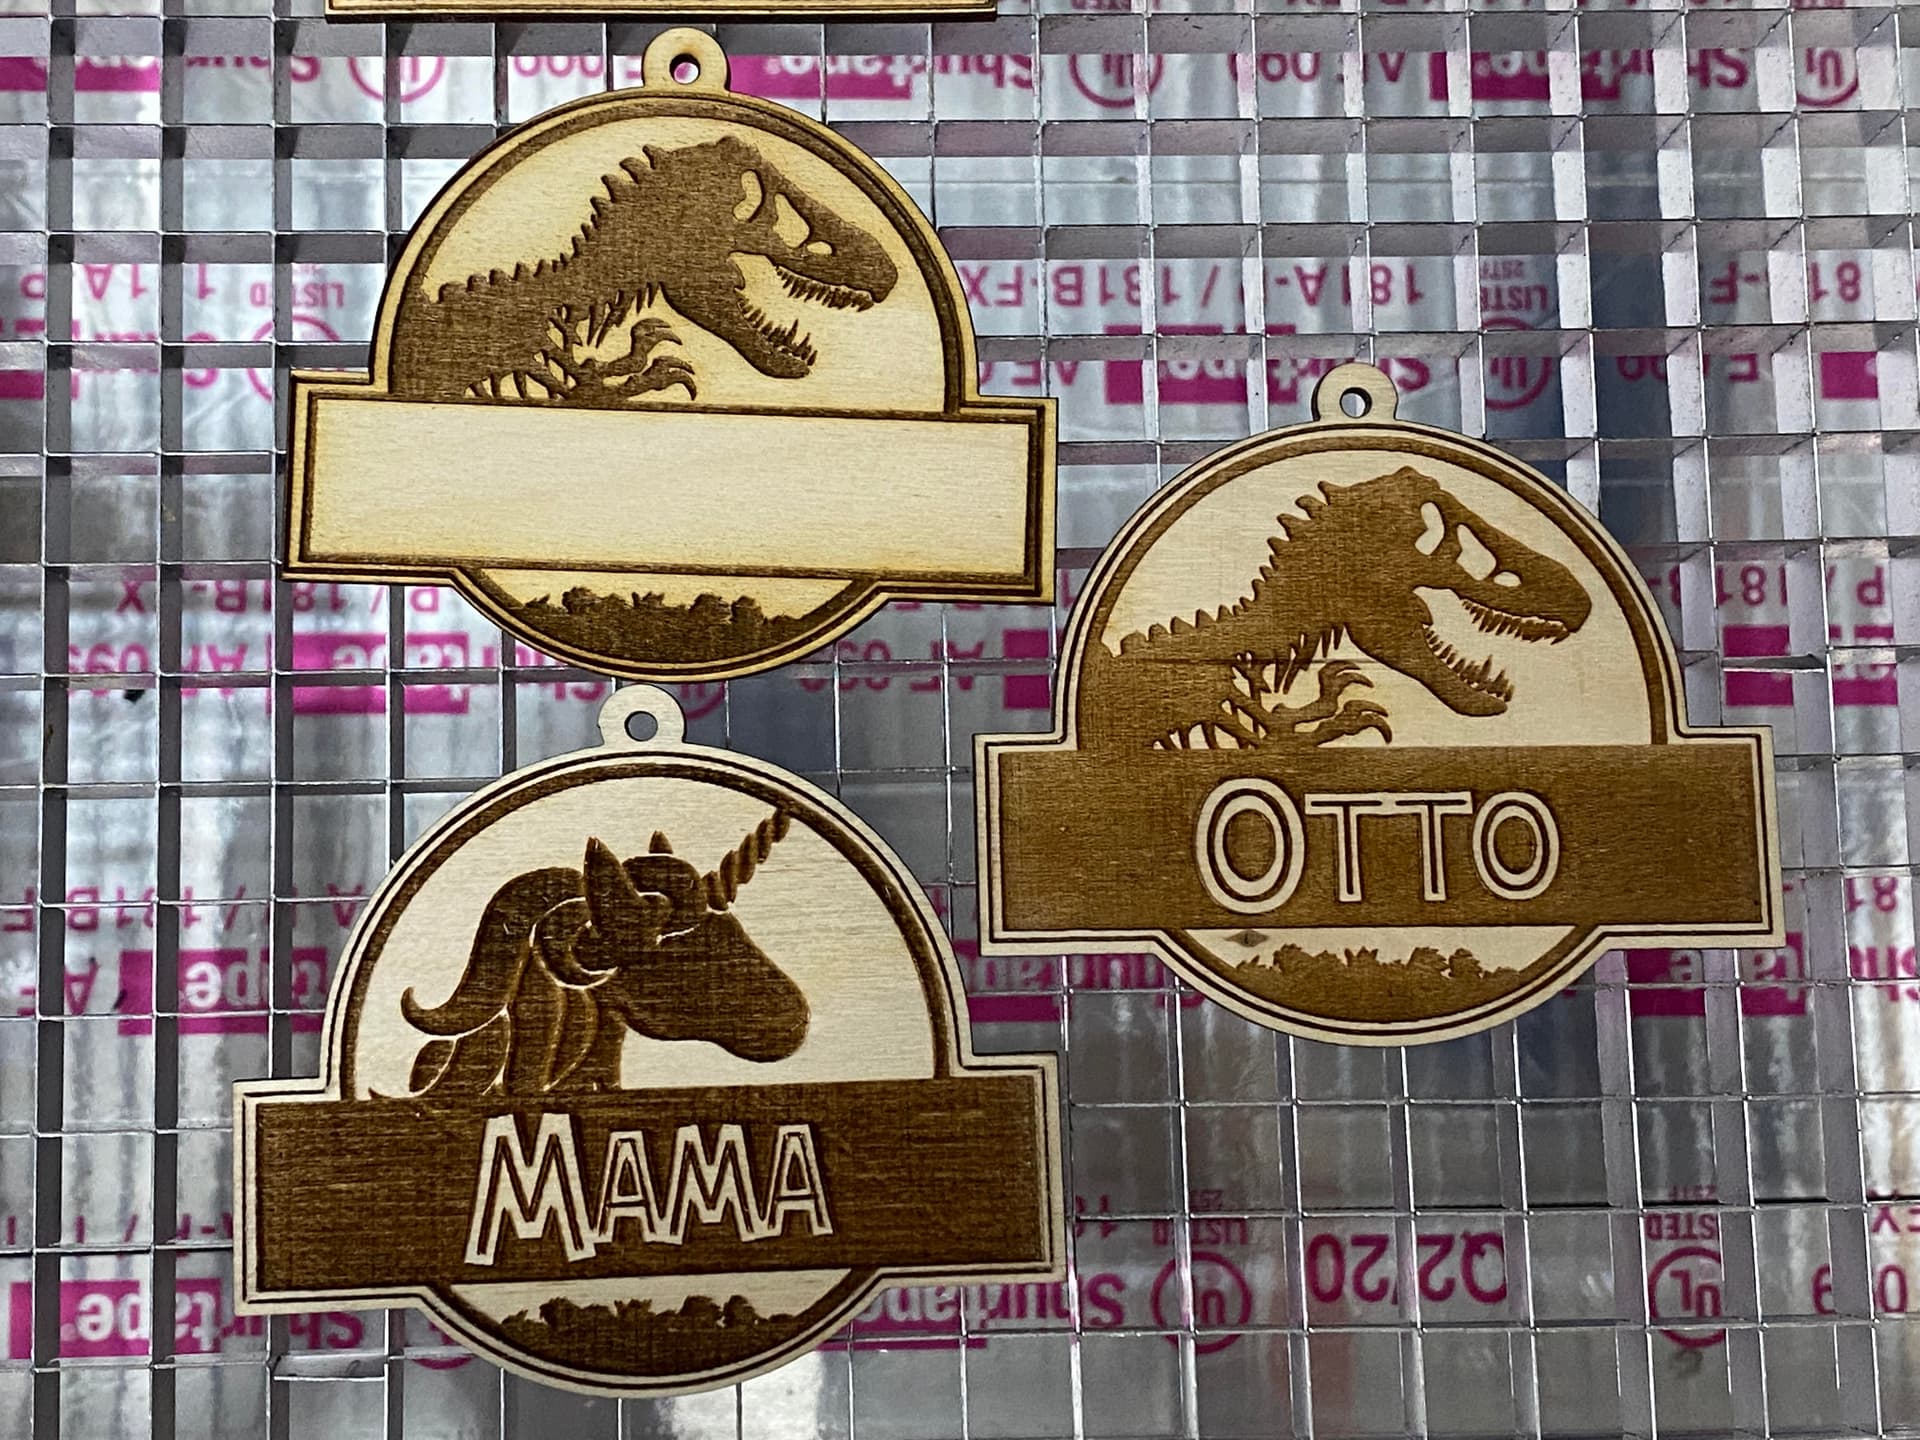
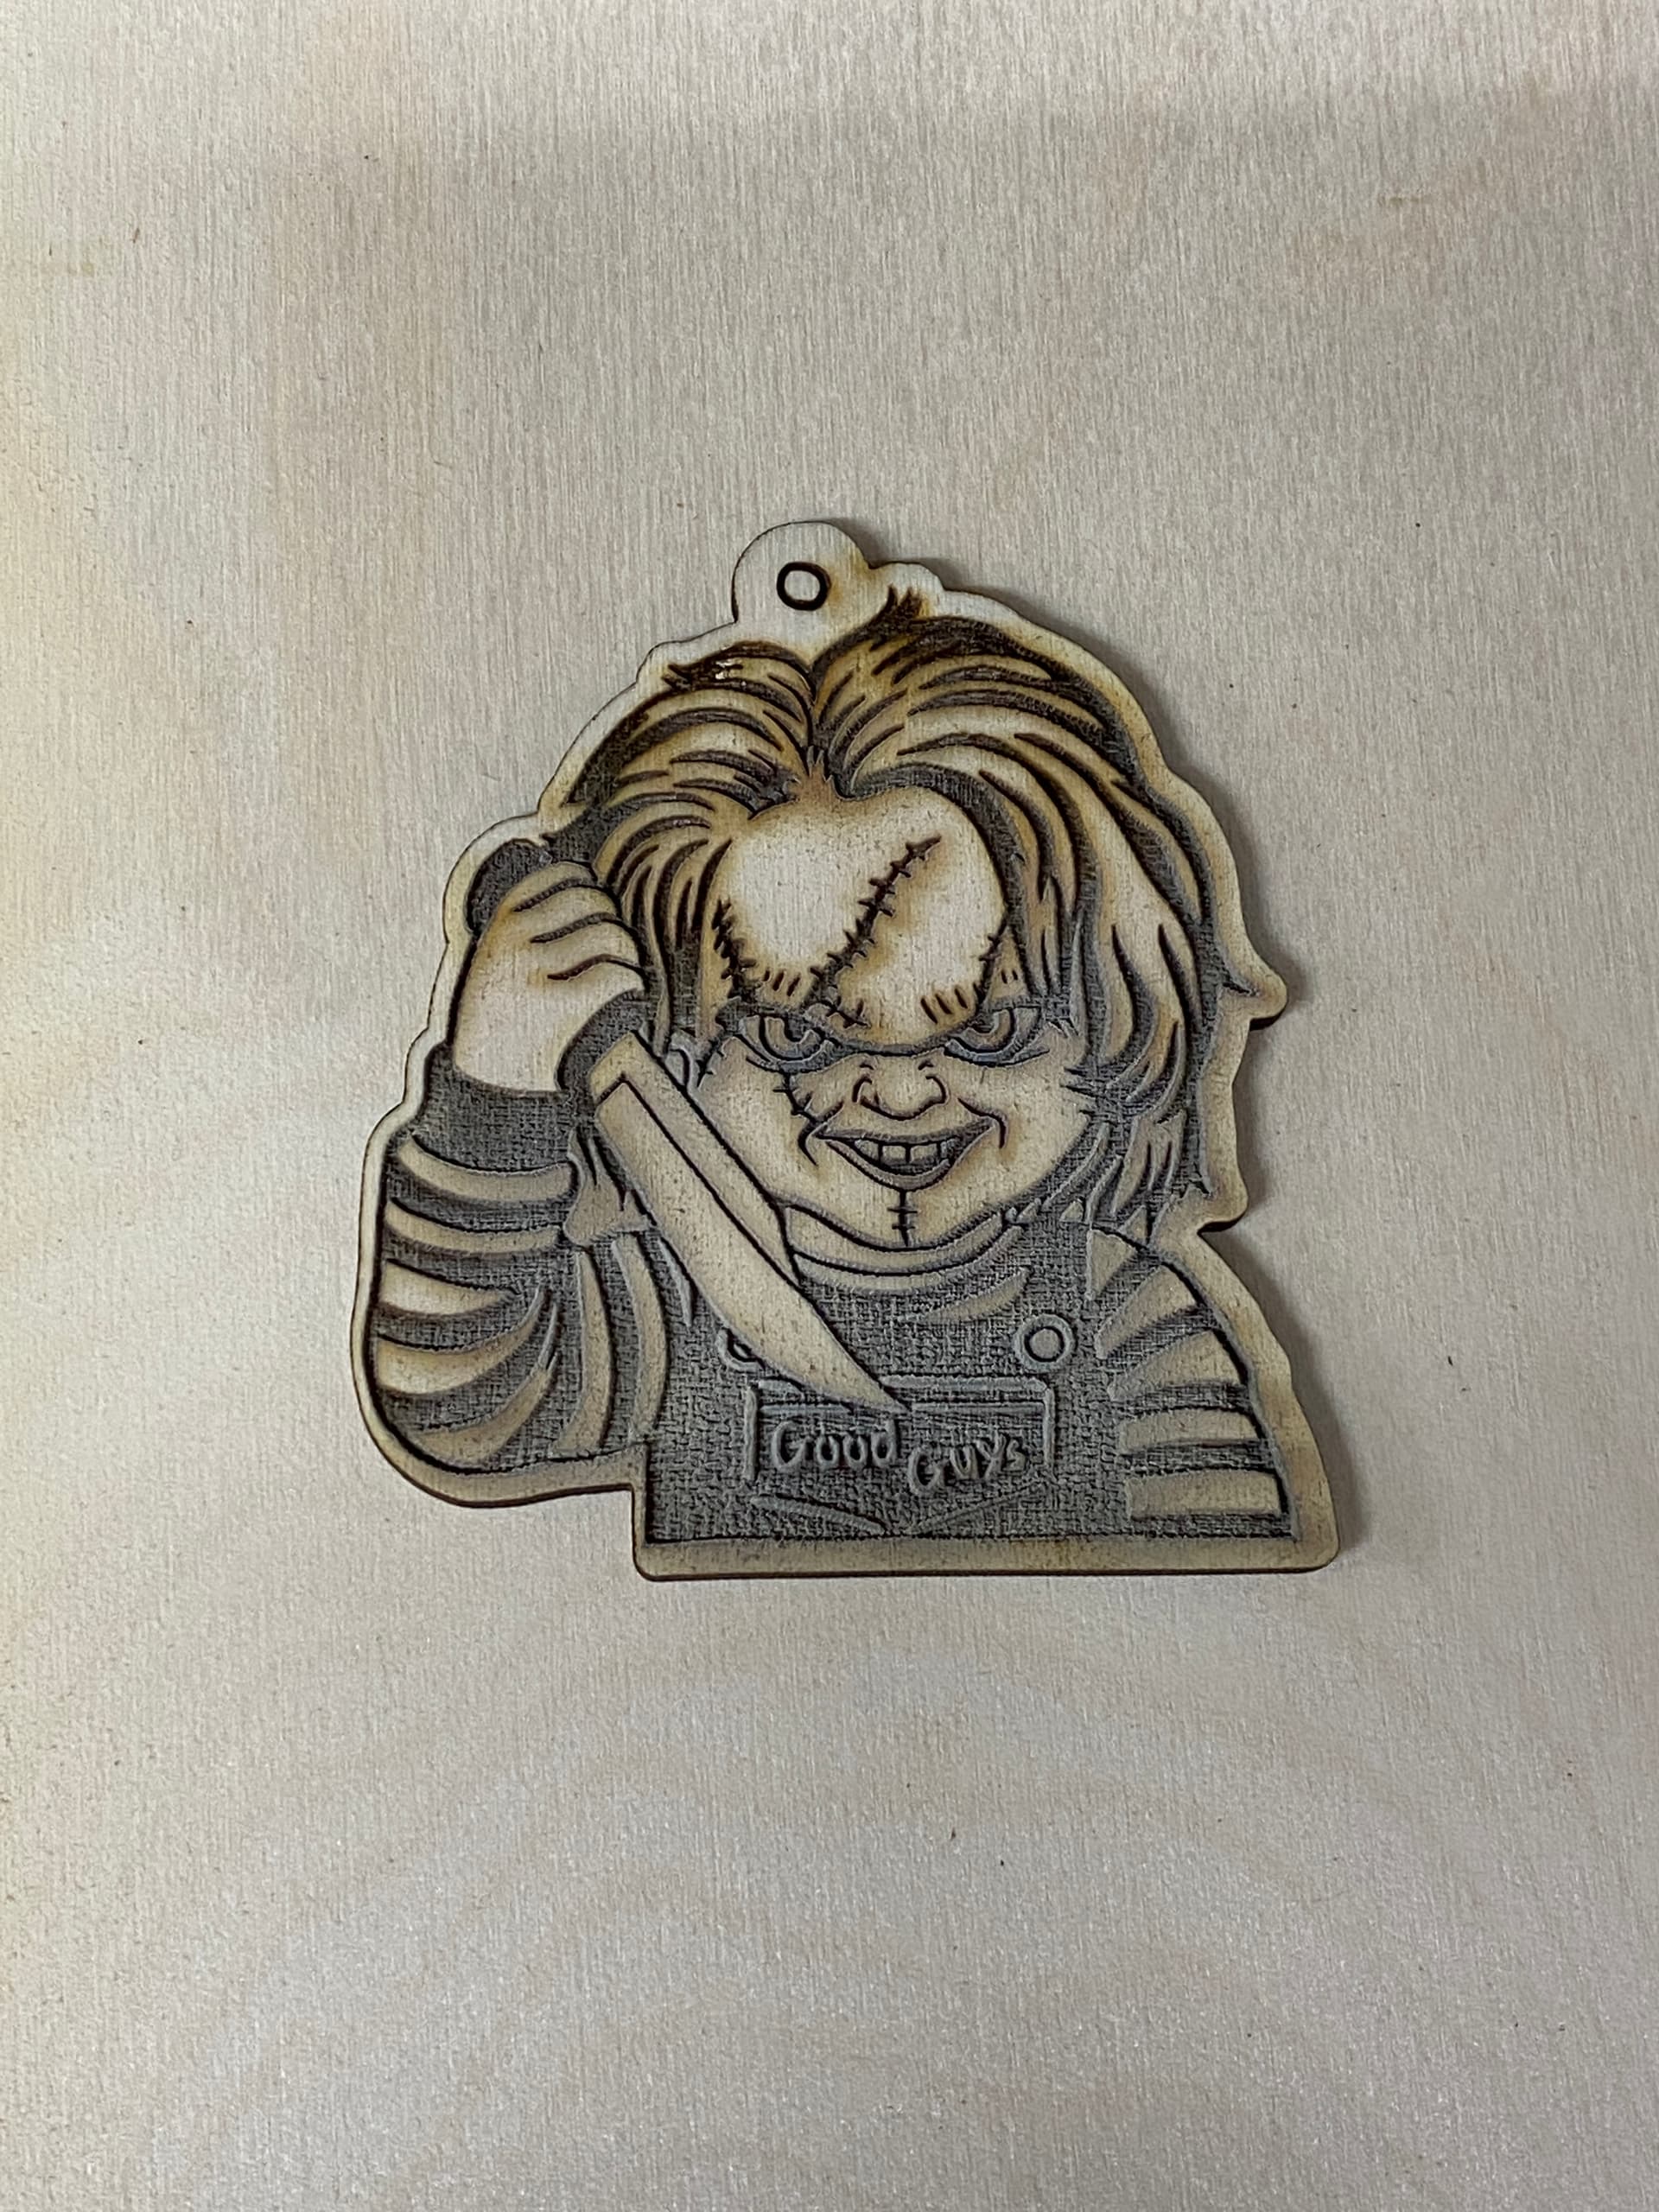
Alright, I must have done something to LightBurn. I went back to my K40 to fulfill an order, and now it is displaying the same symptoms as my new laser. In the picture, the ornament with no name was just burned on the K40 and it shows the same sort of issue. The other two ornaments were from a week ago before I started messing with LightBurn to setup the new laser. As you can see the K40 was previously burning these without any issue. I need to fix this issue ASAP as I have orders to fulfill!!!
It looks like you messed around with your design, it’s not centered anymore.
The uneven engraving itself, I think could be attributed to the difference in material, with plywood a “normally known” problem, unfortunately.
Now I see your preview, you must have moved your laser or your object during the engraving process.
The object on the K40 is taped to the bed, I really don’t think it moved. I’ll burn another just to prove it because anything is possible. I’ve burned 1000’s of this design and had very few if any issues and never this issue in particular.
Im on an older version because this version has worked perfectly fine for me for many years. Why spend money if I don’t have a reason to. I’ve been using the same laptop, usb cable, and laser for almost 4 years. Although I can say I swapped out usb cables recently to see if that cable was a potential source of error. I ended up switching back because the new usb cable was doing the same thing.
Honestly this is very strange that I didn’t have this issue until I added a second laser setup to light burn. Ever since then, it seems as though both lasers are showing the same or similar problems.
I am no longer attributing this to my hardware considering the circumstances outlined in the posts above.
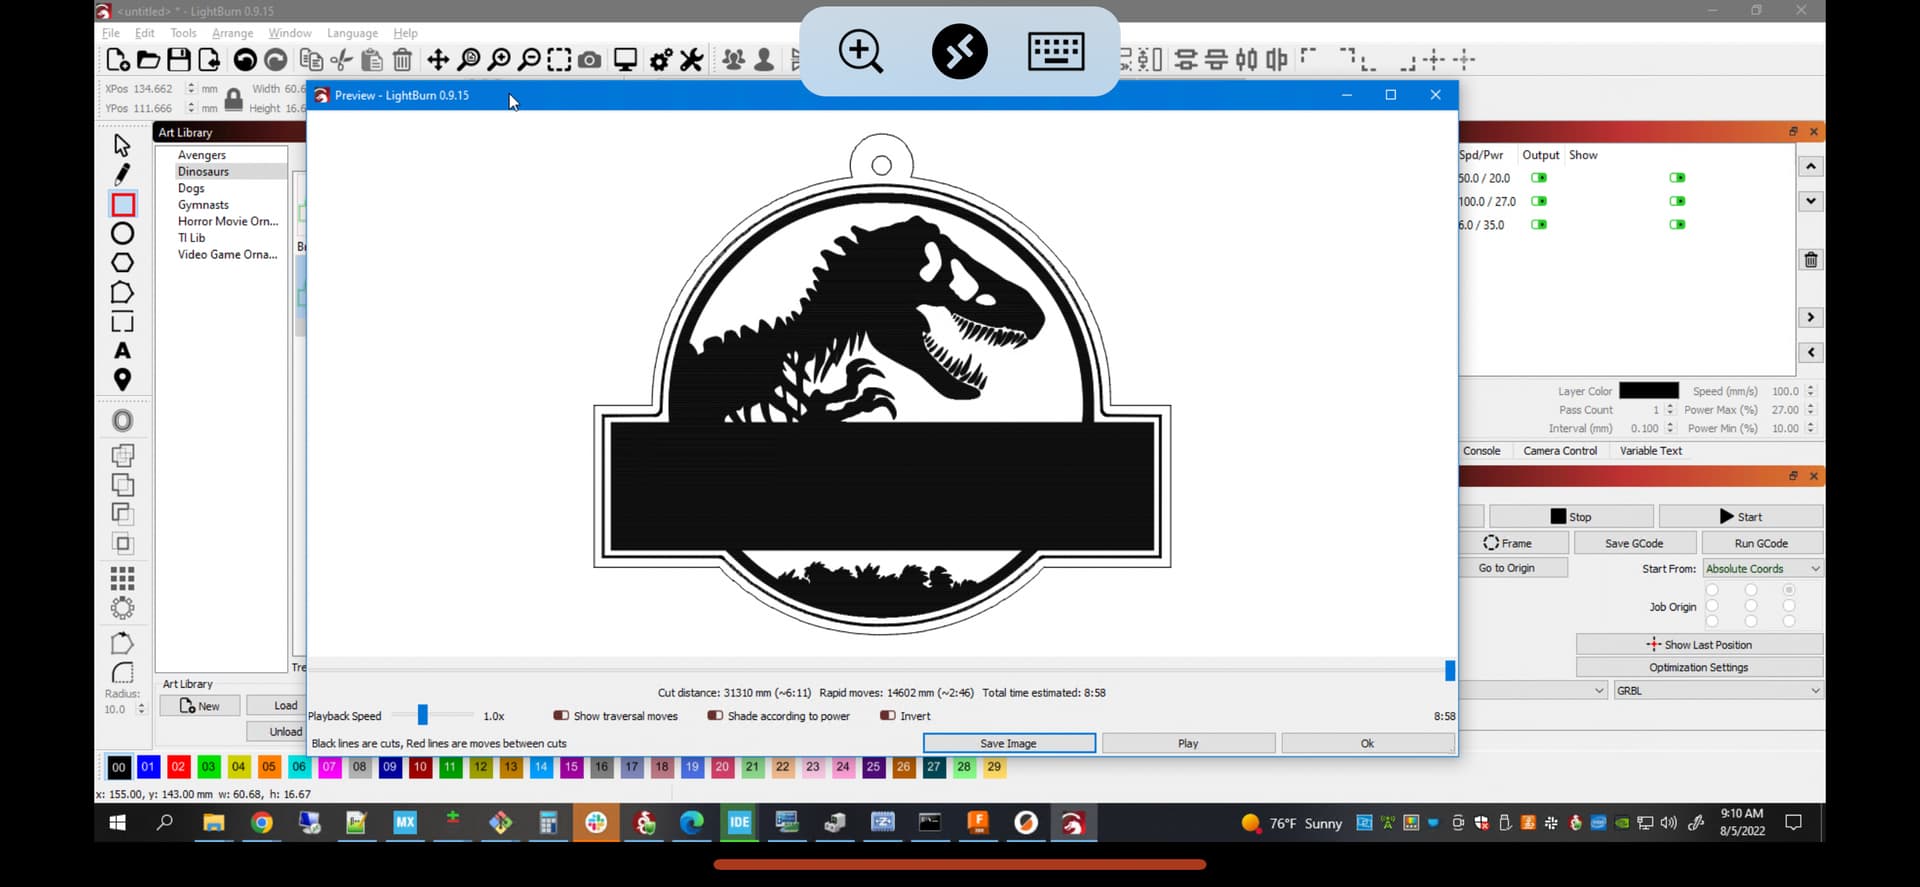
This is almost certainly not the case. There are people that have many concurrent devices configured so there’s nothing inherent in that. The Preview bears out that the laser path is most likely being generated fine. You could confirm this by examining the g-code. I’ve never seen LightBurn generate bad g-code for core movements so I think the chances of that in this case are low.
The fact that both lasers are exhibiting the issue is likely a coincidence or it’s possible that there’s something in the design that’s putting more mechanical stress on the machines so they’re failing in similar ways. Are you using flood fill for these?
Bottom line is that somewhere in the chain you’re missing steps. My first inclination is loose belts but you say you’ve checked for that. If not that I’d think that the stepper motors are missing steps.
To be clear, I’m not putting into question the output of LightBurn. I’m sure the gcode is fine, although I don’t have a great way to actually confirm that.
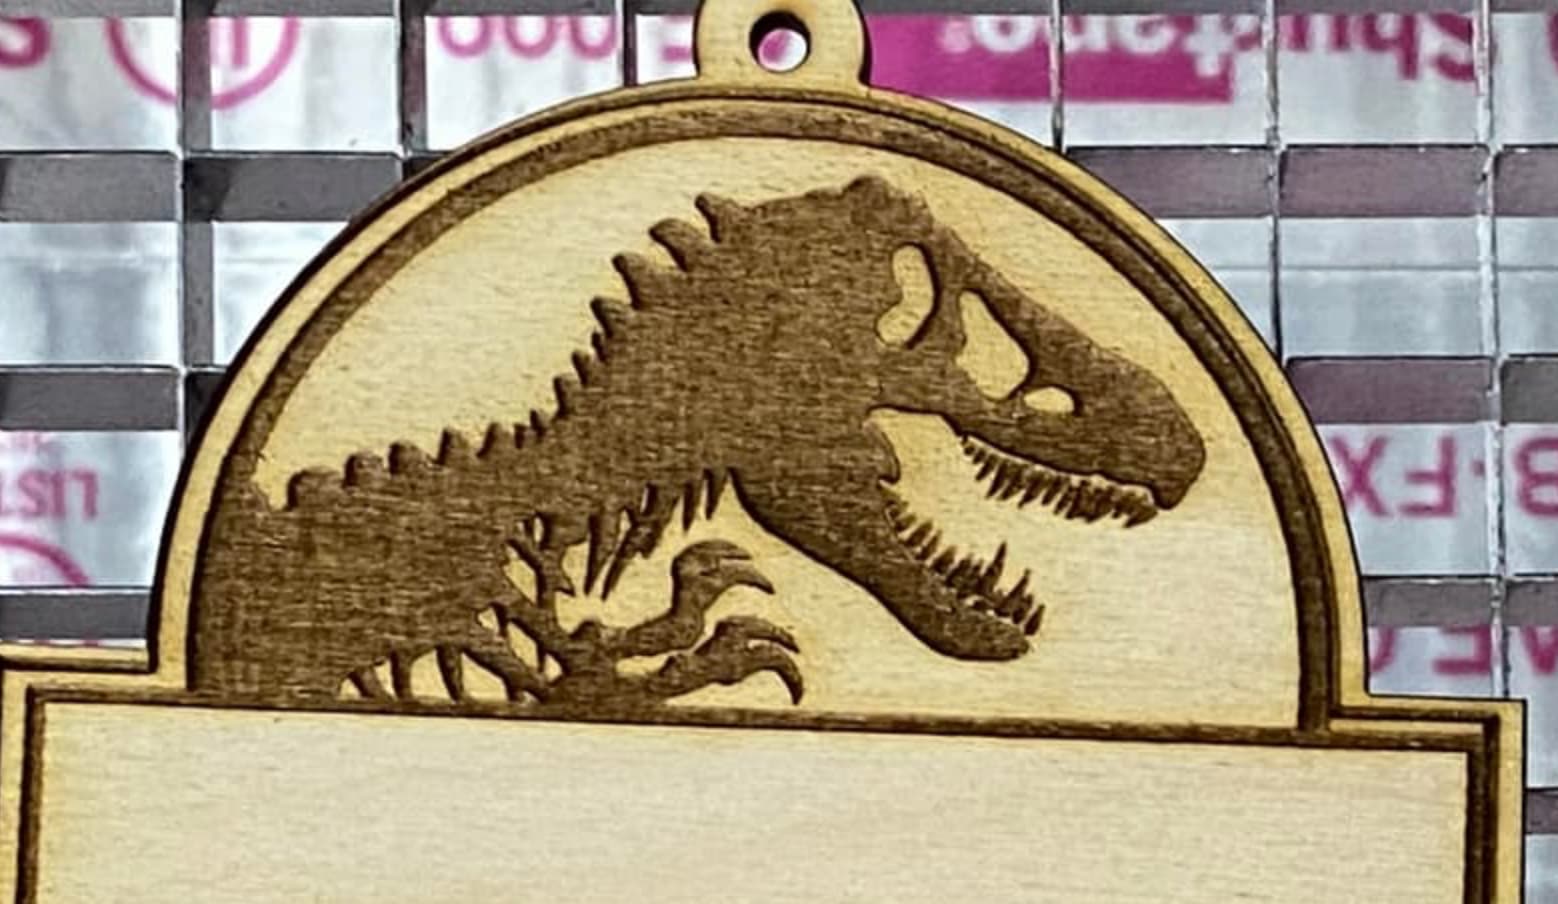
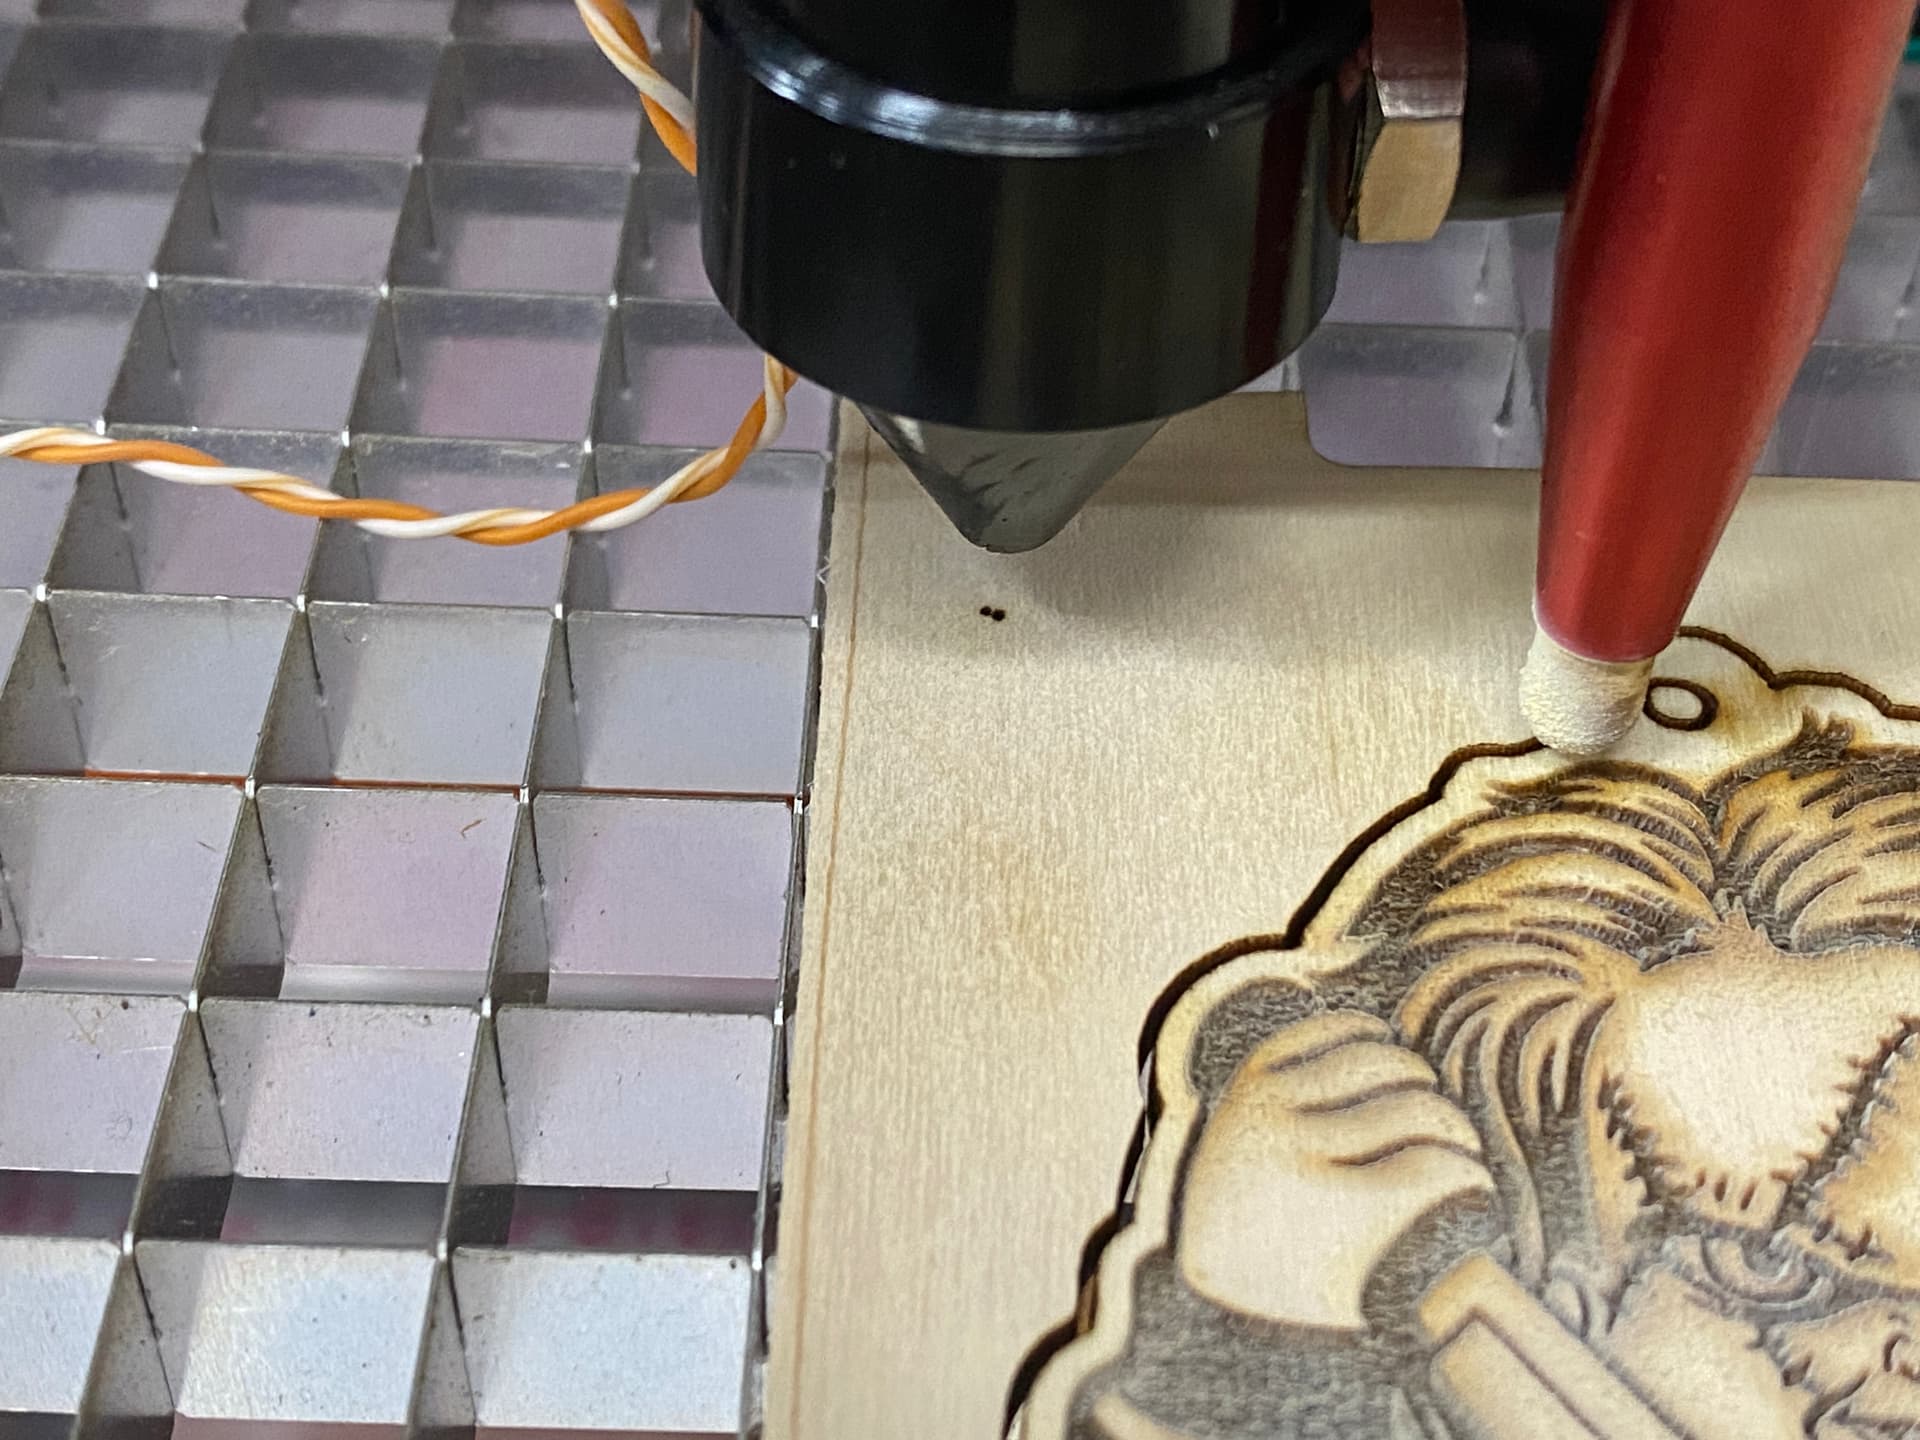
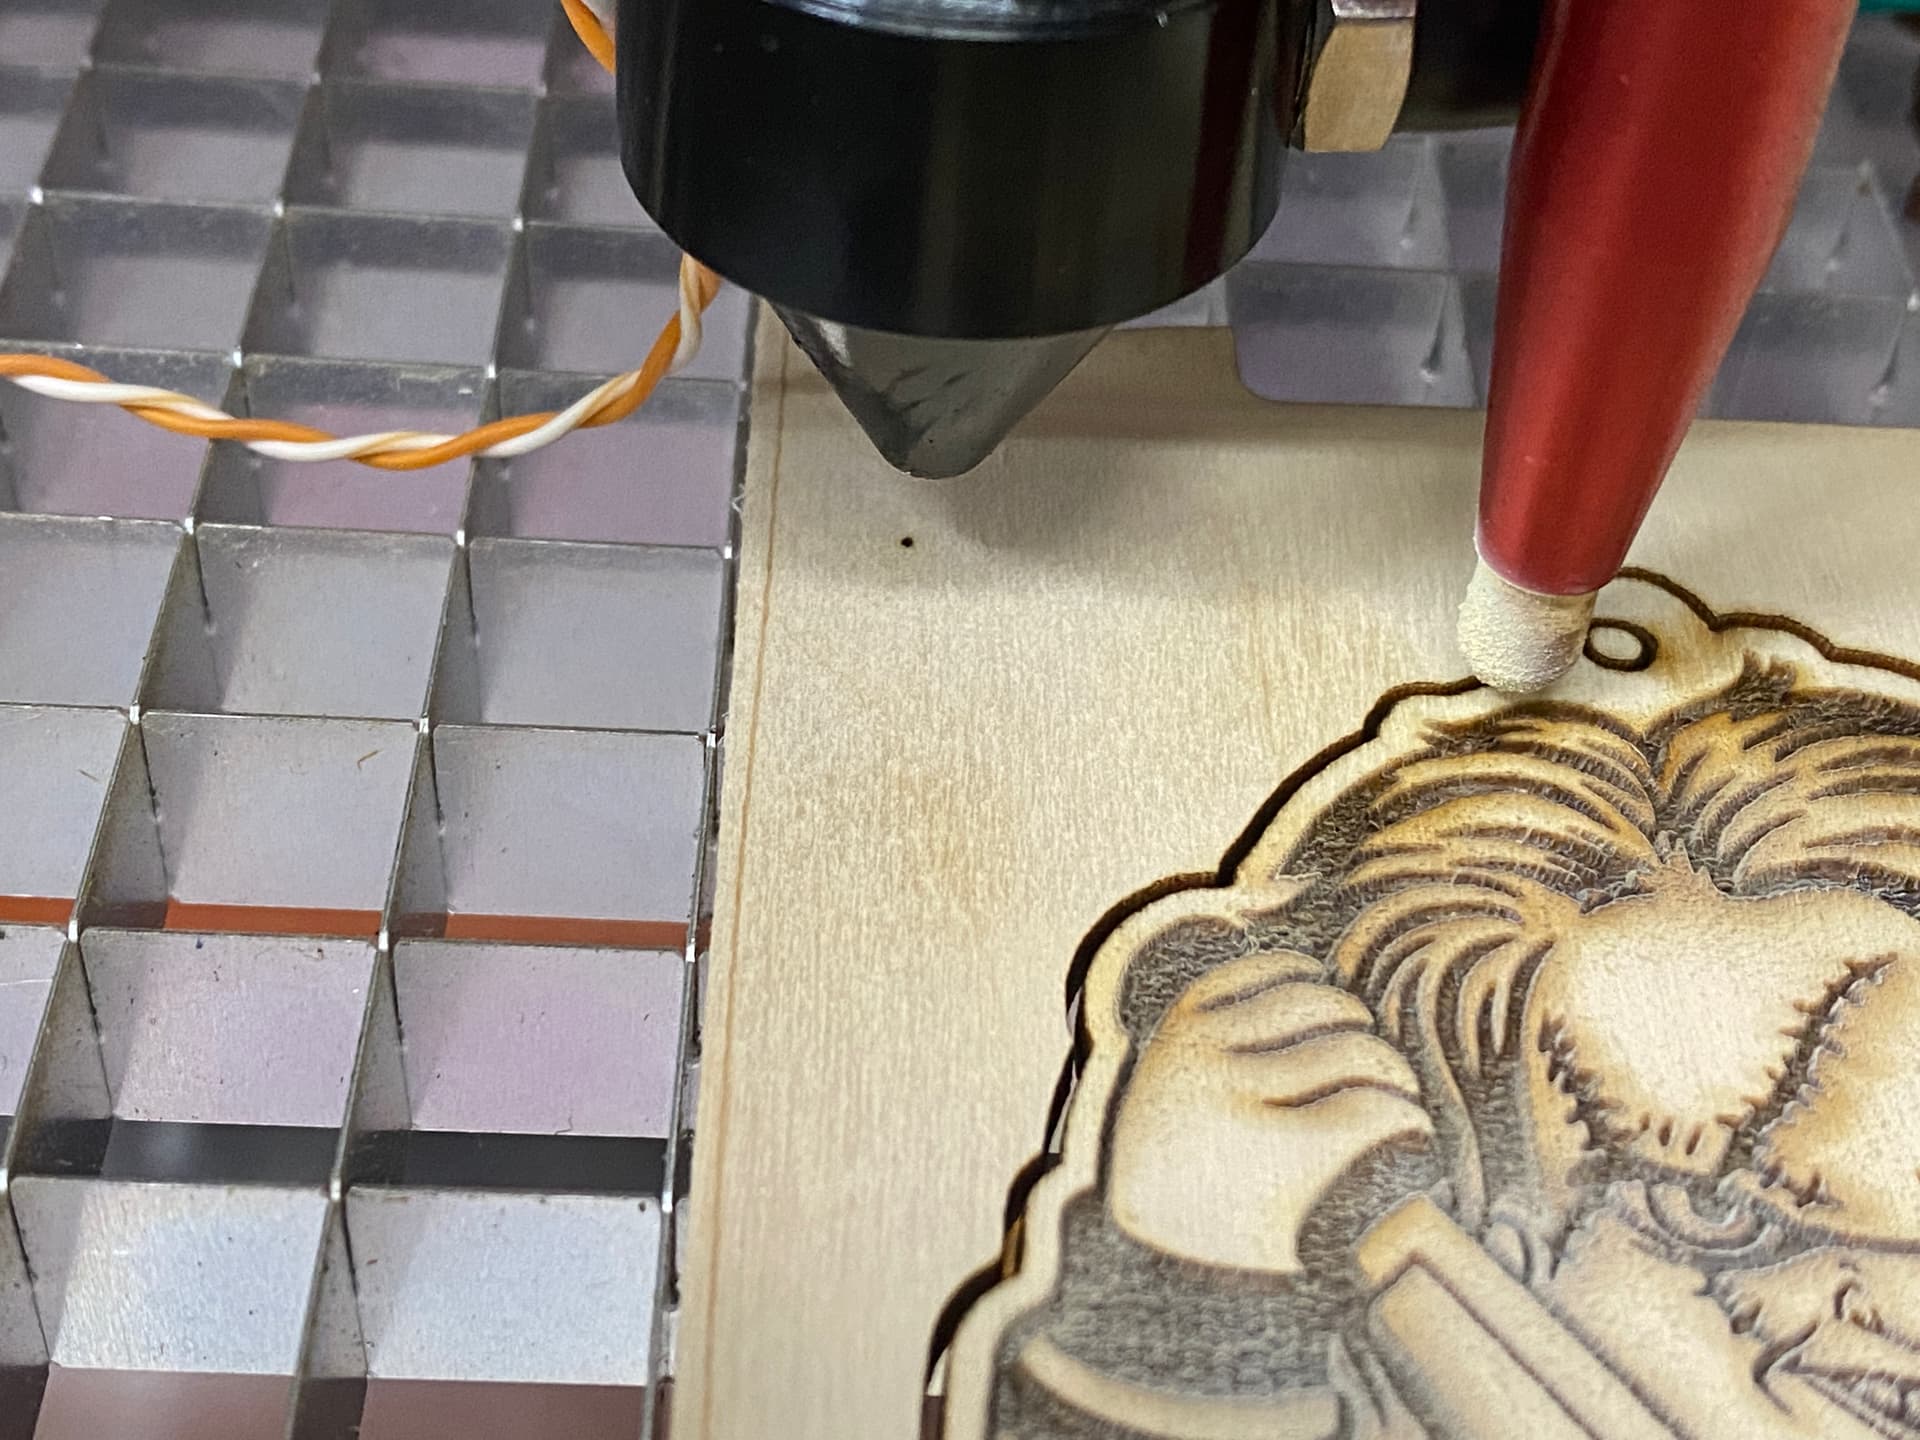
Here is another burn with the same issue happening
My guess is that your laser isn’t able to achieve 18000 mm/m and is missing steps. Try reducing this dramatically and see if you get different results. You can clock it back up to optimize speed.
Ok, I dropped the max mm per min to 6000 which equates to 100mm/sec.
I homed the laser, and did a test fire. This produced a dot on my wood surface. Ran the job, which ended up producing the same results (offset). Then I did another test Fire. The dot that was produced is in a different position. I do believe this confirms that steps were lost.
I built this laser to go faster. My old laser goes max 100mm/sec. Fail. What is causing this step loss???
It’s going to be something mechanical or in your stepper motors. From the configuration file it looked like you were using TMC2209 stepper drivers. Did you use the same for the old laser?
Suggest you do a full mechanical review to make sure everything it properly tensioned and whatnot.
Outside of that, try dramatically reducing max speed and acceleration to see if you can eliminate the lost steps. If you cannot through those settings then that indicates an issue elsewhere.
Ok, I have a theory. I feel like mechanically the laser is sound now. I’ve redesigned a few components that were making me feel less sure, and solved any mechanics issues that I felt may have been contributing. The problem persists.
I’ve been reading the forums and LightBurns documentation. I came across this:
I did the burn and made the adjustments to no avail.
As I look closer at the burn it becomes more obvious that an over scanning adjustment isn’t what’s needed. The offsets from line to line are inconsistent and minuscule.
The pulley and stepper motor setup that I have leads to a step per mm rate that is not a whole number. 53.33, my impression is that stepper motors aren’t going to do that 1/3 step. So it must be lost or gained somewhere. I think that’s why the burn in my attached image has lines that are inconsistent in length and are inconsistently inconsistent.
If I swap out to a 20 tooth pulley my steps per mm land right on 80.
How many people run with non whole number steps per mm? What do you guys think???
You should only look at this after all mechanical issues are sorted and you have your speed and acceleration settings optimized. If you have anything configured for the offset you should remove them until you sort out the other issues.
I suppose it’s possible but it seems unlikely this would be the cause of the problem you’re experiencing. The artifacts seems too large.
Questions:
I see wavy lines in your test, do you know what’s causing it?
with the offset on the right side, what does the left side look like for the same line?
Have you tried further reducing speed and acceleration of rapid moves to see if you can eliminate the artifacts? Would be better to first get things to a good working state and then optimizing from there.
Thanks for bringing me back to reality. One question:
How can you sort out mechanical issues without looking at something like this?
I’ve reduced my acceleration to 300mm/sec2. It does appear as though the overscan test is mostly more consistent. The laser is moving way too slow. I could hand burn this thing faster.
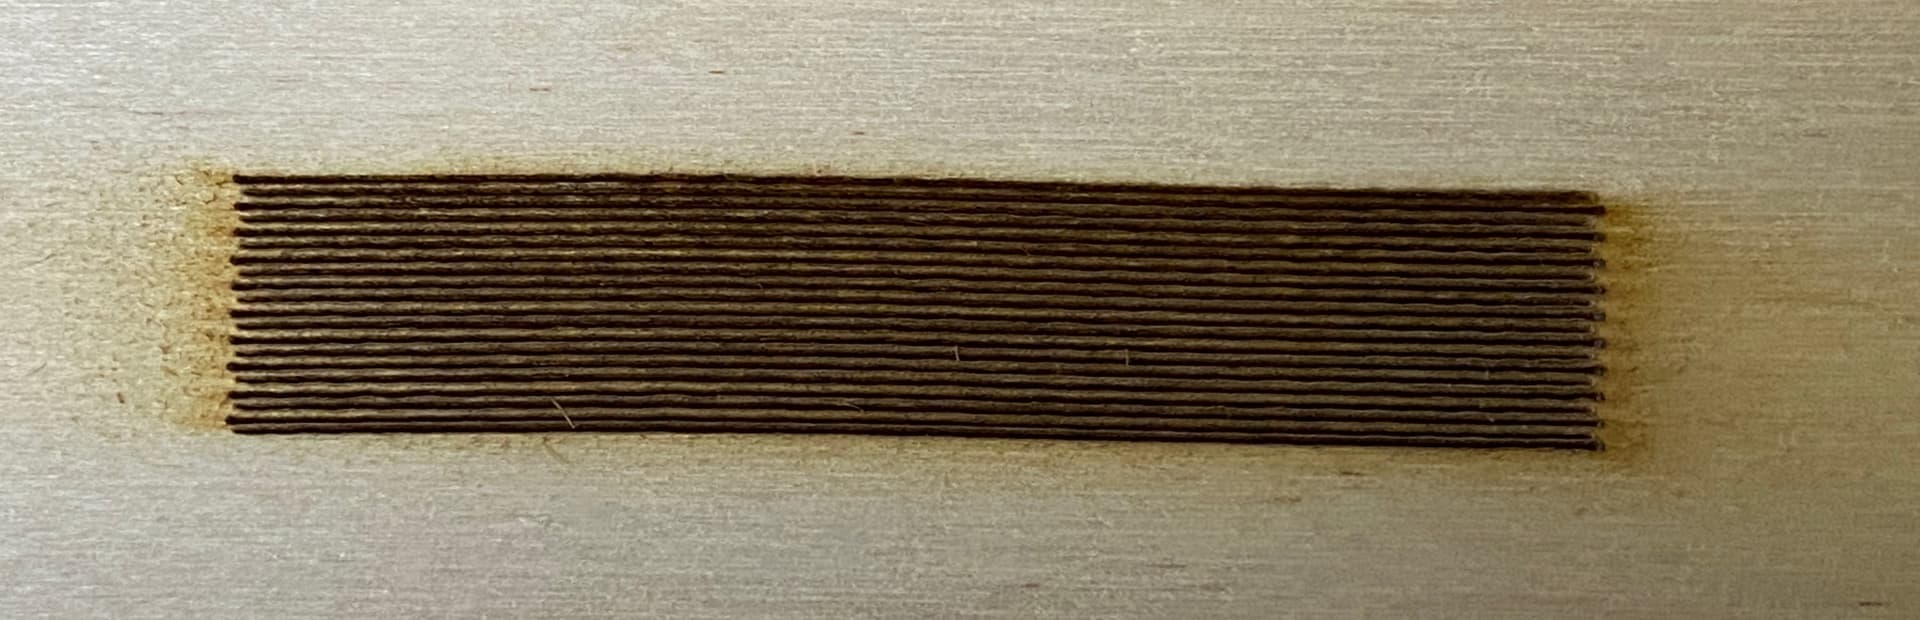
The wavy lines are solved, used an old burn for the images. I’ve attached a new one for you to see.
Check new image.
First image is 100mm/s speed with 300mm/sec2 acceleration:
I don’t mean not to run tests. I mean only not to attempt to apply premature adjustments and then build from there as the fixes may be hiding the root cause.
Interesting. You should clock up the acceleration until artifacts begin to appear. Then clock back or investigate the mechanical weakness.