Veneering might conjure up notions of cheap ‘cardboard’ furniture, but it’s been used for thousands of years to create the many of the finest wooden pieces that litter museums around the globe, and this tradition makes an easy transition to the modern era of laser cutting. Plus, it’s easy, if you know the tricks! So I thought I’d share what I’ve gathered on the topic so far. ![]()
Examples:
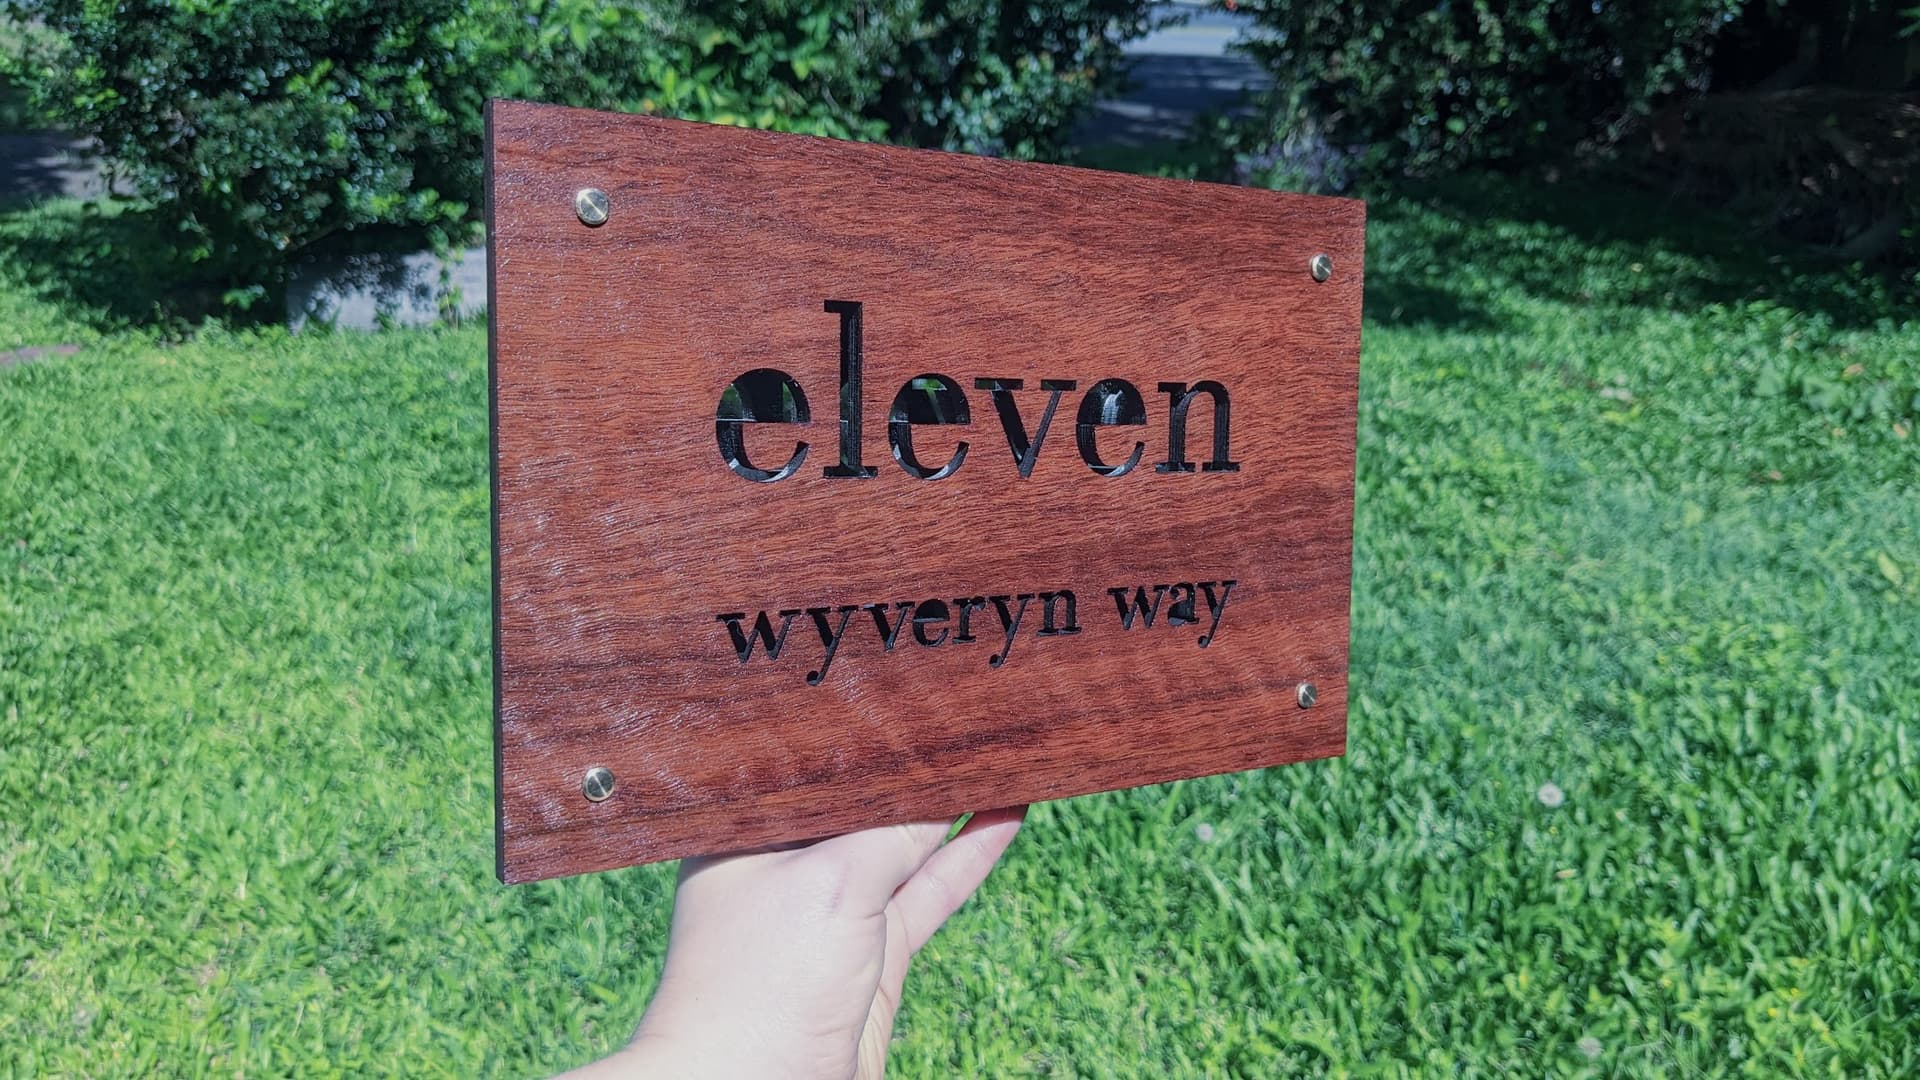
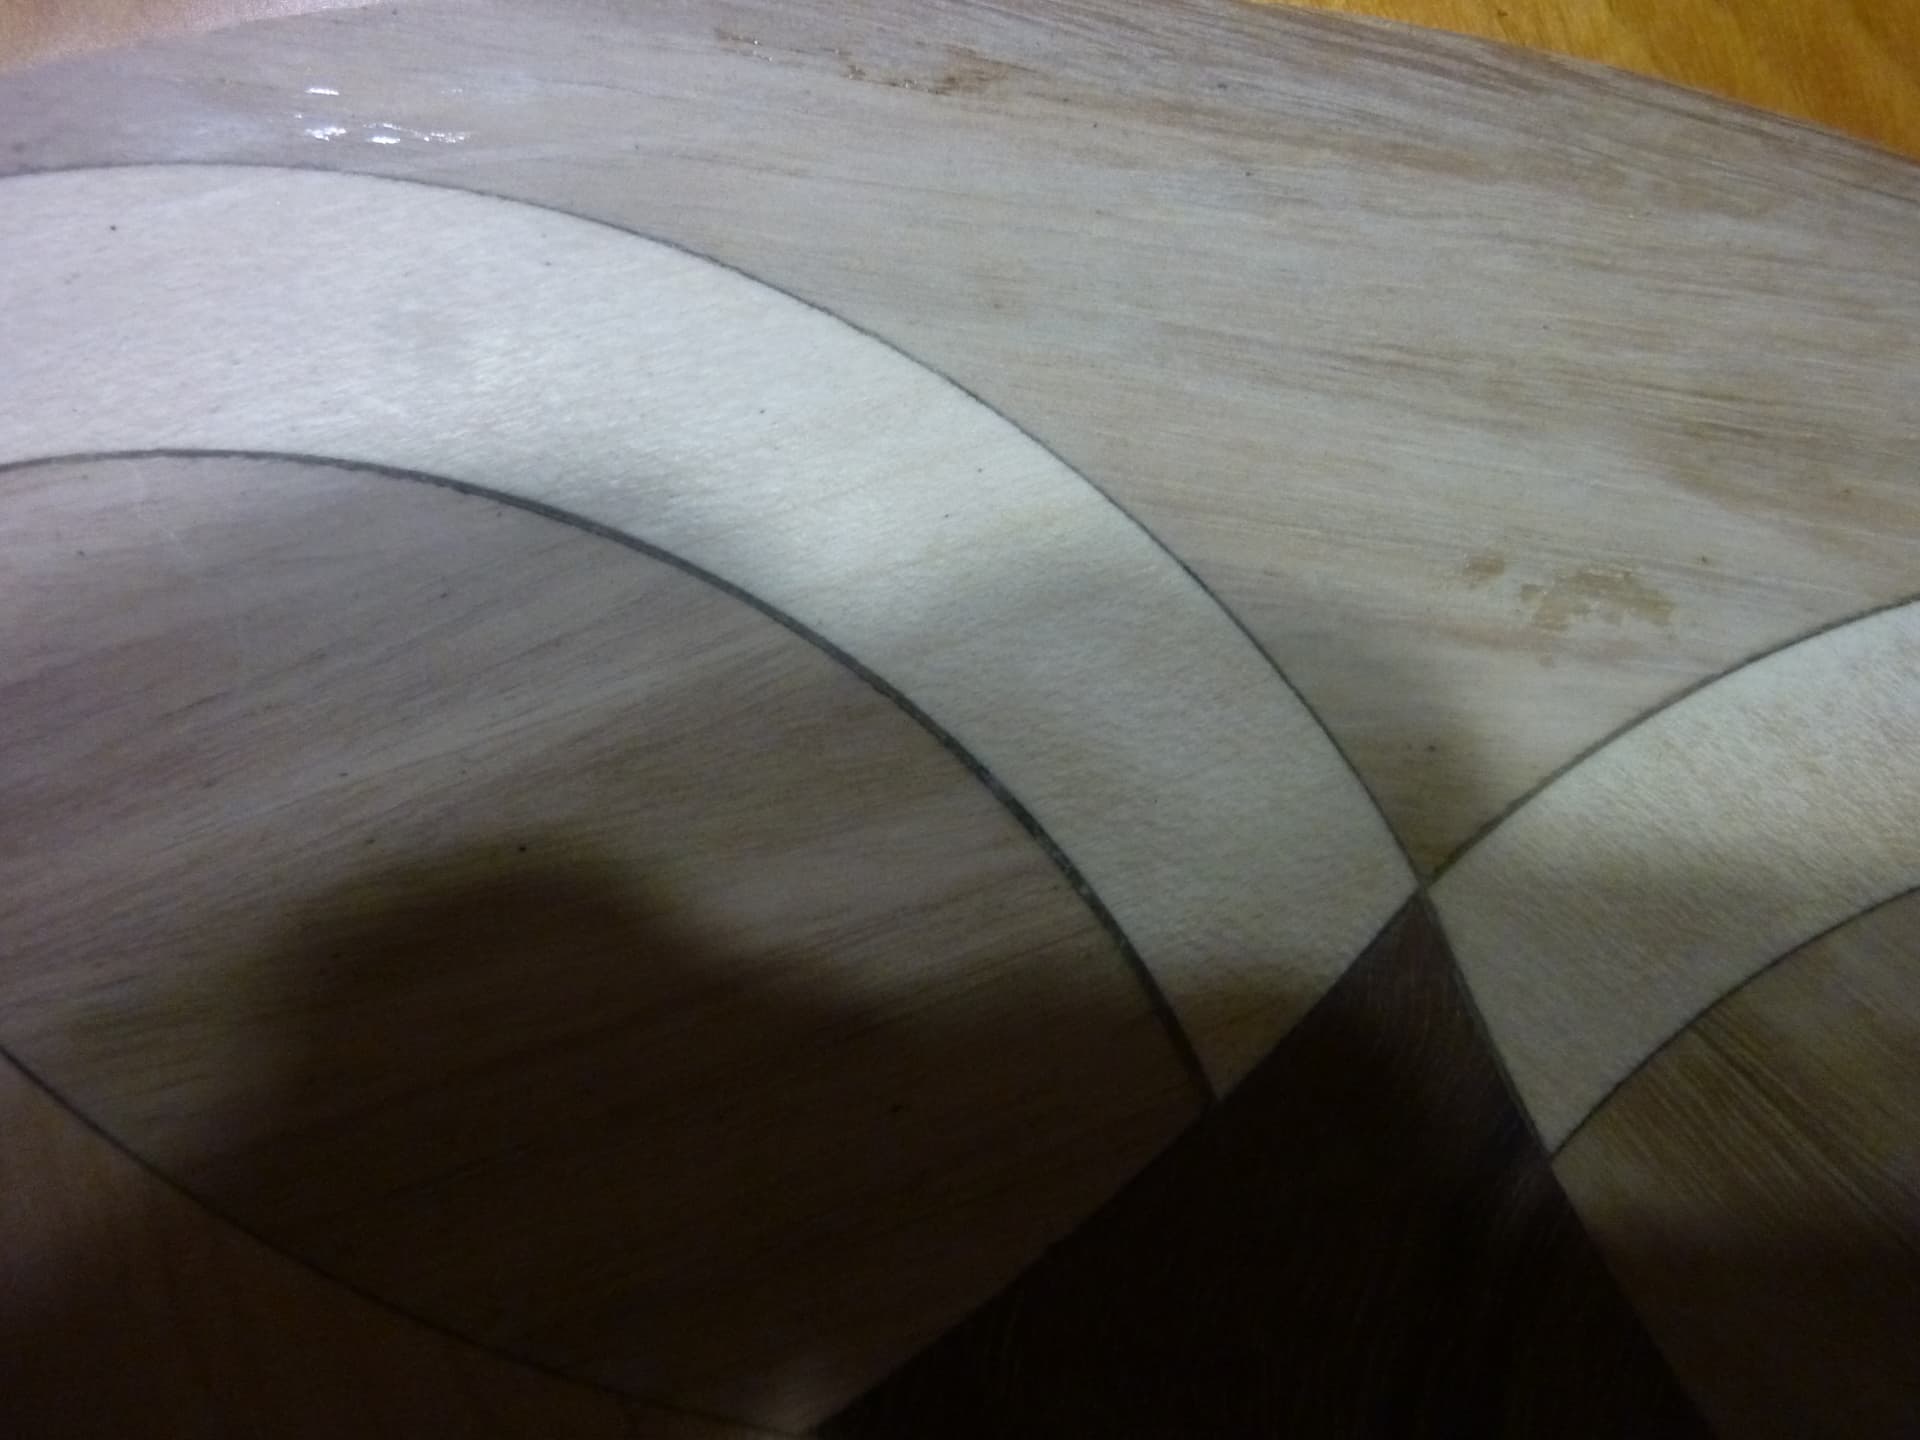
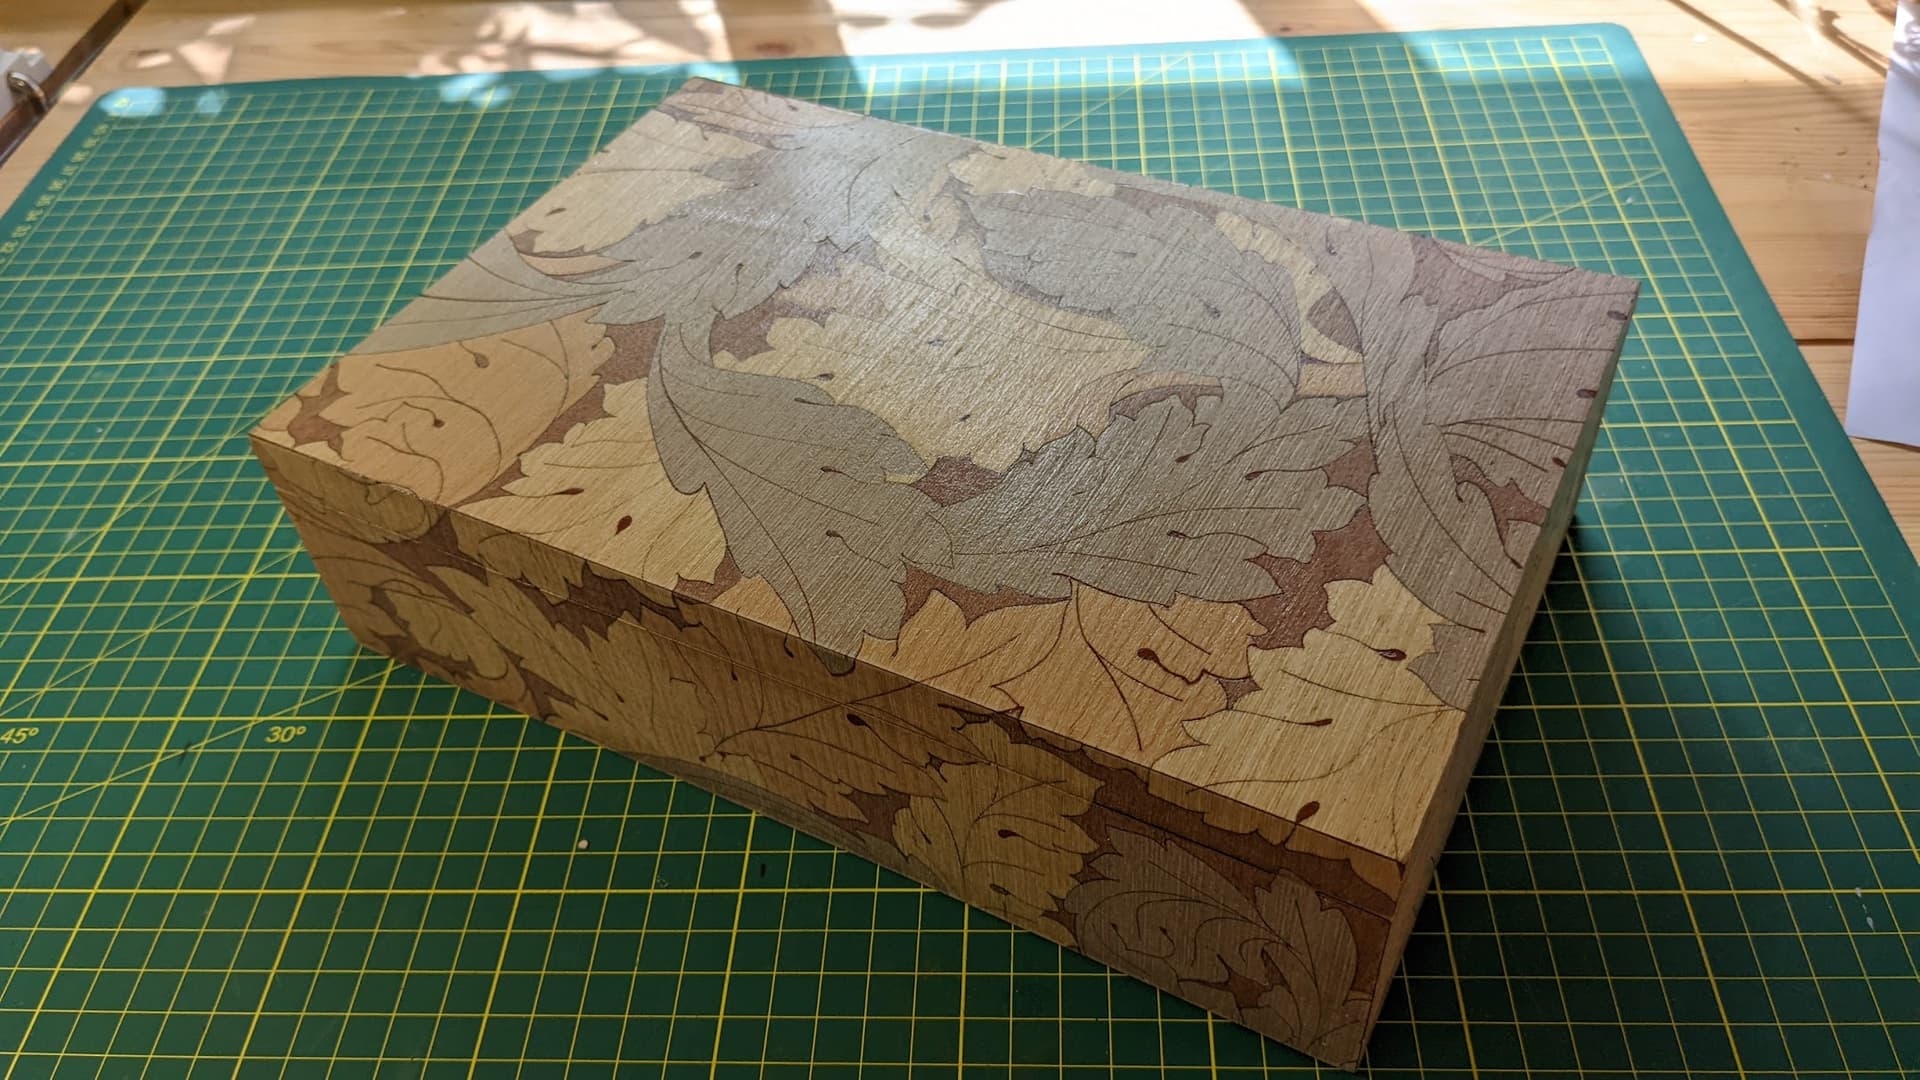
Simply veneering a sheet of fancy wood to a piece of laser ply before cutting it can elevate what would otherwise be a rather simple design.
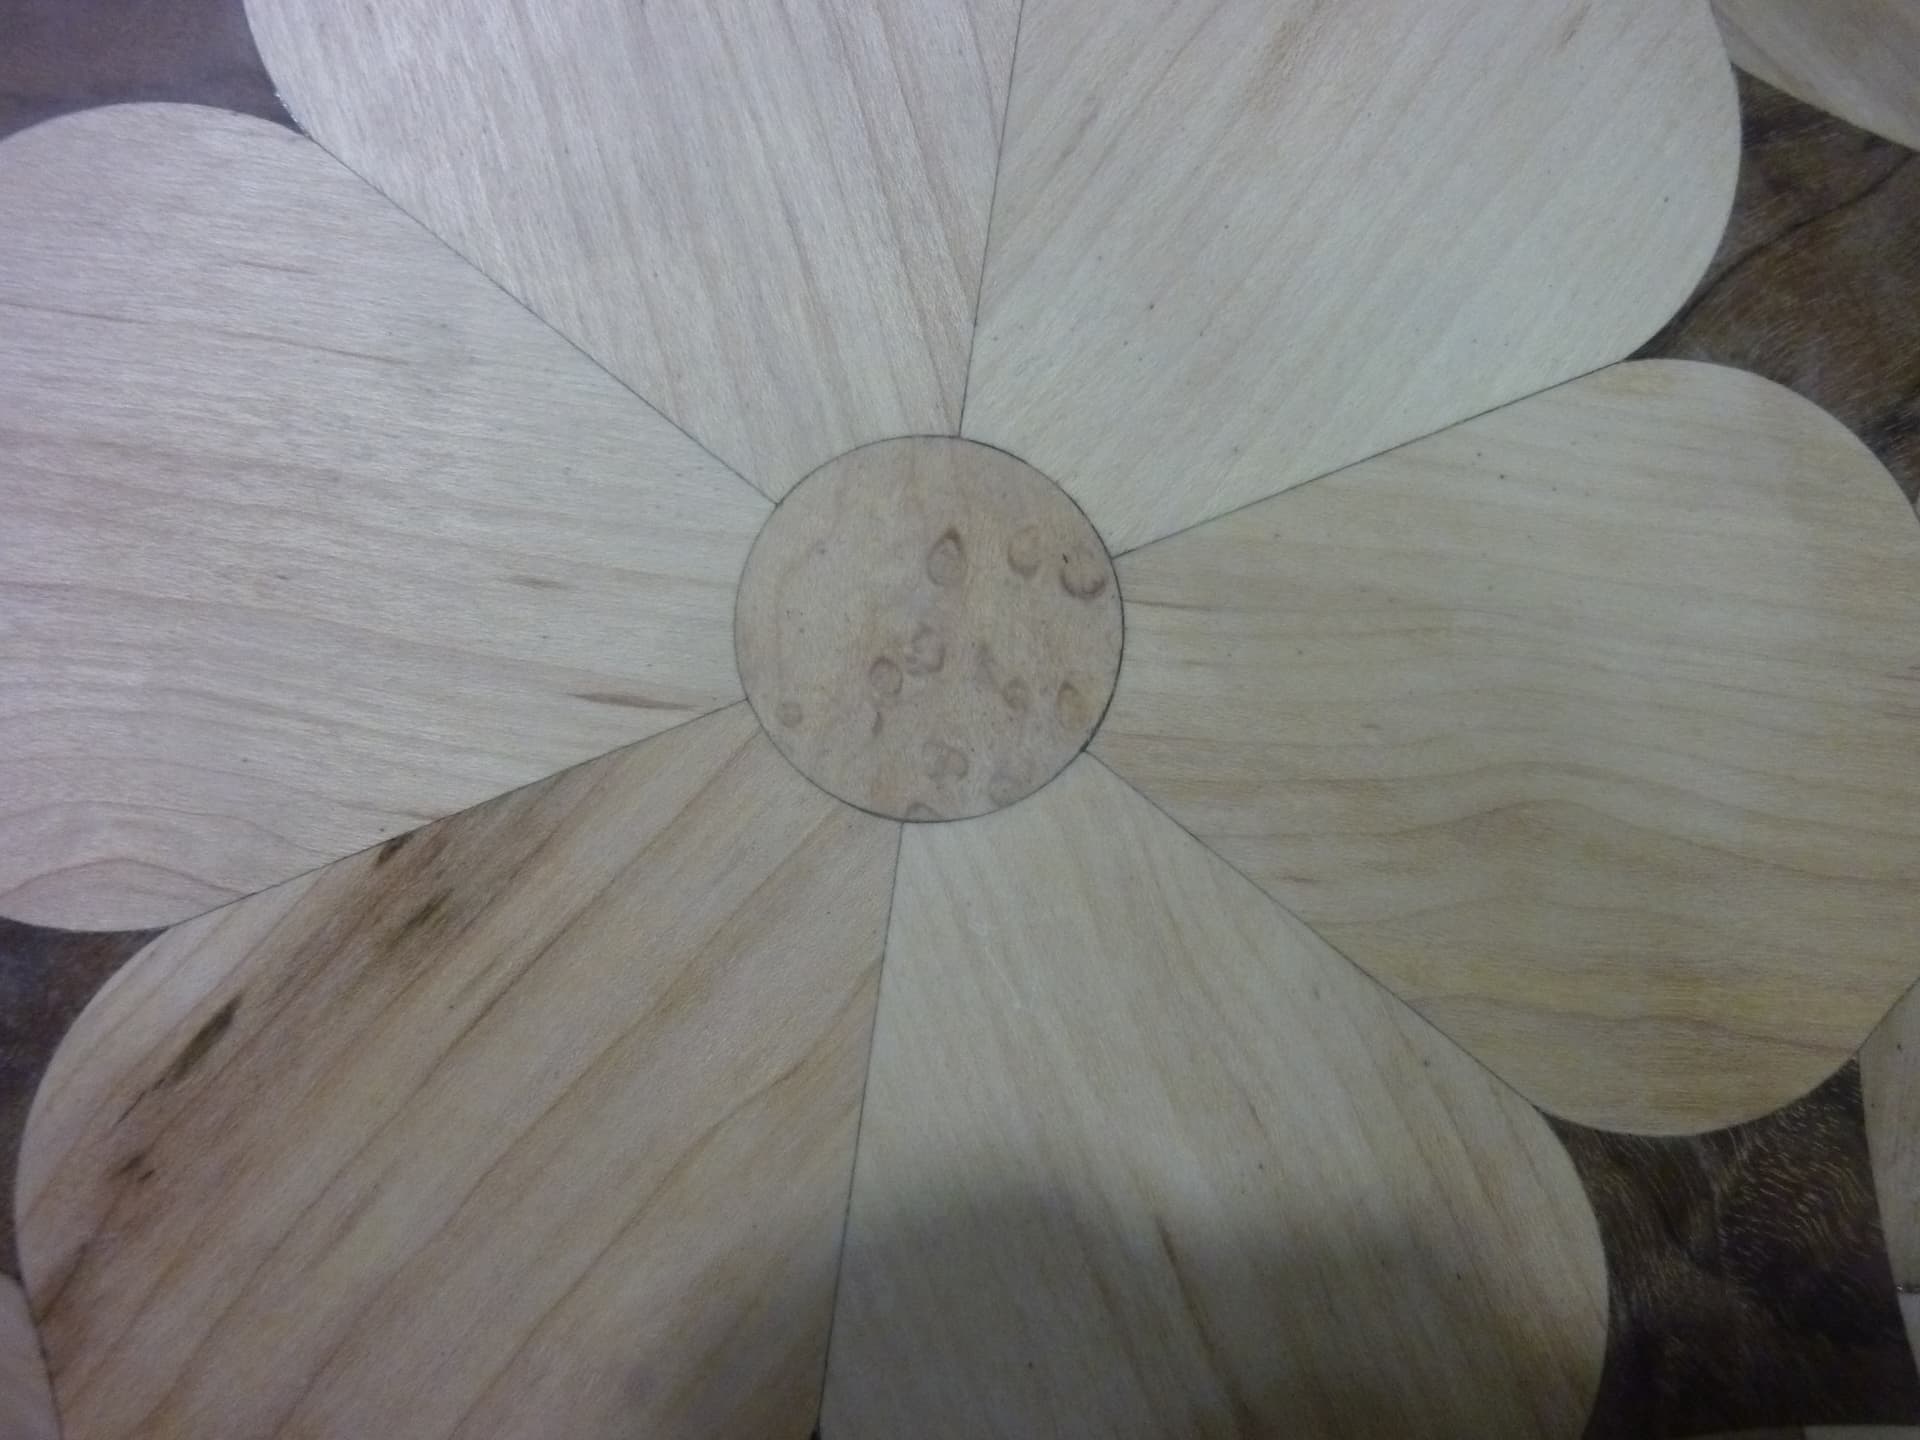
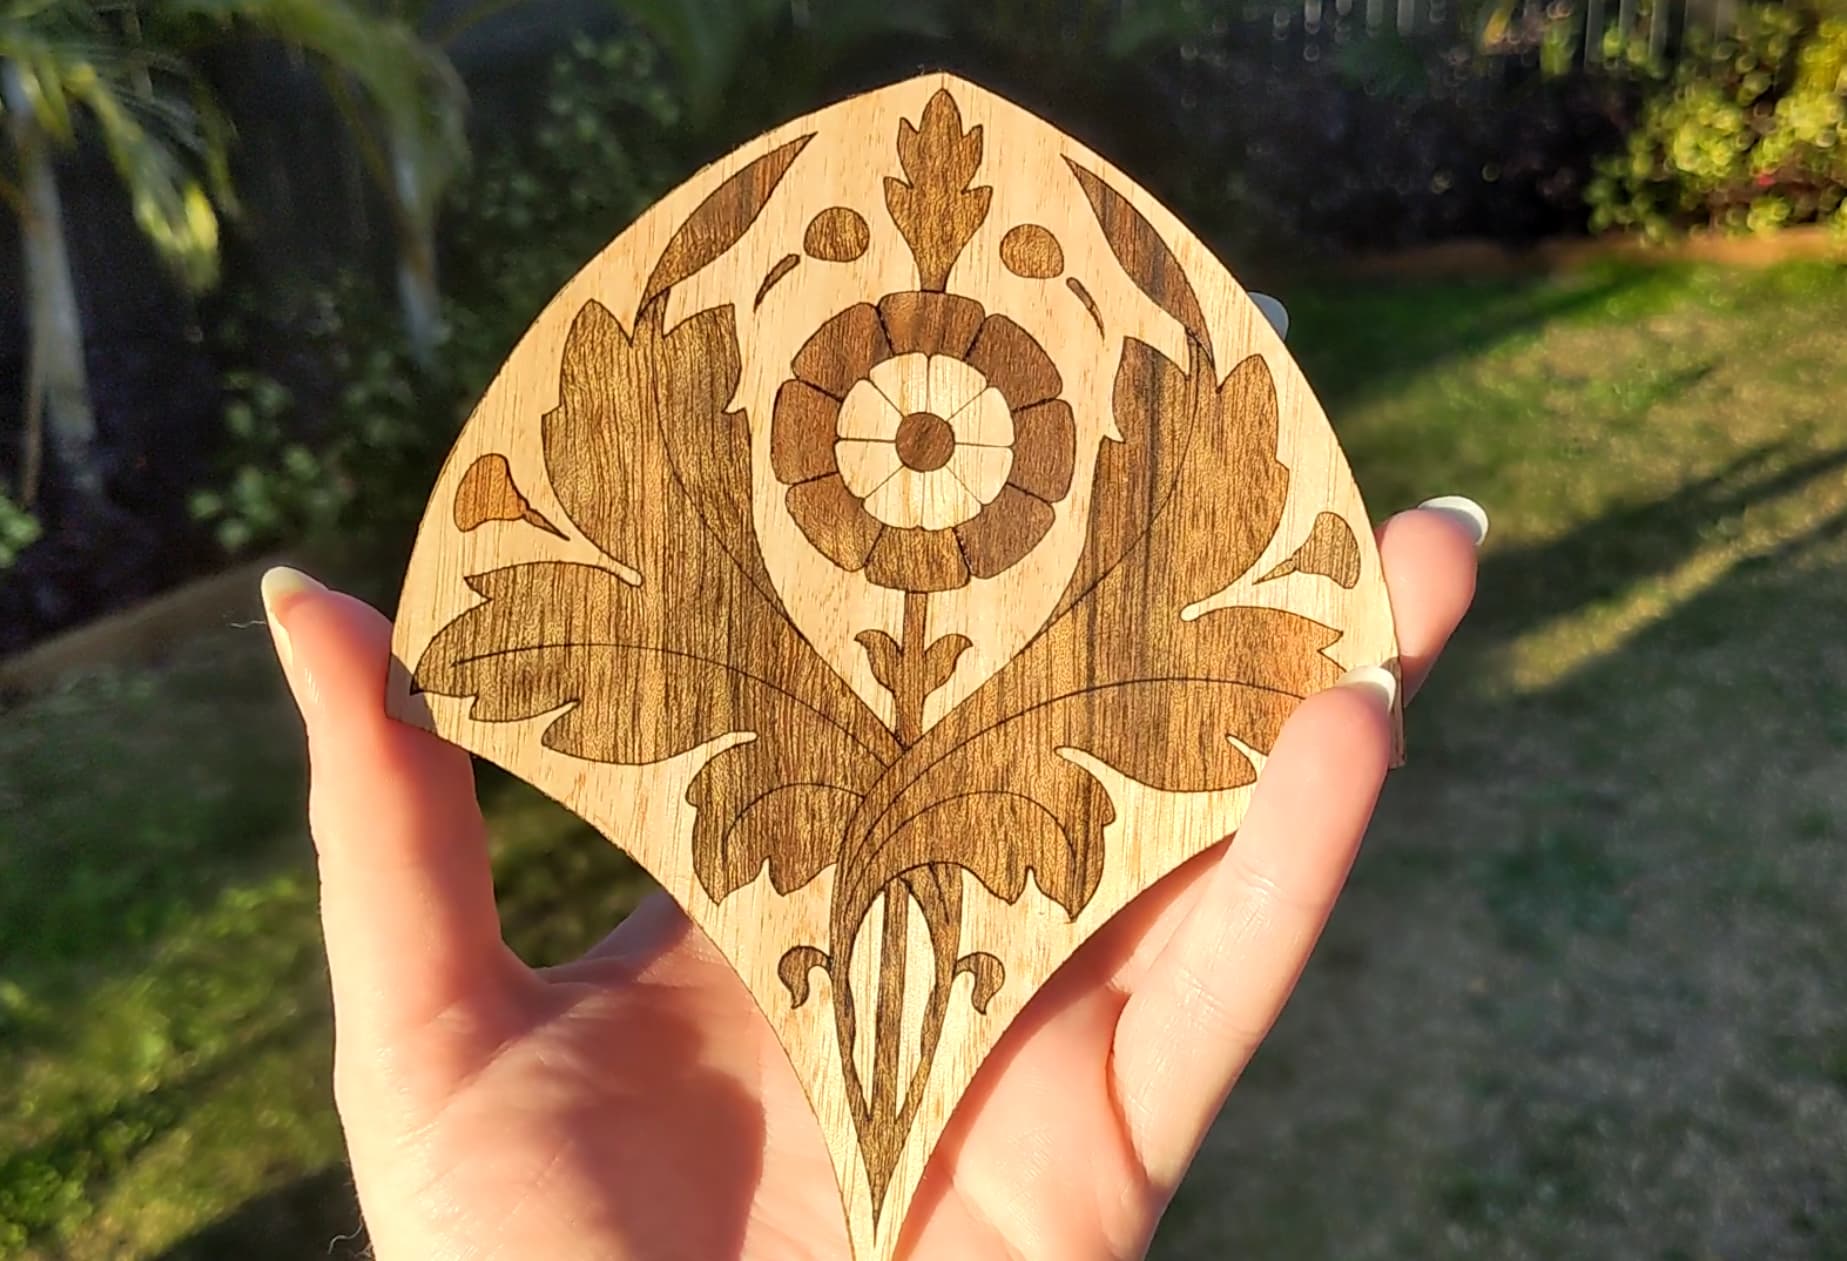
Laser cutters make marquetry so easy that it almost feels like cheating… This was literally my first attempt.
Basic Veneering Process & Glue
In many modern woodworking tutorials veneering is done with a PVA-type glue (e.g. Titebond) this isn’t a great option for veneering in general because it requires you to clamp the whole surface evenly and firmly until the glue is dry (which is no small feat!), and it’s even less suited to laser cutting as PVA resists cutting, produces a lot of soot and discolours with heat. PVA also resists surface finishes (varnish, oil, etc), which is especially important when doing marquetry which has a lot of seams.
Normal plywood is glued up with formaldehydes, which you do NOT want to burn in a laser, for your safety, and because it makes for really charred burns.
Laser plywood is usually made using melamine glue, which is hard to find as a consumer. While it does burn cleanly, it still requires the clamping that PVA does.
HOWEVER there is a marvelous glue that is perfect for veneering and has been used for centuries: animal glue (the real stuff, sold as granules, not in a bottle). While not vegan, it’s renewable and readily available at fine art stores (rabbit skin glue) or leatherworking suppliers (hide glue). It doesn’t require clamping when used in a process called hammer veneering, which relies first on water tension to hold the pieces together, then as the glue dries it tightens up and pulls the veneer extremely firmly onto the substrate material (strong enough that if you leave a layer of this glue on a piece of glass, it will chip the glass as it dries, people make pretty signs this way through a process called glue chipping). There’s a good tutorial here demonstrating how simple hammer veneering is.
While it may seem like it’s extra effort to warm a glue, the savings in time/energy/frustration far far outweigh the inconvenience. Not only is there no need for clamping, the glue burns clean and safe with a laser, and you can apply any finish you wish over it, oil, water, epoxy, it won’t show! Plus it’s reversible and forgiving; if you make a mistake or decide you don’t like something, wet it, heat it and remove it. It responds accordingly to humidity changes, swelling and shrinking with the wood, and thus won’t crack with time. It can be used as a grain-filler on textured woods, and you have immense control over the tack and thickness of the glue (by varying the ratio of water to granules) and the gel time (by adjusting the temperature).
If you have a 3D printer, you can use the bed to melt the glue (at 60C) and keep it warm (at 50C) without needing a double boiler, this completely eliminates the risk of ‘cooking’ it (denaturing it due to high temperature).
The powdered glue keeps indefinitely and glue you have made up with water can be repeatedly frozen and melted for future use.
Laser tips
Cutting veneer is rather like cutting cardstock, even diodes can do it. This was cut with a diode:
One of the main struggles is keeping veneer flat in the laser. If you are using a diode laser you can place the veneer under a sheet of glass to hold it flat (use something that isn’t precious as it may etch the glass). CO2 lasers will readily etch glass, so for them you can tape the veneer to something the laser can’t cut (a ceramic tile, a sheet of dull metal, etc). I like to use masking tape/paper painters tape/washi tape to tape mine as I’m not sure if normal sticky tape is made of vinyl, and while the goal isn’t to cut the tape, accidents happen. Plus regular sticky tape doesn’t always remove cleanly and can stain wood.
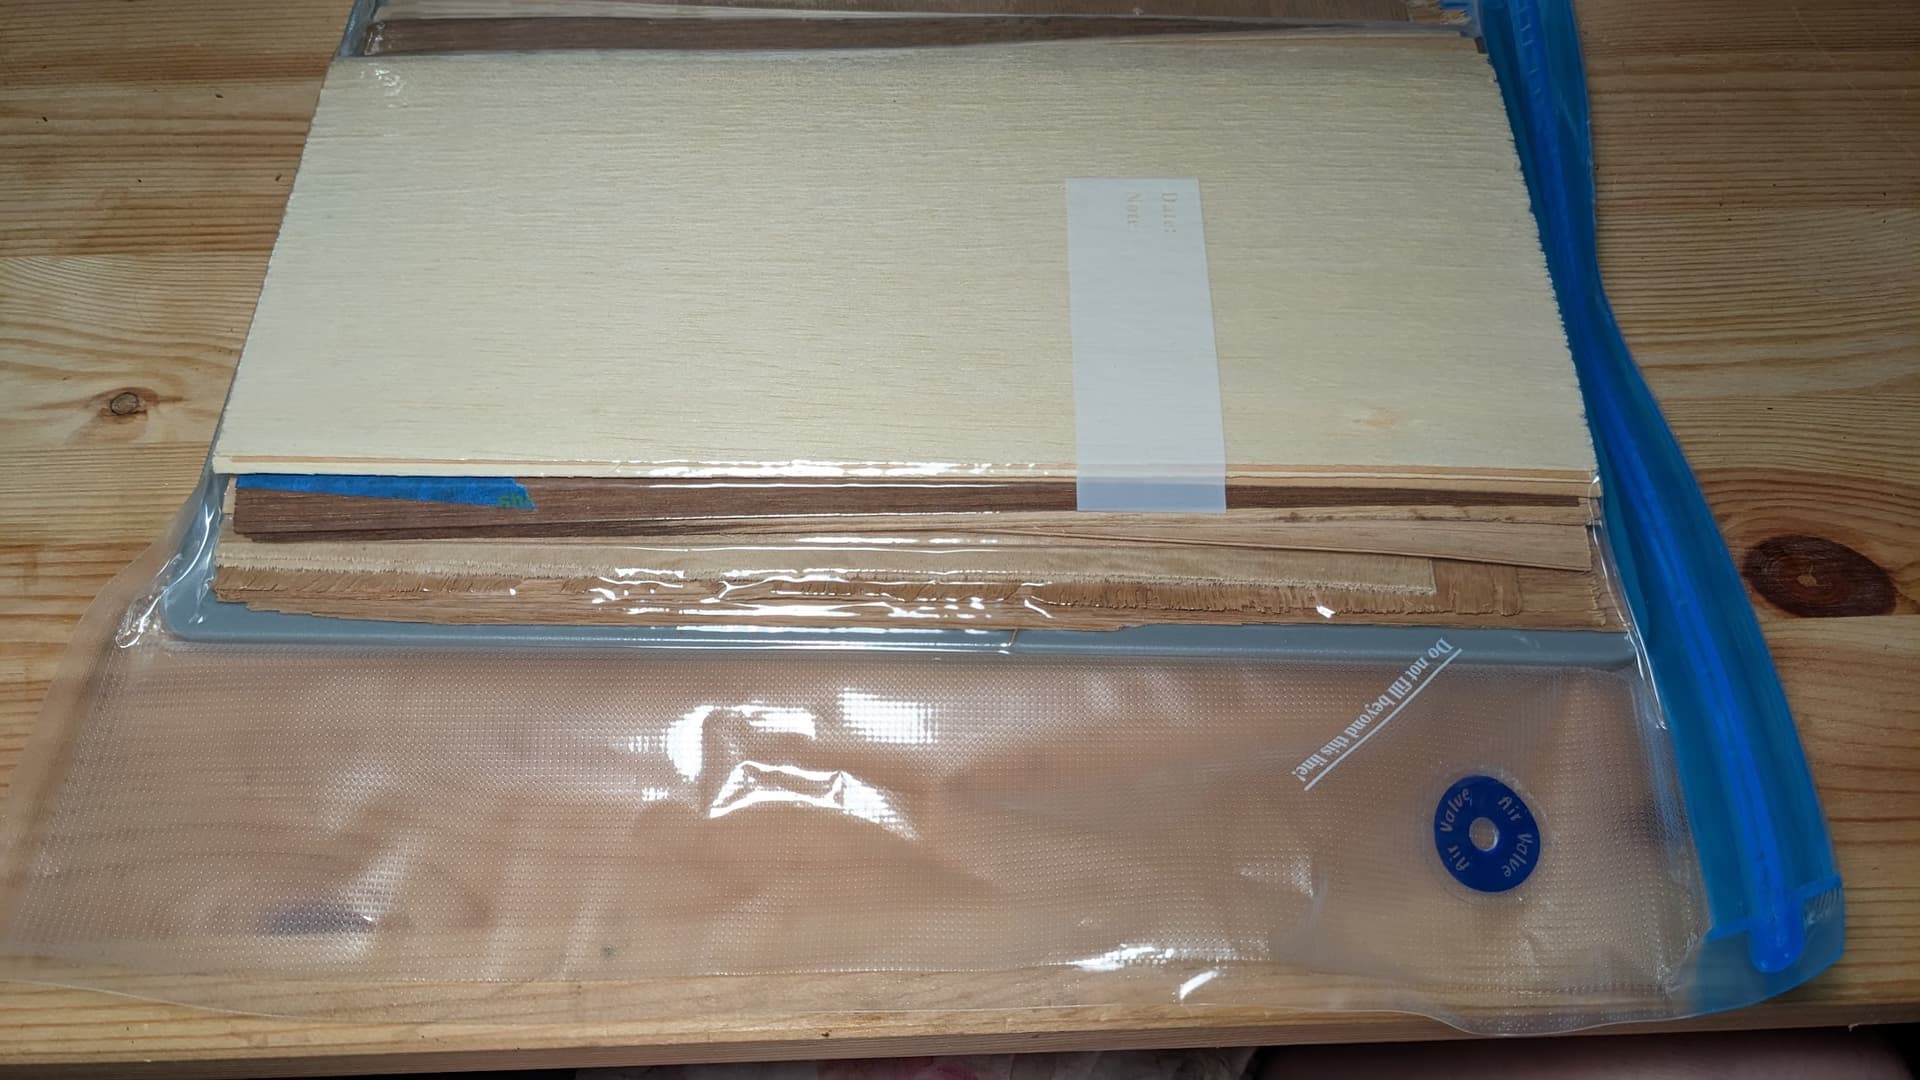
If your veneer has a lot of curl to it, it may still spring up as it’s cut. This can be eliminated by storing the veneer under weight or (if you have odd-sized pieces) stack them atop something flat (here a chopping board) with largest pieces on the bottom, and smallest on the top. Place them inside a vacuum-sealed bag, and pull the air out. This will keep them flat and also remove the risk of mold.
If they are very very curled, and simply storing them this way isn’t working, you can steam the pieces over a pot of boiling water then let them dry between some blotting paper, under weight (a bunch of books is good!). Let it dry completely before bagging it up, lest you encourage mold.
Marquetry
For the leafy box above, I cut each of the 4 colours exactly the same, which allowed me to make 4 copies, each in different color combinations. Putting them together was a bit of a jigsaw puzzle! I assembled them on some clear vinyl transfer tape that was taped (sticky-side up) over an inverted printed version of that image, then glued my plywood substrate, and brought it to meet the veneers.
This assembly was a bit of fiddling, which I personally rather enjoy, but I am exploring some other methods that waste material but make assembly a lot easier, these rely on temporarily securing the work to a material that won’t be engraved by the laser, and then engraving away the areas of that color of veneer that you don’t want to keep, then assembling these pieces together. I will report back when I have perfected a process for this!
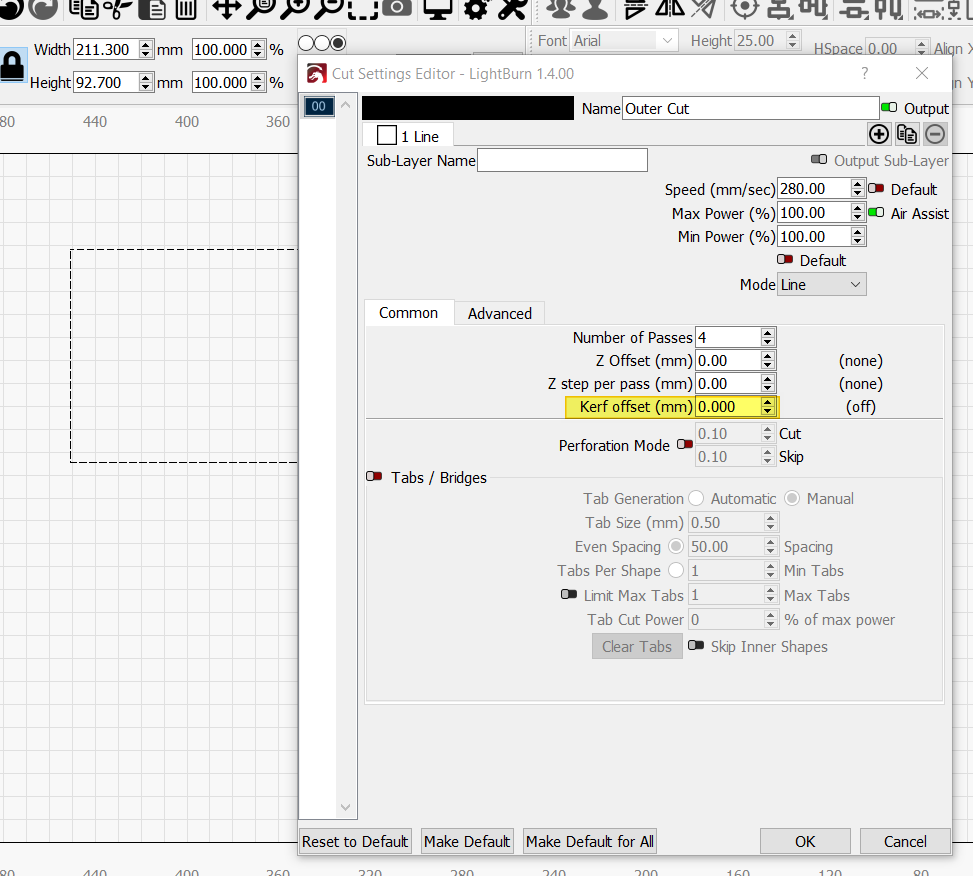
I didn’t make any adjustments for the kerf of the laser, the beam thickness was enough wiggle room to allow the pieces to be placed.
When I do inlay I do like to offset the design by the thickness of the beam’s kerf (in the layer settings) this method relies on the objects being enclosed shapes.
Things I’m still experimenting with:
I haven’t spent much time changing the angle of pieces according to grain line, but it’s traditional to do so and leads to some stunning effects. I’ll experiment with this in a box I’m making.
Sand shading traditionally brings dimension to marquetry. I have been dabbling with a laser-based system for achieving this. My next plan is to sand the work back to its final grit, but before applying the liquid finish, using LightBurn’s Print and Cut feature to engrave shading into the piece.
I’ve assembled these thoughts from various bits of info I have gleaned from around the internet/workshops/personal experiments, one day, if folk are interested, I’ll assemble these into a more coherent guide, but I found info on these topics hard to come by, so I figured I’d present them here for now, in case they’re handy for others. ![]()