Cutting micro small brick wall looks like plus (+) signs in certain areas - using laserboard

SUCCESSSSSSS!!! So I re-read all the postings and applied the recommendations you made. I believe the most pertinent one was to tighten up the belt and any other points of movement, which I did – belt, rollers, etc., etc. Thank you ednisley.

Next, I slowed things down per bernd.dk’s recommendation – Thank you for that.

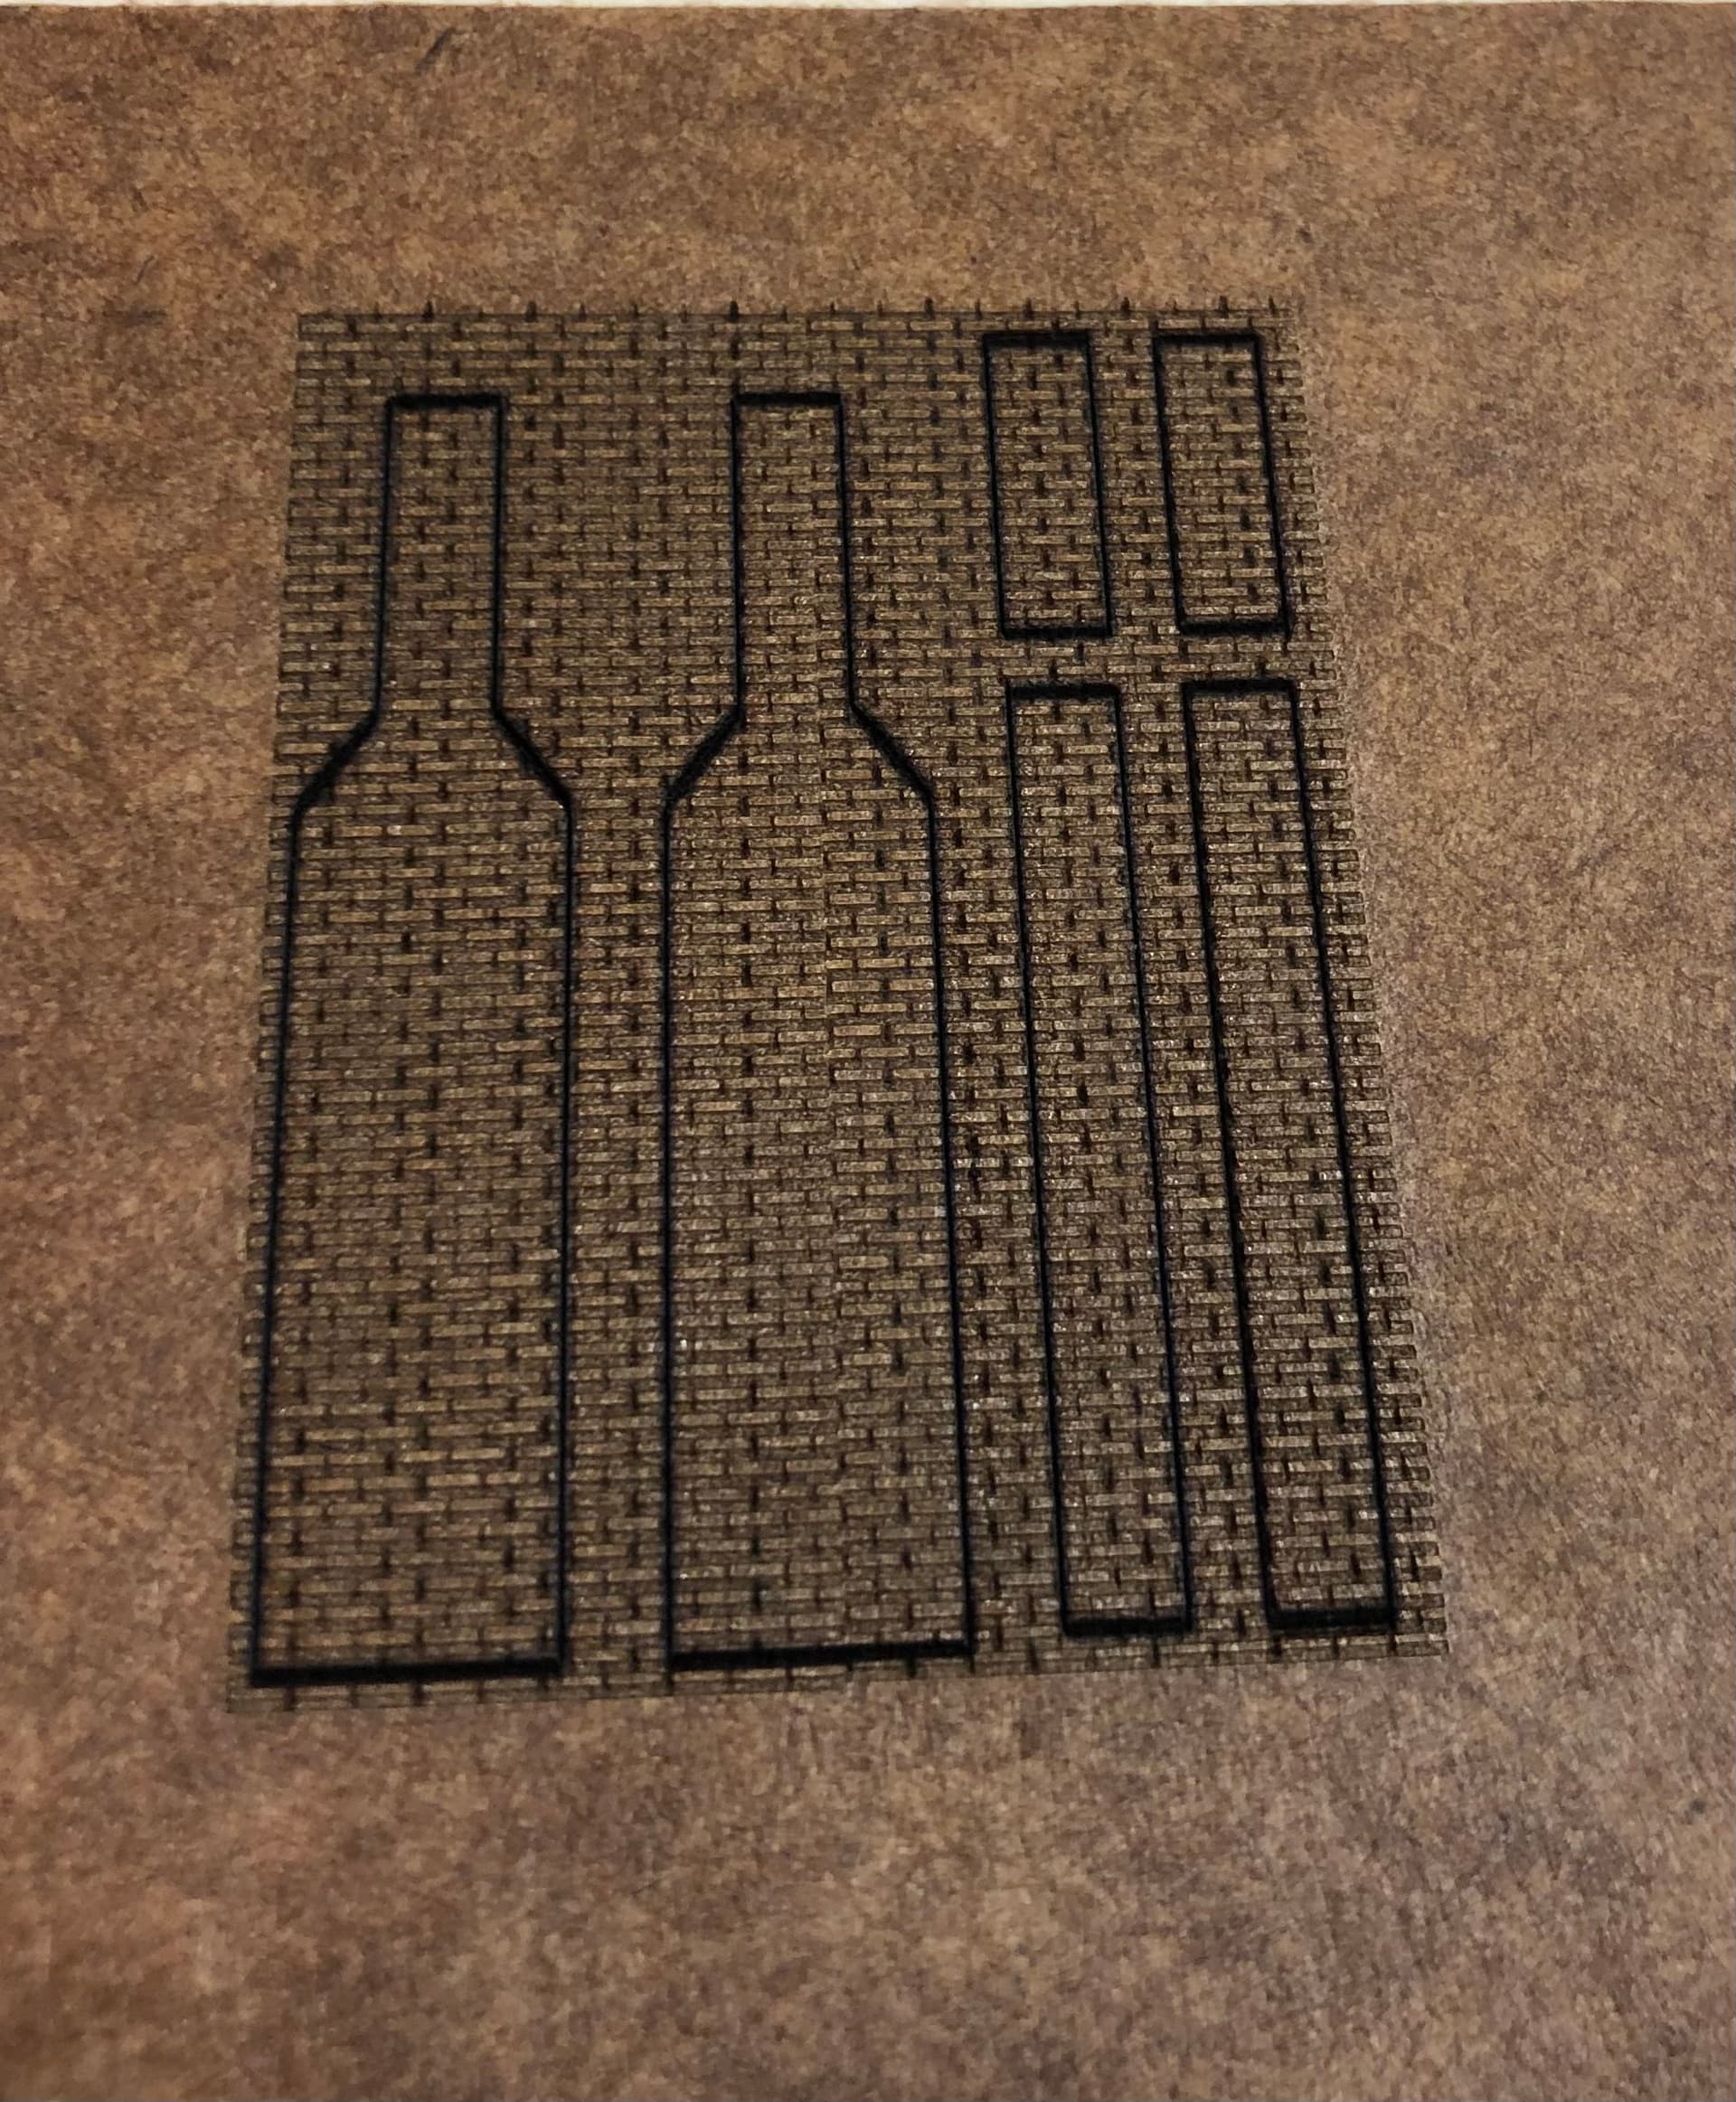
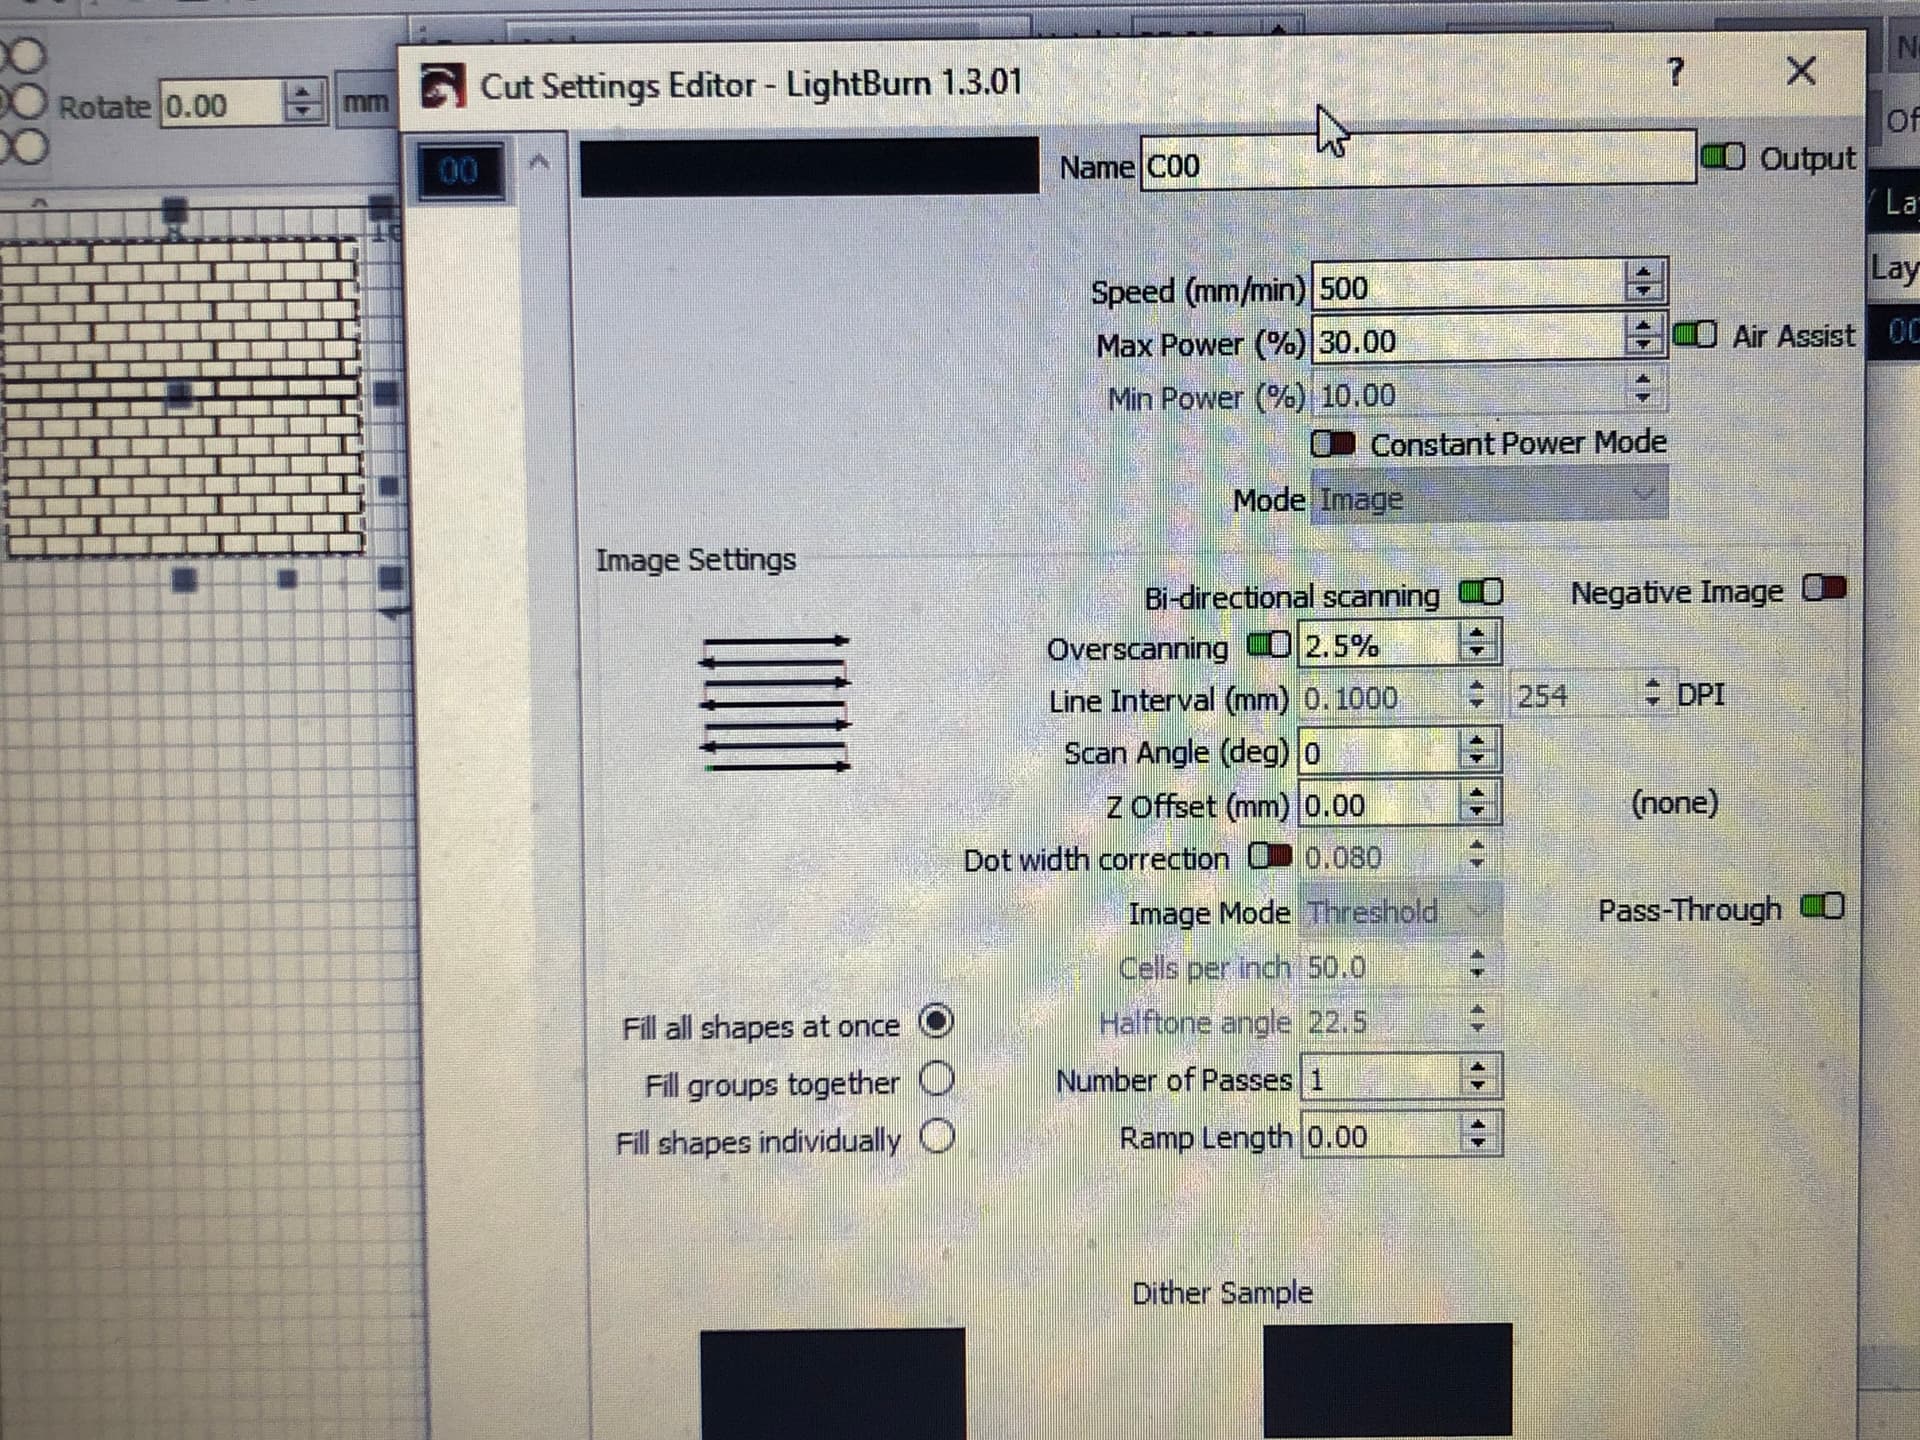
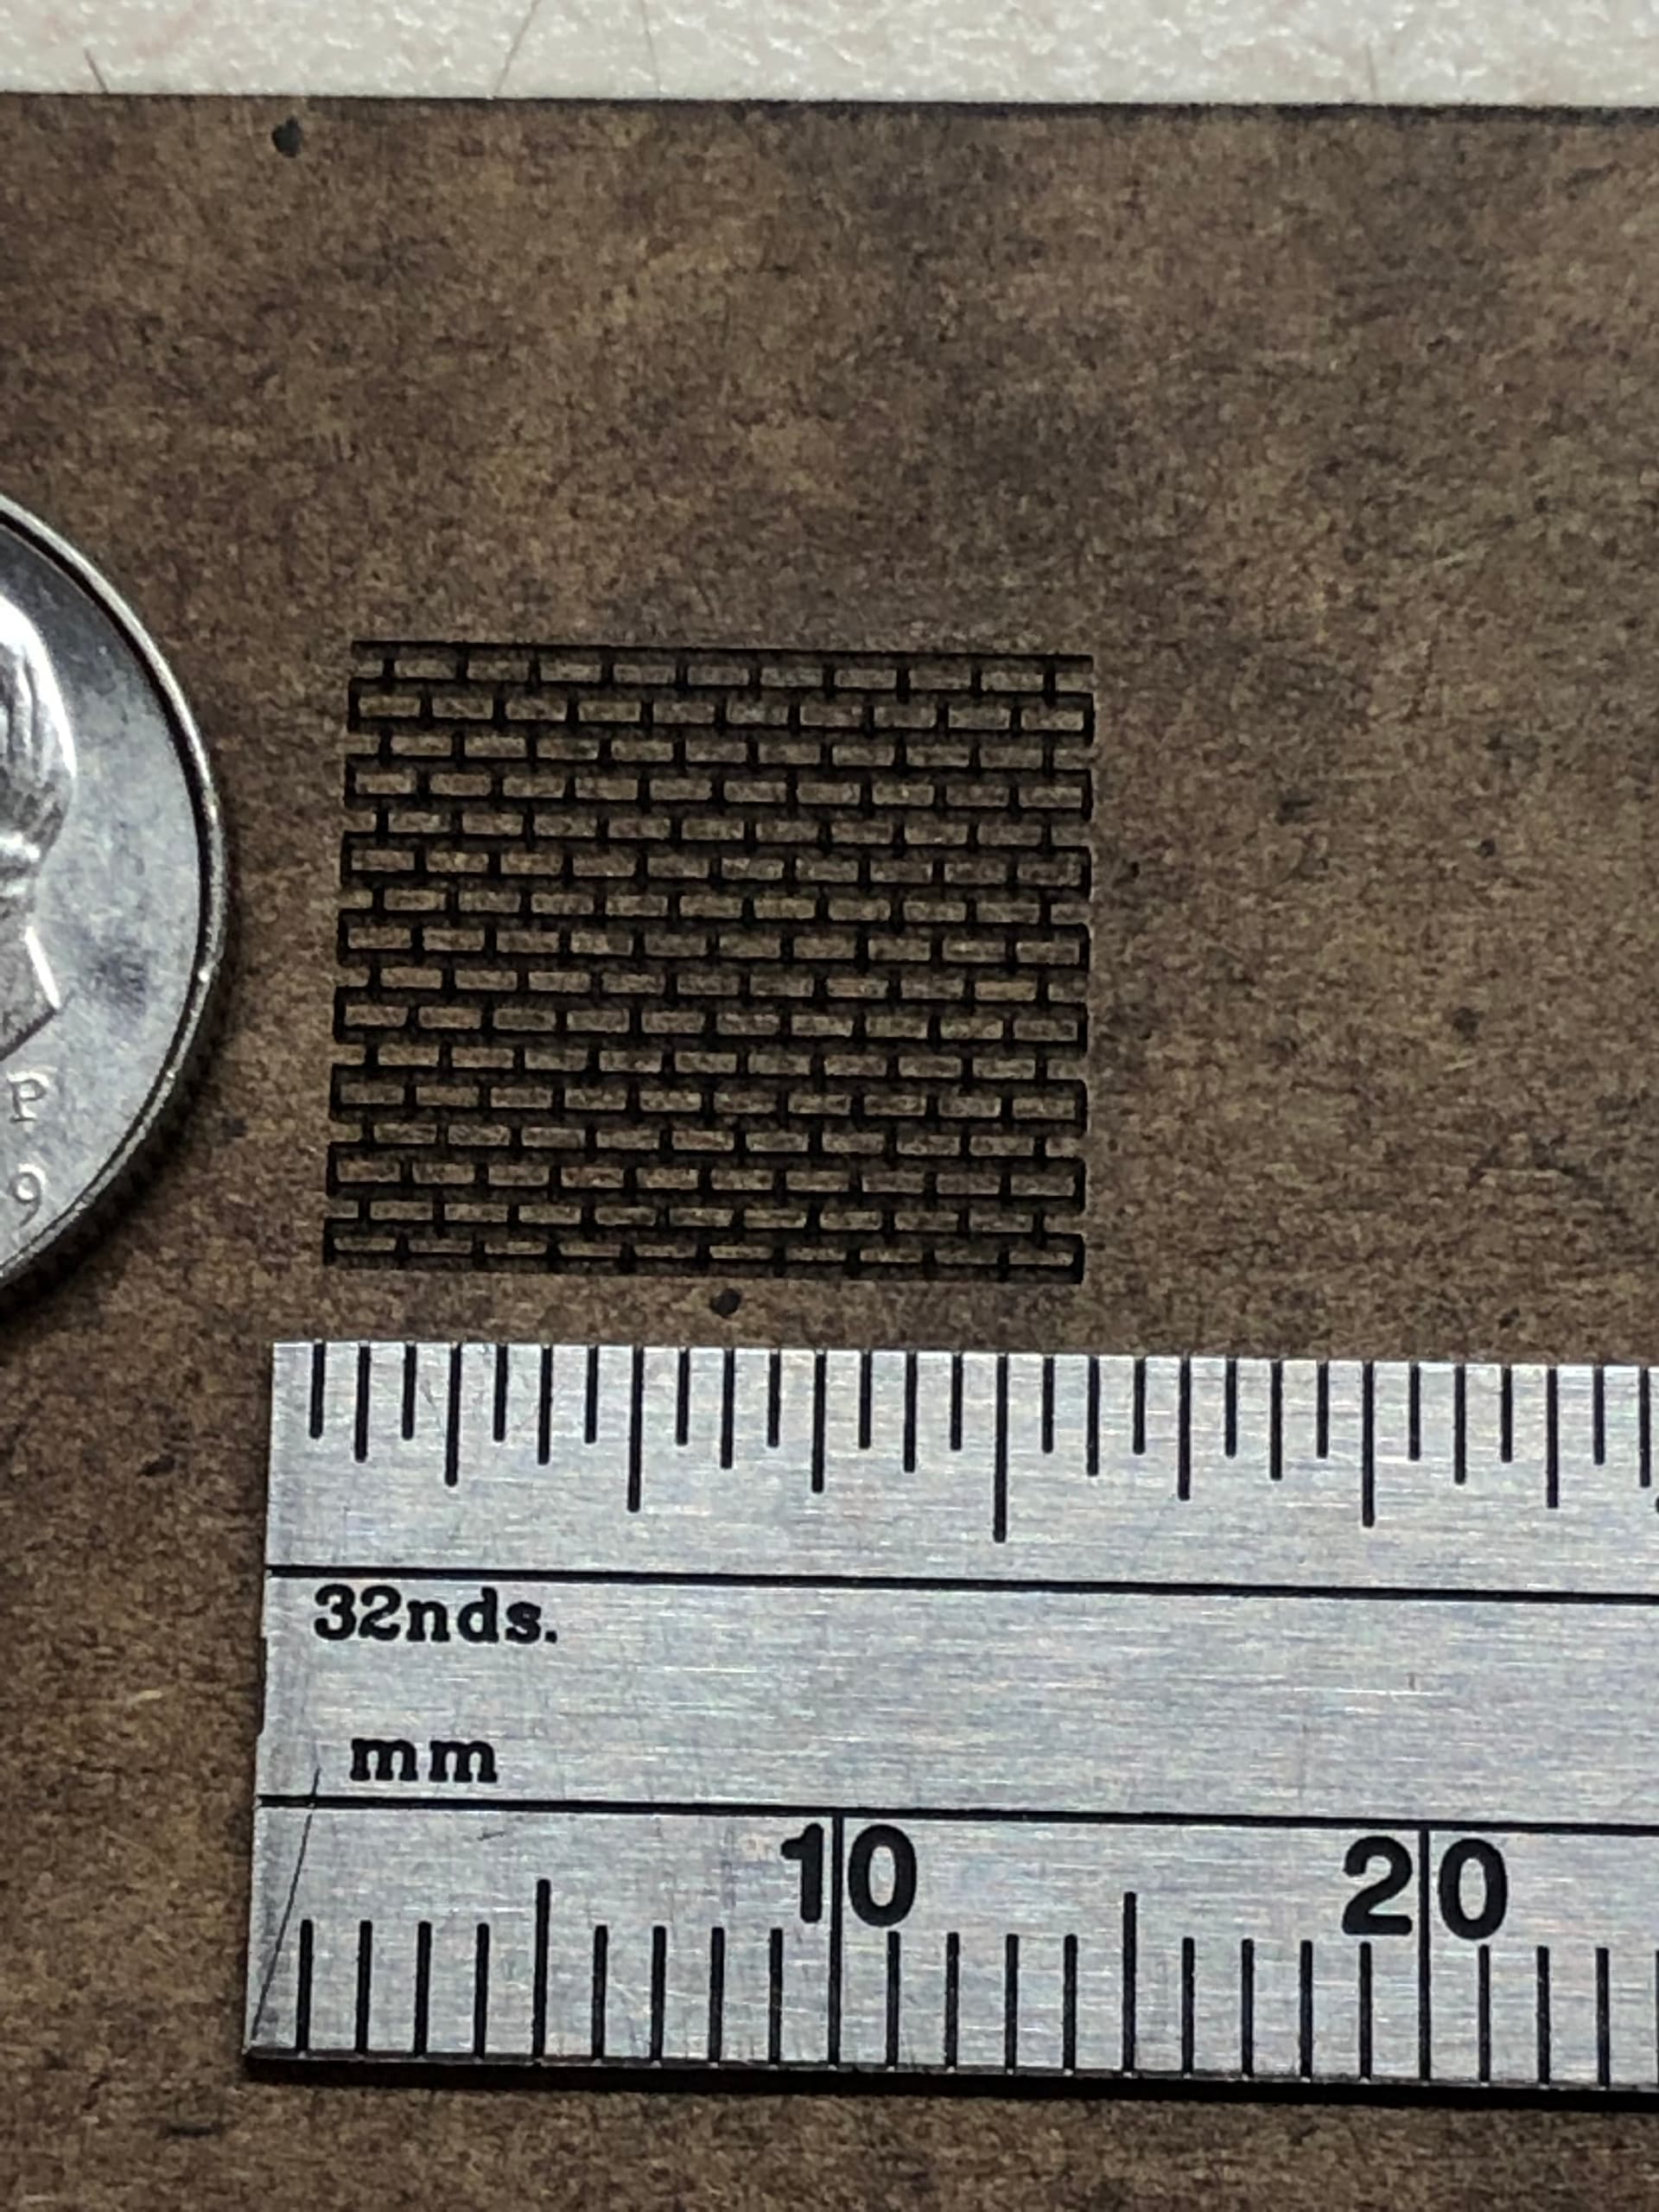
Below is our collective “team” success. I cut and pasted ednisley’s brick sample to LIGHTBURN, with no downscaling, so the bricks were obviously bigger than desired. But I wanted to see if the laser would cut nice thin lines at the settings recommended, which it did fantastically.

Next I downsized the pattern incrementally till I got close to Z-scale. I won’t bore you with pics of the incremental cuts, rather will go straight to the final product.

Here are the final settings I was using:


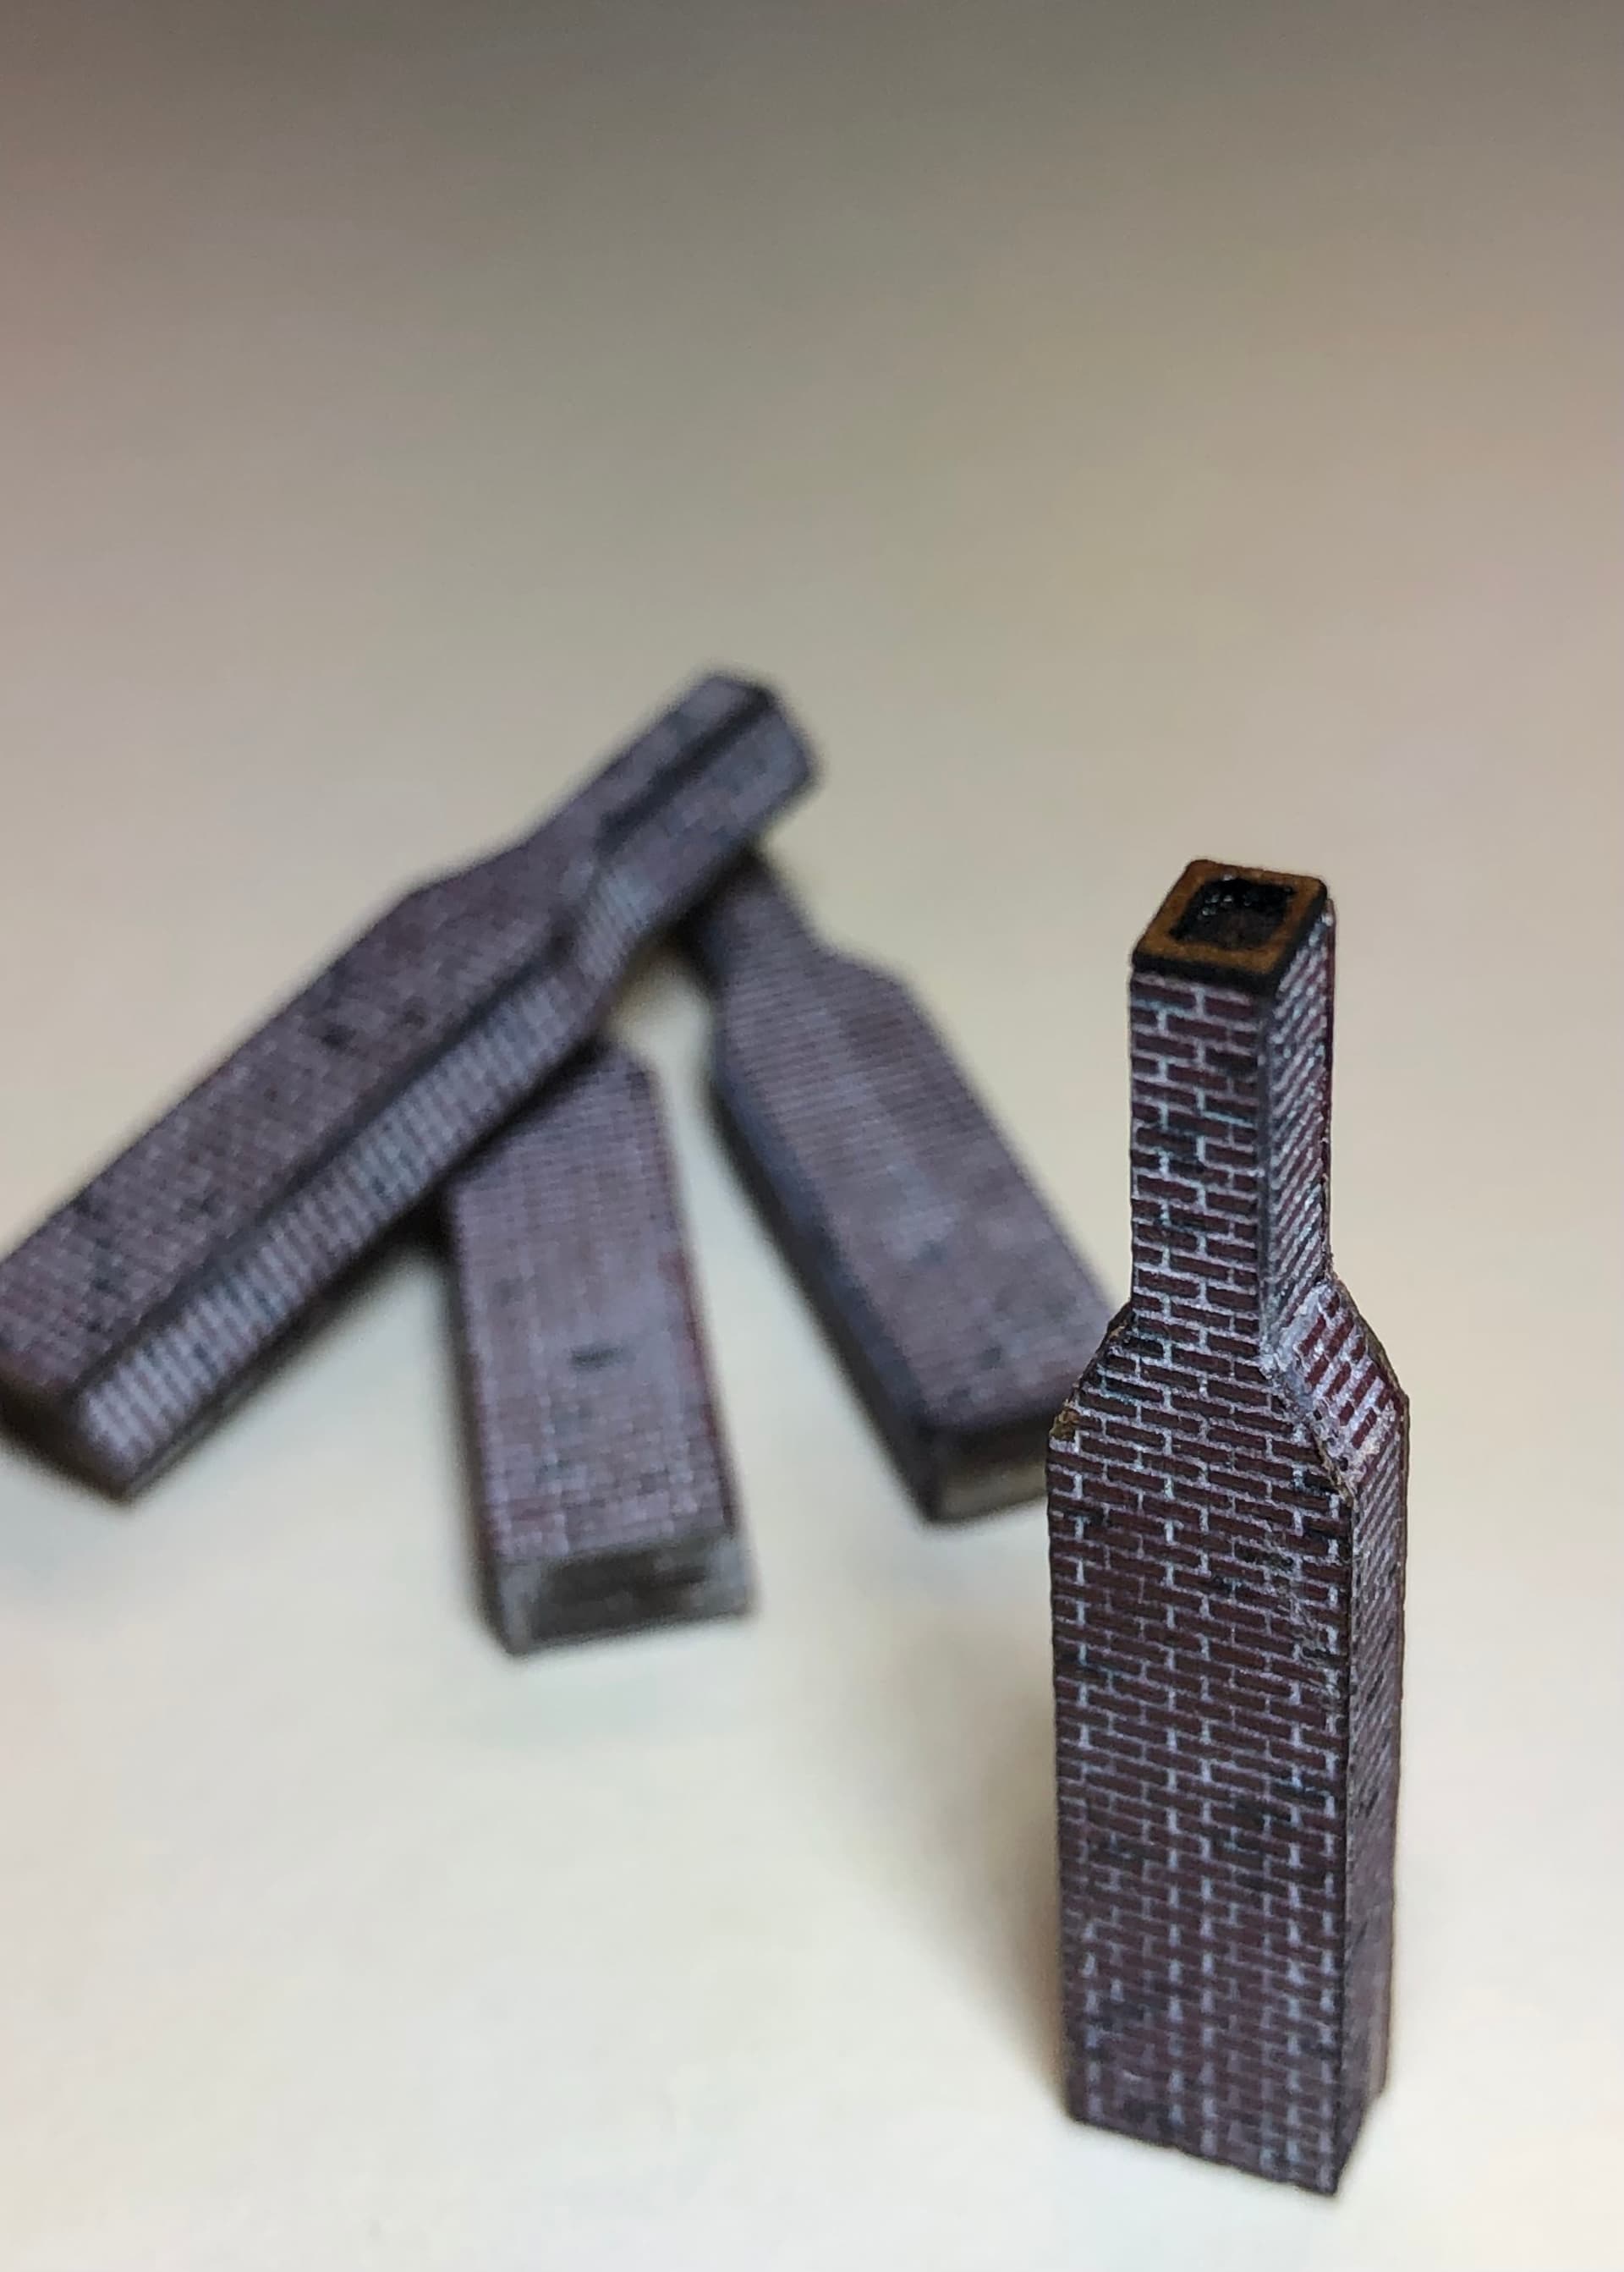
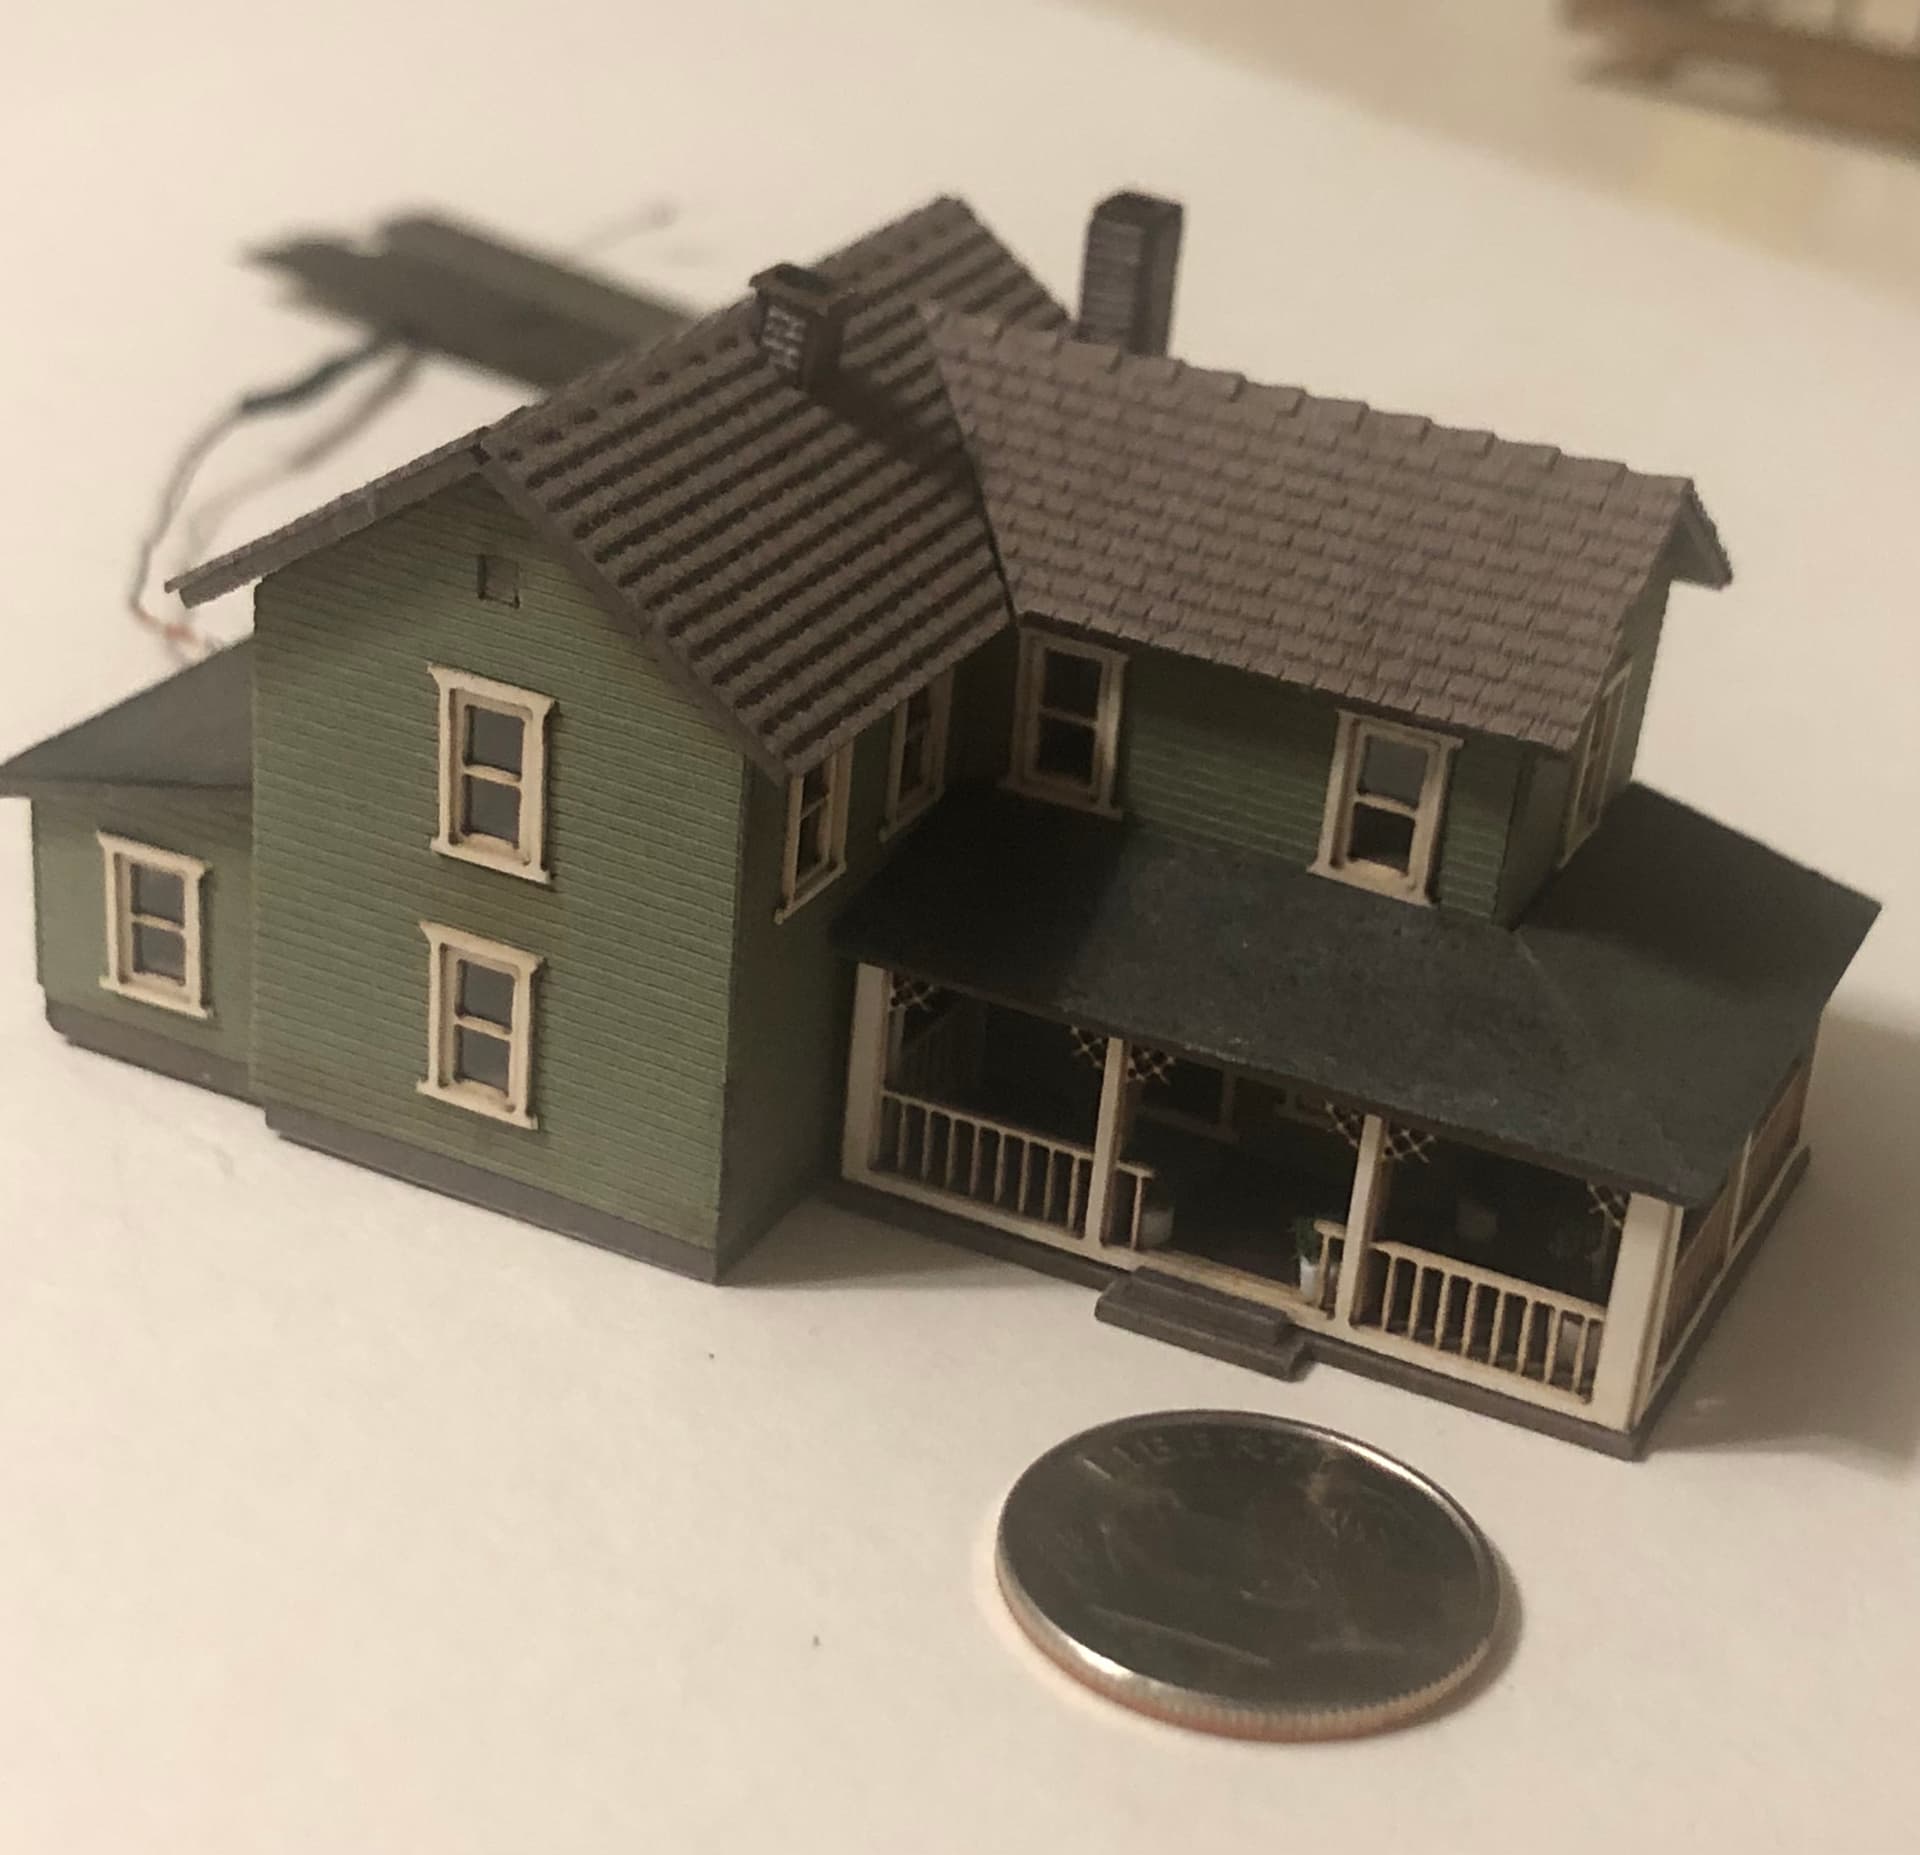
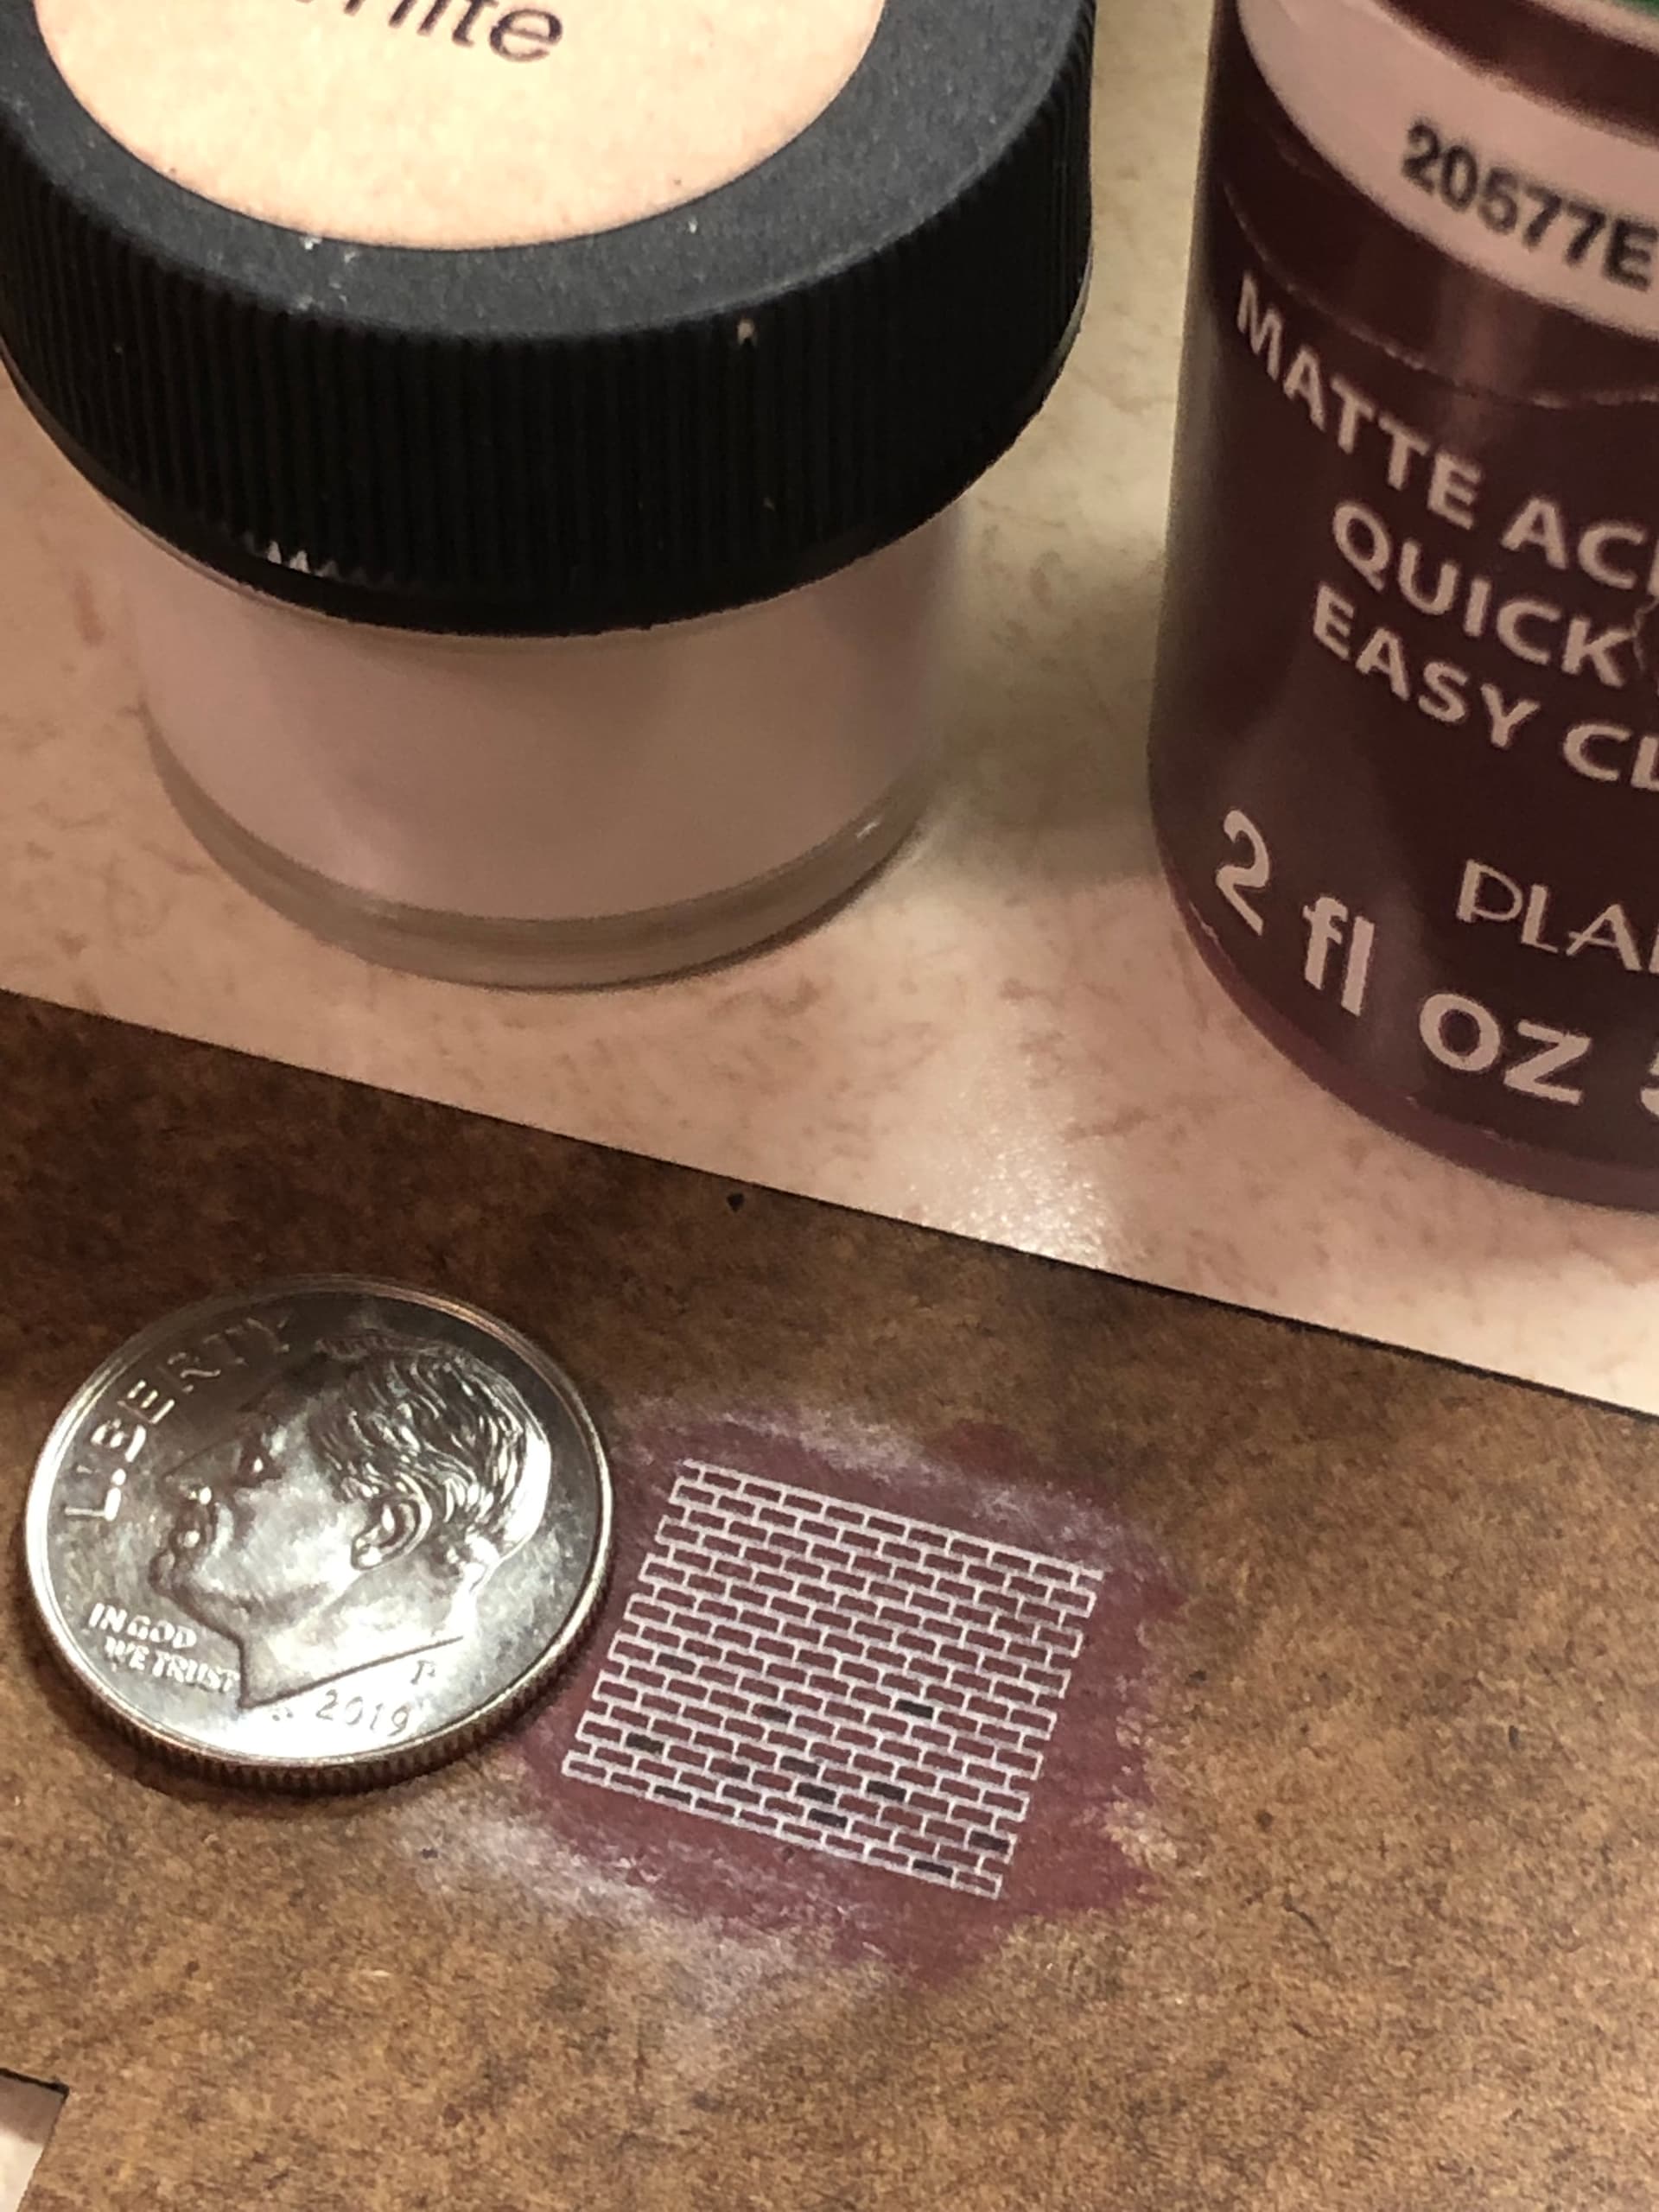
Here is the final cut, with dime inserted to show the scale.
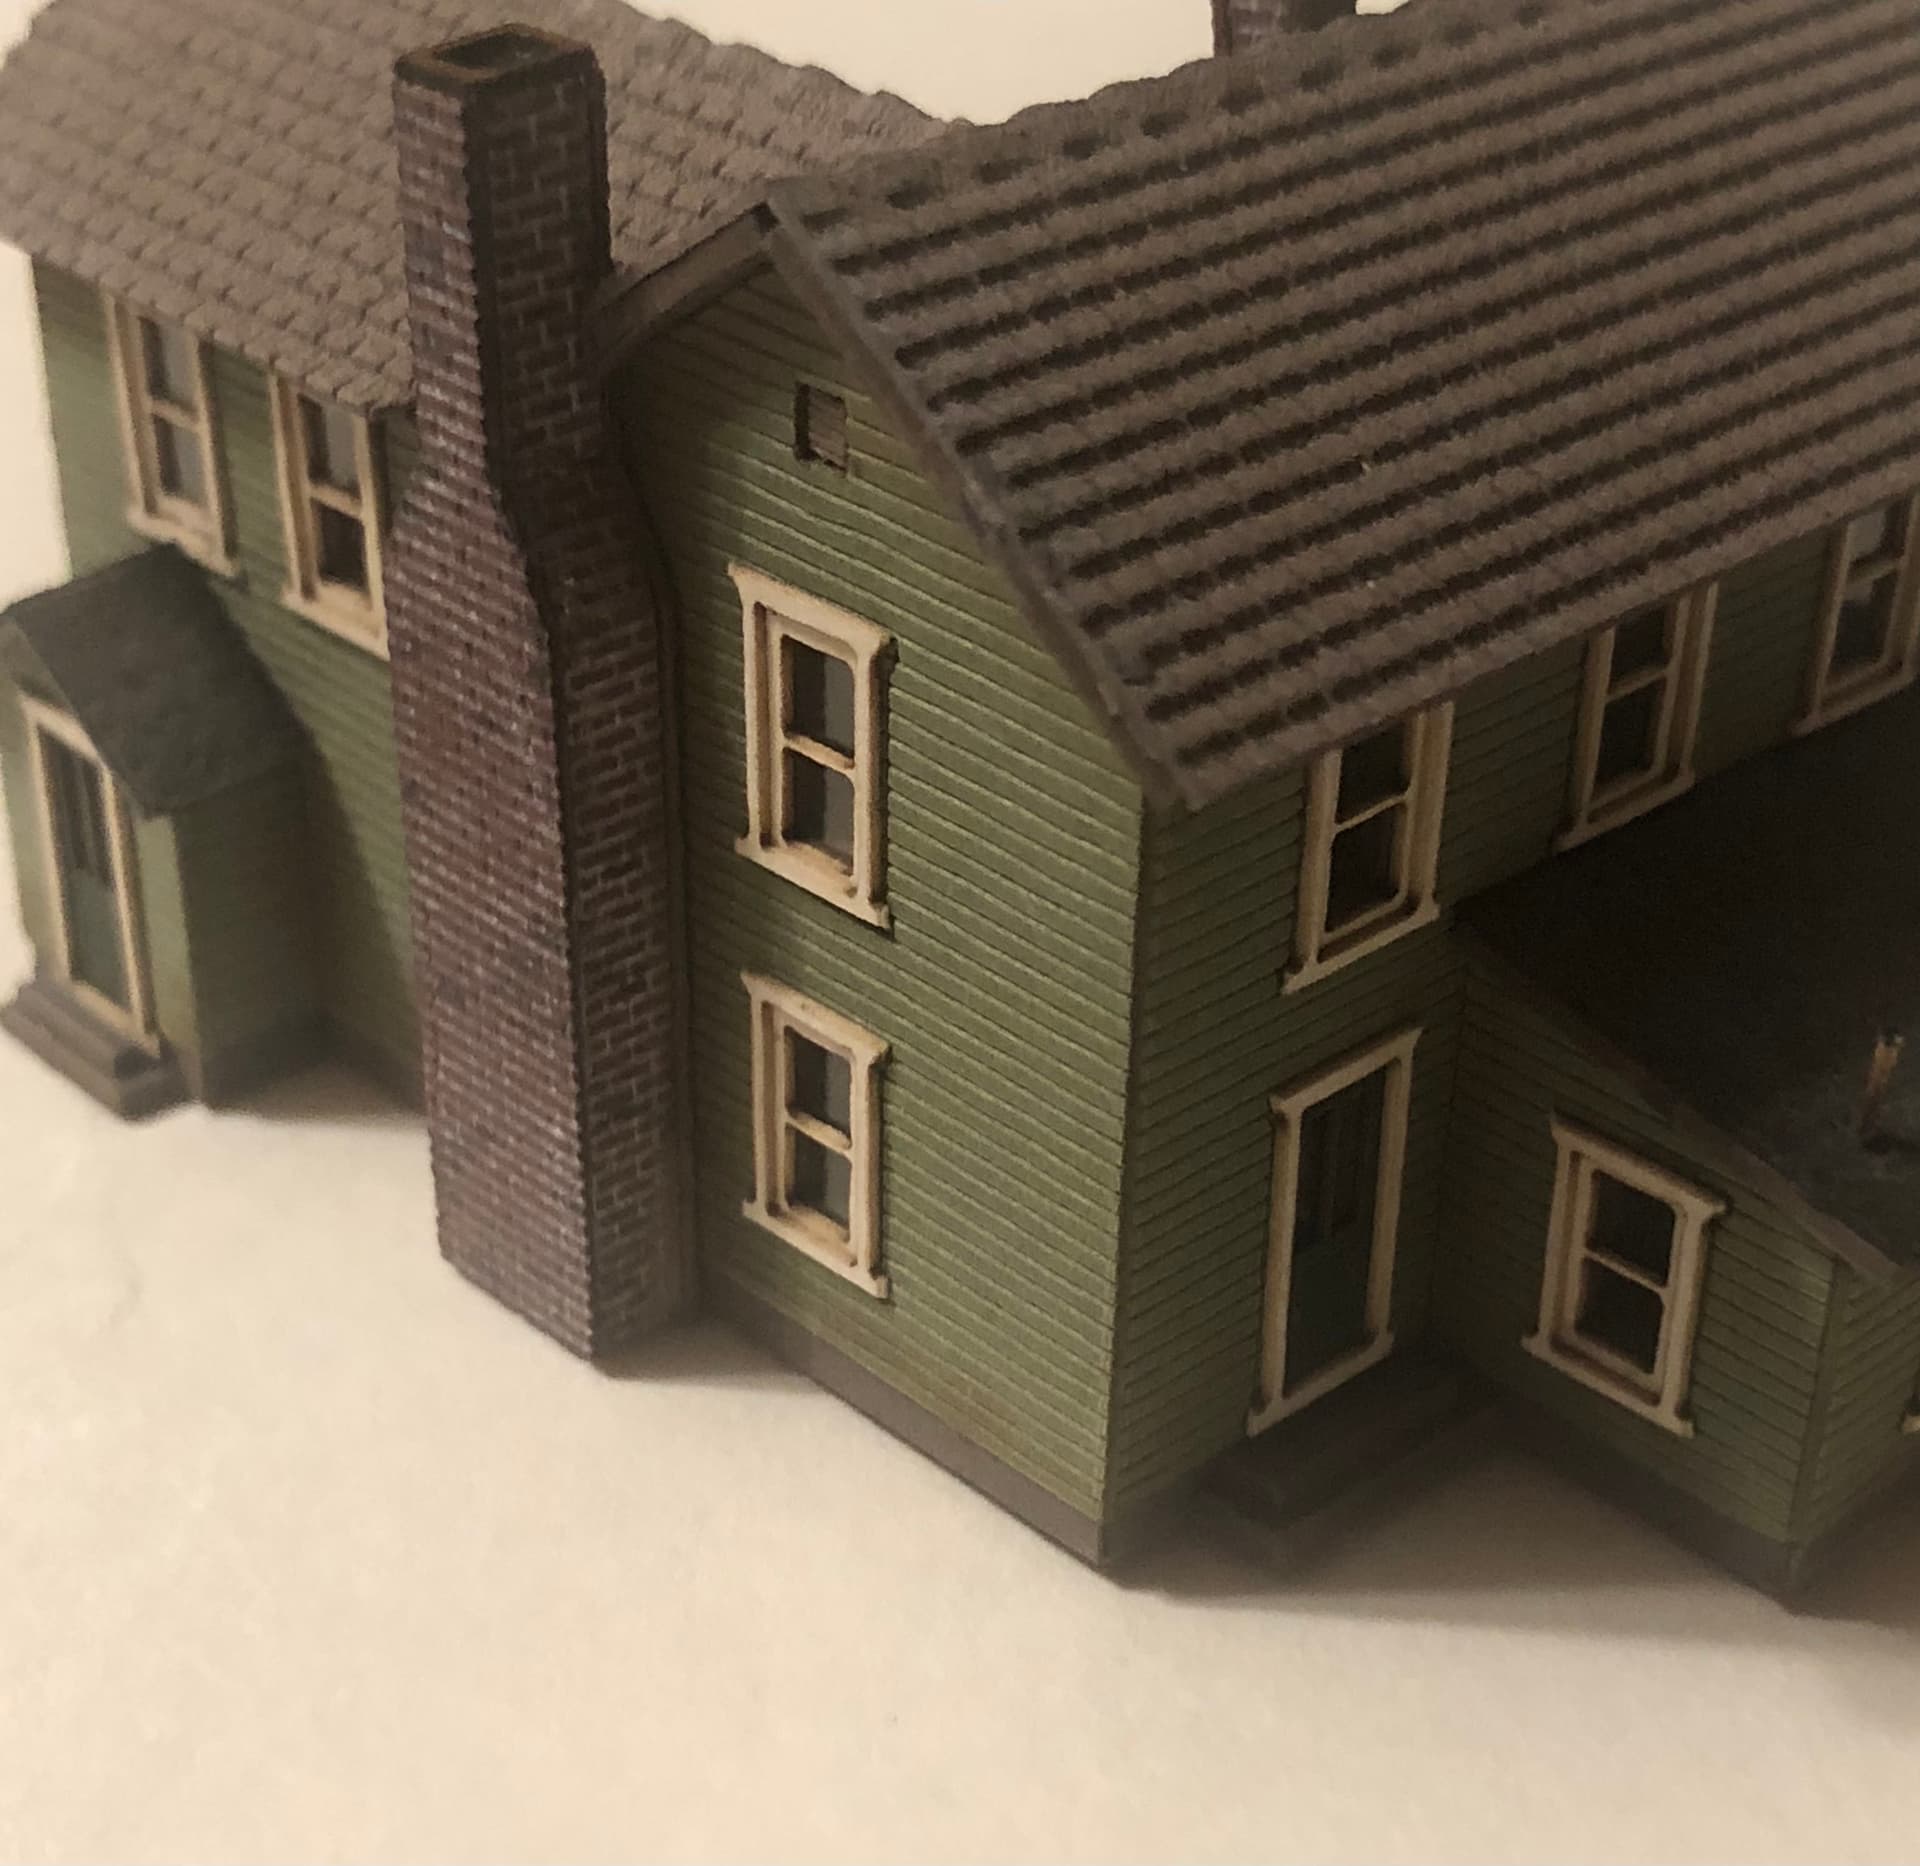
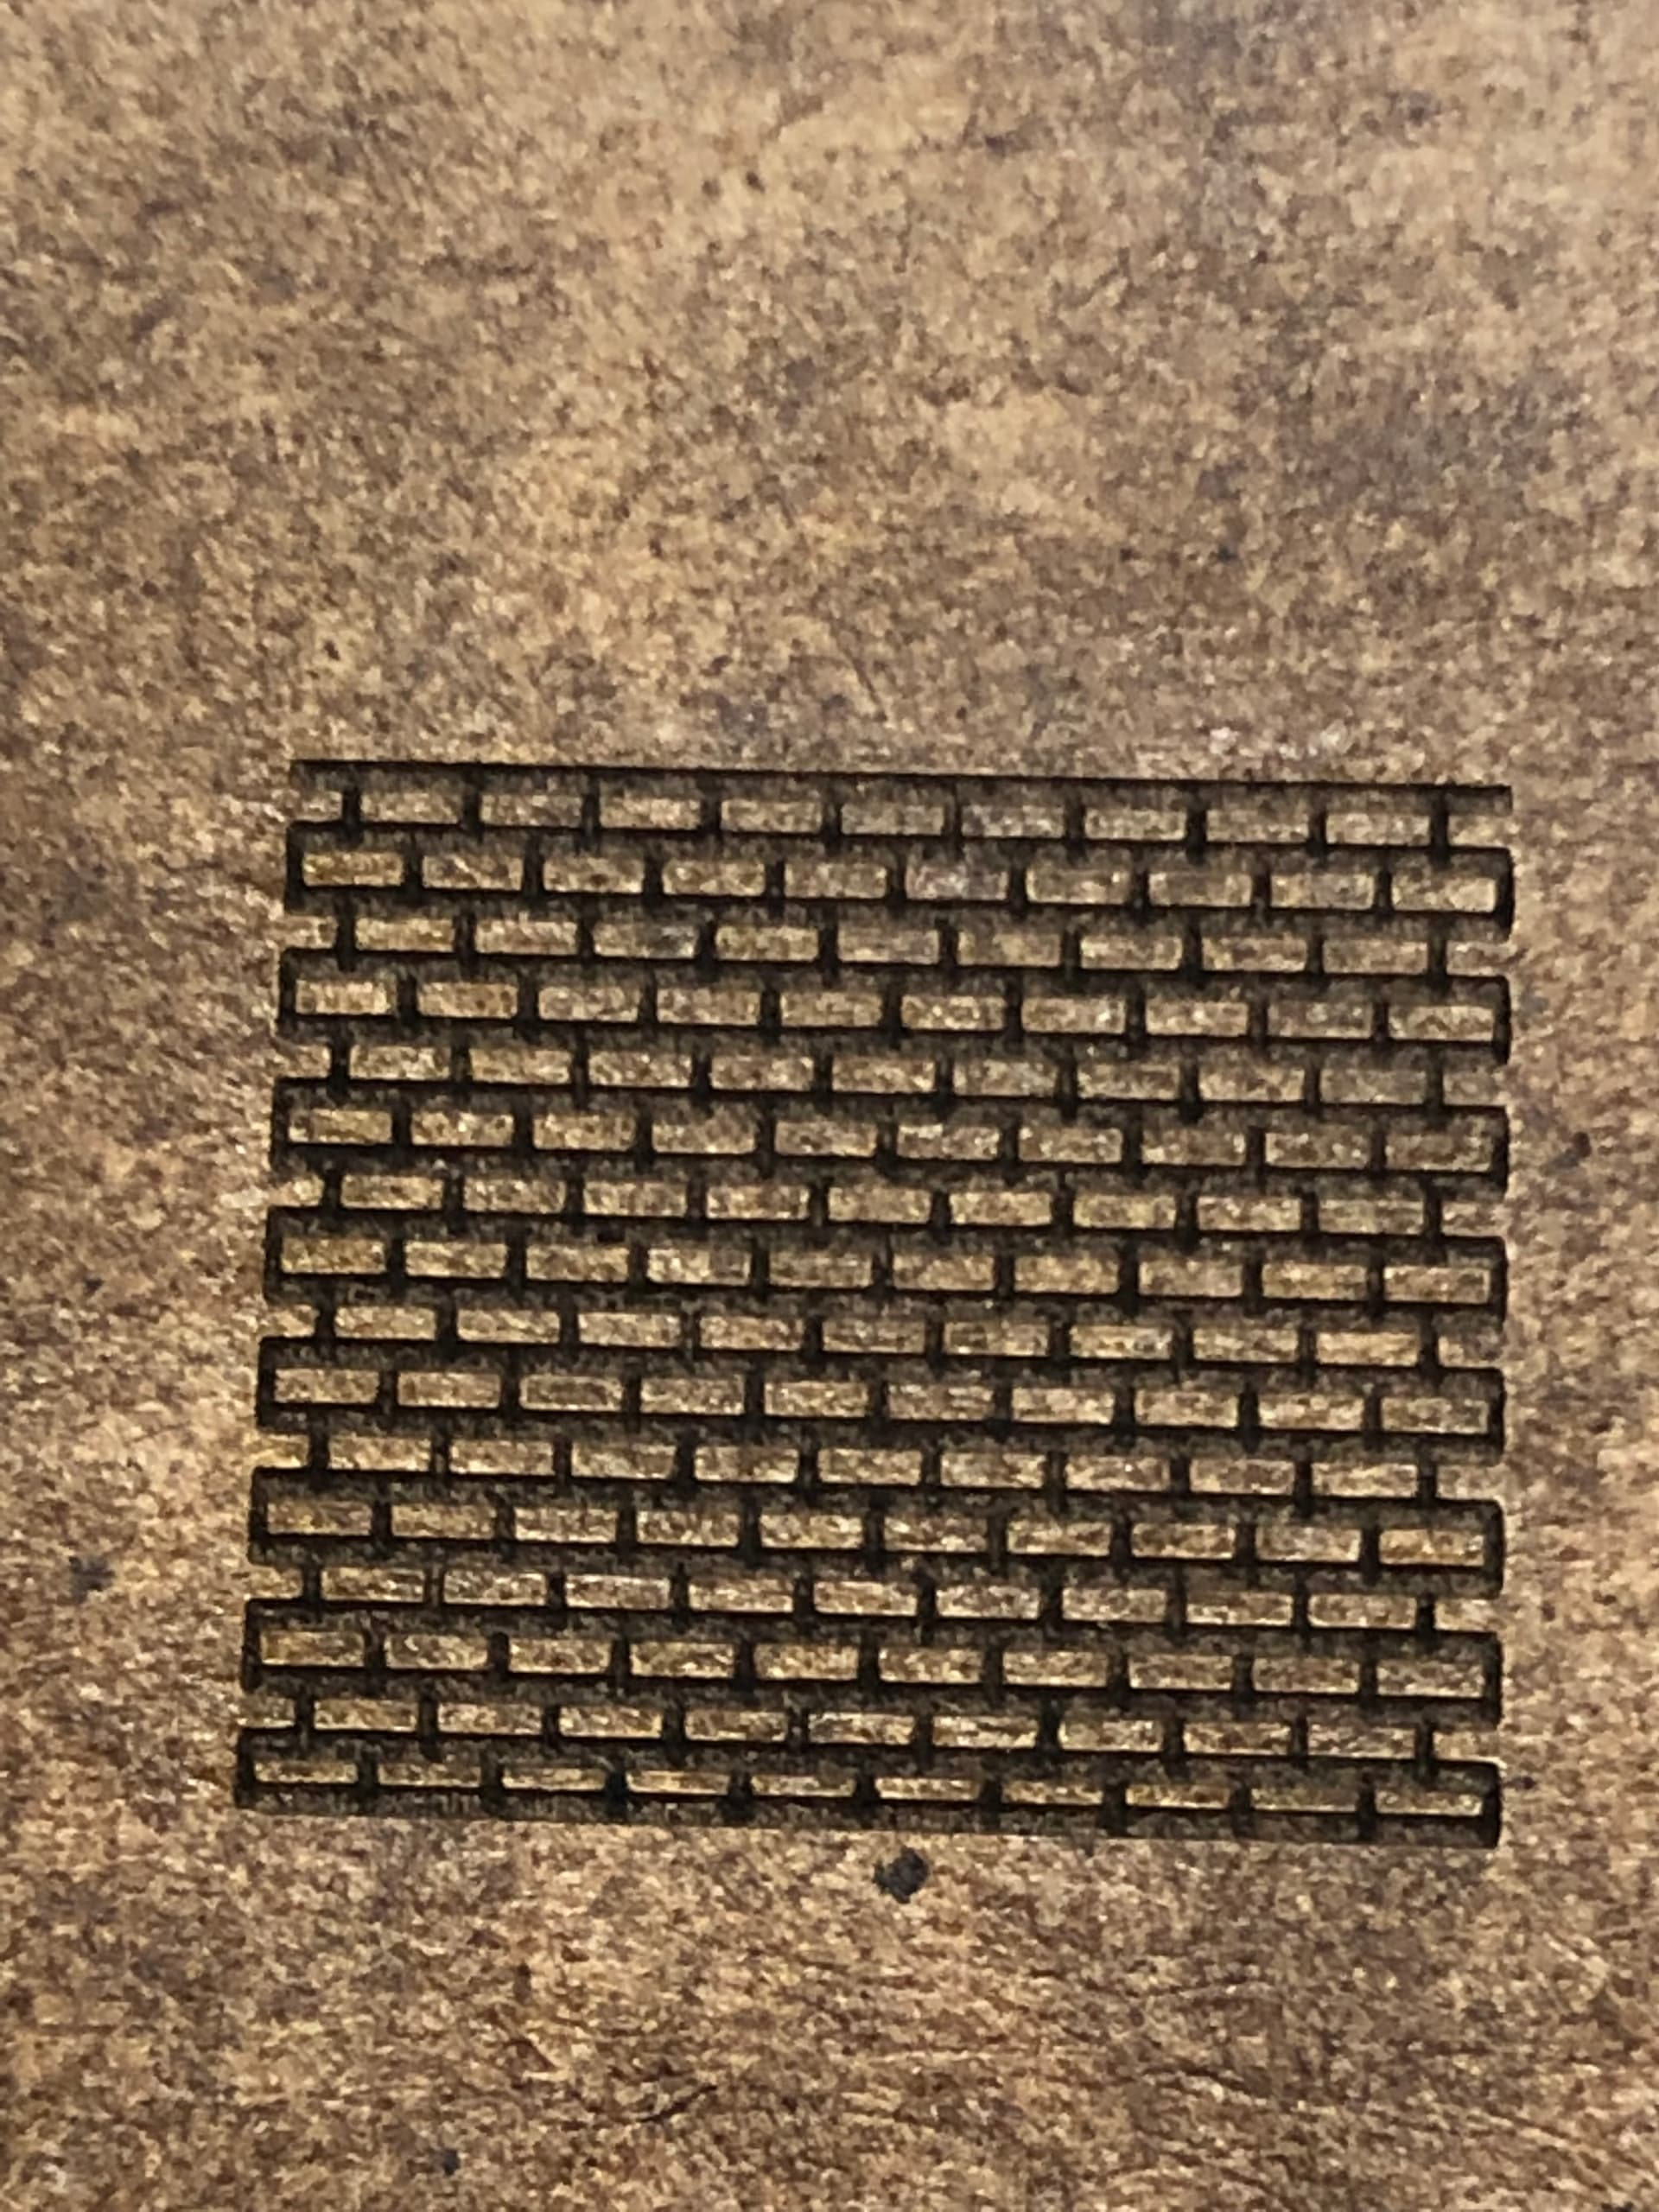
Another shot

Although the lines are just a wee bit wide, I think some additional setting changes will take care of that. But, as it sits, this is very usuable for Z-scale.

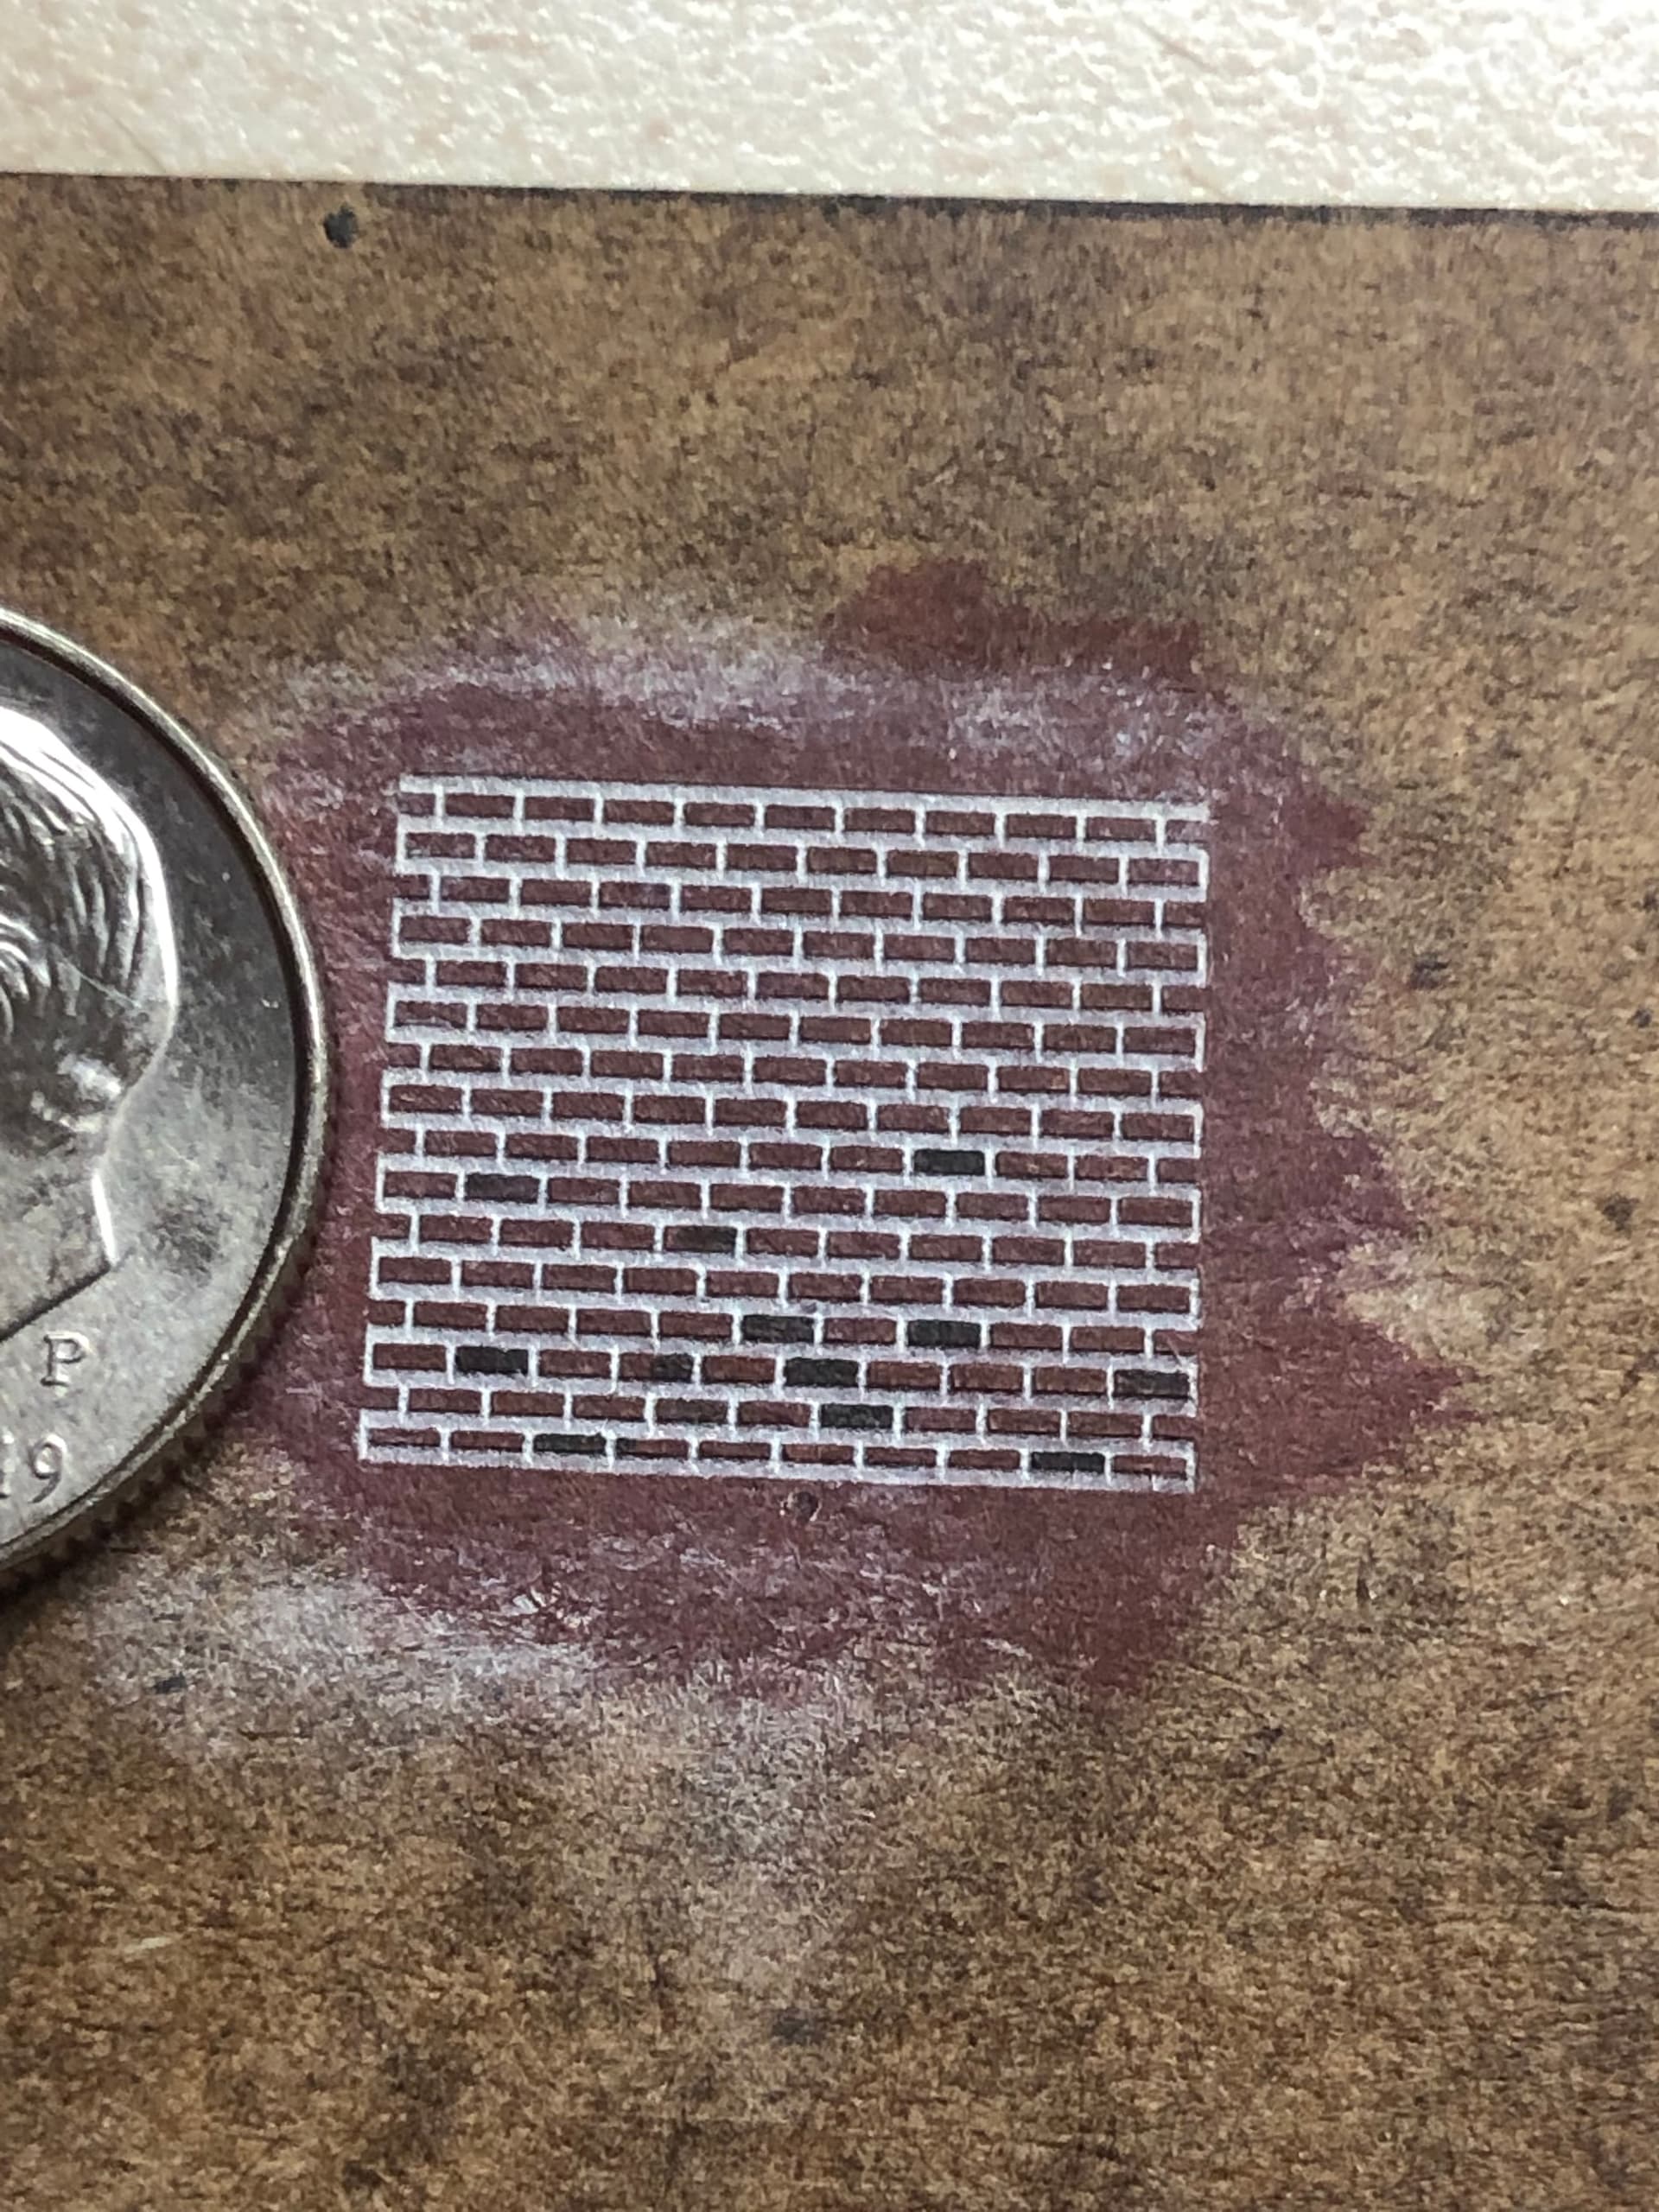
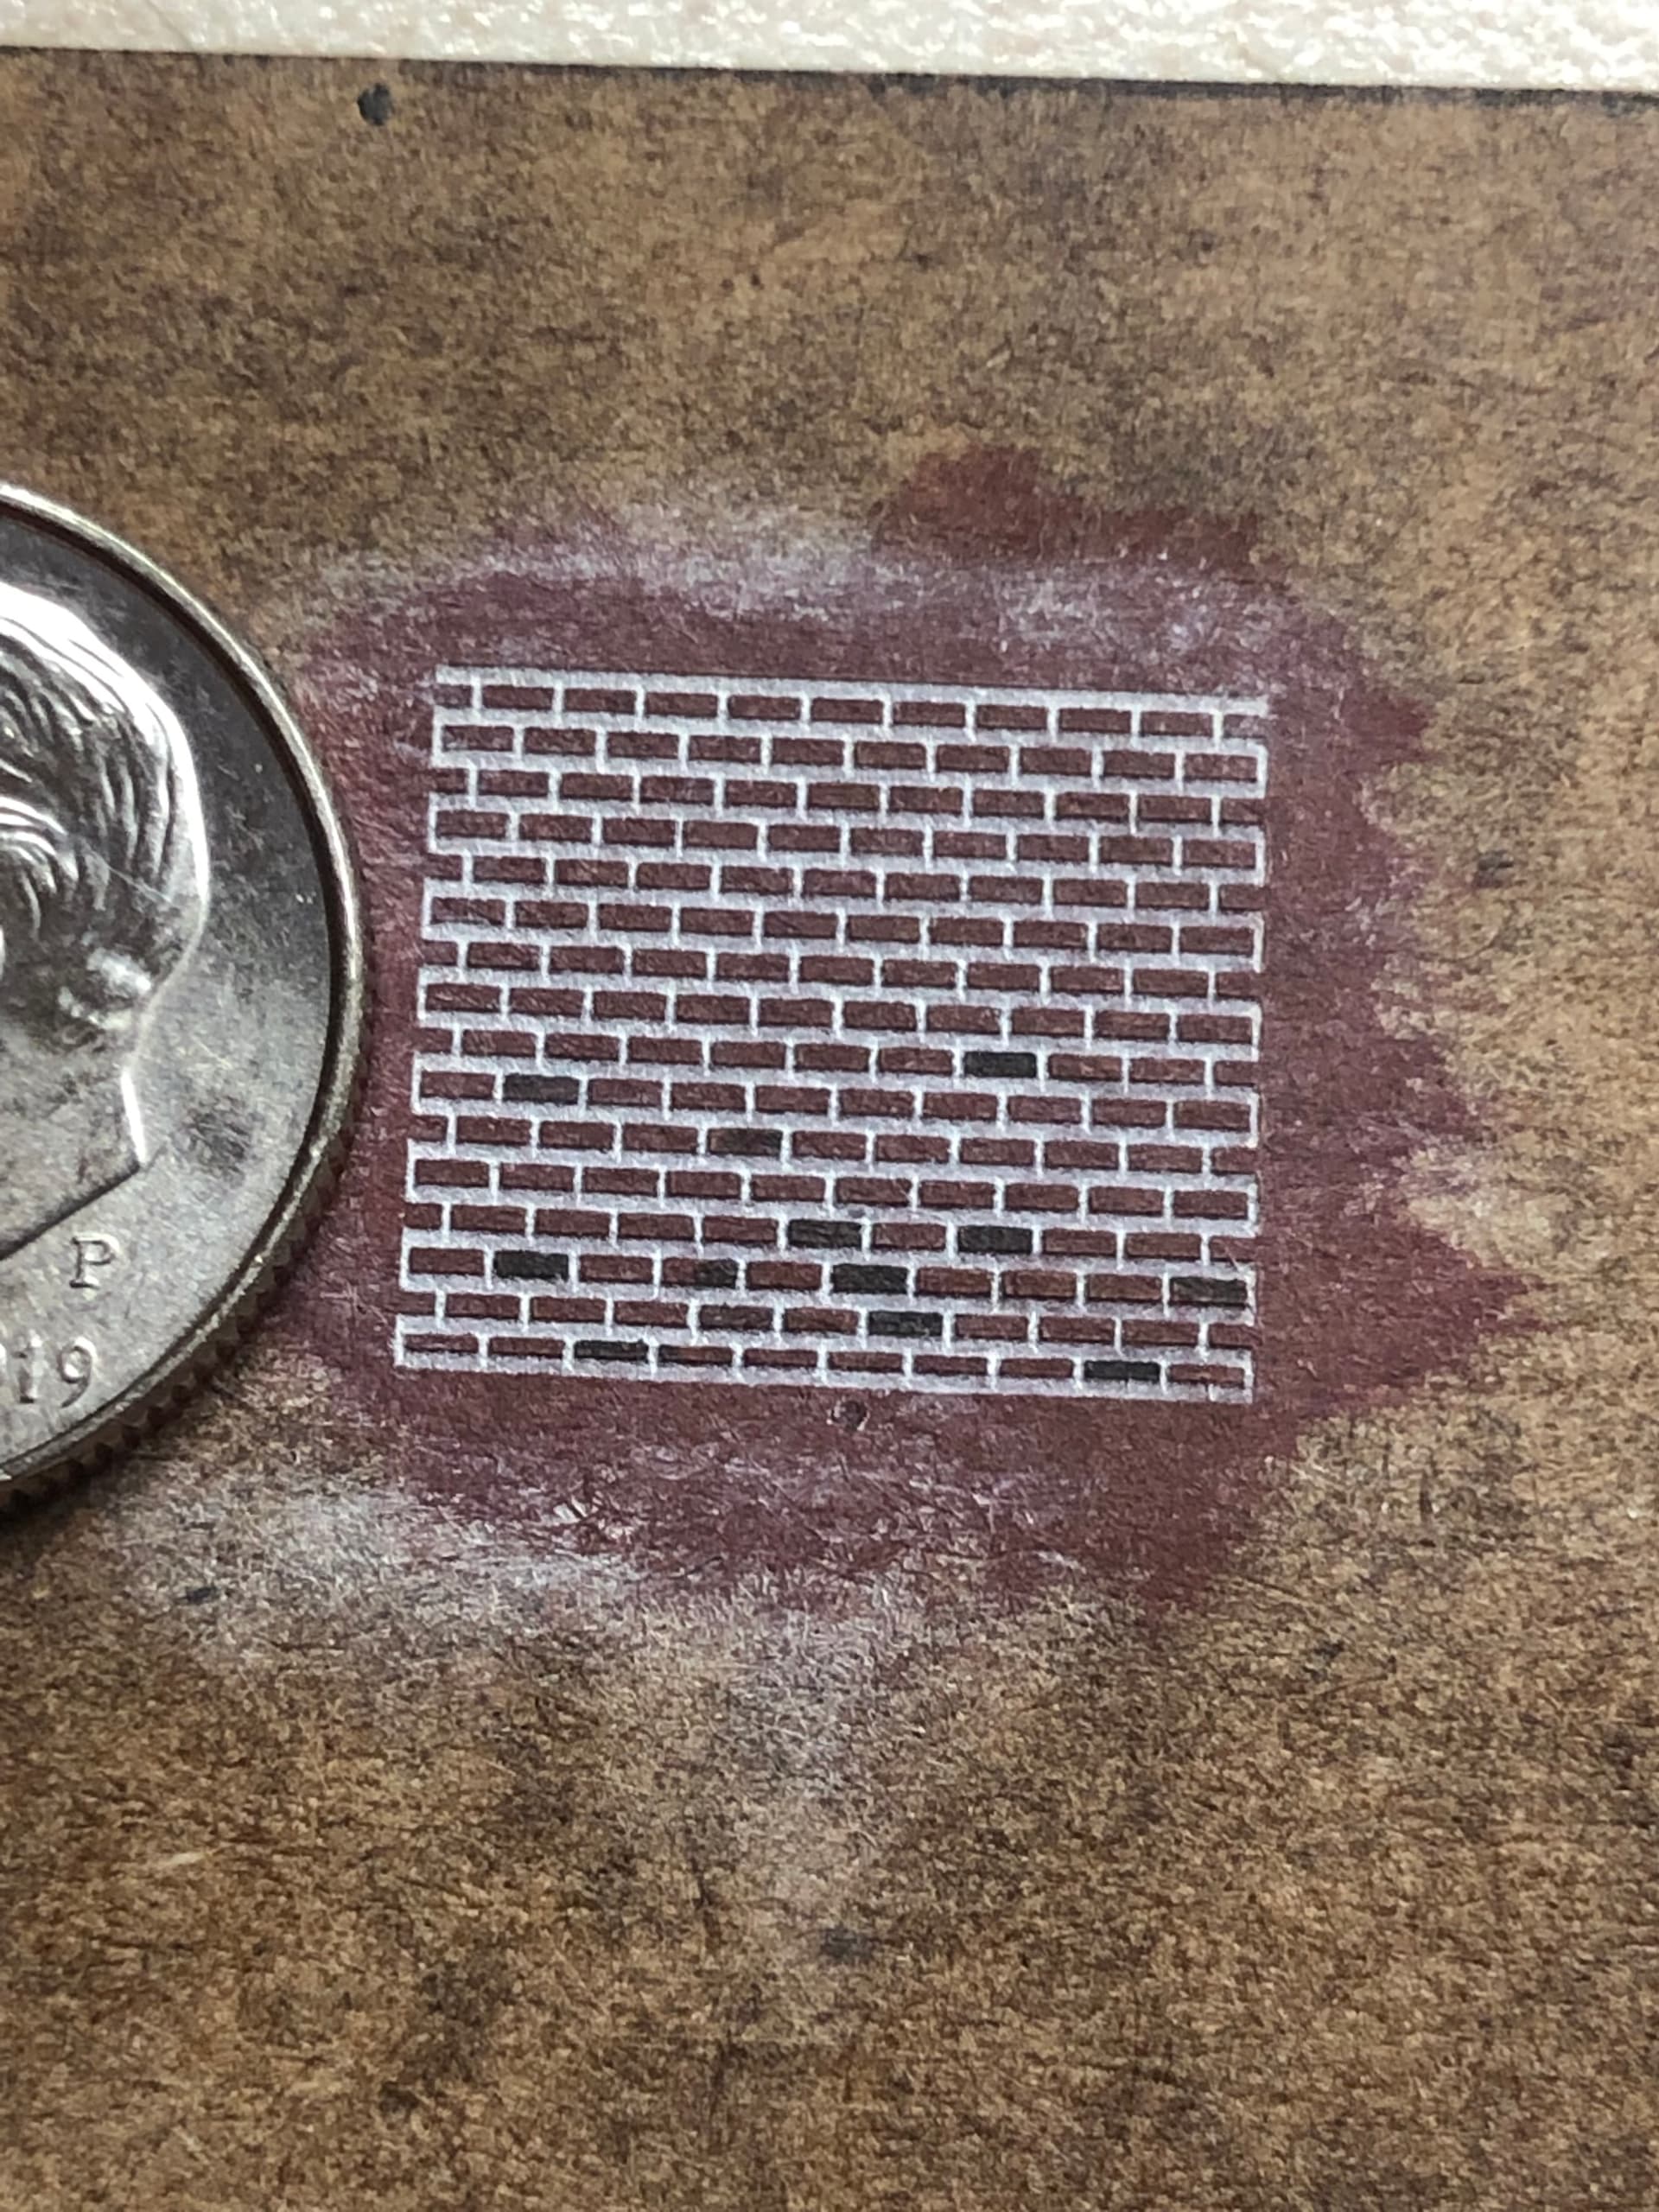
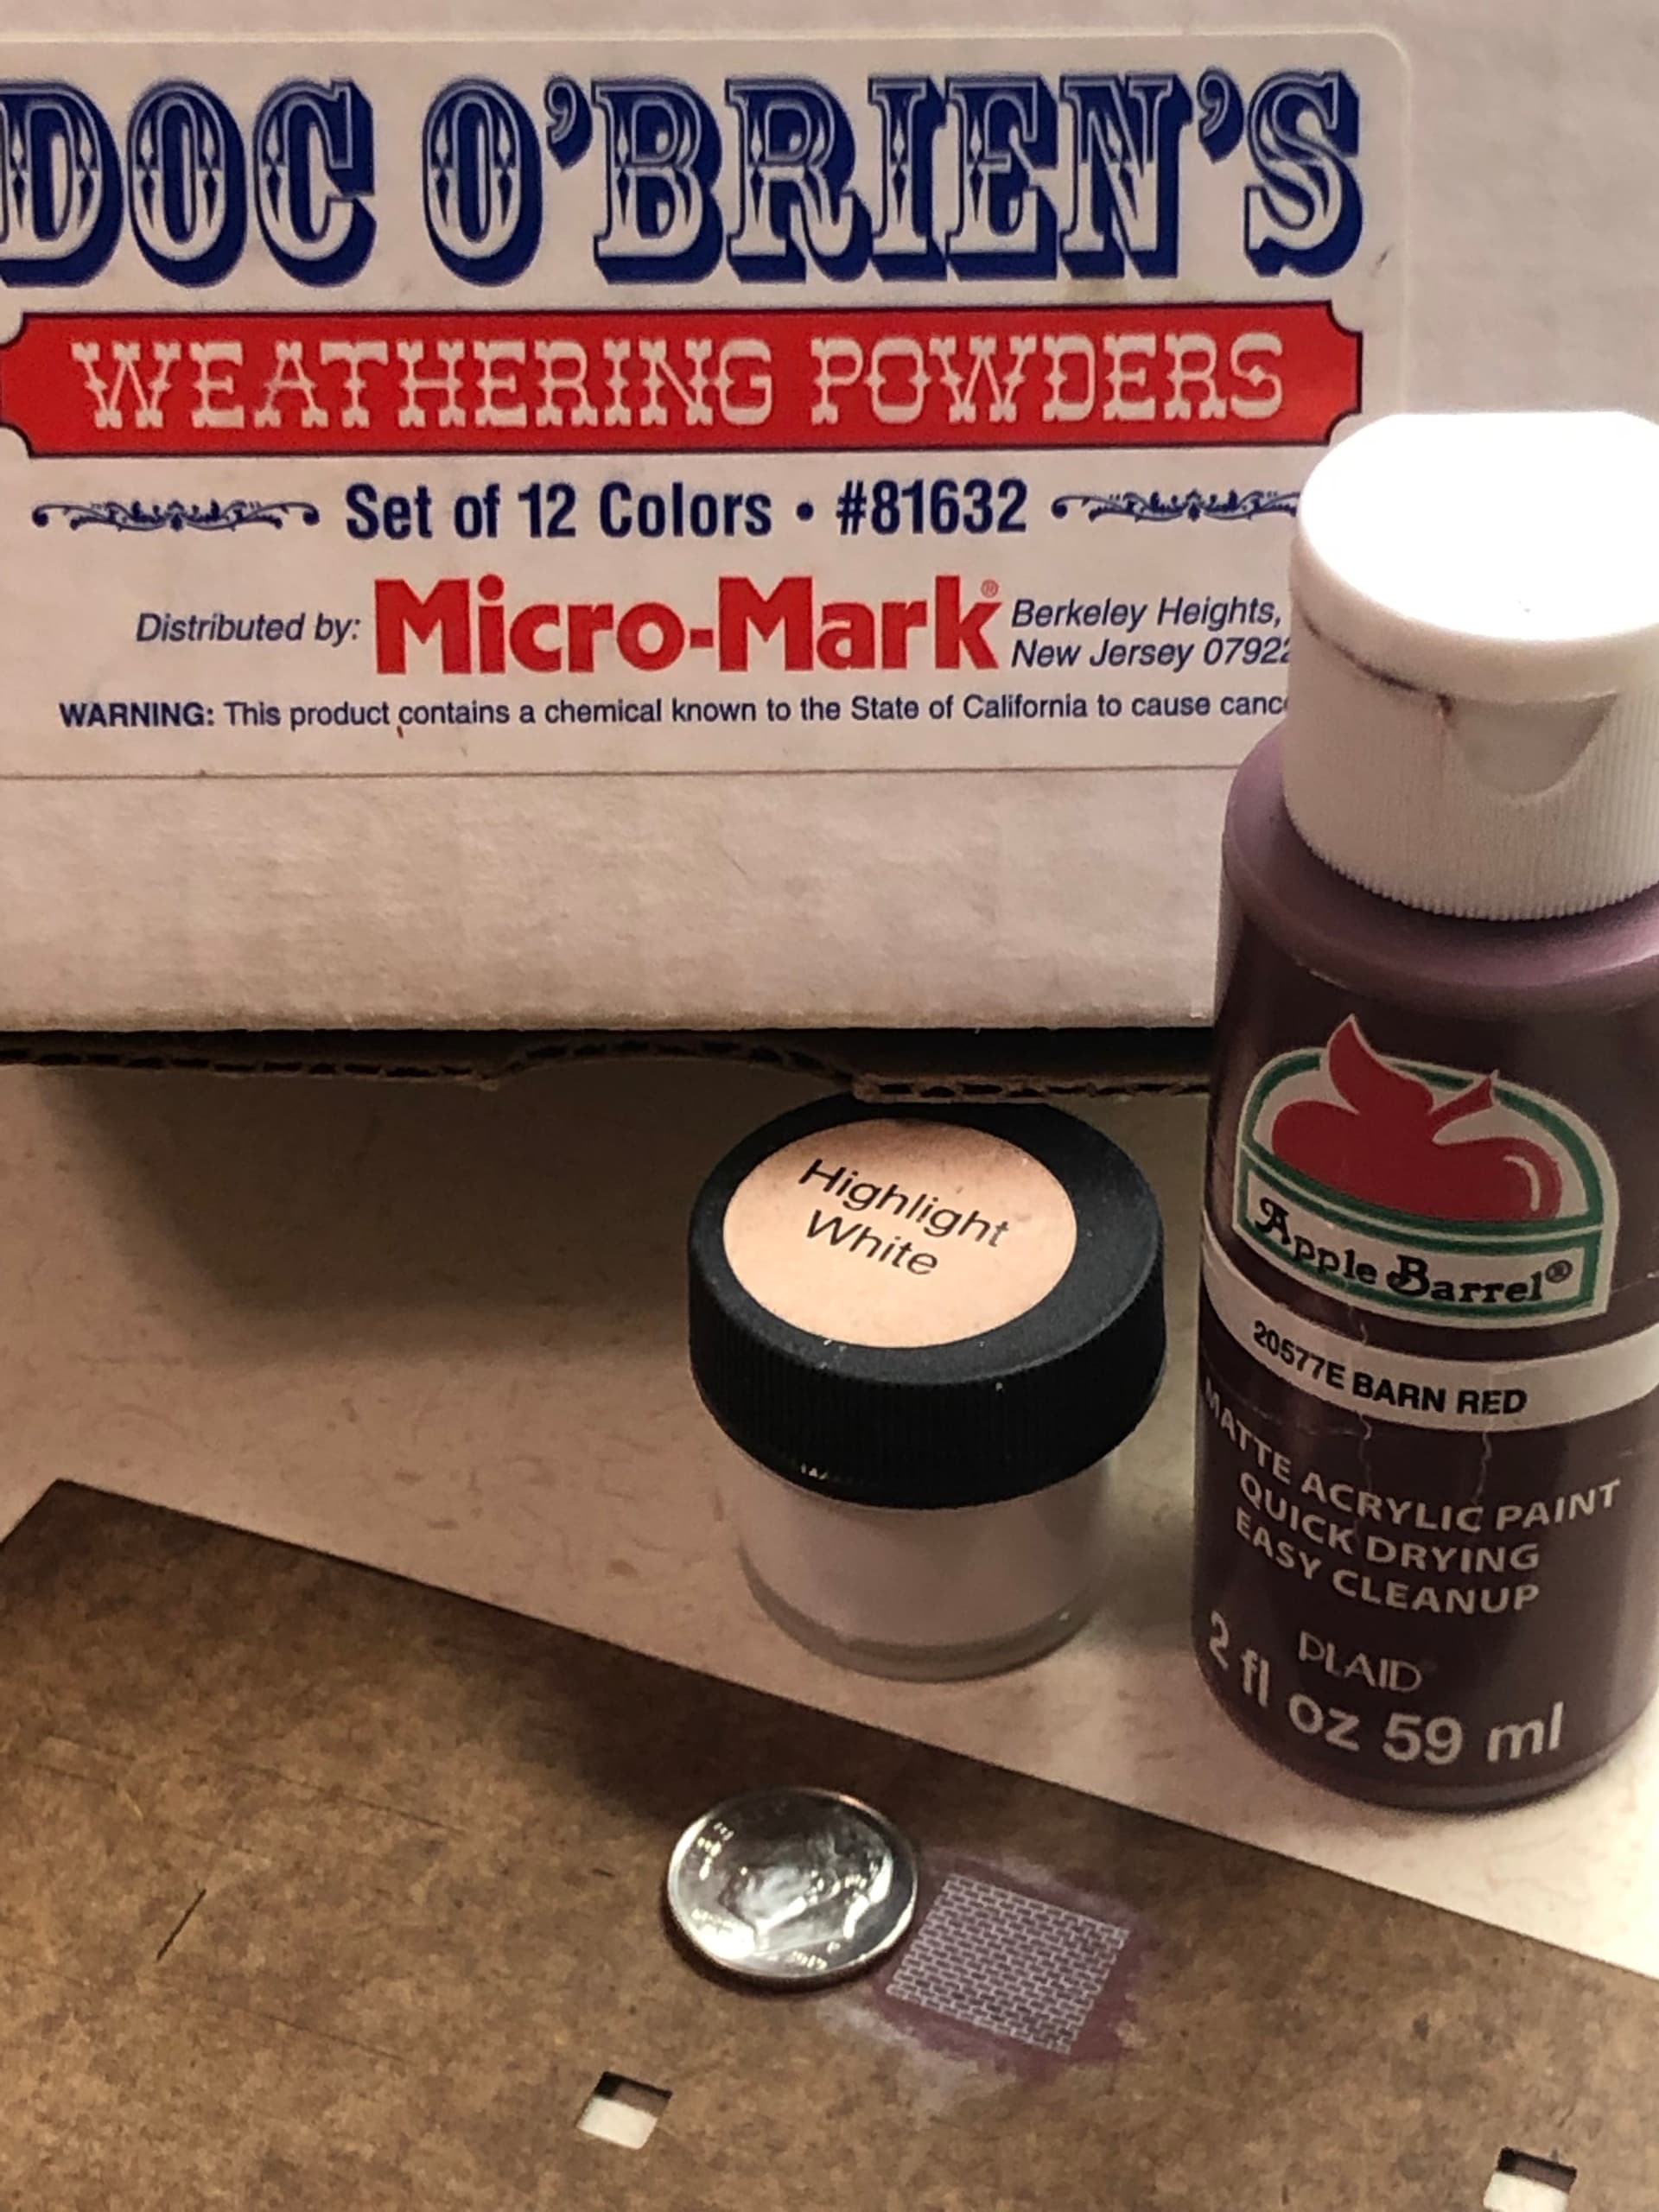
Now, the icing on the cake — adding color. Apple Barrel Barn Red acrylic paint, Doc Obriens weathering powders, an ultra-fine black pen to highlight a few bricks to make them look decayed or mildewed, and a pencil eraser. See video in above discussion.

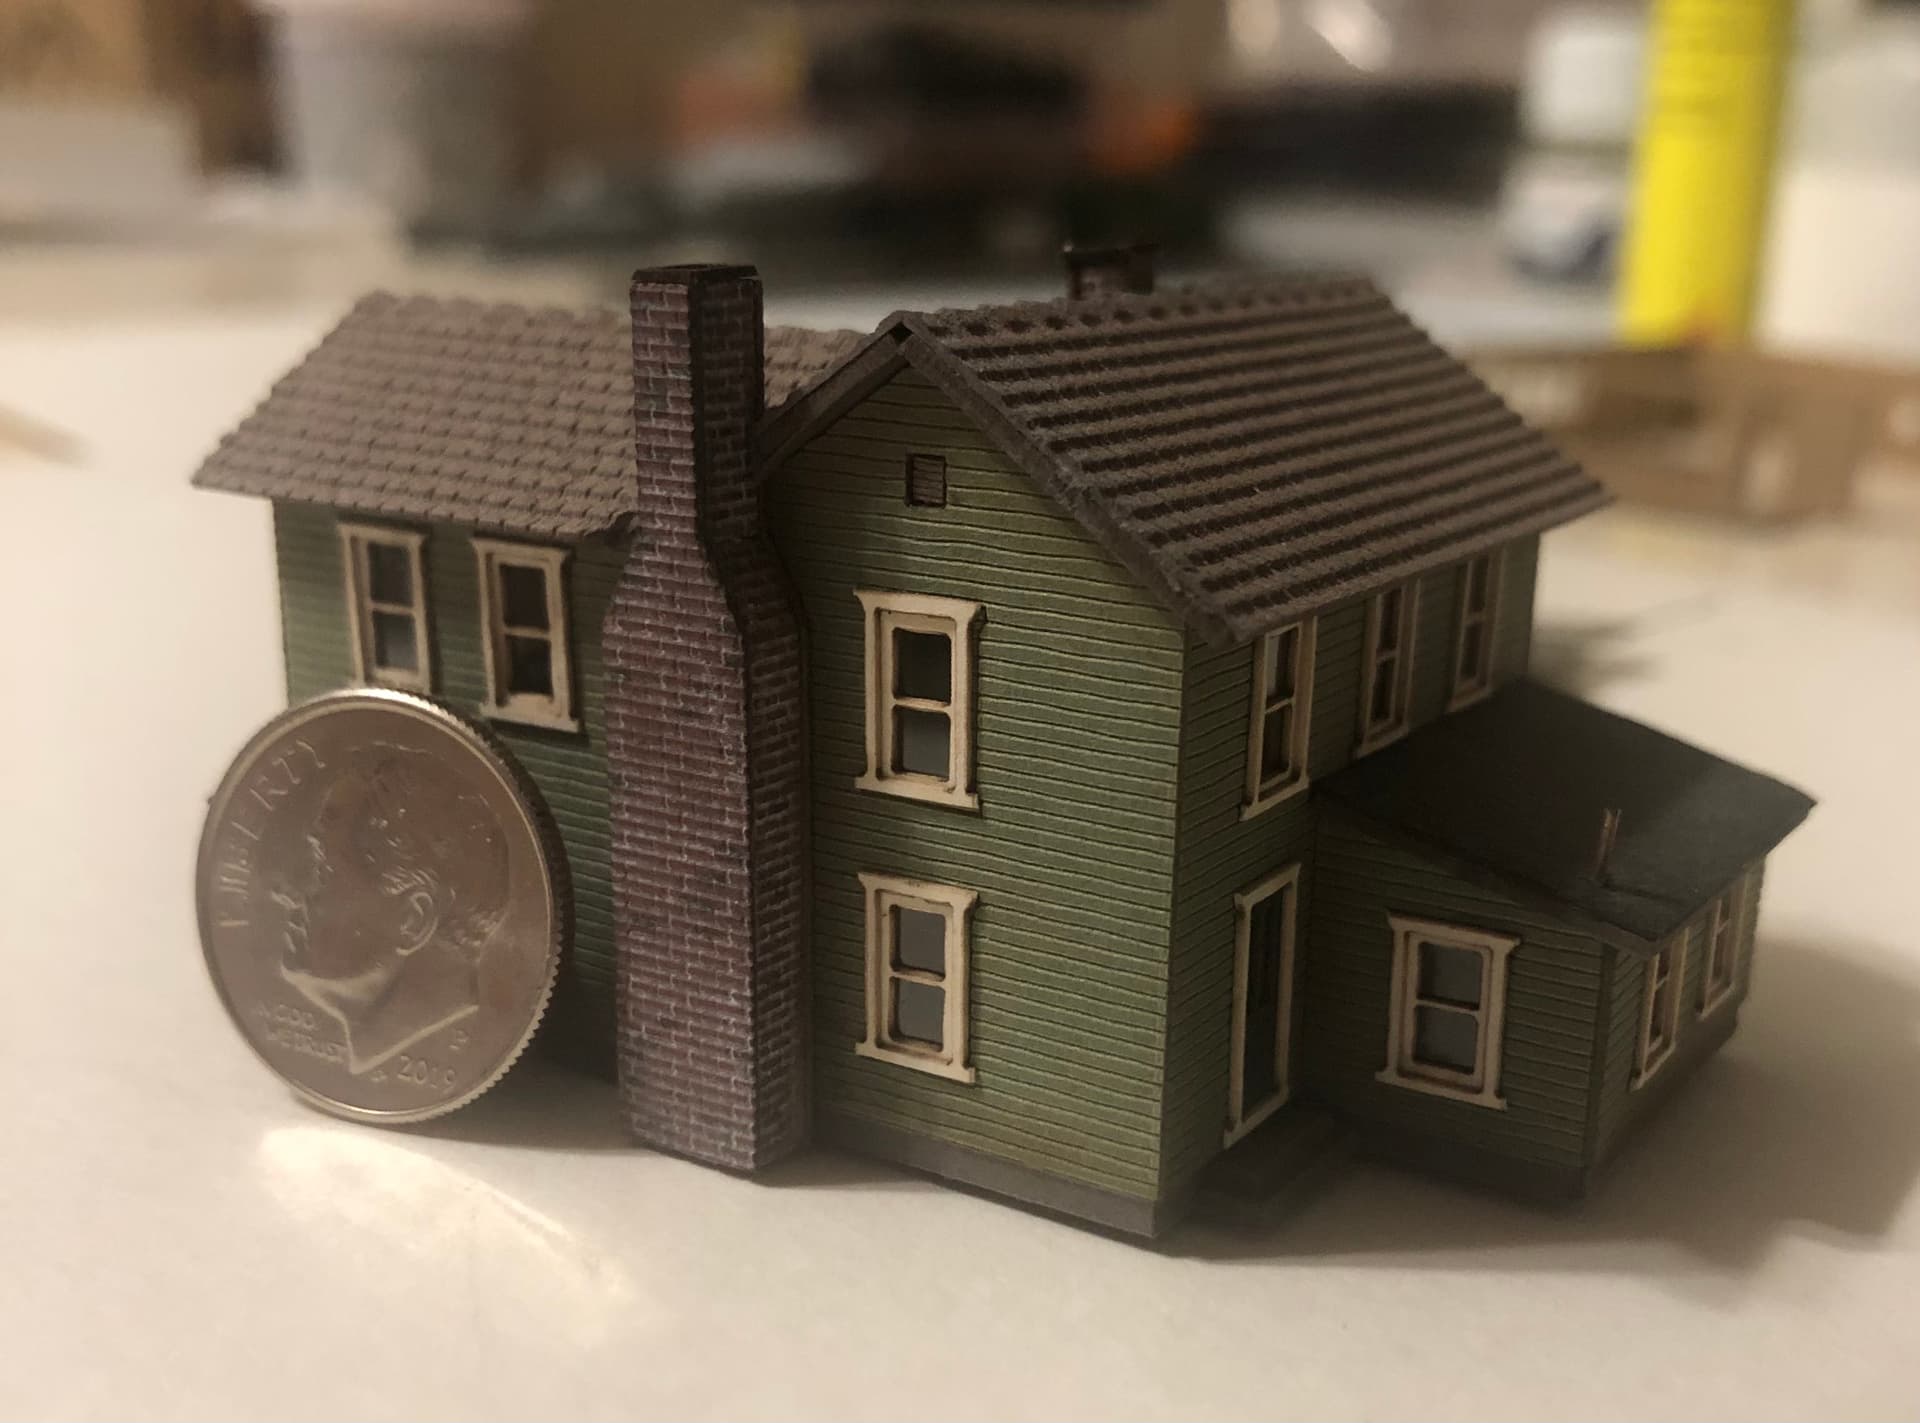
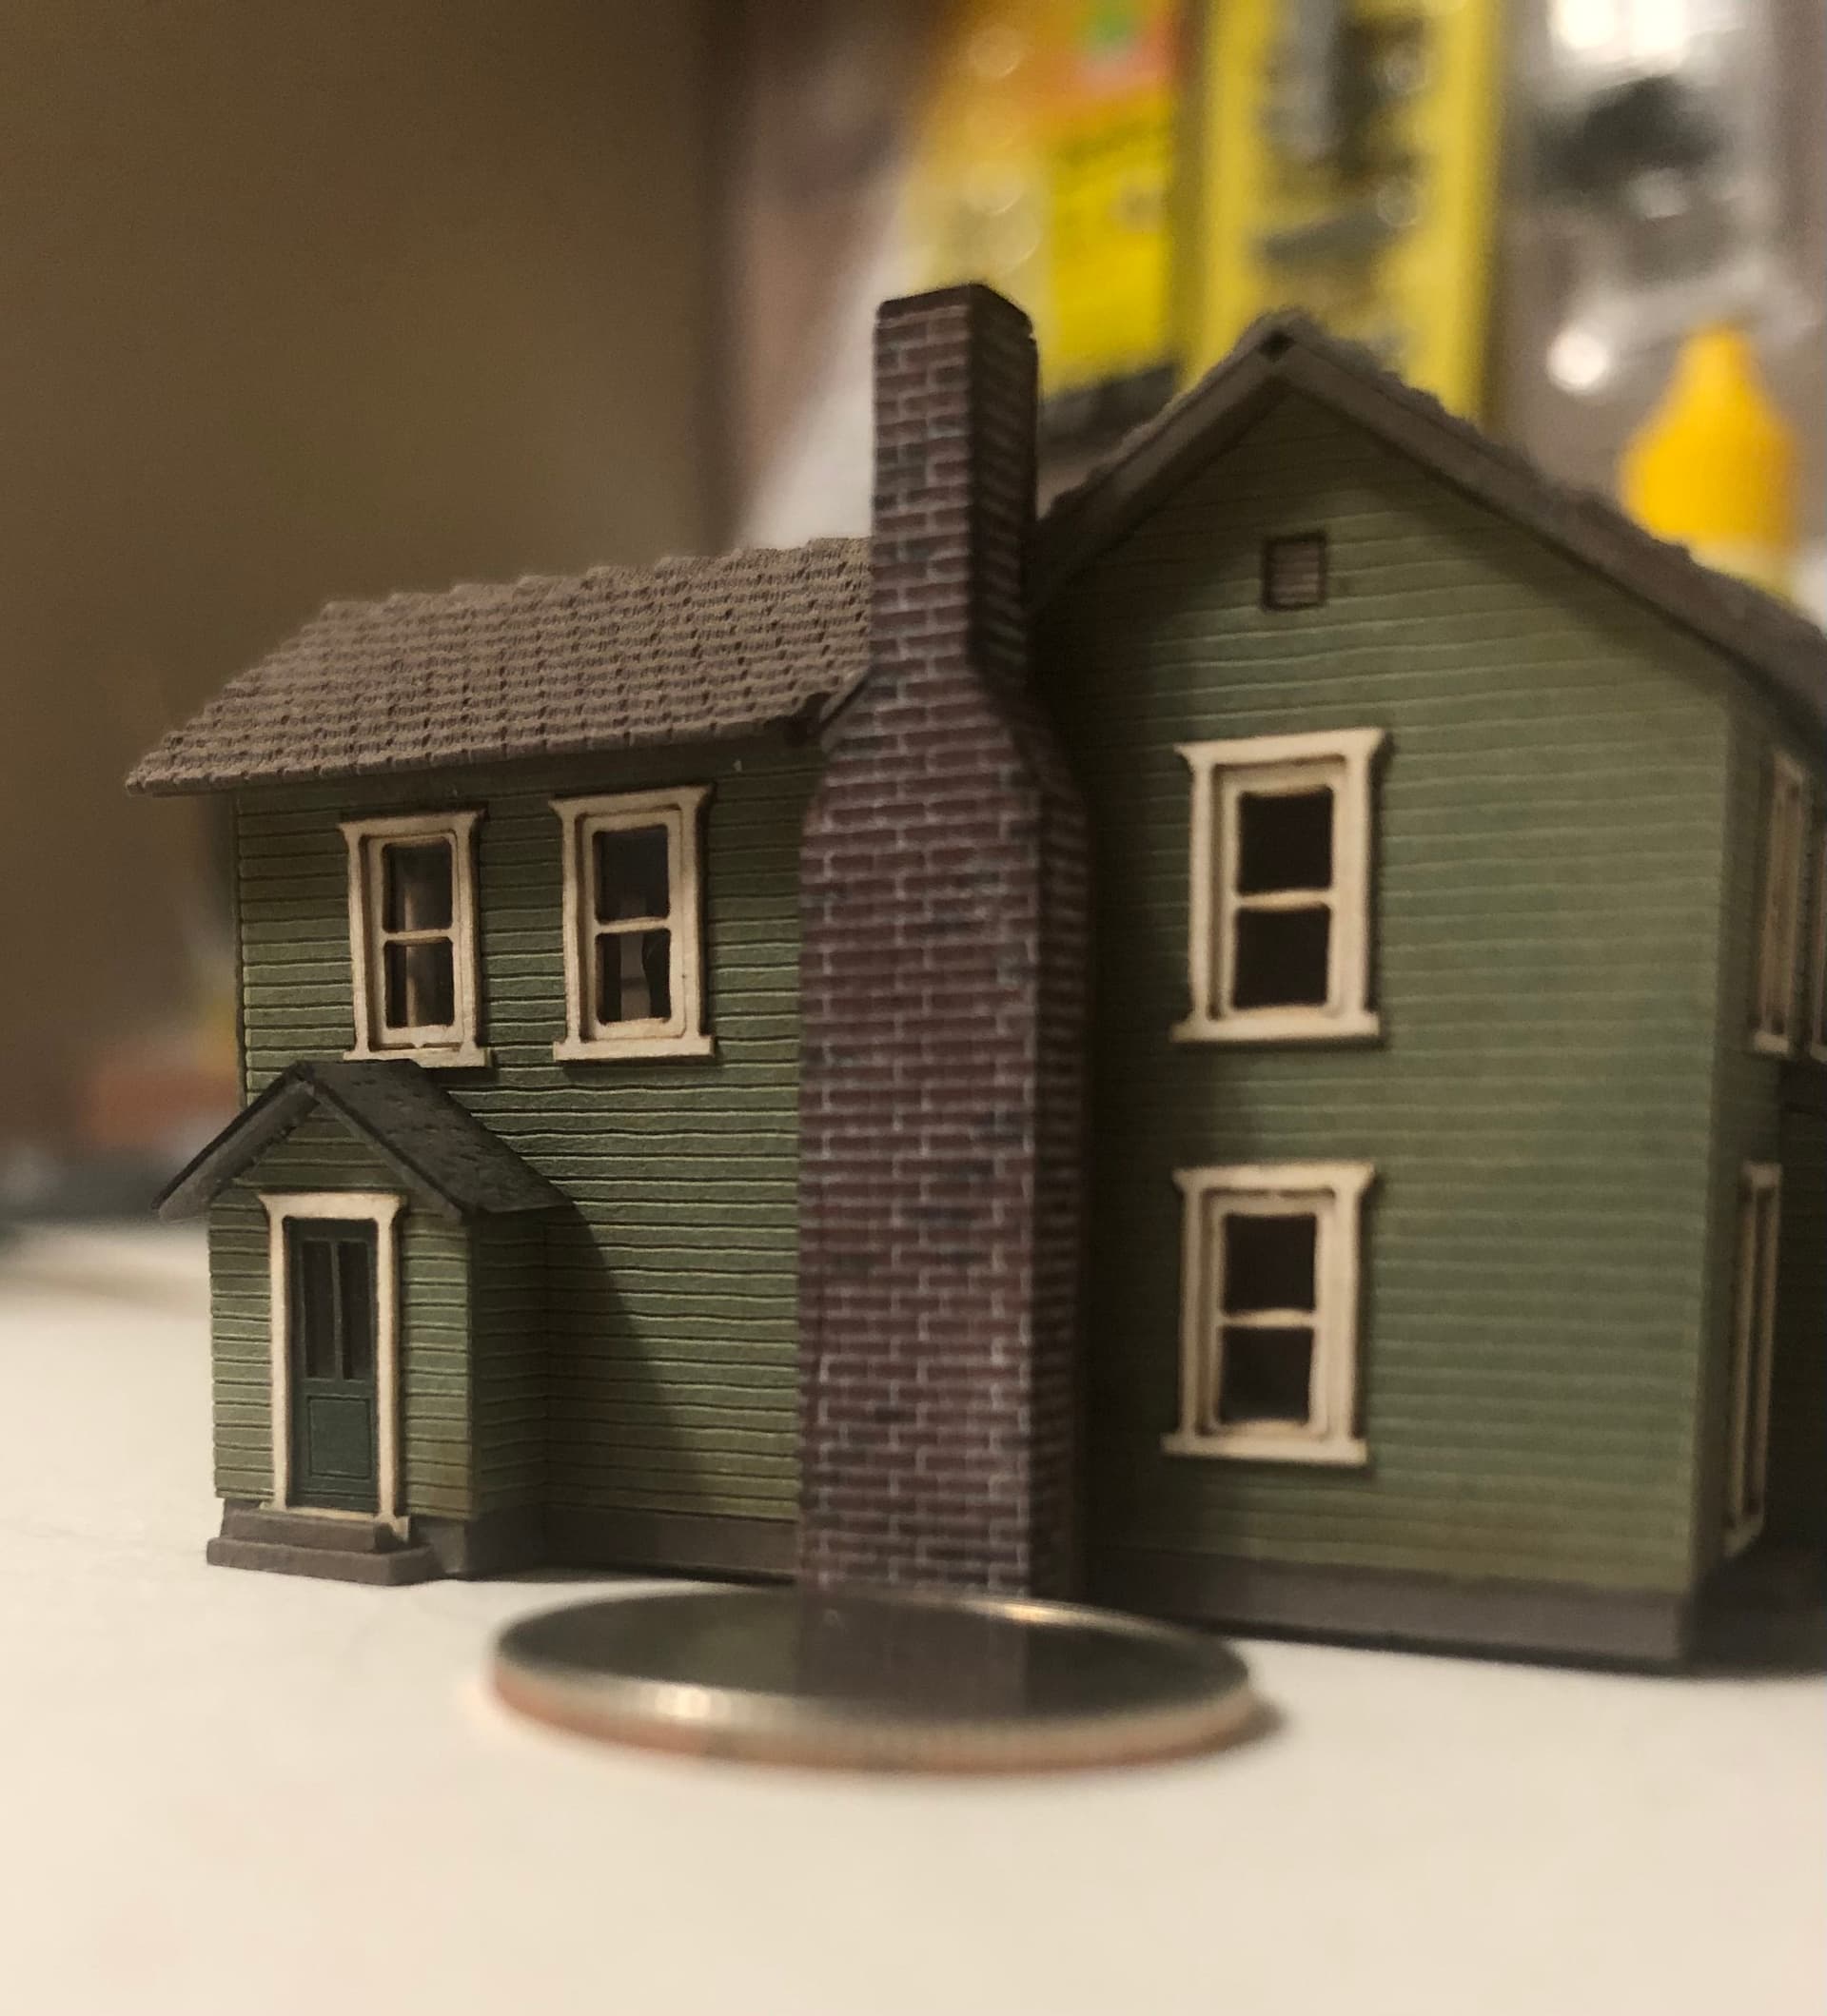
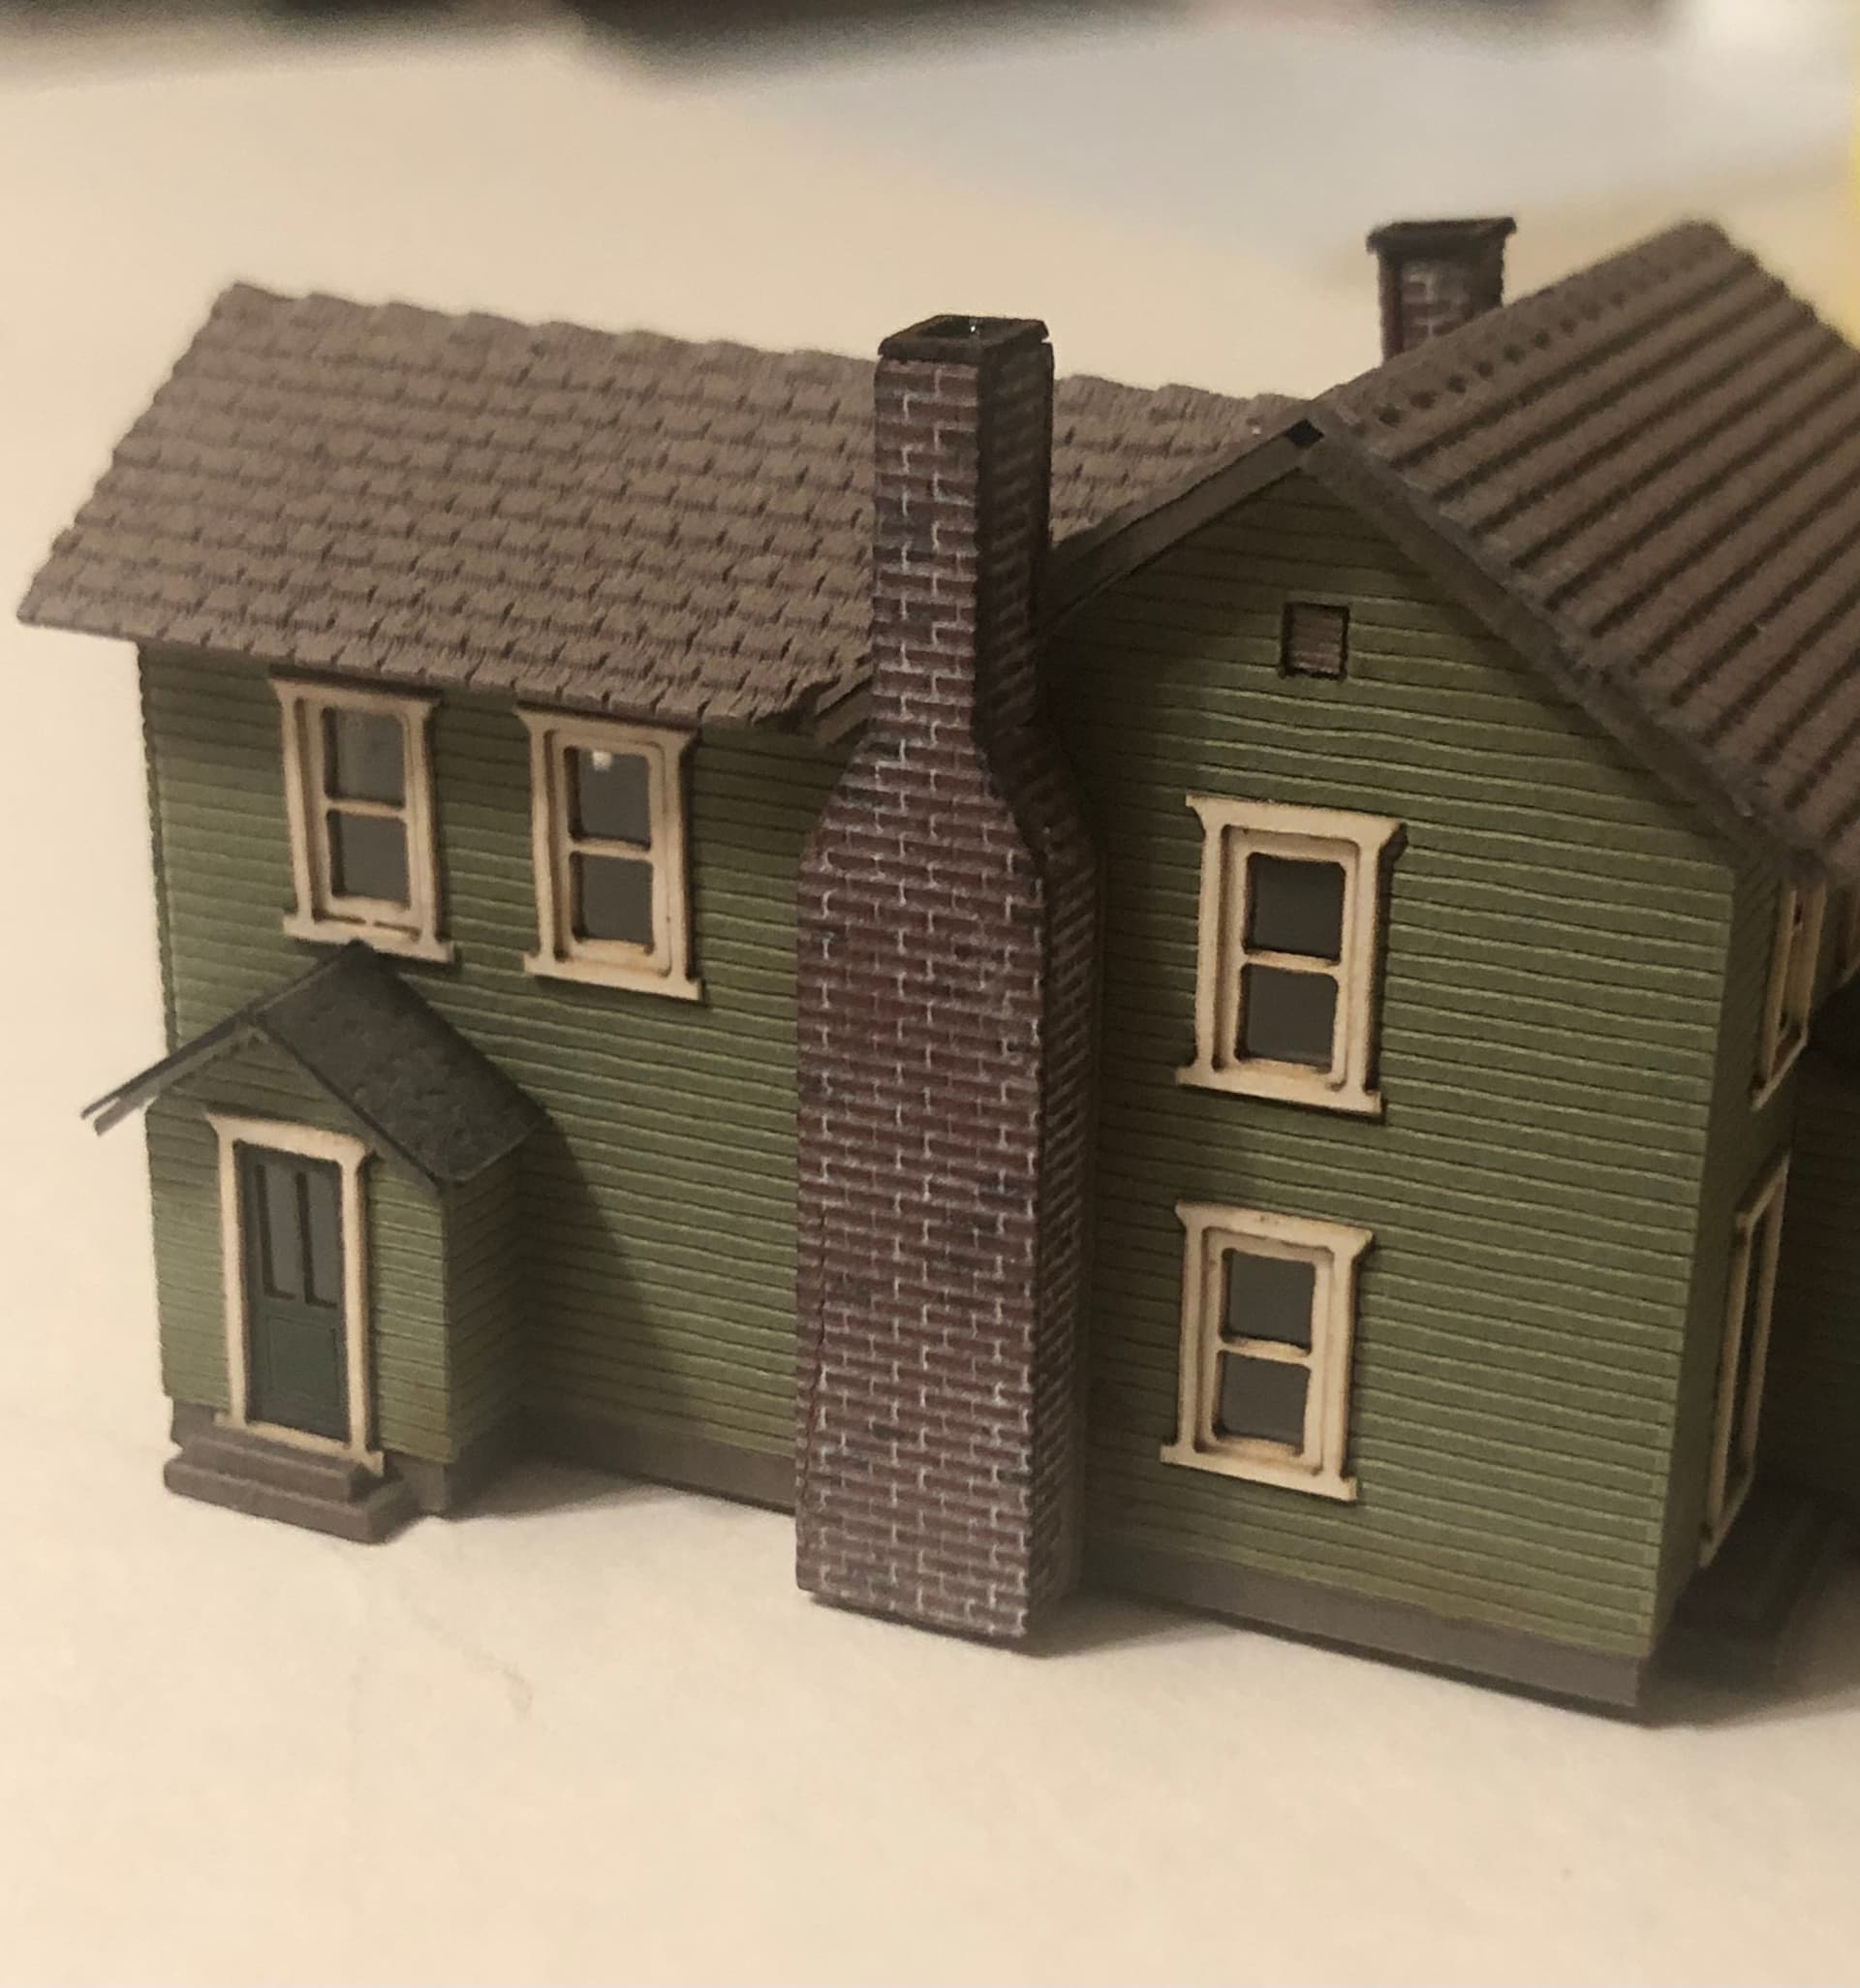
I will report back in a few days (weekend) when I have additional time and hopefully have an end product to share. I am working on a brick chimney that will be attached to the side of a Z-scale, turn of the century farm house.

Thanks to everyone that responded !!!

1 Like

Brewster – thanks for the suggestion. I believe you are referring to an “IMAGE SETTING” correct? I clicked on that, group of horizontal lines and noticed they would rotate a few degrees. Would that be the suggested move then – change that to -or by- 45 degrees ???
Sorry, I’m a newbie here…

Nothing with images, just doing your drawing and layout at an angle so you still have vectors.
If the vectors are preserved with a rotate, then yes, +/-45 degrees. Of course you will need to place
your workpiece at an appropriate angle before etching,

This action causes both axis motors to run equally for any given segment and might mitigate the differences in burn intensity and line width when running single motors for each line. Of course other problems may arise :thinking:
Anyway, looks like your perseverance paid off, looks great!

Thanks for the info BREWSTER! Well noted on your suggestion and I see the logic behind it. And as you state – “other problems may arise”. But still, something to look into and experiment with.

Like, when the next MicroMark catalog arrives, I am in so much trouble.

:grin:

Never done anything quite like this myself, but I have noticed you are not using Dot Width Correction in your settings. This could help you get finer lines from your laser. Just an idea.

Ron — well noted and thanks for the tip! Finer lines would be all the better!!! I will experiment with that setting.

As promised, I am circling back and providing pics of the end results of what I was aiming for in regards to a brick pattern, which was needed in order to complete the chimney you see in the pics below.

The house is a laser cut kit from a company in Germany called ARCHISTORIES. It comes as a multi-piece kit, very detailed and highly exact when it comes to fit, and pre-colored. Plus, one house can be built in multiple forms by simply switching the kit components around. HOWEVER, IT DOES NOT COME WITH A CHIMNEY — thus, I cut and added the one you see pictured. The scale is 1:220, which is Z-scale. And YES, that is a dime in the pics.

The final chimney took me four iterations to get close enough to what I wanted. You’ll note the scrap chimneys in the background of the one pic. I am 90% happy with the final version, although once installed on my model railroad layout, the flaws are not detectable with the naked eye at this scale.

For everyone that commented and offered advice, your assistance took my laser cutting efforts to the next level. THANK YOU !!!

6 Likes

Holy cow this is awesome, great work!

2 Likes

Thanks Colin. The house kit is fantastic to build. My chimney was simply a candle on the cake. LOL

2 Likes

Stunning detail on that. Well done!

Thanks for the input. Many on this forum have helped to get me to this stage with their advice and tech savvy, even by simply reading the other posts.

OH MY GODD I LOVE ITTTT!!!

I love miniatures so much!!

This is to die for!! Well done!!!

1 Like

Thanks Billie! You ought to visit the TRAINBOARD forum and look under Z-scale and T-guage. So Z-scale is what you see I work in for my own model railroad layout, but T-guage is like half the size of Z. It’s insane, and maybe too small. Z-scale is perfect for realism in my opinion.

Here’s a link to a discussion taking place on TRAINBOARD titled “What’s on your workbench?”
There’s a modeller on there who has a laser cutter and is producing crazy Z-scale businesses such as an early McDonalds, an early Taco Bell, Motel 6, etc., etc. Scroll through the pages and you’ll seen plenty of Z-scale miniatures. Scoll down on the link once you open it and you can see a video of the Taco Bell he built. Note in the video, that’s a 9-volt battery next to the building!!!

TRAINBOARD - WHAT’S ON YOUR WORKBENCH? TACO BELL

This topic was automatically closed 30 days after the last reply. New replies are no longer allowed.