Another question, when cutting out projects from some plans I recently got, I have noticed that the notches don’t fit the size of the material I am using.
What is the easiest way to make sure you have the correct notches? And how do you easily and accurately adjust these?
The notches or groves that you cut into the material to slot another piece into it. When you building a 3D model.
The template is designed for 5mm material, but the new material size I am using is 3mm. So the 3mm will not fit snug in a 5mm notch. I’m not sure how else to explain it.
…these are old wooden connections that have been adopted for many other branches of industry. Fingerjoints are also used a lot by the laser people, try looking at “Boxes.py”, if you don’t already know it, it will quickly become your good friend when you make boxes.
LUMINARIA 1.dxf (257.0 KB)
This is the actual project file. I have tried various ways now t otry make the notches smaller, even as suggested in the video shared but no luck. I’m not sure why it won’t identify the notches.
I have even tried the various grouping, and ungrouping, closing path etc suggestions, but nothing seems to work.
Boxes.py is that a Pythoin file? Sorry I know my questions my appear dumb, but I am really new to the laser cutting, this is my first machine, and I am struggling to get the hang of some very basic things it seems.
My machione is the Creality Falcon 2 Pro S - The S is apparently the newer model and you re unable to adjust the height of the laser, which seems to cause some other issues interms of doing detailed cuts or engravings. I needed to raise work of the base, but this then affects the entire camera line up, even means my work piece isn’t laying directly on my Honeycomb bed, so when working with wood there is a lot of smoke.
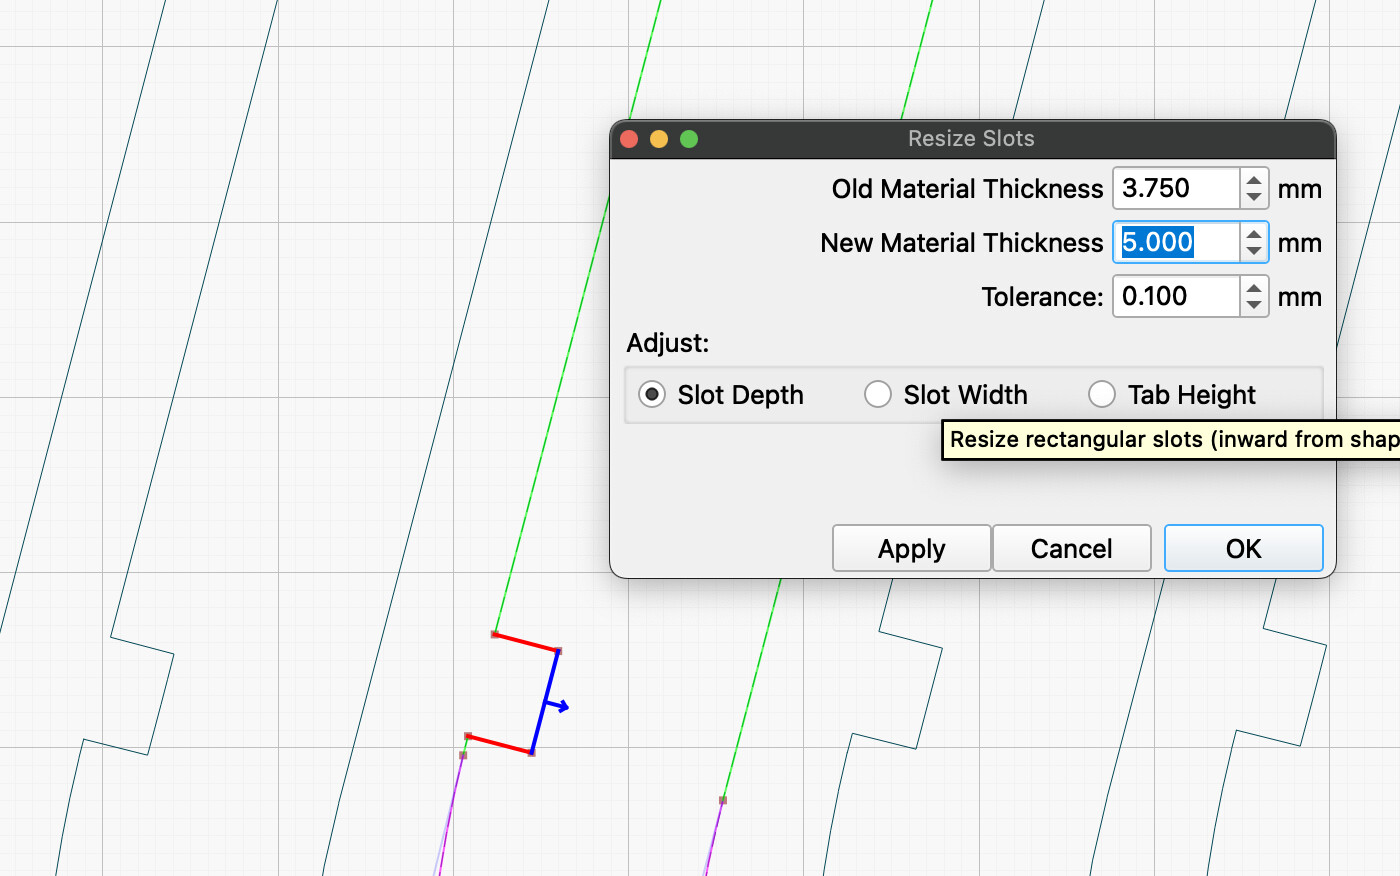
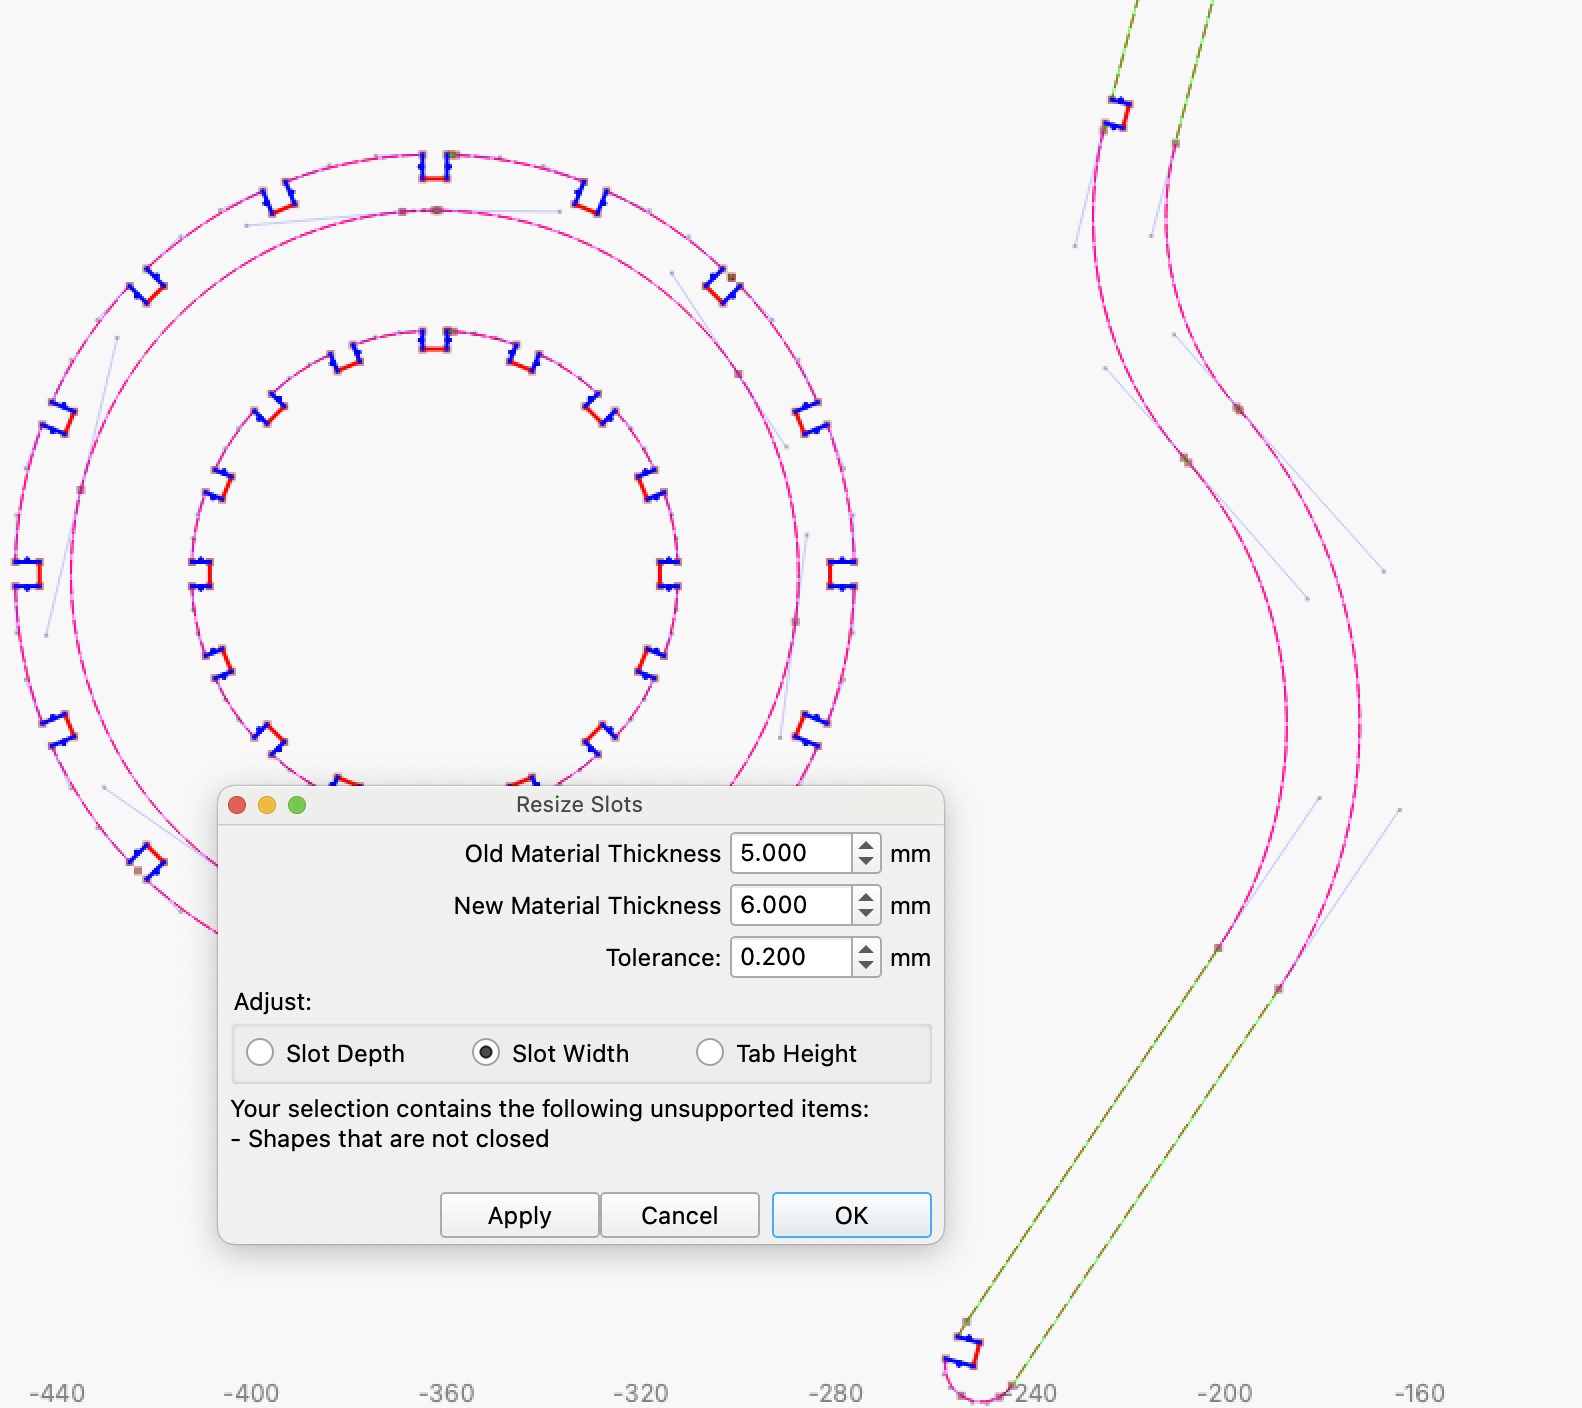
Your file has many “errors” that need to be fixed first before you can use the resizer tool. Here is a small example.
Right now I’m a bit busy with a project but during the morning I will be able to help you a little more.
Thanks for the reply, yes I do think it would be great to be self sufficient in creating my own designs and I hope to get to that point. At the moment, I am using these designs to learn more about the machine itself, the settings for certain cutting or engraving of materials etc.
I must be honest it is a massive journey, and I am finding it pretty difficult to find good learning resources. I was even thinking of seeing if there are any kinds of courses that one can study, but I think I need to first understand my machine a bit bette le in what it can or can’t cut.
Thank you bernd, I really appreciate any bit of help here, and when you have time. I know we are all really busy. For me this is just a side hobby, and right now I am a definite beginner.
I purchased a huge stash of files, thinking that I could just use these to get going and then the resizing etc would fall into place… boy was I wrong!!!
I would like to potentially grow this hobby over the next year or two to see rid it can help my generate a small second income… but I am still very very far from this.
I’ve been working with Lightburn for exactly a year now and I’m learning something new every day… And this forum is absolutely fantastic with so many helpful people…
However, what you unfortunately can never completely avoid is trial and error.
Even with the same material from the same manufacturer and the same settings, there are differences. For example, I laser-cut plywood and continued the project after a two-day break. Apparently, the change in humidity caused the plywood to change its properties.
Oh yes… I had this with to orders of MDF. Both ordered from the same place, and on the one, the MDF was extremely dense, I had to do multiple passes before it burnt through, then I cut the next batch, and it burnt through in a single pass, and with so much heat it ended up causing burn on the underside.
It’s great that the community is helpful, I just don’t want to become an anoyance to anyone. I think that is why I am always concerned to ask the questions. And with being so new, I am still even just learning the basic terminology.
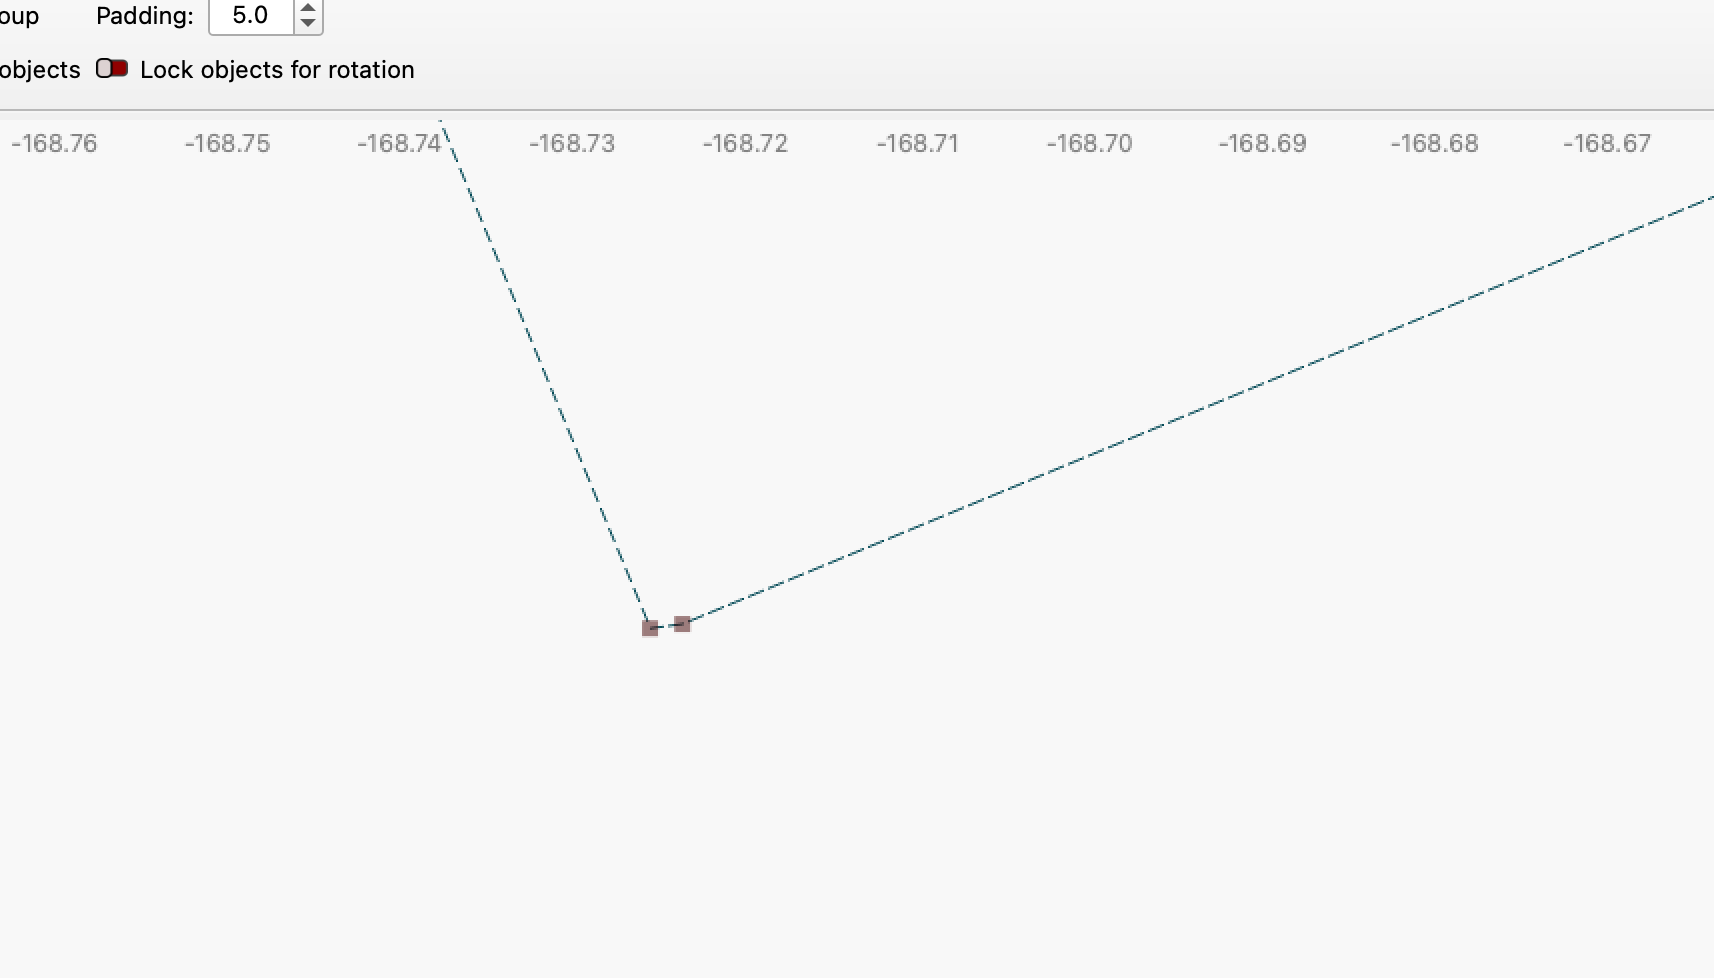
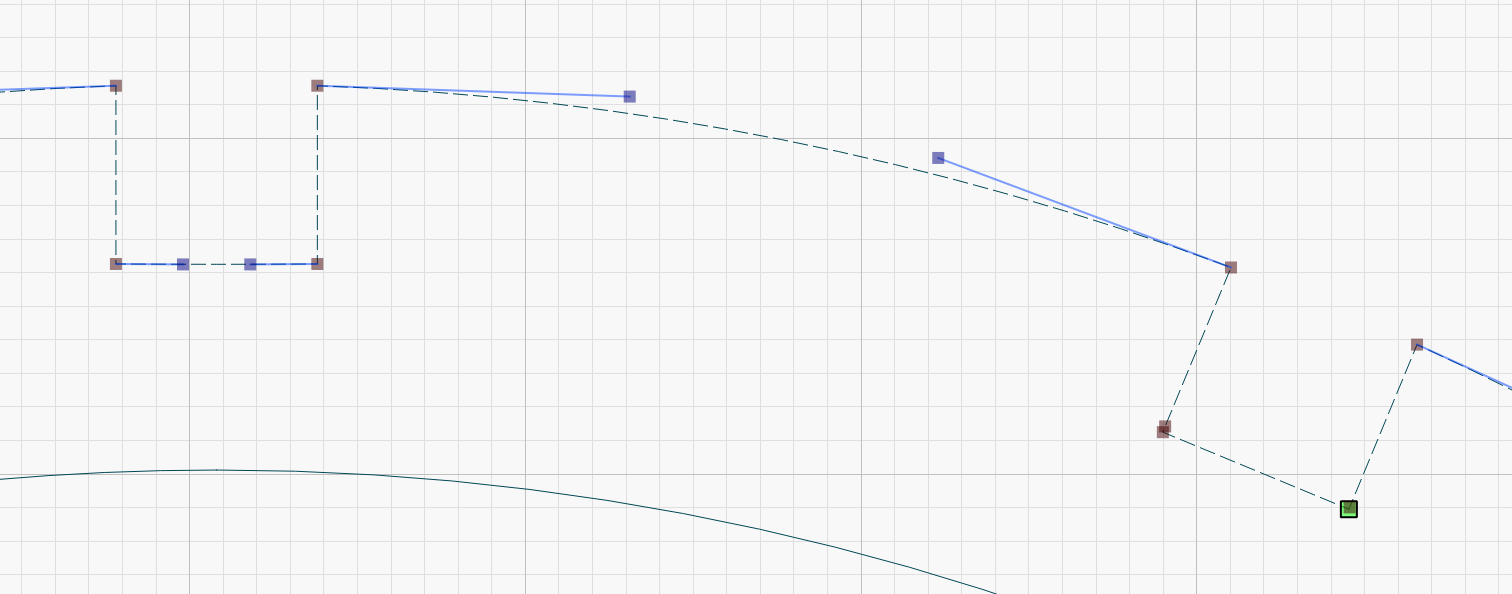
For the resize slots tool there must be exactly 4 nodes, parallel(ish) to each other and straight lines, no curves. No more, no less. This file has additional nodes in the slots area and the length is not a straight line, it is a slight curve.
This is just one slot. You will need to check each one individually and repair as necessary.
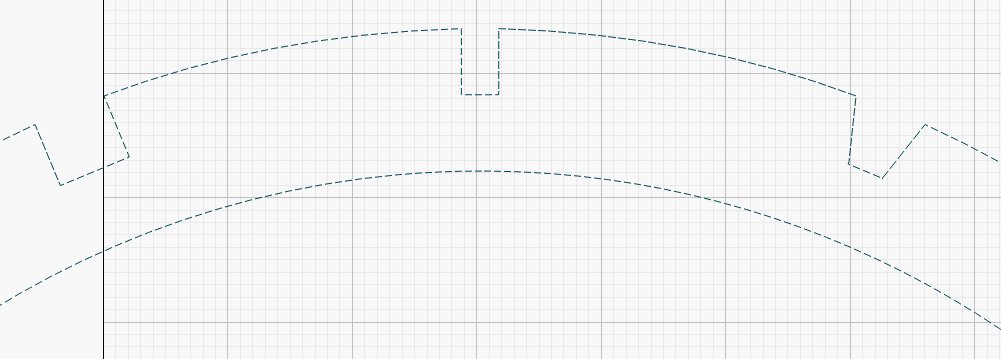
In this section, the top one has a curve along the bottom, the one on the right isn’t a curve, but has extra nodes. It will take a while to fix this file. Unfortunately, this is often the problem with purchased files.
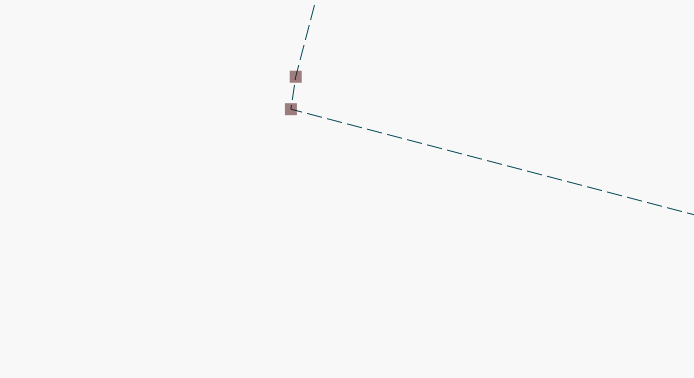
In node editor zoom in to identify the extra nodes, decide which one needs to be removed, click on it then press the D key on the keyboard. This will remove the selected node. You can also just hover over the node and press D, but if you inadvertantly have something else selected that will be deleted instead, which is why I suggest clickong on the node to be sure that’s the one being removed.
If vyou have a curve (identified by the handles) without an extra node, click that line and press the L key. That will restore the curve to a straight line.
You’re welcome and it’s great to see the great answers/help you’ve already received.
Depending on who you buy from, there is a big difference in quality without you always being able to see it.
Basically, resizing is no problem and can be done quickly - if the original is ok.
Files made in other programs are often a challenge, as we could see in your example. However, I managed to make the elongated items to 5mm without any major problems. However, I chose to make the rings new from scratch because it is significantly faster than finding and editing all errors manually.
You can now convert the “new/edited” parts to the desired size without any problems in one workflow.
If you have the desire and will to learn your laser and LightBurn well, you should succeed.
Most people here are involved with their laser on a hobby or semi-professional basis and I think it is important that the desire and pleasure of this “work/hobby” should not be forgotten.
Now that you have chosen to start working on a lamp, it is possible that you can use something from this thread.
There appears to be a problem with Lightburn importing your DXF file. It is adding nodes for some reason. I imported the DXF file into CorelDraw, and exported a SVG that I imported into LB. It worked fine. Tool layer is the original DXF import for reference. @LightBurn might want to look at DXF file.
Thanks so much for this Bernd, I really appreciate it. I attempted removing the extra node on the one outer ring this morning, and still couldn’t seem to close it off correctly. This is going to take a lot of practice I think.
You mentioned recreating the ring because it it faster. I think what is intimidating for me on creating the new rings is how do you then create notches? Would you create a circle, and then add node to the circle where you want each notch? And how would you ensure correct spacing?
Apologies for the silly questions, I think with the learning for me, I am trying to understand how people have identified the issues so quickly, when I looked at the files for quite sometime before even seeing the duplicate notches.
Thank you Ralph. I appreciate your help.
I think at the omment because of being new, I don’t want to be buy extra software applications just yet while still in a big learning phase. It’s odd that t is doing what you are saying.
Would it work to convert the file to SVG in Inkscape and hen import to Lightburn? I think I will test this and let you know.