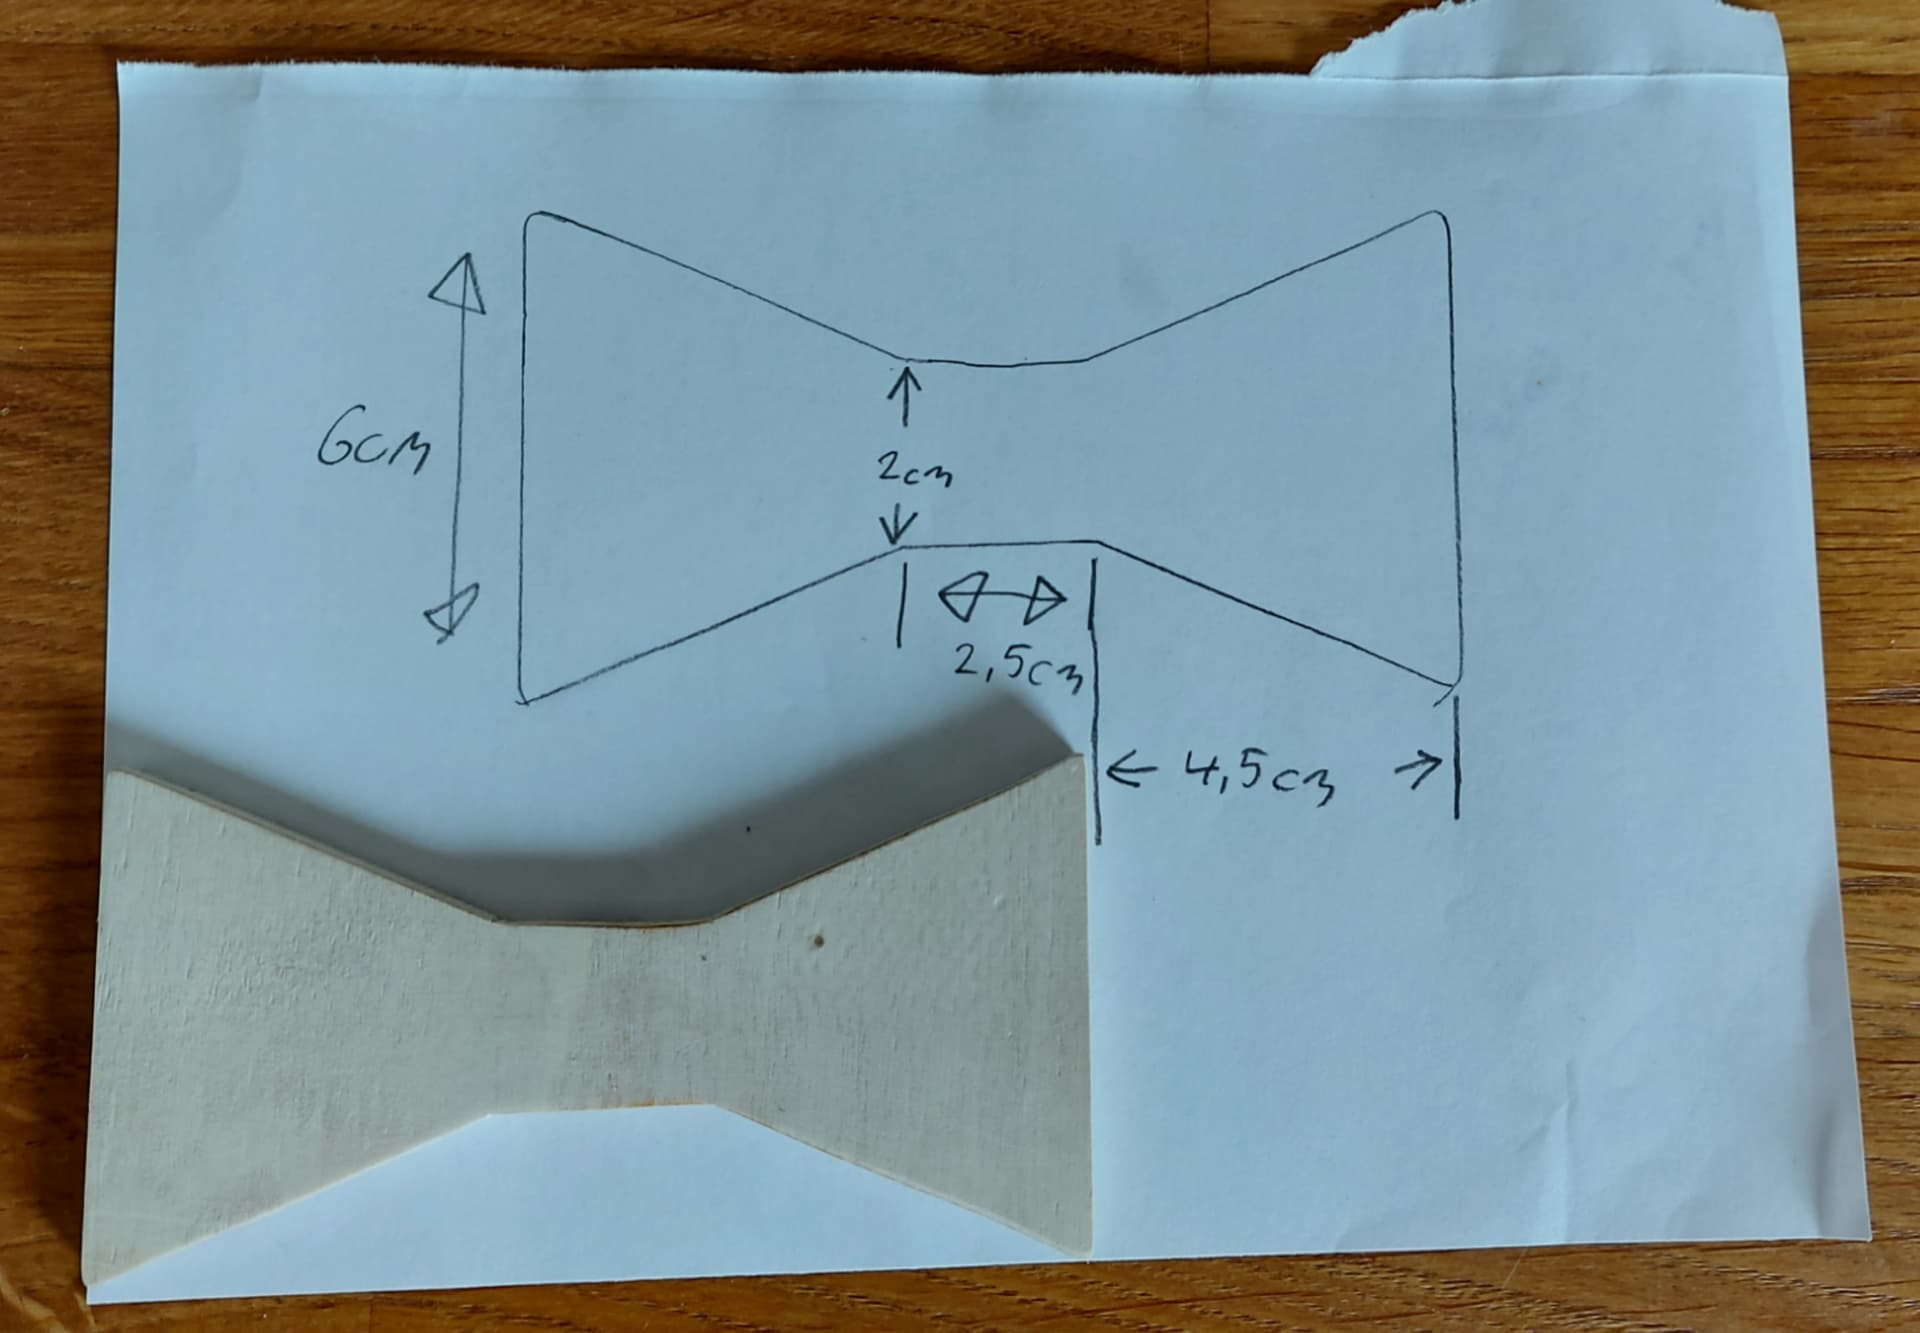
Hi.
Is it possible to draw a bowtie like this in lightburn as in the attached picture?
I would like to have the frame on the bowtie so I can play with letters an patterns inside it before i engrave.
Or do i have to use some other software for this?
Hi.
Is it possible to draw a bowtie like this in lightburn as in the attached picture?
I would like to have the frame on the bowtie so I can play with letters an patterns inside it before i engrave.
Or do i have to use some other software for this?
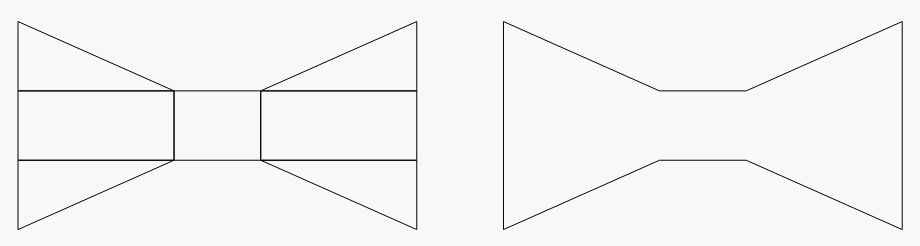
This should be fairly straightforward in LightBurn. I suggest building it up from primitive shapes and then welding all the shapes together. That will make the dimensions easy to manage.
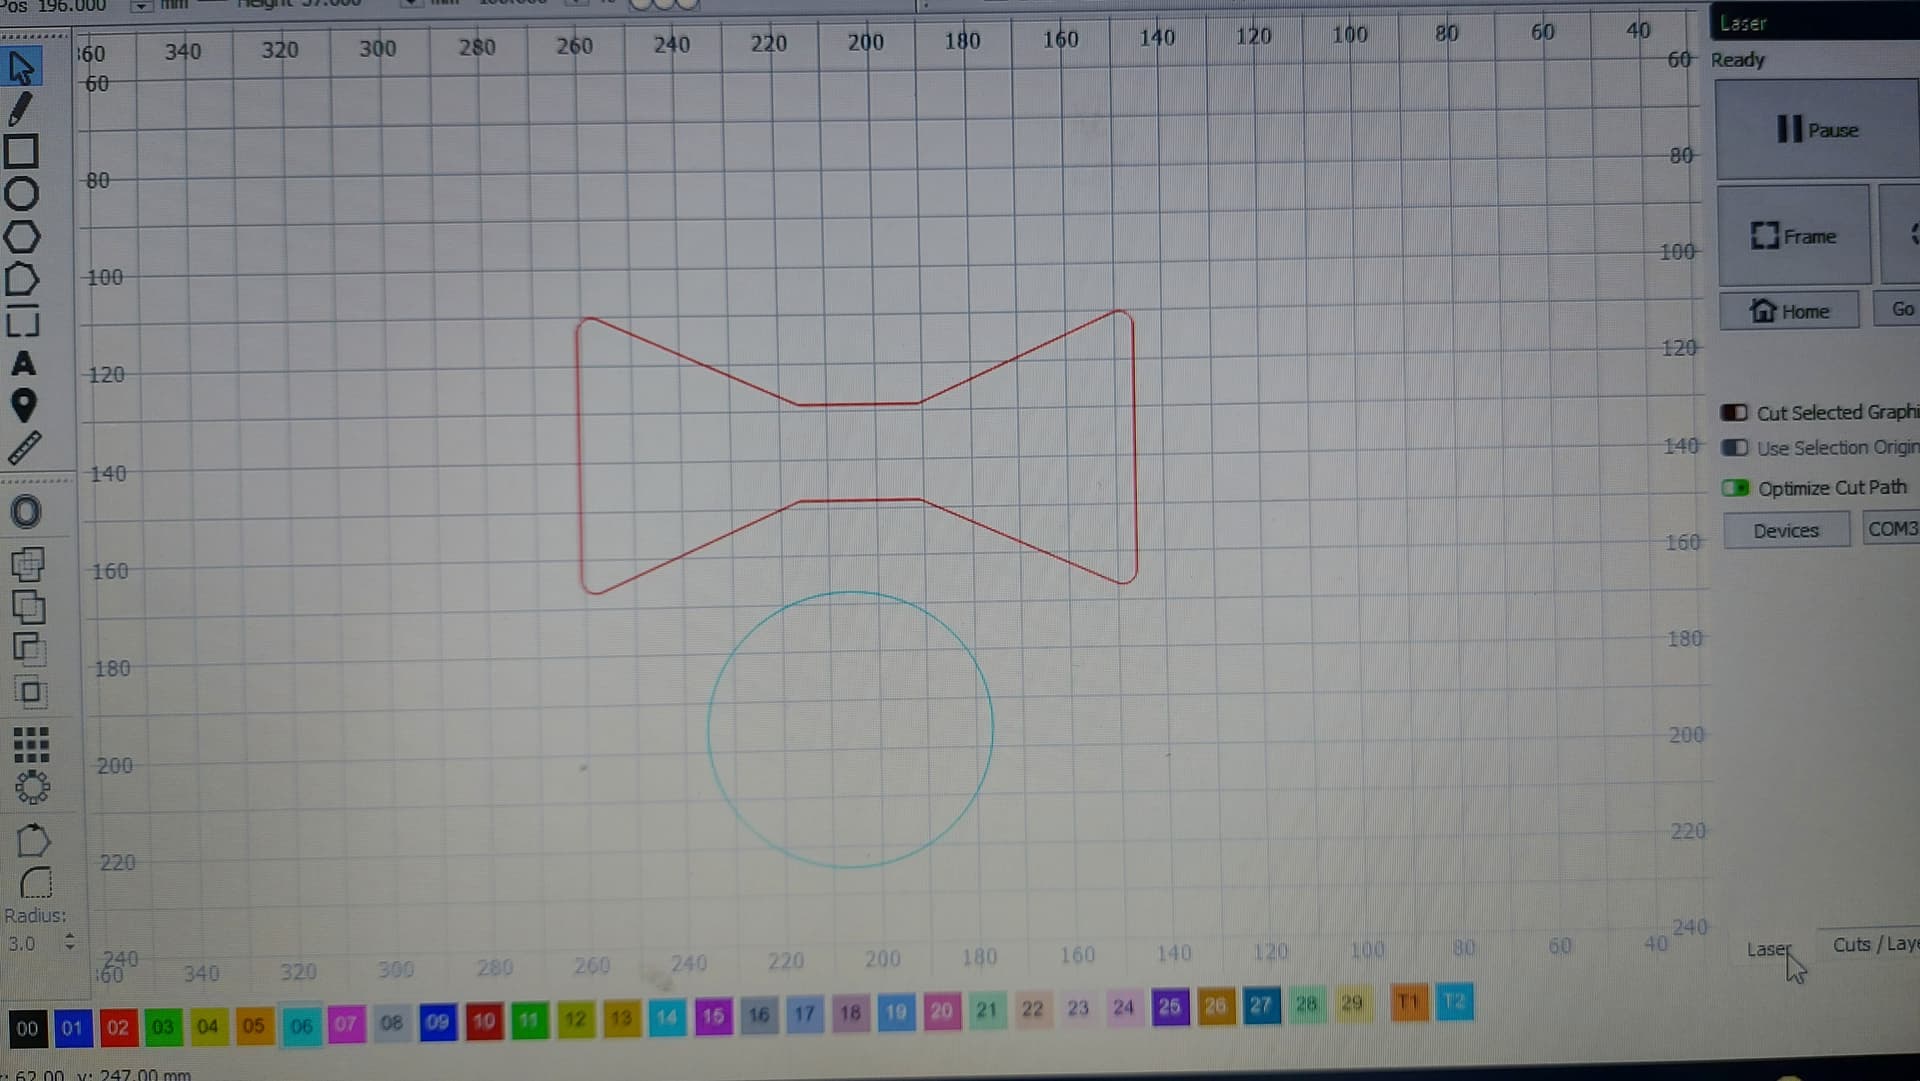
I did a quick video to show how I’d do this:

Thank you ![]()
Thank you so much for making this video.
Now I can start to make some designs
If I was doing this I would create a couple of triangles move them apart stick a rectangle which over laps them in the middle and weld them all together.
I know lightburn has some nice drawing features, but when I need complex shapes I use Solidworks then export the drawing out and import into Lightburn. There are some very easy to learn free CAD packages out there.
Another question regarding the frame function.
When I press square and circle fram button on the bow tie, it makes a square on both.
When I press square on the circle it makes a square, and when I press circle frame button it makes a circle.
Can I do something to make lightburn frame my bow tie as the bow tie shape?
Thx in advance
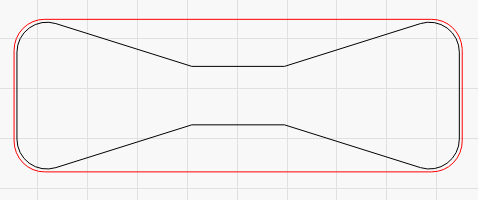
Not really. You can workaround the issue by setting the layer power to framing level power and “running” a job with just the bow.
The ‘O-Frame’ button is called ‘Rubber Band’ frame. It basically snaps a rubber-band around your file, and uses the laser to trace that shape. Since your shape has inward indents, the ‘rubber band’ around the object looks like this:
Awesome that you did this quick video - I just realised:
And I clicked this just to see how you did a bowtie - thank you !!!
This is mentioned in a couple places in our docs:
First, in the Beginner Walkthrough:
https://lightburnsoftware.github.io/NewDocs/BeginnerWalkthrough.html#size-and-position-numeric-edits
Also in the tips and tricks section:
https://lightburnsoftware.github.io/NewDocs/TipsAndTricks.html#equation-support-in-number-boxes
And in the specific help for the number toolbar:
https://lightburnsoftware.github.io/NewDocs/NumericEdits.html#equation-support
No one reads those, of course, but they should. ![]()
Just for fun context, the Equations feature was a pet project Oz worked in directly, back in late 2019 and released with version 0.8.07.
A post was split to a new topic: Laser stops and something like this pops up
Used to be, “when all else fails, read the directions!”
Should be, “Want tips and tricks? Read the documentation!”
Oh well, we DO have people seeking to help others who take the time to…read and demonstrate for us.
Thanks
I’ve been using Lightburn for almost two years, and it still amazes me how feature rich it is.
I’ve been a Corel Draw user since 1996, so when I started working on laser, all my drawings would be done in corel and then exported in SVG. However, as time has passed, I’ve found myself designing more and more directly on LB, and leaving Corel for only the most complex designs.
This topic was automatically closed 30 days after the last reply. New replies are no longer allowed.