I made them with crosshatch and line mode afterwards, the design is only once, then it can be easily converted to shapes/path as desired. Finally I cut them out. Whether there is a time saving one way or the other, I have not tested. Try with the preview window and compare the different modes.
I am always very reluctant with offsetfill. In my opinion there are only a few specific situations where this fill function has advantages. As soon as a shape starts to become irregular and especially in smaller shapes offset fill is not suitable and is not designed for it.
If the mentioned skabble game is not to be mass produced, it also does not matter if it takes 10 or 15 minutes to make it. ( - in my world)
Being afraid to try all available options keeps people from trying and learning new things - and suppressing the use of tools that are built into the program in counterproductive. I find that small letters surrounded by large white (not burned) areas makes for ideal reasons to use the OFFSET fill.
Diode lasers do work at slower speed than tube lasers and may certainly be better suited to OFFSET due to lower mass acceleration effects.
It costs nothing to change the setting and press PREVIEW button. It also costs nothing to use scrap cardboard to run a test sample. Ignorance is expensive - weather the cost is in coin or time.
It is not my intention to scare people or discourage them from trying out functions, I just wanted to diplomatically say that “Offset-Fill” is not suitable for this particular job.
Of course, machines and people are different, and what works for me may not work for others.
When asked how people will handle the task of this Skrabble project, I have answered with the experience I have gathered in this area, nothing else.
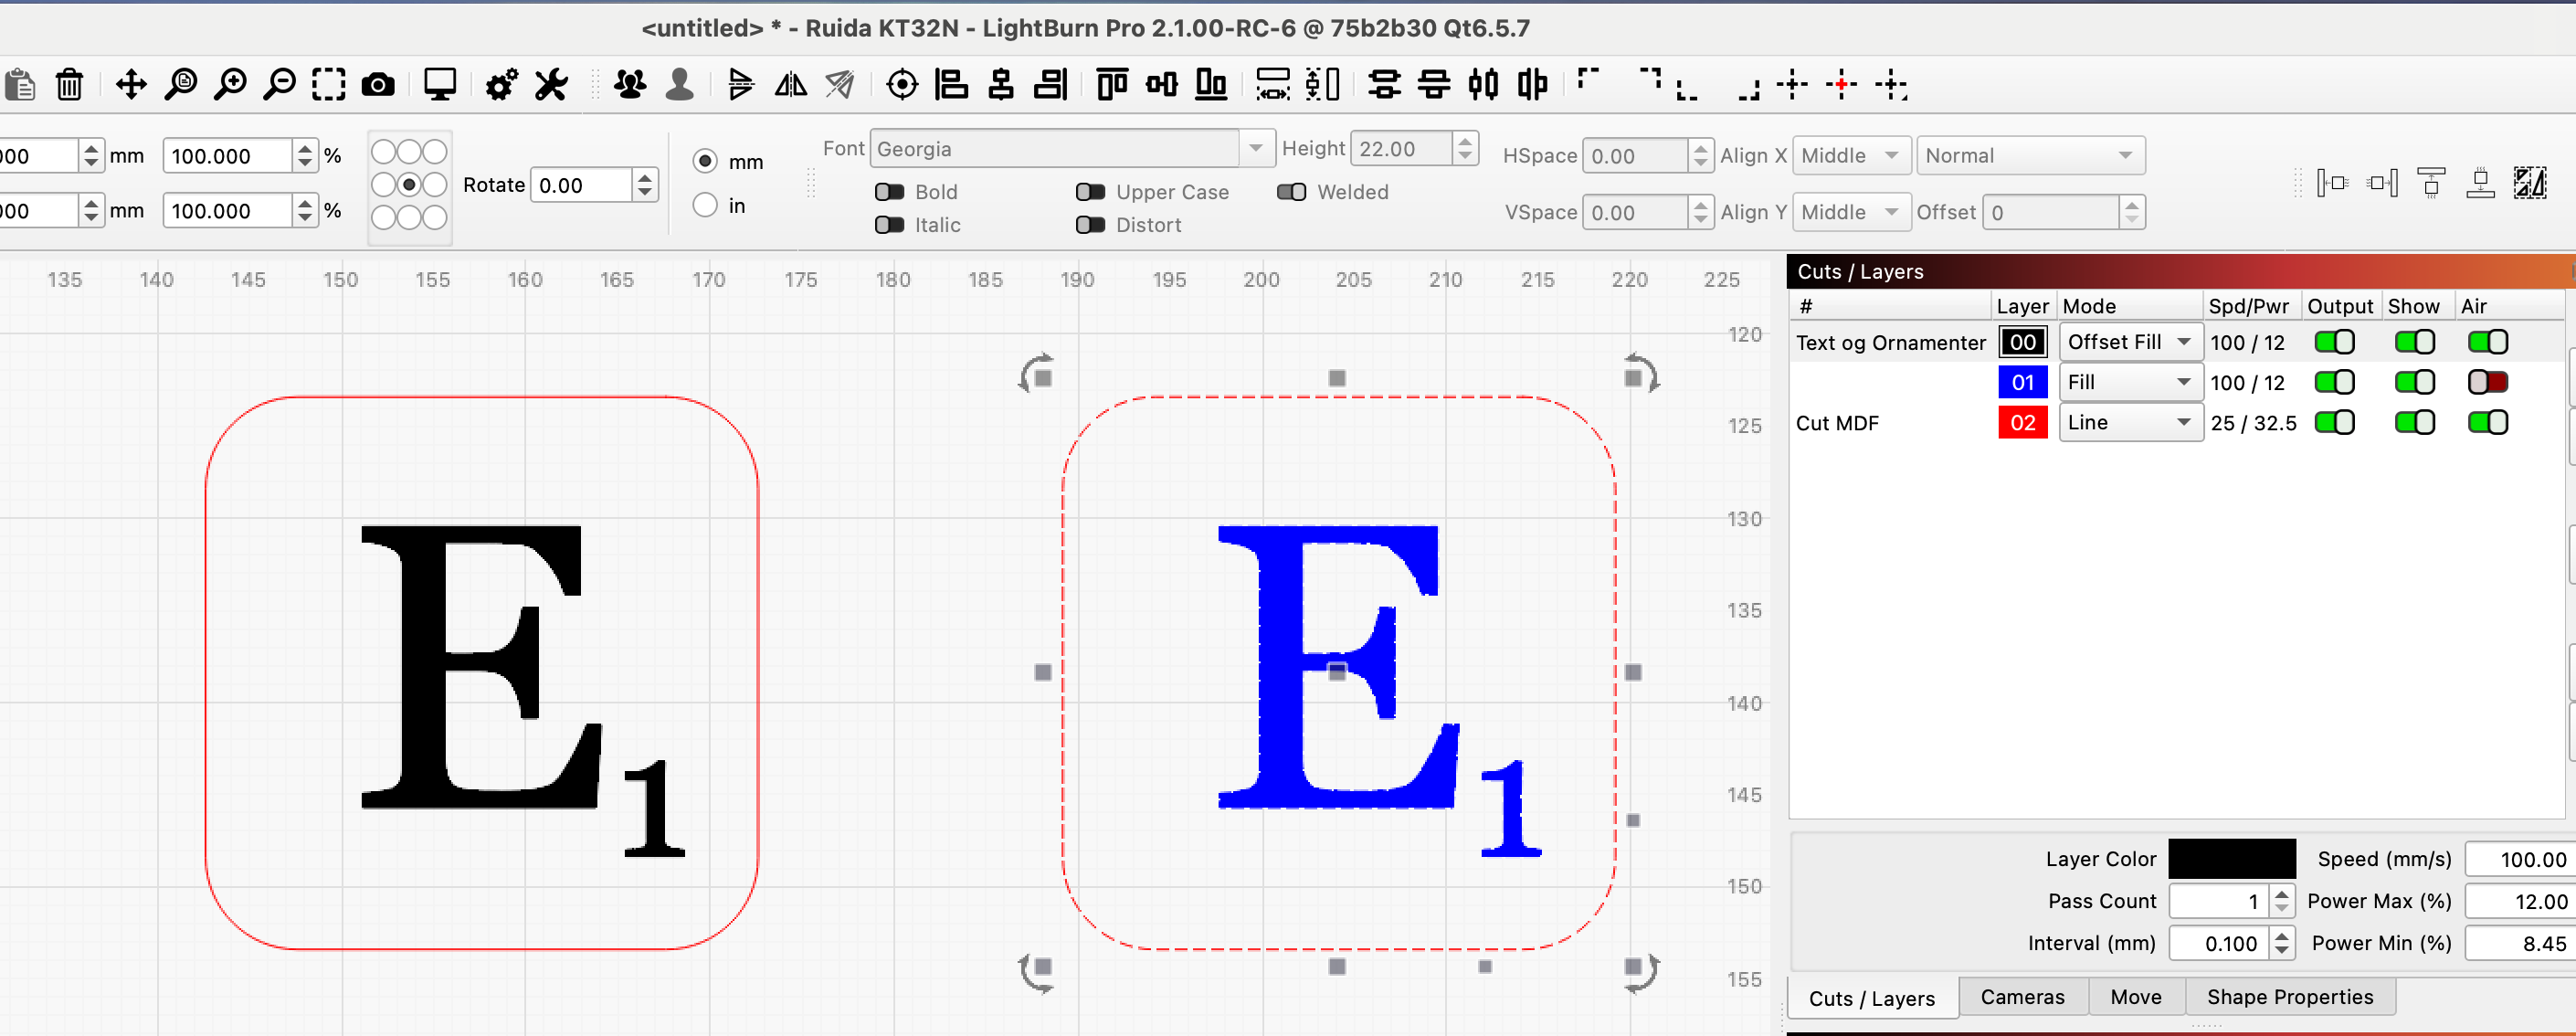
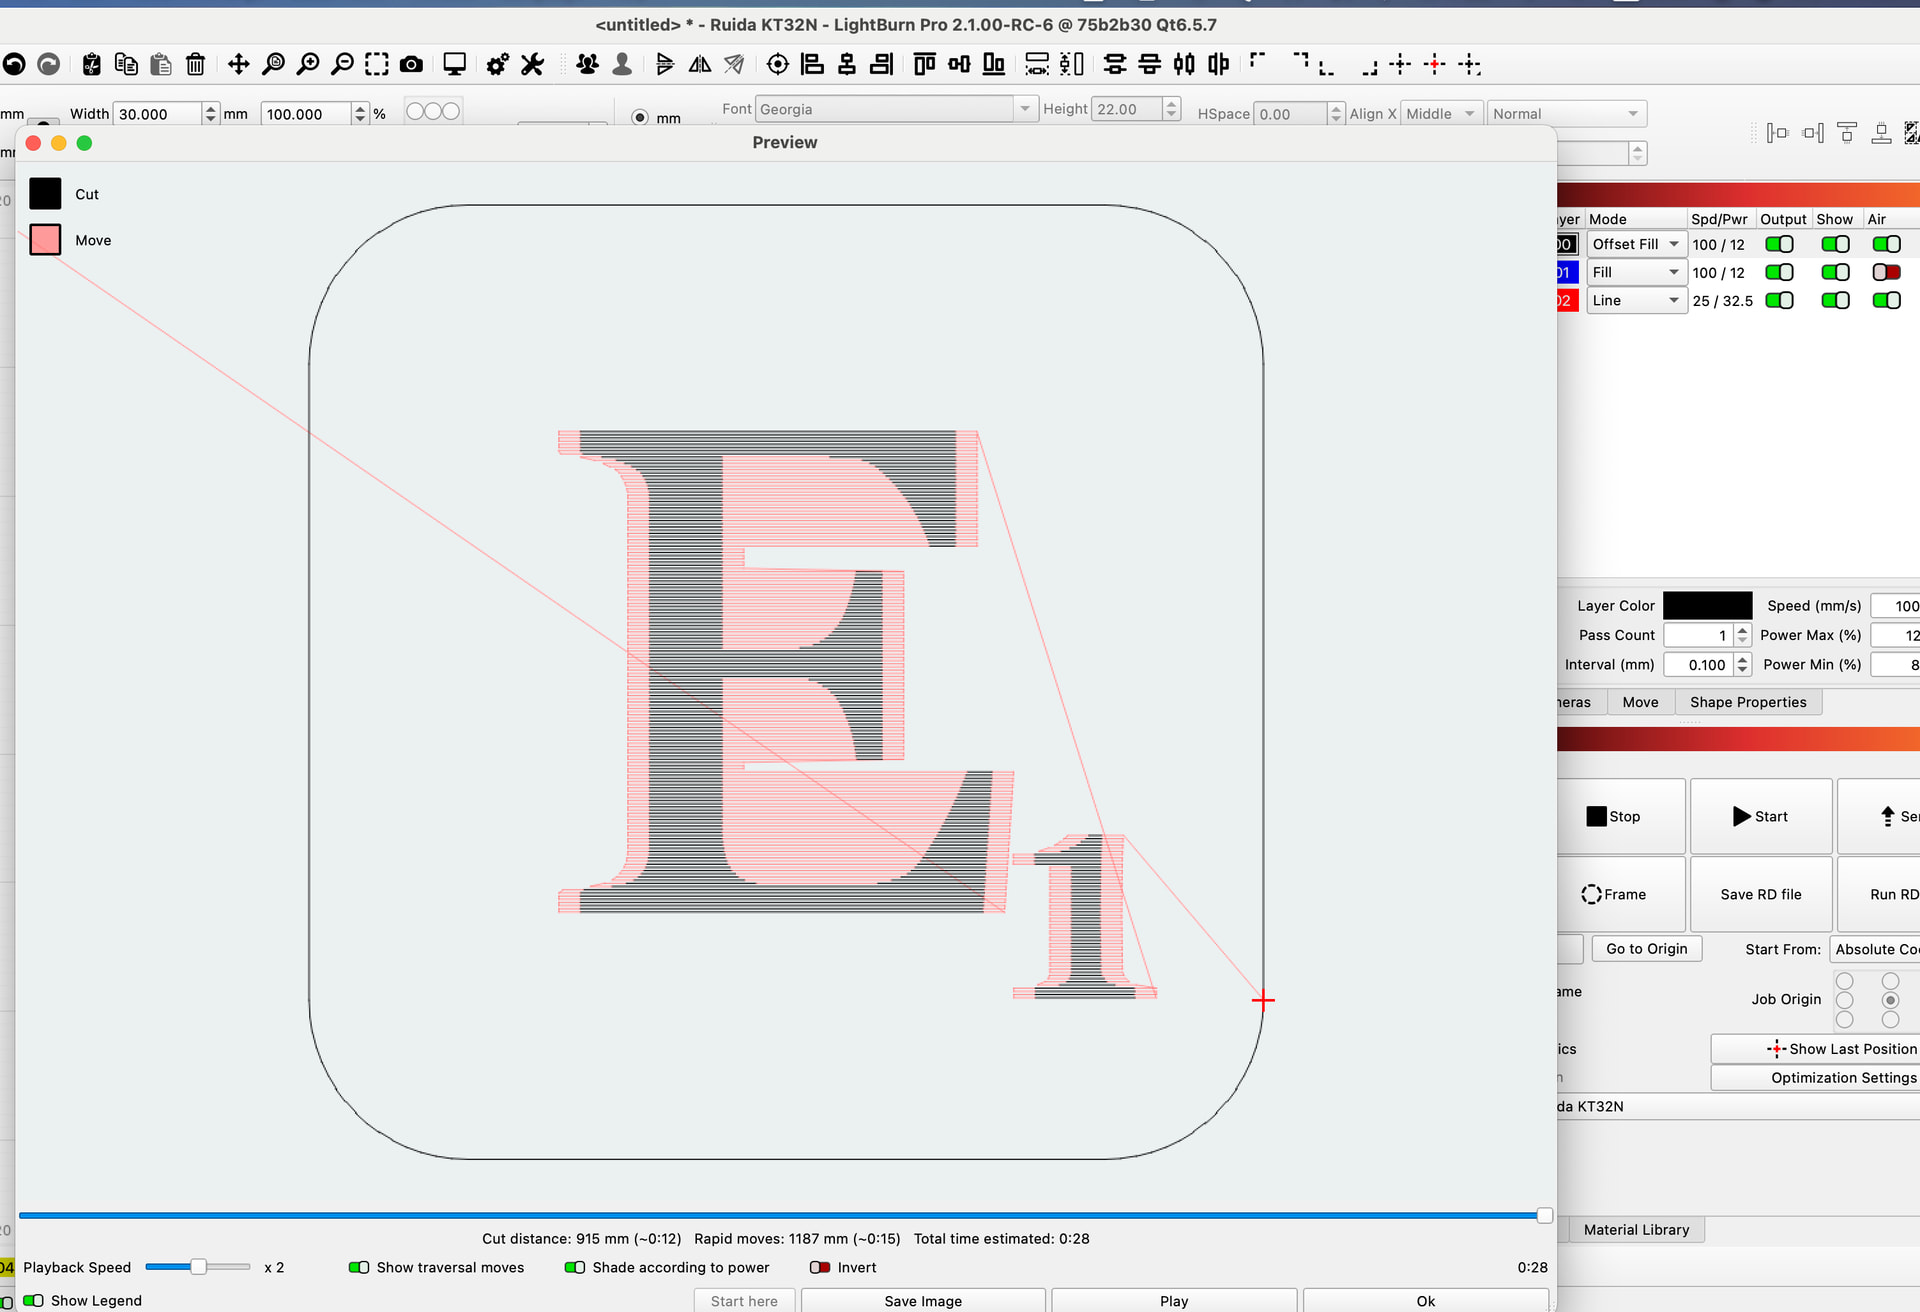
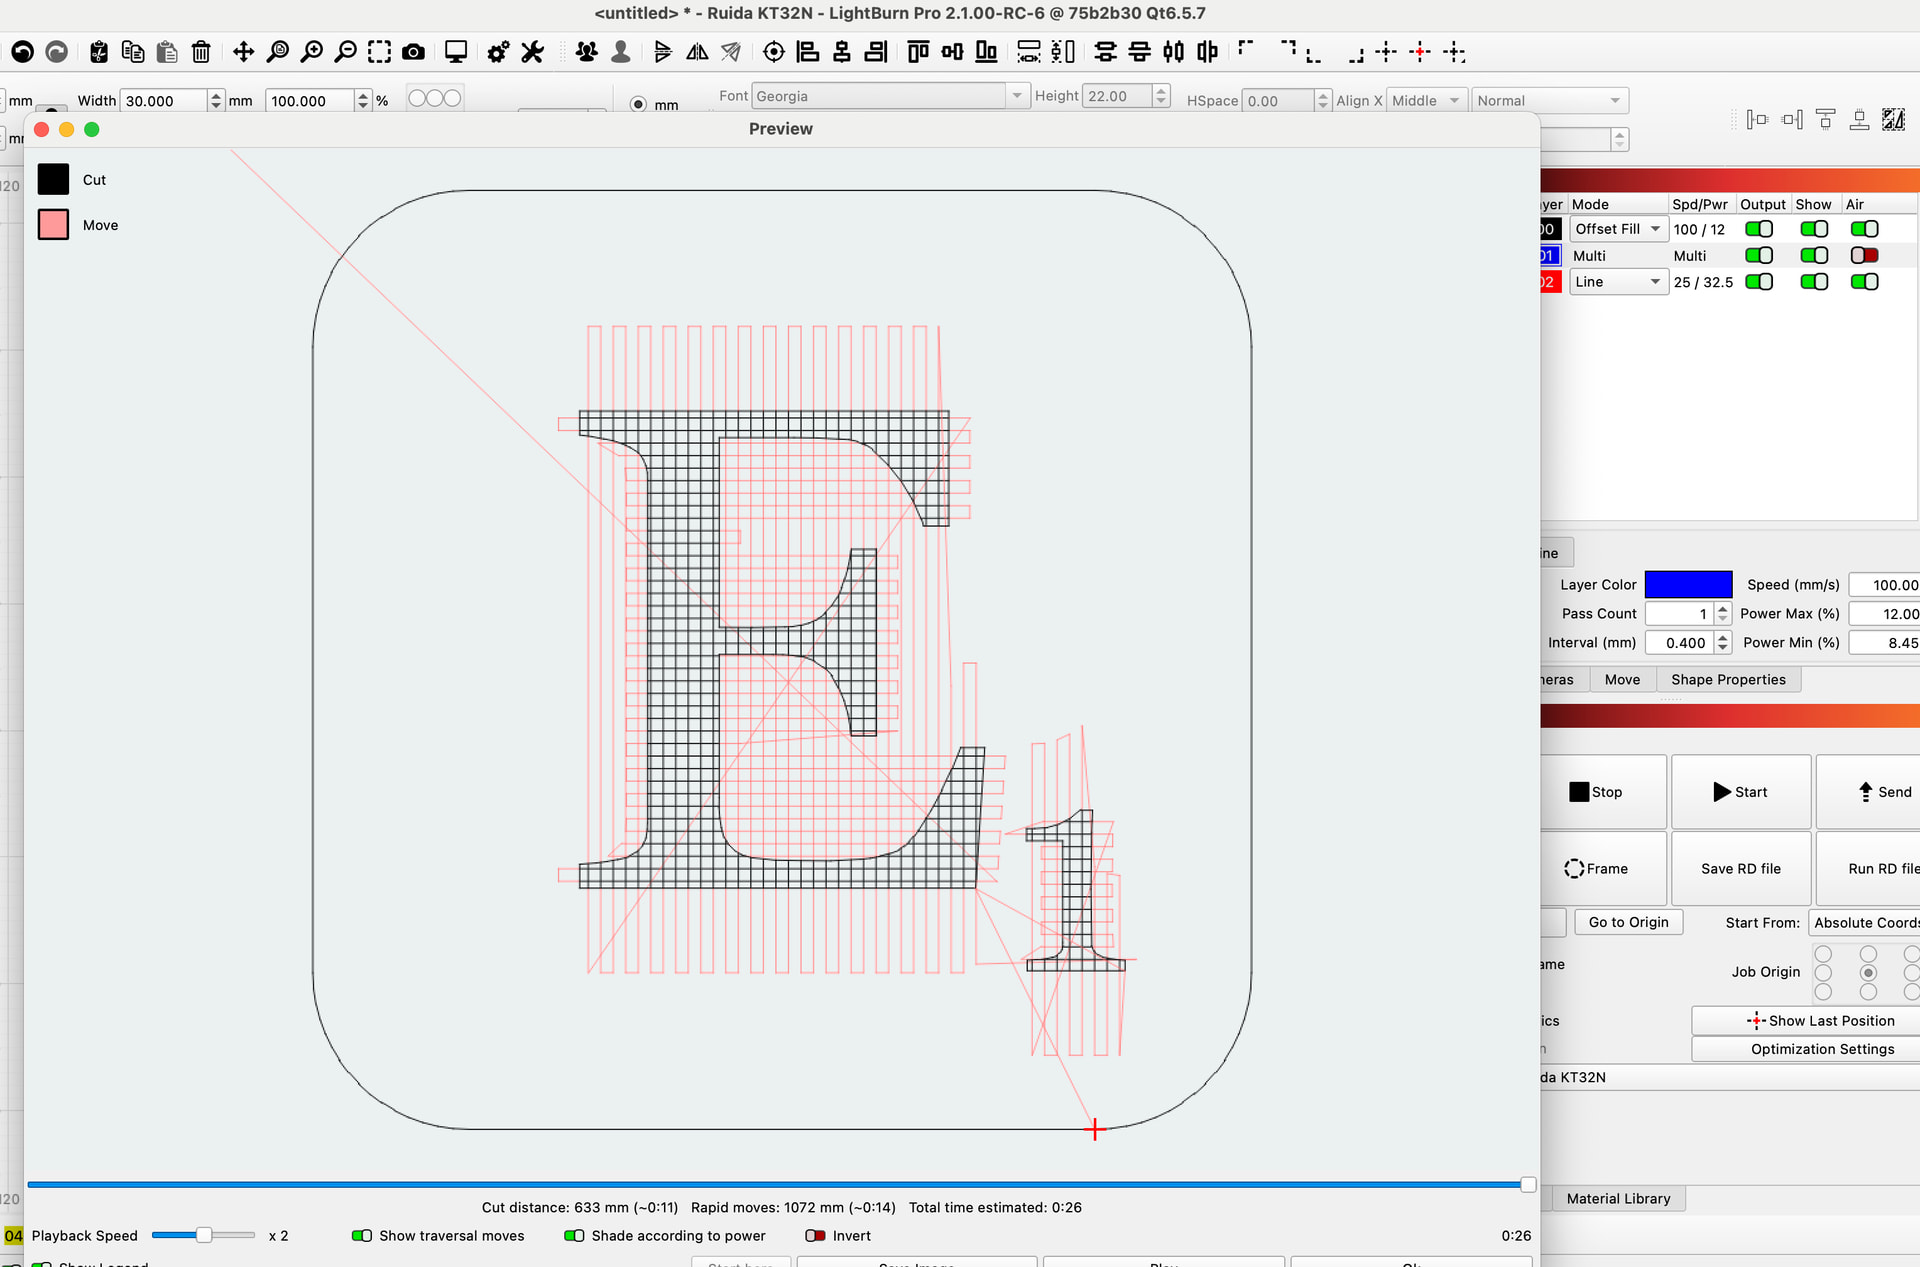
To explain why I think offsetfill is not suitable for the task, (on smaller and complex parts)
here are 3 pictures.
Same parameter, which in this case happens to give the same processing time, but the big difference is the quality or appearance of the result. We have had the topic before and I could show examples with ugly holes in shapes because offsetfill just could not do the job well enough.
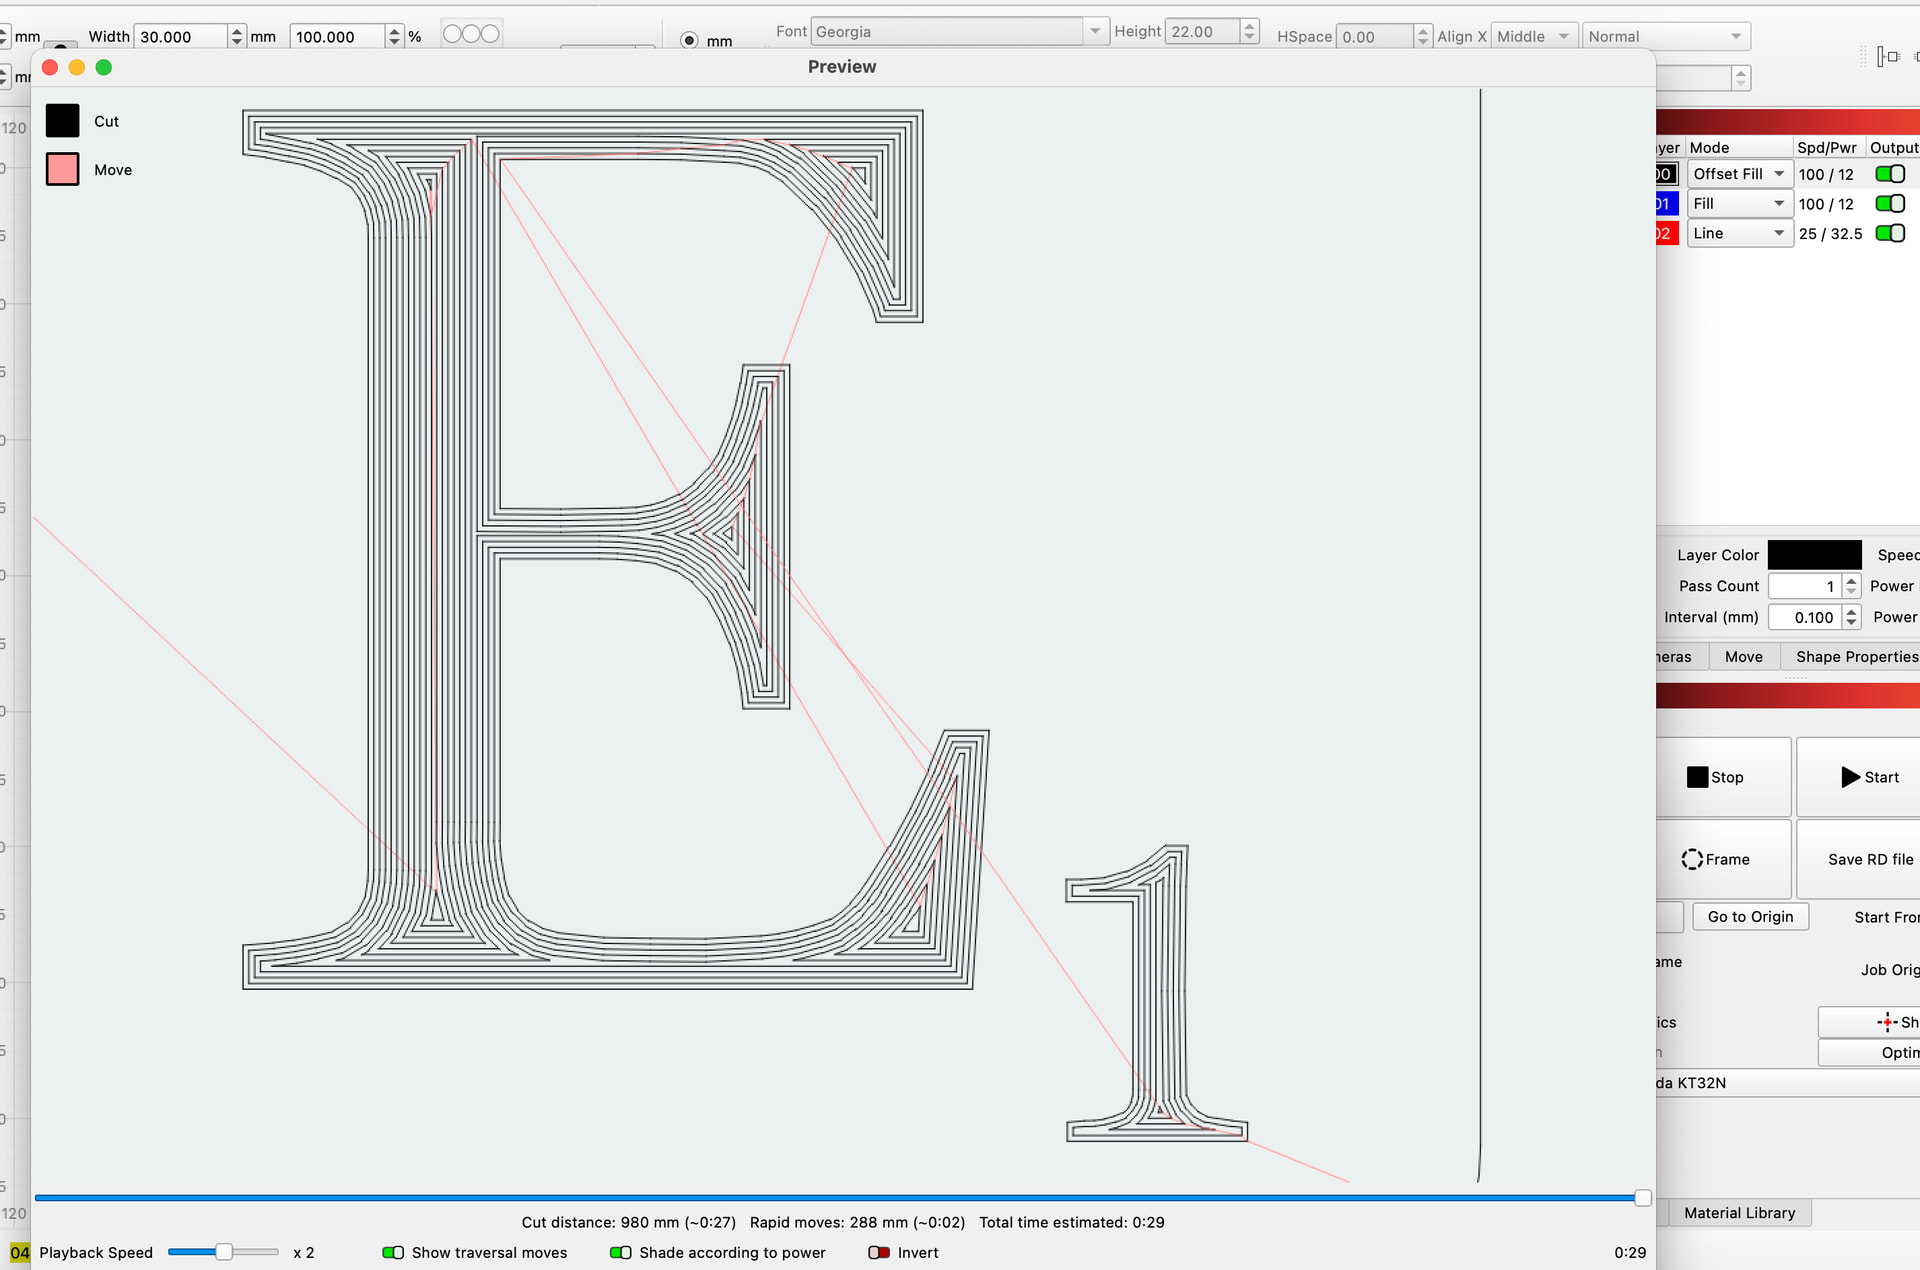
In the last picture you can see the way I used Multi-Layer for the task and that is (for me) the prettiest result.
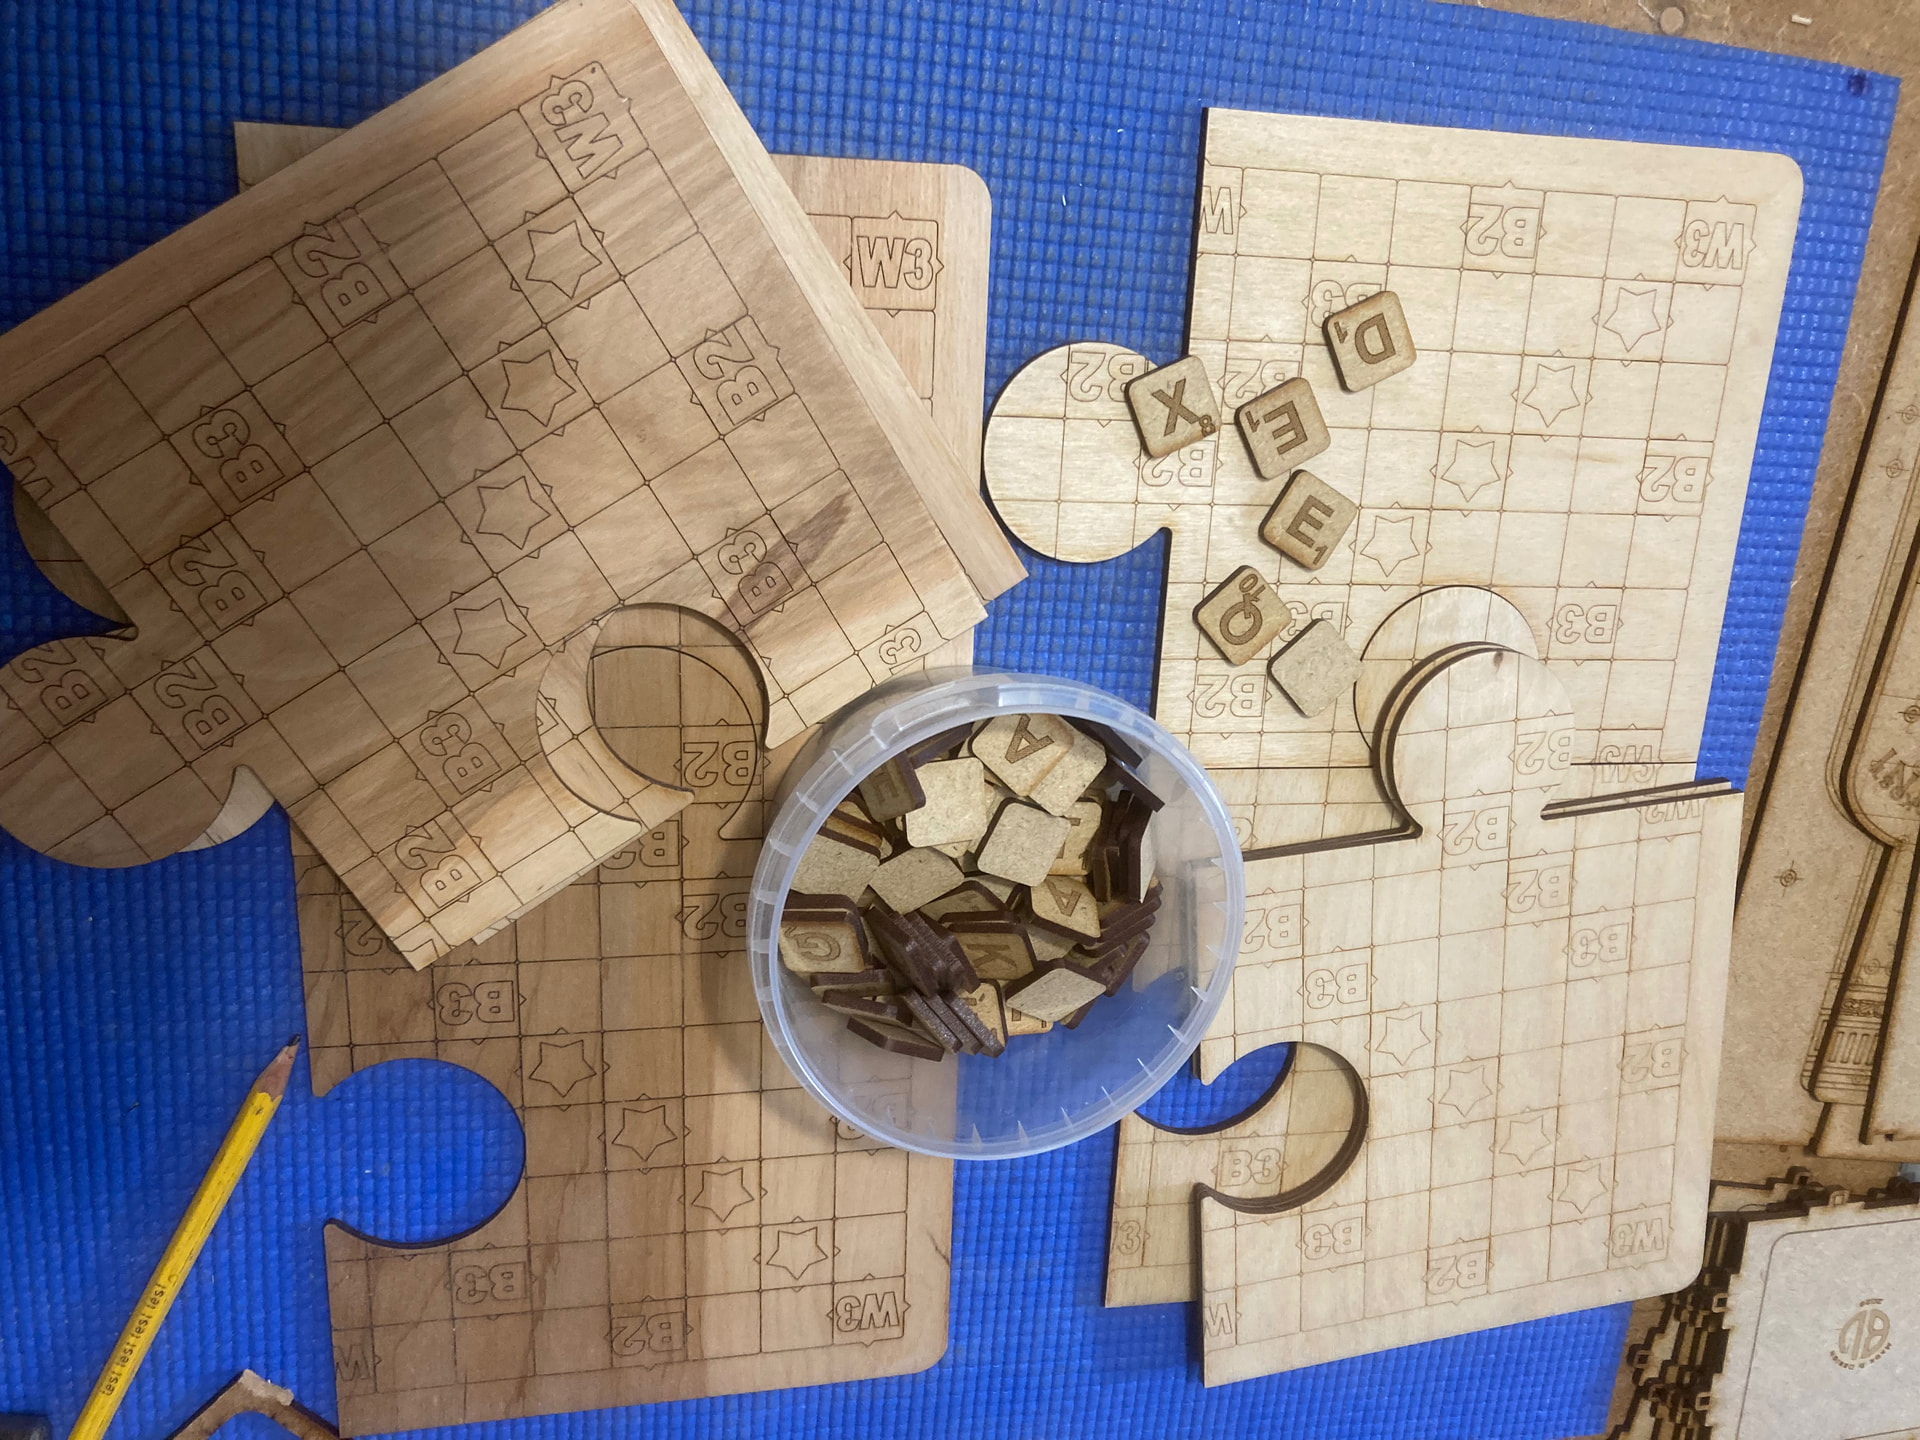
Material - you can use anything your laser can handle, that you have in stock and that you like
I used MDF, birch plywood, bamboo…anything between 3 and 5mm thick
True there can be artifacts in the burn - however, de-focus by 10% goes a long way to covering those gaps just as adjusting the lines per inch can close those unsightly gaps.
I greatly respect you and your expertise in the laser work - please do remember that most people asking questions are novices. I feel that they deserve the same chance to learn (for better and worse) how to get the best results from the program. Experiment is the best way for proper learning.
@bernd.dk thank you for your good hints regarding speed and quality. That was exactly what I was looking for. I also fully agree, that hobby projects (and all my laser work is a hooby to me) do not really need to be fast in first hand. It was more the whish to learn from experienced users before I poke around. @JimNM I am convinced, that asking questions ist not ignorant. If it was, no experienced people would ever have founded a school, or a support forum and no newbee would ever have joined such a school or forum.
When using 4mm Ash for eg and oval keyring, I find a band of Offset Fill around the outer edge very appealing. I might then create an un-engraved (raised) narrow band, with a crosshatch internal to that, which surrounds the unengraved font/image, that has a traced border for a crisp finish all around.
When this is laqured it looks really nice (desirable).
The Offset fill band at the outer edge is quicker and can often hide any smoke residue from the cutting.
There is no offense intended, and no insult conveyed. Ignorance is simply the lack of knowledge, and the forum is here to address that by sharing experience and success. I jumped from your question to what I believed would be a follow-up question. You asked in changing the font to a path would help. Asked and answered already by Bern.
It sounds cool and it’s also something in this style that I use offset-fill for. Often for decorative edges like you do, I defocus a lot so that I get an almost 2mm wide line. Here, however, it’s a bit critical to hit the line spacing so that the slightly weaker edges don’t become visible or darker center stripes occur. But this is where the real time savings can be found.
2mm is a lot of coverage and I must try this method for larger pieces where I also create that dark outer band, the time saving would also be substantial…if it matters.
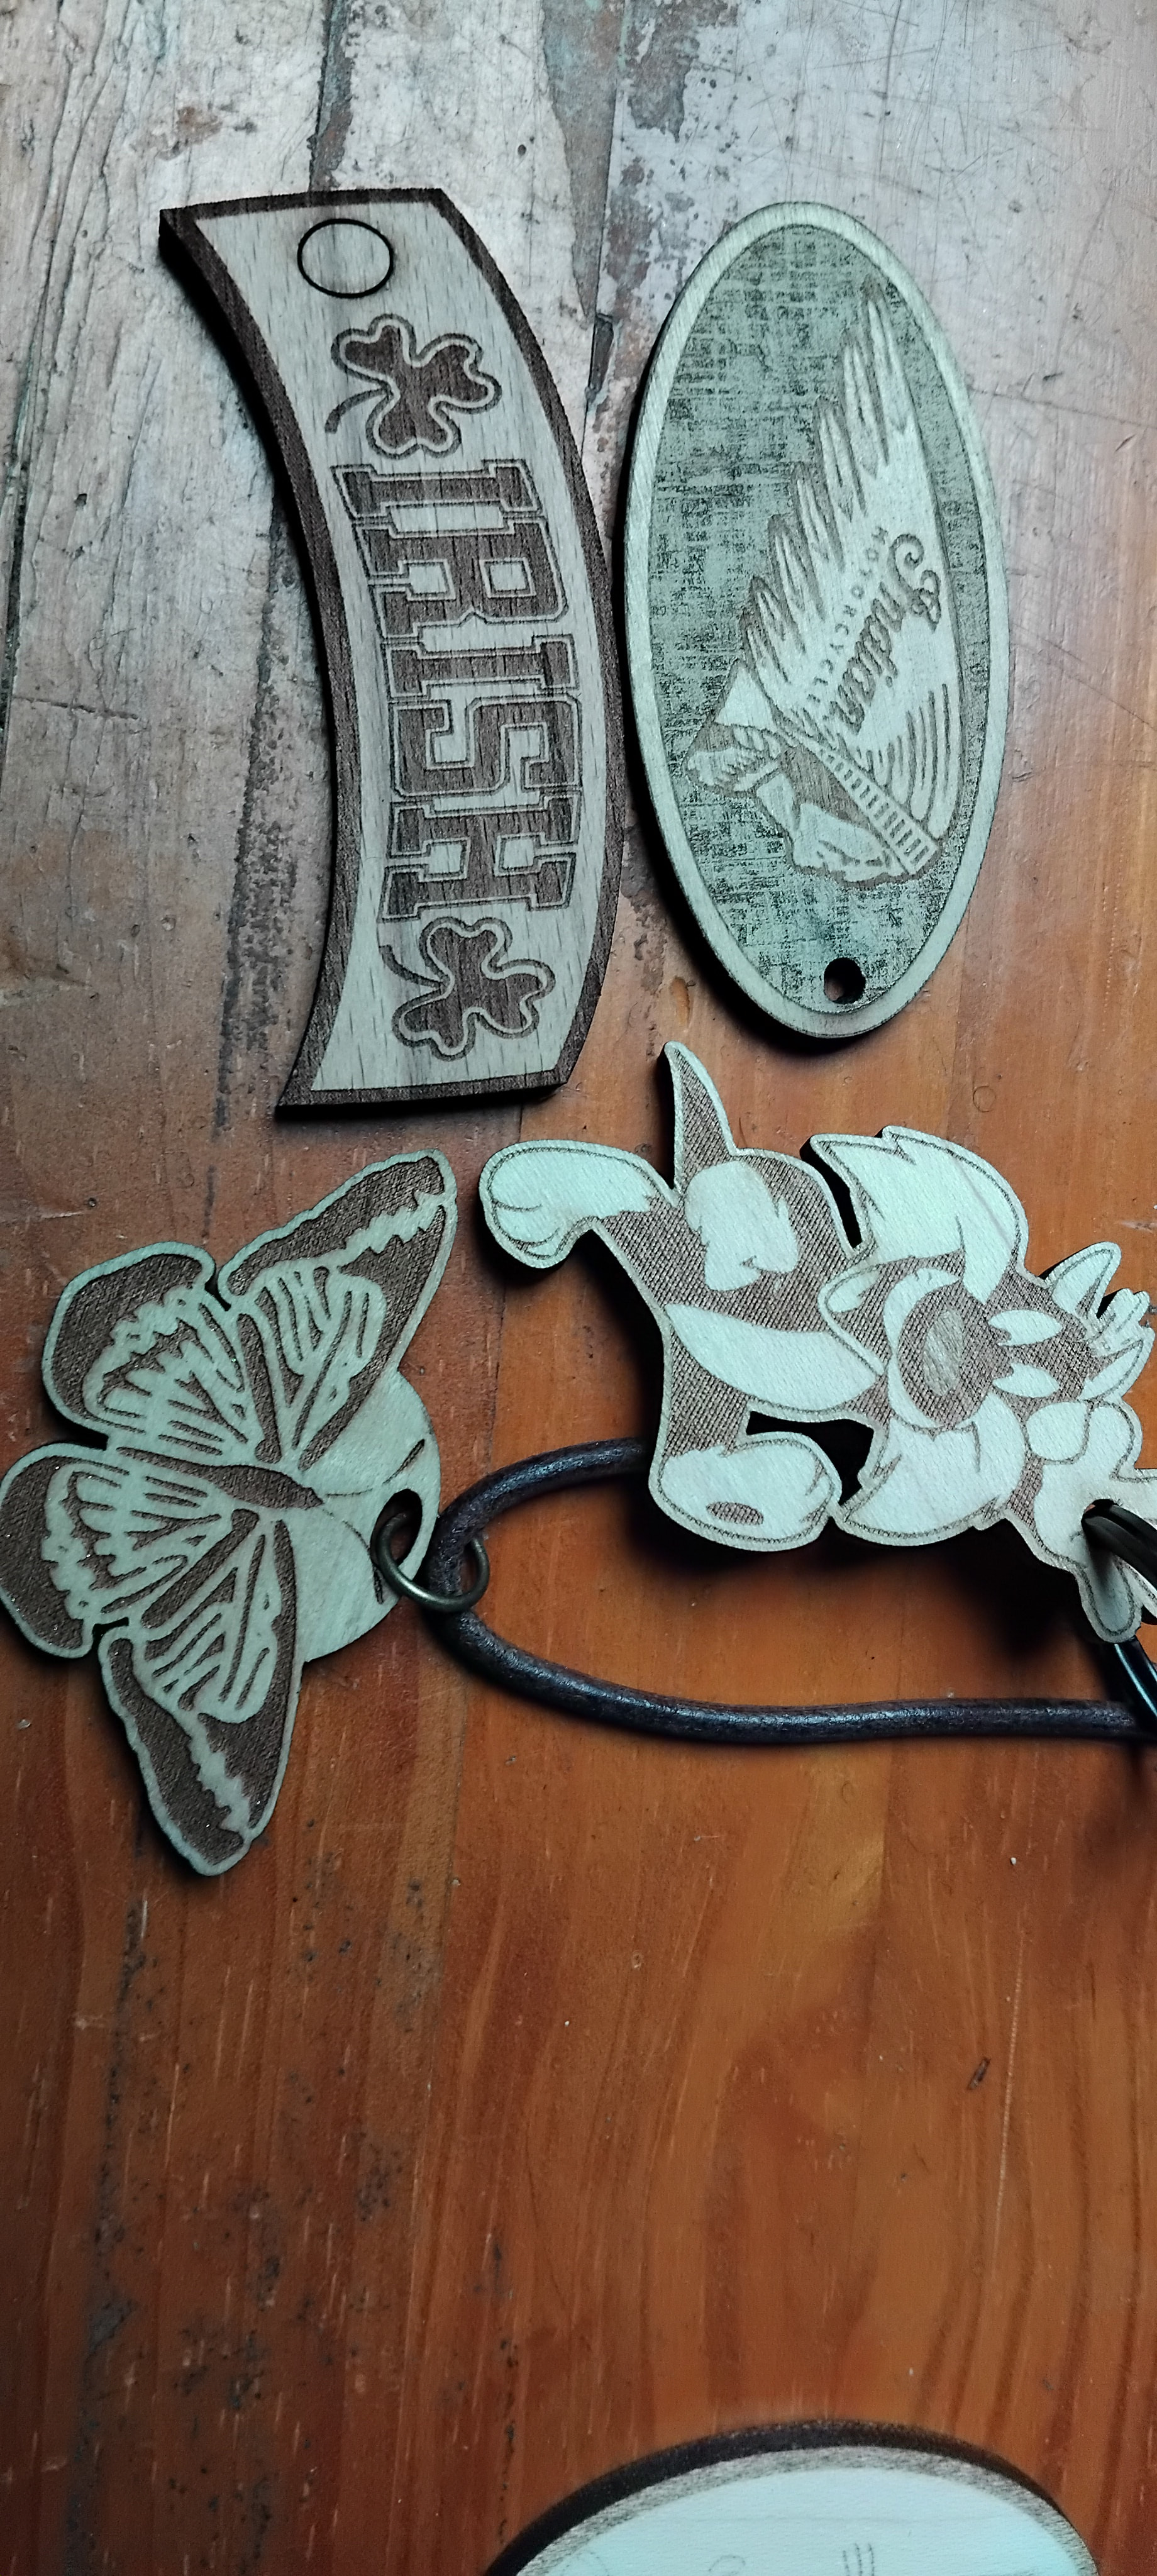
Off topic slightly, regarding the Birch 4mm ply that would not cut easily for me, I did a keyring of the Indian head that is used on the Indian motorcycle company logo. I traced the image and Offset the trace line outward and crosshatch engraved to the outer boundary where I had Offset inward.
The outer layer of the ply was so thin (unlike the reverse surface layer) that the lasering partially revealed..in patches, the layer below which is much darker, this gave the Indian head the raised appearance with a somewhat strange worn-cloth appearance around it..quite unique in my experience, I will include a photo tomorrow.
I had done a couple of these in mahogany and ash and they were OK but this one on the 4mm ply was elevated by this effect.
Just to say, that materials hold many unexpected qualities and taught me to consider even more carefully the potential of every aspect of something.
I believe a guesstimated 10% may be on the edge of still being with the depth of focus (dof) on one lens or far exceed the dof on different lens.
My 4” (101.6mm) has a computed dof of almost 11mm … whereas a 2” (50.8mm) has a dof of about 2.75mm. 10% on one will be withing it’s dof, whereas a 10% on the other will put you way outside the dof area for a very large spot size.
I suggest a better approach is to use a ramp test to find the spot size area you desire. Just MHO.
Nearly forgot to post the Indian head and the engraving around it which just starts to reveal the next layer of ply below.
Nice texture that actually looks way better than depicted in the photo and should look nice laqured, and some examples that hide a smokey cut-line and save sanding time.