no. My post is about grayscale not working at all. All other modes work, grayscale does not.
Can you explain what exactly is happening? At what point does it fail?
I was reacting to this which made me think you were not getting variation in the burn which is what I was attempting to explain about min and max:
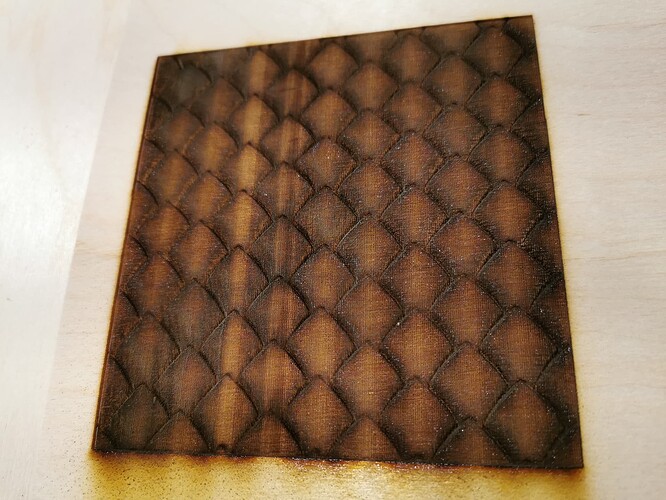
I used these settings on the scales image you supplied in ‘sakura and branch.lbrn2’
Gamma on image 0.5
Speed 200
Max Power 20
Min Power 9 (my 80W tube starts to fire at 8.8%)
DPI 300
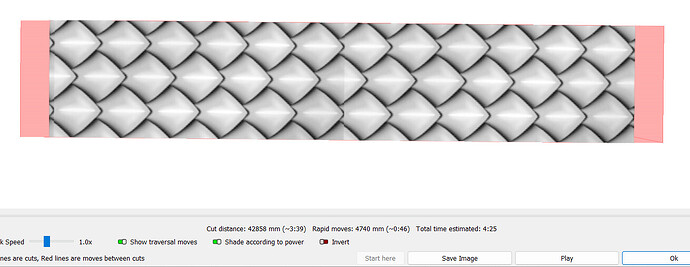
The preview looks like this:
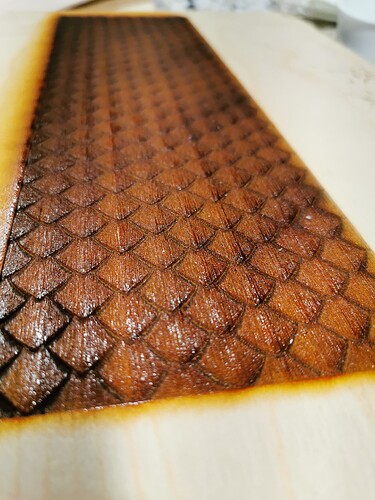
And output on ply:
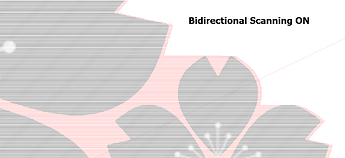
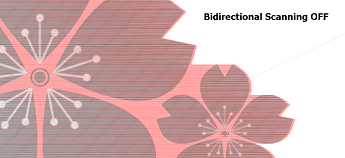
If you are looking for results that you previously got that corresponded with the presence of traversal lines across the image in the preview, then either A) you were using a different ‘Image Mode’ (and just not realising it), or B) you were using grayscale and had ‘Bi-directional scanning’ turned off, which would also leave traversal lines across the engraving in the preview.
If we assume B), then you will still need to revisit your settings. Try adjusting them to be similar to what I have used here as a starting point, and let us know how you get on.
Thanks for running this on your gear @NicholasL. Looks like grayscale is working as expected. ![]()
Alright, restart. Last week I created a project using the scales. I posted that actual project minus showing the logo, showing the scales on wood. Initially, the project’s dragon scales did not engrave anything, meaning it engraved out a pure rectangle that was flat and without any image. I looked at the preview and saw the scales all in black and white with the red outline on the border and thought that is what it’s supposed to look like, but then I put a “cut” border around the dragon scales, checked the preview and the preview image changed to pure red dragon scales. When I went to engrave that, it worked. The wood project I showed is the result of those “red/pink scales” in the preview. Which is why I say the grayscale image preview needs to be red/pink, otherwise you get a max burn or just a flat burn with no picture. It’s odd, and I cant explain why it’s this way, but that’s what worked. Ive done several other grayscales with red/pinks, and all worked. Now, I cant get the grayscale for any image to show up red/pink, and consequently, they all fail to engrave. This is why I said, why does it work one day, and not the next? Does LB need a new update?
sry for late reply, this forum locks more responses if you are new member. had to wait 20 hours.
This is part of the automated security and anti-spam measures. I have bumped your profile, so this should no longer be limited in this way. ![]()
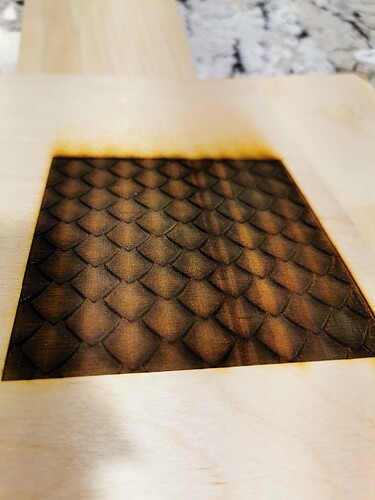
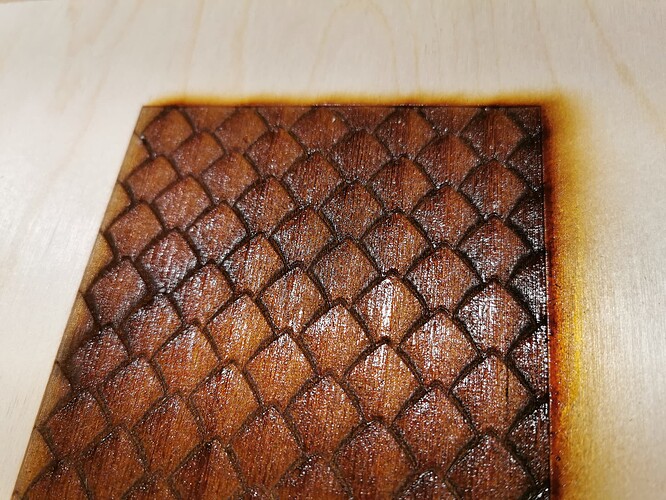
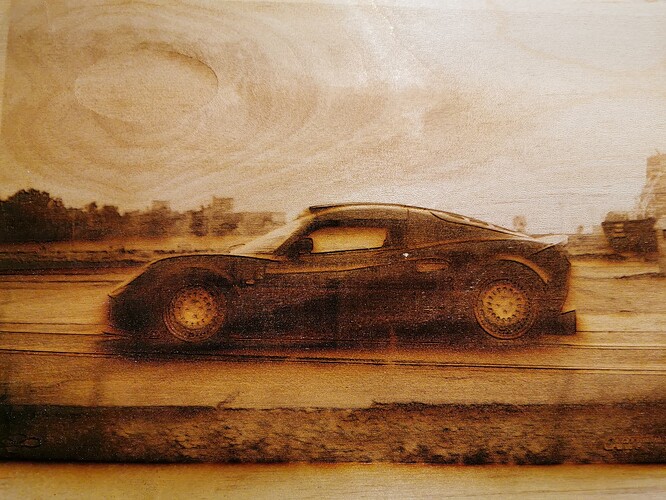
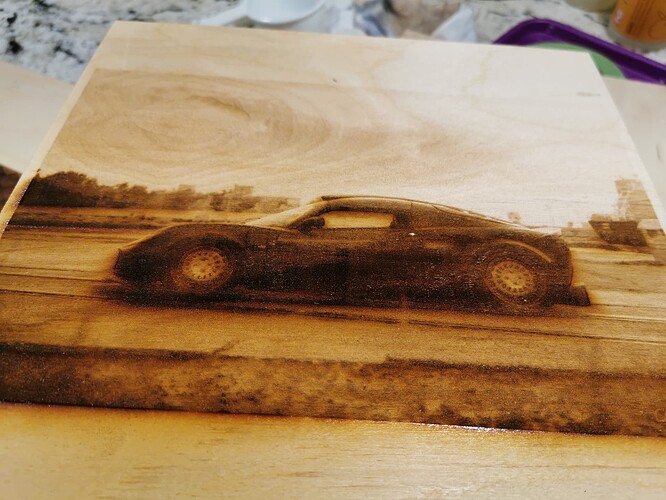
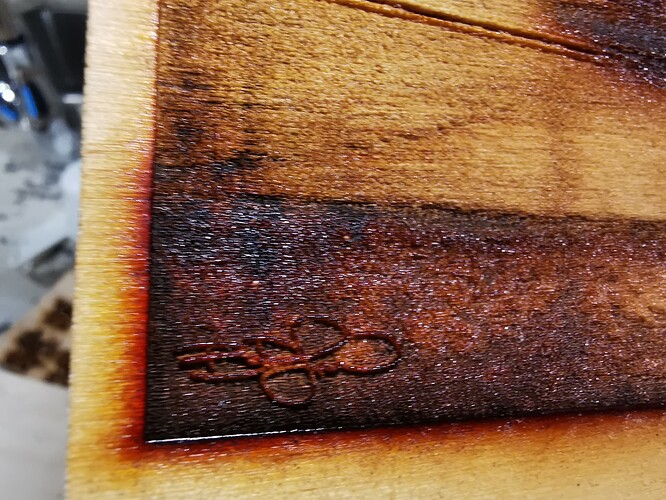
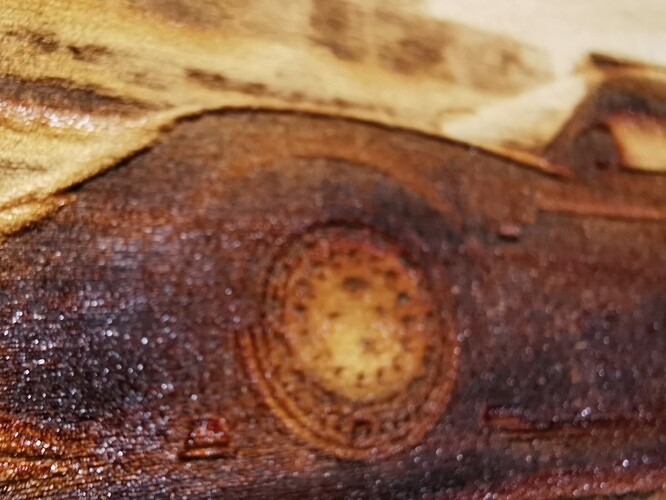
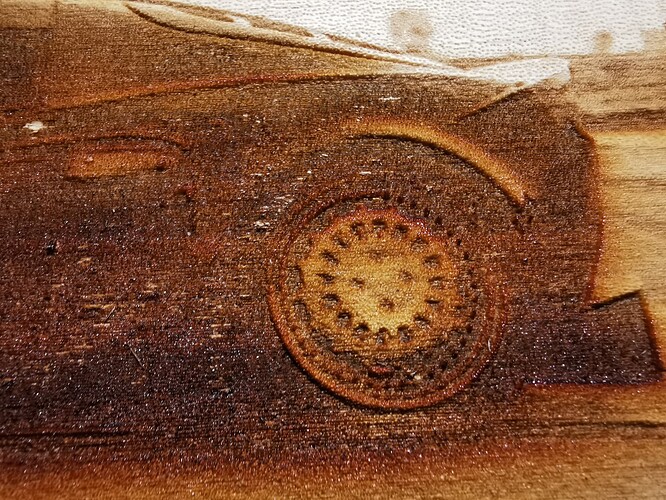
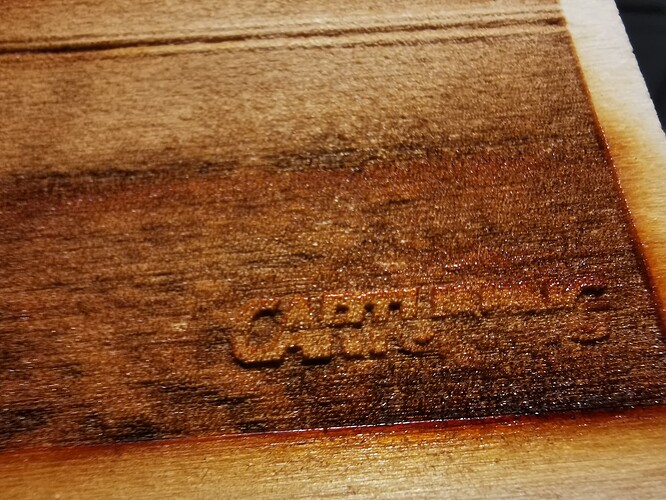
Alright, here’s the proof. I ran several tests today, but I just want to keep it simple. Below you will see pictures. 1 million fake Pesos to the member who can tell me the difference between the two examples. If you said, one looks smooth, clean, and even wet, while the other looks rough, dirty, and dry, congrats a bank in Mexico will be calling you shortly. The point of these two examples is that both are using the same settings. The better looking one I did three weeks ago using a 50, 30, 10 spd/pwr and .45 gamma 225 dpi. I created the same project again today cutting out a swatch using the same settings… the SAME! Why are they different? Answer: the good resulting project from weeks before had a red/pink preview when I did it. The dry and crusty one I did today had a preview with no red/pink in the preview. The same previews members have shown in the forum in response to my question actually are showing a version that results in a drier appearance. The reason I said grayscale is not working, is because if you scale these down to bookmark size, the laser literally evaporates the image (now), but only days before, my bookmark came out perfectly. Once again, is there a glitch, or does LB just need an update? If you are a business owner who makes a number of widgets or wtvr for customers, you cant print one day with one kind of quality (hopefully good) and wake up the next with a disastrous one.
That wet gummy look could be due to a variation of natural characteristics in the material.
Are you sure you are engraving on the same piece of wood, same side, with the woodgrain going the same way?
There may also be differences relating to the direction you are engraving from and towards relative to the direction the air nozzle blows the majority of the residue, e.g. consider the bottom “dry” photo, if it starts at the top and finishes at the front while air pushes residue mostly towards the front - then changing the scan angle by 180deg so it starts from the front may leave more of the residue behind on the part since less residue will get engraved over.
not to sound rude, but c’mon man… its balsa… both pieces came from same batch and I have several pieces with similar results… thats why I use 50, 30, 10… I keep telling you that it has to do with whether or not the preview shows a red/pink image… take it as true and start from there…
I do believe you are getting different results, I’m just trying to figure out what could be causing them.
You mention again the red you normally see in the preview image…this is not related to your problem, why? - because grayscale is very different to other image modes in that the whole image gets burnt, white included, which means you will not see any red coloured traversals in the image except where there are areas of transparency, or when bi-directional scanning is off.
Do you have any other old project files with images in them that you previously engraved using grayscale? - you should be able to open them (don’t import them as that will retain the settings in the project you are currently in), and send them to the laser again to test you get same results.
While I “agree” with you on the way a grayscale works, it still doesnt change the fact that when I had a red/pink preview I had significantly better results than when I now dont. Yes, I have other engraving projects, and they also now dont show the red/pink. Its as if this mystery feature disappeared overnight. The images here are of a Lotus Exige. When I opened the file, it had Grayscale 50,30,10 with 254 dpi as its’ last settings. It is a little worn, because I was so impressed with the raised grain and color, so I kept touching it. lol! But otherwise, it still looks great. The bad news is, I also opened the preview window, and now it doesnt show up red/pink either, so tomorrow when I run a test on it, I expect it to look like trash.
While these are using the same settings the way greyscale and the other modes work is fundamentally different, hence the different results. Greyscale varies the power according to the darkness of the image, and generally gives unpredictable and undesirable results, because as the laser scans along it is (by nature of using the greyscale mode) burning areas that it’s just burned, which get darker and hotter, and this means it’s more likely to bring the sap out of woods as you have found. This issue is compounded when resizing an object as this changes the max speeds reached.
The other modes dither the design into off/on commands (all at full power), and generally produce much better results. I recommend finding your image settings using stucki or jarvis.It will give you much more predictable results.
Here’s a bit more info about image settings more broadly:
It’s a very big topic though, and one of those wicked problems where each setting affects the results of multiple others. Images engravings can be really frustrating, essentially.
all that you just said is not the issue… Im not going down that rabbit hole…
The behavior you’re reporting - getting good results only when the preview goes ‘pink’ - strongly suggests that you are getting good results using a dithering mode, and not Grayscale, because Grayscale does not work that way - it doesn’t show traversal lines in the preview.
You’ve shared tests with a few weeks time in between them, so, most likely, your settings were just different a few weeks ago. That is why you’re being encouraged to ‘go down the rabbit hole’ of understanding the underlying behavior behind the different Image Modes. ![]()
So let me get this straight Tyler, you’re saying I just totally forgot which setting I used (grayscale), when I purposely used that setting knowing it was the best for the image? I actually own a Lotus, we love these cars, so why wouldnt I go through the effort to make the best image for this car? So youre supposing amnesia? Amnesia?.. Even though the setting is clearly saved, amnesia?.. Can we stop with the gaslighting here?
sejiro7, I hear you. I would like to offer a solution. I can not at this point. I do not understand the issue, the tests you conducted nor the results you have shared. But, I want to.
I understand you remember having some settings and have a memory of how these settings produced. I take you at your word and will not challenge this, as I was not there when you did these things. You remember seeing red/pink traversal moves in the Preview you saw. Got it.
‘Show traversal moves’ is purely a visual option in the Preview to show when and where the laser head will move when producing the job shown in the Preview. It shows when the laser moves when not firing. That is it. This is its only function. It does not alter the image, nor image output in any way. And it never has.
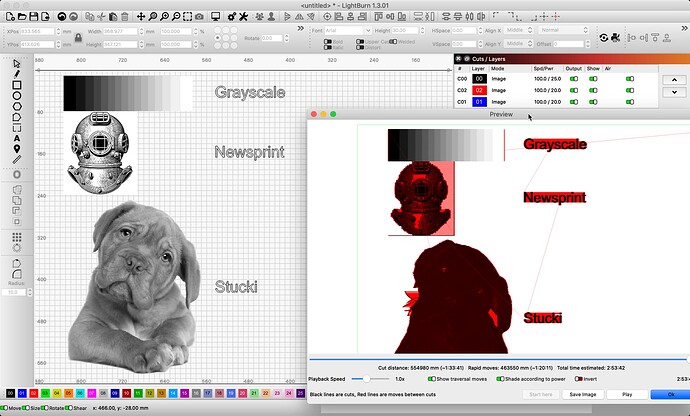
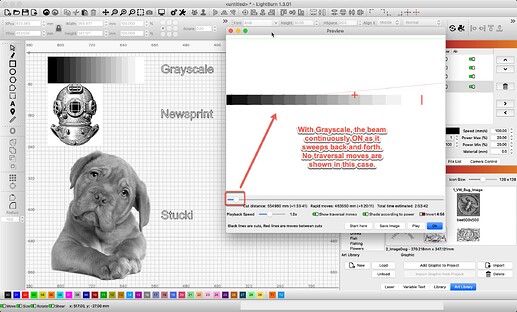
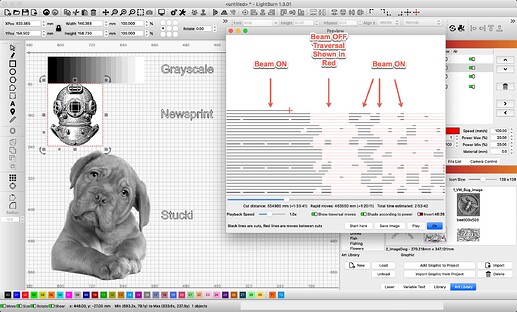
Here I show several images, the top is set to Grayscale, the middle set to Newsprint, and the bottom image is set to the default of Stucki. You should see how the traversal moves, shown in red, differ based on the image mode set to that layer. Laser moving while the beam is off shows in red. You will not see these red moves if the laser beam is firing at this point in the job.
Grayscale is produced with a continuous beam, while altering the power. The beam is not turned on and off while traveling, as the other modes do. You will see traversal for the overscan only.
For Newsprint, you can see when the beam is toggled On and Off.
You say, “Grayscale not functioning”, yet we have demonstrated, on our own, internal gear, that it is working, using your artwork.
I would like to see the results of the testing @berainlb requested above,
Thanks Rick, at least we’re getting somewhere. Trust me, I know the red/pink has nothing to do with the final output, or rather it “shouldnt”, it’s just that only when I saw these traversal lines was the quality of the grayscale optimum. So when I say grayscale is not functioning, I do not mean AT ALL. You, myself, we all can see I am getting some kind of result. The question is why is it now the results are not optimum? Why is it only when I received the red/pink preview the output image was optimum, and when I didn’t I got a crater or less than stellar output? To regard one of the other member’s response that grayscale
If this truly were the case, people would stop buying your product. There has to be a level of control and consistency that is observable and reliable. This quote stood in stark contrast to the evidence of the same project with same settings giving drastically different results. Im am 100% positive your company would not have created and spent arduous hours upon hours and years upon years to give the customer a product that periodically spits out disasters with exact settings and materials. So my next question is, I see you have a red/pink dog in grayscale (and Im assuming you didnt PS it), since my projects did in fact also preview in this way before, but now they dont, 1. is there a glitch? 2. is this an intermittent feature? and 3. can LB devs create a patch that addresses the extreme variance that occurs when doing grayscale as it did with my project? Because if grayscale is working as you say, then grayscale is not consistent or optimal as I showed in my projects from days or weeks ago.
Taking another stab here, in greyscale mode, I don’t get the red lines crossing the image when I have bidirectional mode enabled. When I have it disabled I do. If you turn bidirectional scanning off, is that more like the previews you were getting before?
Else, sorry if I missed it, but have you tried rolling back to a release when you knew it was working as you expected? That might help us all understand the differences you’re describing.
