Hi everyone, can you tell me what features have been added to the latest version of the software for the laser pecker 5?
Hello,
I have heard about a “dual laser source issue” with the LP5, which was fixed in version 2.0. I would require a Dev’s attention to provide more details. - Before I escalate this, could you see if the following works?:
The Device Profile LaserPecker offers on their page here is incomplete and we’ve already sent them an updated version which uses our Custom Gcode device type with the changes in Gcode, these devices need.
Please add a new device to your installation by downloading this file, drag it into the workarea in LightBurn and select “Import”
LP5_Config-Custom-Gcode.lbzip (152.9 KB)
**Important Notice!**
There might be a settings mismatch for the S-Value depending on your specific firmware setting for the laser power ($30)

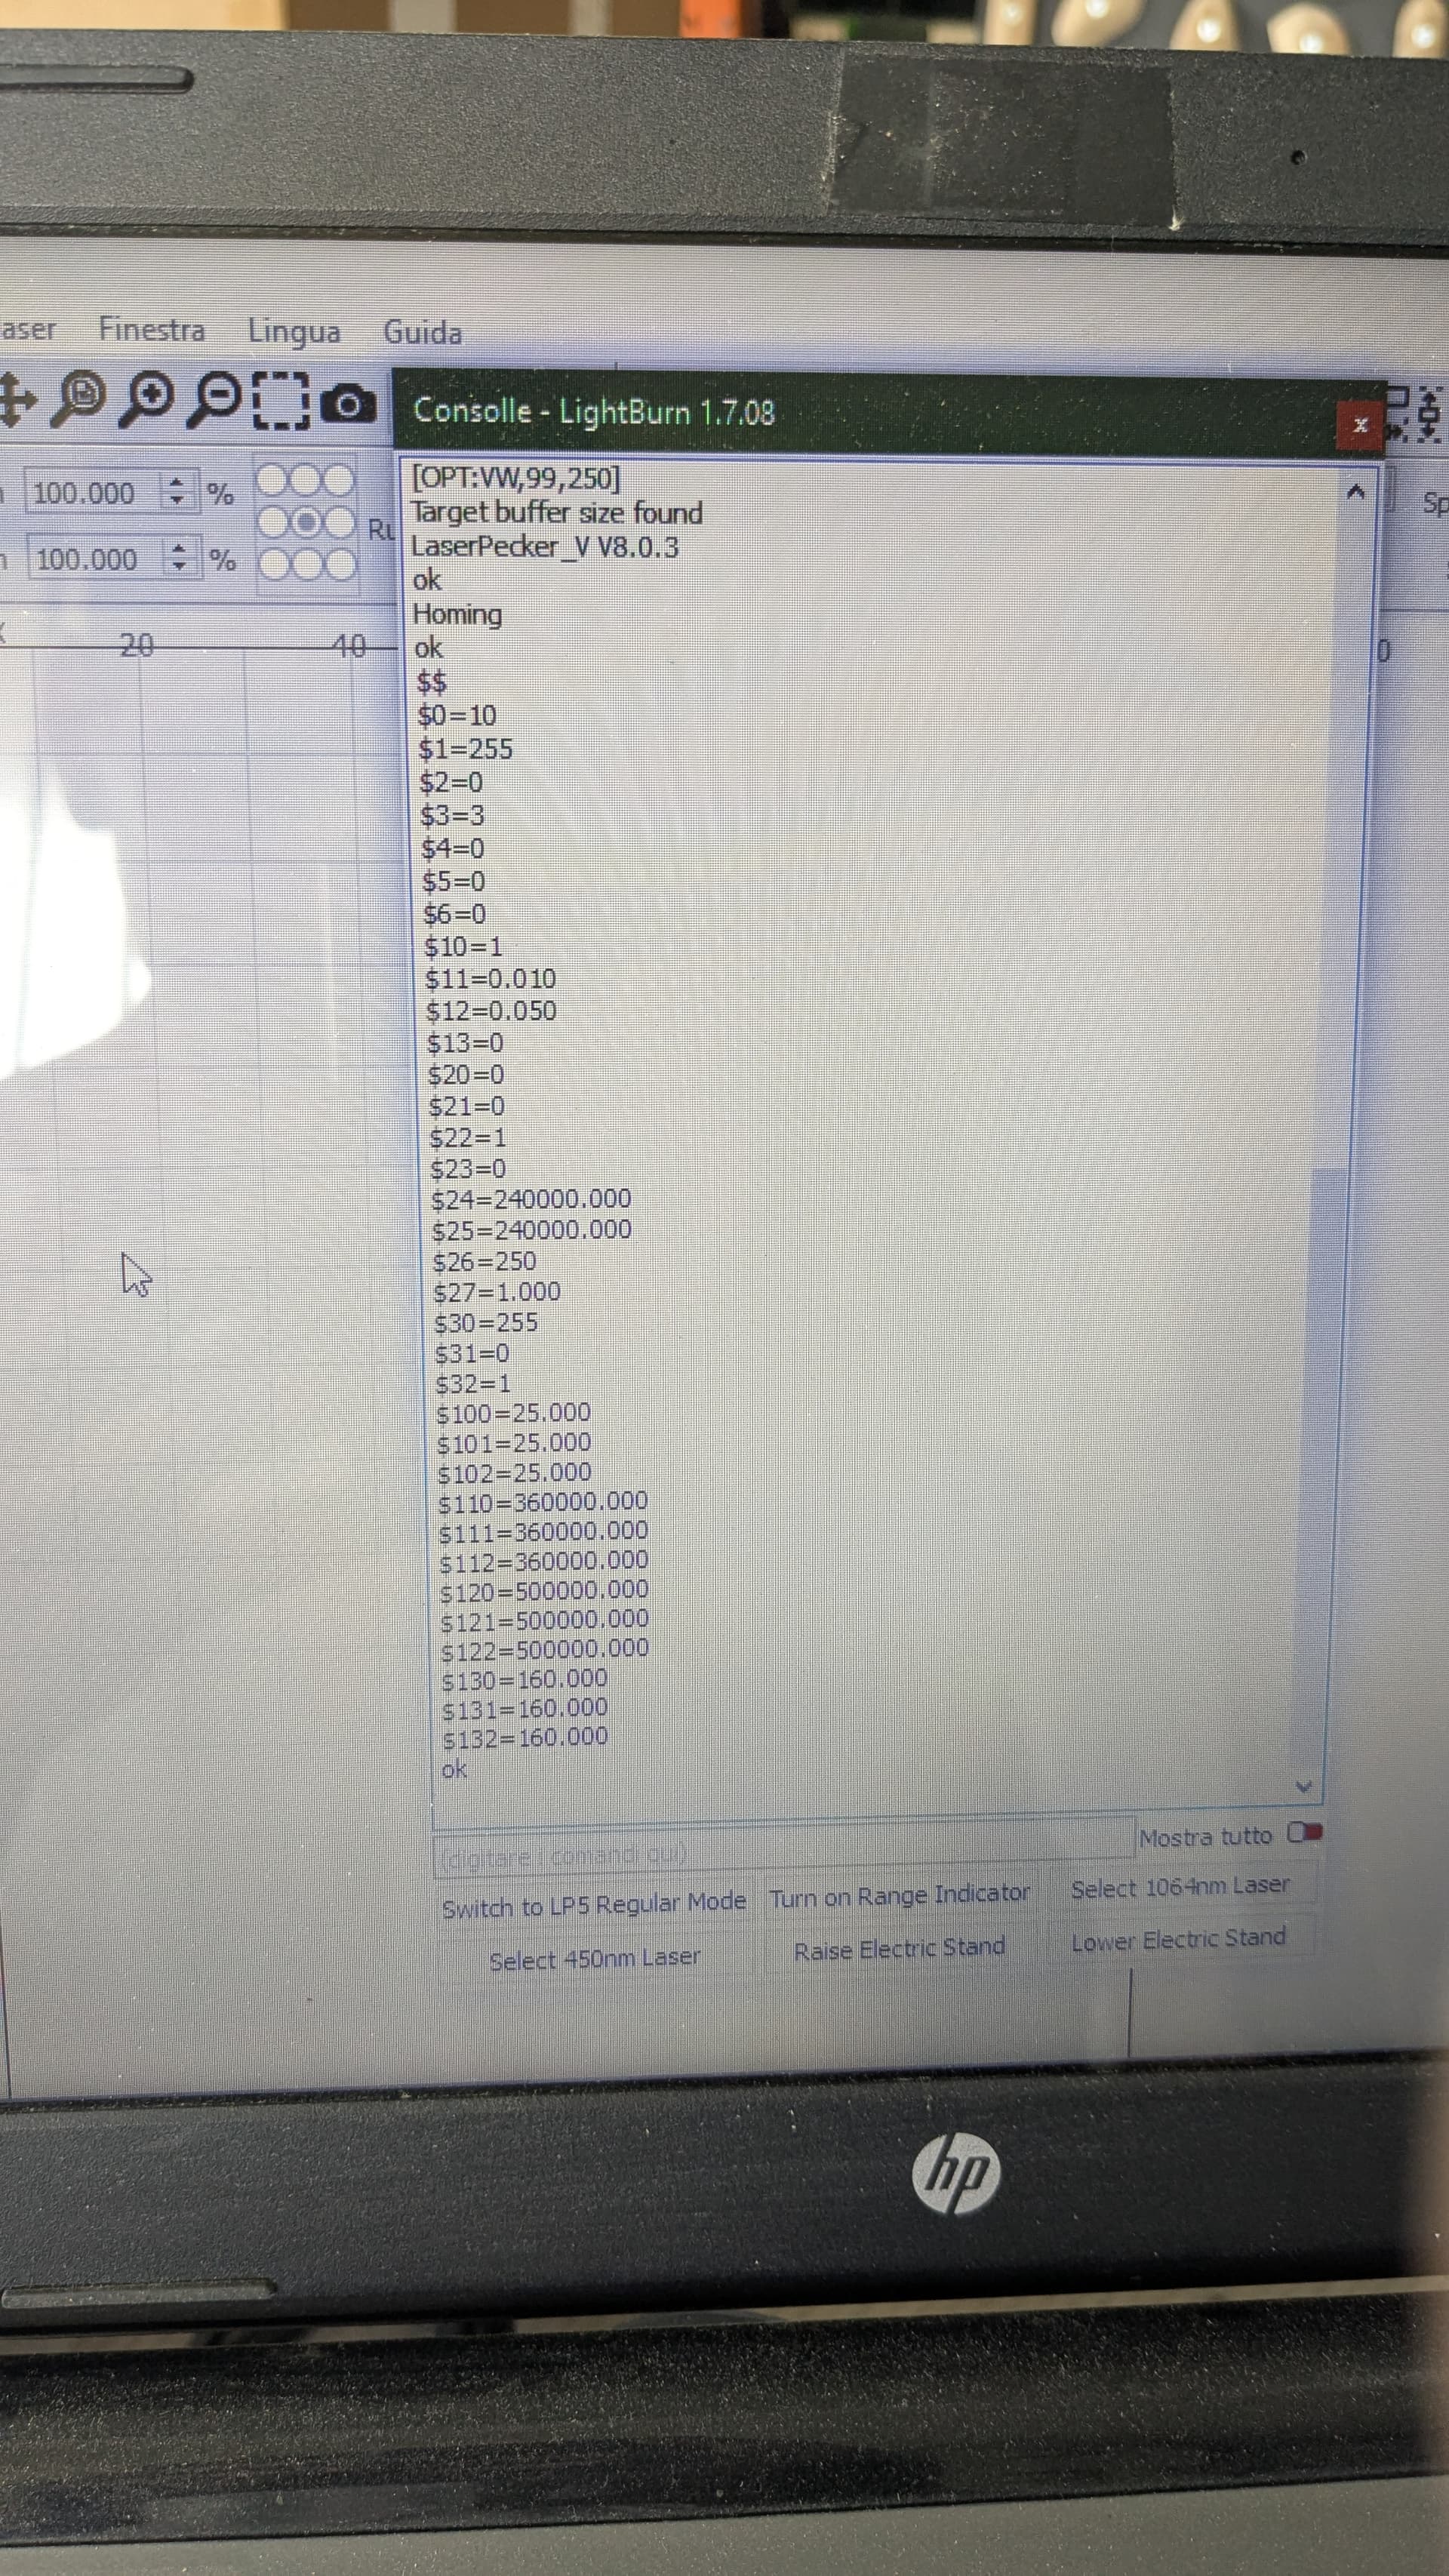
If you could send us the reply of this command in the Console Window, we can see your firmware settings and evaluate whether there are additional steps needed. Enter this in the command prompt and press ‘Enter’: $$
See this docs page for a detailed explanation: GRBL: Low or No Power Output - LightBurn Documentation
In LightBurn version 2.0, we moved the macros from the Console Window to a dedicated Macros Window:
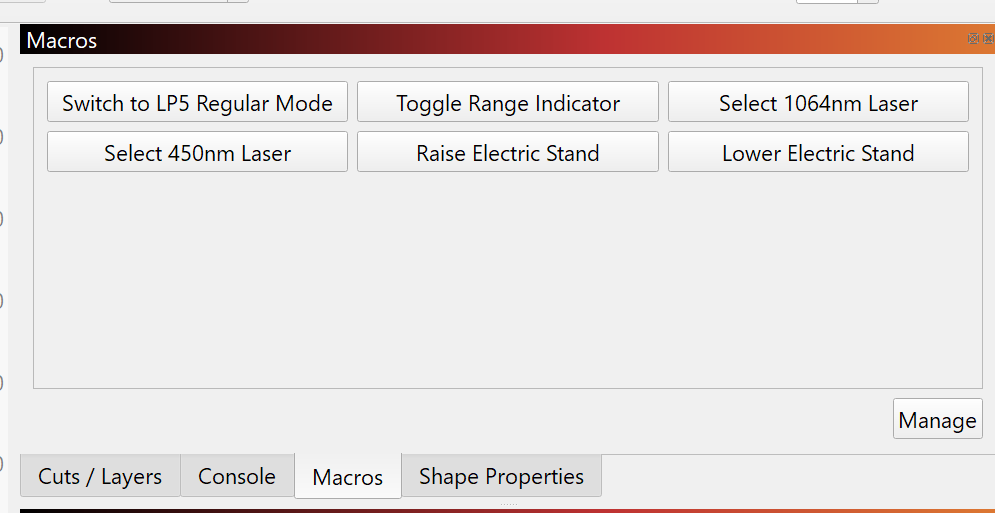
I don’t have access to an LP5 yet to confirm this, but for framing to work on this one, you need to first change to the 450nm Laser by selecting the appropriate macro and hold down the Shift key when clicking “Frame”.
There is this ongoing thread about the topic with more details:
Please let us know, how it goes!
1 Like
If you can get the preview working, it would be really helpful. If you could also control the rotary axis, I’d say we’d be perfect.
I suppose you mean the Framing, and not the Preview (Alt + P).
Can you share more details of what you are doing and what does and doesn’t work?
I’m going to quote @adammhaile on this:
1 Like
yes I meant framing, I wasn’t aware of the key combination you sent me, it’s fantastic ![]() . Instead, is there any plan to use it for the rotation axis in the future?
. Instead, is there any plan to use it for the rotation axis in the future?
Sorry, I misunderstood. I thought the key combination was for framing. The LP5’s proprietary software uses a blue light to center itself on the piece. If I’m not mistranslating what’s written in the link, this option isn’t available. Correct.
Did you run the macro called “Select 450nm Laser” and held down the shift-key of your keyboard when you clicked on “Framing”?
If you could explain in detail how it behaves when you do this, it would help us locate the issue.
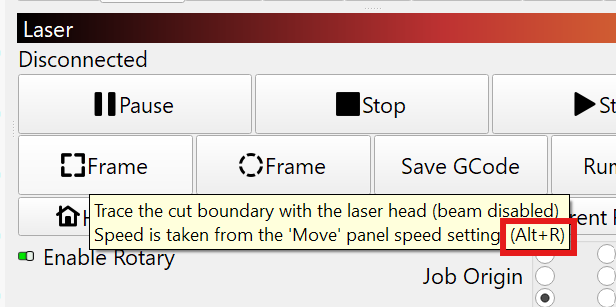
The Key combination for Framing is Alt + R
You can find most key combinations in the Tooltips - Hover over a button to see this:
These hotkeys can also be modified at “File > Preferences > Edit Hotkeys”
But!: The laser is not on during framing by default, hence the need to hold the shift-key when you click “Frame”.
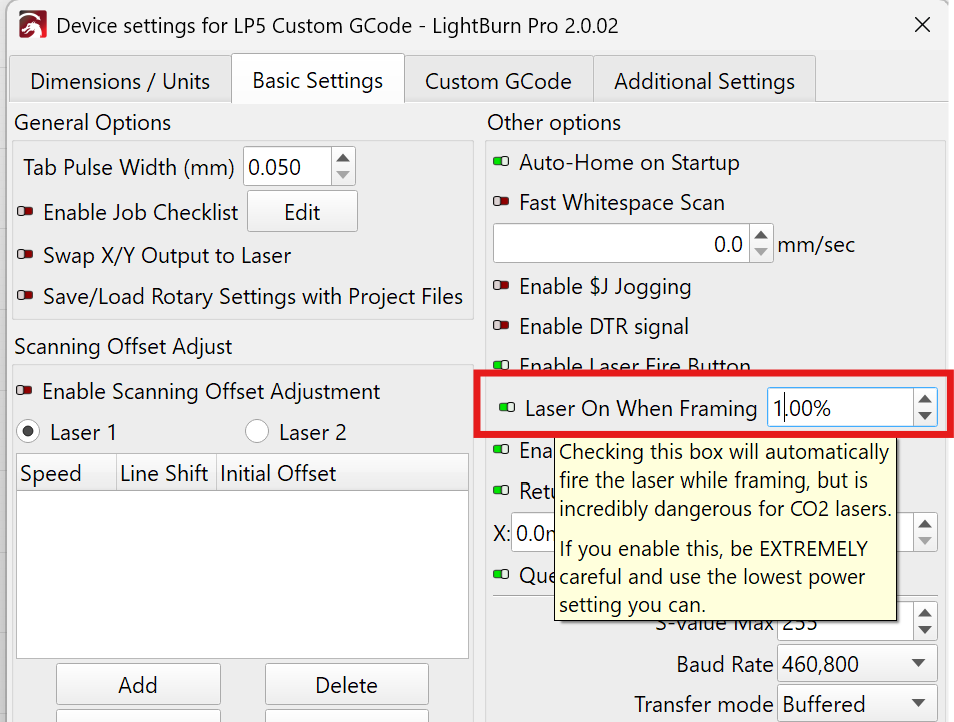
(There is an option in the Device Settings to enable “Laser On When Framing”, but it’s disabled in the device settings and I’d like to make sure, it works with our dev’s instructions before changing anything)
Please send us the reply of this command in the Console Window, so we can see your firmware settings and evaluate whether there are additional steps needed. Enter this in the command prompt and press ‘Enter’: $$
I’m unfamiliar with the LaserPecker software. Can you share more details about this? What is it used for?
Perfect I managed to set it up. Thanks for the support.
Things are looking up!
Thank you for the feedback.
If willing, in order to get a well-working device profile for everyone else, could you answer these questions:
-
Did you have to change anything else besides our instructions?
-
Paste us the reply from the console when you enter this command:
$$
(I would like to double-check on the firmware settings for $30 specifically.) -
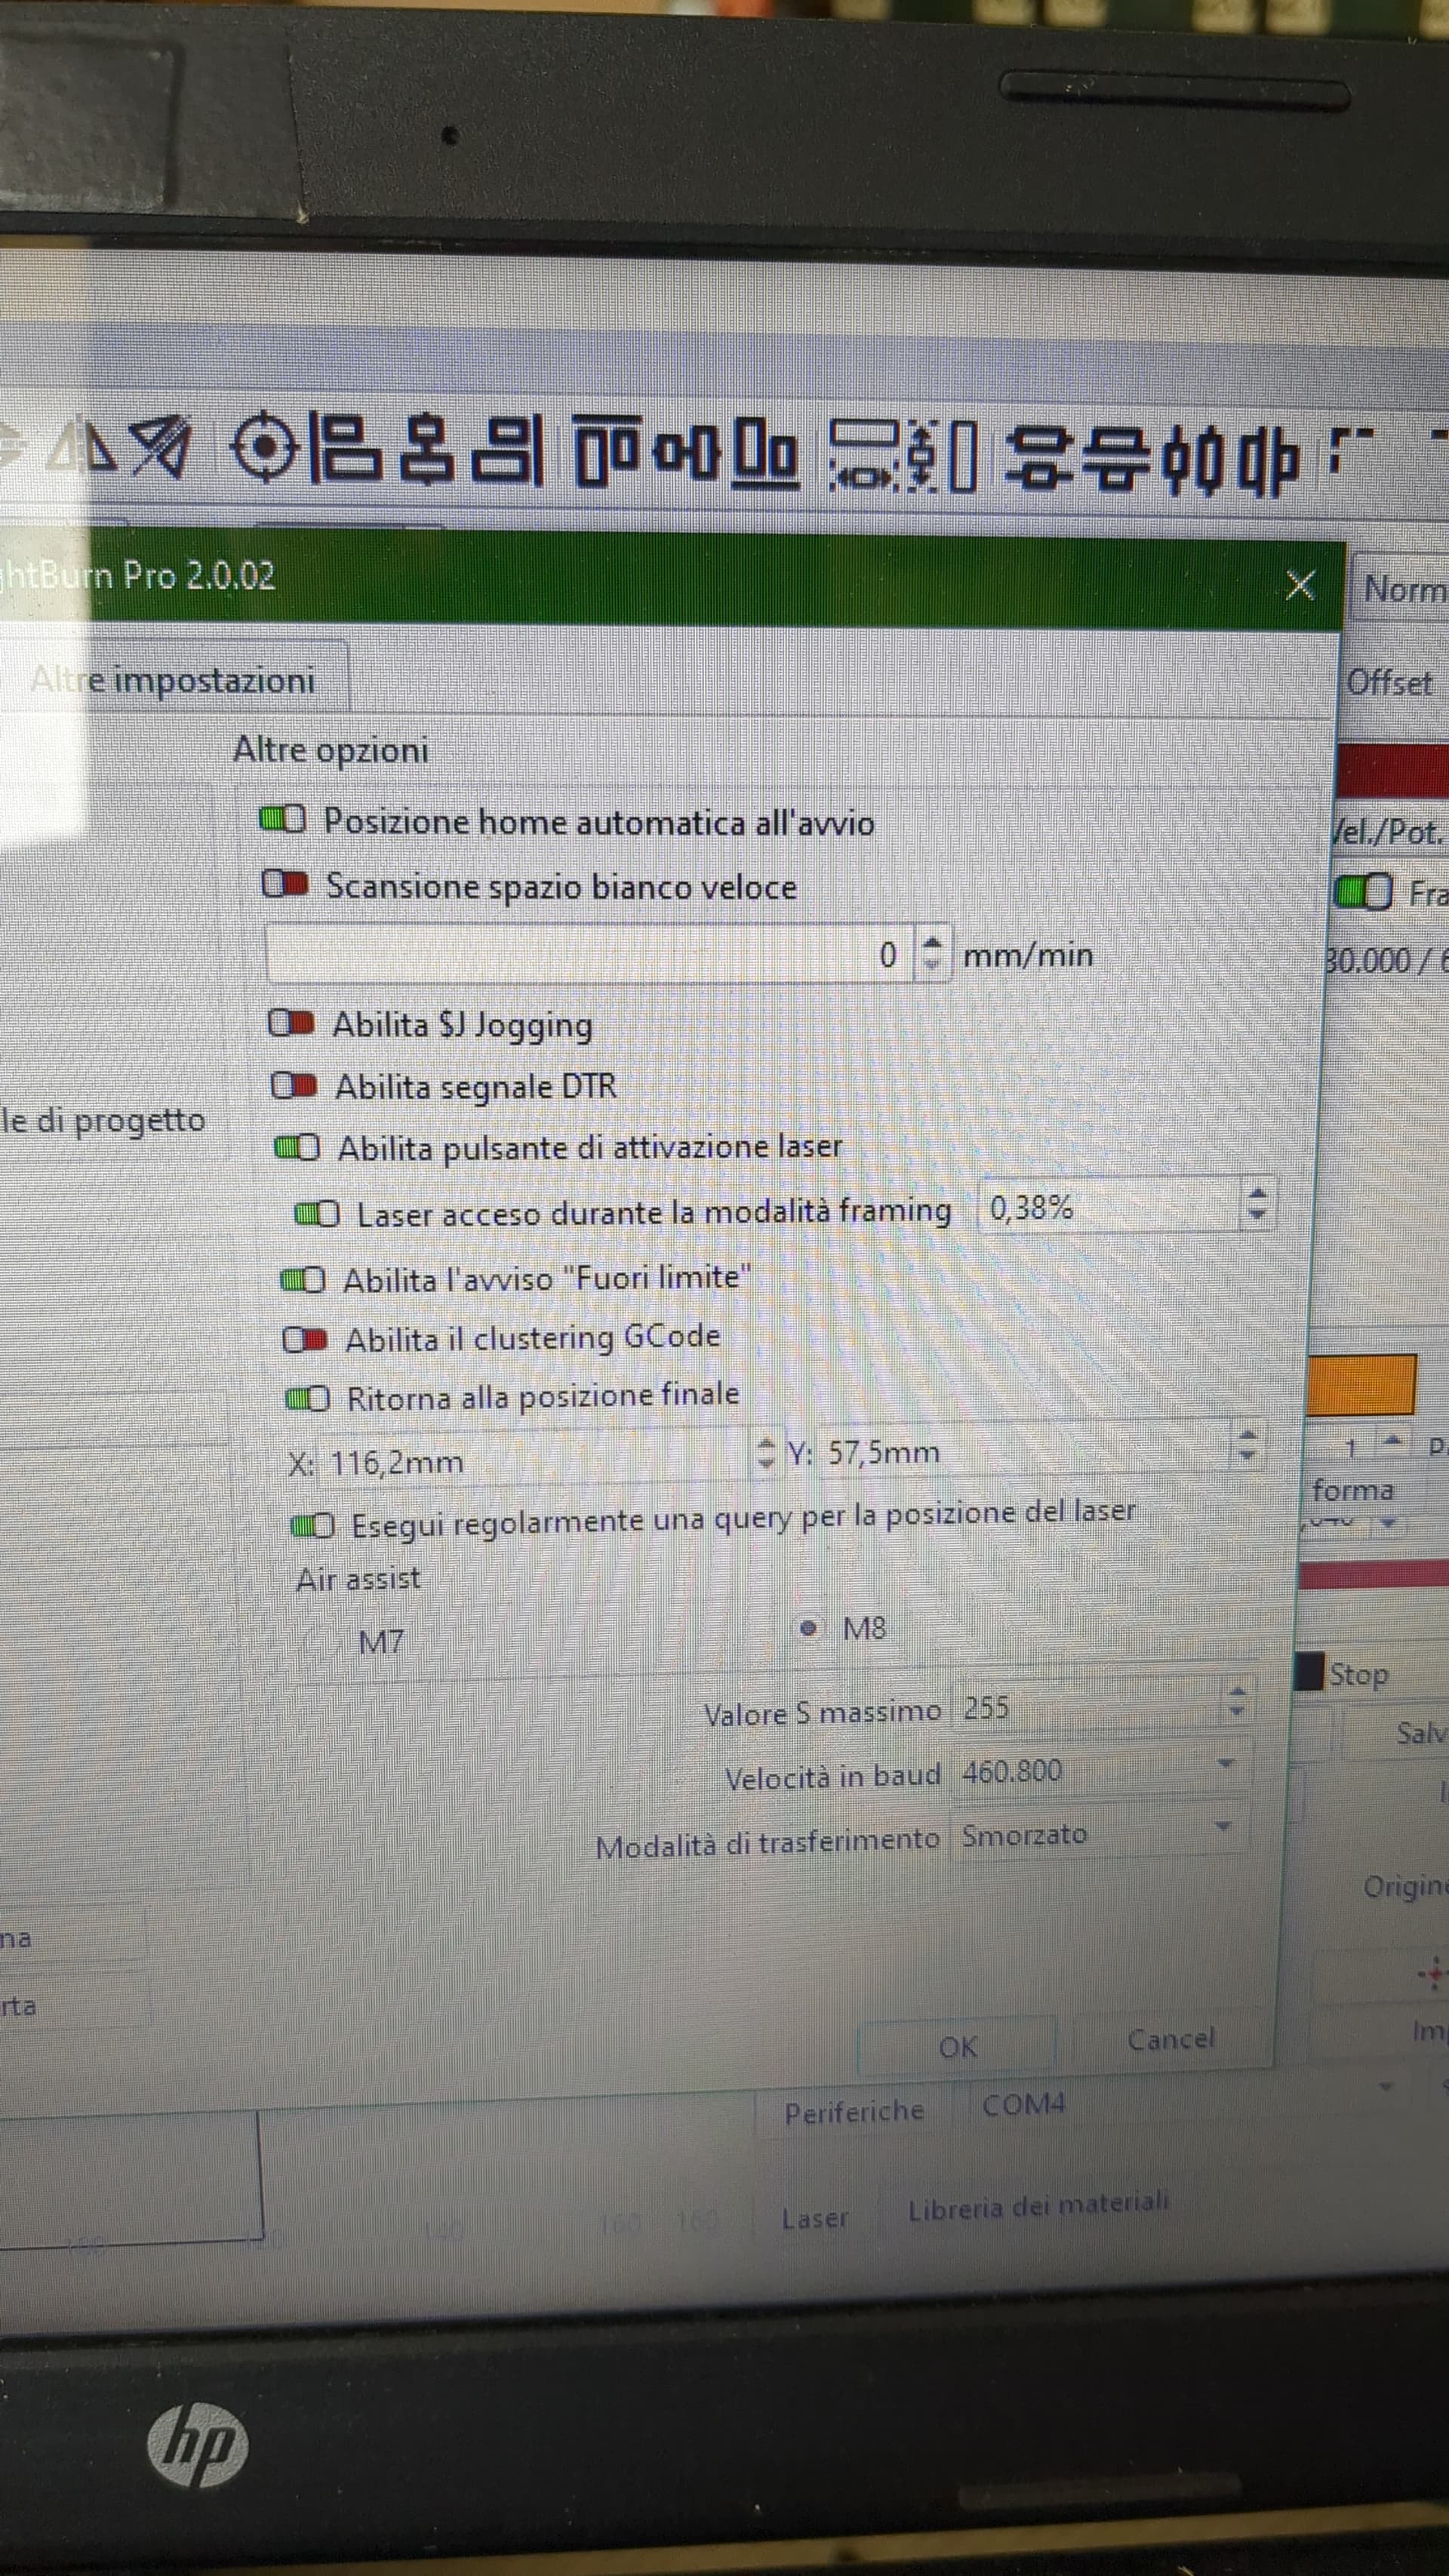
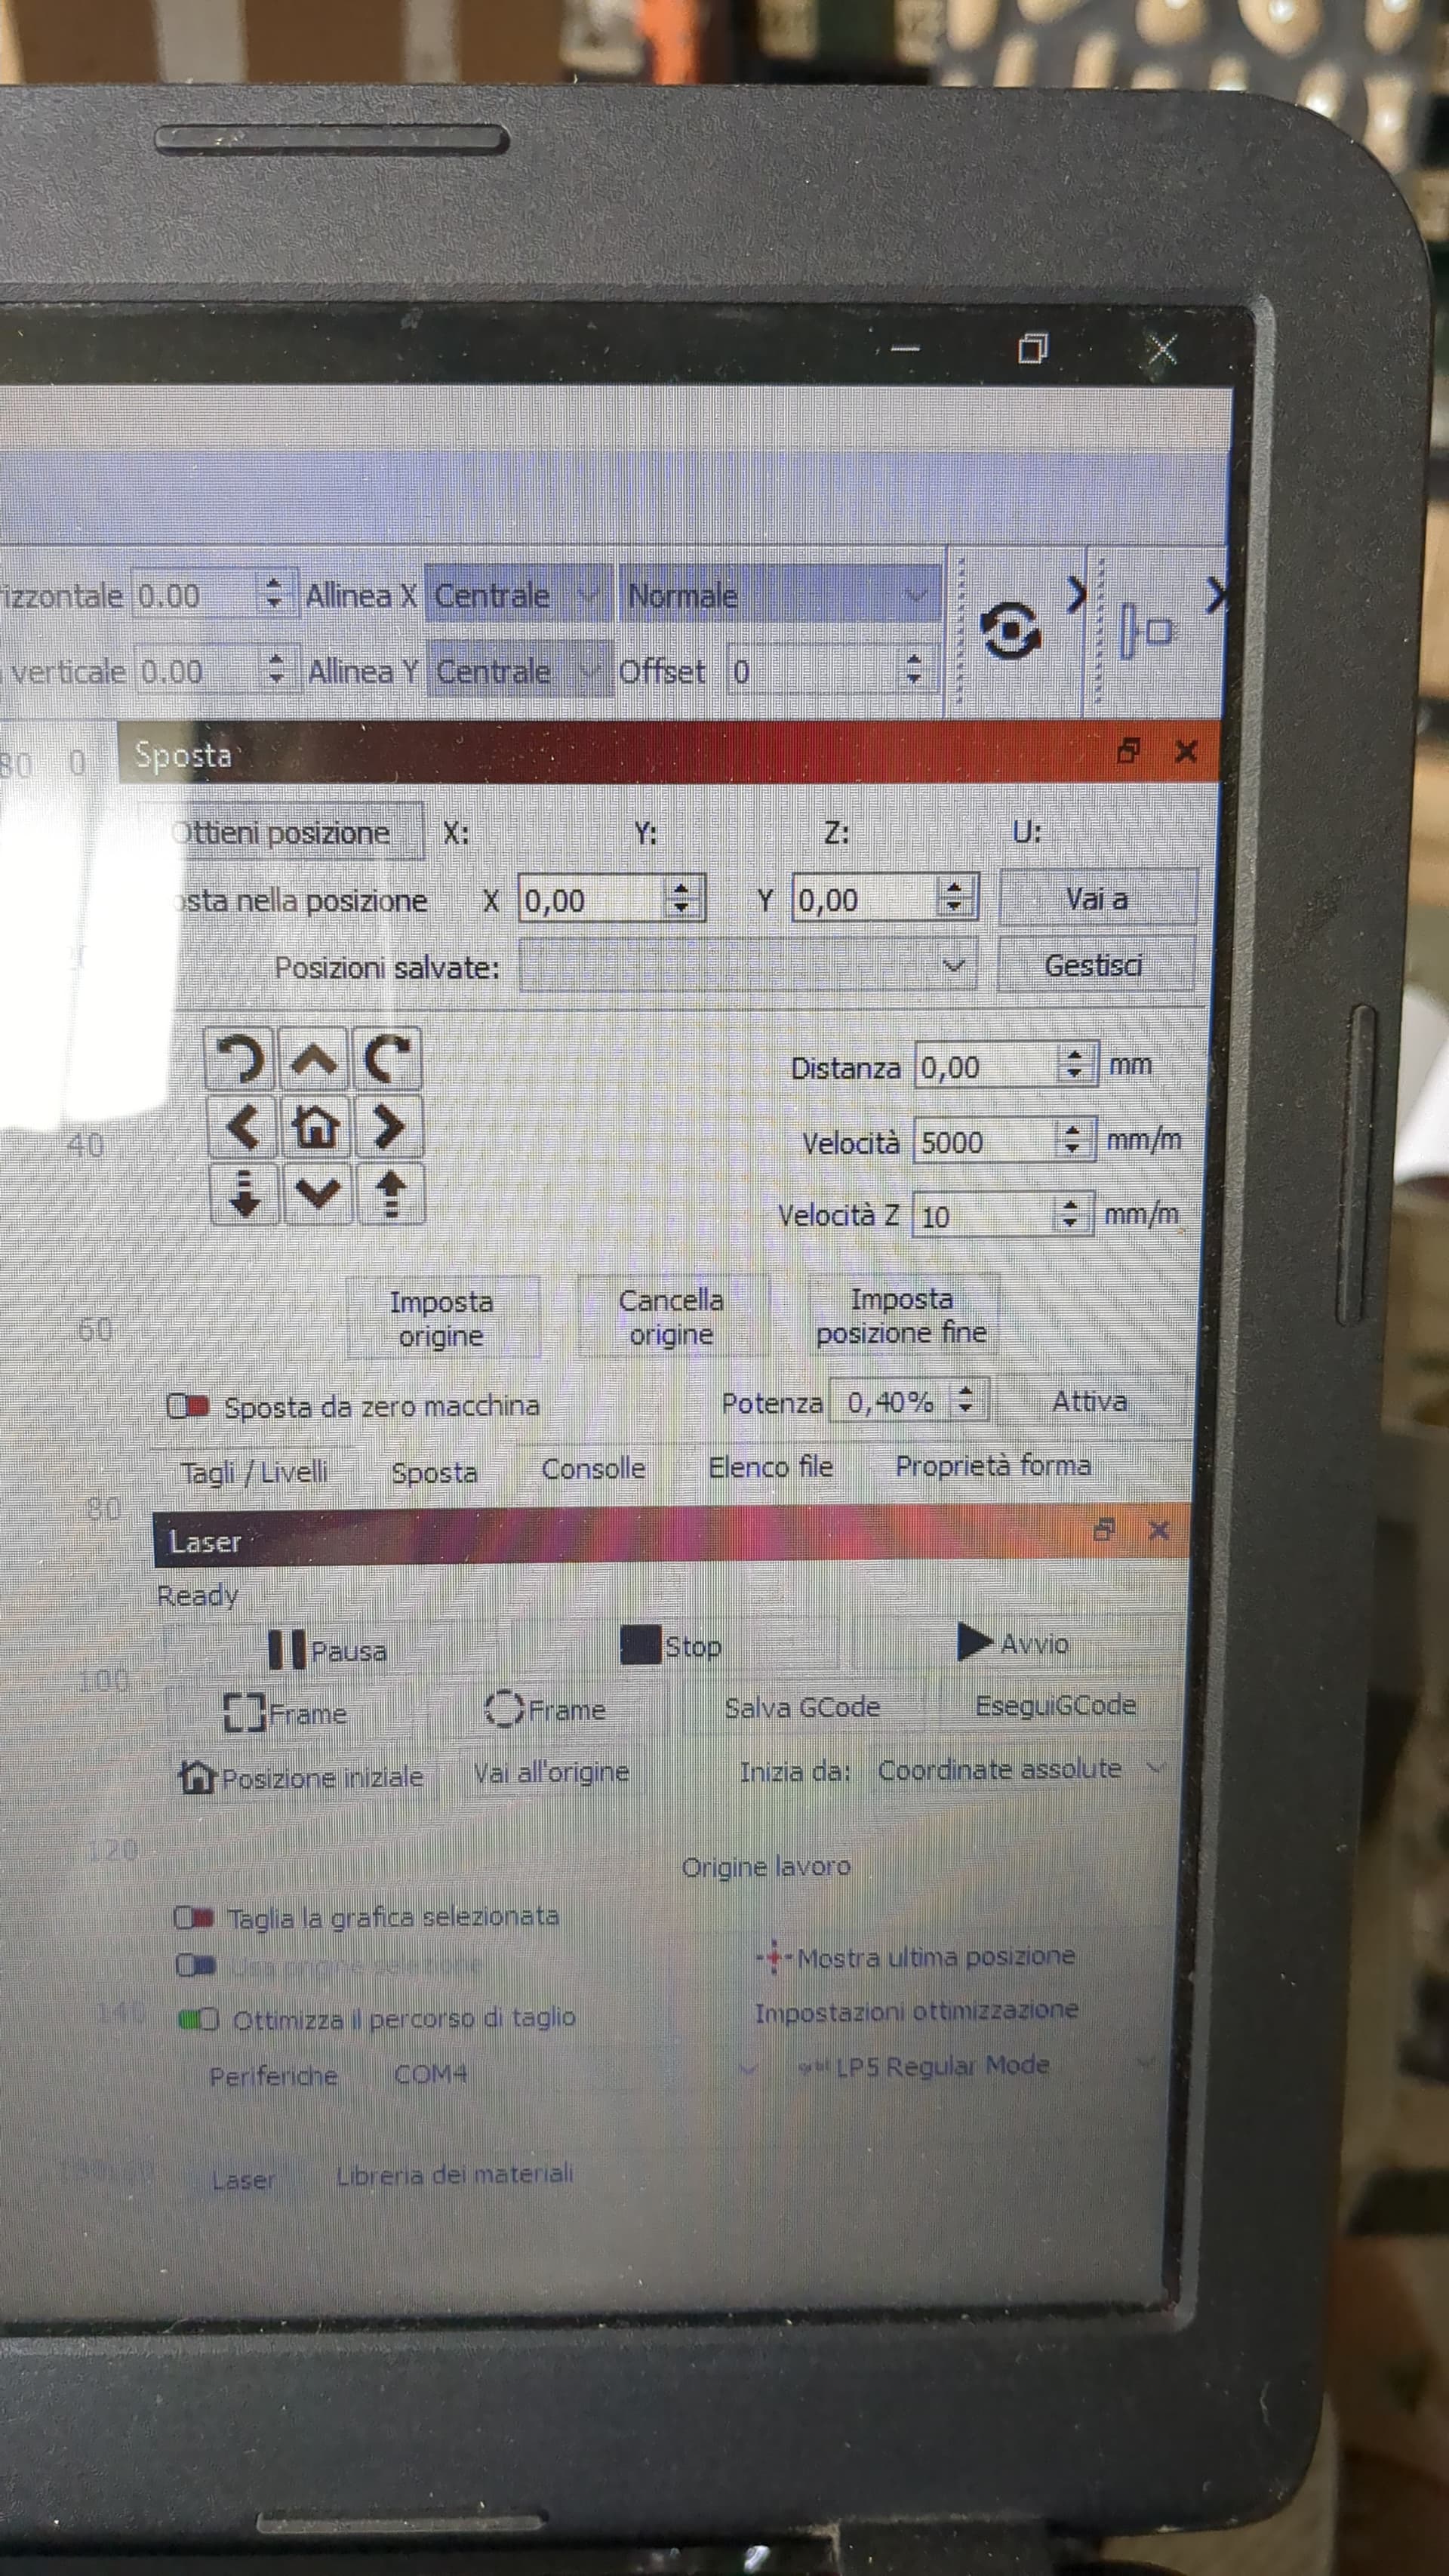
If you enable “Laser On When Framing” in the Device Settings and set 1% next to it:
Does the laser still turn on, when you click “Frame” without holding the shift-key?
Thank you for these tests. It helps a great deal!
where do you put the $$ symbols?
Go to “Window > Console”
And enter $$ here (with your laser connected). Then press the “enter” key on the keyboard.

After this, right-click above it, choose “Select All”, copy everything, and paste it in a reply.
Wait, you are using LightBurn version 1.7.08? Did you install this version after adding the Device Profile? (Because it’s not possible to import this .LBZIP file in version 1.7)
You said initially, that this was about:
I now believe, you were instead talking about ** Updating LP5 Firmware Using LDS PC Software**
Please explain. ![]() (We don’t have any information about the changes in the LaserPecker firmware, if that’s what you were asking)
(We don’t have any information about the changes in the LaserPecker firmware, if that’s what you were asking)
Perfect, thank you for the picture! The value for $30 is at 225 and matches the S-Value in our Device Profile. - That’s good.
Good to hear. Does the laser still turn on, when you click “Frame” without holding the shift-key? (You will need to enable “Laser On When Framing” in the Device Settings)
Could you download the latest version of LightBurn from here and install it? (No need to uninstall first)
Grazie mille! Sono curioso di vedere i risultati.
I’ll look into this. Do I have to have Lightburn V2.0 installed? This version of lightburn has a serious bug which I and others have reported - the x axis going to zero between cuts (at the cut speed) which makes it unusable. Did y’all fix this yet? I had to go back to V1.7 (which I’m happy with) to get any work done.
Do you have a LaserPecker LP5? Version 2.0 addressed an issue with this device specifically.
I see, your other thread here is about the xTool S1. I sent you a reply there.
I have a LP5 and I’ll try the new .LBDEV file next week.
I have loaded the .LBDEV file for Lightburn referenced in the xTool instructions for my S1. If there is a different one, please point me to it. The only issue I have with running lightburn with the S1 is the version 2. Version 1.7 works great with the S1.
My biggest interest is in engraving and cutting metal. The LP 20W fiber laser is considerably more powerful than my ComMarker 20W. My LP4 is great for engraving wood and marking metal but for reasons the LP people only understand, the settings for the LP 4 20W diode laser do not directly translate to the LP5 20W diode laser. Also, the LP4 1064 CW laser works better for marking some metals than the pulsed fiber laser in the LP5 and ComMarker. I had planned on selling my LP4 when I bought the LP5, but I have a gazillion files for the LP4 plus it marks thin metal better so I am stuck with keeping it.
A thought - since you don’t have a LP5, consider asking all of us LP5 owners to contribute so you can buy one - I would be happy to contribute $100 - $200 bucks. The LP people might even give you a price brake. The LP5 is just too damn expensive to not be able to be able to use the fiber laser for what it is good for - marking, engraving, and cutting metal.
@BobM I moved your message back to this thread to keep the two topics separated.
Yes, please let us know how it went! ![]()
As mentioned, the version 2.0 addressed an issue concerning the dual laser in the LP5 and this version should be used with it.
I was honestly confused when I saw that @Stewy got it working in version 1.7.08.
That’s a very kind offer, thank you! Our developer, who wrote the device profile, already has this machine. I will soon have access to it and look forward to taking a closer look at the device and firmware.
I’m sending you a reply in the other thread.
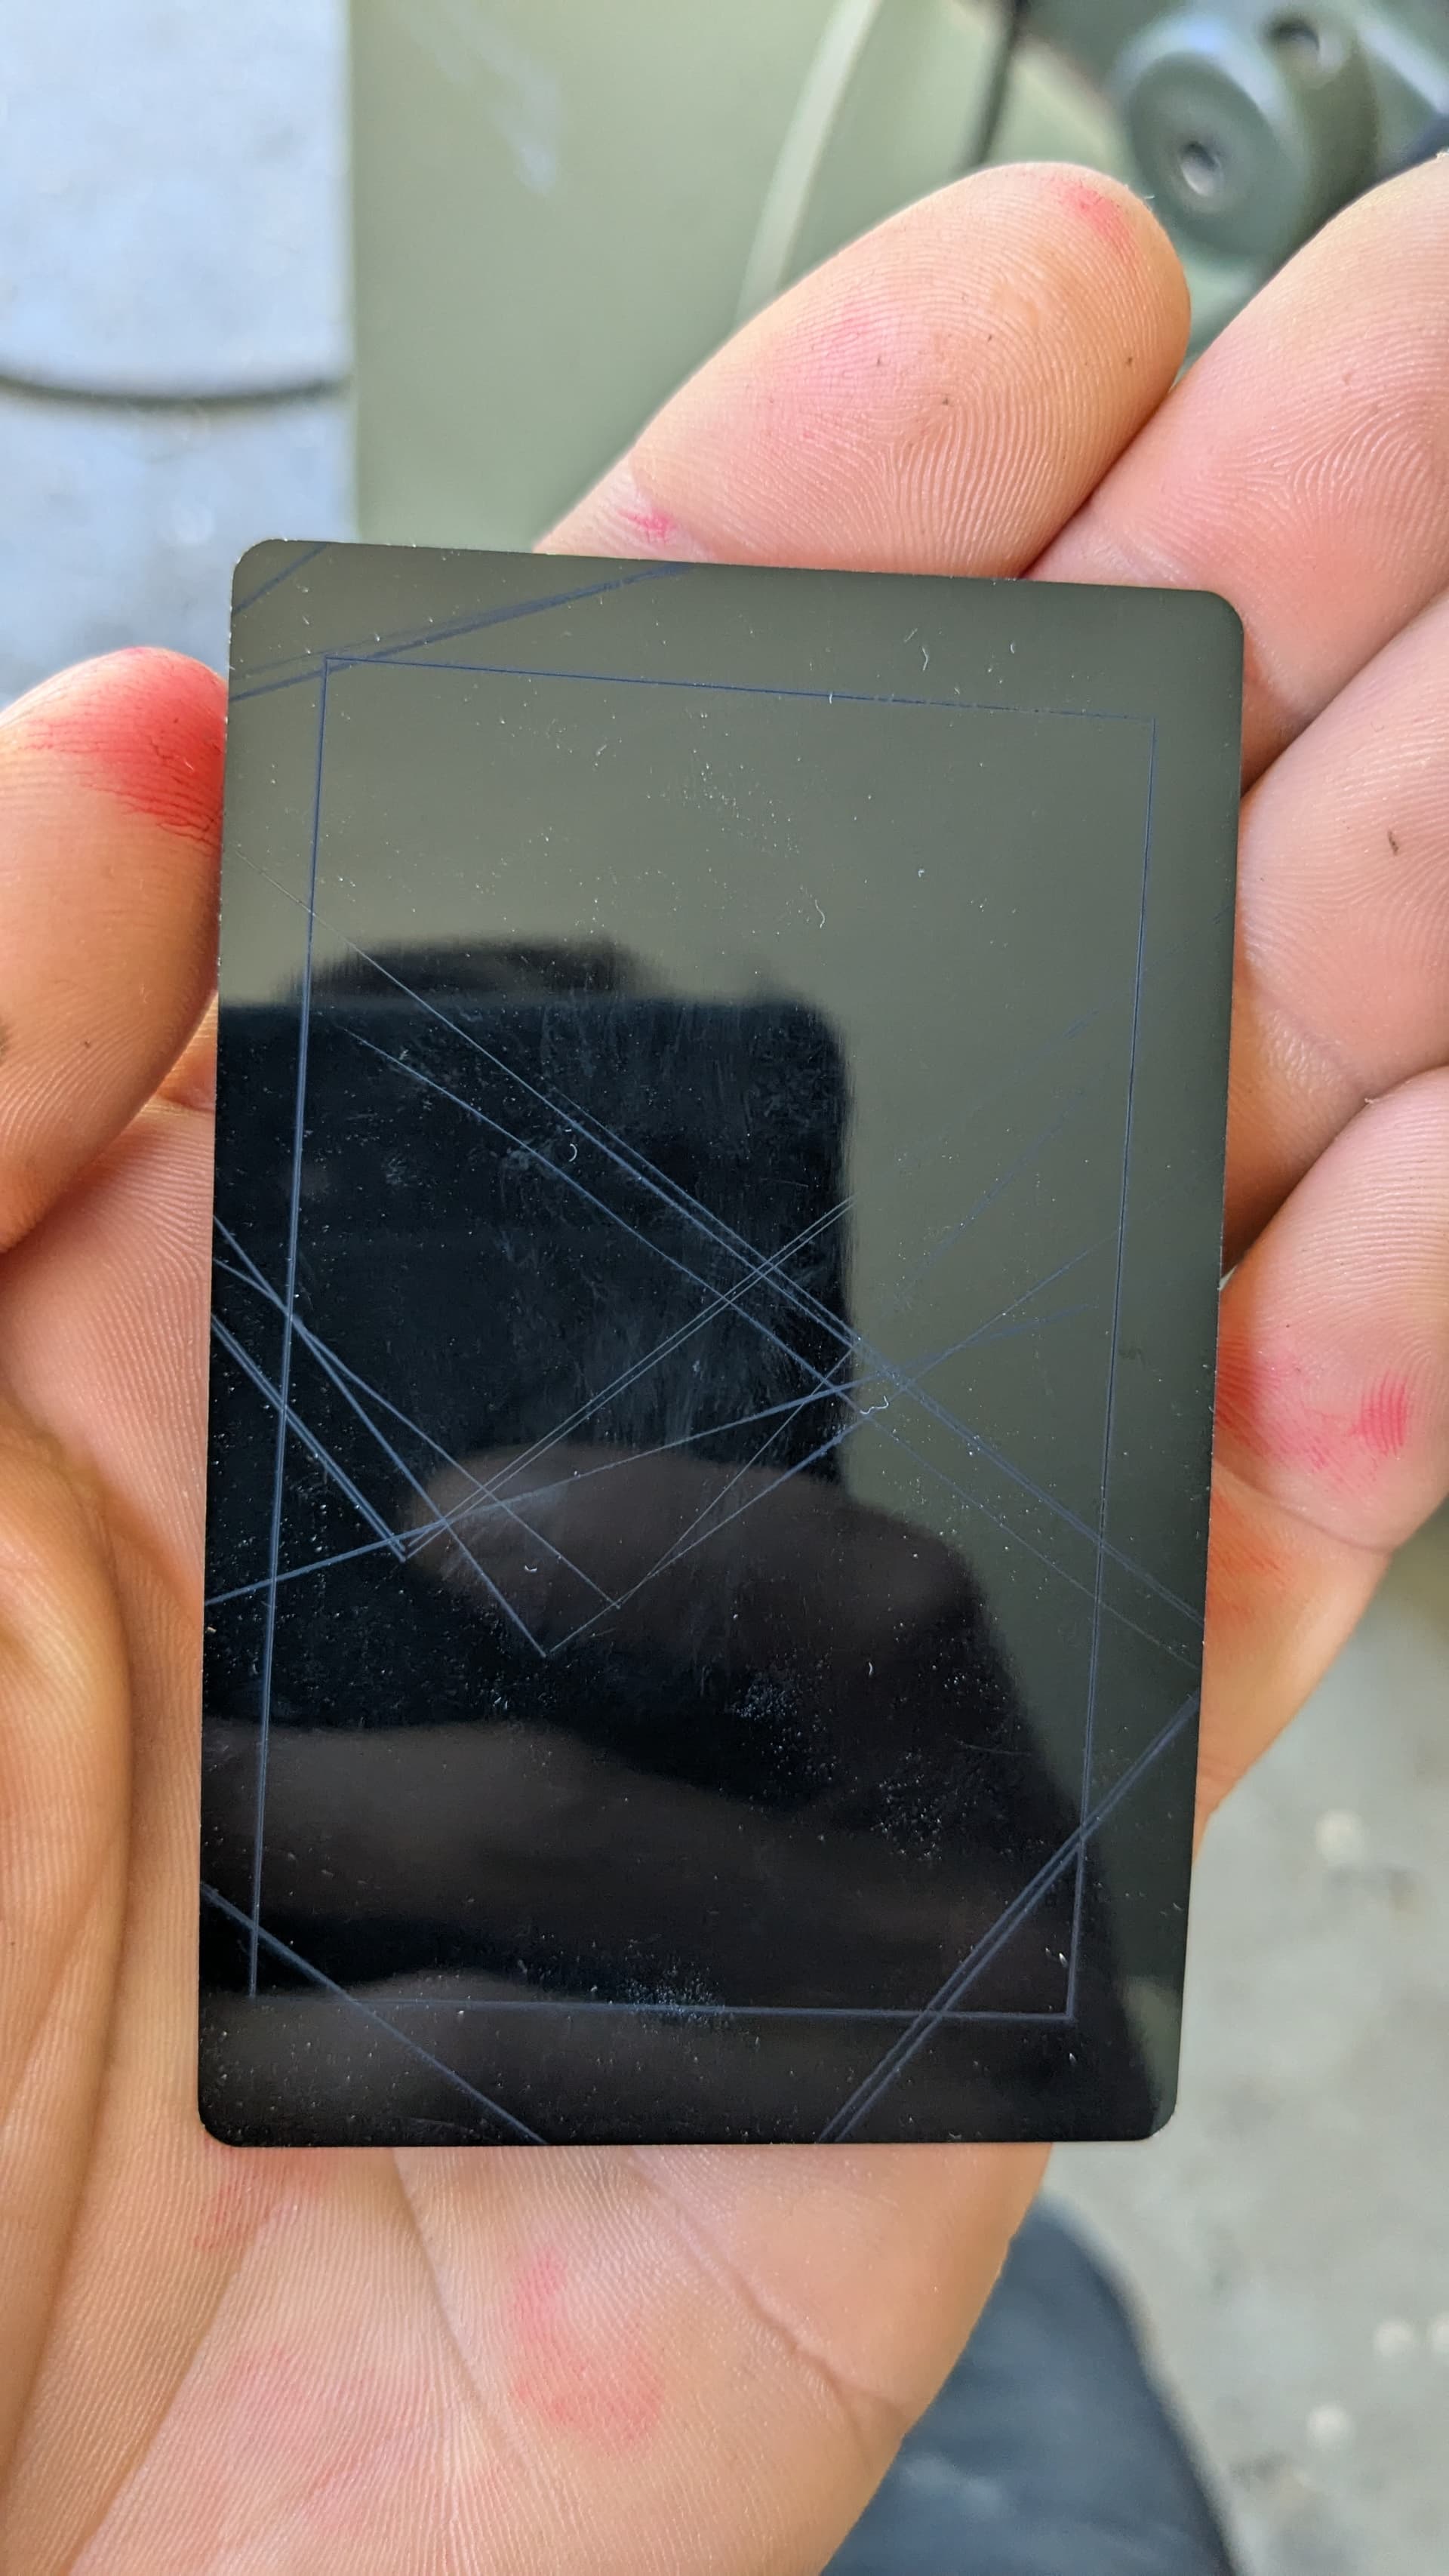
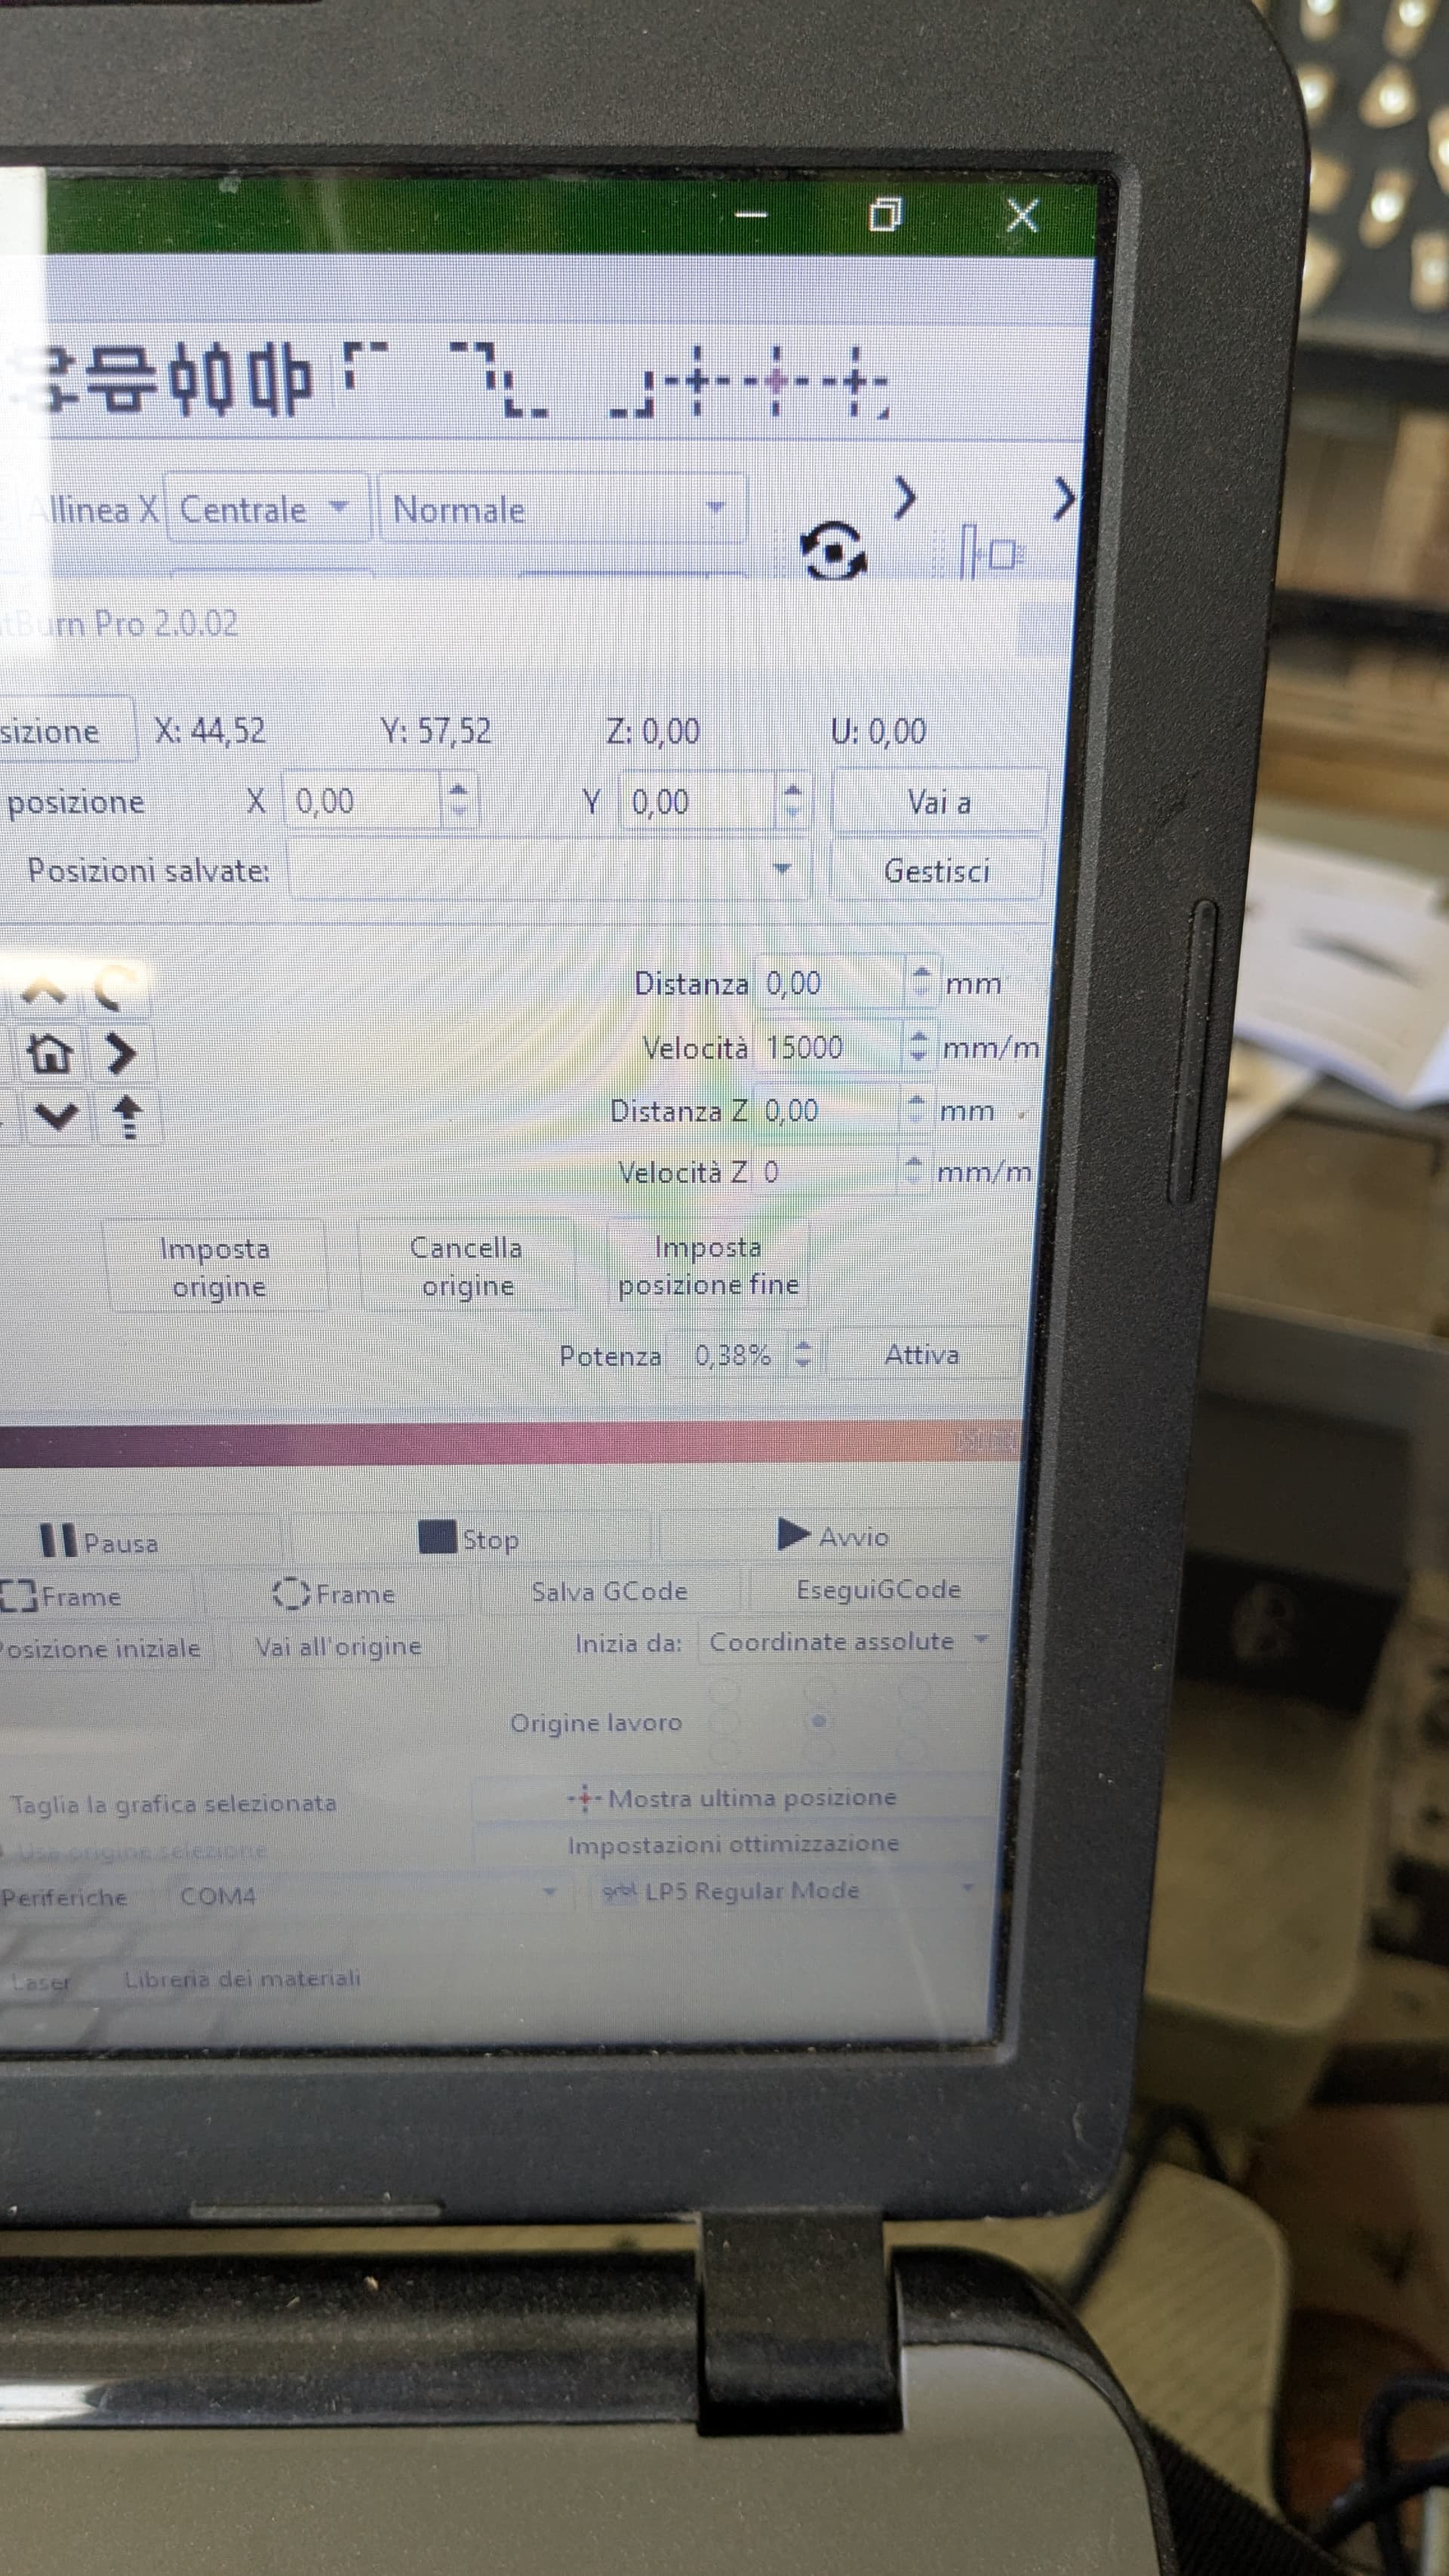
I updated the software to the latest version. Now I could lower the power during the framing phase to 0.38%. The problem is that even then it still leaves marks on the object.