I have imported an image and want to make a stamp. But i can’t find the ramp setting, nor do i see how to invert/reverse the image. Can someone help?
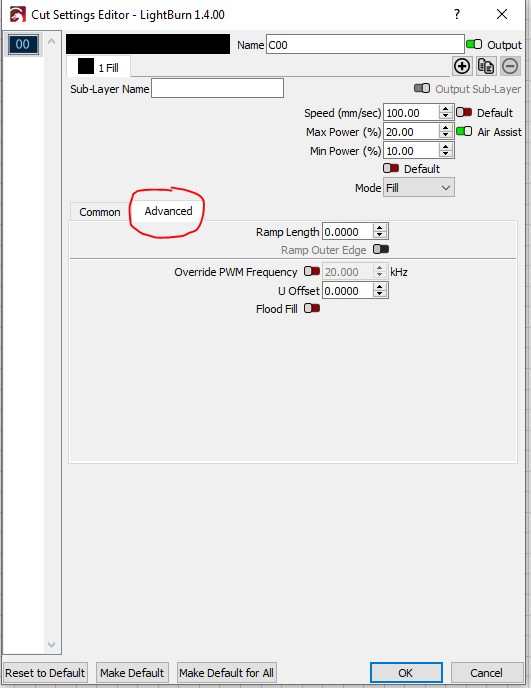
For vector Fills this is available in the Advanced tab of Cut Settings window for a particular layer.
For raster images this is available only for Threshold image type at the bottom of the of settings.
For image layers there is a “Negative Image” selection in Cut settings.
For vector designs you can negate the image by surrounding the existing design with a shape present on the same layer as the rest of the design.
I was able to flip it, but did not find the “negative Image” selection in the Cut settings…
Can you post a screenshot of LightBurn with the Cut settings window showing?
Note that you’re dealing with vector graphics so there won’t be a “Negative Image” option in the settings.
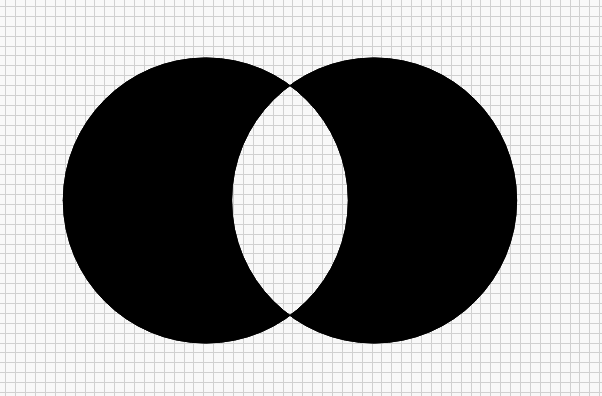
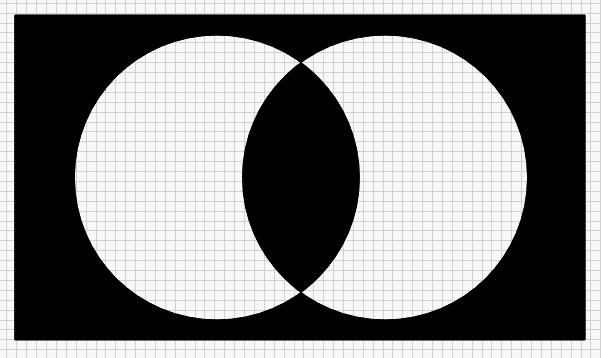
The way that you get a negative space with vector graphics is by having overlapping portions of two shapes.
See this example where the overlapping portion of two circles results in a negative image:
It looks like you already have a rounded rectangle around the letter and star design. This means that the white negative portions of the design won’t be burned which I suspect is what you already want. If you wanted the inverse of this then either add another rectangle around the whole shape or simply remove the rounded rectangle. Note that only shapes on the same layer will interact this way.
One more thing that you should look at for stamps is the “ramp” feature. This would available in the “Advanced” tab of the fill cut setting. However, this is not visible in your screenshot likely because you are in Beginner mode. You can disable this in Edit->Settings.
Yes, you are right. I tried several things, bringing in as a vector file (and quickly found that i could not get to some of the cut setting features). If i were to bring in as a .png or .jpeg, i am thinking i would be able to work with ramp and negative image features…
Your examples above are SUPER helpful. You are correct in that I do not want the lettering burned/engraved; rather, I want the lettering to be raised (that is what i want to show up on the stamp). In the first screenshot above, i have a border (line) around the red rectangle - i do want this border to show up to provide a boundary around my stamp. Do i need to do anything else to get this border reflected on the stamp?
Use the offset tool to create an outline either larger or smaller than the current shape at the thickness of the border that you want. Make sure both the existing shape and the new shape are on the same layer.
You are in Beginner Mode, so some things are not available. You can turn off Beginner Mode in Edit/Settings in the Upper Left corner of that screen.
1 Like
So i did turn off beginner mode and found the ramp feature. I will say that the lettering didn’t seem very ‘raised’. I had the max power set to 45 Max and 40 min (using my 50w laser). i wonder if perhaps my 150w laser would produce a better ramp effect?
You may need to run several material tests to find the desired depth of results. You are removing material to create these ‘raised’ shapes, so you want to remove more material to have these text shapes stand a bit more “proud”. The combination of the speed the laser is traveling and the power being deposited, determine the depth of cut of any given material. Running a few tests on some scraps to find the right settings for your laser and material can save a lot in the long run.
Hello, i’m trying to find the ramp setting so i can make a rubber stamp, using a CNC laser (Ruida controller). Also, how to i mirror the image?
The ramp feature can be found in the ‘cut settings editor’ under the ‘advanced tab’, however it should be noted that this feature is not available for image files
Please don’t double post… it takes time to help people. Double posting takes more time for both of us and creates confusion.
See if this helps you out…
There is always the Lightburn Documentation you can reference.
Good luck
![]()
1 Like
Hey Jack,
Apologies about the redundancy - it certainly wasn’t intentional. I kept getting error messages when trying to submit/log my issue.
Let me see if i can navigate through the steps provide by @sensor. This is my first attempt at producing a stamp. I will refer to the software documentation; thanks for providing source file/link.
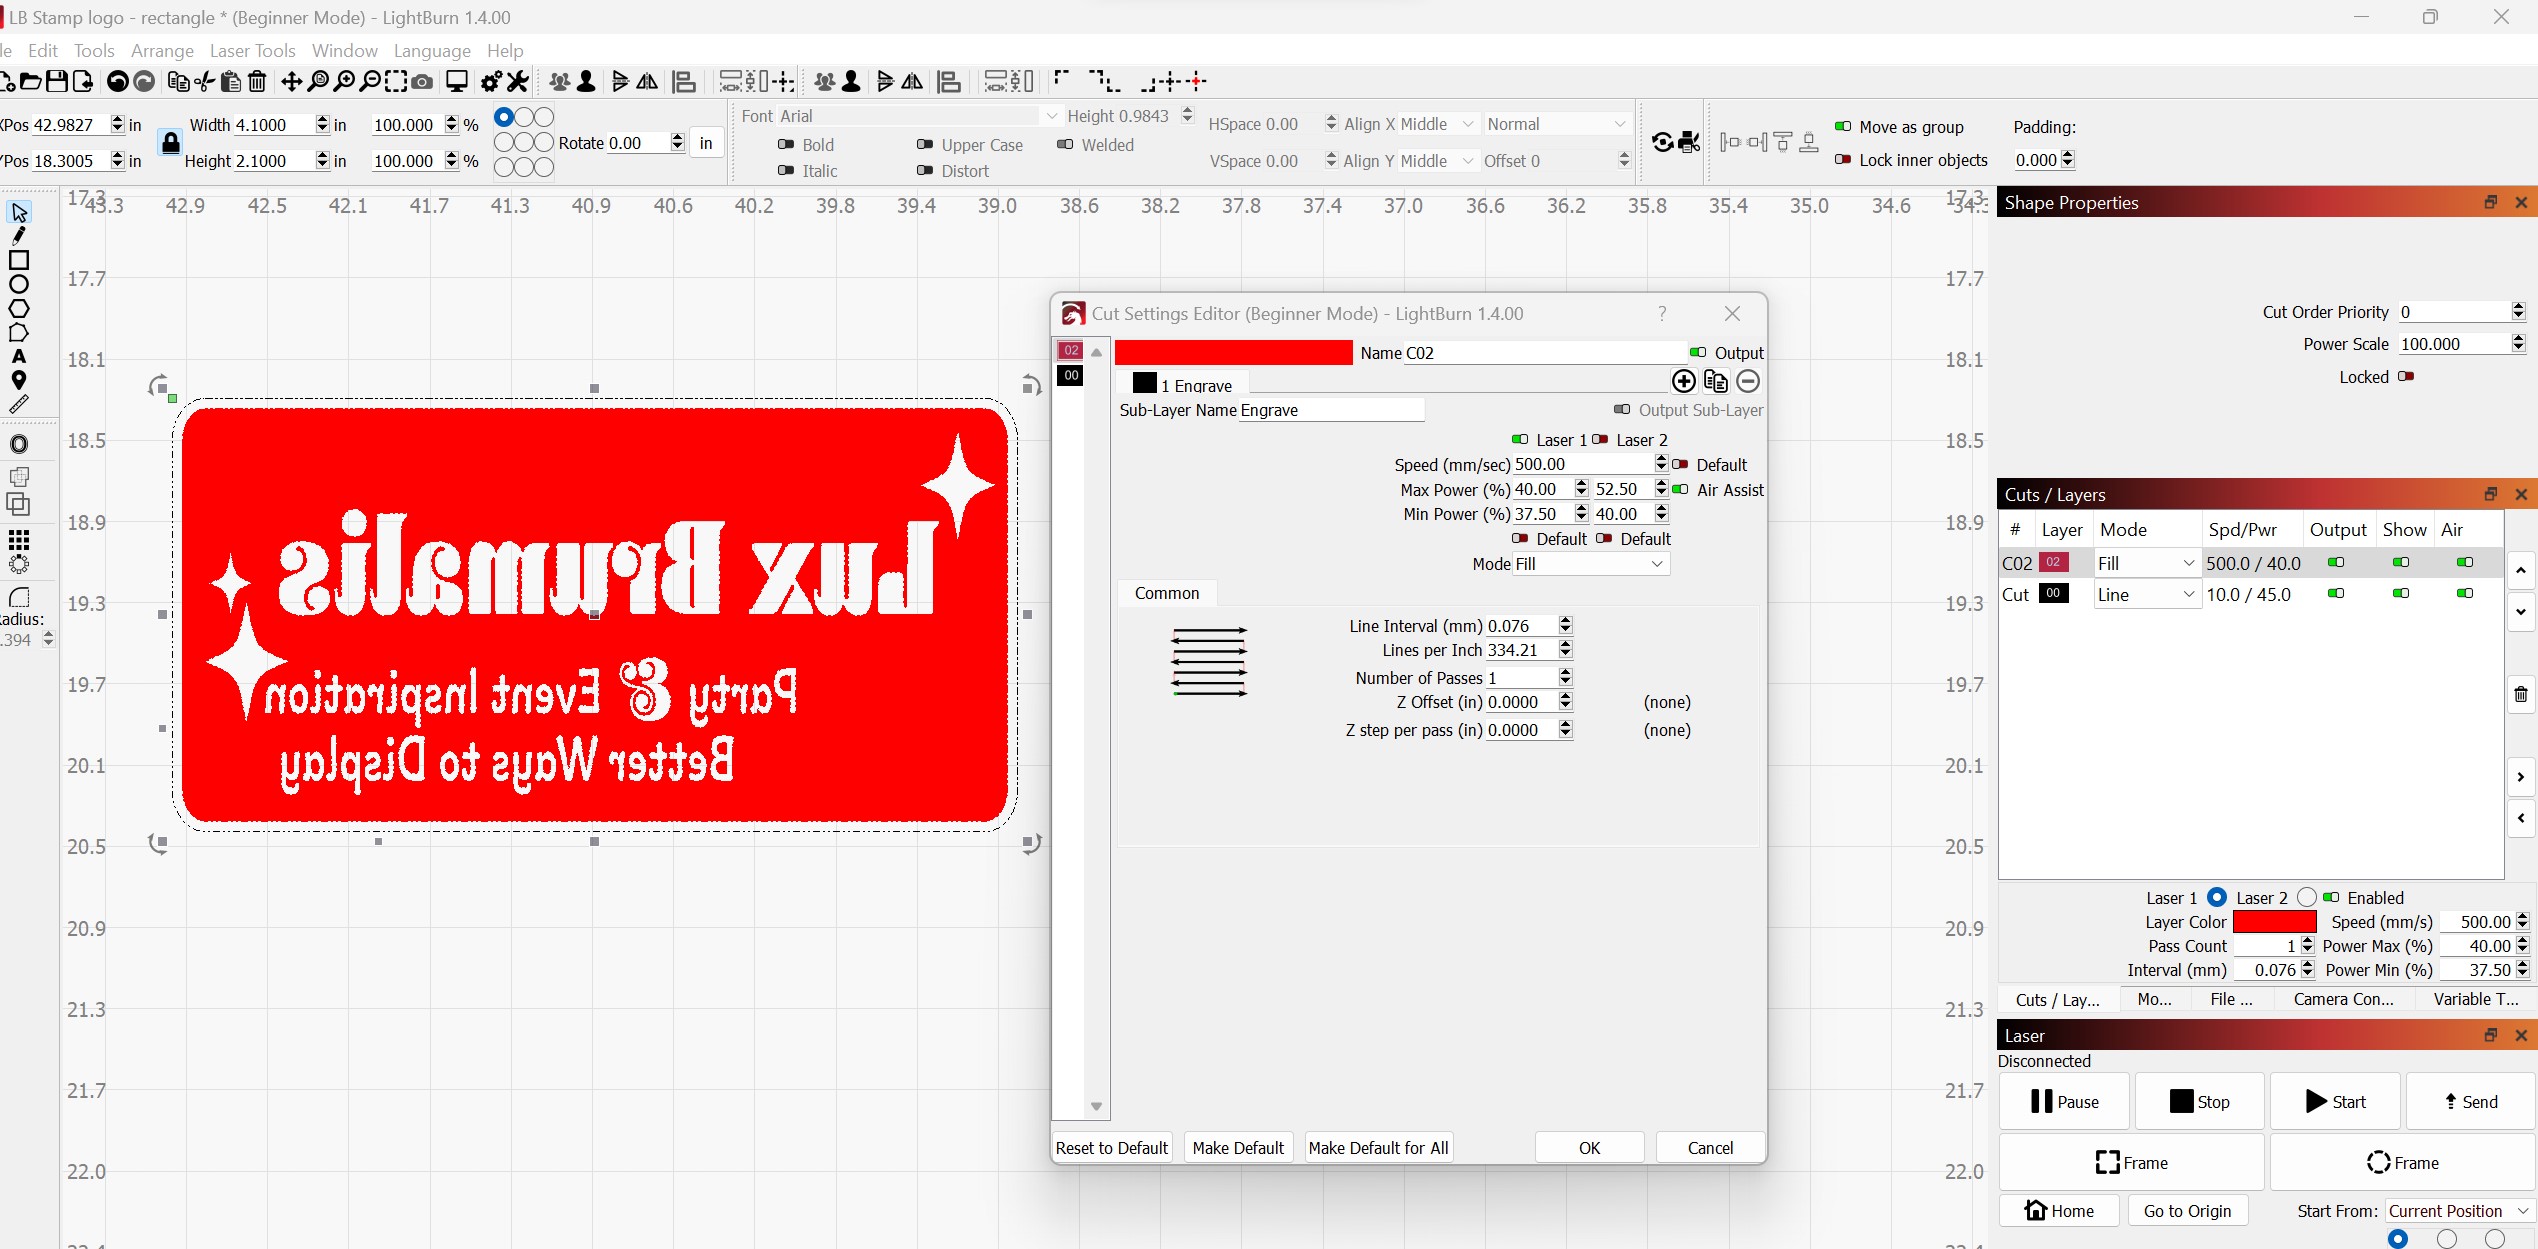
Hi all, so i am not soley working with an ‘image’ - i have added text and traced a small star. I have arranged (flipped horizontal) what i want to have engraved. Will this work? I am hoping that the red area is what will get engraved, but i am not able to see a way to set the ramp.

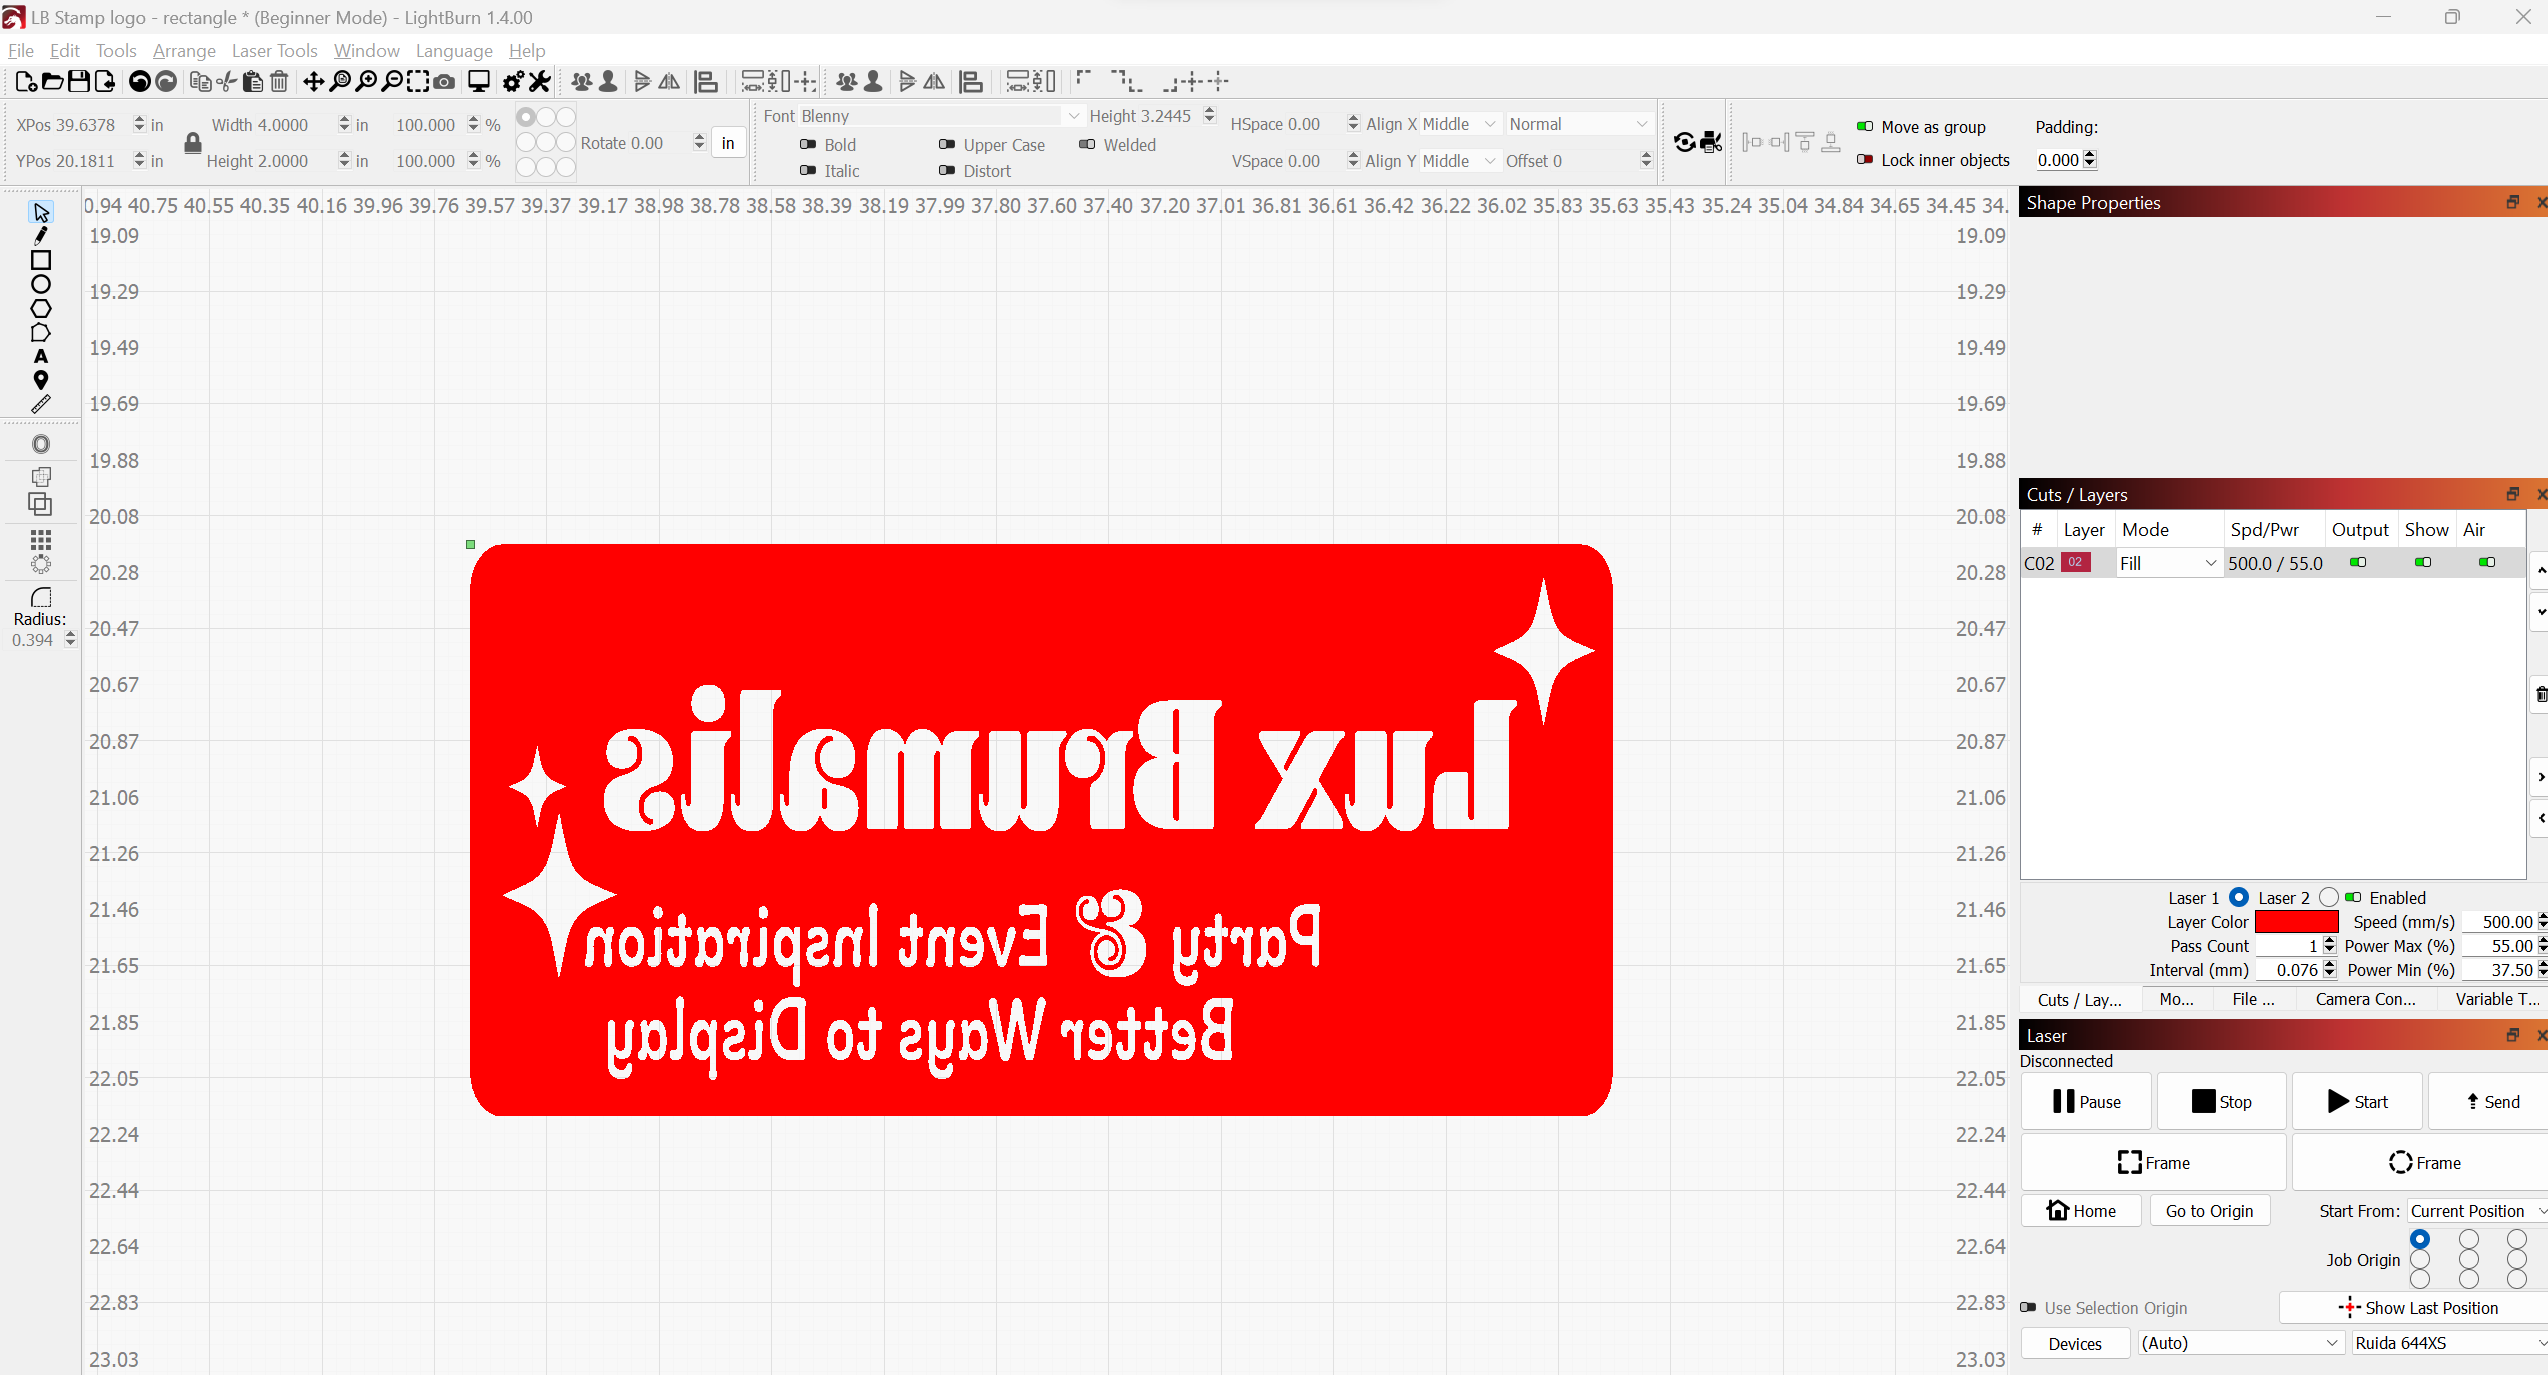
Yes, in this case, the Red is what will be engraved, leaving your text. Ramp settings are in the Cut Settings Editor in the Advanced Tab:
I found it! (as soon as switched off 'Beginner Mode). Can you tell i’m not very good?
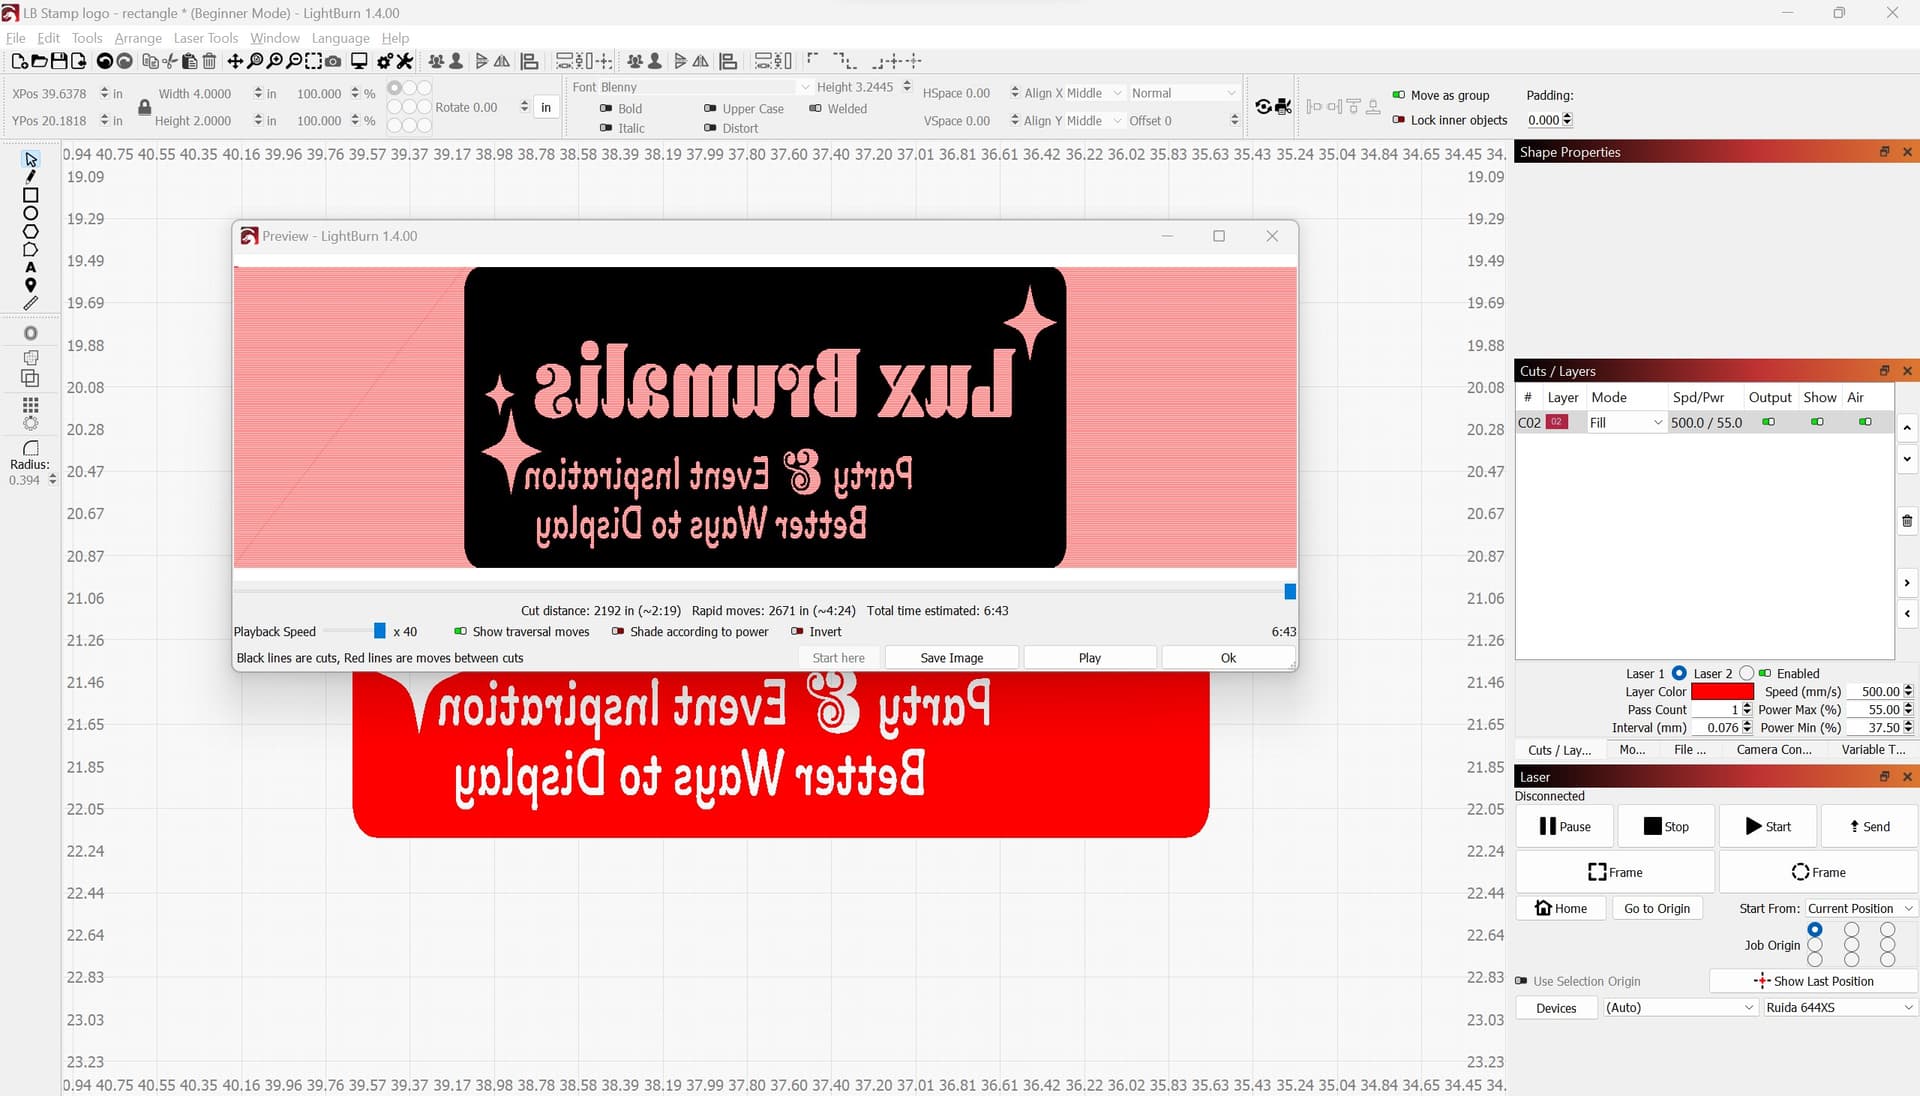
I will have to say, i found that the lettering was not very ‘raised’ - even though i adjusted the ramp setting. I am using a rubber sheet that is for laser engraving - but i was not very impressed with the result. I will give it another go with my 150w laser to see if i get a better result. ![]()