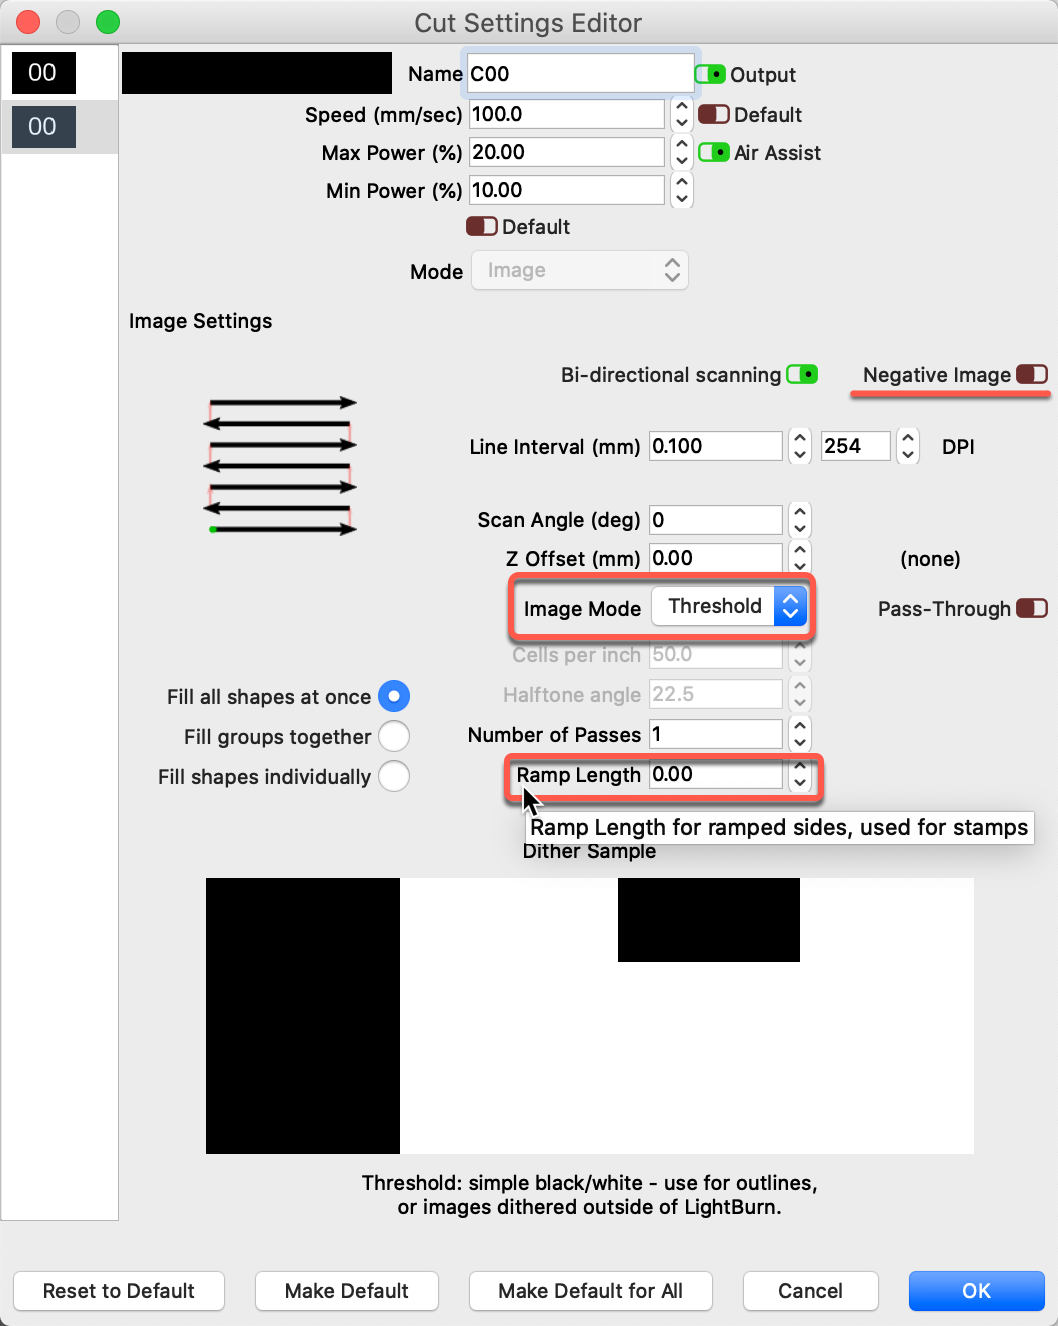
Sorry, I missed that. As @sensor points out, you can achieve ramping, which provides better support for the detailed parts of an engraving. You will also want to flip your artwork, as it should be mirrored if used as a stamp. You can use ‘Negative Image’ to flip raster bitmaps or images for stamp making.
←→
https://lightburnsoftware.github.io/NewDocs/CutSettings-Fill.html#ramp-length - Fill Settings / Ramp Length
Fill Settings - Ramp Length
This setting can be used to slope the sides of an engraving by varying the laser power, and is useful if you create rubber stamps, particularly if the designs have thin regions that need extra support. The ramp length controls how far from the design the slope will extend.
Note: On a DSP controller, the ramp varies the laser power from Min Power to Max Power, so you must set these differently to get a ramped side. Typically you would set Min Power to be just above the firing threshold of your laser.
And…,
https://lightburnsoftware.github.io/NewDocs/CutSettings-Image.html#ramp-length - Image Settings / Ramp Length
Image Settings - Ramp Length
Length to ramp in and out of the sides of engraved features. Typically used for rubber stamps.
If you search this forum for ‘stamp making’, you will find some useful tips and examples. Here are just a few I picked for review. ![]()
And…