Cutting 12mm clear extruded acrylic on a 100w CO2 source with a 5" lens at 4mm/s 85pwr. Cut is always really nice on the edges but on almost every job when the beam hits one of the slats it will ignite (presumably the fumes?) underneath the material but NEVER on top of it. I was wondering if modifying the front of the machine to add some large case fans to push air through the machine / push the fumes away from the beam might help at all? But after suggestions before we start hacking up our machine!
Vapor of methanol, formaldehyde and acrylic nitrile is formed by heating acrylic. When mixing forholed with oxygen it is appropriate it will burn.
Therefore, it is a good idea to “change” the ratio of this gas mixture.
You can easily test it with compressed air, install an air hose under machine bed (material) and blow in some air, preferably where it happens ![]()
So yes, it’s a good idea you have.
I think the problem is the buildup on the slats?
I don’t know if you can get any kind of air flow under there, can you?
I cut acrylic with almost no air pressure, only good circulation. I also have it 5mm above a steel sheet.
![]()
Is your acrylic 12mm thick?
Also 85w at 4mm /sec from a 5” lens will create a ton of fumes
Cheers
![]()
Sas
I like to raise the acrylic off the cutting bed slightly. I have found on my honeycomb bed that when the laser hits the metal underneath it makes a mark at each point. Also some flare up can occur when gasses are trapped under the material. Use a small piece of scrap material on each corner to lift the acrylic up a few MM to allow more airflow underneath.
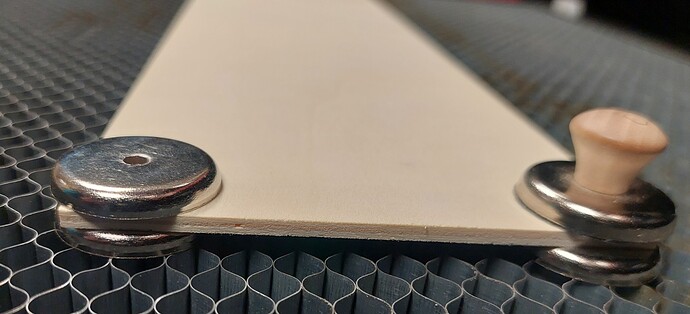
I do something similar to soniclab, except I use 110lb neodymium magnets when I cut ply or acrylic (it really helps flatten out warped ply).
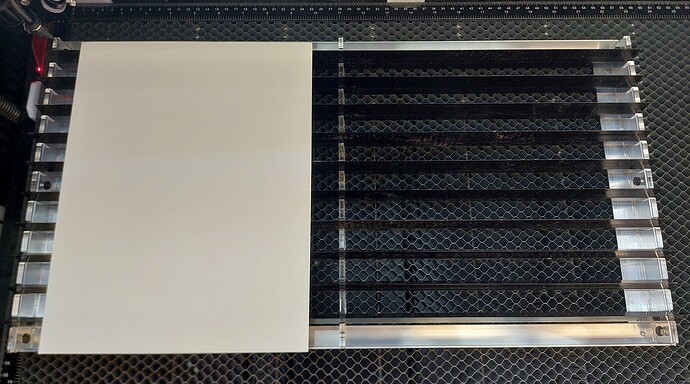
I also made a jig to hold the unused knife blades that came with my laser. I had the 3/4 aluminum L laying around, and I cut the knife stands out of 5mm acrylic. It’s real handy when I’m cutting alignment targets out of card stock.
Just out of sheer curiosity and the want to expand my knowledge. How does the 5" lens contribute to the amount of fumes?
@soniclab @bionicback321 standing off/raising the acrylic would definitely work and is something that we’ve tried in the past but the only problem is some of our jobs extend right up to the edges of our sheet size, sometimes only leaving 1-2mm of excess material so we would end up having to sacrifice some of our final product. Was ideally looking for a way to not have to miss out on any precious material!
For anyone interested too: we’ve decreased the volume underneath the material for the time being so our extraction system doesn’t have to work as hard to clear such a huge area and it seems to be having the desired effect so far! However, we may also introduce some extra airflow to see just how good we can get it!
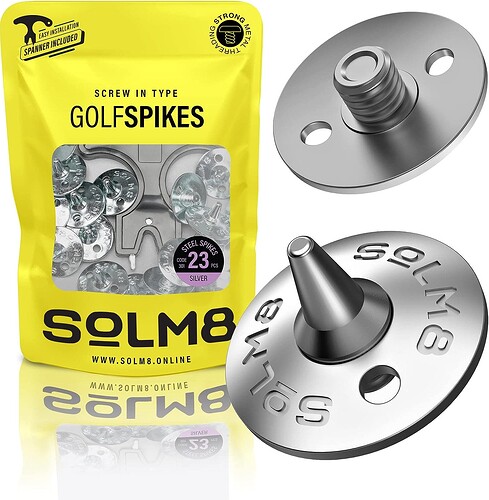
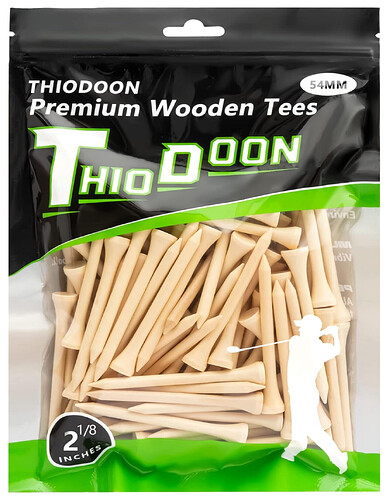
I bought a bag of these to lift the material off the honeycomb. The threaded part fits perfectly in the honeycomb. The only issue I have had with these is if the honeycomb is uneven and/or the material is warped then the material tends to have a wobble at times. I have not spent much time trying to figure out how to correct this yet but thought I would throw it out there.
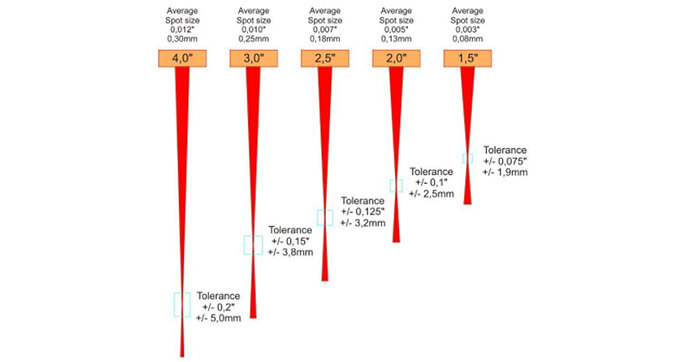
Short Answer: Bigger lens = bigger beam Smaller Lens =smaller beam. Bigger beam cutting more acrylic generates more fumes then smaller beam cutting less acrylic.
Long Answer/Analysis:
Acrylics engrave nicely with low power and high speed. The desired designs can be produced with a relatively low-power laser. If the power is too high, some deformation or fire in the material may occur.
Shorter focal length like 1.5" means a smaller focal spot and focal tolerance, which is really suitable to laser engraving a high DPI photo/picture/graphic.
For laser cutting, a longer focal length can guarantee cutting quality with a crisp and flat edge. under the circumstances, 1.5” and 4.0" are more suitable choices.
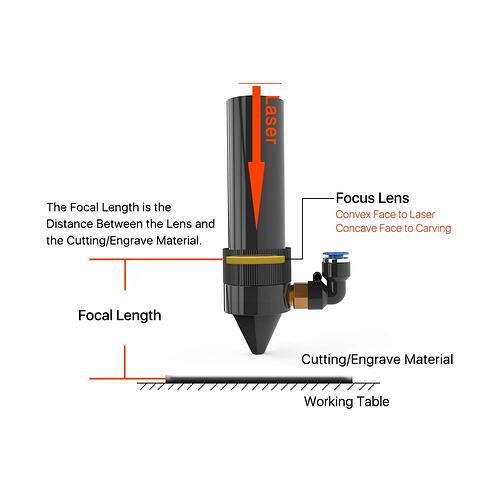
The longer the focal length the deeper the cutting distance.
1.5” Focus Lens
If you are requiring extra fine engraving such as fonts below 6pts, the 1.5" lens is optimum. This is a short focus lens has a smaller minimum spot size but spreads out more quickly after reaching the focus making them better for fine detail but not good for thick cutting. Best used for fine detail engraving and thin lines.
Uses: Fine Engraving for fonts as small as 6pt.
Spot size: 0.003”
2" Focus Lens
The 2" lens has a good combination of fine engraving and thin cutting. The short focus lens has a small minimum spot size but spreads out more quickly after reaching the focus, making them better for fine detail but not great for thick cutting.
Uses: All around lens for engraving and cutting up to .25” material.
Spot size: 0.004”
Lens
5” Focus Lens
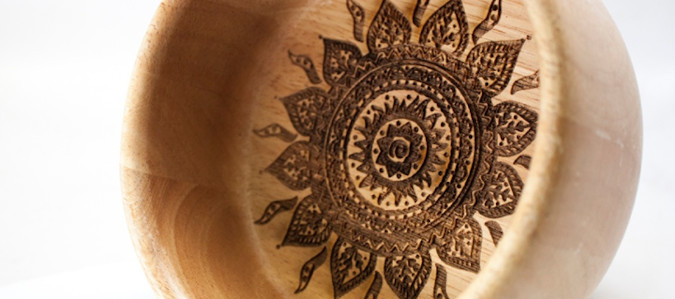
A long focus lens keeps the focus longer allowing for straighter edges but does not focus down to as small a minimum spot. This optic is appropriate for cutting soft material like thick foam. When focused, the 5" lens has a large spot size which prevents it from being ideal for cutting harder materials like wood and acrylic. Since the spot size is larger, that prevents it from cutting harder materials like wood and acrylic with ease. For example, it is a good lens for engraving into deep bowls, where you need more working space.
Uses: Long lens for engraving from a distance for irregular objects or for cutting thick, non dense foam.
Spot Size: 0.01”
Not an expert in this field however I do know more than the average chicken ![]() little with a laser.
little with a laser.
Cheers
![]()
Sas
I use something from the golf industry as well to elevate my work from the honeycomb table .
I trim the top off 3mm as suggested by this fella and it work awesome for me
Cheers
![]()
Sas
I like this as well. Much easier to come by than the screw-in golf spikes. I was only able to find one supplier on Amazon. Apparently they are an old design.
Do you have any issue with uneven honeycomb (mine sags in the middle) and warped materials?
The one thing I do not really like when elevating materials in this way is if the cut piece falls during cutting and there is a spike under the cut piece it can cause the piece to not fall all the way through and have an edge stick up which the laser head could hit. It has happened to me. I had to start over and spend some extra time making sure the spikes are positioned well. But that is not always easy to do.
Living in the great Pacific Northwest you can only imagine the humidity we have and its love hate relationship it has with my birch plywood ![]()
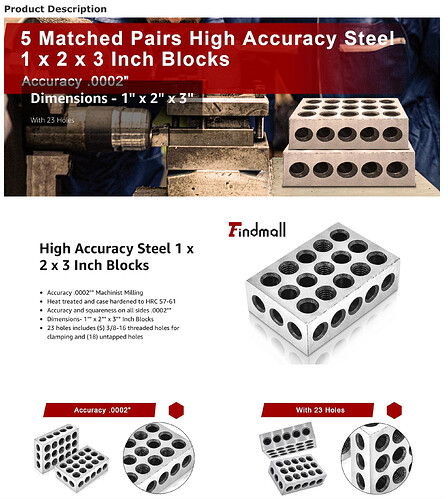
I found that by placing steel blocks such as these helped with keeping the material even
.
Also these type of magnets that are milled to hold down 3mm and 6mm/1/4in work well. I bought some very well made here in USA ![]()
Also other longer versions available
https://www.etsy.com/listing/1198845670/
I find that cutting of 3mm from the top of the golf tee allows your material to drop closer to the honeycomb bed and it does not generate the type of “spike” that would be created as a result of a piece falling and protruding out after it is cut.
Because the distance from the tip of the nozzle above the material is higher then the distance from the bottom of the material piece to the honeycomb.
Cheers
I know exactly what you mean. I too live in the NW and I was surprised how badly my 1/4" BB warps ![]()
I have found ways (although I really like those magnets you linked to) to hold down my work when cutting on the knife blades and directly on the honeycomb, but when I use the golf spikes, the unevenness of the honeycomb and any warping of the material makes the boards wobble because the surface area is now (MUCH less) a handful of points rather than a somewhat flat surface. And it is almost impossible to implement a way to hold the material down to the spikes without adding more unevenness (I have tried). Not sure if this is making any sense.
I can see the advantage of the lower profile of those spikes. My spikes are slightly taller.
Where do you live neighbor ![]() ?
?
I live in Portland. Where are you at?
![]() Vancouver, Washington over the river
Vancouver, Washington over the river
We should meet over a cup of coffee sometime after the holidays.
Yeah for sure.
