Hallo zämma,
bin absoluter Neuling und bräuchte eine Kontakt mit jemandem, der auch einen solchen Laser hat. Ja, ich habe die Bedienungsanleitung gelesen
In der Bedienungsanleitung steht, die Ausgangsposition des Lasers wäre vorne links. Die Stoppschalter sind aber so, dass sie hinten rechts sitzen. Hat das eine mit dem anderen überhaupt etwas zu tun?
Dann war der Rahmen schon zusammengebaut und verkabelt bei Lieferung, anders als in der Bedienungsanleitung und im Installationsvideo erklärt; und auch die Stoppschalter waren schon montiert. Deswegen bin ich etwas verunsichert.
Hello zämma,
I’m a complete newbie and would like to get in touch with someone who also has such a laser. Yes, I read the manual
The instruction manual states that the starting position of the laser would be at the front left. The stop switches are located on the rear right. Does one have anything to do with the other?
Then the frame was already assembled and wired upon delivery, contrary to what was explained in the instruction manual and installation video; and the stop switches were already installed. That’s why I’m a little unsettled.
Ja genau, aber weder auf diesem Bild noch auf dem Installationsvideo sieht man die Kabel, deswegen bräuchte ich ein Foto von jemandem, der genau diesen Laser hat.
Vielen herzlichen Dank! Auf dem ersten Video kann man alles viel besser erkennen, als auf dem Video, das vom Handbuch aus mit QR-Code verlinkt ist. Jetzt bin ich mir sicher: Alles richtig verkabelt.
Leider ist es mir noch nicht gelungen, 3mm Sperrholz zu schneiden: im Film sieht man, wie sie 4mm Sperrholz schneiden, das geht bei mir nur mit weniger als 300mm/min und 100 % Leistung, schade.
Did you setup your machine as plain GRBL?
Is your laser $30 = S-Value_max = 1000?
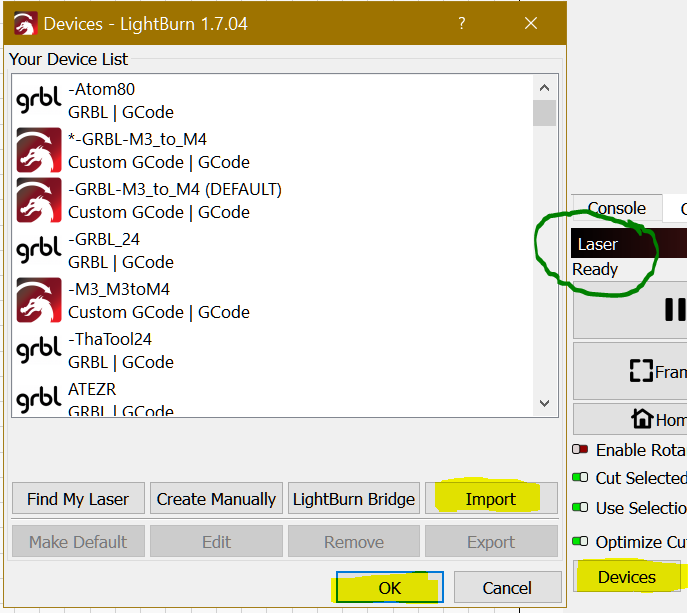
Drag this file over your Lightburn window or Click Devices button, Import to your Devices and make it the default laser. IKIER-K1-PRO–device.lbdev (2.8 KB)
3 things that should get your laser to cut correctly:
Use the focus piece that came with the laser to set your laser focus. If you think that is not the correct focus distance you have to make a focus test to find it.
Set your laser to Standard Mode ($33=1) or Fine Mode ($33=2).
“Macro0_Content”: “[ESP500]\n”,
“Macro0_Label”: “Autofocus”,
“Macro1_Content”: “[ESP501]\n”,
“Macro1_Label”: “Auxiliary positioning”,
the “[” must stand before ESP
But: Great news now everything works fine!
Thank you so very much!
to make you smile: the iKier support team is celebrating the Chinese New Year and will not be available again for a week Happy New Year …
… there are still some problems, hints an help
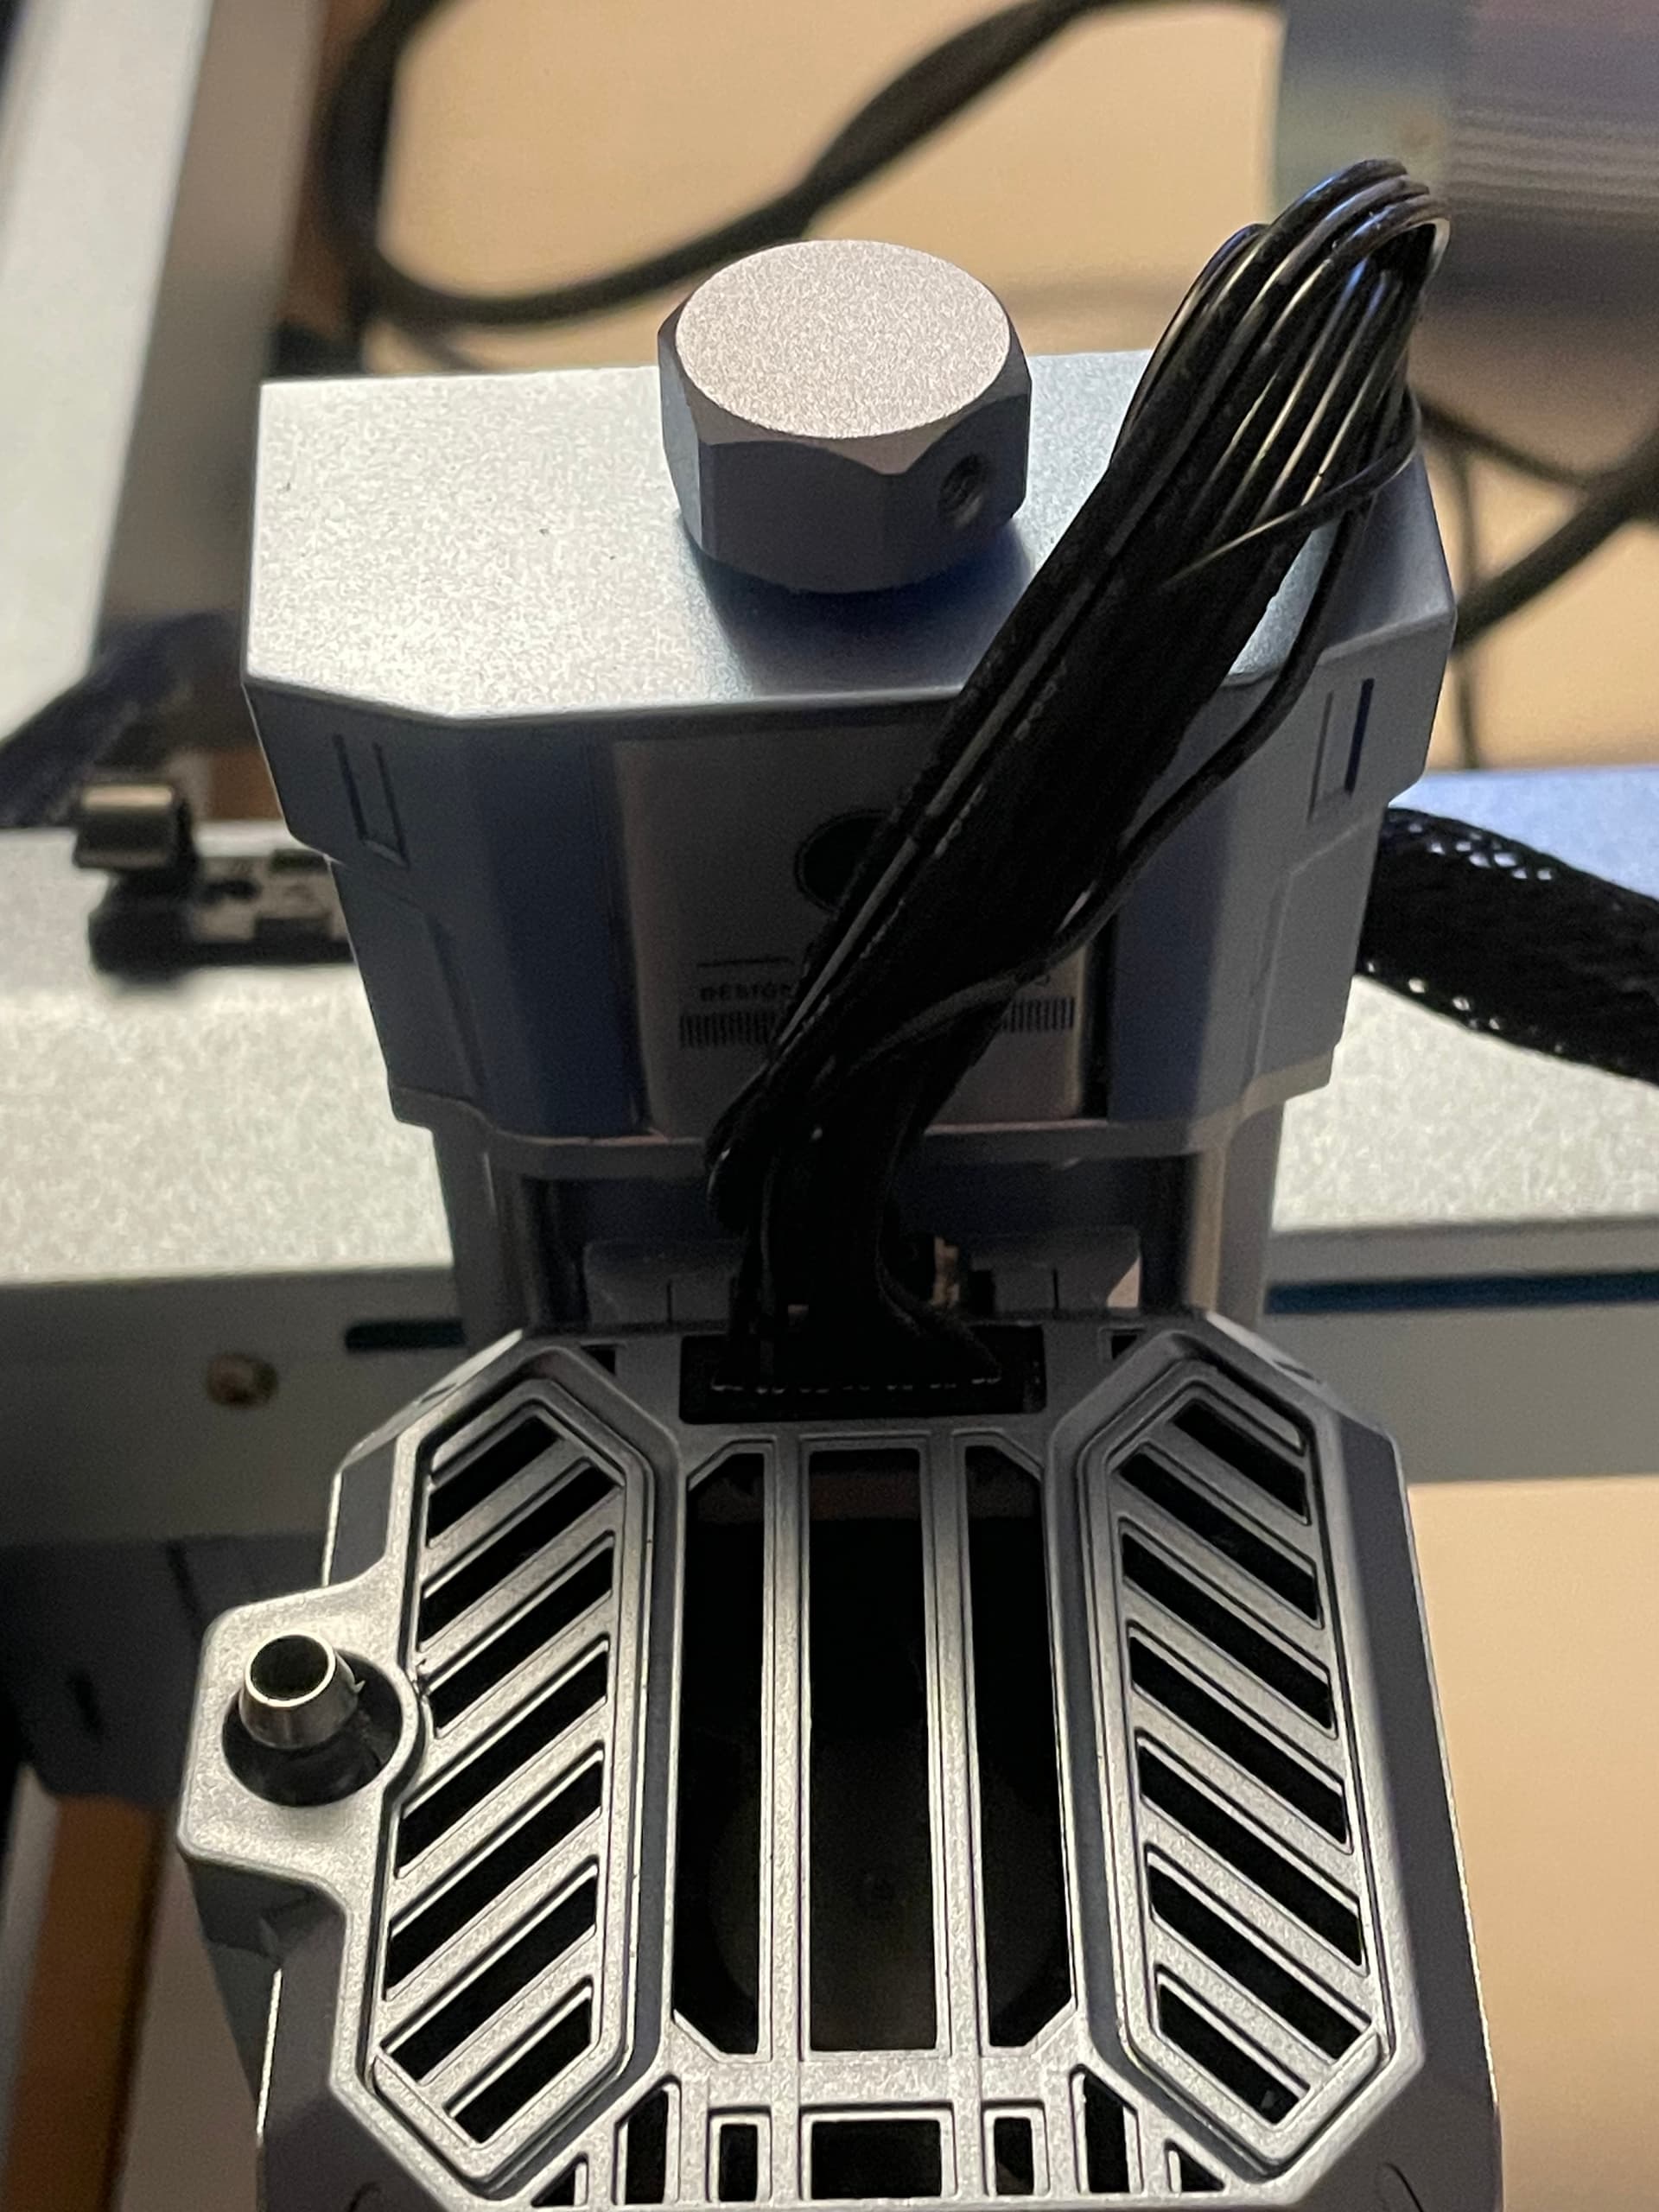
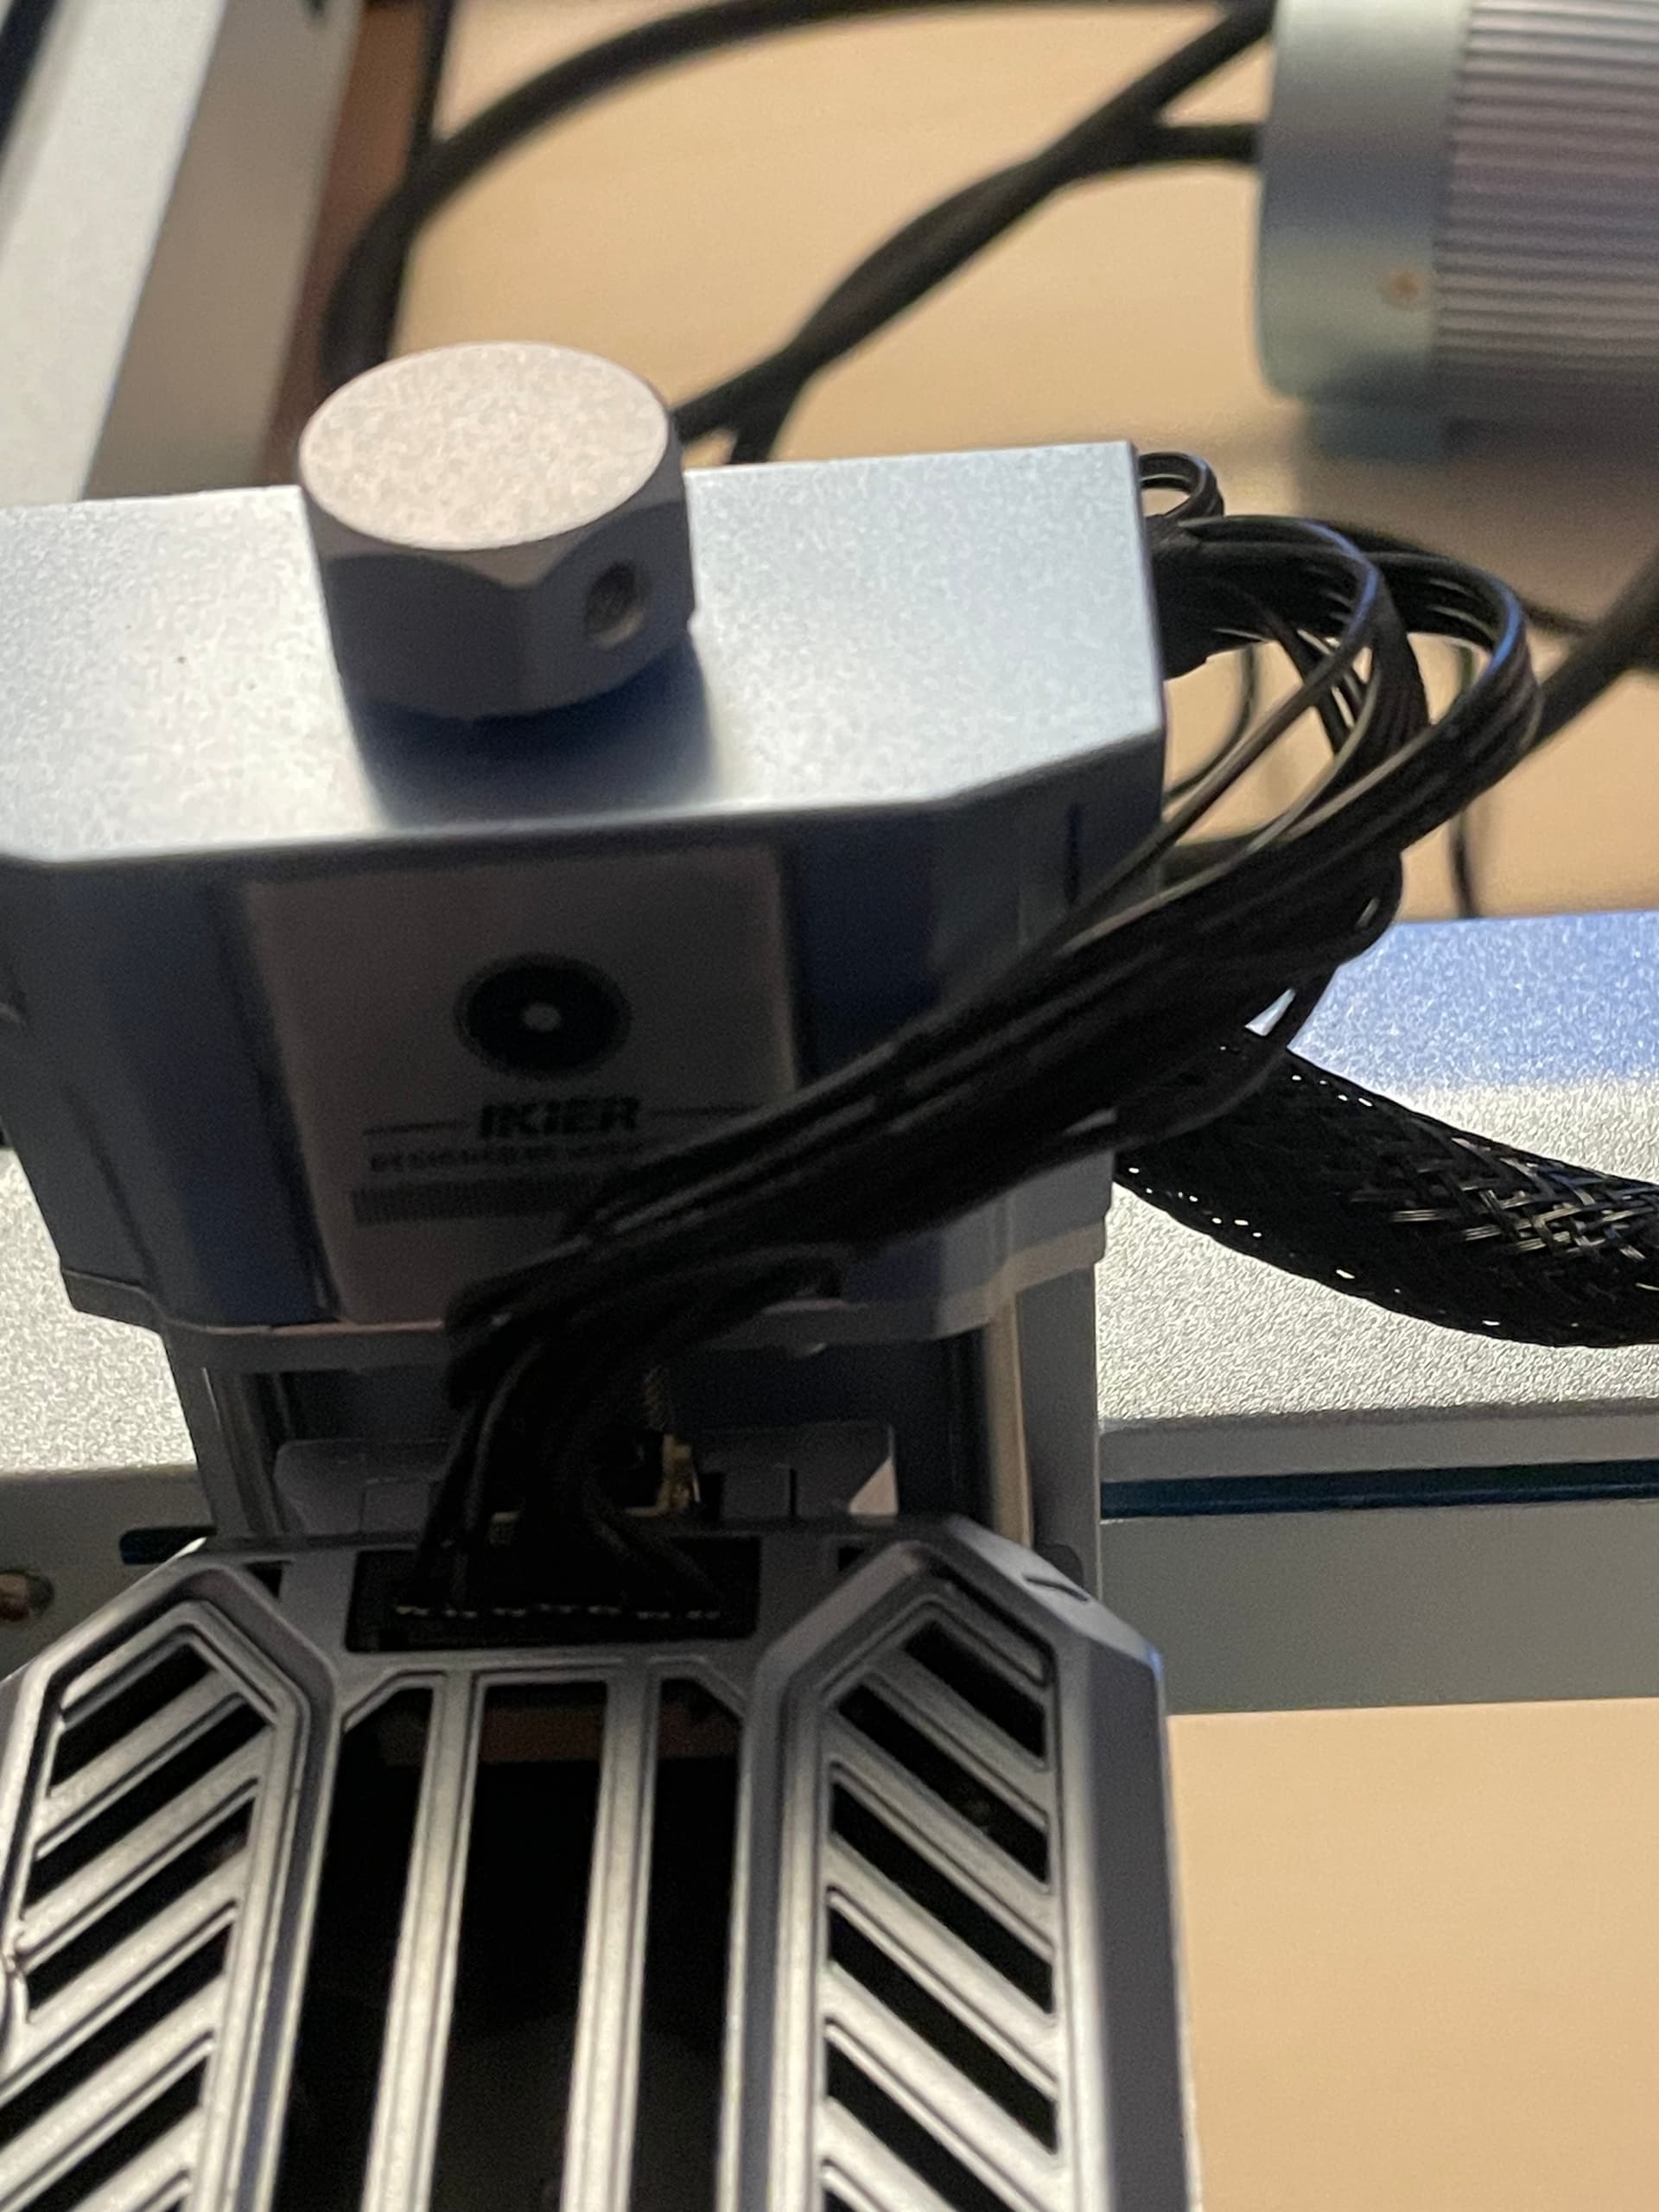
1. The wiring does not work as delivered.
The cable that leads to the laser is either too short or routed incorrectly, in any case it pulls the plug when you use the autofocus. Remedy: turn the cable holder, route the cable around the laser.
**2. The user manual contains a QR code that links to an outdated video. **
Remedy: Thanks to friendly support in the lightburn forum, a link to a more current video and one in German. Thank you for that. [IKIER K1 Pro 20 Watt - #3 by Tilman]
3. Neither the user manual nor the installation video explains what can/should be tested with the “high speed test.gc” file that is on the included stick.
The test did not produce any visible results, after the laser had moved over an area of approx. 250 x 250 mm for about 15 minutes.
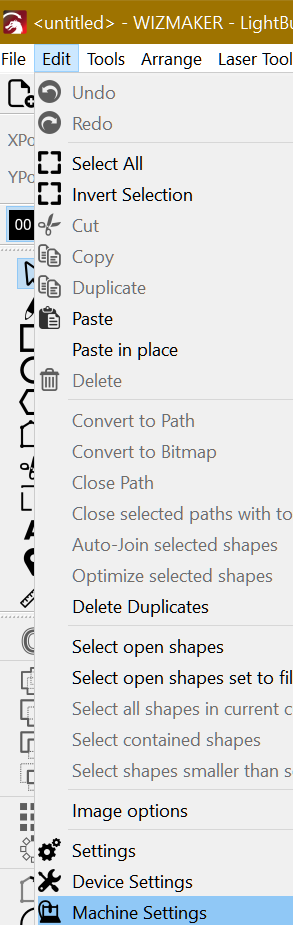
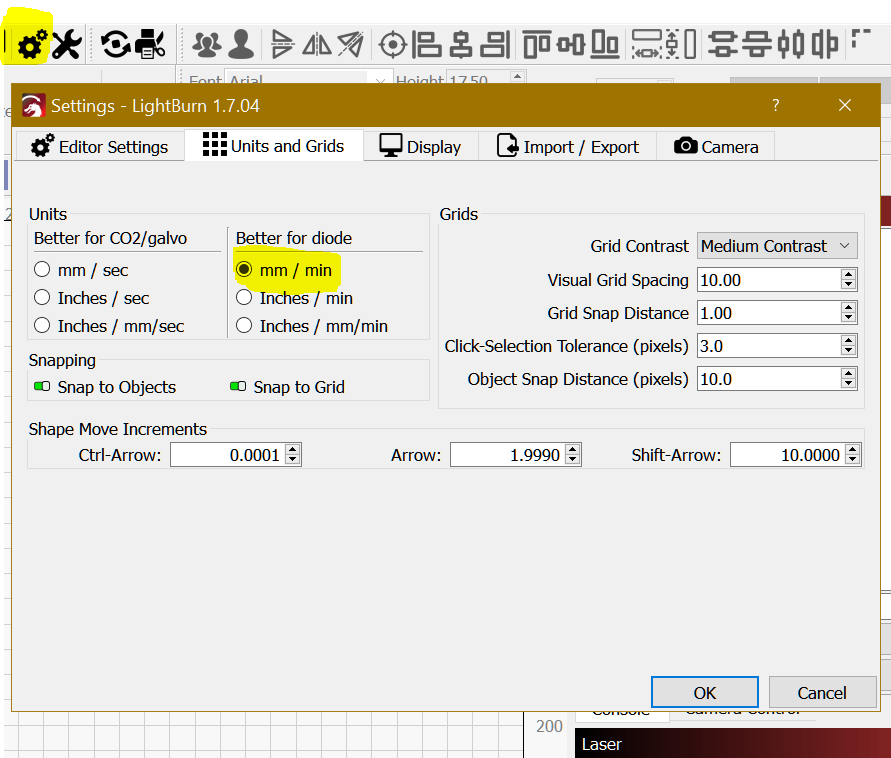
4. The user manual describes the setup in lightburn, but important settings, e.g. for the z-axis, are not mentioned.
5. Neither the operating instructions nor the video explain how to connect to WiFi.
After researching on the Internet and lots of „trial and error“, I can suggest the following procedure:
a. Insert the USB stick provided into the controller, it won’t work without it.
b. Install the iKier app on a smartphone
c. As long as the smartphone is still connected to the Internet (via your own WiFi), select the device.
d. Now(!) select engraver as the WiFi on the smartphone. In contrast to some posts on this topic, “engraver” is not the name of the device, but the SSID of the WiFi produced by the iKier. 12345678 worked for me as a password.
e. If the smartphone is connected to the laser, an image (which must be on the smartphone, no more Internet access at that moment) can be engraved from there.
f. In the menu item “Creation” of this app you can see a small work area… I haven’t tried anything else yet, it’s too complicated for me… but obviously you could also use the laser from your smartphone.
Siehe auch https://youtu.be/JPzcUOW_e8k?t=2319
6. **The cutting results are poor. **
The values for speed and power given in the table by the manufacturer are not sufficient. Cutting 15 mm thick wood - as stated in the advertisement - seems unrealistic when 3 mm thick plywood cannot be cut.
Remedy: A file kindly provided via the lightburn forum. This file can be edited very easily with a text editor. Important: in the macro definition it must say [ESP500] and [ESP501] instead of ESP[500] or ESP[501]. After I deleted all previously installed devices under “Devices” in lightburn and then installed my device using this file, I was able to cut something for the first time.
[https://forum.lightburnsoftware.com/uploads/short-url/5ZWQWJNzQmunlGlKH16wbWPHvpw.lbdev]
7. For completely unknown reasons, some engravings or cuts succeed right away - and now with acceptable quality - but then the laser suddenly stops in the middle of the work area with the message: “The movement limits of the laser have been reached”.
This message occurs frequently. It doesn’t matter whether you select absolute coordinates, current position or user-defined position when “Starting from”. It looks as if the laser doesn’t know where it is at the moment. Remedy: I found out from a post in another forum that a user’s device was pre-assembled, but not all screws were tightened and all cables were laid properly. The user recommends completely disassembling the device and reassembling it; all cables should be laid tightly (so that there is enough play at the end of the cable) and all screws should be tightened. I’ve done that now, but haven’t been able to test it yet, I have to buy new material first
I’m now working with the USB stick because I read in a forum post that the transfer could also be to blame. This way I managed to successfully complete a project (a box designed with makercase.com). Unfortunately, the error message “The laser’s movement limits have been reached” still occurs for no apparent reason; for example, even after autofocus in the home position. Do you have any tips on what I could try?
The message appears in Lightburn Console or the Laser control screen?
It can be your set speeds for the Cut/Layers, overscanning settings, your job origin and position of material to be lasered.
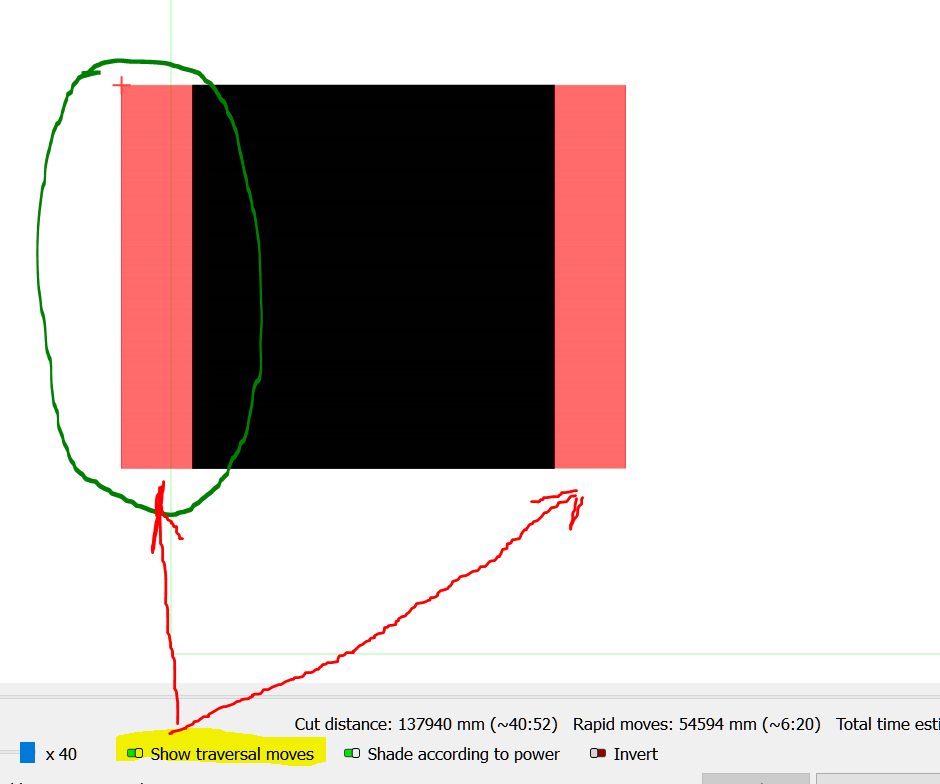
Always do a preview and enable Show traversal moves to see the place where the laser head moves indicated by the Red lines. As you see in this example the left red lines are outside of the workspace (limited by the thin green line).
If you work near the limits sometimes it can triggers this error.
Thank you once again!
The message appears on the display of the laser and lightburn reports Error in the console.
To test if its a lightburn- or a laser-problem i tried to use the laser disconnected. What i do:
Power on
Homing the laser using the touchpad - successfull
Autofokus using the touchpad → error message on the touchpad: “The laser’s movement limits have been reached”
Starting again
Choosing an G-Code file from the usb-stick
“Frame” using the touchpad → error message on the touchpad: “The laser’s movement limits have been reached”
What i did before: Connect the laser with usb-cable to the computer.
Starting lightburn; homing laser via Makro, autofocusing laser via Makro, klicking “Frame” → error message on touchpade and in lightburn …
The only difference is that Z is enabled.
Disable Z axis in your Device profile, manual focus your laser then import this file (it will be in the middle of the workspace) and run the project.
If no errors select and move the shapes to (X)114.628, (Y)157.975 by inserting these values in XPos and YPos and run the project. 002_gears_planetengetriebe_no_Z.gc (149.5 KB)
Run the jobs in a piece of cheap cardboard with a low power set only to mark.
Thank you very much for your effort and patience.
Thank you for the link to the very instructive video.
Thanks for the file, I tried it:
Copy your file to the USB stick
“Frame” the laser travels round a square in the middle of the working area → everything is OK
Pressing “start”: immediately after that the display shows the error message “machine exceeds maximum range of motion”
(i switched language of the display to English to give you the correct spelling)
What I would also like to note:
disable z-axis: i will do it to check your advice, but the gears must be from 10 mm plywood. And because my laser can’t cut it all at once, i’ld like to cut it in two phases. Following an advice from another forum i would like to lower the laser a bit for the second phase.
Meanwhile i tested your other advice, i mooved the gears to the center of the workspace, disabled z-axis, saved the file and then the g-code to the usb-stick.
And then it worked, wonderfull. I will post the lightburn-file in finished creations.
The support team ist meanwhile back from New-Year-Holidays and i am very curious about their answer