Inconsistent results: LightBurn, D1 Pro, or not possible at this price point?

I am trying to create secondary language letters on existing keyboards in a low production environment using an xTool D1 Pro, their infrared laser module, and LightBurn. I’m getting reliably inconsistent results, even after xTool sent me a replacement infrared laser module. Is this a problem with LightBurn that I might be able to correct with different settings? Is this a problem with the D1 Pro? Or am I simply asking too much of a laser in this class and price range? Note that this is a continuation of a thread I started (and abandoned) in January called Incorrect operation with D1 Pro and Infrared Laser

Background: What I am doing is formally known as laser foaming. The laser heats the ABS plastic keycaps just enough to create small gas micro-bubbles under the surface via liquid vaporization without melting or otherwise removing any of the material. The micro-bubbles diffuse the light differently than the surrounding material such that a light mark is made on dark ABS (and dark marks are created on light-colored ABS). Too little laser energy and nothing happens. Too much laser energy results in melting of the plastic and the nice contrasty light marks become darker and look somewhat burned. Way too much laser energy results in engraving of the substrate, much like we do with wood, and is a big no-no as it releases nasty poisonous chemicals.


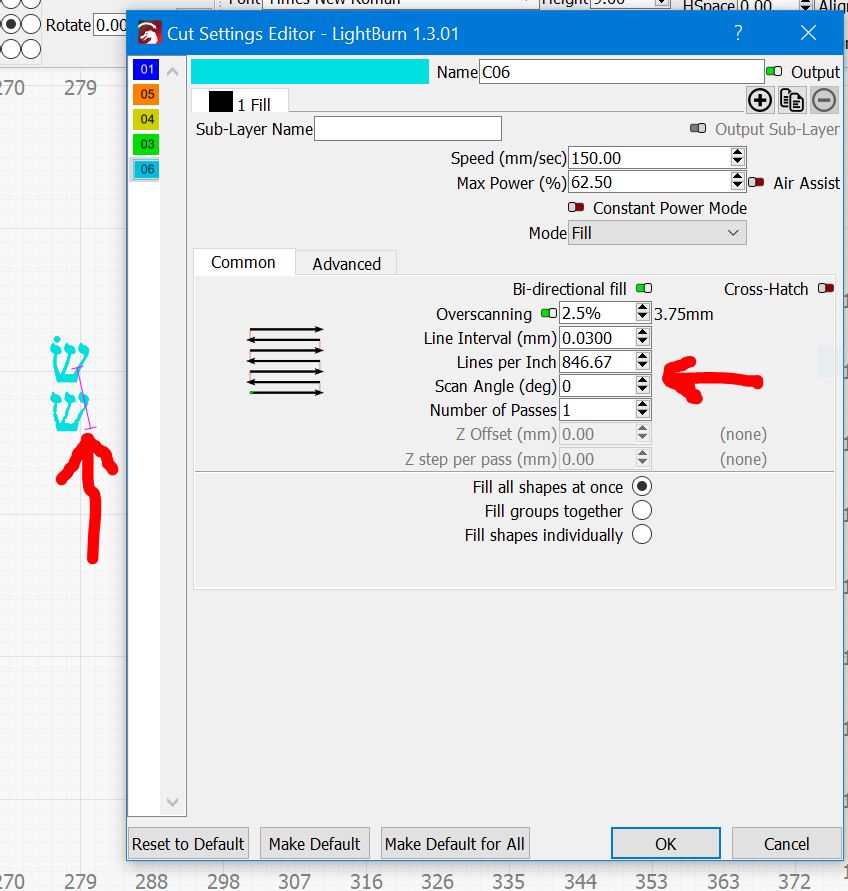
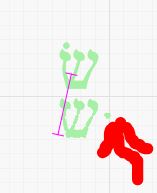
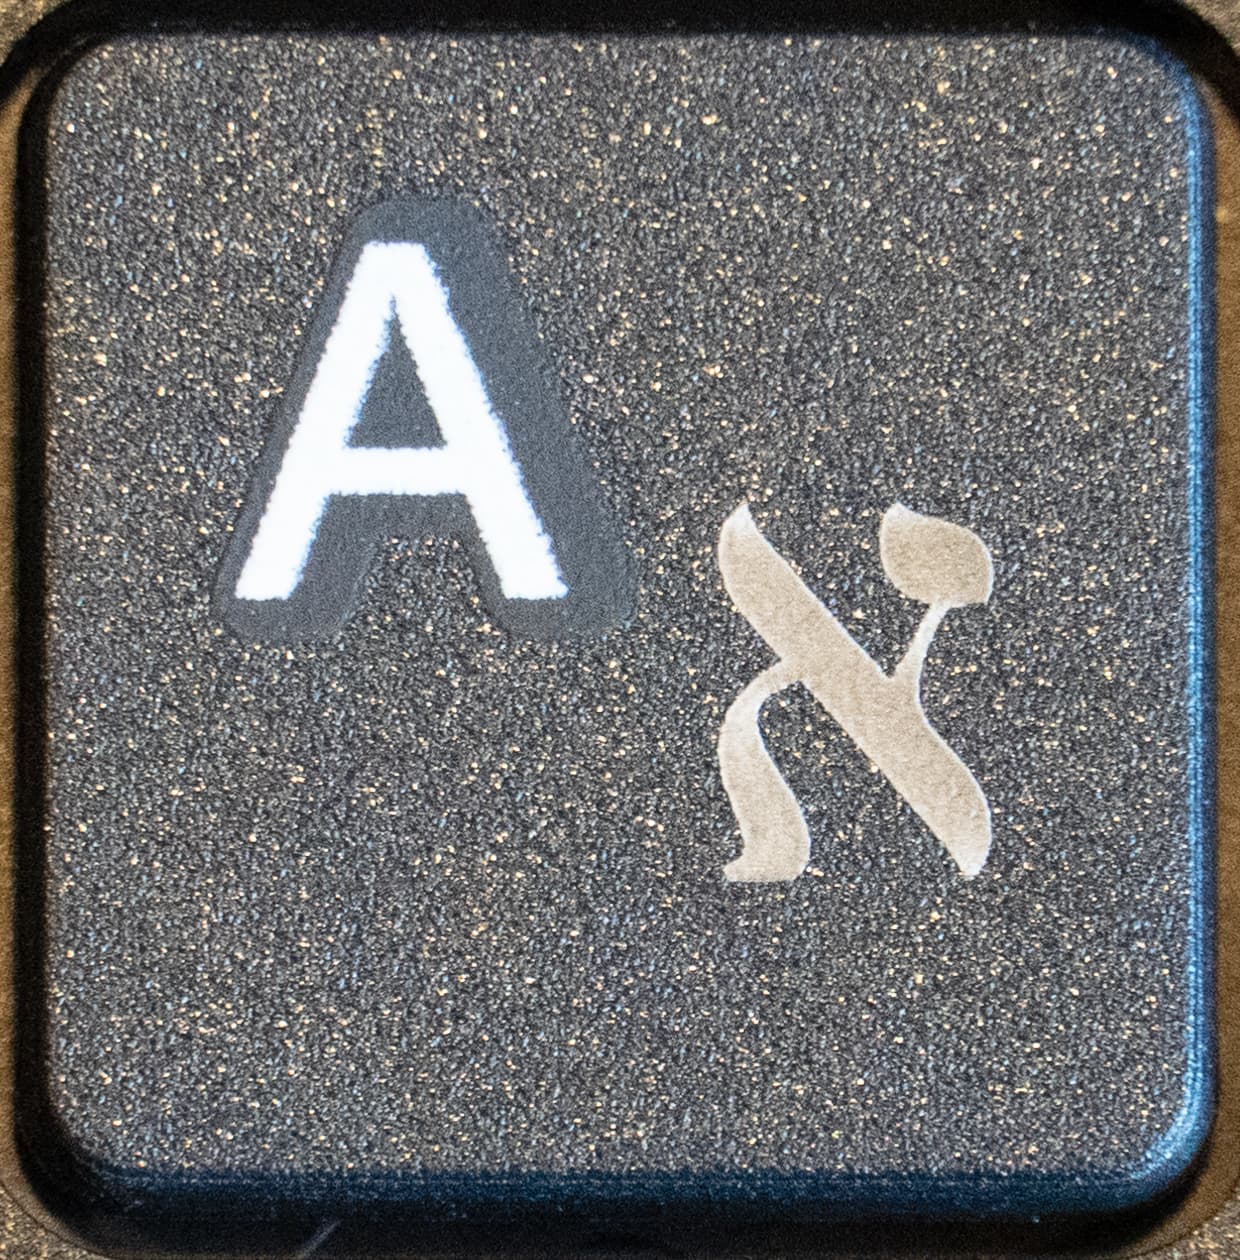
Here is a nice looking set of test characters. The actual setting used for production is the one used to create the lower left character.

The problem I am having is that I can create a nice-looking mark for a single character in testing, but when I use the same settings to mark an entire keyboard, the identical settings fail. Thinking that overscan settings might be an issue, I doubled the default overscan setting recommended by xTool, but that didn’t help. Indeed, I can create two high-quality characters spaced about a key-width apart, but again, when creating an entire row of characters, failure ensues. Typically the failure is that there is too much laser energy resulting in dark, faded-looking marks. That is the exact opposite of what one would expect if the overscan was too short.


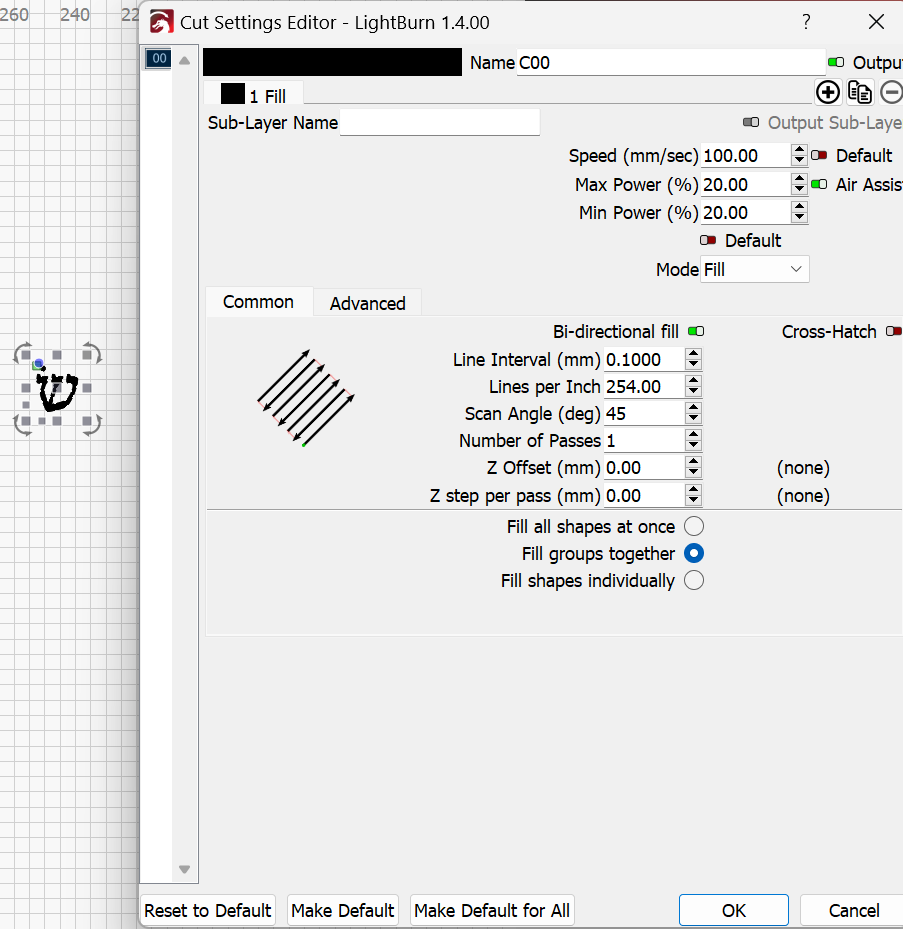
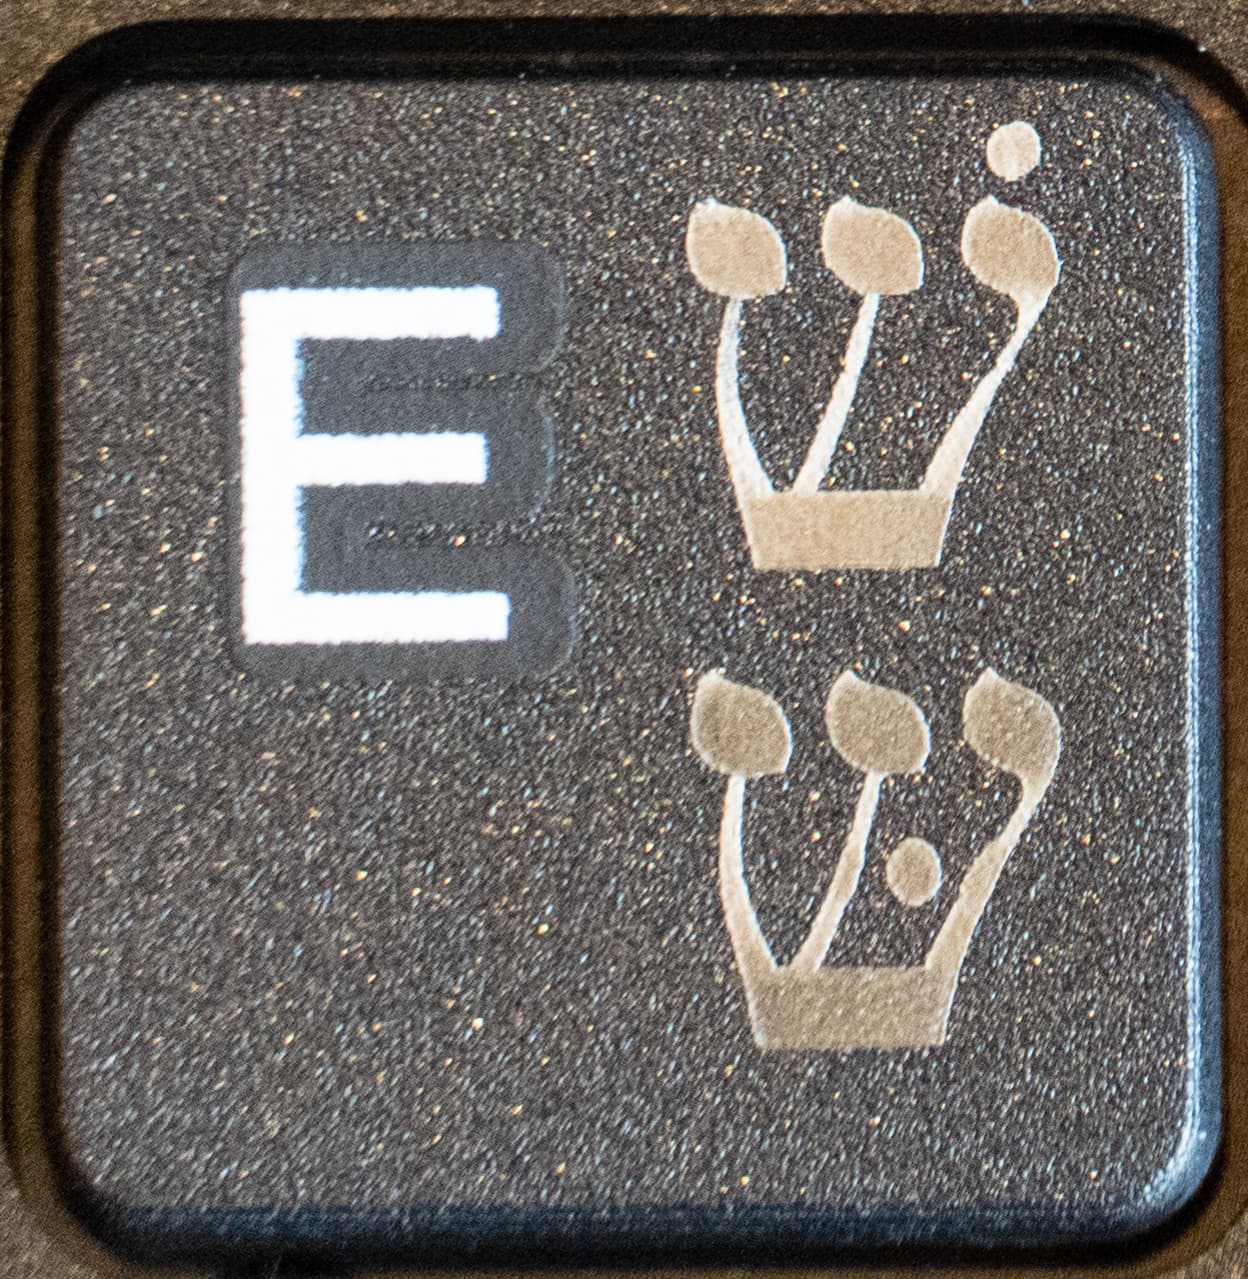
Here is the same letter located on the proper key. The entire row of letters (A through L) was produced at once. The entire row looks like this. Light at the edges, too dark dark and starting to melt in the middle.


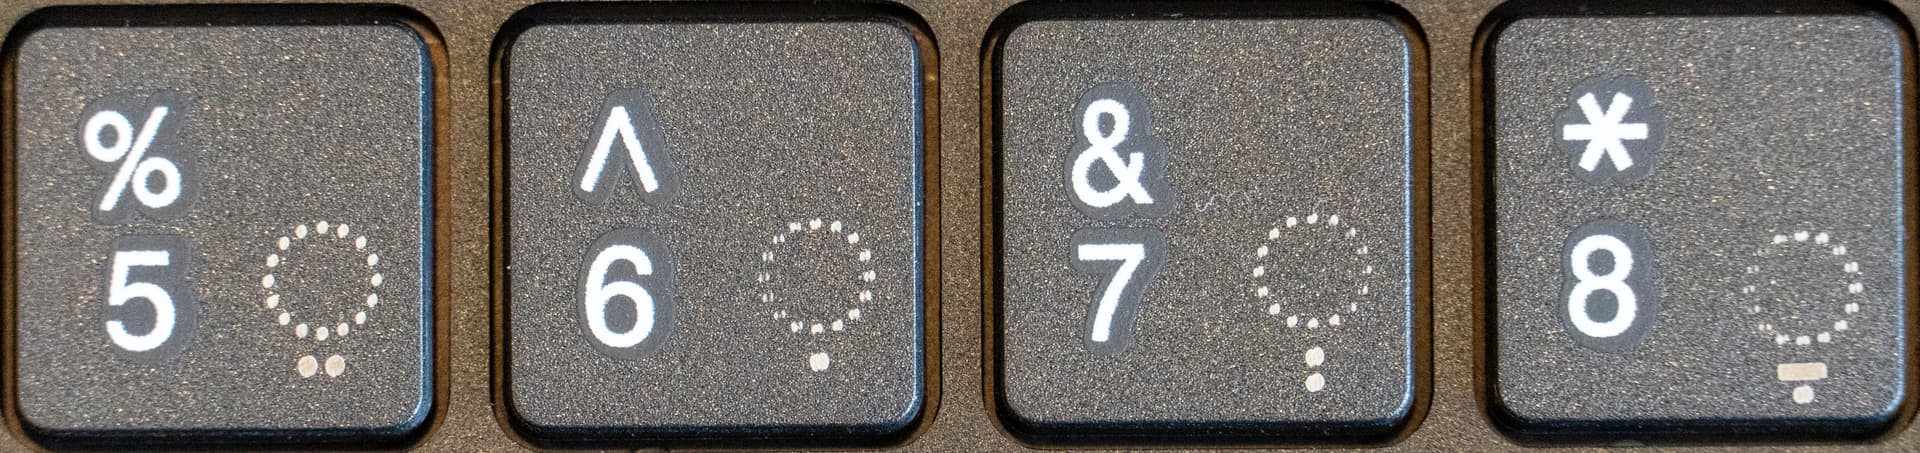
I’m also seeing characters that are faded at the right and left edges when testing with just a two-character pair, as if the laser were moving too fast or not giving enough energy at the beginning and end of the scan line. Again, that is the opposite of what one would expect if the overscan setting was too low. In the above photo, 4 and 5 were burned as a pair, 6 and 7 were burned as a pair, as well as 8 and 9 were burned as a pair. I thought the settings for 4-and-5 were too dark based on the fact that the circle outline of dots were correct but the two large dots at the bottom of the character (on key 5) starting to melt. I dialed it back just a little bit for the 6-and-7 burn. It might seem as if the keyboard was moved during the burn, but what is actually happening is that the dots are not being fully formed. The center area of the dots forming the circle are missing and the bottom dots are mis-formed. For burn 8-and-9 the same settings as 5-and-6 were used. The circle of dots has the same problem with not enough laser energy, but the bottom bar and dot on the 8 key got too much laser energy.
The 9 key looked just fine and is not pictured. Go figure.


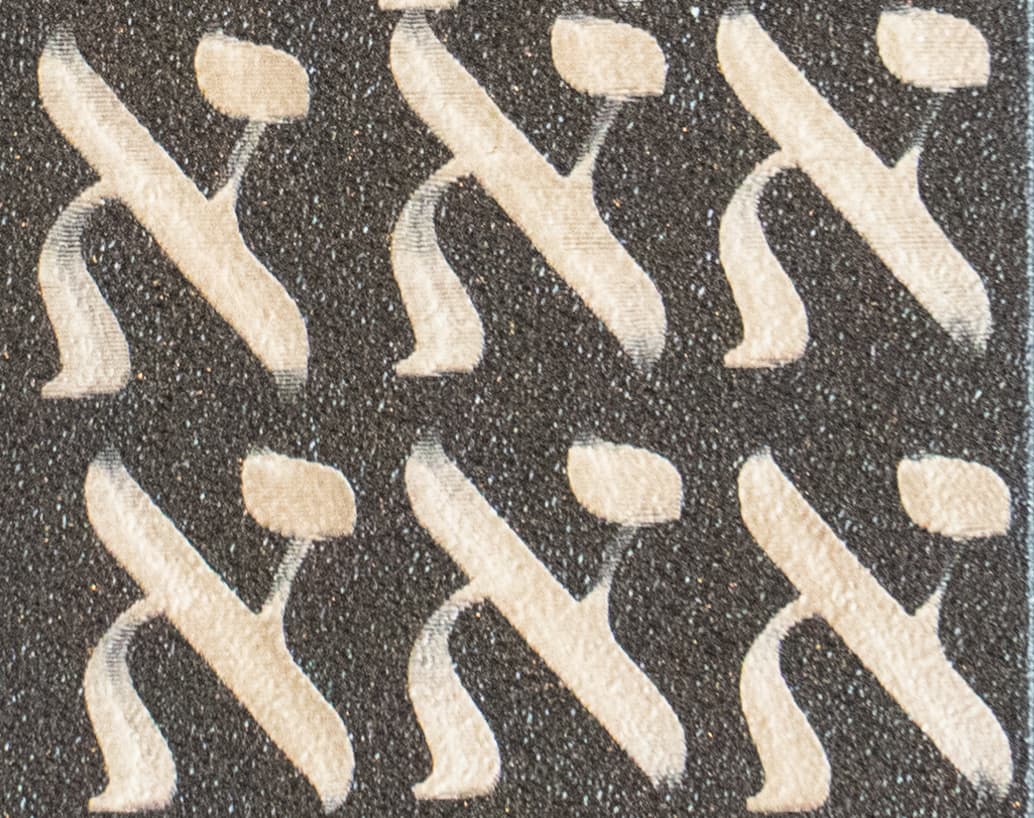
Finally, here is a sample of characters that are absolutely inconsistent throughout. Proper laser foaming with a bright contrasty mark in some areas, dark and melted in others.

FWIW, the area around the D1 Pro is well controlled temperature wise. Further, all of these burns were made within a few minutes of each other, meaning even if the air temperature changed a little bit, the temperature of the material would barely have changed at all.

Help! Is there no way to get a consistent output from LightBurn and the D1 Pro?

I suspect you may be approaching the limits of the machine and the laser module to put down precise amounts of energy into very fine areas of the keys. I also suspect that some of this inconsistency may be due to variation in the material and/or slight focal distance variance from key to key.

I assume you’ve done the due diligence but if you’re not already, you want to make sure you’re cleaning the keys thoroughly prior to burning to eliminate any surfaces oils or other contamination.

Outside of that, I’d suggest possibly experimenting with a different scan angle. 20 or 30 degree scan angle or even a vertical scan angle may provide better results in your case. I’d also suggest attempting a crosshatch as that may even out any imperfections from a single scan angle. You will of course need to revisit speed and power settings when you do this.

I know we discussed doing an interval test in the last Topic. Have you done this? This is going to be extremely important at your scale and the type of burn you’re trying to accomplish. Crosshatch also could potentially mitigate this.

By the way, you’ve clearly made some progress since the last Topic so well done.

berainlb -

Thanks for the tips. I’m using brand new keyboards, so unless there is some manufacturing residue that needs to be cleaned off, there is nothing to clean. As for changes in focal length distance, these are flat top chicklet-style keyboards. I did have one Logitech keyboard I ordered to see if it would laser, but upon checking the flatness of the keys, I found the upper left side of the keyboard to be out of regulation (a piano term that denotes whether all of the piano keys sit at the same height). I’m checking them all now and finding that the key regulation is good.

As for scan angle and cross-hatch settings, I’ve been playing with those for the last few hours and find that LightBurn and the D1 Pro aren’t speaking the same language when those options are turned on.

First problem is that LightBurn has an interaction bug between RTL languages (Right-To-Left, such as Hebrew) and the scan angle setting. Once the scan angle has been changed from zero, the LightBurn file is screwed up such that one can neither type nor edit RTL characters. This is true even if scan angle is reset to zero for that layer. The cursor adopts the scan angle and nikud (the dots that go inside and around the letters) becomes misplaced. See screenshots below.


LightBurn Scan Angle Error 2

The second problem is that the D1 Pro laser module (at least the infrared module) doesn’t output anything when crosshatch is active except for laser head movement in the usual X-axis plane. Any movement in the Y-axis plane seems to turn the laser off altogether. The result is no output at all if the scan angle is non-zero. As for crosshatch with a zero scan angle, nothing is output on the second Y-axis pass. This is plainly obvious in my testing. (I could send photos, but it is a pain to get the high-quality photos I uploaded in my first post. You will have to trust me on this one - no worky.)

Blockquote
By the way, you’ve clearly made some progress since the last Topic so well done.

Aww, shucks. Thanks. :innocent:

BTW, I am getting good results when I use keyboards that were manufactured using a laser. The ABS plastic in these has an additive that makes laser foaming work better. Interestingly, these have sculpted keycaps yet I’m having no problems with focus. The additive seems to make them more tolerant of laser power variations. Indeed, on one of my prototypes, my laser marks were clearly better than the OEM marks, though unless comparing them in this way one would never notice. However, these are wired keyboards and the times, they are a-changing. My colleagues and students in the seminary where I am affiliated have indicated they’d rather have compact wireless keyboards with chicklet keys that feel and resemble what they have on their laptops. I have yet to find a wireless keyboard where the legends are made using a laser process. My market is speaking loudly about what they would prefer. Sigh. Anyway, I could upload photos of those keyboards if anyone is interested. They come out looking very nice.

Hi.

I’n very much a newbie when it comes down to laser equipment, but as I have a pretty much the same setup as @RadicalDad , I too think those are the most likely candidates for that inconsistent behaviour.

As You probably have discovered, the usable focus range on the xTool IR module is extremely narrow.
And from what I have read in the net, it seems that the focus arm is too long -and as a result the focus is nowhere near the optimal- on pretty much every module, mine included.

I haven’t performed any precise tests after the modification, but according to the the ramp test it seems that the arm on mine was ~1.5mm too long.
I didn’t measure what was the dot diameter with the original focus, but I’d assume >0.1mm, so about 3 times the advertised 0.3mm.
That increase on dot size/less energy intensity may be beneficial on some tasks, on others like metal marking, perhaps not so much.

My solution was to hack ~8mm off the arm, and to drill and tap the remaining arm for a M2 allen head bolt.
I would have liked to use M1.6, but for some reason I couldn’t find the taps, and M1 was a hair too small for my liking.
Since the channel for the focus arm is ~3.5mm wide, the head diameter of a M2 bolt obviously has to be trimmed down as well.
A grub screw would be ideal, but M3 was the smallest I had :frowning: .
That arm mutilation is intended as a “temporary” solution, I do intend to make a new arm from scratch because quite frankly it looks like crap.
But we all know just how temporary most of the “temporary” solutions tend to be, don’t we :wink: .

As the xTool IR head focus is very finicky to get just right, I’d assume that for the best results, the keys would have to be removed (if possible) from the keyboard and inserted into a jig of some sort to ensure that the distance is as repeatable as possible.

As a sidenote, thanks for bringing ABS foaming to my attention, definitely something I have to look into, even though metal marking was and still is my primary reason for the IR head purchase.

Regards,
Sam

2 Likes

Not sure but it’s possible there could be a mold release agent or something similar left on the keys. But unless the keys are sealed in some way I wouldn’t necessarily assume the keys are completely clean although that seems less likely if they are new.

I only brought this up because my understanding of focus for the IR lasers is that they are extremely fussy with focus. I was under the impression that sub-millimeter precision was important but I can’t speak from experience. Not sure how much variation the chicklet style keys could have.

I’ve seen a handful of RTL bugs in LightBurn. There’s another where bent text gets reversed.

However, I couldn’t recreate the problem you’re seeing.

Is there a simple way to demonstrate this?

That’s super odd. This is almost certainly a firmware issue but I’m curious.

2 possible tests:

  1. save gcode for the crosshatch, then import back into LightBurn. Is the crosshatch represented in the imported view?
  2. replace the IR module with the blue diode laser module. Does the behavior change? I’d expect these to be exactly the same.

Hi.

My “two fingers type, eight rest/seek” did it again, seems that You adressed some of the issues I mentioned in my earlier reply.

There always is at least some separating wax residue from the manufacturing process, unless for some reason (for example painting/plating) the keys are throughly cleaned.
I’m no plastic manufacturing expert, but I doubt that keyboards and/or keypads would be completely free of separating wax.

Regards,
Sam

This topic was automatically closed 30 days after the last reply. New replies are no longer allowed.