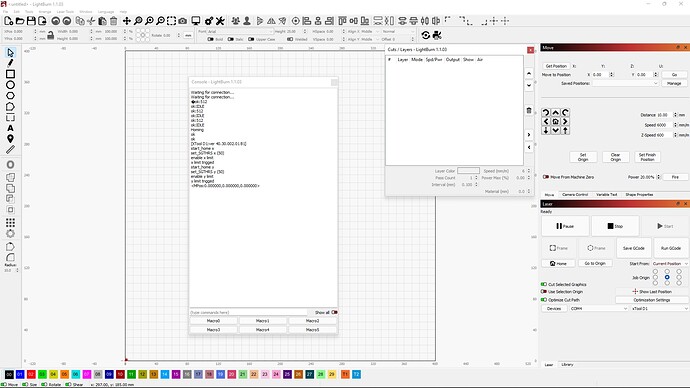
Total Newbie. I’ve wasted about 12 pieces of test material. No mater what I do everything seems fine when I frame and hit Play to preview but when I start it cuts off the object. I’ve updated all firmware and software just yesterday. I’ve watched 2 dozen videos at least and everything seems so easy, but no matter what I set as a start point, absolute, etc, it always burns out side of my specified area.
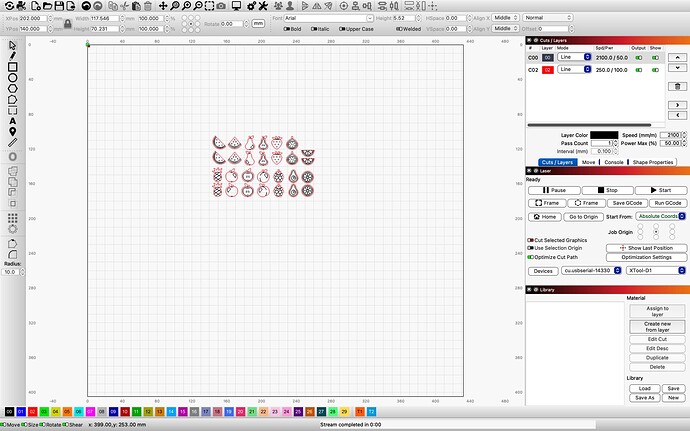
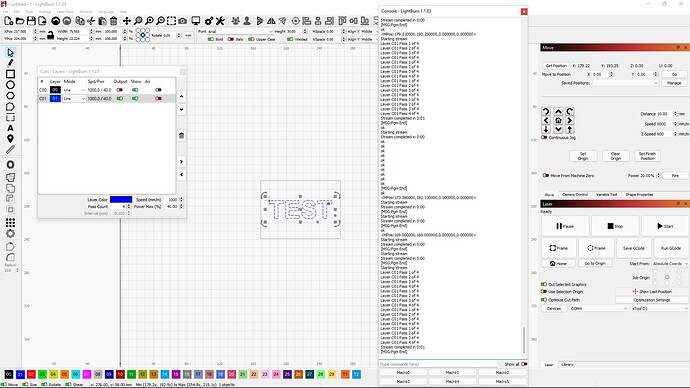
Can you send a full screenshot of LightBurn with the design loaded and ready to go? And photo of resulting burn?
When you turn on the laser, are you starting the laser with the head at back-left? That is what you need to do for your machine to have a proper 0,0 set.
While testing I suggest you use cheap or disposable materials until you have things well dialed in. No need to waste good material while experimenting.
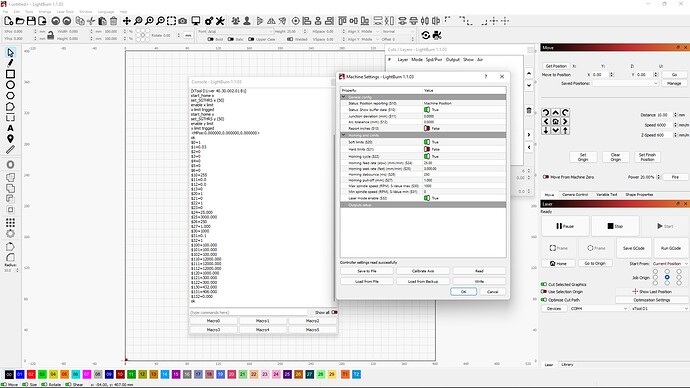
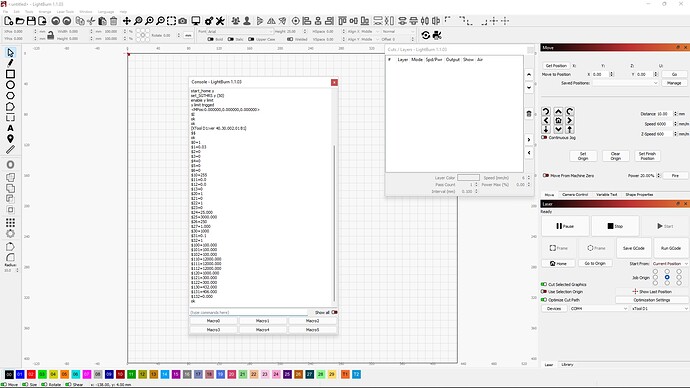
Also, please run these commands in Console one at a time after powering on with laser head at back left and return results please:
$I
$$
$#
?
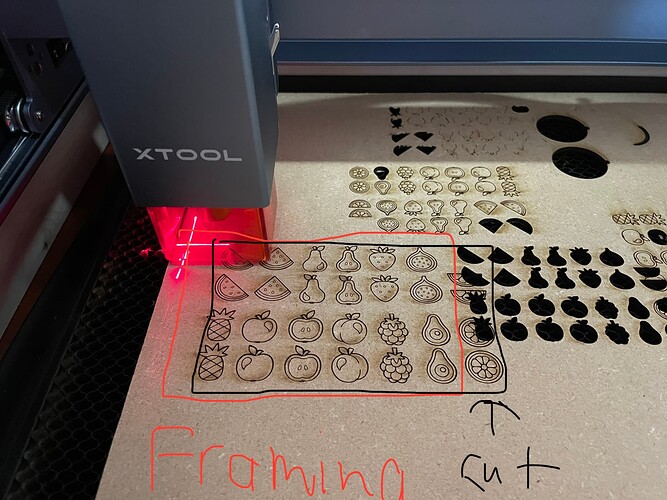
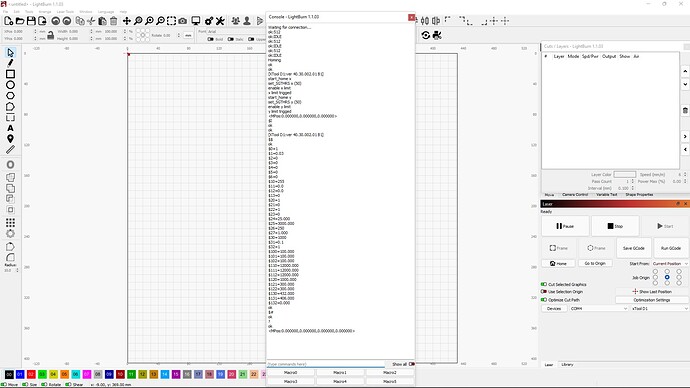
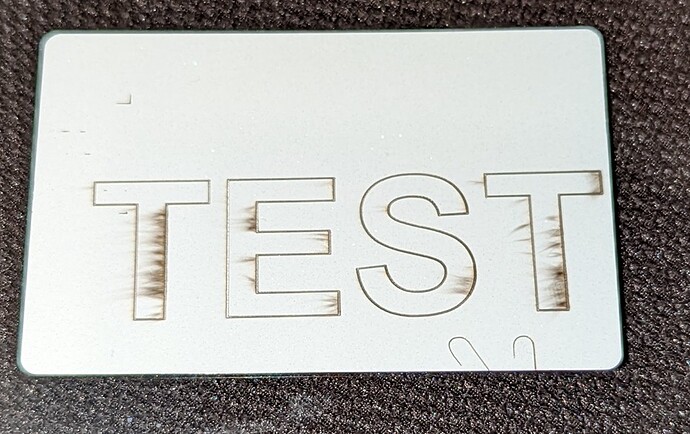
Here is my photos of the 'Xtool printing outside the framing. It only does this on the Lightburn software. It does NOT do this on the Laserbox Basic. I must have to click on something to make it work. I have no idea what to do next to fix this problem I am having on LightBurn and my XTOOL 10 watt laser.
You mentioned above to run these
$I
$$
$#
?
In console. I know where to find console but I have never entered anything there before. Do I copy and past this into the console are and delete what is already there?
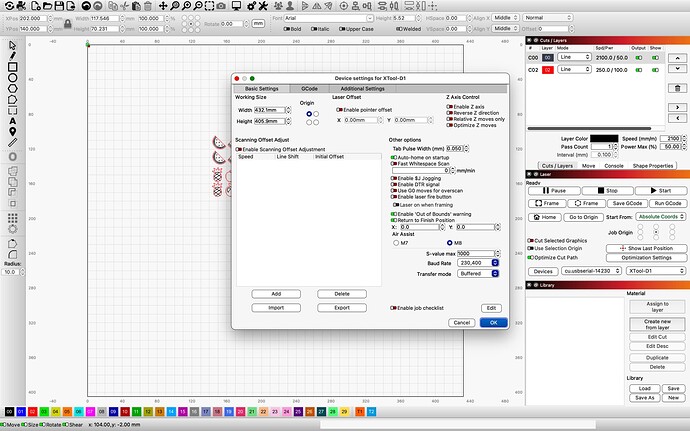
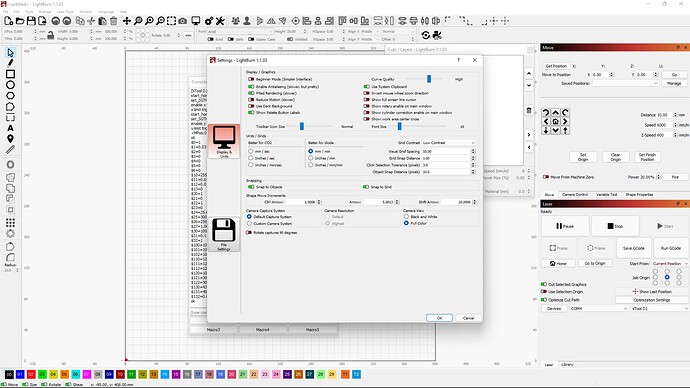
Can you take a screenshot of your Device Settings screen?
Normally D1 requires a pointer offset because of the cross-hair light that xTool uses for pointing which is not common for diode lasers.
Did you get your device configuration from xTool page?
https://xtool.zendesk.com/hc/article_attachments/4414379634455/xTool_D1.lbdev
More info here:
User Manual for xTool D1 LightBurn Software – xtool
Here is a photo of my screen on LightBurn.
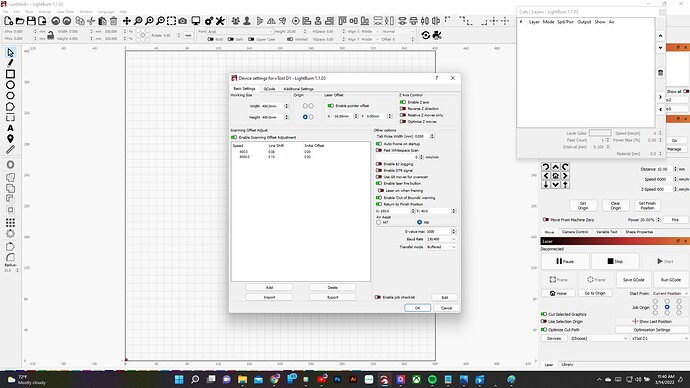
Here are my Device Settings
**** That means I have to uninstall both software and then reinstall. Correct?***
YOU ARE AMAZING!!! Thank you so much!!! It WORKED!! EVERYTHING IS LINED UP NOW! I LOVE YOU!!!
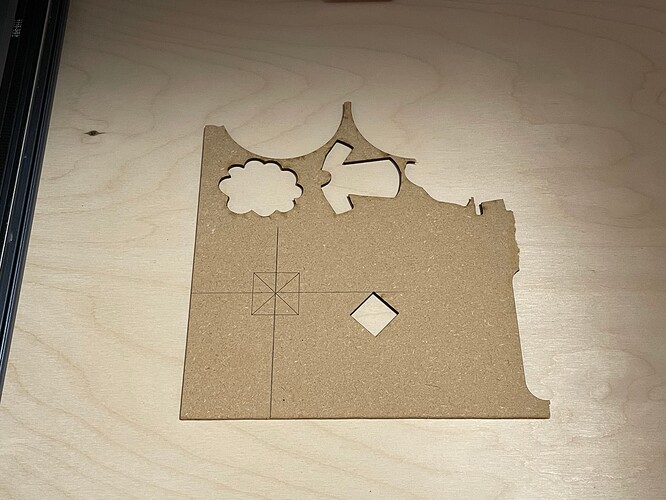
The center lines up with my pencil marks
Can you go to Device Settings and take a screenshot?
The one with this icon. ![]()
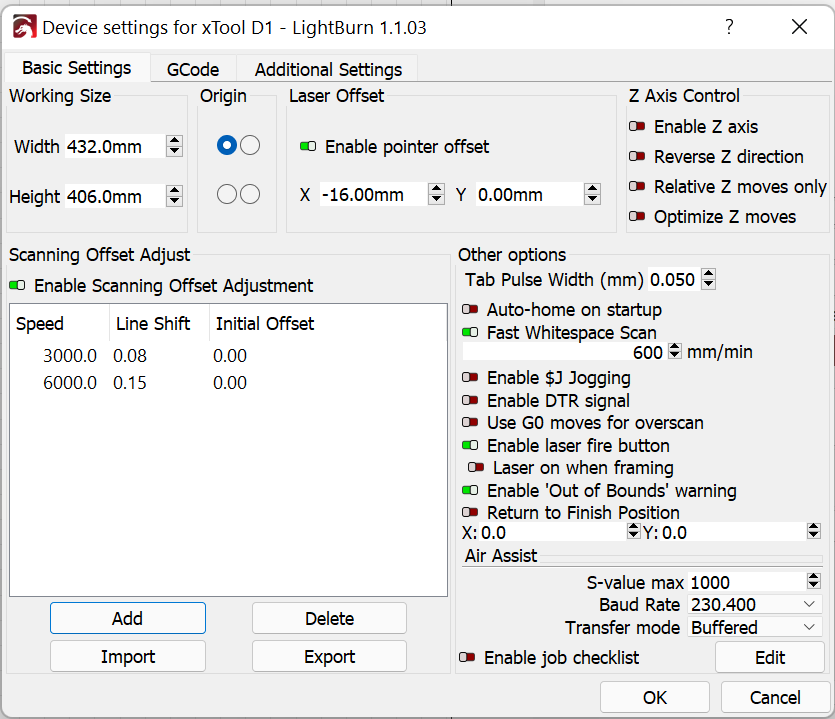
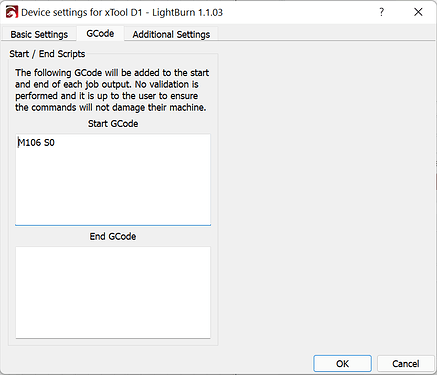
Your device settings are not “standard” for the D1. You have 2 options. Either create a new device by loading that file I linked earlier. Or you can change all your settings until it matches these exactly.
Basic Settings Tab:
Gcode tab:
This should resolve the issue you’re having with the crosshairs not lining up to framing.
Hold off on entering Console commands as I don’t think that’s the problem. I’ll document it here for future reference.
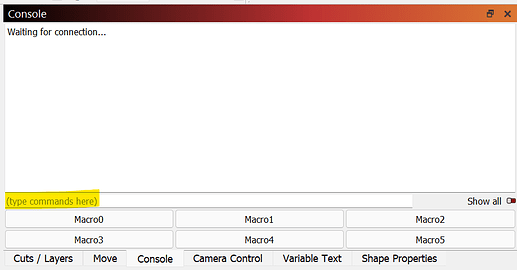
Copy-paste one command at a time into the highlighted area and press enter. The results will come in the white area above. Copy that text into a reply.
Sorry I took so long to reply.
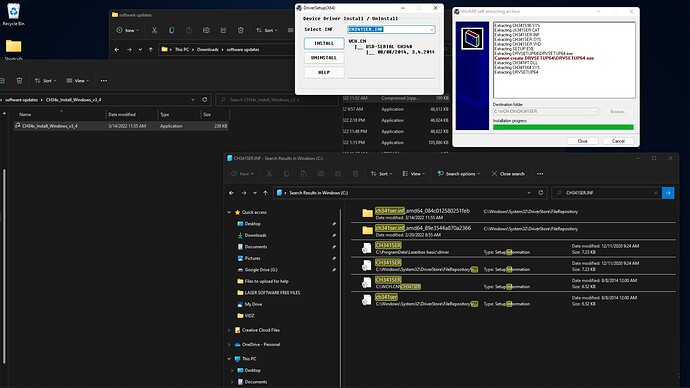
Ok I’m including images.
I could not get the CH340 file to update my drivers but it seems there is a driver in the system files.
For the commands you sent should I CLEAR the commands and then ENTER the new commands?
UPDATE…
I didn’t have the machine turned on.
Once I turned it on and ran the install it worked. I’m going to go through the device settings that you sent to Diane and see if I can get mine to match.
Okay. I’m trying to get caught up with where you are.
Looks like you’ve changed origin and moved to Absolute Coords. That’s good. I suggest you leave it on Absolute Coords until you’re very familiar with how your laser works.
Always start your machine with the laser head at top left and you should be able to reference your laser bed just as it looks in the workspace.
Can you describe in detail what’s not working as expected? What did you do? What did you expect it to do? What did it do instead?
Take a look at the most recent image files. The burn was not in the center of the frame. I even ran the frame command before and the laser traced the card perfectly but the burn was definitely not center.
What are you referencing for the frame? Are you referencing the crosshair or are you using the laser light from the module?
AHHHHHHHHHHH
I’m using the CROSSHAIRS. How do I get the laser exact point to reference the corner of the frame?
We’re getting there…you’re definitely starting to make me accept this machine instead of smashing it…LOL
That was an unsatisfactory question. I understand how to use absolute position to get the laser exact. I guess what I’m asking is how do I determine the off set or get the crosshairs to help me figure out how to frame my me work area?
I didn’t mean your question was unsatisfactorry…by the way…i meant my question was unsatisfactory…hope there wasn’t any confusion. I didn’t frame my question properly.
The Device Settings configuration of laser offset of X-16 mm should have addressed it.
Try one thing.
- Burn a square using “Cut selected graphics”. Leave the material as-is.
- With no changes to the design or settings now do a frame operation.
Does the crosshair follow the burn marks exactly?
If not, try to identify why? Is there something mechanically wrong? If not, it could just be a discrepancy from the factory. Just adjust the offset amount in Device Settings to accommodate for any difference in crosshair marks vs actual burn location.
