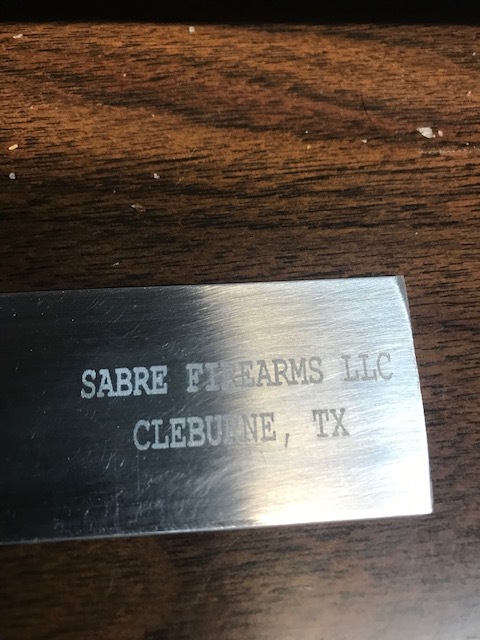
As a firearm manufacturer i need to engrave to a minimum depth of .003 inch or 0.762mm. When engraving on a practice anodized business card i get a good engrave. On a anodized aluminum receiver i was able to wipe off the engraving with my thumb after 50 passes. What am I missing in the setting. Laser noobie. Omtech 30w fiber laser
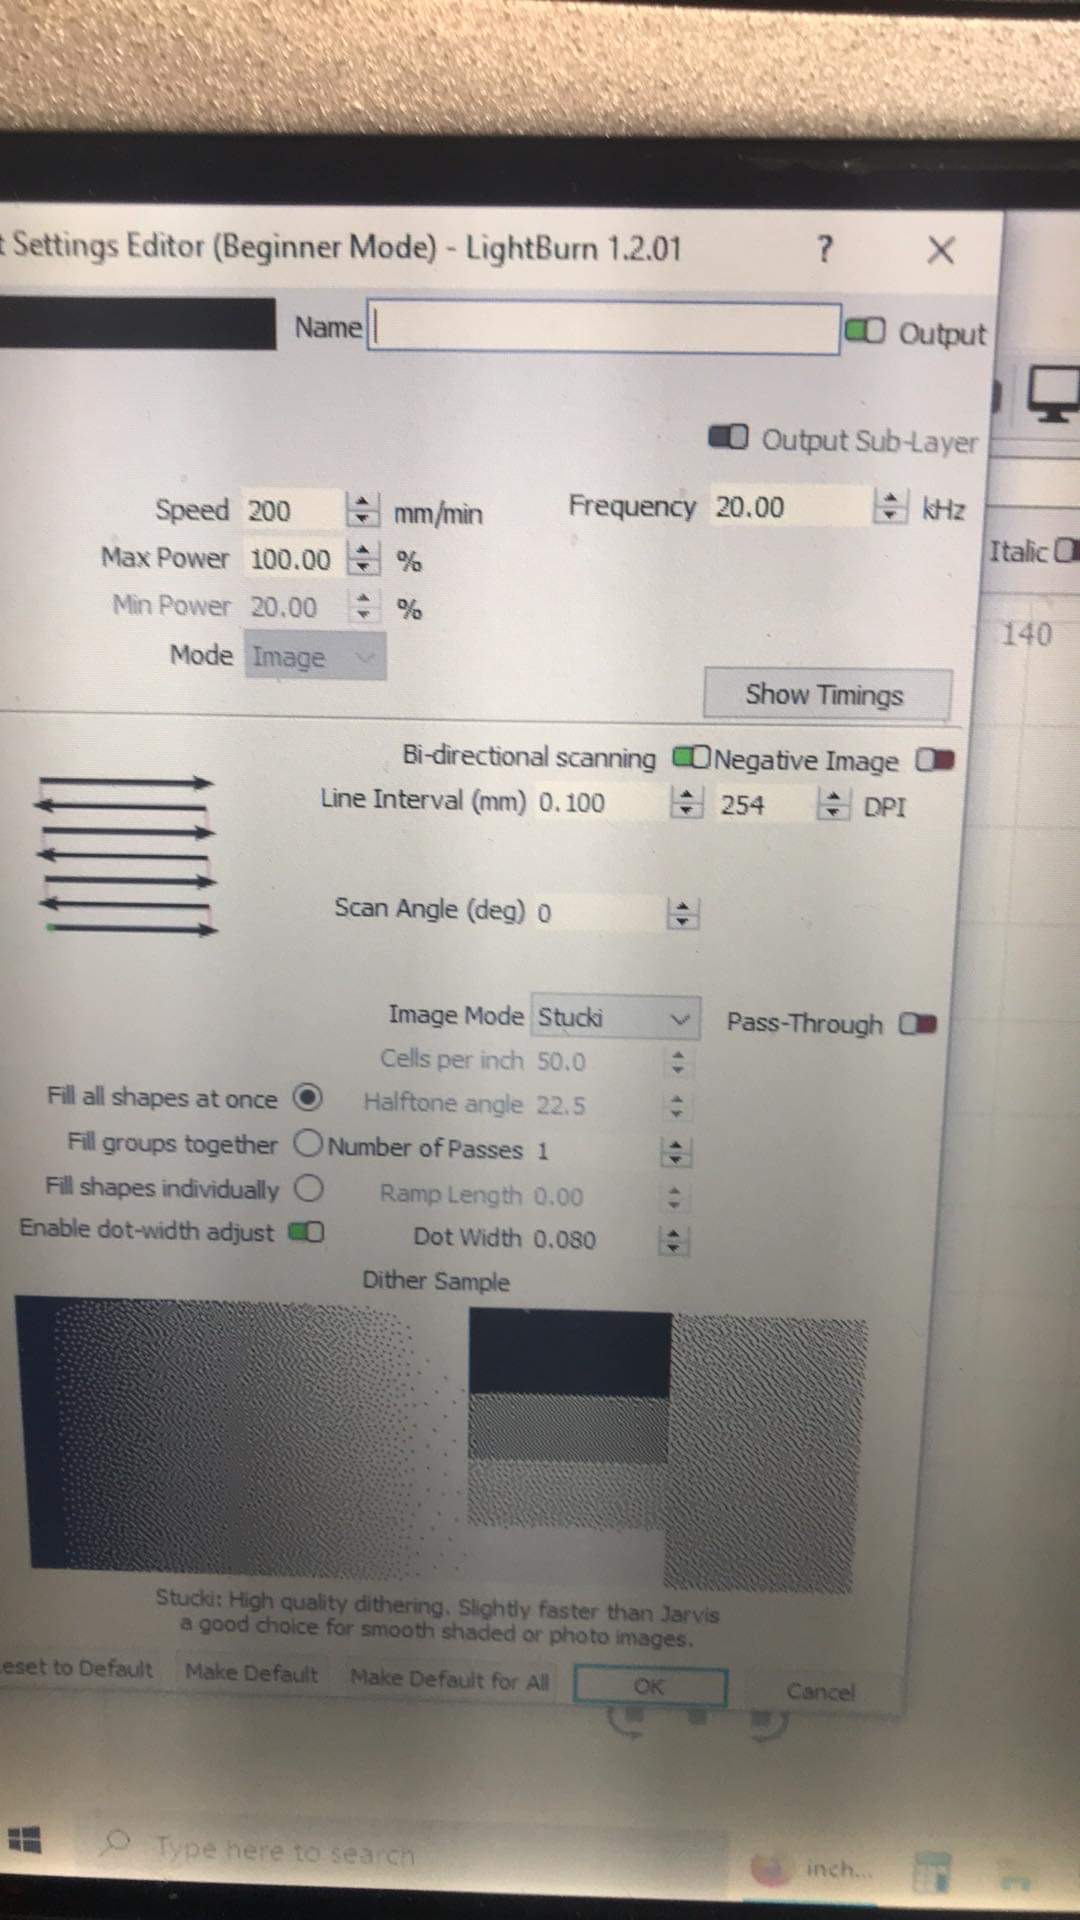
Looks like you have parameter Mode for “Image”. Need Mode “Fill” Make sure you are in focus.
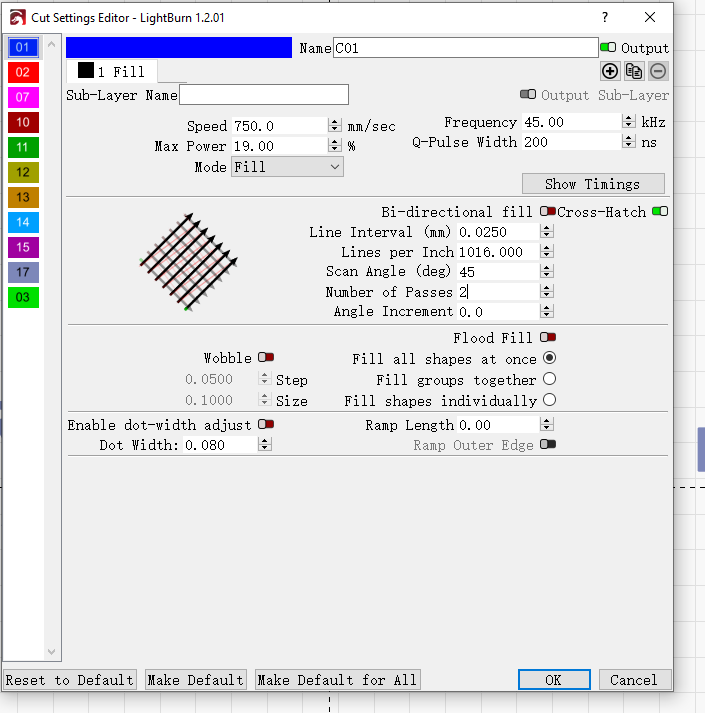
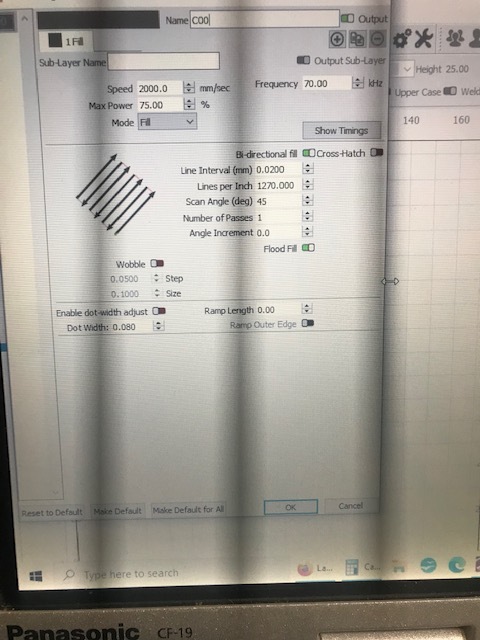
This works good for me on aluminum receiver 60 W M7 175 lens.
Hi Dan,
Your settings are VERY slow for a Fiber laser. They’re actually in mm/min, not mm/sec as is common for this type of laser - galvo lasers can move VERY fast. The fact that you’re not getting a good etch with max power and minimum speed tells me there’s a high chance your focus is off. We have a new video going over the process: How To Focus A Galvo Laser - YouTube
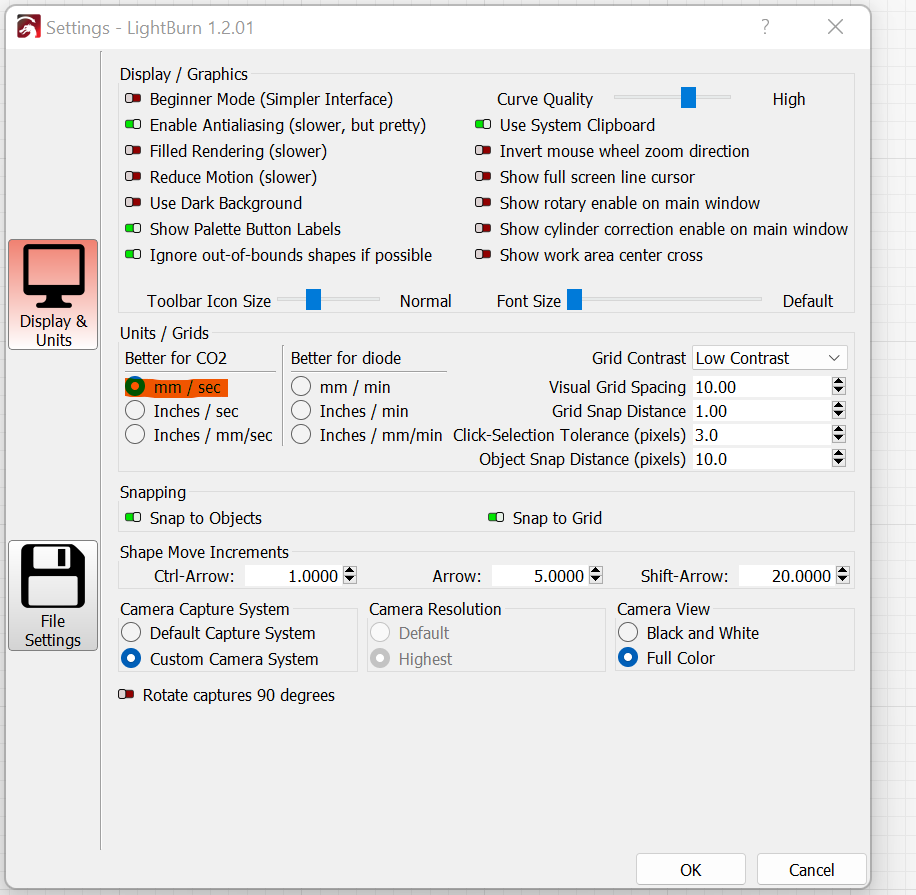
First I would change from mm/min to mm/sec under “Edit > Settings”
Then I would try around 1000mm/sec with multiple passes
You may also want to turn off dot width adjustment, here’s an explanation of what that does - Dot width correction? - #7 by LightBurn
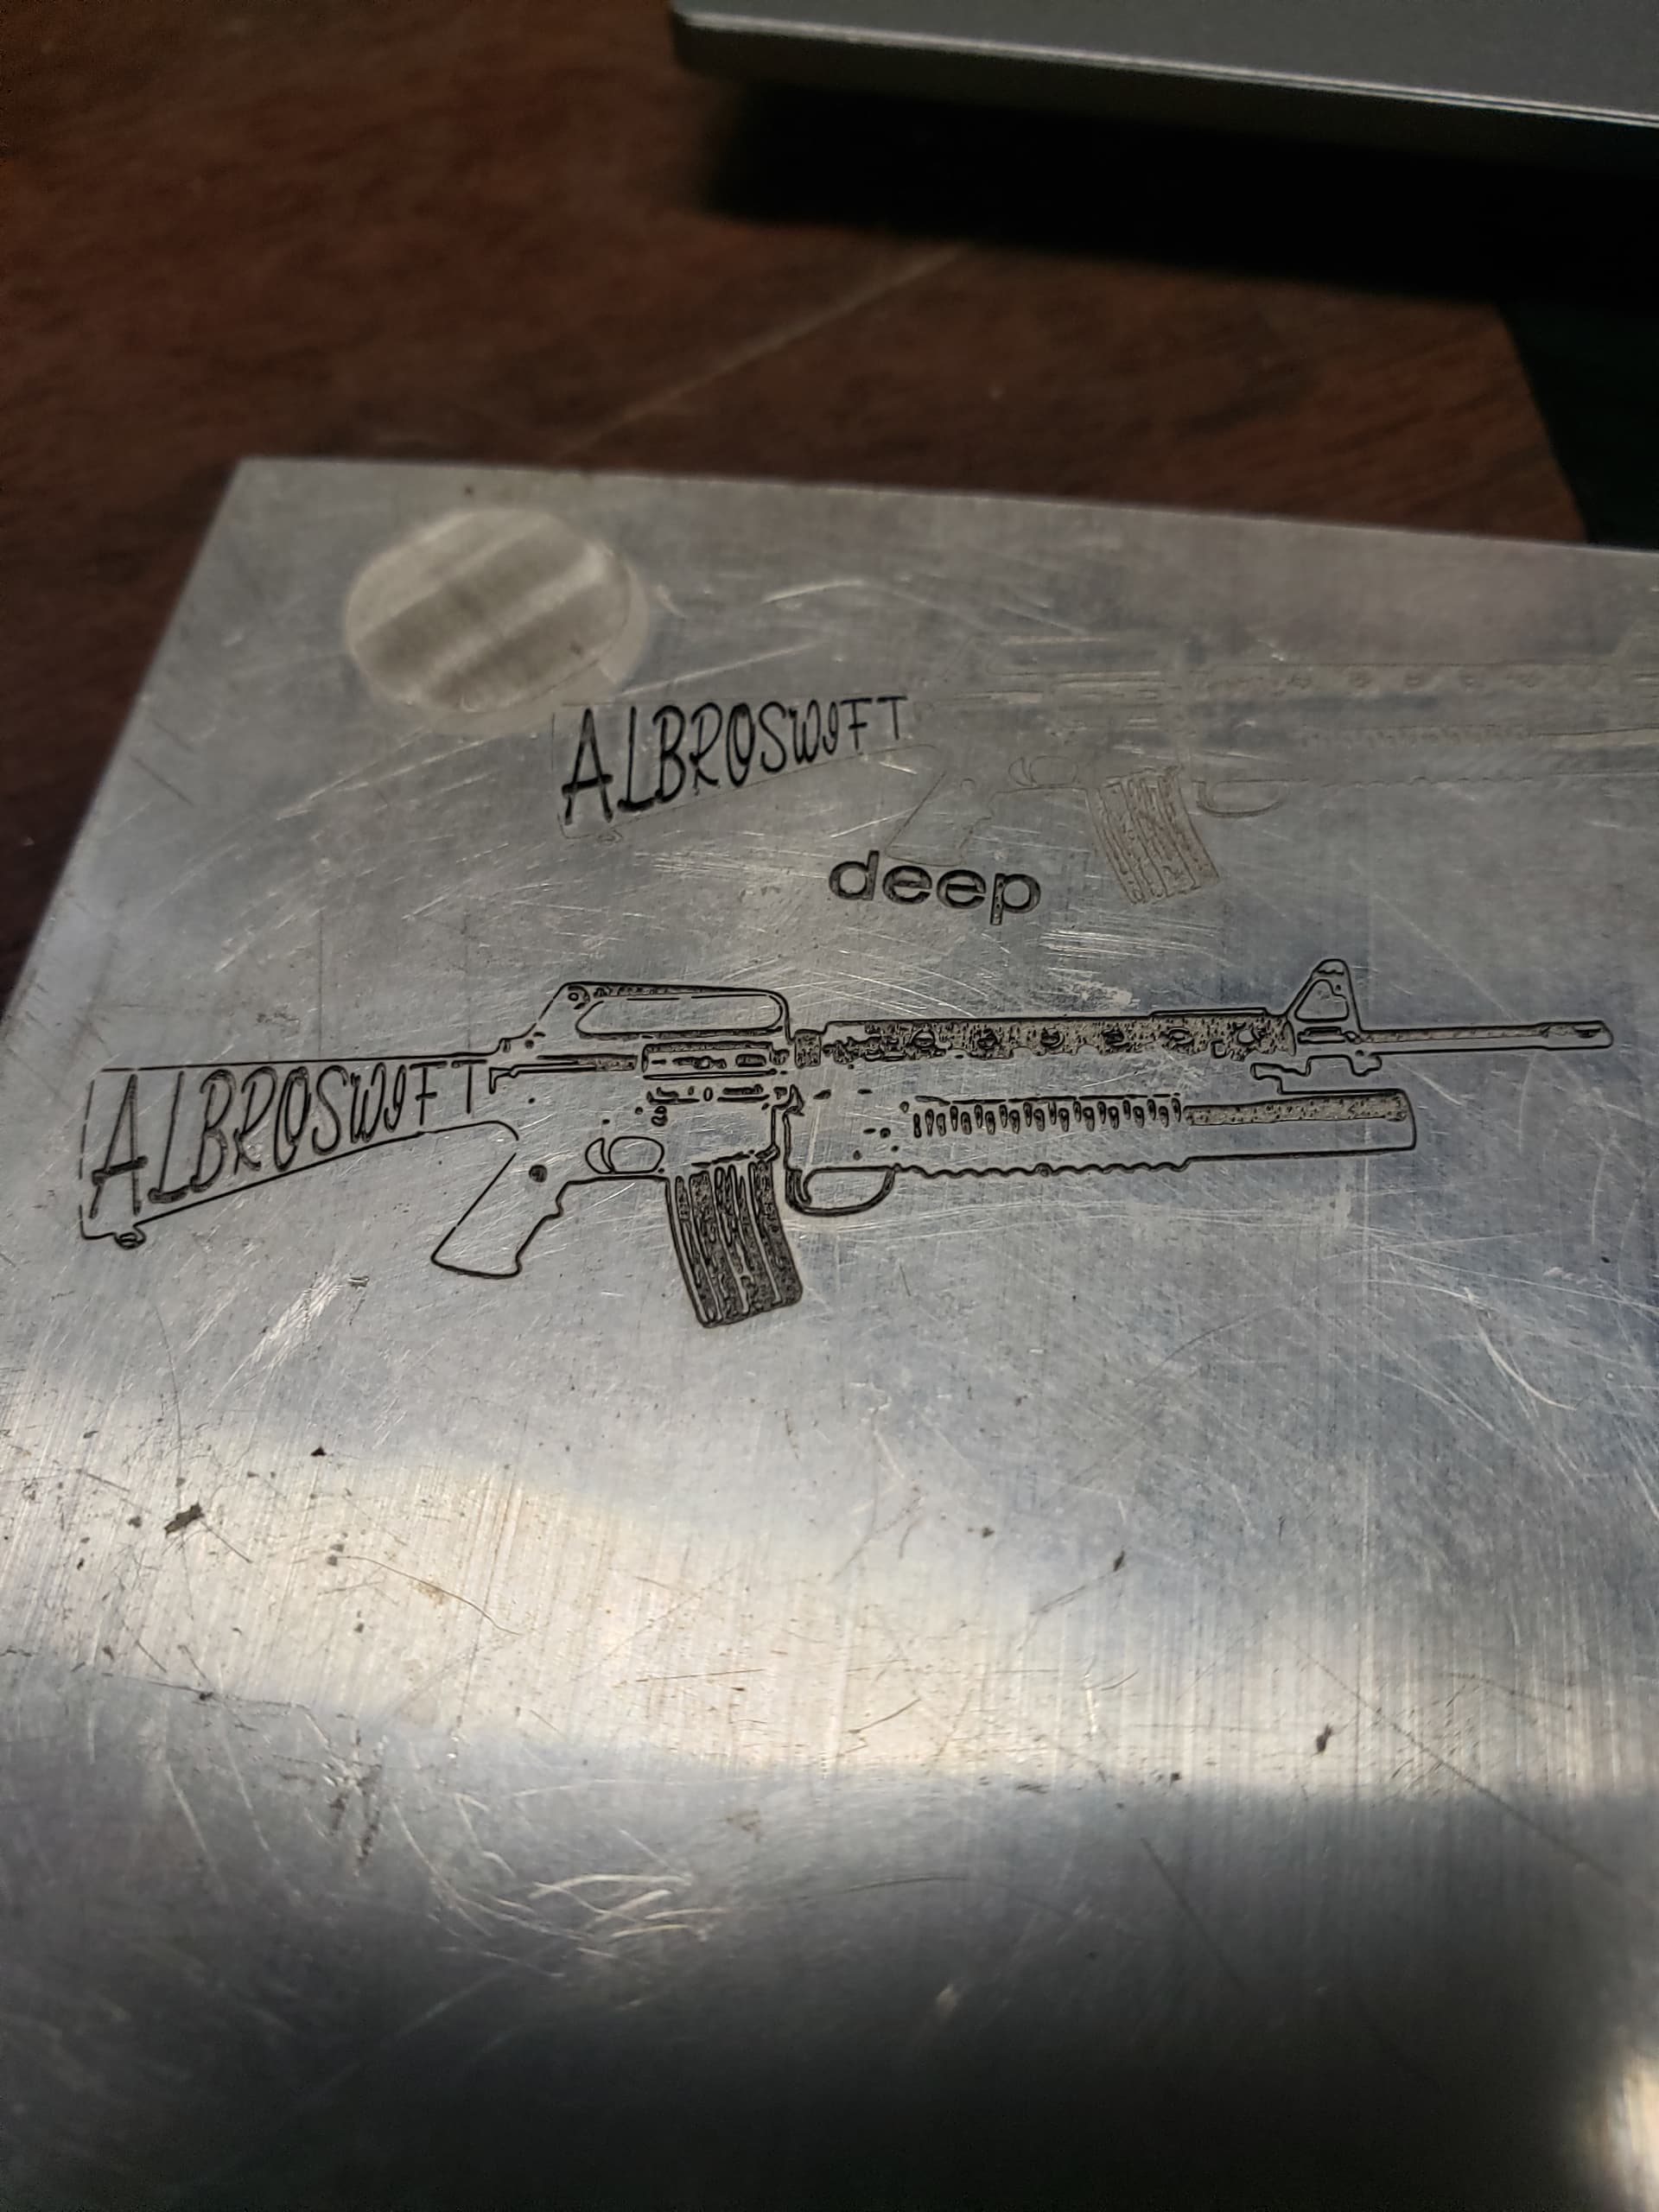
While etching a vector shape (as @albroswift mentioned above) does give you some more control, it’s not necessarily the reason you’re not getting a deep etch. If you’re etching a logo or text, it is certainly the way to go however. You can turn your image into a vector with the Trace Tool (Alt+T)
1 Like
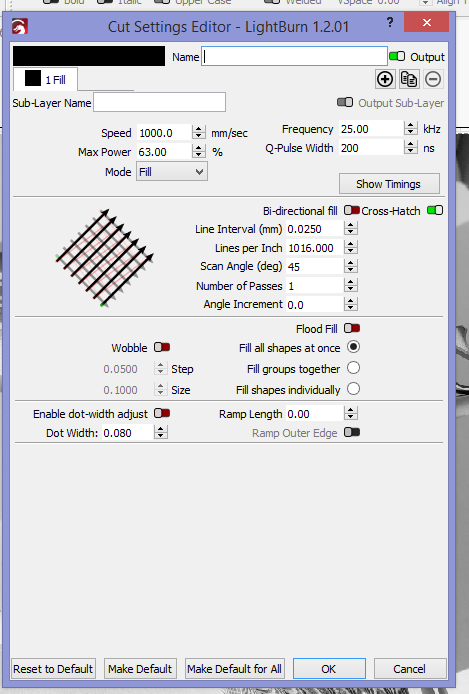
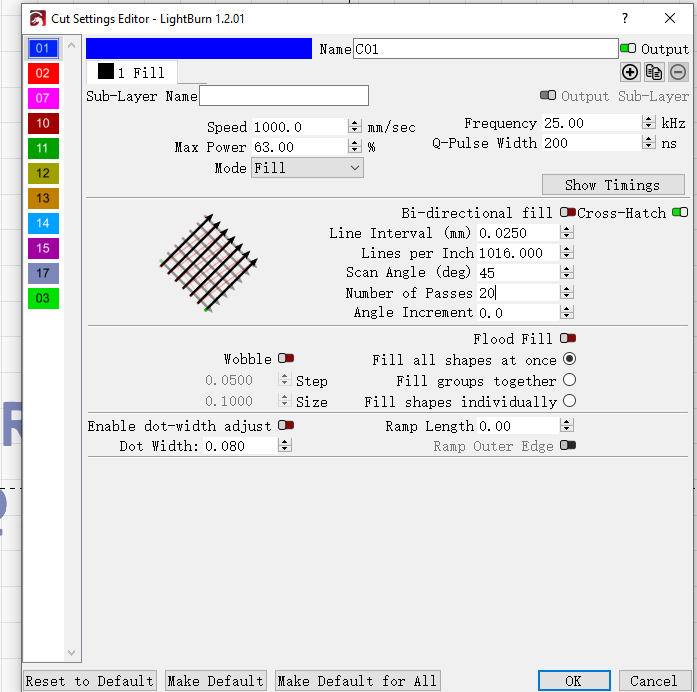
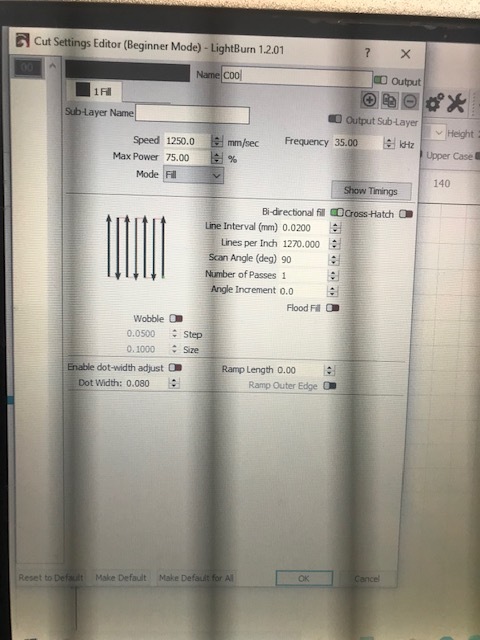
Adjusted as below, lens focal distance is 254mm. And it set as such. Specs as suggested. Adjust speed to mm/sec also. All text engraving no images.
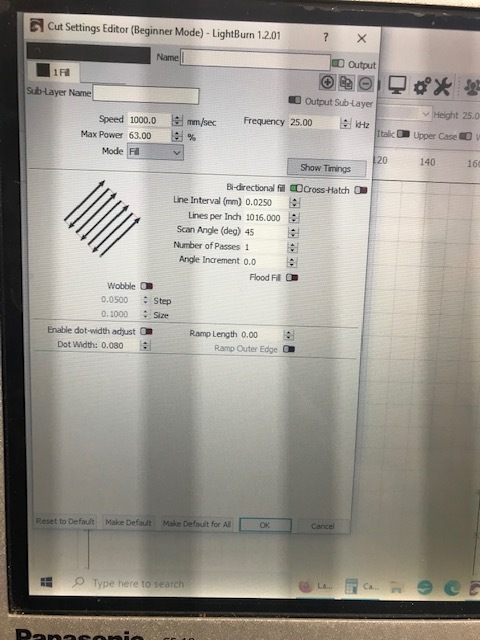
Watched the focus video as suggested. Square focus test laser brightest and loudest at 22cm. Cut a square on a anodized business card. Still cannot get a deeper engraving on a piece of aluminum flat stock.
After focusing and adjusting as suggested i got a decent engraving with 50 passes.Going to tweak the font and retest tomorrow. Then Measure depth.
1 Like
50 passes seems like a lot. What lens size do you have? Just for science tonight I’ll set my laser to 63% of 50% and see what it does, report back. I’ll also see what the param converter outputs.
Lens is 1064nm
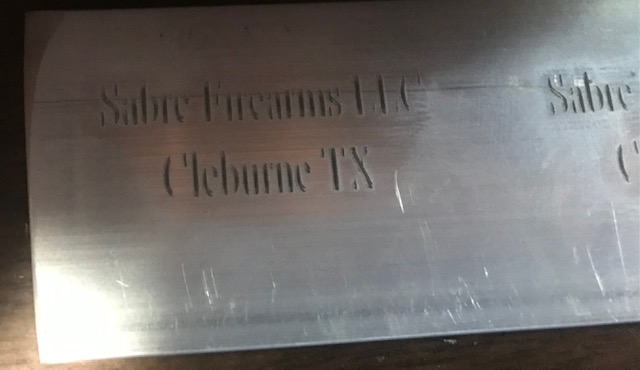
Got a decent engrave. Other firearm manufacturers think i have a laser power supply issue as I seem to be getting left side fade. And depth doesnt seem to be deep enough.
3 cuts as follows:
speed 1500 mm/sec
spacing .020
Freq 35
Angle 90
Passes 50
cut 2
same as above but angle 180
25 passes
Cut 3
2000 mm/sec
Freq 75 mhz
Angle 145
Flood Fill on.
15 passes
Engraving is decent but seems like it should be deeper.

Tried a few tests, with a 175mm lens I needed 70-80% (60W) power/ 20 passes to deep engrave some 6061 aluminum. Couldn’t hardly scratch it at 40%, no matter how many passes. Tried a param similar to your last post. When I first got my laser it had a 100mm lens, cut deep with less passes/ less power. Seeing how you are limited to 30W, not sure what lens you have (1064 is wavelength of the laser?) lenses are cheap, (But need to calibrate each new one) 50mm-75mm would give you a lot more concentrated power then say 100mm-150mm. 75 mm would be 2-1/2" + of workable area, enough for serial number and name. Also could add some wobble. Aluminum seems to be more difficult then steel.
This was with wobble 0.1 step 0.3 dia (that’s a lot of wobble) If I wanted it to look nicer I would mx in some non wobble passes to smooth it out but the wobble seemed to cut with less power.
This was done with the 100mm lens didn’t even know aluminum was trouble at the time!
Looks like my Lens is 175mm.
Cloudray has lenses for around 50-60 bucks.
I would suggest get one in the 70mm to 90mm range. I don’t know if lense size and wattage are exactly linear, looks like when I go from 175 to 100 typical aluminum dark goes from 63% to 36% so close.
So caveat, ive only had a laser since July. Did a lot of research prior. And I did stay at a Holiday Inn once.
1 Like
Hi
Problem may be simply caused by the aluminium grade itself.
The aluminium card you used to test is probably a low grade soft aluminium.
Whereas the reciever is a high grade 7075 which is a standard used for firearms recievers and might need a very high power to engrave or switch to a cheap cnc engraver instead.
Good luck kirk retired uk firearms dealer.
1 Like
I am guessing that the anodized aluminum business card is really a paint or a very thin anodize. The firearm is probably a hard anodize, which is thicker and much harder. I recall machinists saying that cutting through a hard anodize coating can dull steel tools. The firearm manufacturer wants the hard anodize for durability. If you take a sharp steel point and hit the business card with a hammer blow it will make a dent but the same point and hammer blow will not dent the firearm surface.
1 Like
I was using 6061. Pretty consistent alloy. Used in AR receivers, along with 70xx Also ran some annodized aluminum from a decommissioned 80% lower, didn’t take a lot of power to remove black and do white color but did take some heat for deep engrave. I was using 100mm lens (60W)
Ill grab particulars tonight if I have some time.
Might be worth trying a black marker pen over area after each engraving attempt .
Engrave then apply black marker and engrave again.
I use a 5.5w sculpfun s9 on my knives going over three times using this method works well.
1 Like
So tried couple things,
20+ passes 63% to hit 0.004" for the serial # I like more like 0.006 to 0.007 so if you cerakote still have sufficient depth
2 passes 19% did white like the punisher
not sure what I did with hellboy, think it was 1 pass same settings 100mm lens.
60W 175mm lens

Settings for 0.04 serial
Settings for white aluminum
Steel cuts a little better then aluminum
1 Like
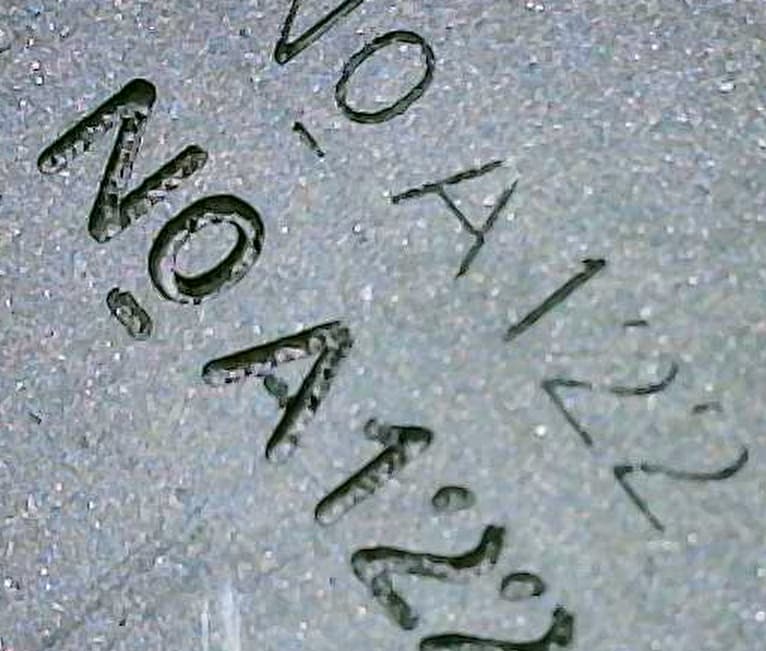
Getting good deep cuts. Almost ready to engrave on a receiver. I seem to be losing some Letter clarity though. Any Advice?
Anything I should change on my cuts to get better letter Clarity. C S E i lose clarity the most.
Cut 1 25 passes
Cut 2 25 Passes
Final Cut 15 Passes
1 Like
Couple things, if you set passes in sub layer instead of during framing, and rotate your hatch ea pass, for example 24 passes angle increment 15 deg (=360) it may help with the bottom and top of the radiused letters, s,2,5, c, etc. Also, try checking cross hatch instead of second layer then passes will be like 45, 135, 60, 150, 75, 165 etc instead of all same valley.
Also, I’ve noticed flood fill should not be used excep for special cases where speed is the most important factor.
I like to go 0.001 on last sublayer, like 5 passes 72deg angle increment.
So using what you have, short story,
Example Sub layer 1 24 passes cross hatch bi directional angle increment 15 deg angle ea pass
Example Sublayer 2 no output
Example Sublayer 3 .001 5 passes cross bi 72 deg angle increment.
Do you have a usb microscope?