She’s cruising. 200, gonna try 400 next.
good  I am following you with excitement.
1 Like
I got a start to getting it written up. There should be enough there to get a RAMPS board running Marlin 2.0 with the laser features from the branch. I’ll add more here over the next week or so. I wanna re-do the panel before I write it up since I got some fancier buttons to use, but the acrylic I want to use to re-make it is on its way.
https://bitbucket.org/dongoss/trigorillalaser/src/master/
I’m going to move the repo over to GitHub before long because BitBucket’s lack of Markdown really sort of kills the whole self-contained idea.
Let me know if you need more details or pictures or drawings or anything. I’m leaving the “RAMPS” board in it as long as I can.  I do have a RAMPS 1.4 board with the diode cut and fuses bridged if pics with it would help, too.
I’m simplifying some of the other parts like the relays by swapping everything over to 24V instead of having to step down to 5 like present. I also got buttons with lights in them that I can use to simplify the holes in the panel, and some panel connectors for the temp sensor, blower, and flow indicator(12V generator)
Any feedback on the write up, minus the crappy BitBucket formatting would be appreciated.
This is the updated repo where the document is a lot easier to read:
Hello!.
@mentaldemise I really appreciate your feedback here and on the marlin github.
I have a custom machine with marlin 2 on a SKR 1.3 motherboard with a 5W laser diode and as you have mention on another post the the M3 M5 causes pauses and this leads to problems with the laser when engraving.
What i want to know is how do you edit the gcode from lightburn to be able to use the INLINE feature do i have to replace every single line?
Oz mention that Lightburn uses G0 for fast white space scan but that’s not what i see when i export my gcode from lightburn.
eg
; Scan @ 50 mm/sec, 100% power
M05
G0 X76.55 Y8.36 F7200 <----this is the only G0 on the start of the gcode and another one on the end.
G91
M03 S100
G1 X0.06 F3000
M03 S0
G1 X0.3 Y0.1 <---- This should be G0
M03 S100
G1 X-0.66
M03 S0
G1 X-0.11 Y0.1 <---- This should be G0
M03 S100
G1 X0.89
This will replace them for you. It’s a pain because you really want to take the second line up to the first and that’s why it looks co cryptic. Use this Regular Expression in Notepad++ to run the two replace commands and test it out. Just Control F, then click the replace tab, and put in “M03” and replace with “I” and then make sure “regular expression” is checked and use the second one ^(I.+)[\n](G1.+)$ with $2 $1
- replace all M03 with “I”
- replace
^(I.+)[\n](G1.+)$with $2 $1
^ This will “process” two lines at a time and actually end up inverting them, so line two will be in front of and part of line one. Note that Notepad++ will chug a bit relative to the file size. Sub-second with an easy fill but just the regex could take a minute with grayscale.
Thanks for the reply i did it and the result is below
But still the G1 is there so with help from a friend knowing regex i have replace the G1 with G0
without power with
replace (G1.+)(I S0) with G0\2
According to marlin this will work if the LASER_MOVE_G0_OFF is enabled on configuration.
; Scan @ 50 mm/sec, 100% power
M05
G0 X76.55 Y8.36 F7200
G91
G1 X0.06 F3000 I S100
G1 X0.3 Y0.1 I S0
G1 X-0.66 I S100
G1 X-0.11 Y0.1 I S0
G1 X0.89 I S100
and this is the result
; Scan @ 50 mm/sec, 100% power
M05
G0 X76.55 Y8.36 F7200
G91
G1 X0.06 F3000 I S100
G0 X0.3 Y0.1
G1 X-0.66 I S100
G0 X-0.11 Y0.1
G1 X0.89 I S100
I will try it tomorrow and i hope this will solve the problems i have with my laser when engraving.
Do i need to have M5 I to turn off the laser now?
G1 S0 is used because it is preferred - it keeps the speed consistent when engraving.
The G1 S0 while not the “best” way, G0 turning it off is an opt-in for the firmware. For safety sake it should S0 while Marlin has this feature in test at least. That’s my vote. If you gave me your Gcode and I had that setting off it would burn on all the G0 moves at the same intensity it was at last instruction. Might make for a trippy effect.
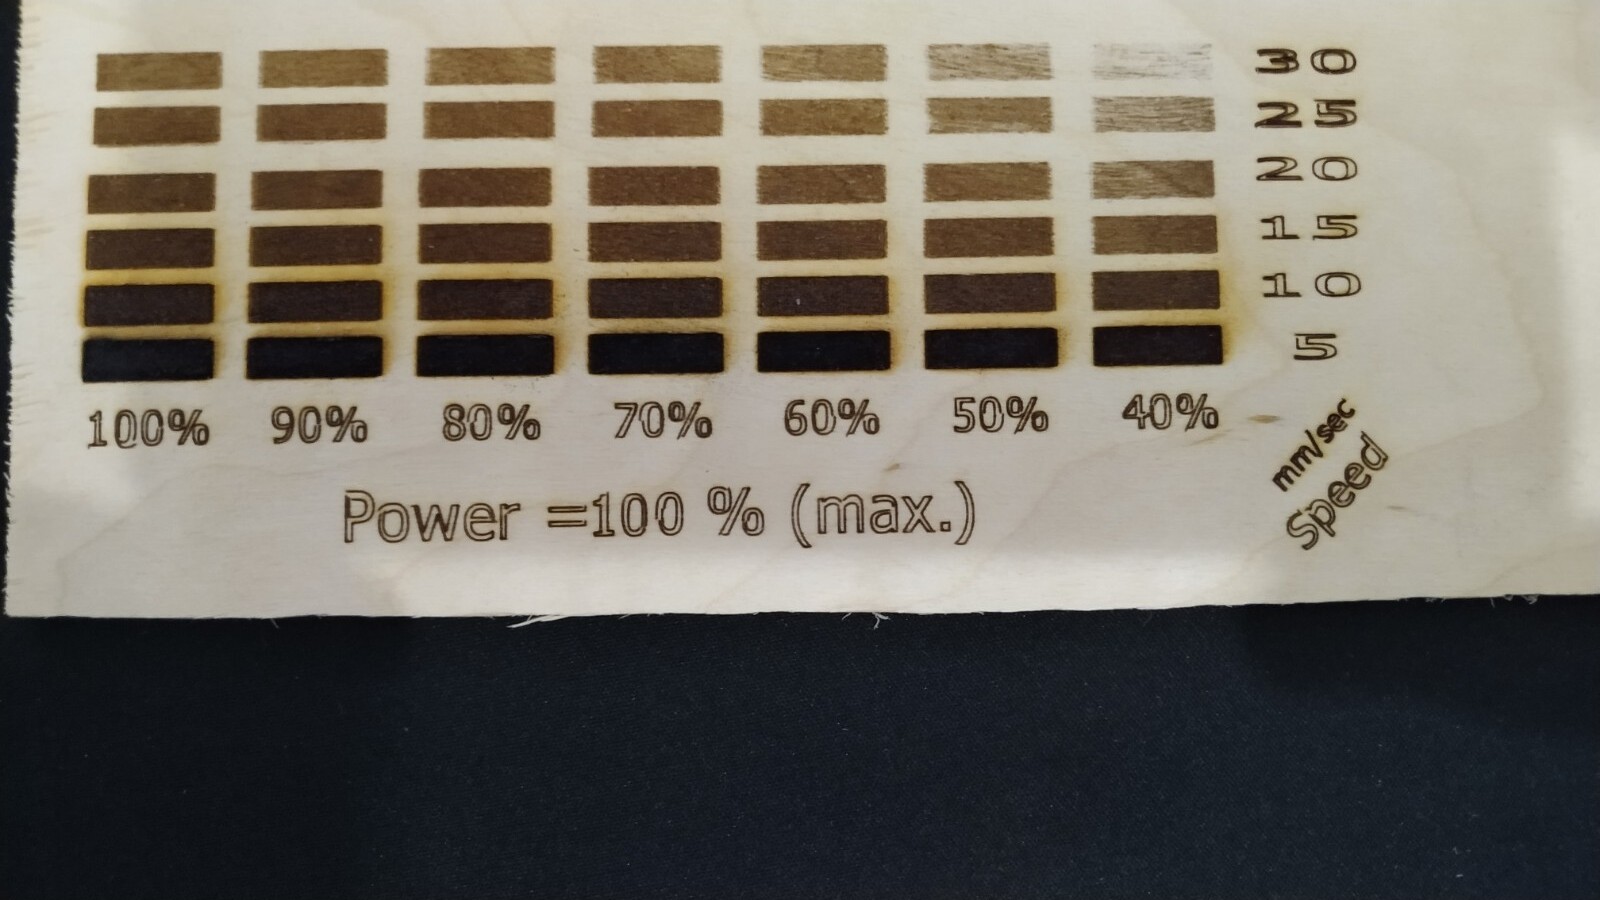
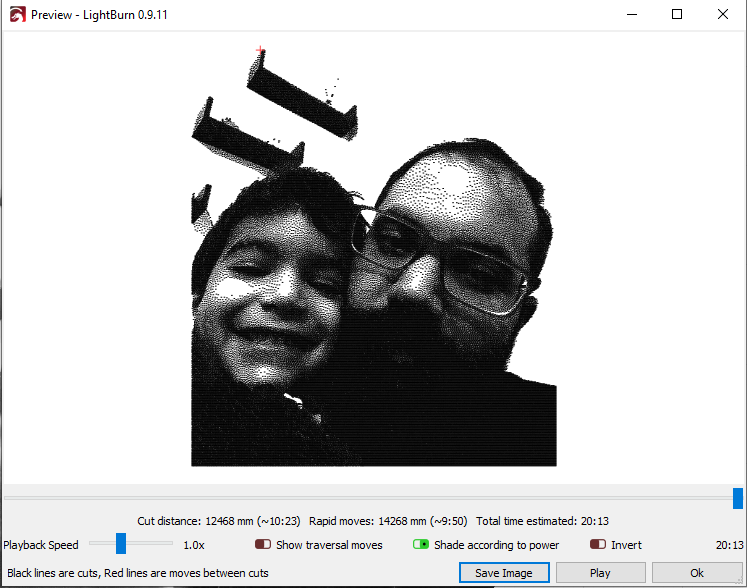
I’ve been playing around with Engraving since pulling down the upstream changes and re-flashing last night. I need to adjust still and not sure this is the best material. ~25 minutes to engrave.
Note that this laser was ‘born’ when this thread was started, and then re-born to support fast raster. With that in mind expectation should remain pretty low. 
I couldn’t sleep so…
I can confirm that the this worked with marlin and i have better results than just M3 M5 the laser now moves at the speed it is supposed to move.
Before this always slowed down for some reason and that made burns on the wood on some places and no engraving at all on others where the machine started to make lines, bigger spots etc.
Now the speed remains the same on all spots and the engraving is perfect the funny thing is that when i made the speed/power test before the changes because the test have big horizontal lines the results was perfect but when i tried this settings on other objects it was all burns because the planer-synchronization on marlin had to keep up (if i understand that correctly) but now even on dots from your marlin 2.0.0 logo is perfect i have some minor lines between M n and X but maybe this is from my settings.
If anyone want to try this keep in mind that you need “M05 I” on the end of the Gcode for the laser to turn off (or at least go to 0 power? i can still see the led that controls my laser green but the laser has 0 power).
@mentaldemise Thank you for posting this the last time i had see the laser working so good was on marlin 1.1.9.
I will post some pictures tomorrow.
1 Like
Sounds like you were in the same boat as me. I replaced my M2 board with a RAMPS 1.4 and a modified RC candidate for Marlin 1.0.0. Yes it worked with Inkscape but trying to get something from Fusion 360 to Inkscape and into that damn export plugin and using a version of Inkscape from 7 years ago all killed it for me.
I’m not running the regex anymore, though that was the ONLY regex I was running. They’re adding this support directly into Lightburn for an upcoming version, so I have the option right now to just toggle to it to help test. I’ve been running with it on for weeks now and haven’t had any issues from the software. Some from the laser.
For a short while, depending on which branch you got, there was a bug I reported as well where the laser wasn’t always turning off when it should so you may want to check that out. If you find a comment from me saying the laser wasn’t always turning off you know you have the “bad” one lol
1 Like
I’m always using the latest bugfix 2.0 of marlin from my personal fork.
And i’m not really sure if the LED from the motherboard was off after the job but for sure my laser is off i dont have beam and the LED on the laser is OFF just the motherboard PIN led stays ON.
I bought this 5W laser diode a year ago and i was using it with a melzi board and marlin 1.1.9 on a Tronxy printer now i have all the parts on a 3d printed CNC/laser with marlin 2 and 32-bit board.
Still testing and learning.
1 Like
One thing I’ve noticed is that if I hit “Stop” when I’m streaming a job it’s a crap-shoot as to whether the laser turns off. I can disable it from my button on the machine and then frame and after that it will be off. I don’t know if you wanna send an M5 when stop is hit or what.
Yes this happens to me to from time to time the solution for me is to stop it from the marlin menu Laser control maybe they will fix it on the next update.
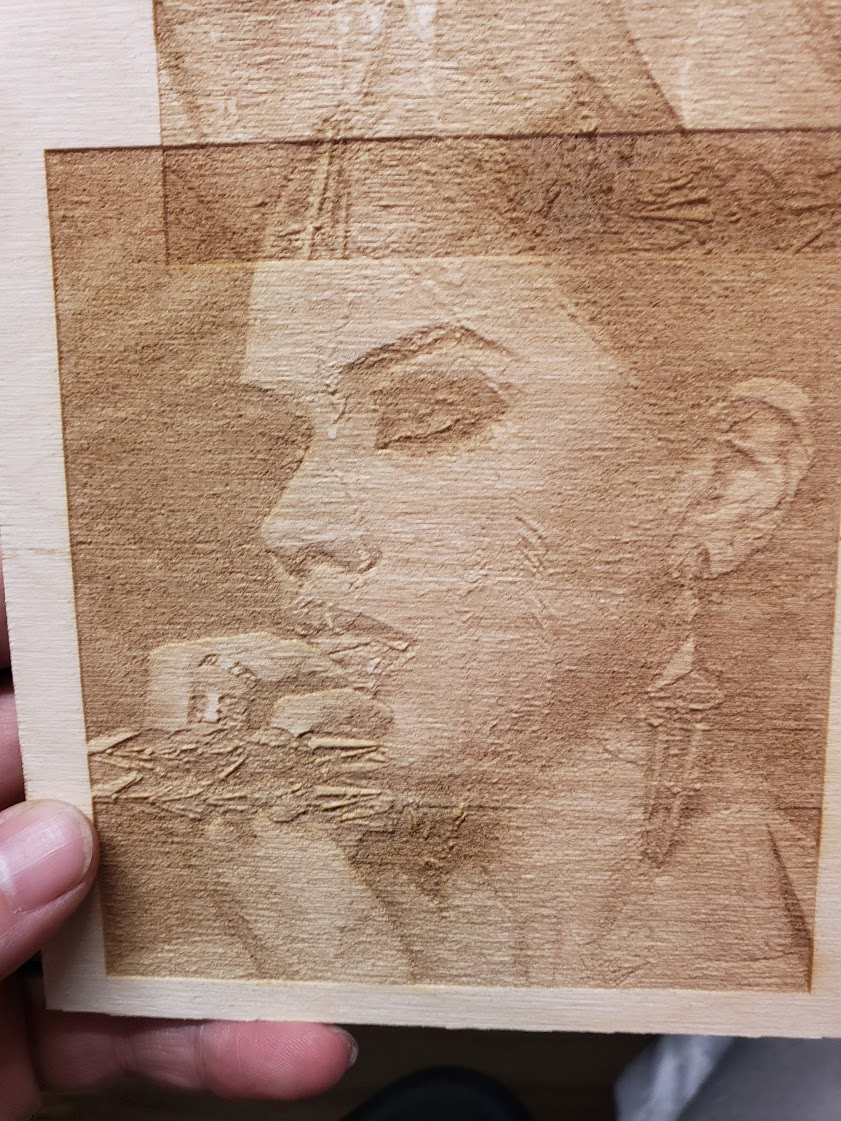
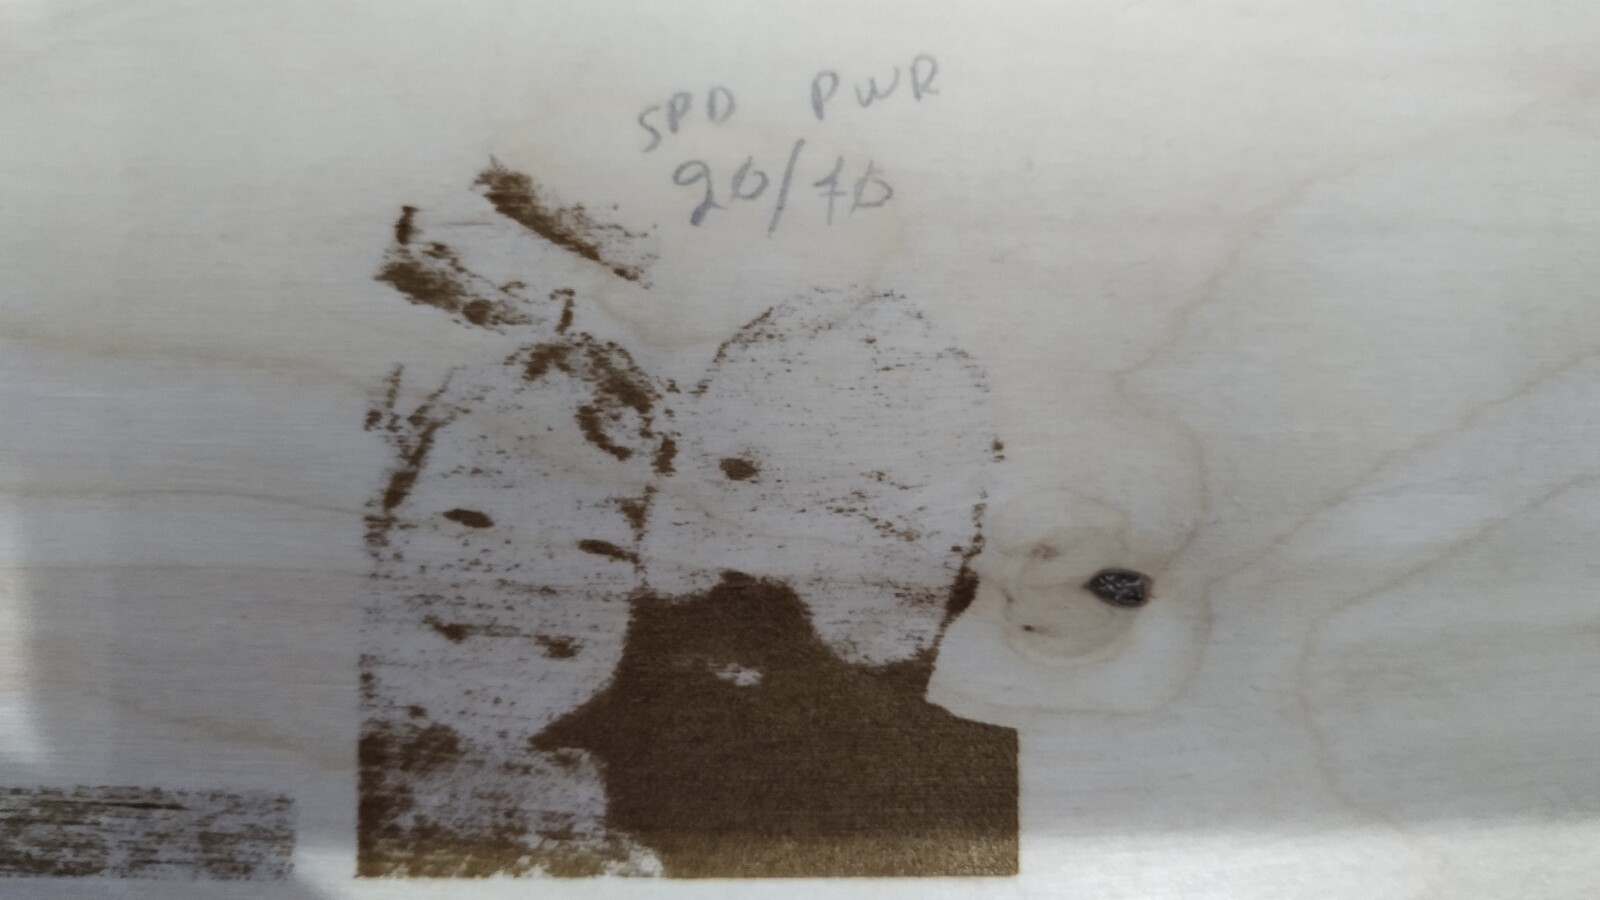
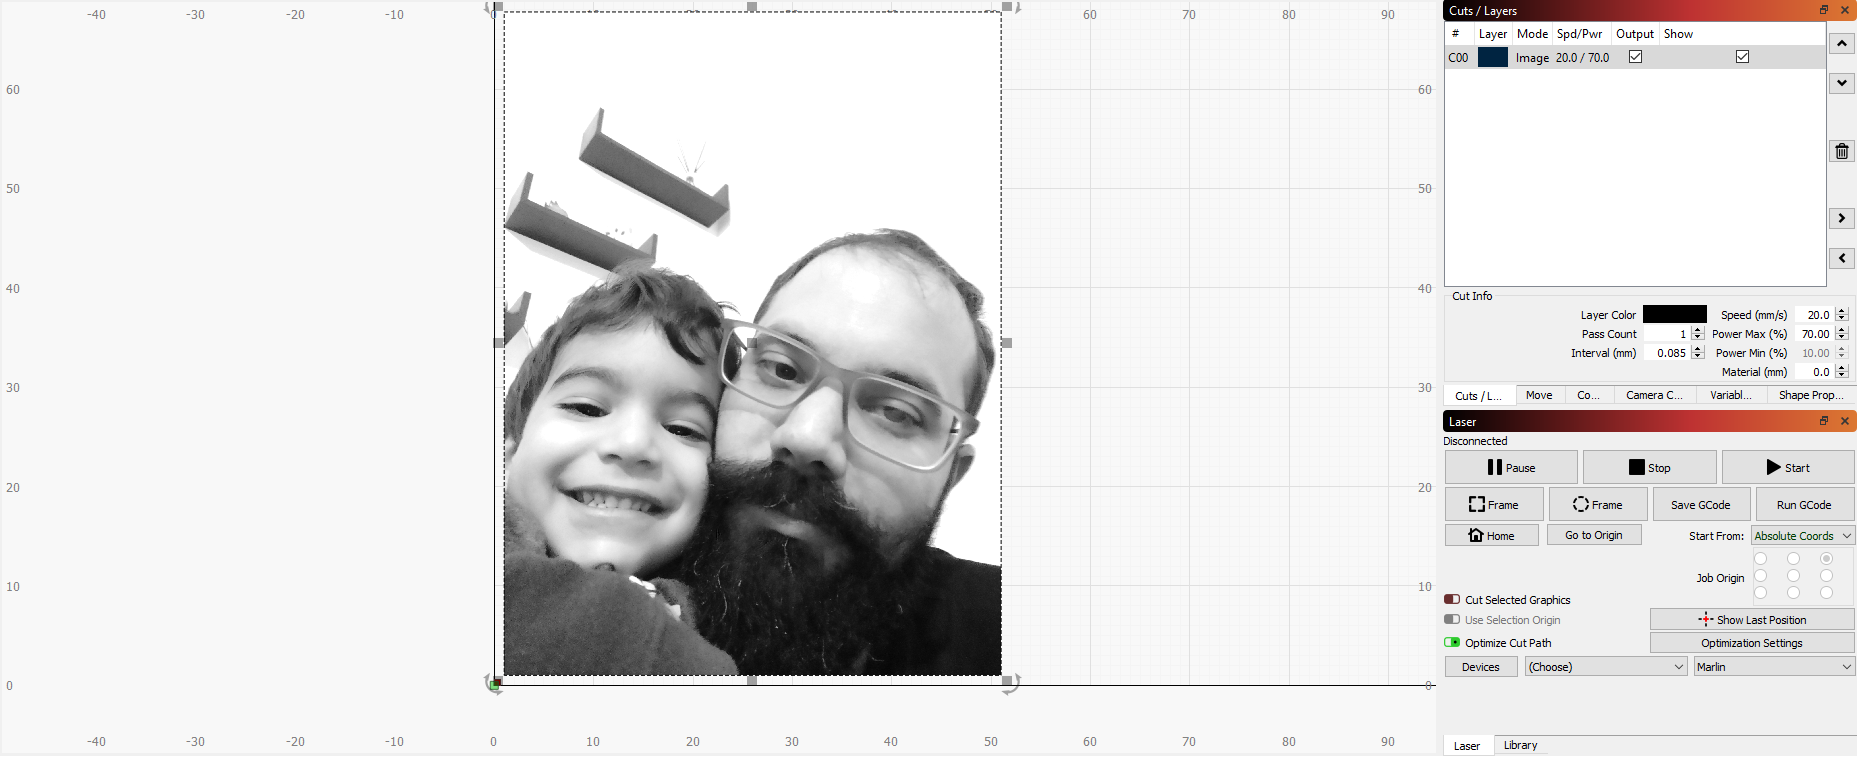
I’m still drying to understand the engraving process for images what i can tell for sure is that it works complete different from fill.
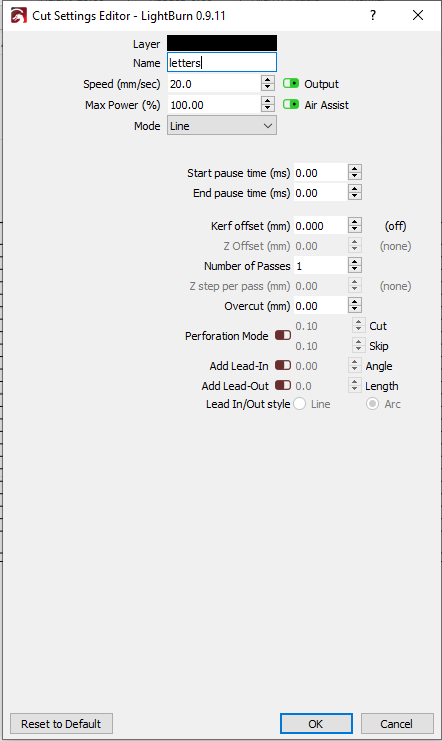
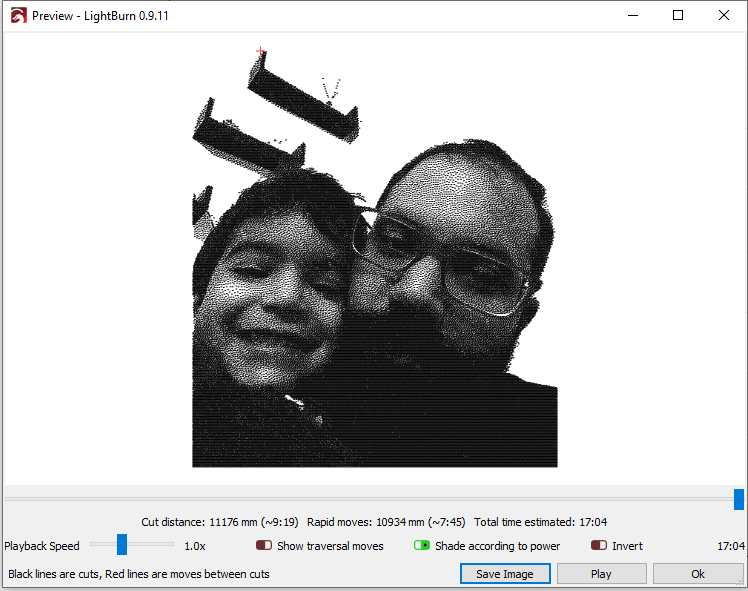
Here’s is some pictures from my tests the picture the preview my settings and the results.
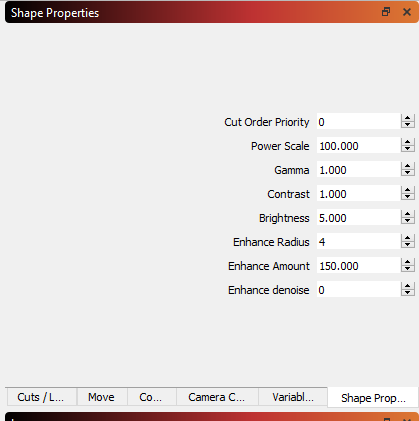

Your settings are fine, you’re probably just missing inline mode. Oz said it should be in the next release. You’ll have to set it up in the firmware too. Does it seem to “studder” a lot? It’s looks like you’re over-burning everything from the stall for intensity change that’s mentioned way up somewhere in this thread. Inline mode with some config settings in Marlin takes that away so it can change intensity without stopping.
But i already have inline mode enabled as i have mentioned before.
Here is a link with my settings
https://github.com/gminadak/Marlin/tree/TopsCNC-bugfix-2.0.x-SKR13-TMC2130
I have almost the same settings as you have the only difference here is that you are using a CO2 laser and i use a 5W laser diode.
So i didn’t change the SPINDLE_LASER_FREQUENCY, SPINDLE_LASER_POWERUP_DELAY (this is ignored anyway) and maybe some other options.
And i use the inline option on my gcode.
Better but not perfect.
Here is another test the only thing i changed is the DPI(lower) and Power
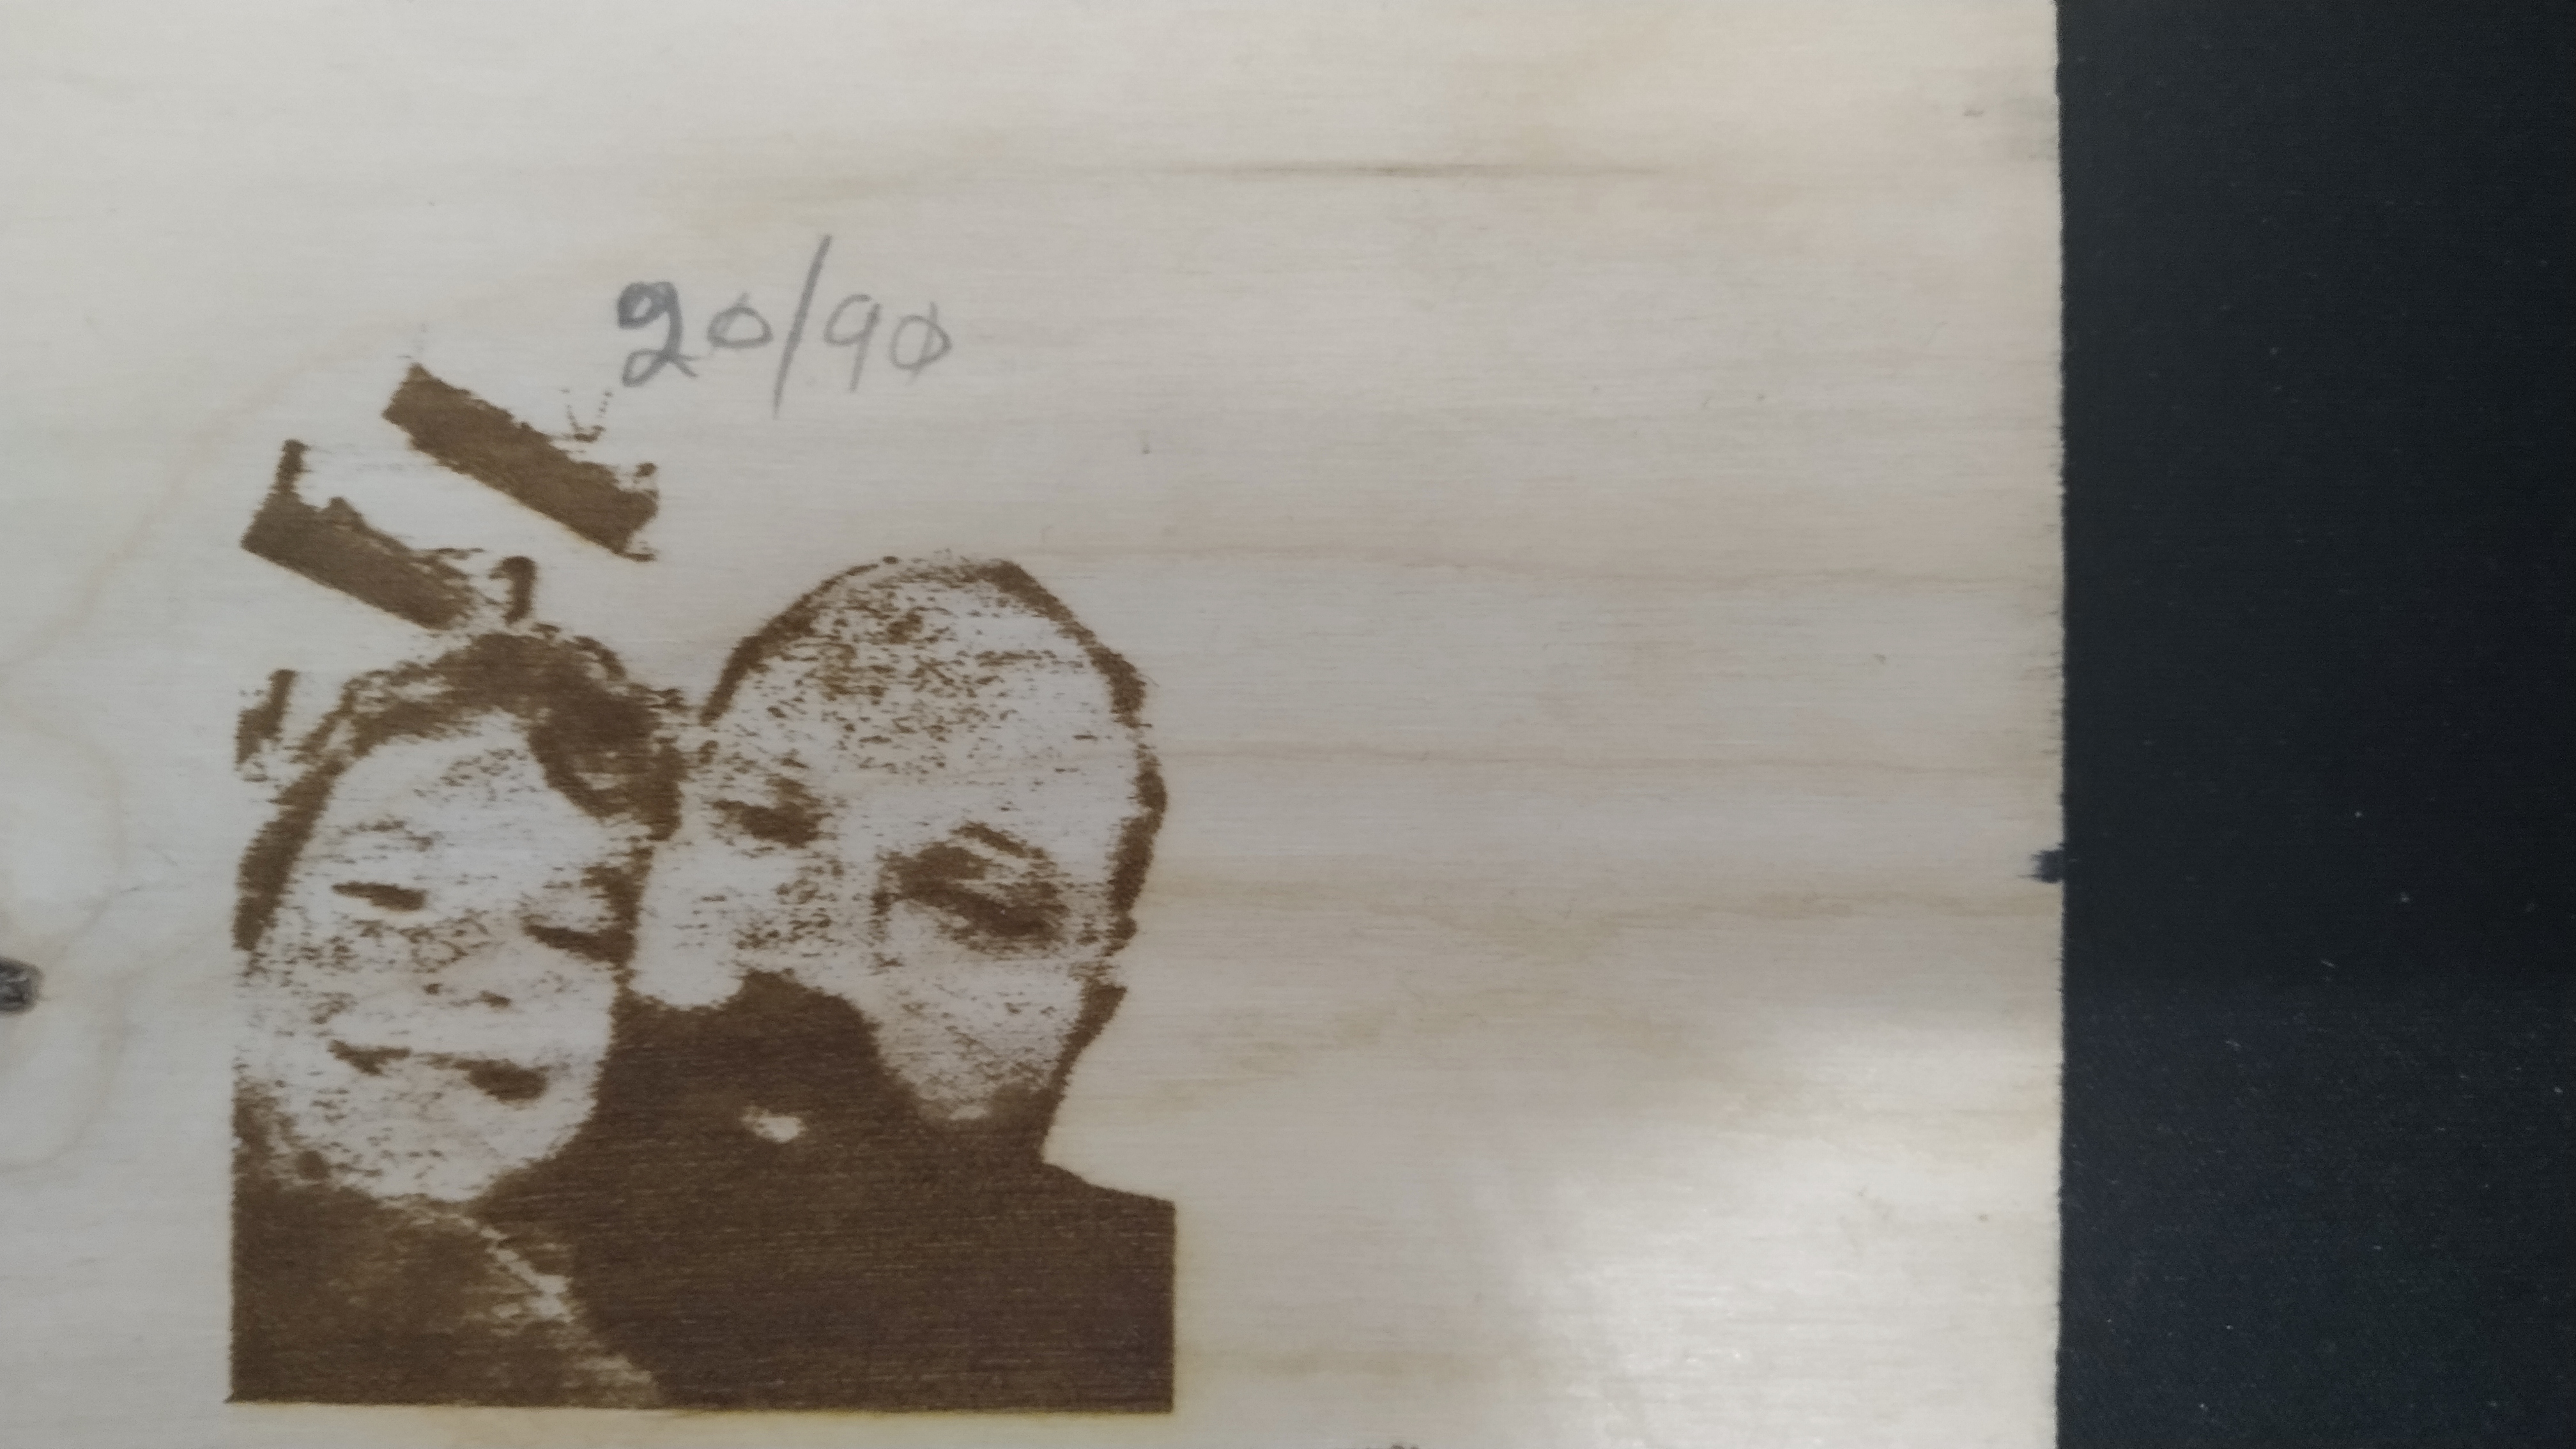
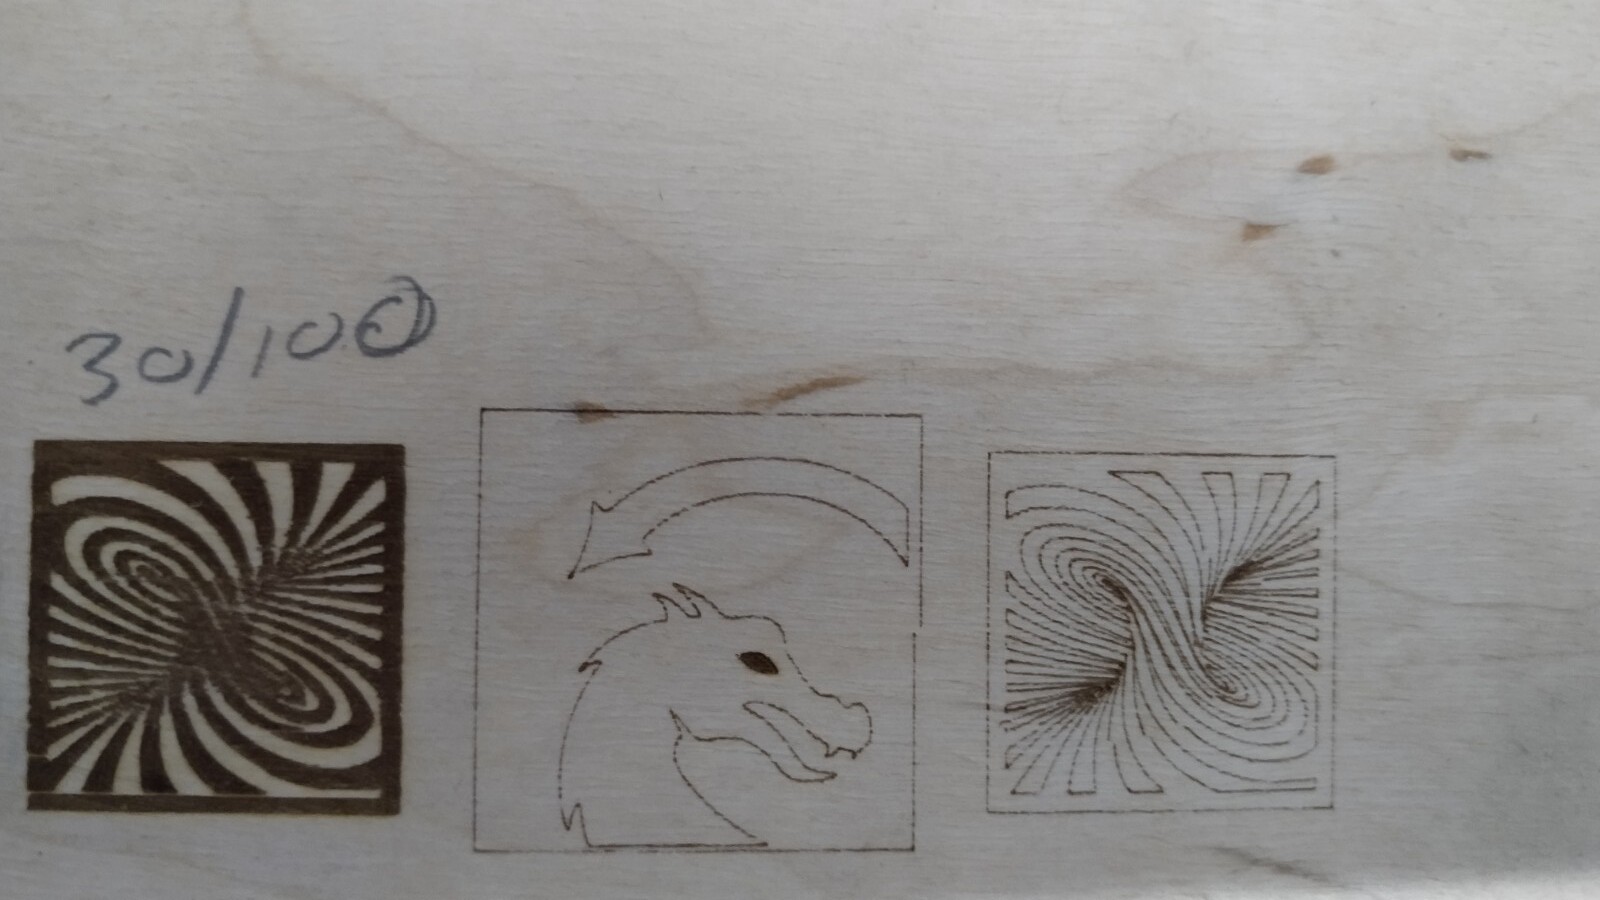
I almost suspect you’re using a pin that’s running on/with another timer. In your image above of the twisted thing you can see that the laser isn’t wanting to turn off when it’s supposed to. Are you using the fan PWM - with the other side hooked to 5V somewhere or what?
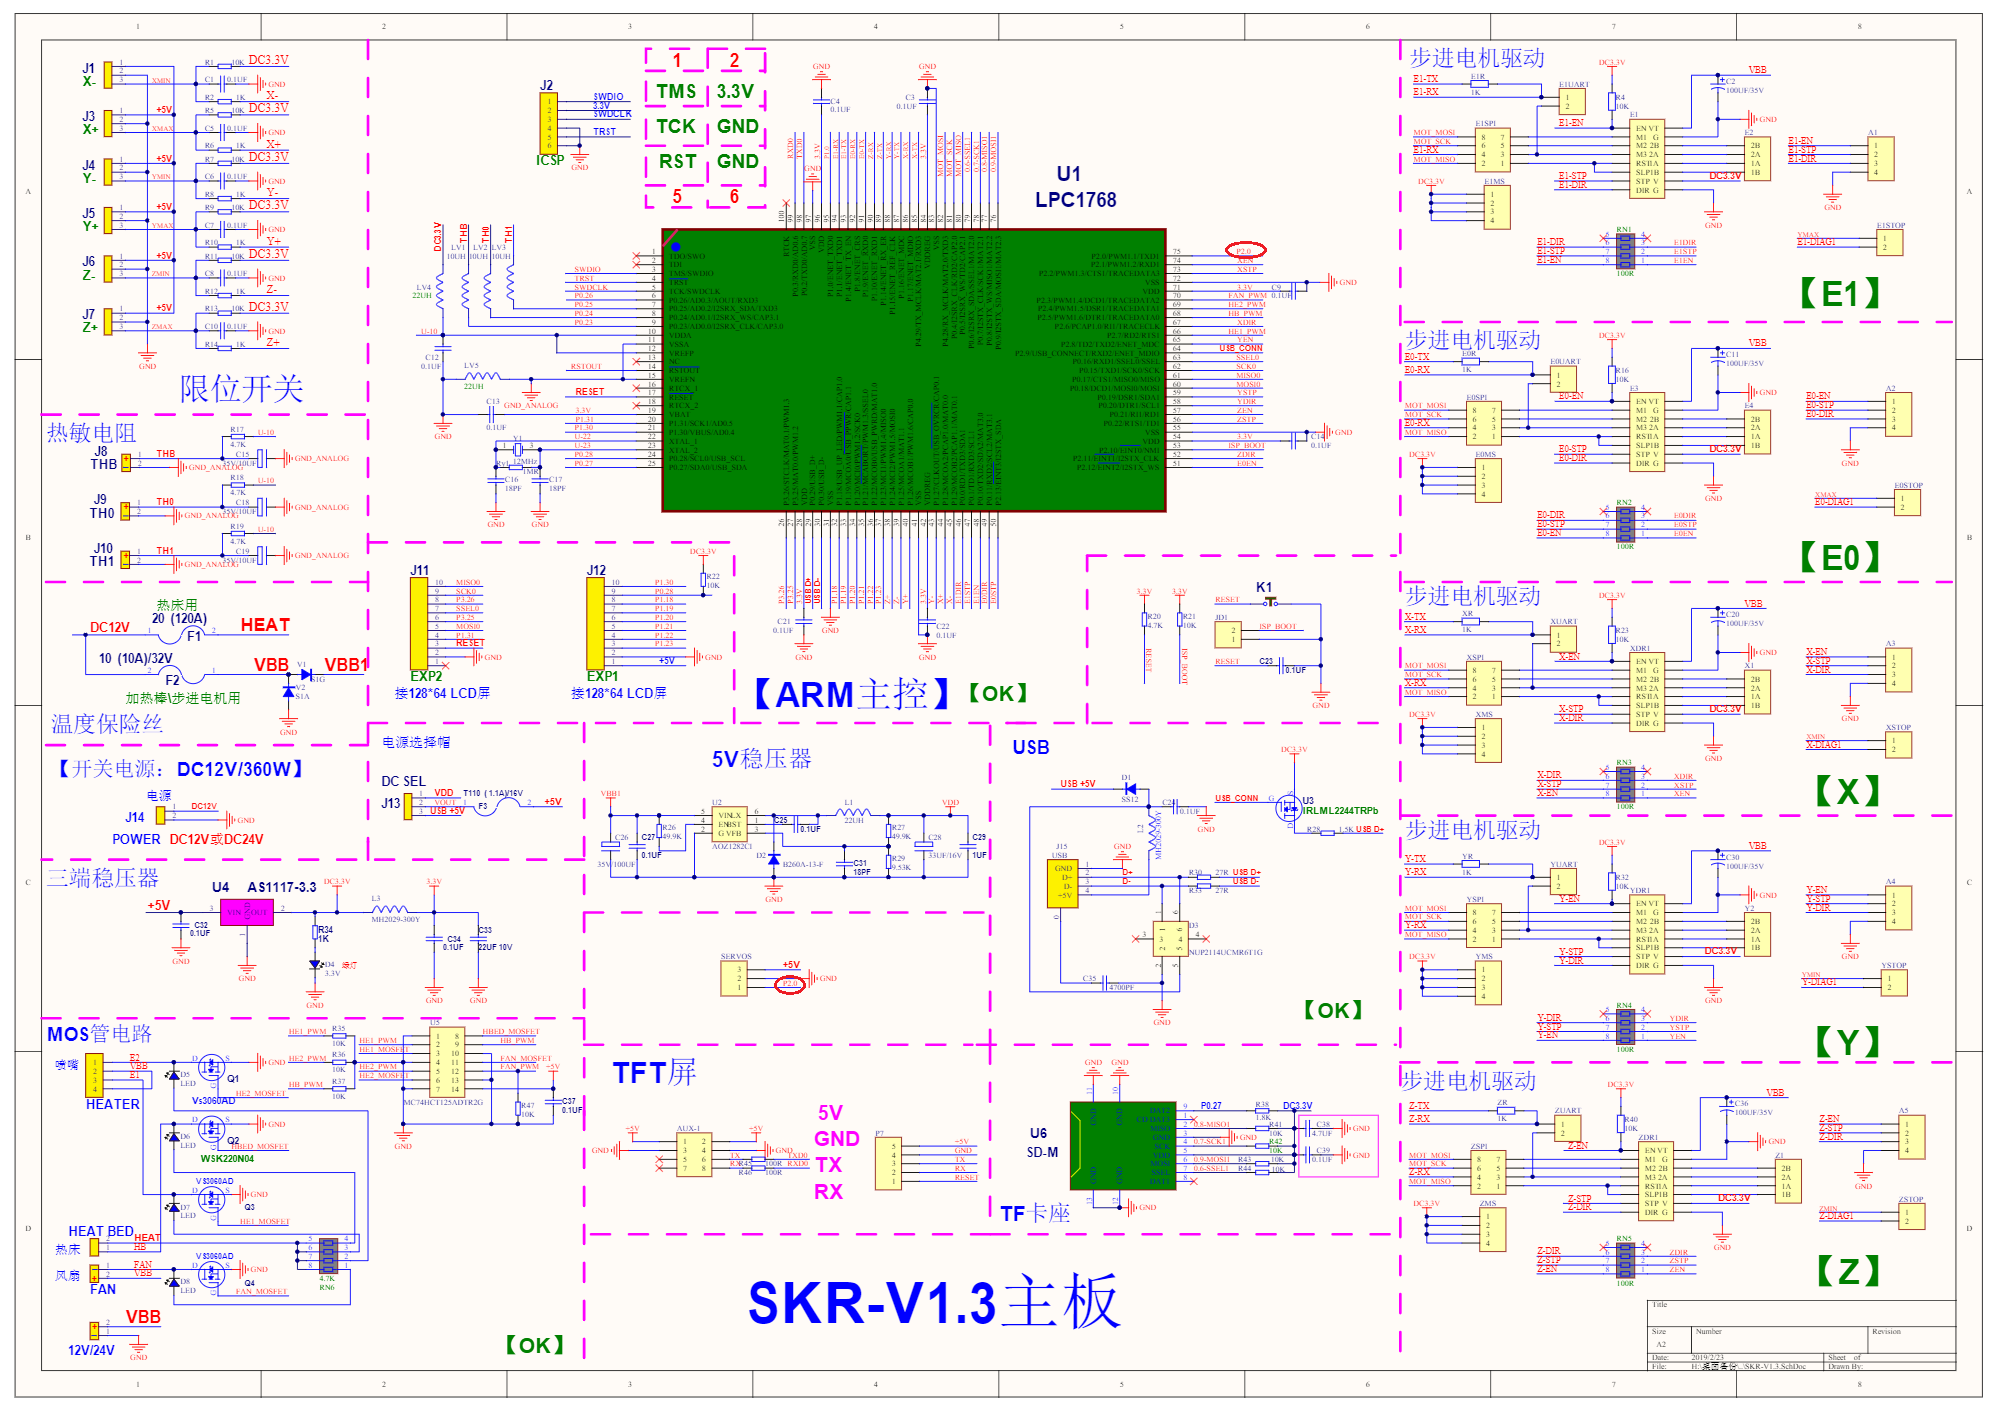
I’m using the signal from the servo pin
My laser have 3 wires 12v+ 12v- (S) the Power is directly from the PSU and only the Signal is connected to the board PWM output.
Marked with red circle.
1 Like
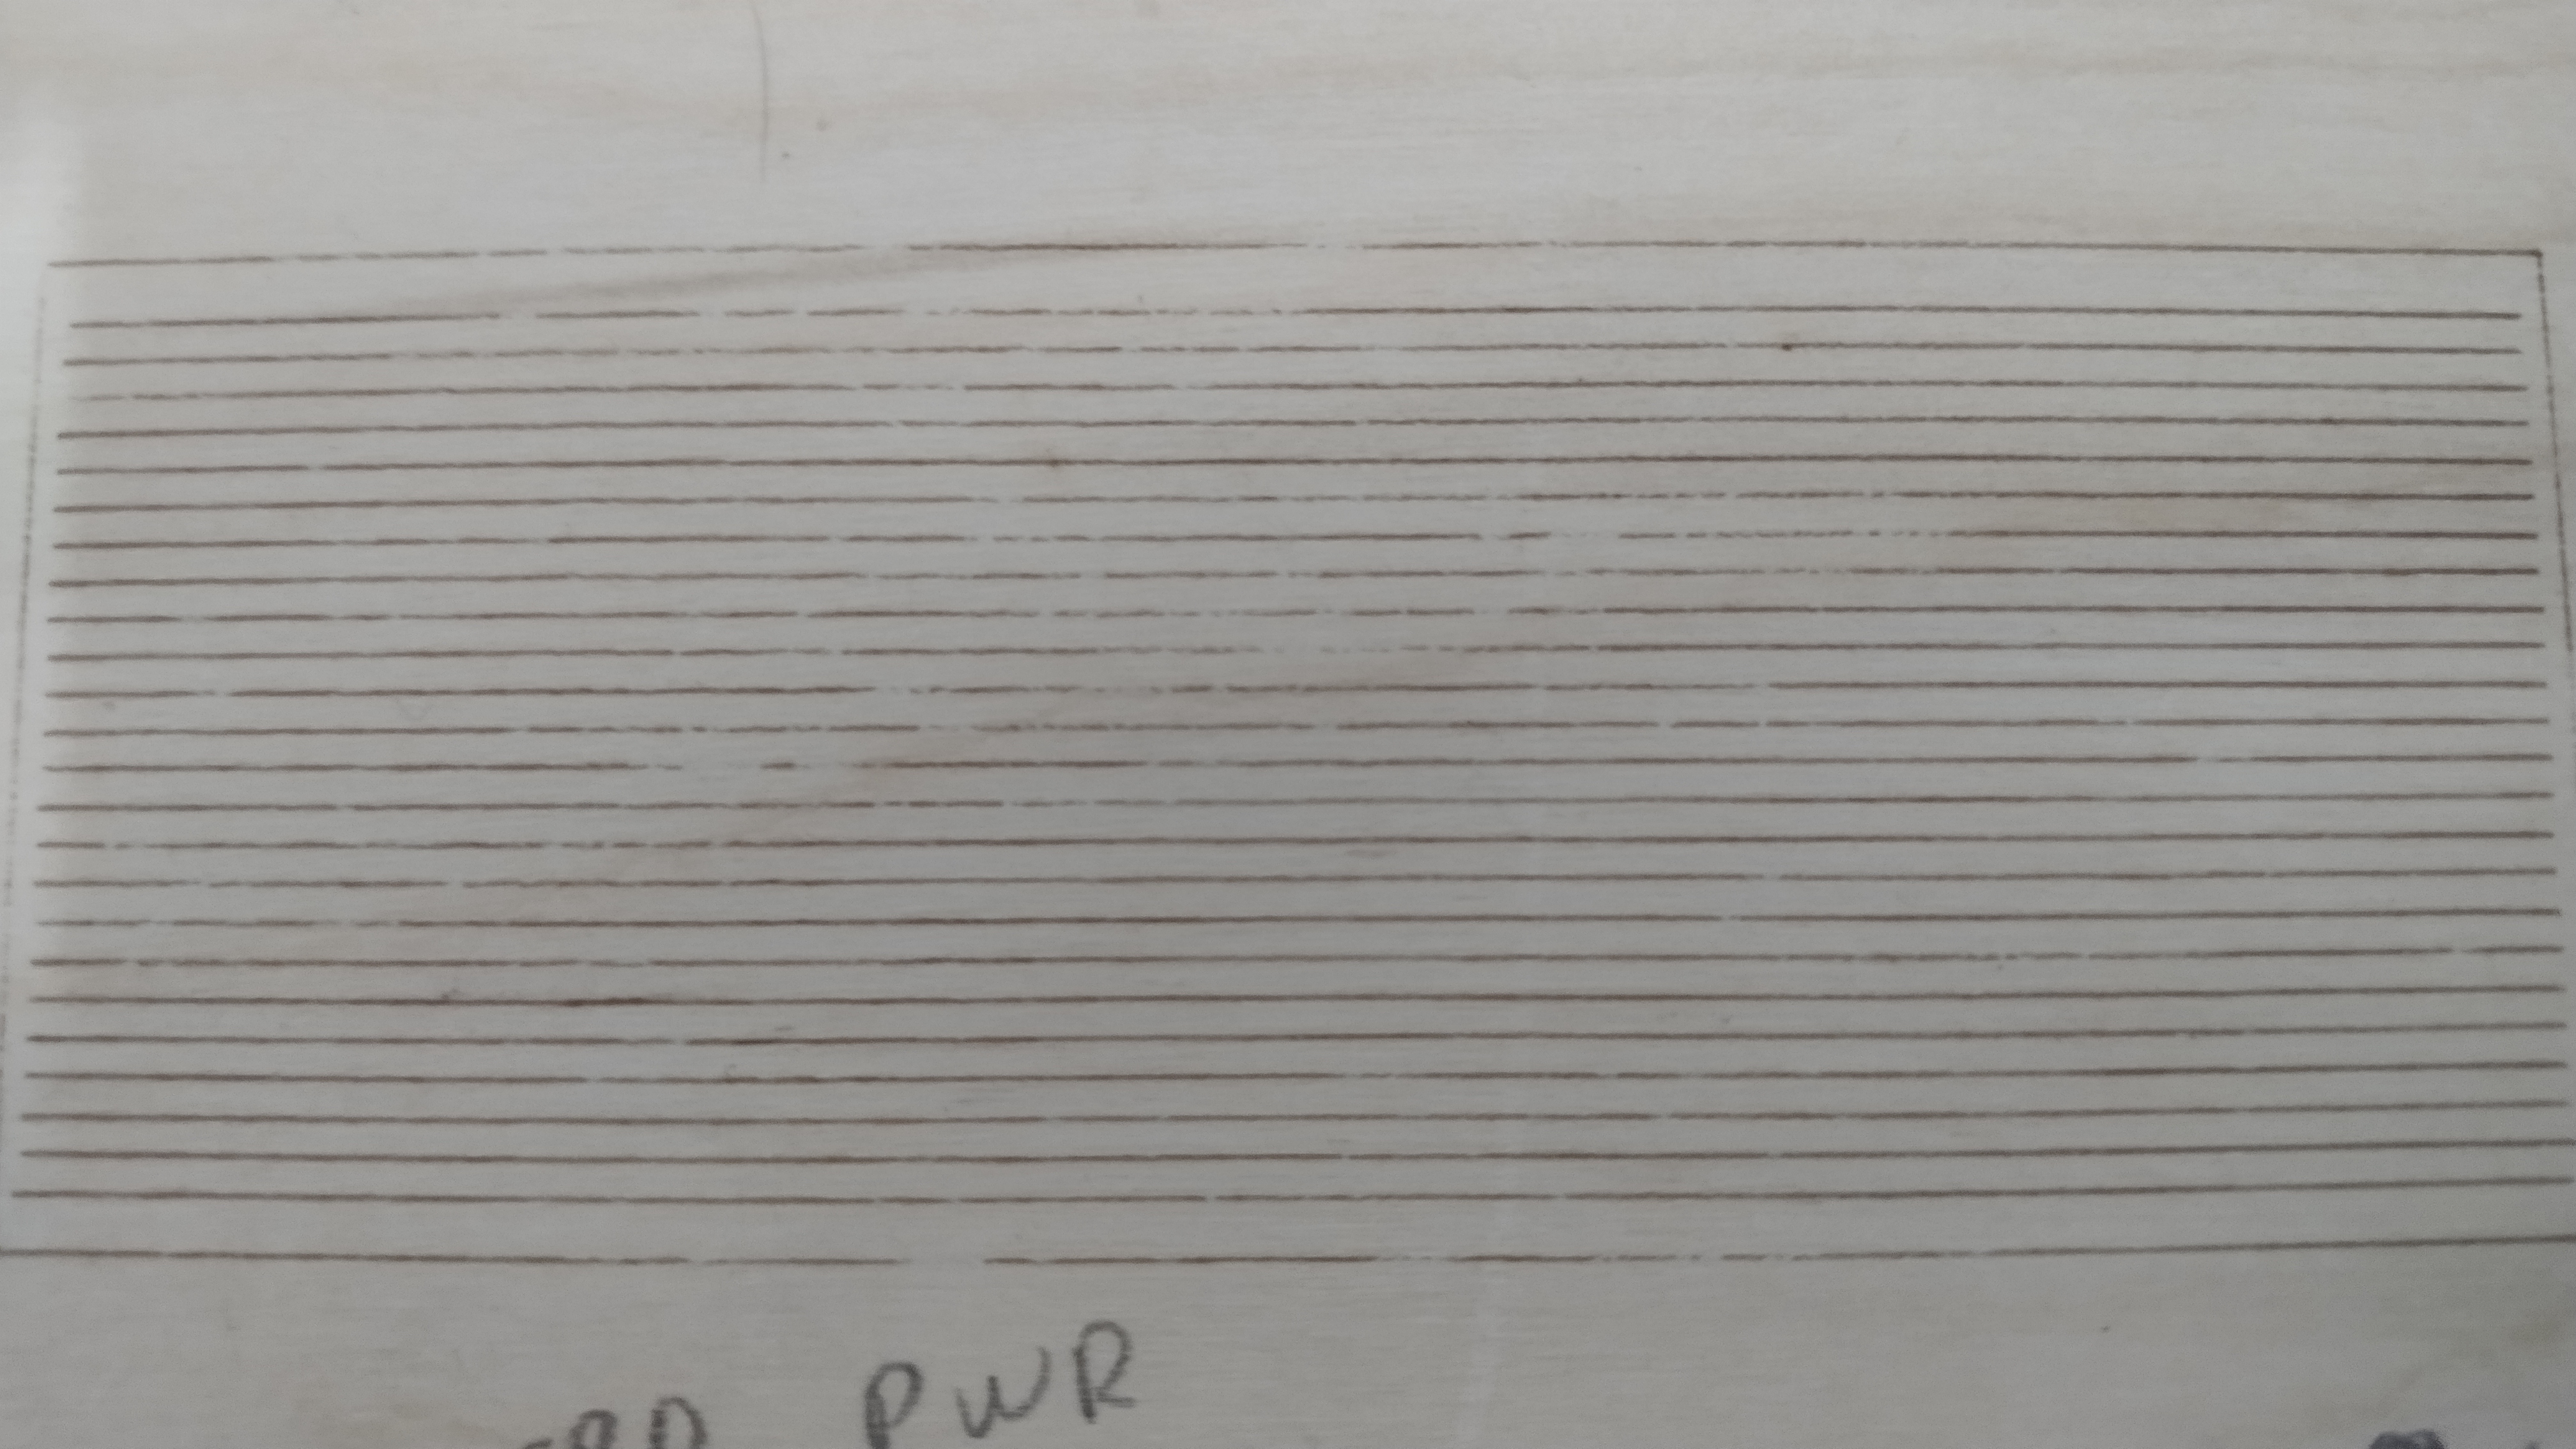
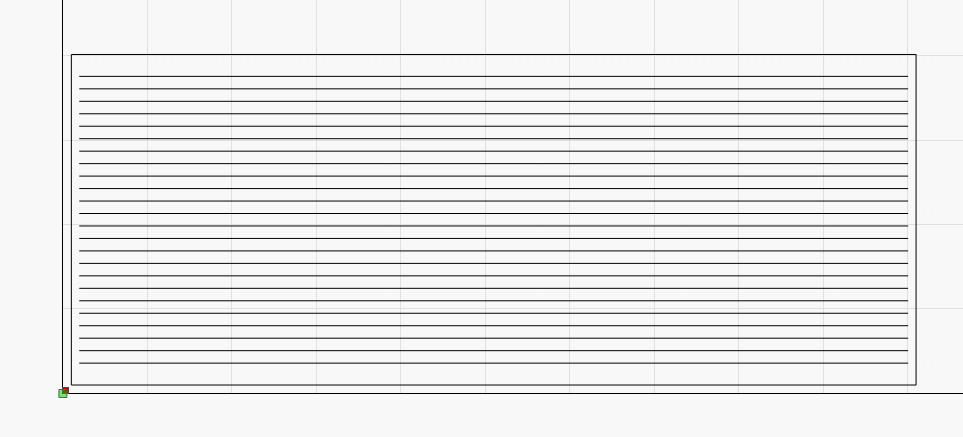
After reading this post link i made a line test.
As you can see the laser starts/stops where is supposed to BUT for some reason the lines isn’t consistent and i can’t understand why…maybe it’s the wood? marlin dont send the correct power? laser is out of focus?, to fast? i don’t have a clue.
the txt file is my gcode
test_LINES.txt (1.7 KB)