It is here already if I am looking at this correctly.

Paraphrased feedback from Oz:
… because those are entirely different things. The shear/rotate/size/move handles apply to every selectable item in LightBurn, and are there to turn off the ability to do those things, not on the current selection, but at all, on anything.
Squeeze is a property on an individual text shape, so it doesn’t make sense to put it on the bottom of the main UI, always taking space.
EDIT: “Zaxis program control so I can use LB on my CNC mill.”
Yes, aware of their interactions. That’s why I suggested graying it out if not a text item.
I’m good with where they exist now that I know.
All good, sir.
Thanks. I enabled it after 15 install. But no go. Supposedly a “Material” option is to be added to the drop down Menu where “line and fill” are found for selection.
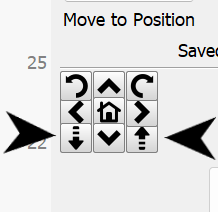
Disable Relative Z Moves only. That will show you the material height setting.
Issue with Taper module. I’m inclined to believe it’s rendering the taper upside down.
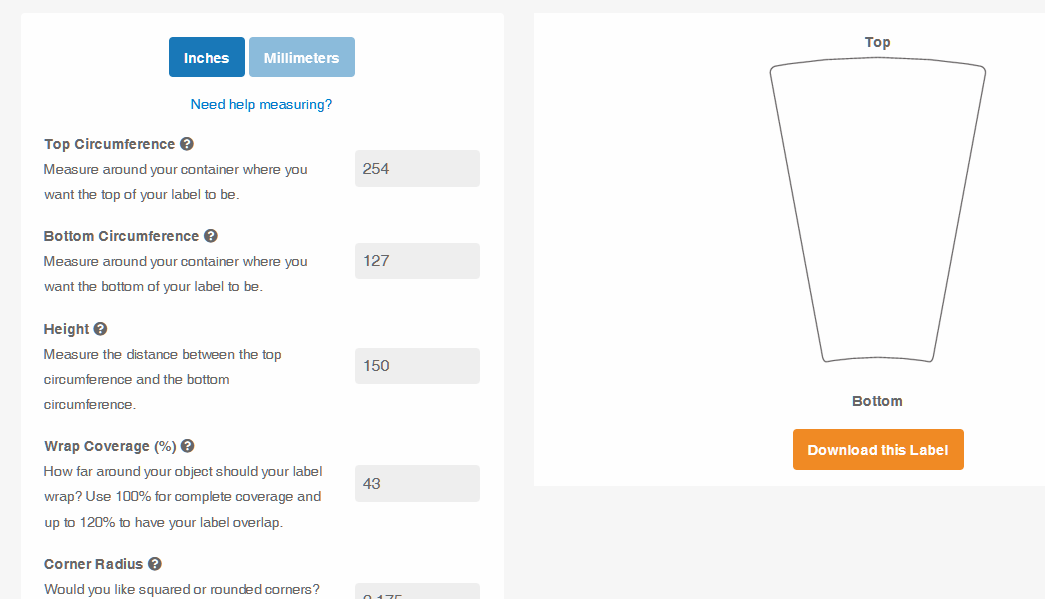
When a round or square image or vector is placed on the taper (where the taper is larger* at the top), the burning size is compensated to be larger in distance/circumference/diameter. This is so that when it is looked upon directly it appears to be a perfect circle or square.
Having a larger rendering at the bottom, as in LightBurn 1.5 demo, would make it wrap way too far around at the bottom of the image/vector at the lower portion of the tumbler.
As mentioned in a previous post, I do have Silhouette Business Edition that I’ve used in the past. Also, to confirm my findings, I’ve been playing around with other online taper conversion software. All of the others show the stretch to be larger at the top than at the bottom.
*FWIW, most tumblers are in fact larger at their tops, but I do have a coffee mug that’s much larger at the bottom to be used while boating. It’s a neat mug, but I digress…
Anyway, see attachment:
All were created with the same dimensions. However, some apps are done in diameter or circumference so I had to convert accordingly. Don’t let the differing numbers fool you. They’re all the same. Having said that, some apps generate a template that requires you to manually stretch your object. Horrible situation but apparently some have no real issues getting satisfactory results.
Taper Comparison.lbrn2 (426.0 KB)
Noted and verifying now internally.
Regarding rhe taper module:
Two values need to be added.
First is how far down from the top is the design going to be placed. Even though it’s linear, it still alters the final outcome of the shape. The farther down it’s moved the narrower the top and the wider the bottom. If the top is moved down to the point to where the bottom previously was, the top width is now the same width. However, since the bottom of the design is also farther down it’s even wider.
Secondly, adding an amount of wrap around of the object also impacts the final width. Currently, we don’t know whether we’re intending to make it do a full wrap or a partial. Yes we can scale after the fact but doing it on the front end improves the workflow.
Would it be possible to retain that information for the shape’s properties? If something doesn’t look quite right, the numbers are lost and you have to start from scratch. Things like moving the design a little farther down or making it wider come into play and may be the only tweaking needed to get the final desired outcome. Having the numbers retained would definitely improve the workflow.
I just thought they had the rotary turned around in their setup.
Hi Steven,
I occasionally have to print tapered product labels and understand your point but in Lightburn you are not printing a label that wraps around a container, you are printing directly onto the container. The two processes aren’t dimensionally inversed but the direction of compression and expansion are directionally inversed. if you look at the top and bottom lines of the Silhouette taper you will notice that the lines are curved to compensate for the pitch of the taper and the curvature of the container, the Lightburn taper doesn’t have that curve.
edit: I should have said this first, The rotary isn’t rotating on the center axis, it’s rolling around on it’s circumference and printing directly onto the container.
I’ve confirmed that the Taper Warp is to account for the warpage on tapered tumblers. If the tumbler has a smaller radius at the bottom, the bottom of the design needs to be stretched to correct it, so this feature is acting as intended.
How about this…
As the glass rotates, the upper moves XX.x mm. the bottom, being smaller, has to rotate farther to cover the same XX.x mm linear distance. So in a sense, the bottom is stretched to get that extra distance.
Make sense?
Now that you’ve provided that explanation, yes it does.
I did use the words “inclined to believe”. Bwahahahah!
I would still to see the added functionality of the three items I mentioned before:
- Distance from top
- Desired width of final product
- Ability to retain shape properties
I downloaded the Beta 1.5 yesterday.
Today after a busy weekend …installed it on my Mini Mac. Its not the first Beta I have used and never had problems, but that refers to my limited use, I do not cut anything on my diode lasers and this time I started into 1.5 using my Fiber Laser. Image all setup …time to turn the laser on…did so …but the noise from the fans faded away just as I hit the frame button…and nothing happened . Bypass the time checking everything and getting nowhere, so I messaged the seller in China who is very helpful to the buyers and 4 minutes later got a reply which included some Laser start up checks and a screenshot of the LB setting page (not 1.5). The sellers had Red Light Always on….mine did not and other info was missing. Then the ping you get in your head when realising…why didn’t I start with 14.05 LB!
So started it on a second window….openerbthesettings page and realised three “ menu buttons” and opened 2 the “missing setting! The Red light always shower ! I have never turned it on before! But hitting frame…it did and hitting start…wizzed through the little metal “ Business card” everything OK!
Maybe some of the fiber boys who have used tge 1.5 beta could share their findings re my issue…did you?
The problem was due …to me expecting the setting to pop up all in one! Dod not notice the page had the paged shown in the top menu! Page two has all the “missing” settings…including red light on!
I was hoping they might squeeze in a few xtool s1 bug fixes. ![]()
![]()
What types of things are you referring to here? I’m not aware of any S1 bugs that would be attributable to LightBurn.
Maybe bugs aren’t the right explanation, some of the features of LightBurn don’t work or if turned on have an odd effect. One such example is the continuous jog control, if it is turned on then there is no jog control at all. But if it’s turned off I still have the limited jog option where I can enter a set distance. The other that I have observed is the fast white space scan, if it’s turned on I’ve had issues with engraving when the laser speeds up and then slows down numerous times when no white space is present and even skips lines. Another is the fact that to use the rotary with lightburn a set of gcode has to entered on the gcode screen and then removed when finished.
So whether you call them bugs or just plain issues they need addressing ASAP.
This needs to be supported by the controller to work. Are you sure the S1 supports this feature?
Is this for a vector graphic or image? Unexpected slowdowns could be possibly explained by things in the design not obvious. The skipping lines should never occur. Either the machine is losing steps or possibly a firmware issue.
How do you know what gcode has to be entered? Is this an xTool requirement? If so, then that’s more about the idiosyncrasies of the machine.