I’m finding issues related to screen scaling in Windows 11.
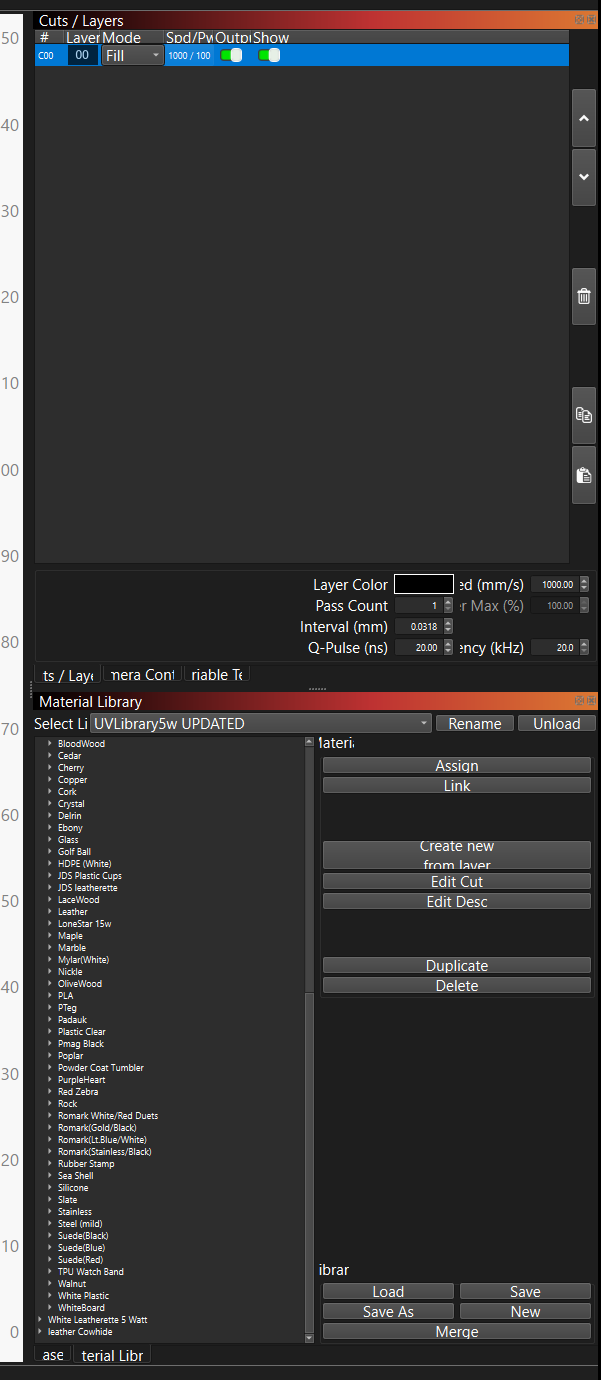
My laptop runs 2560x1600 @ 150% scaling by default (recommended setting) With this setting I’m seeing tabs overlapping the content making certain parts of the windows unusable. See the material library below where I cannot select values at the bottom of the list.
If I change to 125%, the overlap goes away but the text on the tabs becomes truncated.
I can’t use it at 100%. Too small for my eyes to tell you if all is well or not.
To help me find the root cause of this issue, can I get you to try a couple of things and see if it solves the problem for you?
Changing the scale in Windows settings while LightBurn is open can cause text to scale at a different rate to the rest of the UI. If you set the scale in Windows to 125% and restart LightBurn, is the text still truncated?
Have you tried toggling the High DPI scaling options in the Display tab of the settings menu (shown below) and is there a combination that fixes some or all of the issues?
Yes, setting to 125% and then starting LB does resolve the truncated text and the window tabs overlapping.
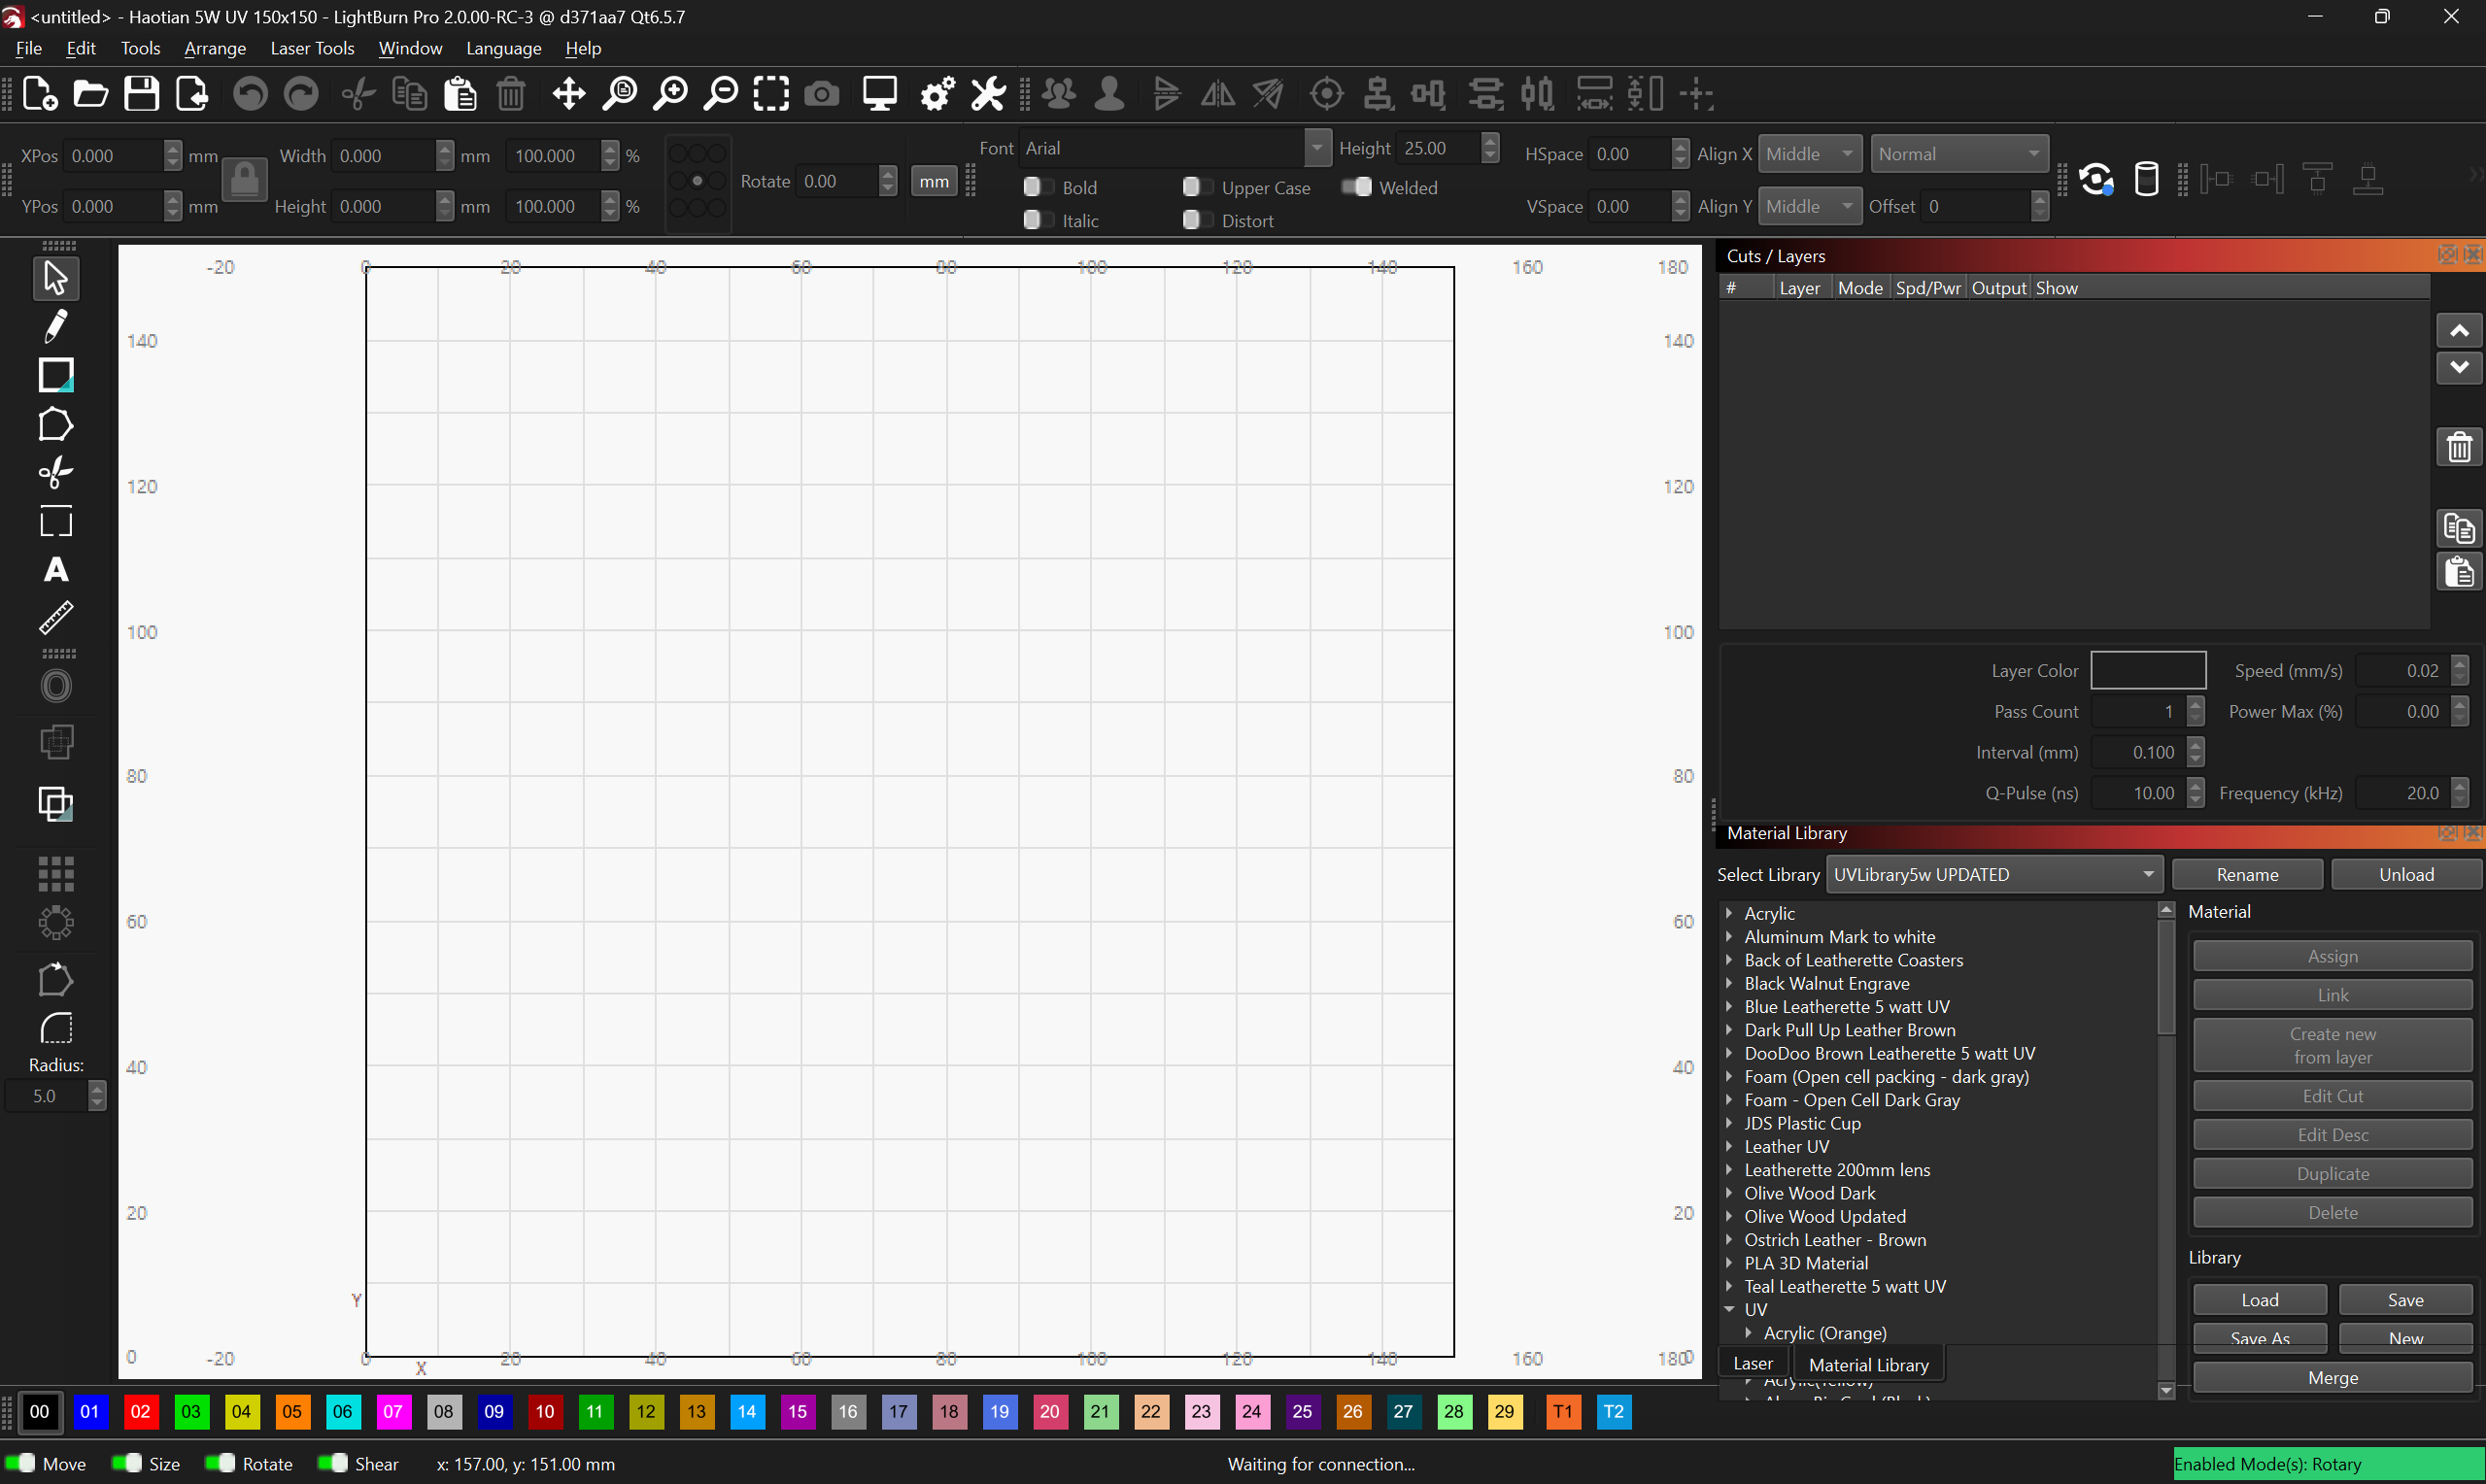
I switched back to 150% (default) and turned off High DPI mode and sure enough everything looks sooooo much better now. All of the icons and windows don’t encroach on the workspace anymore.
Mismatch of measurement units?
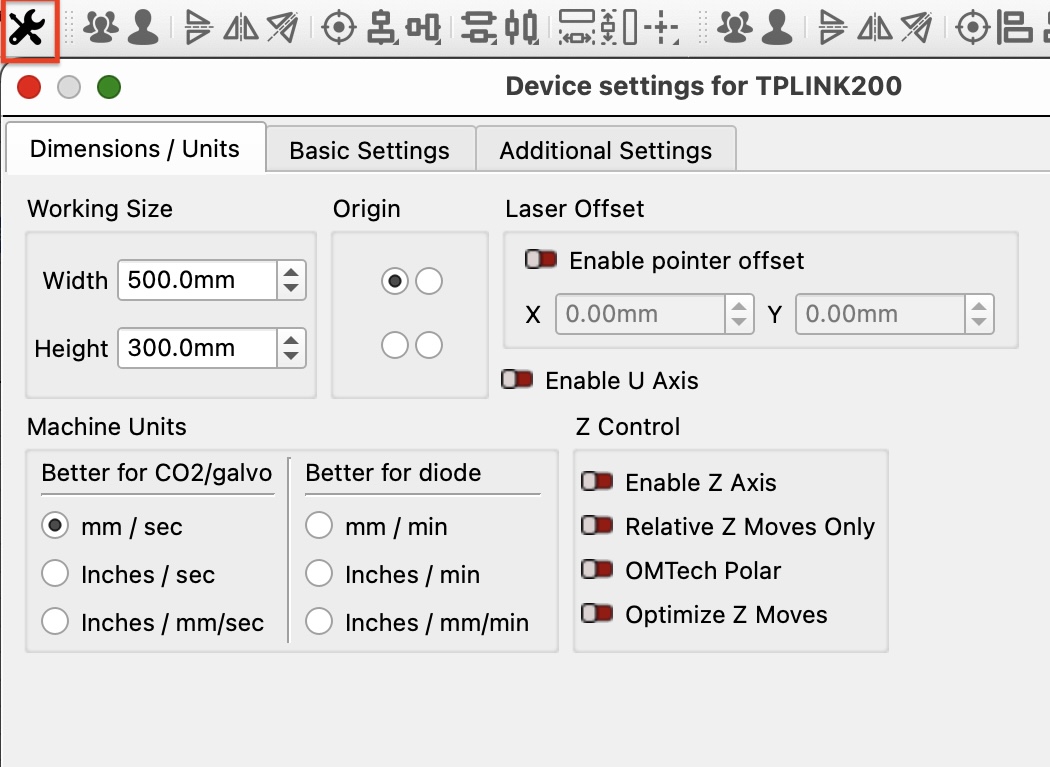
Unless I have missed something, setting mm/sec in device settings, is not reflected in Laser Tools> Material Test Generator
LightBurn Pro 2.0.00-RC-3 @ d371aa7 Qt6.5.7
MacBook Pro OS 15.3.1
I tried it again, this time while in the Material Test Generator, I clicked on Edit Material Setting, which had the proper units mm/s. When I clicked out of that and back to Material Test Generator, the mm/m had changed to the proper mm/s. Thanks for giving me a reason to try something different, though I don’t think that is the intended method to get the measurements correct.
Do this, if willing… Change the ‘Machine Units’ on the ‘Device Settings’ page to something other than currently set and save. Check the Material Test again. Now go back and reset to your normal setting and see if that resolves.
I will have the devs check. I did see similar, but found that if I flip the current setting, then reset to my original config, things work as I’d expect. More digging to do. Thanks for reporting @patricr.
I wonder if changing the location of the “Machine Units” to a different location caused the momentary hiccup. I overwrote the app when I installed RC3 over RC2, maybe it had a read error over the previous setting?
Hello I tried RC3 with my xtool s1, and homing is working.
2 things:
I believe this was mentioned when you do Alt-P to see a preview, you do not see anything, classic dark did not work for me. My windows theme is dark mode.
When I do a calibrate camera alignment for a material, say 3mm bass, I then adjust the offset so all is perfectly aligned with the camera and the system. I do another Calibrate Alignment with a different thickness of material (Say 2mm backer board), the offset is off, not a lot, but I adjust. For each Calibration, right after I’m done I export the camera setting by right clicking the camera live view save with a naming convention of thickness, so I build a calibration library; and write down the offset for the thickness. When I work with a given thickness, I then import the camera calibration and adjust the offset to my handwritten notes. Is it possible that when I export the camera calibration that it includes the offset?
Tested out the RC3 and there seems to be a problem where I can’t find my IP-camera that runs on a Raspberry Pi. There was already a problem with the old version: I had to select Default Capture System to for the camera to be found.
Now the new version won’t show the camera. Camera Capture Settings Fallback and Recommended both show just “None” as a option.
My current setup is that I’m running the camera on Raspberry Pi and connect it to my PC over Wifi with old software called IP Camera Adapter. The camera shows as MJPEG Camera on LB version 1.7.04. The Raspberry Pi is running motionEye for the camera.
Hopefully there will be a fix for this since the Raspberry Pi -camera has been awesome so far!
Thank you. I have several end users, and have a YouTube video on this, and would love to say create your library of calibrations, adjust offset for each calibration, and then export all in one.
@JediJeremy Hello, I posted thie earlier, and just wanted to ensure you get this, as I find this is very important, as I have about 20 endusers using this, and have the same situation:
When I do a calibrate camera alignment for a material, say 3mm bass, I then adjust the offset so all is perfectly aligned with the camera and the system. I do another Calibrate Alignment with a different thickness of material (Say 2mm backer board), the offset is off, not a lot, but I adjust. For each Calibration, right after I’m done I export the camera setting by right clicking the camera live view save with a naming convention of thickness, so I build a calibration library; and write down the offset for the thickness. When I work with a given thickness, I then import the camera calibration and adjust the offset to my handwritten notes. Is it possible that when I export the camera calibration that it includes the offset?
Yes, I have same problem here! Lightburn is overlapping, and if I change resolution, cannot se the text anymore…
Another issue, the dark theme is odd, some of text is impossible to read…
Third issue, camera adjust. Brightness, and focus does not do anything…