Hi. I used to drive my laser KH-5030 with MacBook/Mojave and Lightburn 0.9.19 without any problems.
With same USB cable setup after updating to Big Sur and Lightburn 0.9.20 I cannot connect to Ruida. I changed back to Lightburn 0.9.19 but with no success. For checking USB cable issue I made an old setup with win10 and RD works and this was running ok. Anybody having any thoughts how to fix this problem with updated OS and Lightburn?
The problem is Big Sur, not LB or Ruida.
I’m still running on Mojave, for precisely this reason.
But, there’s an easy solution - use network, not USB.
I took my older MacBook, still running on Mojave, and downloaded the latest Lightburn (trial) on it and tried that combination to get connected with my laser. Still no success. Would it be possible that Ruida is somehow locked because of tries with wrong combination earlier?
I have to go shopping for USB-C/Ethernet adapter and I have long way to go. Still I have a slight fear that the basic problem isn’t the version of OS.
On your Mojave what is the Lightburn verision you are using?
I have a Mac Pro 5,1 running Mohave, and tried to connect through the Ethernet jack using 192.168.1.106 after setting this as the Ruida controller I’d, and manually changing the ip on the Ethernet port, which defaulted to a 169,xxx.xxx.xxx address. I couldn’t connect either. When I enabled dhcp again, and got that address again, I could connect to the laser with a 100 offset to the last number. I was overthinking this, and now it’s working fine. My Mac Pro is using WiFi to connect to the router. Hope this helps!
Charlie
Thanks Charlie. I’ll try that later. Right now I’m running Lightburn (trial) from Win10 without problems. The configuration process was clear and easy.
Now I have to solve my original problem which is that the laser head Bangs full speed the steel frame on Y-axis after start. This came after I switched from rotating unit to the normal Y-axis stepper unit. Factory or other reset makes no different. I changed the Y-axis step value also but this don’t effect to the journey of the laser head to the starting point. I cannot even imagine where it might be. I newer had this issue before. I’m sorry if this topic doesn’t belong here the moderator should tell about it.
Did you take the controller back out of rotary mode? That setting is stored in the controller itself, so you have to turn off rotary mode when switching back to flat work, and reset the controller.
Yes I did. It has been so for a long time. Now I am totally frustrated. The controller thinks that the work bed area is somewhat ten times bigger than it is. I reset both of axis and when the head is on the upper left corner the values are 0.0. Manually moving the head to the upper right corner Ruida shows value 236mm. The working area is set 500 by 300 in vendor settings. Y -axis value in lower corners show 39.9mm. That isn’t right? Lightburn file cordinates don’t fit this setup?
You also said that you changed the Y axis step value. If you did that while in rotary mode, it would not have made a difference until you turned it back off. Reset the controller and home it - After homing, when the laser is sitting at the home position (wherever the homing switches are) what are the positions shown on the laser display?
About two and half million thanks. Those were the minor settings which made the difference. It’s working. Maybe it still needs some limit buffer adjustments but that’s all. (I hope)
Now I start working to get my Mac in touch with that thing.
I’ve used all versions since very early. I’ve only had trivial problems - no issues with running or connecting to the machine that weren’t of my own making.
I’m on the latest, whatever that is.
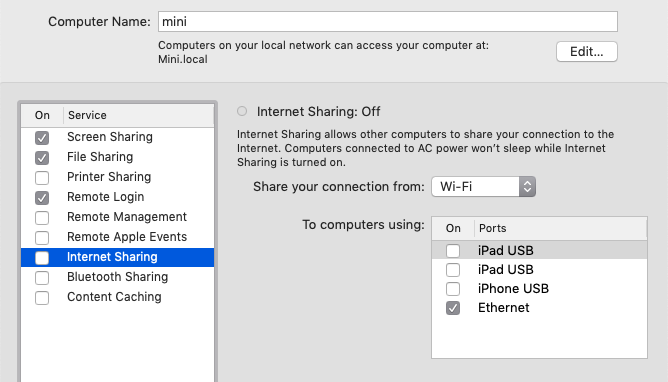
If you’re got Ethernet, you can just directly connect a cable to the laser and, for ease of not having to any fiddly configuration, go to sharing > internet and Share your connection from wifi.

That will automatically configure routing between your USB-C port and the laser and allow DHCP through. Configure your laser to the same subnet as your laptop - 192.168.0.x usually.
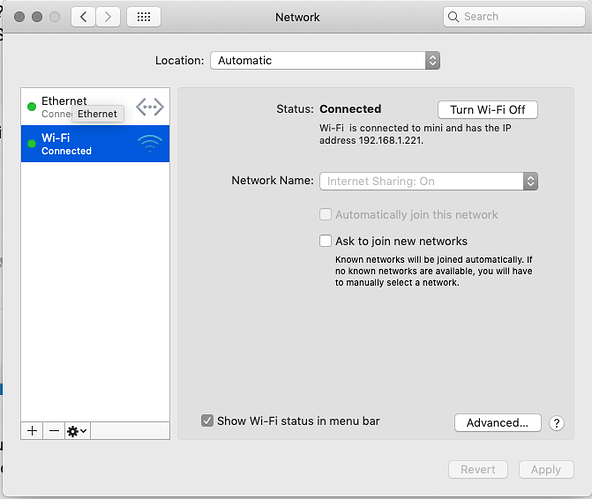
This is what you should see, but reversed - ethernet will have ‘internet sharing on’. I set it up to share to wifi on my machine, because I’m connected to ethernet. I don’t normally have it enabled - it was just to show you the method.
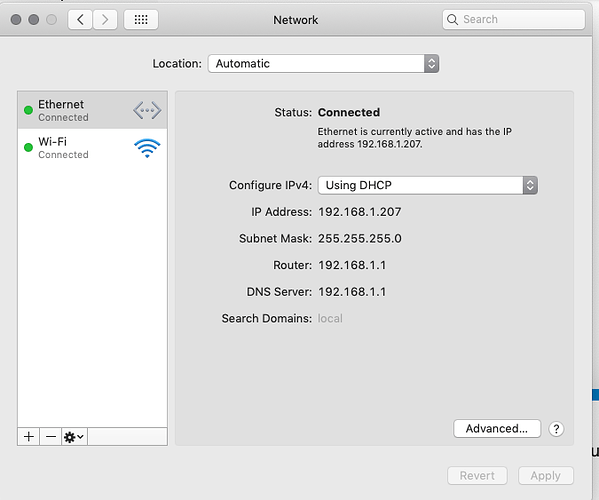
You need to use a number range that is different to your wireless connection. Its more than likely your wireless is using 192.168.x.x, so set your ethernet to 10.0.0.1 and use the same range for the laser.
The 169.x.x.x range is self-assigned, when it can’t find a DCHP service in that network.It’s perfectly fine to put your laser into the same range, but poor practice - better to definitely assign an address from another private-network range: 192.168.x.x, 10.x.x.x or 172.16. x.x, and the machine in the same network.
There’s a bunch of docs on connecting, look in the Mac subsection.
Before updating from Mojave there were no problems running LBx.x.19/laser from my 15" MacBook. After updating to Big Sur and LBx.x.20 no connection with my laser. My older 13" MacBook is still running on Mojave and I installed LBx.x.20 jut for testing if my problem was OS related. I had to take trial version of LB because I couldn’t find my license key. Trying to contact laser from this setup was unsuccesful.
Oh, OK. Different situation, then.
I’ll think on it.
Do an Option+wifi icon and screenshot (ctrl+shift+4) the resulting wifi detail.
I’m not on wifi yet. What I have described is on USB connection. I’ll report about wifi/ethernet connection later.
I am typing this on the MacPro 5,1 my laser engraver is running on a 27" 2008 iMac running High Sierra, I forgot which Mac I was on 


This topic was automatically closed 30 days after the last reply. New replies are no longer allowed.

