Thanks Nicholas.
i will use only lens cleaners in future,
i have the new sensor for Y axis and will install this weekend, should i then do the mirror alignment on my Laser, if so the upper and lower power is set at 13%, should I keep this ratio and reset when finished.
Slop error comes up when i select frame will that automatically reset after mirror alignment or do i need to reset start position as absolute coordinates, when i select frame it goes directly to bottom Centre and Slop error comes up…
I will try and send a picture of mirrors 2 and three
do you have any pictures of a burnt spot on mirrors as a reference
I have one from m2, both short distance and long distance marks.
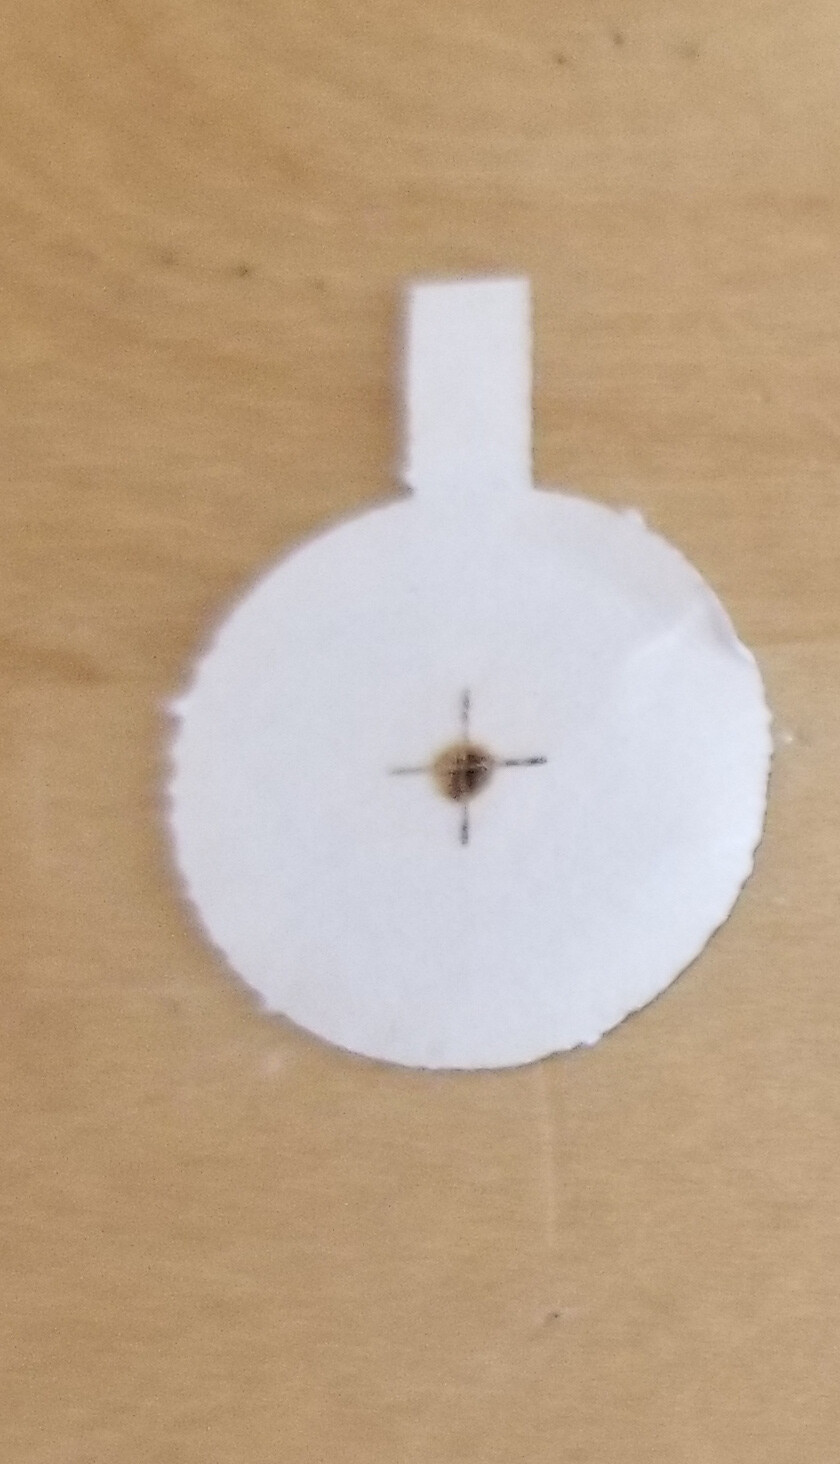
Used it on Friday no issues… on Tuesday it had moved away from TEM00 state. The mark in front of m1 now looks like this.
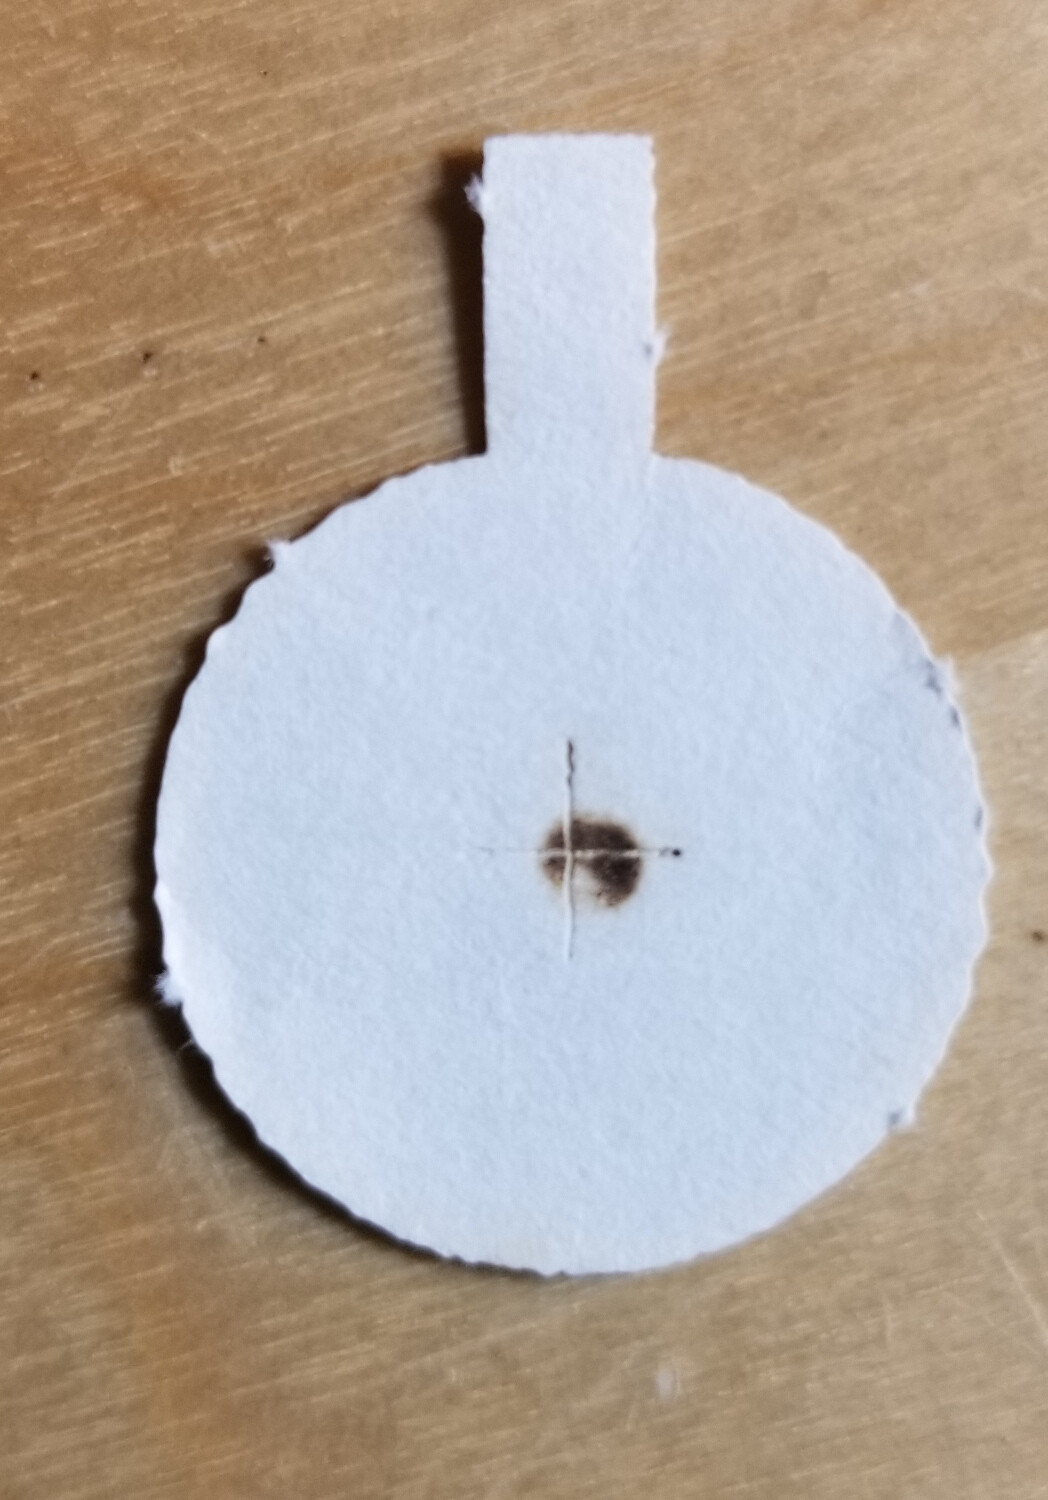
This was previously dead center…
Notice there is less power striking here than the laser marks.
You keep bringing this up, are you unsure that your alignment is correct?
If I change out the sensor, it has nothing to do with the laser beam path. It should have no effect on alignment. It’s only function is to locate home or 0, 0 for the controller. Even changing out a controller, lps, power supply would not effect the beam path. To have an effect on your alignment it has to relate to a change in the optical path… which you are not doing…
Low power setting is only used when doing vectors. It’s the minimum power applied at it’s lowest speed when the head is changing directions.
So this doesn’t apply to you… Maximum power is used when you press the pulse button.
![]()
Hi Nicholas. Sucess realigned mirrors and , shut laser down a couple of times to see if any problems, laser is running good, replaced new sensor and checked movement, runs perfect so far. tried to cut a small job not cutting through, engraved ok but would not cut through as yet, changed the power supply on Ruida panel to 55% no difference. any suggestions. thanks for your support. Sam
1 Like

Looks good!
I presume you are changing the ‘Max power’ setting at the controller? - that is for the pulse button, it does not change anything for a job file.
Its best to change the power for the job in LightBurn, however if a job is running you can (at the machine) press the ‘Pause’ button, followed the ‘Menu’ button to override the power.
You can change these while the machine is running or pause it…
![]()
Can you elaborate on this please…
Thanks Nicholas,
yes I changed the power at the controller but it didn’t make any difference, then I went back to my laptop to try and change some other settings by increasing speed and power, but still no luck.
if I hit the pause button followed by the menu button and override the power, then what am i trying to change, the speed or the power??
Hi Nicholas still waiting on your comments ( pause the machine and make changes to Menu, is this to overide power, can you elaborate Sam
Hi Nicholas, Tried the pause button on the Ruida control but I need your help to go further on not seeing where to go on the ruida panel, Change the speed or power settings??
If you have a job running and you press power or speed buttons, you can change the power/speed values and when you press enter to confirm, it will apply them to the executing job.
![]()
Do you mean the power or speed button on the Ruida control panel
I went back and started a job, and pushed pause button, then speed and changed the speed, not a lot of difference, do I need to up speed and power at the same time, or one at a time, will the power make the most difference in the cut??
In theory you can run half as fast and get results similar to doubling the power.
Job will take longer to execute.
I don’t know what you doing … can’t comment
![]()
Hi Jack.
Thanks to you and your team for all your support and being so patient with me it’s been a long ride.
Lightburn is fantastic, and I think as an old guy 78, I have learned a lot, but still learning.
I understand what you say by pausing in the middle of the job and selecting a power or speed button, is it the power or speed I need to change to get a cut,
it’s not cutting through with 3 passes it appears to be only a light engrave (see the enclosed Picture)
in theory what power and speed do I need to select to get a cut,
normally I would set the Speed at 100 and the power at 45, I hope I have explained myself this time, even my wife doesn’t understand me some times…

1 Like
First off - a huge thank you to everyone that’s helped with diagnostics on this massive thread. A huge kudos to @berainlb and @NicholasL
From the image above, I’m drawn to the corners at first glance. See how the beam gets wider in the corners? That’s ‘overburn’ or too much power set in the ‘Min Power’ box for that layer in LightBurn
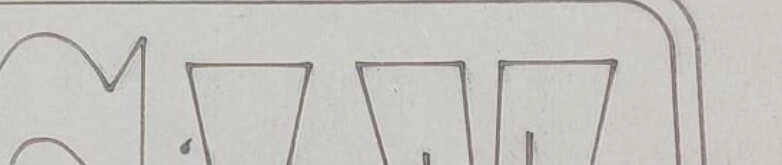
Max power is used when the laser is up at speed. Min power is the lowest power the laser uses even while it is slowing down to change direction in the case of a 90 degree corner. The Laser has to decellerate the head, stop it, and change direction, and that motion would ramp the power from Max → Min power at the corner stop, the back up to Max once the laser is up to speed in the other direction.
Your beam width also seems a bit wide, you may want to check your focus. This video covers how to do a ramp test and the mechanics behind the focus head on your laser. https://www.youtube.com/watch?v=Eg6THrEdleo
This is way to complicated for me, I don’t understand this guy at all
Well then, fiddle with your focus until you get the smallest dot on your workpiece, that is the ideal focus point.
Then, slow down your cut, and let us know the speed and power that works to cut through the material you’re working with - and let us know that material’s thickness and type.
Ramp test is a very good idea.
As a rule of thumb for cutting - generally you want to get the job done quickly and in just one pass, so you will want to use a decent power of at least 60% and then change the speed to be as fast as possible while still be cutting through, which for 3mm acrylic and your 80W tube I expect will be roughly around 18mm/sec.
We recommend that you familiarise yourself with the the built in [Material Test] generator (Material Test - LightBurn Documentation) to quickly establish what speed and power settings give the best result for cutting.
To help you understand the relationship between Speed and Power, (and if engraving also ‘Line Interval’), I have linked an image, and as the post’s author mentions you can substitute ‘Darker’ in the graphic with ‘Deeper’.