I have rediscovered Russ`s conclusion about min/max power settings and think myself that I understand it now. He made a video 5 years ago over this topic but made a sequel 2 years later which also completed this topic.
If you don’t think it’s safe at 19mA, I think you should replace your laser tube to achieve it, because your K40 machine is a bit reluctant to cut 3mm
Hi Anoxin, I do not quite understand what you mean. Can you please try to describe it a little differently?
Are you saying that my 60 (50) Watt can easily handle 19 mA for daily operation? I have no reference or recommendation from the machine manufacturer with which mA I may run the tube, apart from what is stated in the enclosed manual, which unfortunately does not fit the delivered machine - “not over 95%”. 95% of what ?, of the maximum power of the 60 Watt power supply? or 95% power from the Ruida scale?
Regarding my K40, it can fine and clean cut 3mm plywood, it is not primer therefore I have upgraded my machine park 
Now I have found a small network switch, plugged in the cables, ran the setup of the Ruida controller in LightBurn manually with ip address 192.168.1.100, and the few other relevant data. After right-clicking on Device in LB, the contact is established !! - it’s just so nice and easy, with the right accessories ![]()
Next task is setting up my camera, I hope, as LightBurn is now running over LAN, that Linux Mint will stop crashing when I connect the usb camera.
… continues
… no, unfortunately, it did not work even though the machine is connected to computer through lan.
I want to use the camera function, so either there is some Linux guru who helps me or I should consider finding another OS.
(without starting LightBurn there are no problems with my usb camera)
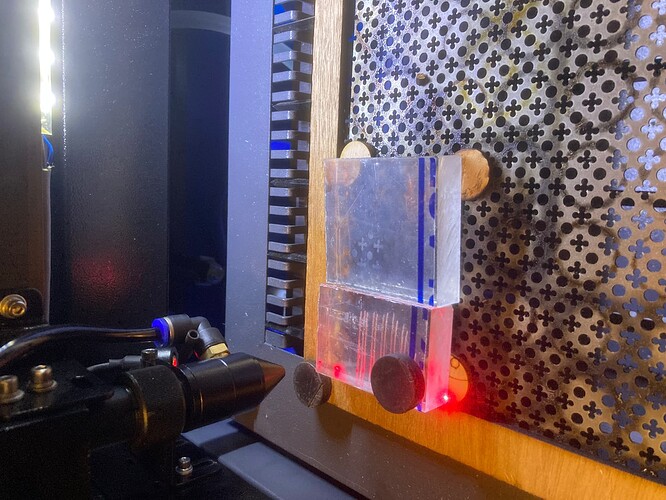
I also managed to play a bit with acrylic today, a cut through 15mm acrylic showed me that I’m probably not 100% at the right angle with my nozzle, which is a small drift to one side. But, it’s very little and I can not spend too much gunpowder on it right now.
The problem with my camera annoys me a bit more.
3 mm/s 70%-18mA
Thank you Willy, but my K40 is perfectly calibrated and with the new 60 Watt OMT machine, it is probably only the nozzle head itself that needs to be corrected a few tins. I think the middle of my machine bed may be slightly curved in the middle, hence the slightly crooked cut
It’s just a very simple guide that applies to your new CO2 laser as well. Found it searching the forum and someone had posted it 3 years ago.
You have Russ’s laser head alignment tool file? Might just need fine tuning.
No I have not. Can you send a link?
Thanks, I’ll try if I can find it.
mk2-targets-issue-2.lbrn (54.9 KB)
Not sure what else you are looking for.
Might want to visit RDWorks learning lab, they have a whole section called “Russ Sadler’s Adventures”.
Might have to register, not sure what they do now.

Here’s the beam checker. Put tape on one side and hold it to the bottom of the nozzle at one of the holes and fire a pulse. Lets you know if beam is centered out of the nozzle or not.
Beam Checker 2.lbrn2 (12.2 KB)
Jack has already sent it to me and I could not remember exactly how it worked …
But, everything is clear now and I want to thank you all for guiding me in the right direction and for helping me. Sometimes it just goes too fast here and I make compromises that I otherwise try to avoid.
I have checked into RDWorks learning lab a few times but I would not sign up for another forum but in the future when I get more time again I will definitely do so.
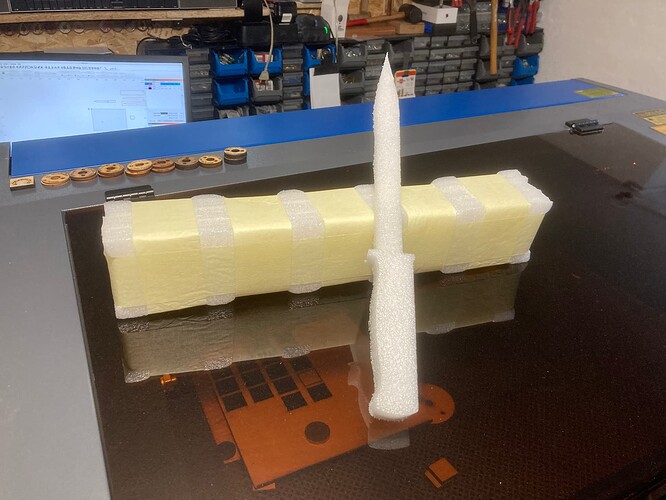
Today I have to work in foam material to make a wrap for the ww2 bayonet I have restored, it has to be handed in tomorrow. I would like to have used my camera for this job, scan the bayonet, trace it and cut it out … ![]()
For my packaging project, I recycle the foam material that my laser machine was transport-safe with. So now there is no way back for this machine 
The attempt to reuse the bamboo plywood from the transport box I gave up after the first cutting attempts, the material simply falls apart in the various very thin layers of wood / bamboo. Only sporadic glue has been used to hold the layers together, a bit amusing, but the box survived (almost) from China to DK, so no blame.
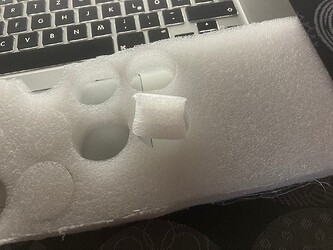
The foam is a very large pore material, approx. 25 mm thick. In order to get an acceptable result, I set the focus point only a few mm from the surface. Although not much power is needed, the speed must be adjusted so that the material does not melt together after the laser beam has passed through. I stopped the tests at approx. 35% / 9mA and 30mm / s.
The bayonet I drew (of course) in LightBurn and it did not take too much time either.
Below or above? Which lens are you using.
You do know that ‘thing’ you created is a deadly weapon ![]()
I’ve really never done anything that thick.
![]()
25 mm foam, do you think it is “a lot”?
I use the included standard lens, Ø18mm, 2 ". If I use the correct focus length of 50.8mm down to the surface of the foam, the cut-out items (and holes) become conical. I place my nozzle about 2-4 mm above the surface, then it fits.
I will probably buy myself 2-3 different lenses and mirrors, I do that with my K40 and it gave a nice effect for the money. I would like a 1.5 “and maybe a 3”, so it should be even easier to cut foam.
By the way, I think the fine cut through 15mm acrylic with the flame-polished surface is more spectacular. 
I have adjusted the nozzle, now it is 100% ok in X and Y direction!
Thanks again to you. 
That’s your ‘returnability’ You’d have to ship it back in the ‘foam’. It is stronger than the box it’s in ![]()
I’m sure that’s exactly how it was shipped. Mine was loosing pieces as they rolled it up my driveway. No one could have put mine back together either.
![]()
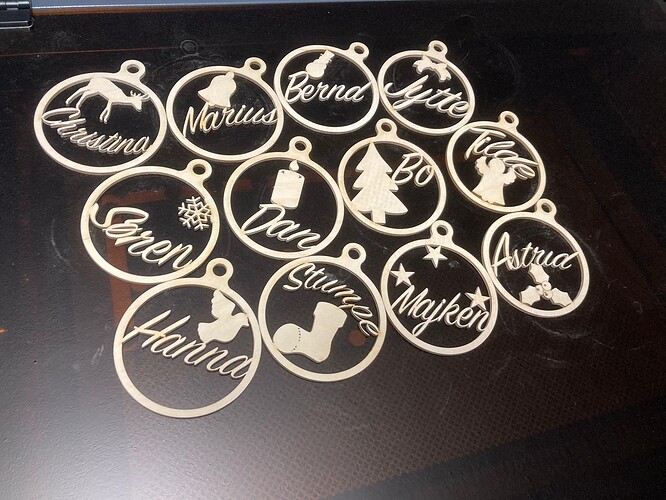
After a few days where I could not work with my new laser, I picked up different materials for new projects from my laser wood supplier and did some tests today. It suited me well that I was asked for some Christmas decoration from our closest friends.
First I made a template with a “Christmas ball”, then I wrote and oriented names and a few suitable figures which I scanned from all sorts of advertisements as there are so many at present.
The material is very fine BB plywood, leftovers that I got from my supplier, for free.
The settings are: 37mm / s, 45/45% = 11mA
I could have done it with 40mm / s but because the workpieces are so filigree I prefer that cutouts do not sit too tight. The whole process, from construction in LB to cutting on my laser machine, went very fast and fine.
… continues


