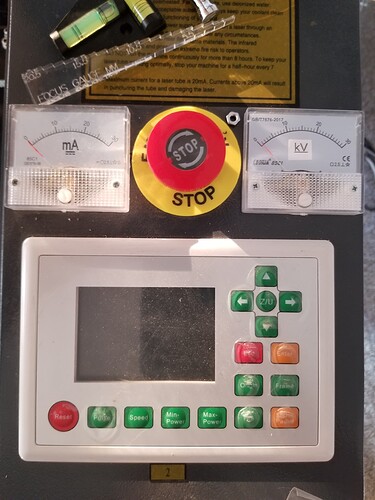
I only drilled 5 small holes, it “did not hurt so much”
You are very welcome to get the file with my little LB-Ammeter Meter Box, if you can use it as it is or in a modified version.
Of course I would like to get a file for your box. Thanks in advance.
OPS. You need to find the right power and speed settings that suit your machine and find a kerf setting that suits you best. If you glue the 4 bolt heads into the box before mounting and use spring washers on the inside of the electrical cabinet, it will facilitate installation a lot 
LB-Amperemeterhus.lbrn2 (131.8 KB)
TNX so much…
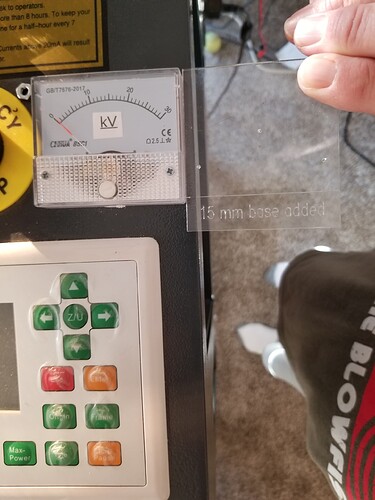
I used this outline for hole alignment or a drilling template. I added 15mm to the bottom for an offset from the console. I cut it out of 2mm acrylic.
Just another option…

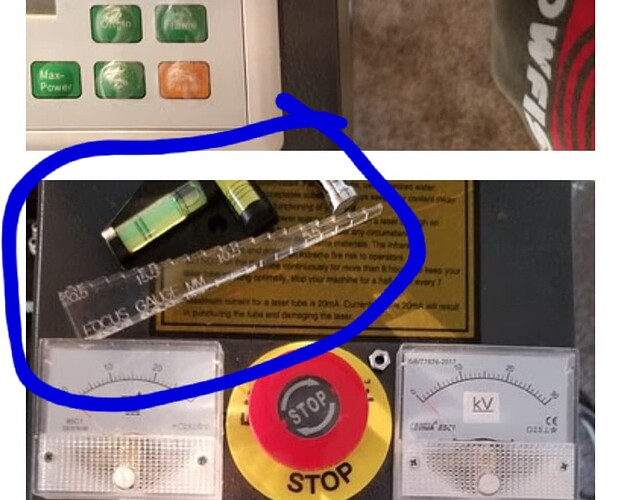
Assume you mean the ‘focus gauge’. These are from Russ Sadler…
Here is another for 50mm.
This is the compound lens focus gauge.
This is to check where the beam comes out of the nozzle.
Beam Checker 2.lbrn2 (12.2 KB)
Is that what you are after…?

Yes, that’s what I was looking for. Thanks so much… 
Summary
I think the thread has gotten so long that it should be stopped now. It is also not my intention to have my own channel here in the forum 
The machine, OMT 6040 60Watt, works very well. The safety check at the start, primarily the electricity, showed no serious defects, except for the rear lid with the original fan mounted, everything is properly grounded and there were only a few loose connections on the components (3 in the controller). I do not use the 2 external 230V sockets because they do not have a ground connection, (only 2 poles).
The Ryxon KT332N controller, which is a Ruida designed / produced controller, works flawlessly and is connected over lan. However, it will be nice to know which “original” Ruida controller my KT332N corresponds to.
Purely mechanically, the machine also works fine, although the material used for the load-bearing parts is thinner as with my old K40. I have to admit that it disappointed me the most and I could not imagine that the machine would be able to run stably and accurately - but it does! It’s probably more of a “head case” that I have to overcome.
I have peeled honeycomb out and replaced it with a steel plate, but right now I have the honeycomb plate in use again, it is nice to be able to switch between 3 different options (the knives are no.3)
On the air side, I have added a small compressor to the existing air pump, it works quite well and for the heavy tasks I have a large compressor standing ready. For cooling, I use my CW5000, which I am very happy with, except for the noise it produces. I have soundproofed a bit but it is not enough yet. The machine’s built-in water pressure sensor has saved my a** already 2 times.
I have closed the extraction on the back and made a new outlet in the left lid, from there the smoke is sucked from an external large industrial extraction through 2 homemade pre-filters and an activated carbon filter, it works fine.
I have experimented a bit with a 3 "lens but use the original optics that the machine came with on a daily basis. My focus is fine all over the bed and I can cut through solid 20mm pine and 16mm acrylic, with the same setup I can also make fine intarsia.
I am probably most happy with the height adjustment and the size of the bed, it fits perfectly with the type of tasks I work with.
What am I missing ?, replace my laser head with the lightweight version from Russ, establish some proper light in the engine room and a LightBurn camera is on the wish list.
Thanks for all the fine advice and comments on my way with the new machine. If anyone can use a little from my experience it will be extra fine.
This topic was automatically closed 30 days after the last reply. New replies are no longer allowed.


