Good Morning,
so i tried to get my Neje LM2 (non S!) 7W with Firmware 7.1 ans GRBL 1.1f to work with lightburn.
At first, all worked as i followed the tutorial from northlakeswoodwork and all testing went fine.
As my Board is Version 12 and has auto-Homing enabled on the Board i followed the tutorial for the Neje 2S - Step by Step. As said above. All worked fine.
When i put my Device at Homepoint manually it shows me X0 Y0 when i get coordinates from device.
When i finished a job it returns to Home and then Shows X0 Y170 and trys to move over the border.
As i was googling for this issue i found Workarounds but none really worked.
What i already tried was to make a new Profile with Home in the Back Left and one with the Front left. Issue happens with both settings. I downloaded both Custom Settings for the LM 2S and the LM 2 from mentioned tutorial. As my board is newer i may have the Problem there.
G92 X0 Y0 won’t work either after manually homing it. It still shows X0 Y170
I dont think it’s an issue from the Board or anything else cause it works fine in the neje Software.
I will add my Settings later as the Software is on my other machine - but maybe someone already has an idea what else i can try.
I also looked at this topic Link to Topic but the answer does not really Help as i tried that like mentioned above
Found a work around thanks to a FB Group
It’s just some small fixes in the Settings and G10 L2 P1 X0 Y170 in to the console if your stuck at Y:170 affter Homing as it was with my machine.
I think you have other problem(s) even though this may be a good workaround for now. Aside from a bug…
If you send it a home command, such as startup and it does a home command via manual entry or in the gcode stream or whatever … the same results will occur… it will load x and y to zero. So someone/thing is putting that 170mm Y offset there, probably via the gcode.
Some things to check is that Light Burn knows your home position and that the direction bits are set properly for homing. The direction bits may not be an option if there are not stops at both ends of each axis and/or it home properly.
I’d bet on a a configuration issue… Double check both Light Burn and your controller configuration.
P.S. Hopefully you kept a copy of what worked before in the other software… (8’)
I have the exact same problem with the 2S Plus. I’ve done all you did and nothing has worked. Since mine is 255 x 440, initially I changed x and y to 250 in all areas just to be safe. All works with these exceptions: when you hit home, Lightroom says 0 in all cordinances but if you “get location” LR updates they Y coordinance to -255. Also, if you stop a job and try again without rebooting the laser, it starts about 30mm farther away from home only in the y position. X is fine. Also origin si always in the bottom left and home is in the top right. You can get them to move anywhere you want in machine and device settings but NEVER all in the same position! I face the machine with the controller on the right and would prefer to have origin AND home on the top left as you face the machine with the controller on the right so that you are seeing on your PC: a landscape version of 255x440 with both home and origin in the top right corner. This has not been possible for me. I just bought the software today not knowing these subsequent issues existed. I can only run a job now by rebooting the laser, getting the machine’s updated and now accurate coordinances back into LR and starting over. Not very efficient and very annoying unfortunately. I would gladly pay for machine and device setting files that work for the NEJE Master 2S Plus! But it seems no one has been able to work this out yet!
I also fixed stuff in my Machine Settings. I need to find the PDF again that was provided in t hat FB Group.
I didn’t have any problems with the homings since but i still have some issues with other Settings in Lightburn i could not figure out yet i am afraid.
Sharing that PDF would be great, and if you tell us what this other issues you are experiencing, we might have some suggestions to resolve. Let’s trade!
Back! Had a rough and busy week - sorry for the delayed response.
So, I can’t give out the PDF as the author doesn’t reply buuuuut. I simply copy the Changes made in Settings:
First Step:
Make a Profile for the Neje Master 2 - Home Position REAR LEFT
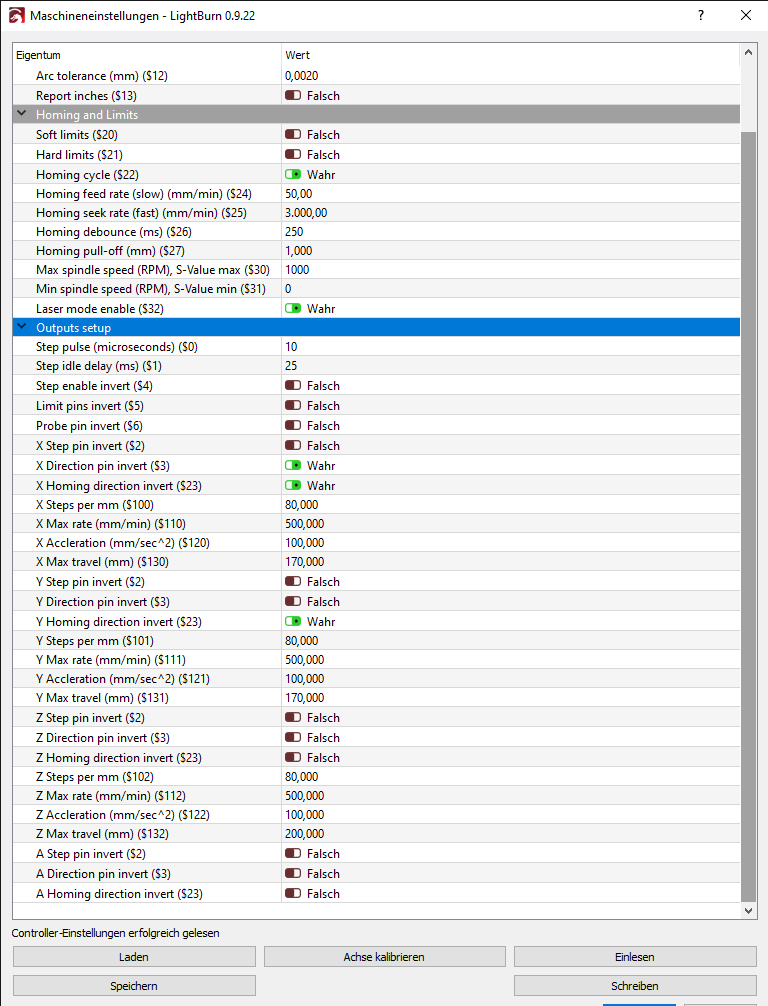
Second Step go to Machine Settings and Change the Parameters:
Property Value
Status Position reporting ($10) Workspace Position
Homing Cycle (22) True (this step mentioned in the Neje pdf)
Homing feed rate (slow) (mm/min) ($24) 50.00
Homing seek rate (fast) (mm/min) ($25) 3000.00
And Also:
Click on the Outputs setup to expand the device settings
5. Y Step pin invert ($2) False
6. Y Direction pin invert ($3) False
7. Y Homing direction invert (23) True
Don’t forget to write them to the controller.
If your Device Shows “X 0 - Y 170” when you get the position from the Machine Type:
G10 L2 P1 X0 Y170 in the Console
If it shows something different from “Y170” Replace the 170 in the Code to the Coordinate Shown by the Machine.
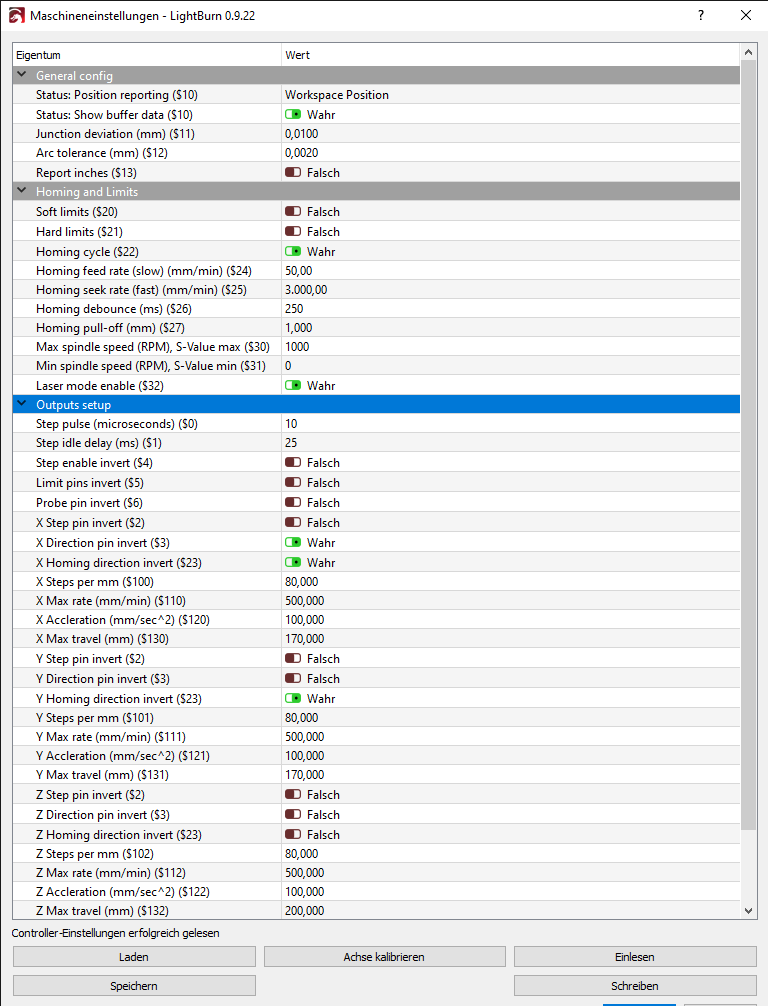
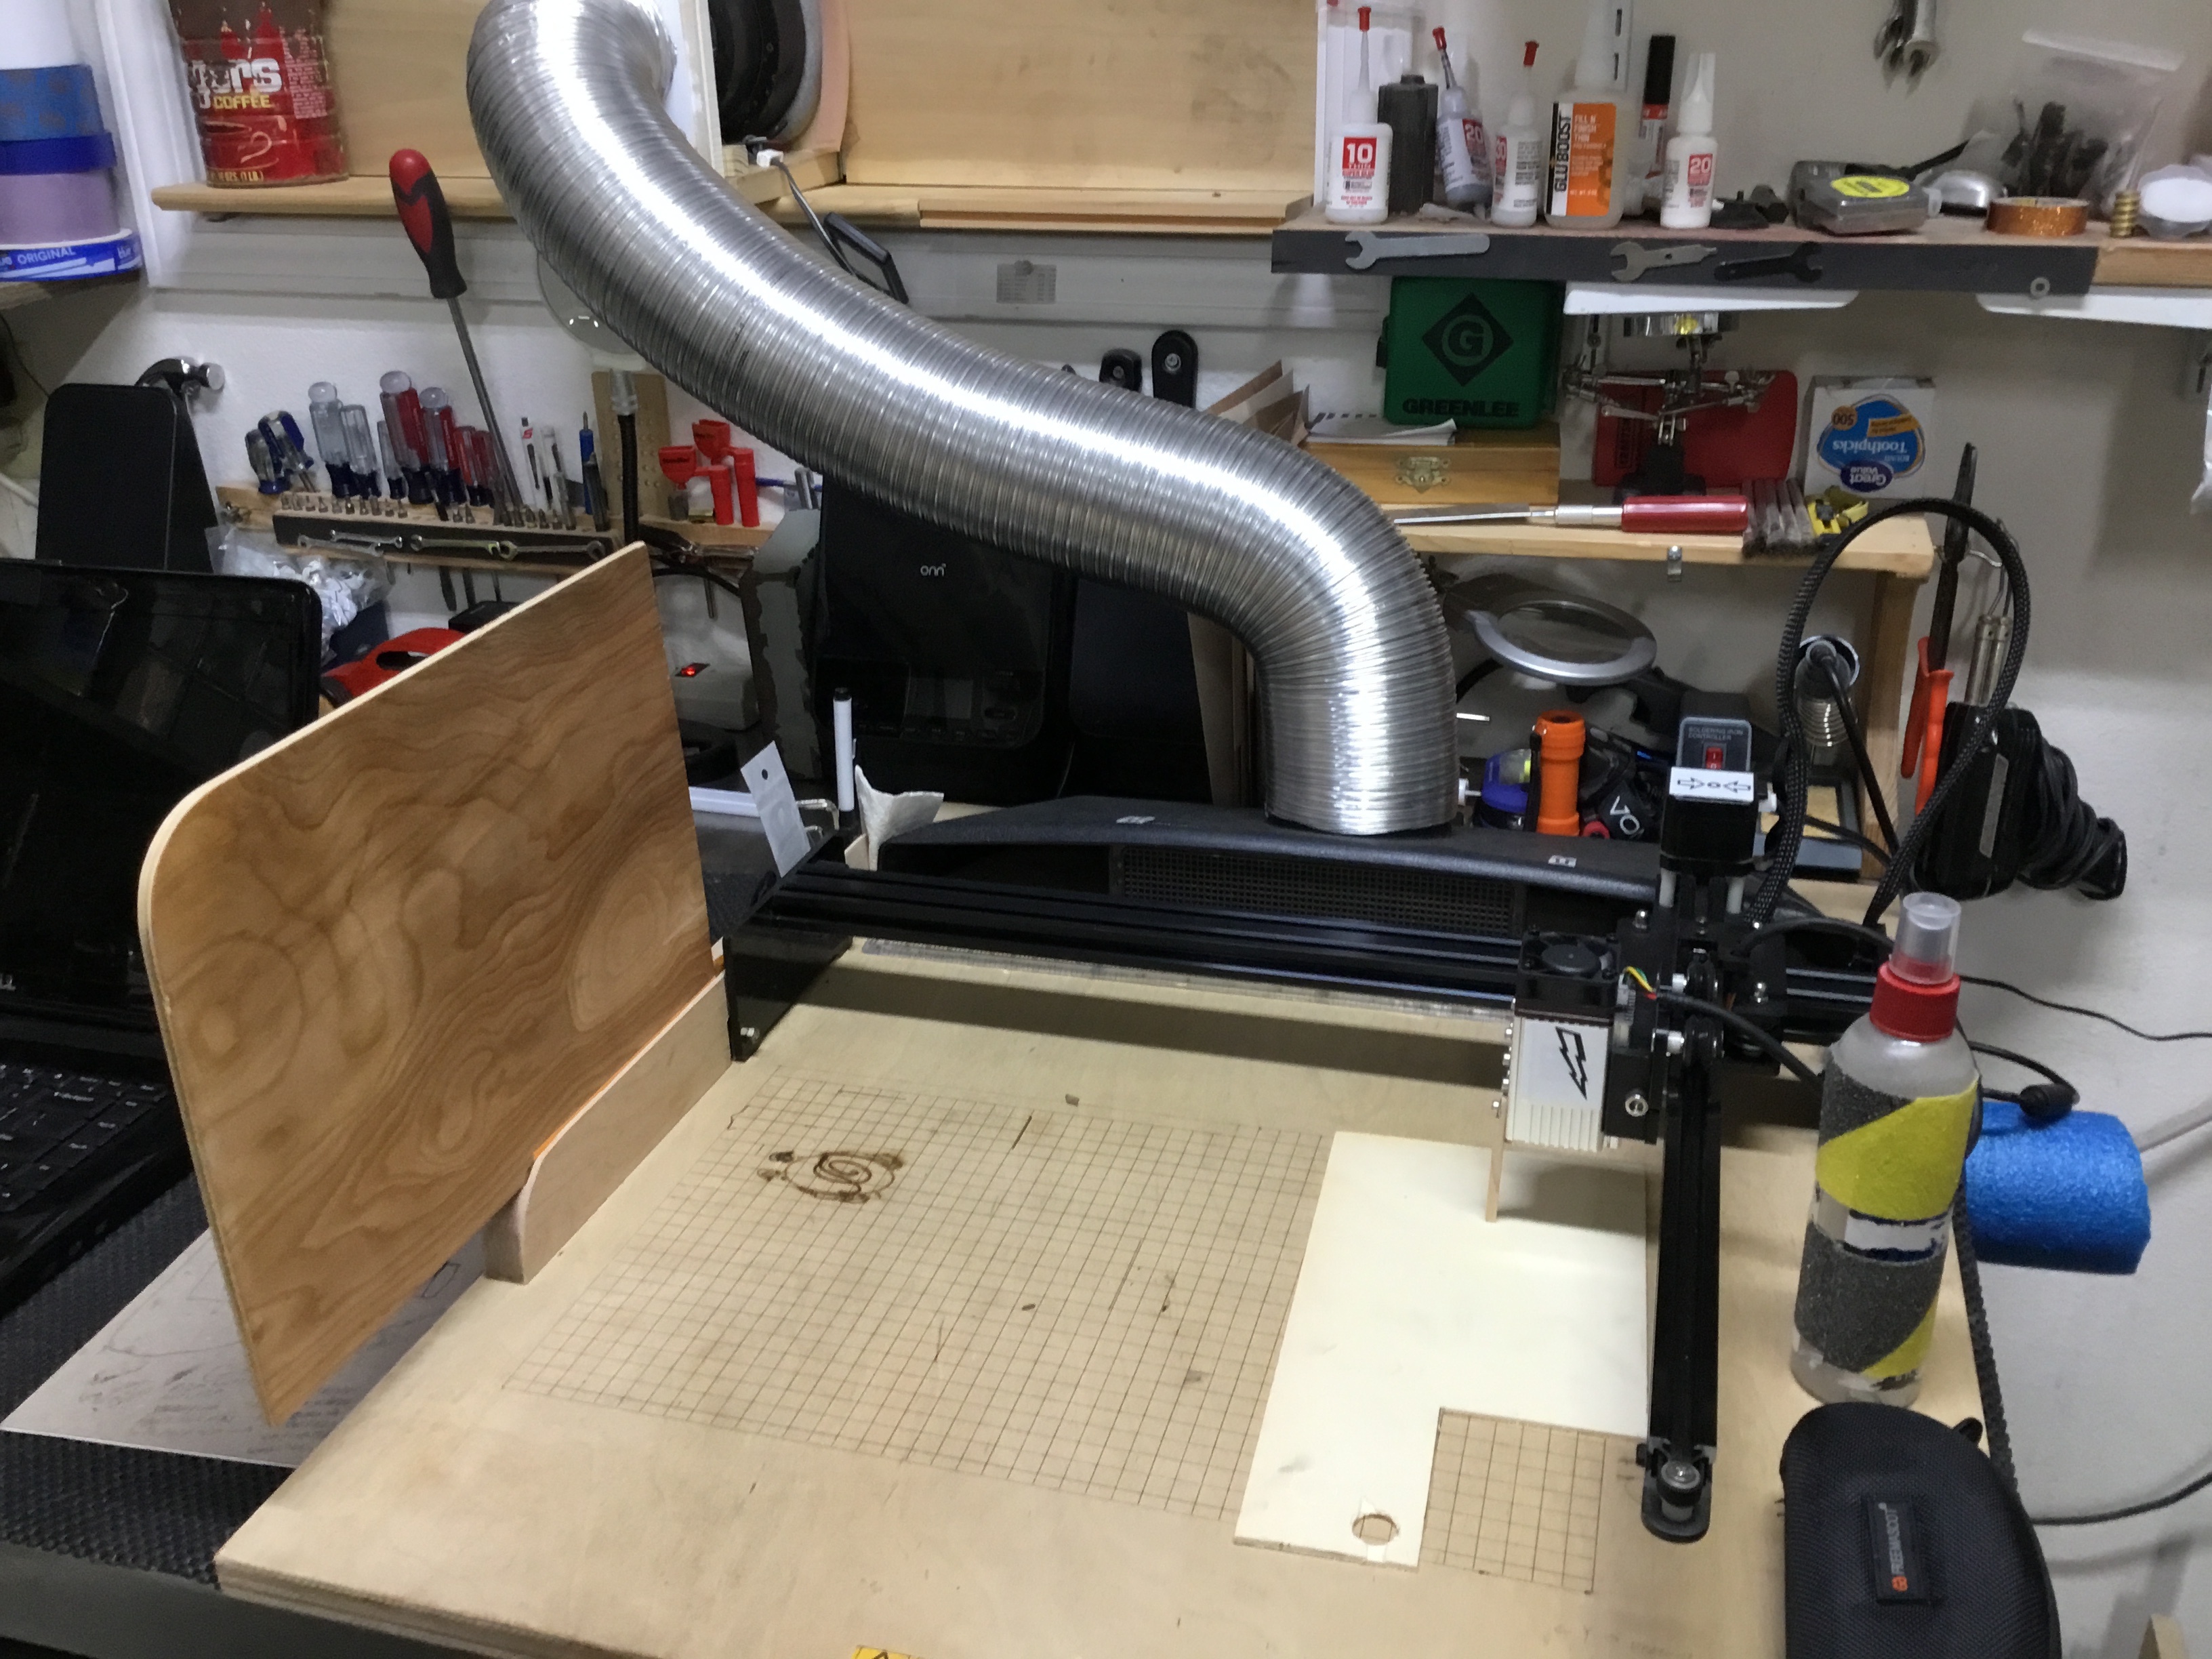
So - that fixed the homing, but it still feels like I got some Issues with the Settings. Would it be okay if I just put a Screenshot of the Settings here or should i open another Thread?
Once these changes can be confirmed to work, might be nice to then pull together a post that covers this in instructional steps as you have for the homing. A “Neje Setup” thing, maybe a FAQ. But I am getting ahead of myself.
So that’s the Settings i have at the moment.
The issues i have is that it looks like the machine movement is very slow and still trys to go over Borders sometimes
So it works with homing but i feel like the rest of the settings is messed up for normal working with the program
I have the master 2S Plus 30W. At this point what I’m doing as a workaround that works is:
At the beginning first thing is to use the NEJE homing button on the side of the NEJE.
I then go to LB move menu and “get position” and make sure it says all 0’s
Run job as normal and all works right for me.
I set LB to finish job in ending position and not to home. It doesn’t lose position then if I run more than one of the same.
If starting a new job, do #1 and 2 again. If you don’t, it won’t home correctly
I’ve found that LB showing all 0’s in position, doesn’t correlate with NEJE’s position on my setup the above is my wor-around.
These discrepancies have caused homing issues, out of bounds belt jumping, the unit slamming hard into the home position which can damage limit switches and when running multiple items with the same engraving, the engraving is moving each subsequent run making re-alignment of the item farther in the same direction each subsequent run. I’m sure there’s more but I’m in living room away from my laser and I’m old. Lol, so I hope some of this info might help all of us who are working with the NEJE masters. I will say this: they are one tough machine and accurate! Also FYI, I have developed an easy way to get perfect focus on any item height in 5 seconds! No kidding! I’ll post this shortly. Need to do some drawings first.
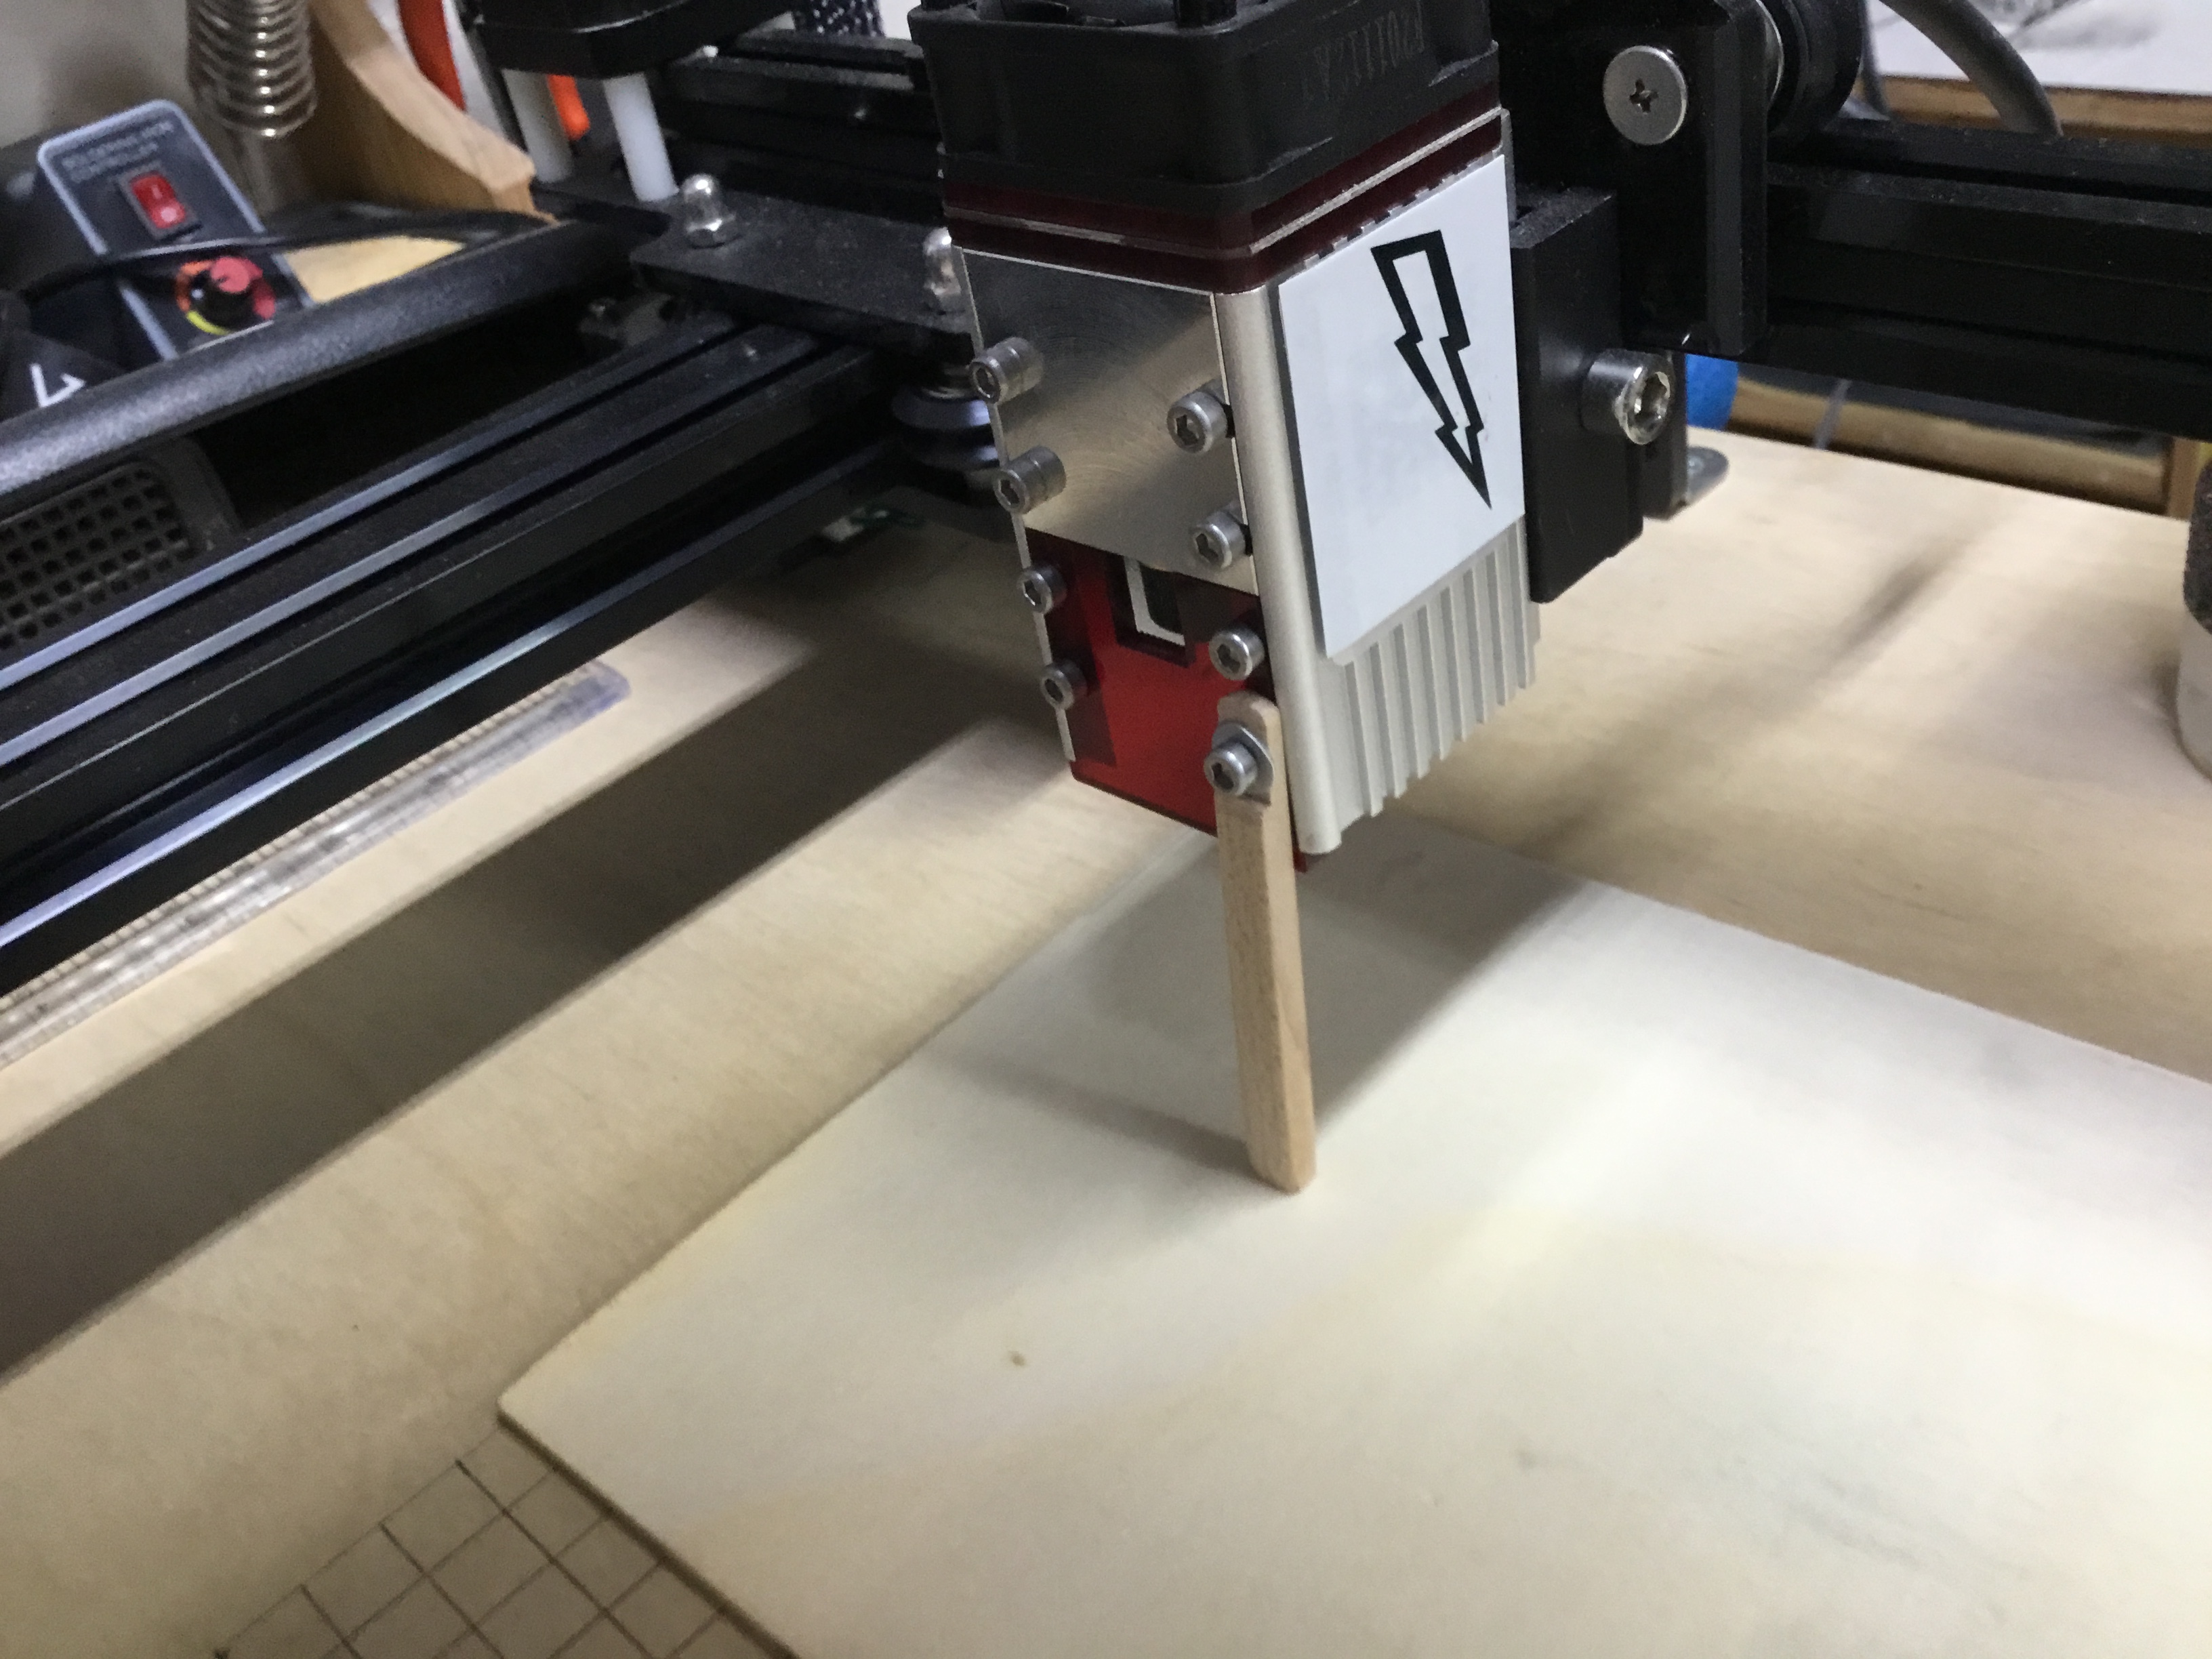
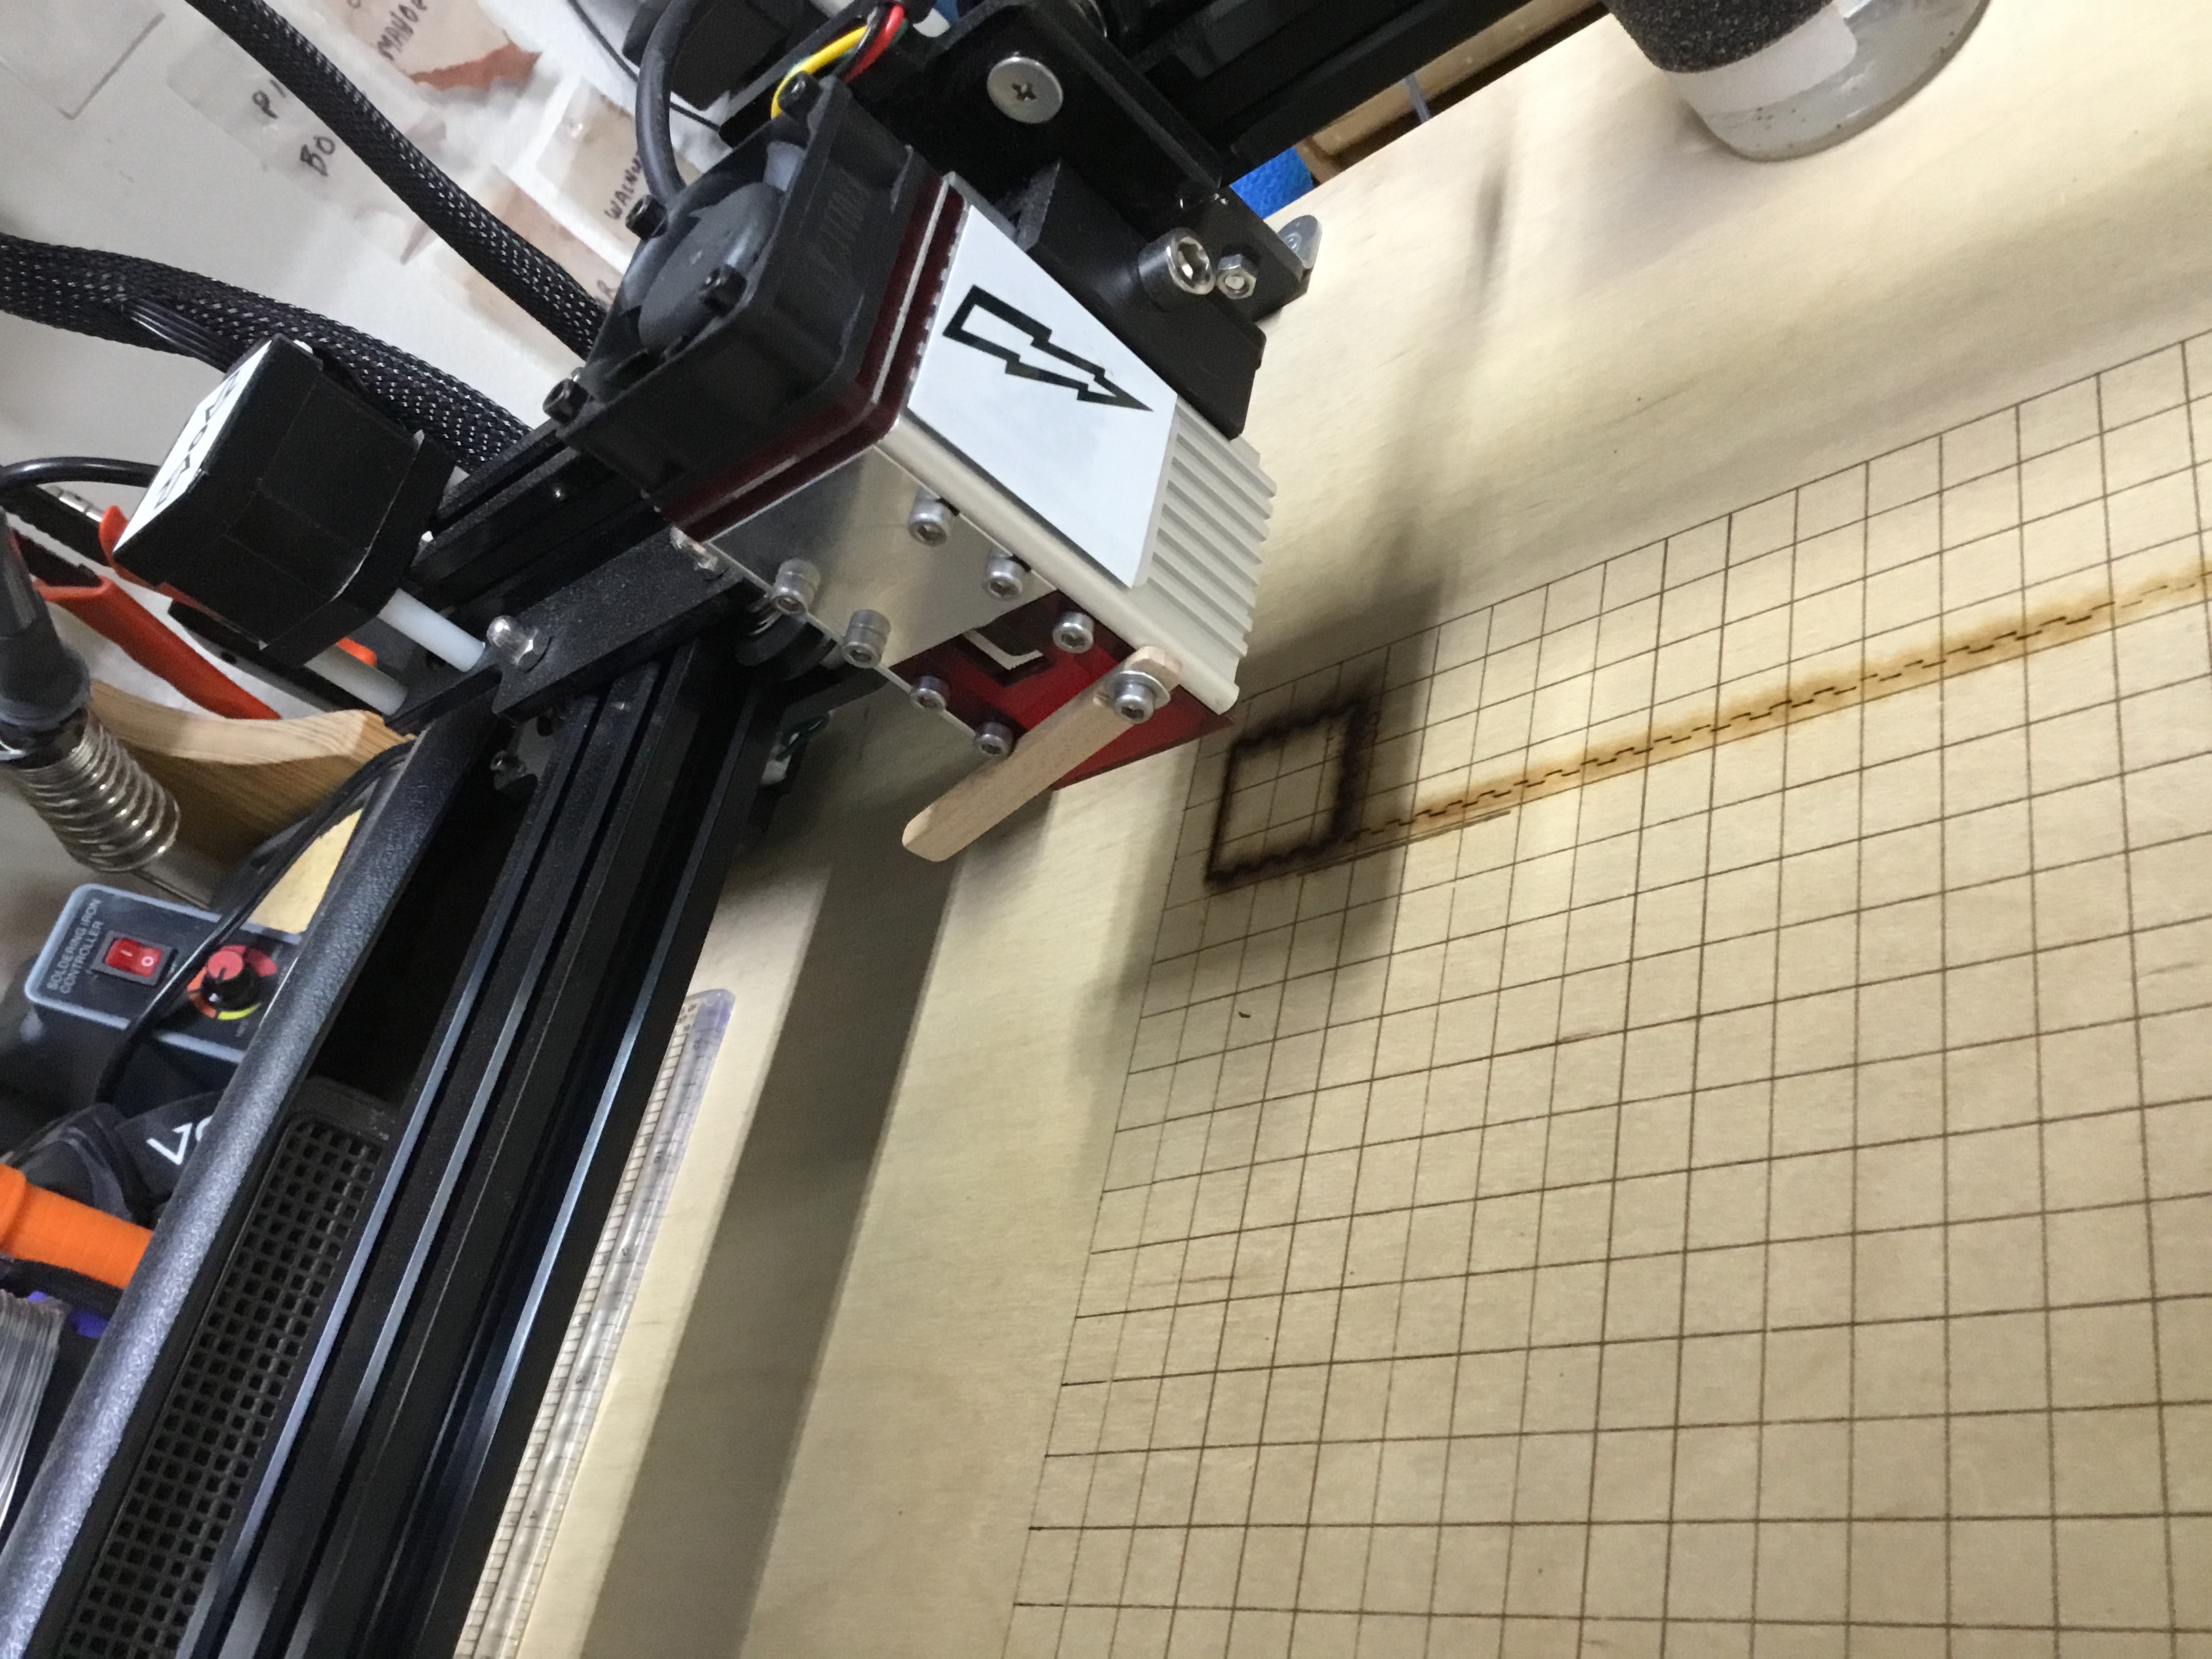
First is to use a focus ramp. First we’ve got to find your perfect focus distance. So, Raise up your laser module as high as you can and place a long stick under the laser that runs your longest direction. It should be the length of your longest travel. I used a long board about the size of a paint stirrer. It should be straight as possible. In my case, I made it 440mm long. Then lift one end of that stick by placing something under it so it’s as high as possible and still clearing the bottom of the laser. Then draw a line in LB that will burn a line the length of the board. Etch that line in the board a few times with one burn at lower power, one at a medium power for your laser, etc until you can get a line most of the way down the board. Find the area where the line is the smallest/sharpest. Move your laser directly over that spot and measure that distance from that spot to the bottom of your laser and cut a block of wood to that length. Ok now for the quick setup. Put that cut wood on top of the material you’re engraving and lower the laser till it touches, lock the laser down and you’re done. Even better yet, (I’m out of town now so this is my best guess by memory on the following info.): I took a very small (about 1/4” square piece of maple) and cut it about 1/4” longer than that distance measured. I cut a 1/4” notch out of one end so it had a 3/32 x 1/4”long flat area. I drilled a hole in that flat notch the exact size of the Allen hex screw on the bottom right of the red laser filter. Take that screw out and mount that stick on the laser using that screw and the hole you made. (I found a small thin washer that I put on the Allen screw to more securely hold the stick.) Snug up the screw but not too tight so you can rotate the stick up out of the way when not setting laser height. You’ll never lose it that way! Put your material in, loosen the laser’s locking allen screw, flip down the stick to touch your material, tighten the laser’s locking screw, flip up the measuring stick and you’re good to go for any thickness under the laser. (ps: I put a tiny drop of removable locktite on the threads of the Allen screw so it wouldn’t work loose moving the stick around - mine did).
Also, I found my lens was loose and the only way to stop that was to tighten the lens cap until it was snug. That moved my “perfect” focus area so I had to move the laser higher to get perfect focus but boy what an improvement. Especially on cutting! Now cutting 3 mil plywood from hobby lobby in 2 passes at 80% in LB. Previously I was not getting full power even with settings at “1000” on speed settings. I experimented around and seemed to be getting power closest to NEJE’s app when I set the speed settings to all 9’s. 9999 in device settings and 999 in the laser panel. I was able to engrave some woods at 2% power at 600mm/min. Using those speed settings. Even went as low as1% at 400mm/sec for some photos. Now I’m working on darker burns using baking soda, clear non toxic coatings, etc.