I just ordered a newer faster diode laser (in profile) and it won’t be here until Tuesday. Since I used my 30 day trial when learning to use my 3018-PRO with 5.5W in 2020, I bought Lightburn yesterday. I decided to make a flag as an exercise while waiting for the arrival of my laser machine.
Here are the obstacles I am encountering with screen shots:
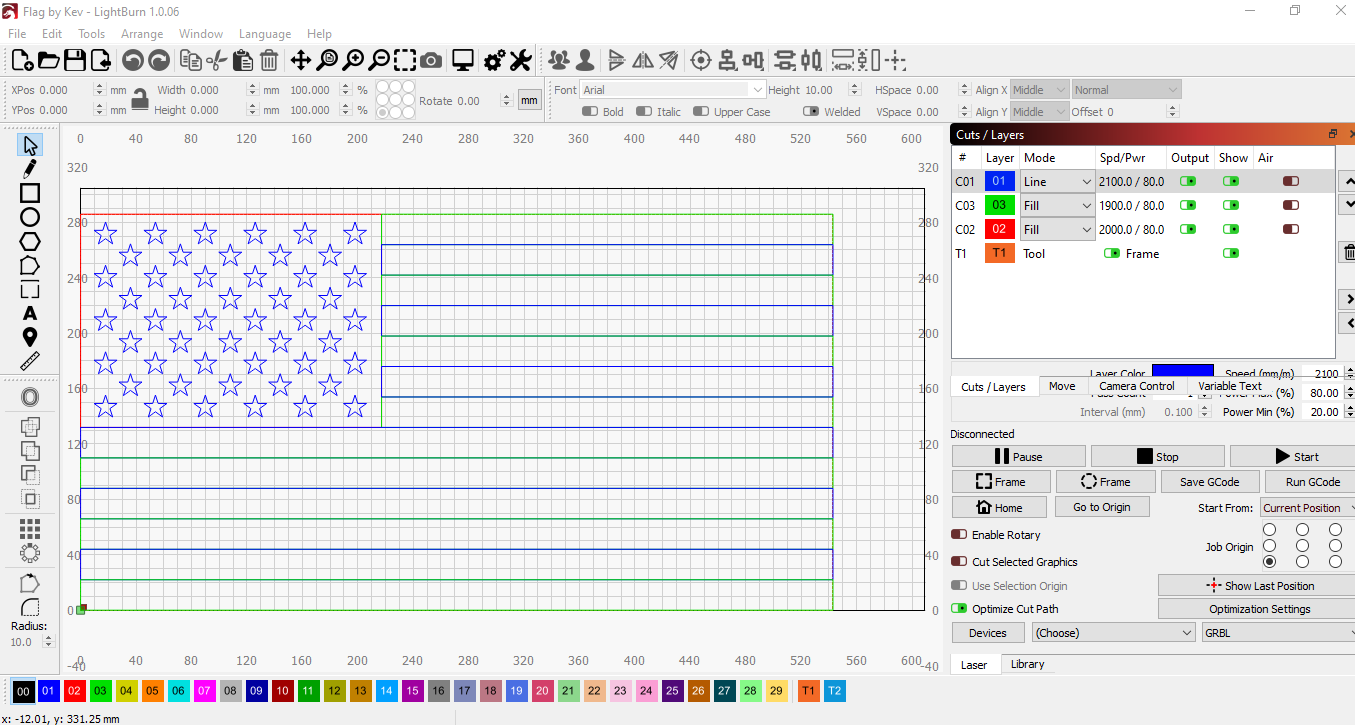
Basic project window: Haven’t worried about speed or power levels until I test new laser.
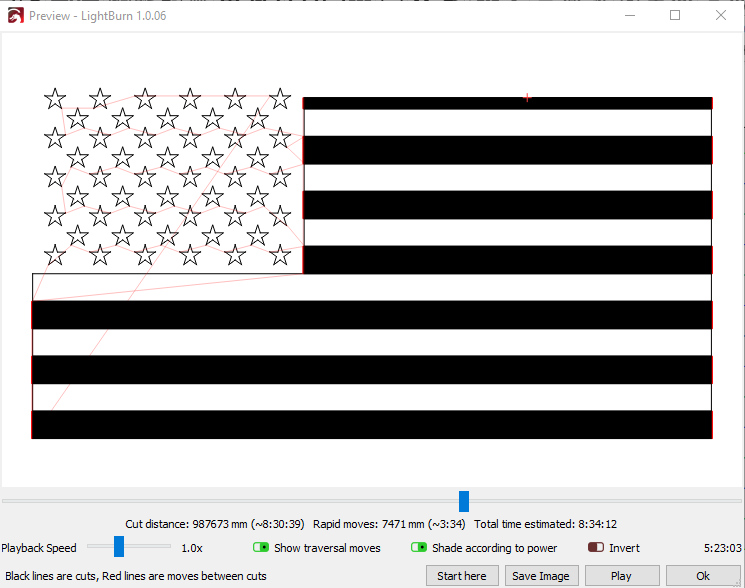
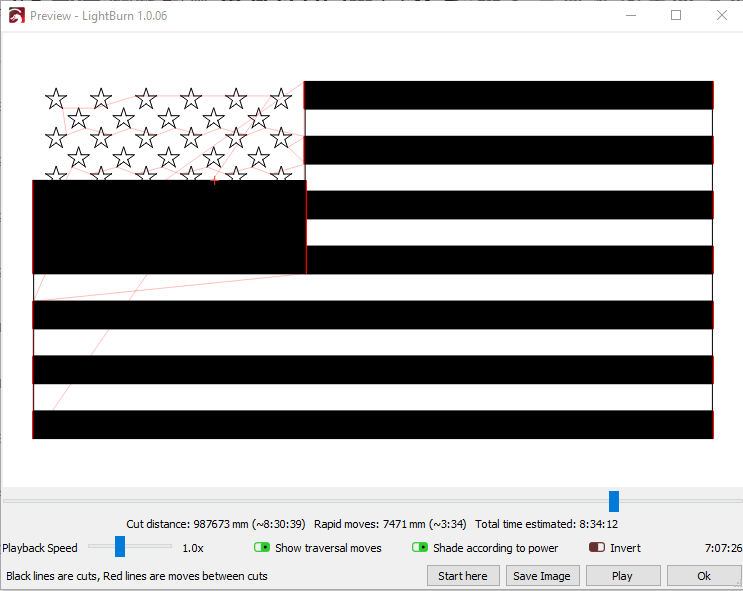
When previewing, it would appear that the stars will be burned as a line, and it is hopeful that their background will be burned dark and etched into the wood but allowing the preview to run, makes me think they will be “burned over” when the background area is burned. Next two shots of preview window shows this.
This is my first REAL attempt to use Lightburn to design something. During my trial period a couple years ago, I used it to do NWT photos of my grandkids and I for presents and loved them. Now I need help understanding the proper order of the layers, how to ensure that features (like the stars) won’t be eliminated by subsequent layers being burned, etc.
I would appreciate all constructive criticism and advice and will happily pursue tutorial information as I am referred to it.
Thank you all in advance.
Kevin
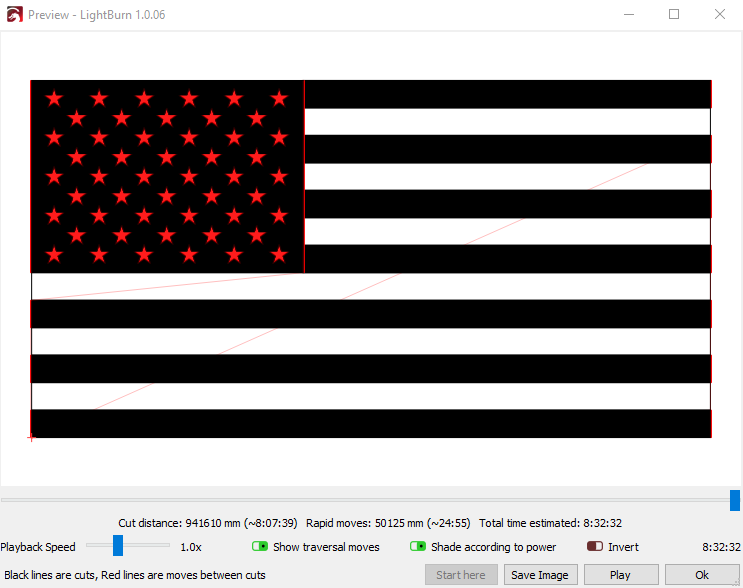
It wasn’t totally clear from your post what you expected the final outcome to be. I’m interpreting it as you want the stars to be unburned while the background behind the stars is engraved.
If so, try putting the stars on the same layer as the red fill C02. The stars should then be interpreted as cutouts from the background. The stars will not be engraved while the background is.
I assume more experience will lend itself to being able to see that for myself but at this stage all I can do is shake my head in wonder at how rapidly you solved my issue.
It absolutely will. Between gaining general familiarity with the tools as well as experience with solving for specific problem scenarios these types of things will become more apparent.
In this particular case, the key bit of knowledge is knowing that for a closed shape that is filled, any shape that’s placed inside of the outer shape will be interpreted as a cutout/hole. In fact, you would be able to see through to any objects lying beneath the hole.
By the way, it might be easier to see how things change in real-time as you design if you change the View Style in the Window menu. Pick one of the “Filled” styles. This will make is so that fills actually show as filled in the workspace.
This can cause performance problems for very complex projects so something to keep in mind if that comes up.
Thank you for such prompt and clear advice and coaching. Problem solved in less than a couple hours while I was doing household chores. Amazing!
Have a great day!
I am trying to end up with white stars on a dark background with the “red” stripes being dark also. I am hoping to get at least a two color version of a flag that way and will use this as a basis to add military, law enforcement, or patriotic vectors in the stripes to the right of the stars.
Yeah, the distance seems like a lot. Might play with line spacing. I think that the preview time is related to max speed parameters of my 3018-PRO and since I don’t have my new, faster unit yet, I haven’t been able to have Lightburn grab the new unit’s device data. What it is working with right now was a machine that had about a 1200 mm/min max speed before it started missing steps.
I’m open to suggestions on optimizing this file. I sure the learning experience will be priceless.
Right now, I am using this as a learning exercise while I’m waiting for my new laser to arrive.
@GizmoGuy, this is worth review to help with understanding how fills work, with visual examples. There are also optimizations that can significantly alter the time required to achieve the results you are after. Understanding the limits of your new laser (speed, power, dot size, et al.) will help in knowing the best optimizations for a given task.
I did purchase a good quality set of protective glasses when I got my first laser. They are 160-460nm OD6+. Having used them, they make block so much its difficult to focus my adjustable focus laser. They seem to do a great job and were recommended in another laser group by the group founder. I have no problem purchasing another set and relegating these to “back up” but as a rule, I don’t watch my laser while monitoring it for safety, fire, etc.
Thank you.
Actually, since it was on a 3018-PRO, I left the focus ring alone, set the distance in the ballpark with my calipers, and Fine tuned it with small jogs on the z axis. It was just difficult to see the spot size change with these glasses when focusing. Bought a fixed focus unit this time.
I like that idea. Even if only to have a backup dowel. I think the unit that I bought, will be a little more easy to keep perpendicular to the work by virtue of the manual z adjustment. It seems to be of reasonable quality. I suppose that will open up other potential issues but we shall see…
It’s generally considered bad practice to allow lasers (really, any automated equipment) to run without supervision.
Hunt around on these ‘fires’ and it’s usually a commercial company cutting acrylic, the same job over and over. Tough to get people to sit and watch, so many end up in flames. I keep a 5 pound bottle of co2 for fire suppression.
Lasing is the act of ‘burning’ as part of their function, so there is always a fire danger. I’m sure there is much ‘threat’ with a low power machine, but might not be a good idea as a habit. They still burn and all it really takes is a flame with oxygen and fuel (like your desk or home.)
How many of these Chinese consumer products have exploded or burst into flames?
Another issue is that my cats love to chase the CNC machine while it’s running. So when using one of the small machines inside I ‘eject’ all the animals out of my work room.
Good that you have protection and an extra set for visitors, they all want to ‘see’ the laser work. I use my regular glasses for the co2 and have a set of ‘safety’ glasses from home depot (with side shields) for visitors.
Just understand what you have and use common sense and you’ll probably be fine.
Thank you.
I may have given the impression that I would leave my laser alone because of a 19 hour burn… Reality couldn’t be farther from the truth (although the need to babysit it, WOULD take quite a toll).
I have worked around hazardous machinery, welding, electrical hazards, inhalation risks, pulmonary irritants, and other industrial hazards for 45+ years. While I may not be an expert on all of these potential hazards, I have had extensive training with an emphasis on preventing injuries, illnesses, and equipment damage when working in the presence of these hazards.
With this background, I heartily endorse everything you just said and encourage others to take personal responsibility for their safety and that of the others (including pets) that may be in the work area, whether it be intentionally OR inadvertantly.
I AM looking forward to “playing” with my new toy. My wife is smiling because she has seen more excitement and smiles from me in the last week than in the last year… It’s amazing how a little freedom (retirement) can affect your attitude.
Thank you for the encouragement and advice. I always appreciate advice and counsel from someone that is further down the road in their journey and look forward to being able to give back in like kind.
I wouldn’t suspect that your burns would be unsupervised. I envy you being in a good position to take advantage of technology to overcome the disputes between safety and convenience. Sounds like an awesome set up.