UPDATE: I may have figured it out! I had “Use Selection Origin” checked so that probably over-rode “Current Position > Center”. Does that sound logical?
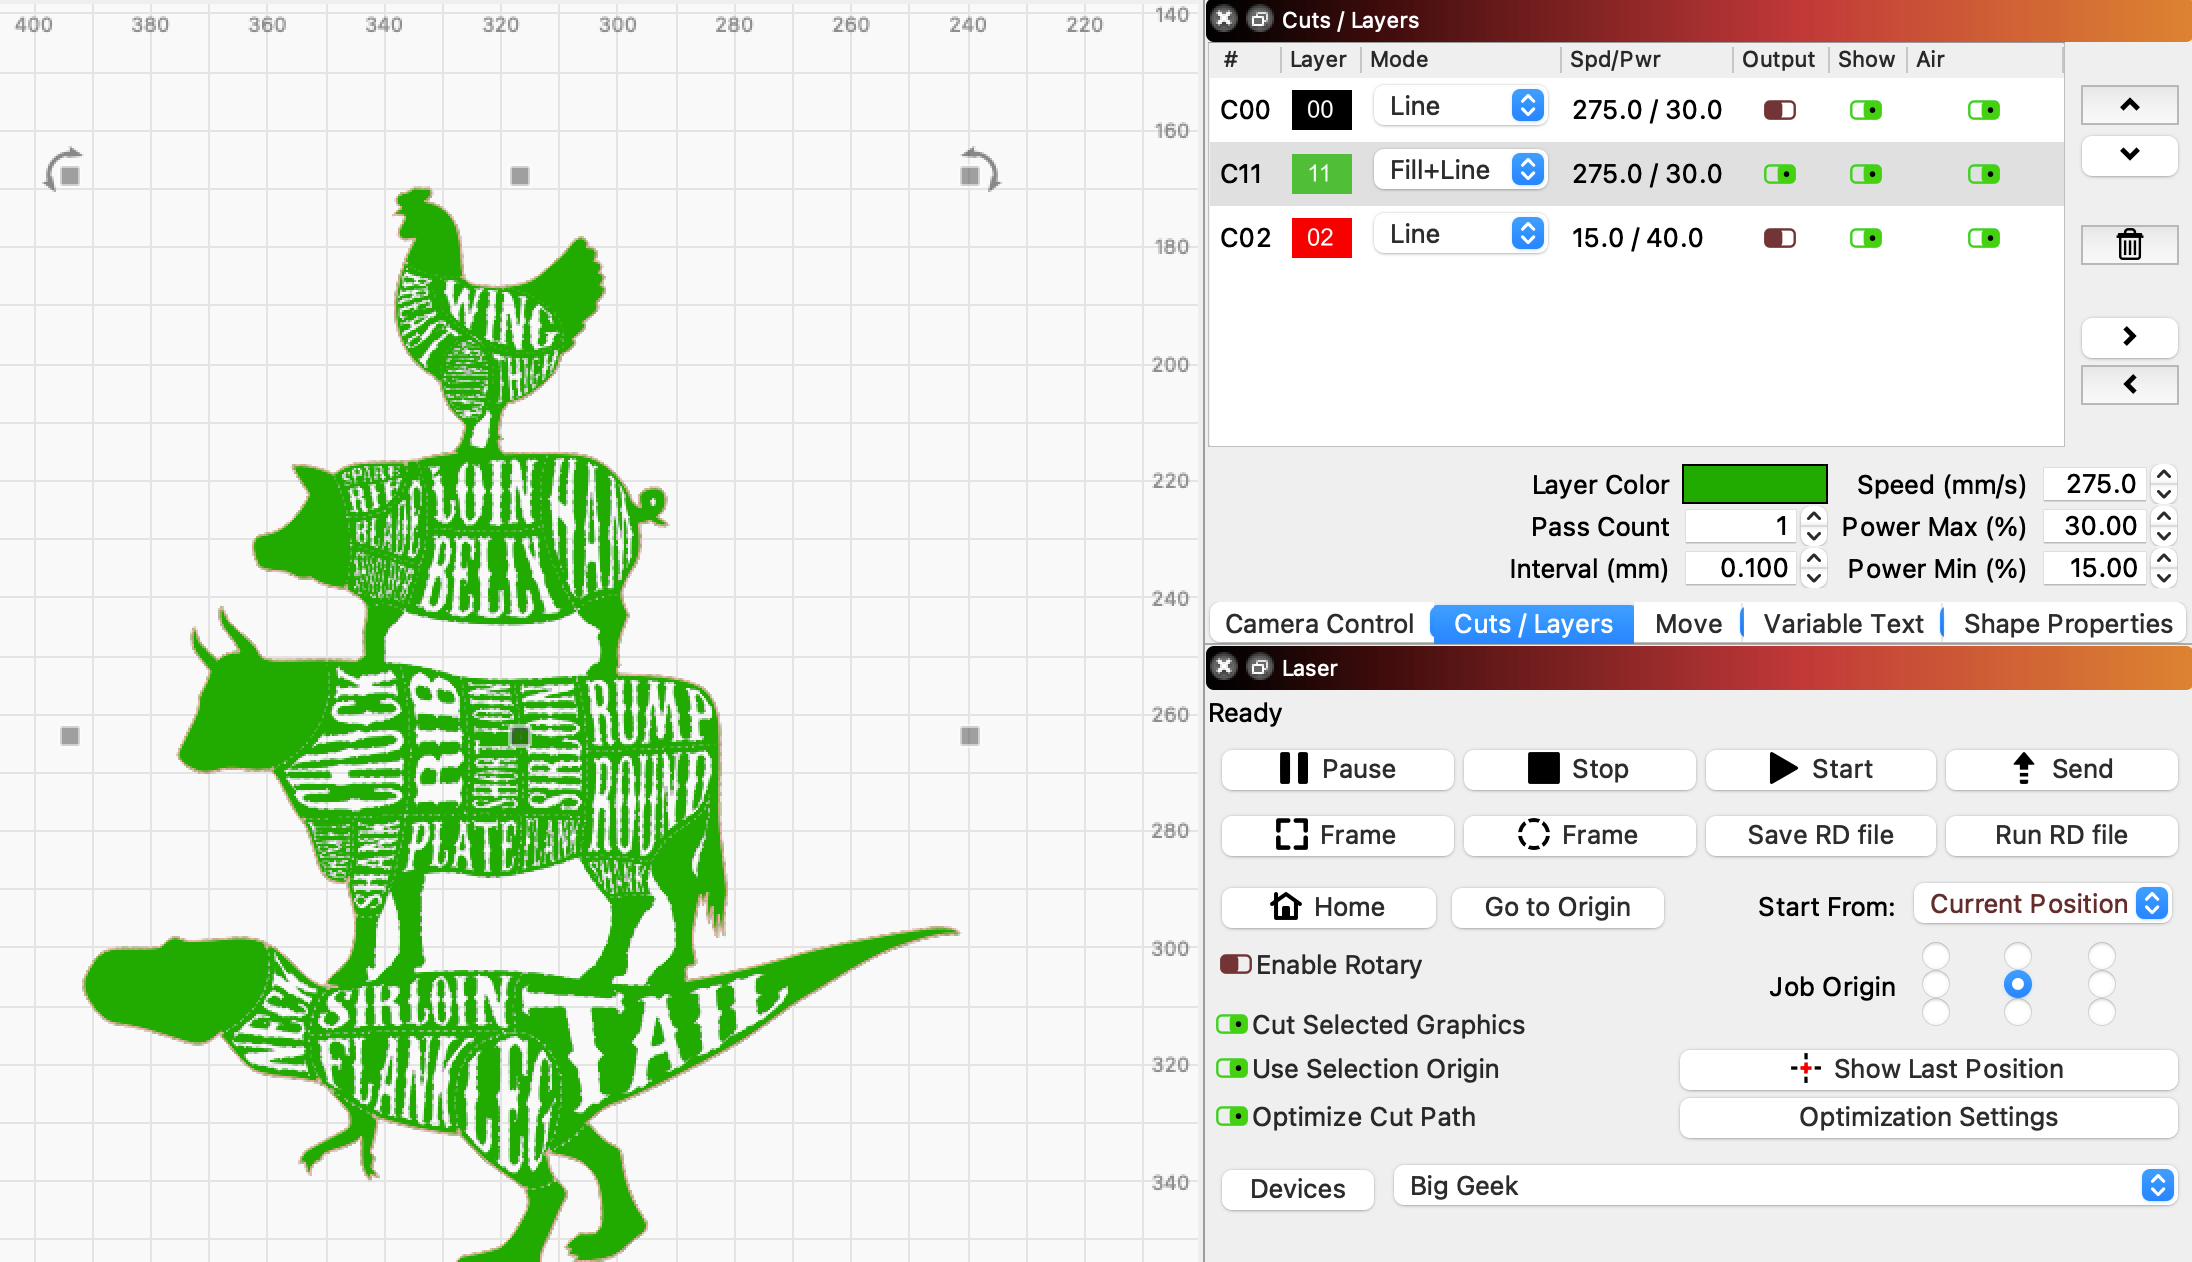
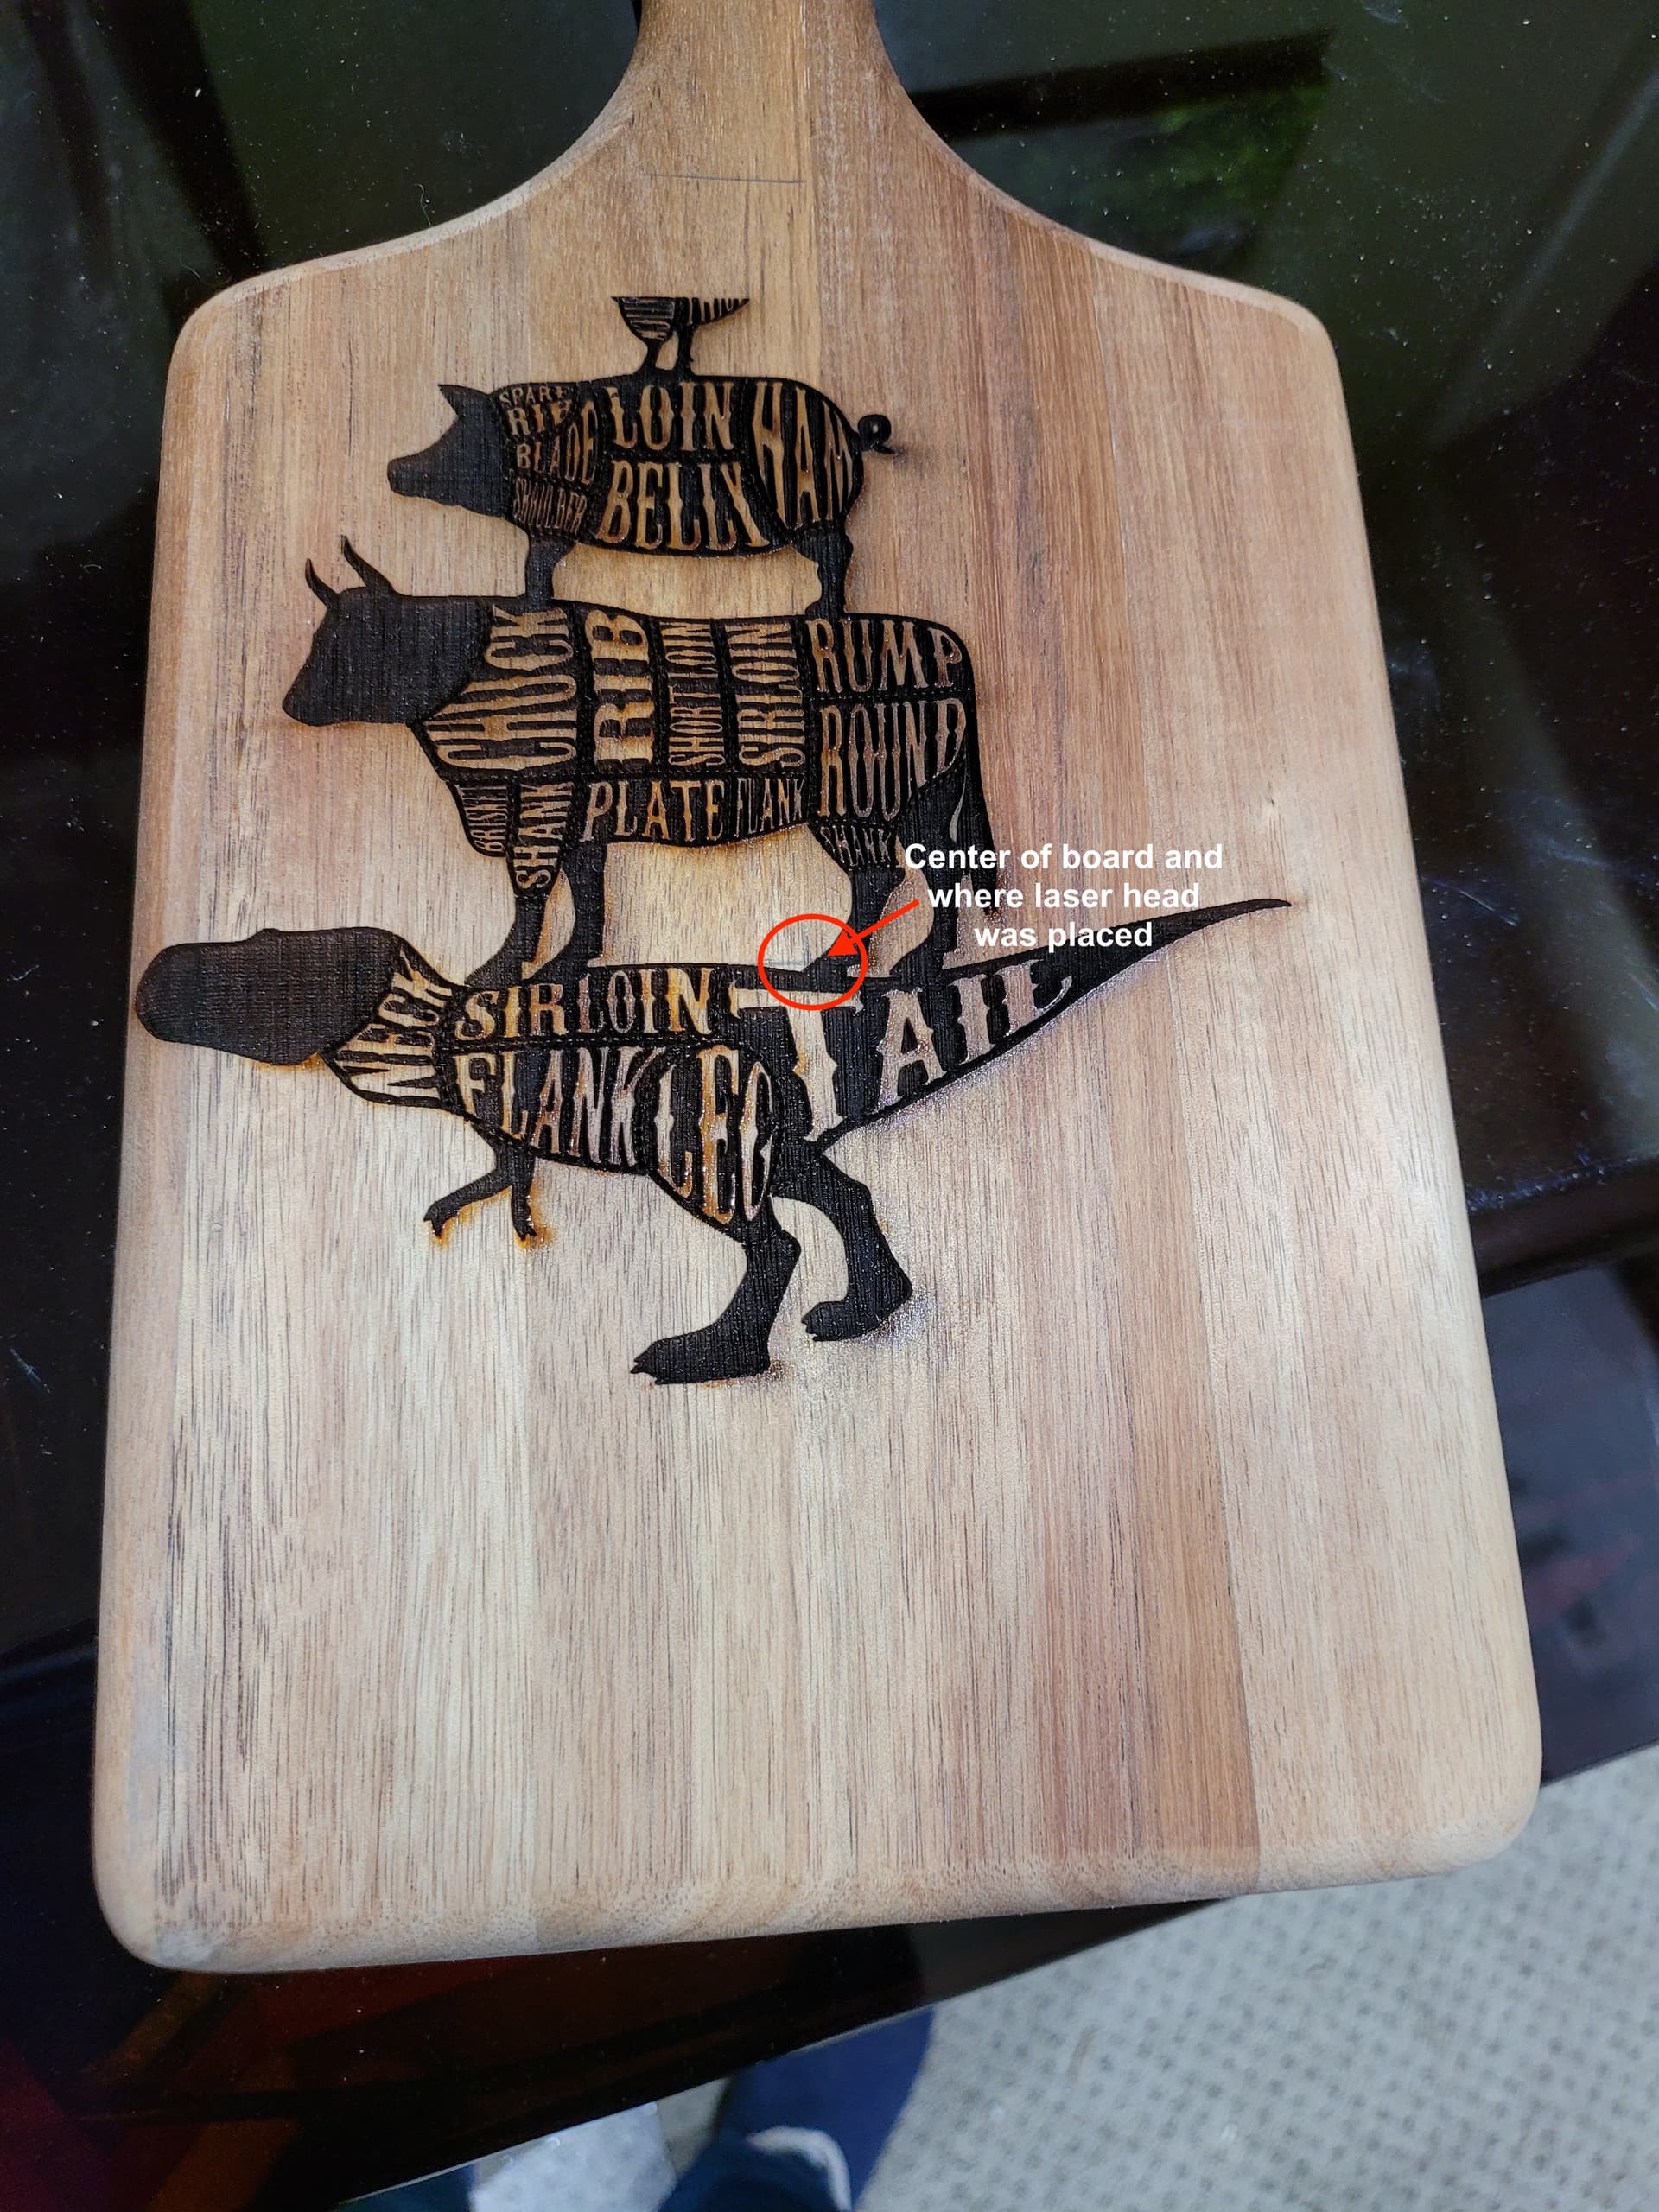
I have an OMTech 80W. The machine origin and Home are in the right back corner. I had the red dot of laser head in the exact middle of the bottom portion (below the handle) of my cutting board (marked with a + on the board). I had just the 1 file uploaded and nothing else on the page. I had Selected Graphics checked and just the engraving portion (C11) for Output. I had (as you can see in the screenshot) selected Current Position > Center. The green dot was in the exact center of the design. When I framed it, it was in the exact right position. But once I hit Send (to Ruida controller), and then Start on the machine it did not start cutting in the position I expected. Instead, it moved up about 3.5" and over about 1/2". I assumed Current Position > Center meant it would start in the center of my design exactly where placed, but it does not. I’ve had this happen to some projects, but others it works fine using the same Current Position > Center option. I’ve watched a half dozen videos and thought I understood it, but I guess not. Any guidance?
No. I don’t think so. I think you had it right earlier. Or at least there’s nothing wrong with using selection origin. The only thing it does is change which objects are used in determining the relative location of the green job origin indicator. Basically, either include all objects in workspace or only consider those that are selected. In other words, you were right and it should have worked.
I don’t see anything inherently flawed in your process. I detect one possible misperception but that doesn’t change that what you described should work have worked as you planned. I don’t see anything obviously wrong in your screenshot.
The one perception issue I noticed was here:
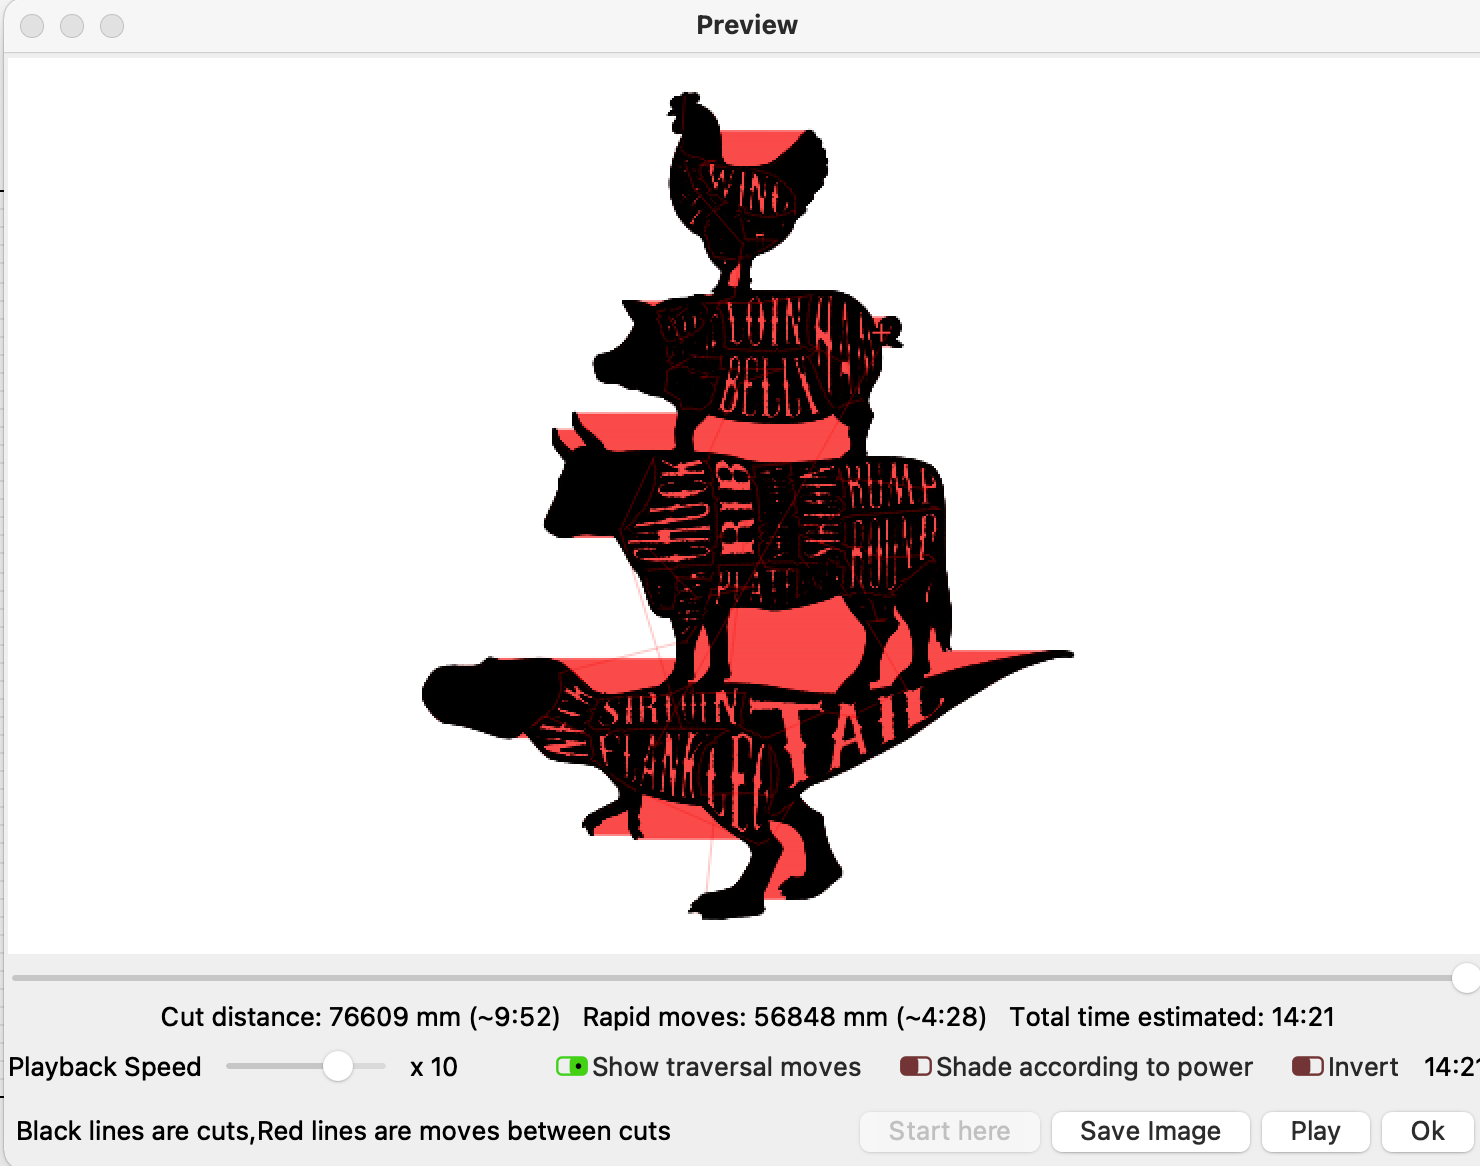
The job origin indicator doesn’t necessarily mean that the laser will immediately begin firing from that position. But it does indicate that the relative position of all operations of the job will be offset from that position. Put a different way, you could very well see the laser head move away from the green square position but that location still should be the reference point that both the design and actual burn are tied to. You can see this in Preview. You’ll likely see a traversal move right at the beginning away from the center to start burning from a logical position.
It’s not clear to me why it moved beyond the expected center spot, however. Can you see in Preview the larger than expected movement?
I knew it would not fire in that position, but the placement should be relative to the position, but it wasn’t. I tried again with “Use Selection Orientation” unchecked and reuploaded the file to LB just in case there was a problem with the previous upload. This time it placed the design over about 1" to the left so another cutting board ruined. I don’t understand why this is happening when the frame shows it in the exact right position.
I moved the laser head and then clicked “Show Last Position” so I could see where it was identifying the head of the laser. But DANG! Good eyes!
I tried again this time I moved the head to the bottom of the board, selected Current Position > Bottom Center > Send and it started in the center of the board with the dino feet. I just don’t know what is going on. Maybe I need to uninstall and reinstall LB. I am still in trial mode for another 10 days.
The vertical placement was high about 1/2". The Green dot origin was in the center front flank of the cow exactly where I’d expect center to be. Interesting now is when I click “Use Selection Origin” and click the graphic it is in the same place, but when I click off the graphic the green origin moves down and to the left about the distance that it is off. Not sure how to account for that.
This is with “Use Selection Origin” checked and the graphic selected. If I click the “Set Laser Position” and click on the green origin box, the head moves up and to the right off the center marking. I feel like I’m getting closer but don’t understand why it’s working this way.
If you’re comfortable uploading the .lbrn file someone could review to see if there’s anything going on in the file itself.
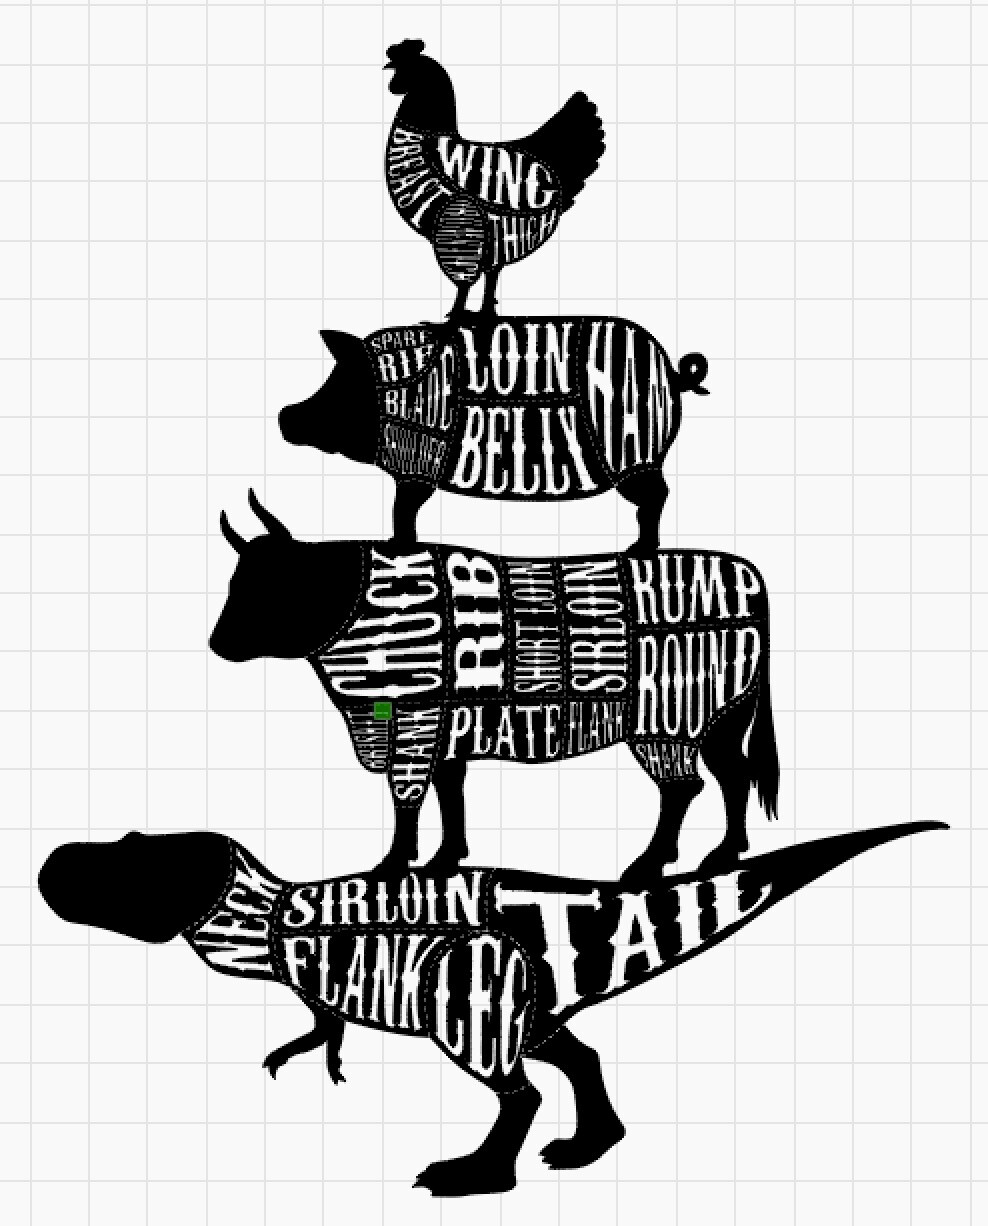
Taylor Dinosaur Butcher Cuts.lbrn2 (2.1 MB)
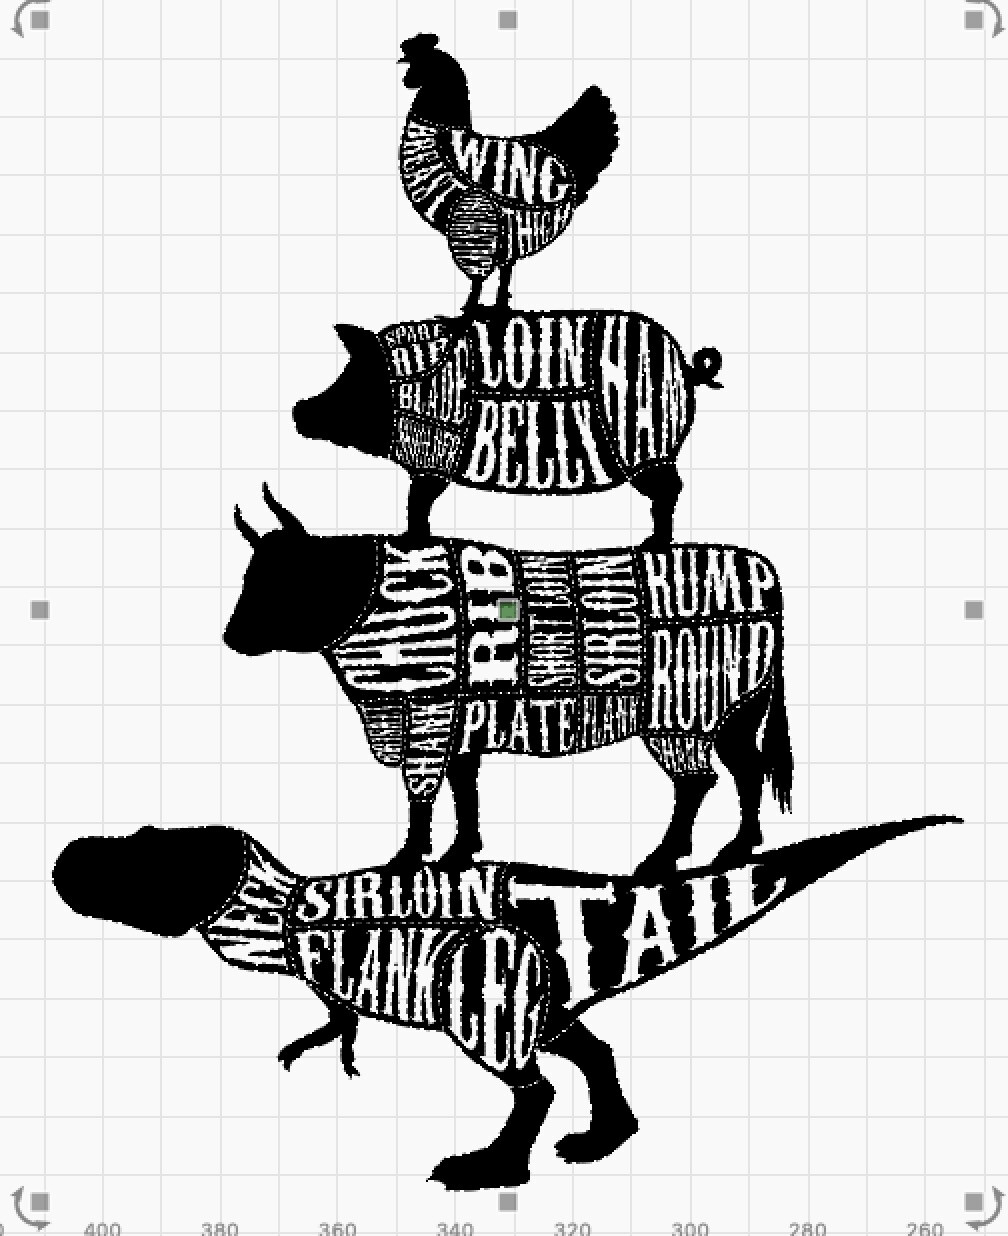
This is the file. I did edit it slightly from the first picture to center the 3 animals onto the dinosaur a little better but otherwise the same.
I’m tending to think it’s not related to LightBurn.
I took a look through the file and I see nothing obviously wrong with it that would cause this behavior. Preview looked exactly like you’d expect. What you’re describing almost feels like if you were in user origin mode and had forgotten that you had set one. It shouldn’t behave this way in current position.
This behavior is likely because the origin will revert to placing job origin relative to the whole page since nothing is selected.
Is there a way for you to test this without ruining boards? Maybe running it at lower power on something disposable?
Maybe try removing the 2 layers you’re not outputting. See if that changes the behavior.
Otherwise, don’t know if you’re in a time crunch with this but perhaps just line it up for Absolute Coords and try to sort out why this isn’t working separately.
Hoping someone that’s more familiar with your controller will be able to identify something perhaps controller specific.
Yes, I’ve had the problem before, I just figured it was me and being new to Lightburn but since the frame shows the correct placement, it just totally baffles me why it is off when I “Send” or “Start”.
Hi Tammy, welcome to the forum… Let me take a ‘stab’ at this and see if I can help get you going in the right direction.
The ‘Start From’ and ‘Job Origin’ work hand in hand, so to speak…
If you have ‘Start From’ set to ‘Absolute Coords’ then the ‘Job Origin’ is greyed out, since the job origin is absolute coordinates or 0, 0. I happen to run most of my detailed stuff with that setting…
If it’s ‘Start From’ is set to ‘User Origin’ you generally have to put the head where you want it and press ‘origin’ on the console keypad.
‘Job Origin’ specifies where, relative to the ‘User Origin’, that the image will be ‘anchored’.
So if you choose bottom left, then the ‘image’ (or whatever) will be produced to the upper right of the ‘user origin’ .
Choosing top right puts the ‘image’ down and to the left of the ‘user origin’.
The ‘Current position’ is supposed to work similar, but doesn’t need to be set. I don’t really use this with my stuff…
Does this make sense?
I’m not sure what is happening for the position. I think you just need some time working with it.
This has got to be the most simple type of operation, but it has bamboozled more people than the national debt.
This is a good thread but with all the back and forth discussion it’s hard to follow. I really liked that the original post was edited with a summary of what solved the problem.
It’s not solved yet, but I do agree it makes it so much easier when a solution is posted in the OP. I’ll do that if I figure it all out. I’m still having problems. It frames, but doesn’t cut where it frames and now it is skipping areas of the cut. Ordered an adapter for my mac with an ethernet port to see if that fixes it. Fingers crossed.
The purpose of the Lightburn bridge is an added layer of software to deal with the specifics of UDP and the Ruida interface.
As @berainlb points out, doubt an Ethernet addition would be of much benefit since the bridge is already connected to the laser via Ethernet. Wifi between the bridge and the router is very dependable with a good signal.
Tammy, I am not sure if you solved this yet, or not. I just saw this post from the weekly email received from LightBurn forum.
Unfortunately, it’s below freezing this AM in Texas and my laser is in the garage, and tube empty at the moment, so I can’t actually try your file. However, I do lots of projects similar, and at least I can tell you my method, and what works. I’ve never had an offsetting problem like yours, so I use the technique, and maybe it will work for you.
Use some cardboard to test this on. Put an X or mark where you want the center origin to be.
Make sure to set your power way down to just over minimum firing power. You just need to see where it’s going to engrave.
Move you laser head manually to center over the X on the cardboard.
PRESS the Origin button on your controller panel. This sets your “User” origin.
In LB, set the Job Origin checkbox to the centered circle
Set Start From: to User Origin
Those steps should center the design (represented with green dot in LB) exactly where you set the Origin (by pressing the origin button previously).
I would leave off Use Selection Origin.
Run it and see what happens. Be careful engraving on cardboard. It’s very easy to catch it on fire. Keep speed up and power as low as possible in settings for the layer.
Best of luck,
Ray
PS: I too am on a Mac and using Wifi connection. I generally find on a complicated project it better to “Send” the file to the laser, and then to load the file from the laser controller and run it from the laser. Every once in awhile it will fail sending the file to the laser, but generally a retry will take care of it. Once it transfers without error dialog popping up, I’ve never had an issue with anything sent over.
This is similar to what I was trying except I was not using User Origin so I’ll try that when I get home tomorrow. I am still trying to figure out why when I framed it, it was in the correct spot but as soon as I did “send” to the controller it was off. It did it 3 separate times, all with the same file. I tried “Send” and “Start” and got the same results.
I did find a post about deleting the preference folder (which is essentially reinstalling Lightburn) so I did that. I have not retried this file yet, but so far it is cutting where expected. Once I test this again this week and if it works, I will update in the original post in case someone else has a similar issue in the future.