We purchased an OMTech 80W laser that has two lasers (one for the left and one for the right that move together). I can make it burn the same image on both sides. How can I make it burn over the entire area of the bed? It seems to tell the lasers to burn one side or the other but not use both to burn designs that span the entire bed. I am sure I am missing something simple here.
Is there a way I am missing to have Lightburn tell the laser the left half is done by laser 2 and the right half by laser 1? Seems like a logical approach.
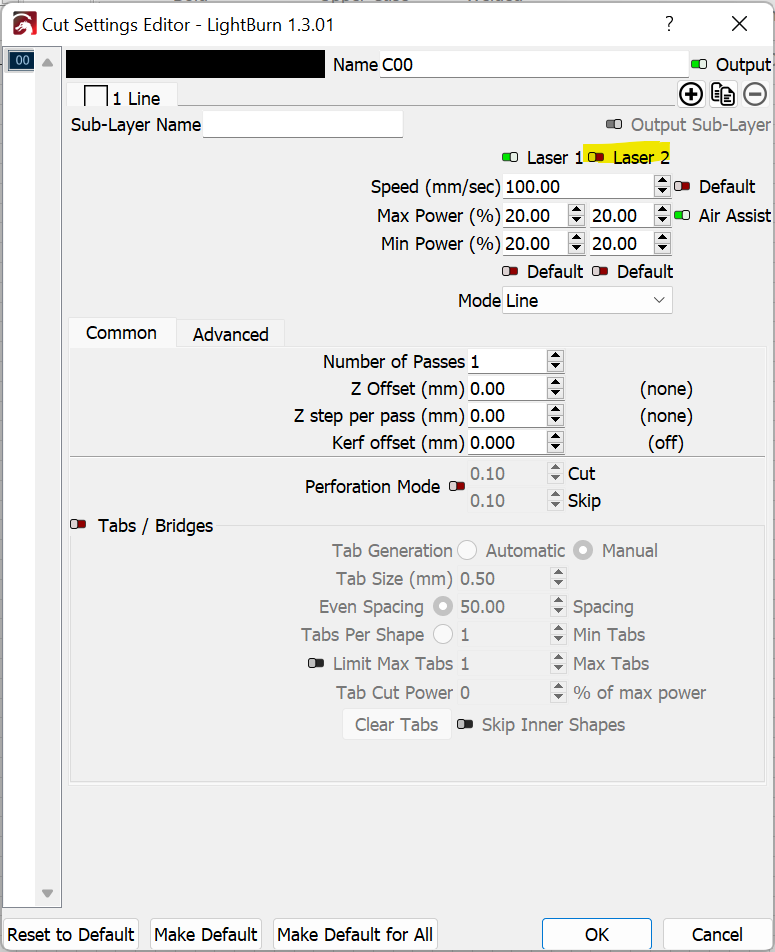
I know I have enabled the laser 2 controls. That was how I got it to burn on both sides of the layout.
Enabling laser offset is probably what I am missing. I’ll dig into what that actually means. Thanks and I’ll try to update the post with what I find out.
The machine references only one position. This is one of the heads. The offset is what’s applied to correct for the extra heads ‘offset’ from the first …
I kind of doubt this is the issue you have, but I have no experience with dual headed lasers.
I agree with you the single laser approach has enough suprizes. The dual head laser is only useful for specific applications where you want to burn two things at the same time, or you have one head that specializes in burning and one for cutting and you don’t mind giving up half your burn area. For most people, it is a complete waste of $$, IMHO.
This has me puzzled and I my ponderance of wonder … what is the machines actual use or description of use? What is it’s advantage with the heads set up as in the video?
Since the tubes are the same wattage, what advantage is that system the way it works. Only thing I can see is reduction of the X beam travel distance, with it setup like the video.
I could see this with a ‘cut’ power/‘engrave’ power split in tubes…
Did you have a specific purpose for twin heads.?
I’m hoping to work ‘backwards’ and ascertain what may help us here.
It was not purchased by me. The person who did buy it thought it would be faster. That would be true if there was a manufacturing process where you wanted to make two of something. For normal usage, I doubt there is any value to this configuration, though I may change my mind if I can get it to work the way I hope it can.
Yes, I definitely have the second laser defined in the device setup. I also have tried to setup the cut editor in 4 different ways:
Laser 1 on (enabled off) I get nothing
Laser 1 on laser 2 off (enabled on) I still get nothing
Laser 1 off and laser 2 on (enabled on) I get a burn on the right side
Laser 1 and 2 both on. I get the same image burned on both sides.
I have my 2 laser X offset set to a positive 235mm since that is the distance between the two and the home in the upper right (since that seems to be where the laser wants to go when I hit its home button).
I have tried setting the 2nd laser offset to -235mm but that didn’t seem to work.
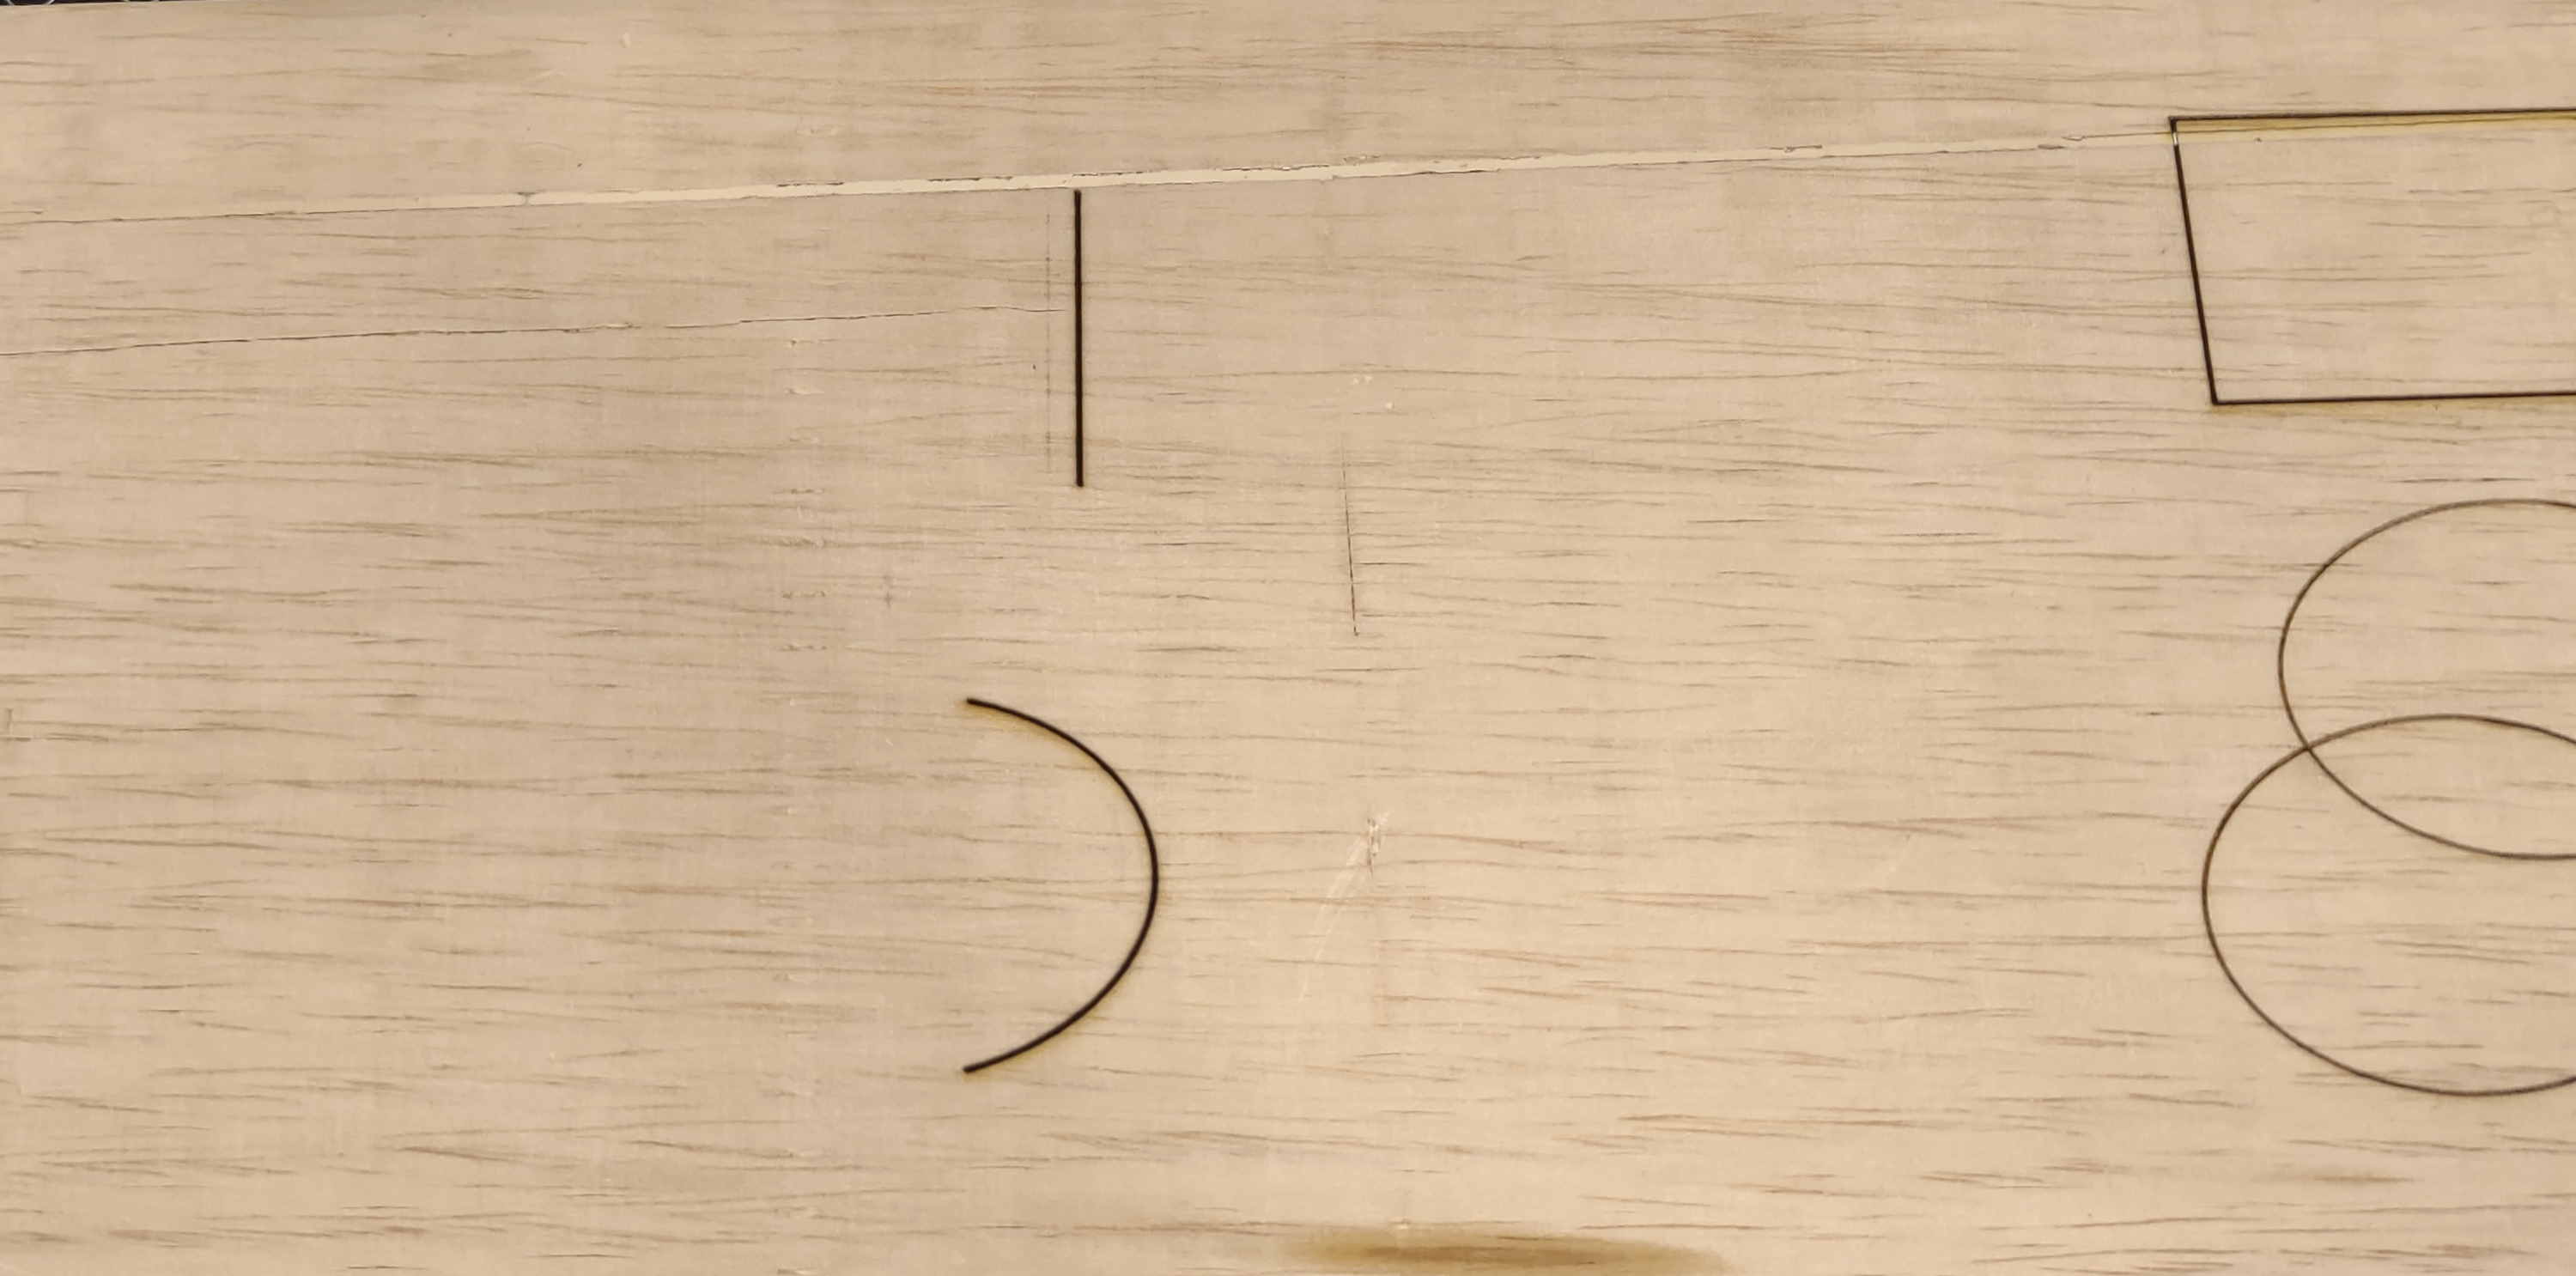
If I place a circle and a square at the midpoint, I only get the right sides:
Are you saying you were expecting to create two different designs simultaneously, one design with one laser head and another design with the other laser head?
I’m only familiar with 2 use cases for these lasers:
Use one laser head at a time, choosing the appropriate laser head based on the type of cut desired on a particular design
Use both laser heads at the same time to cut the same design simultaneously with both heads.
From the lasers I’ve seen both laser heads are attached to the same drive mechanism so would not have independent movement.
I finally figured it out. I just kept experimenting with the laser offset and the laser assigned to a layer and can now use laser 2 on the left side and laser 1 on the right side. There is an area in the middle where either laser works. This burn was done from one file and two layers.