Somewhat new to this but I am having 0 luck with dropping a photo into light burn , laser it to wood and it looks nothing like an image. Any one know any video’s that start from start to finish of laser engraving a photo with lightburn?
1 Like
Hey Mike, first of All, welcome to Lightburn.
To help you out, we need to know quite alot of things.
-
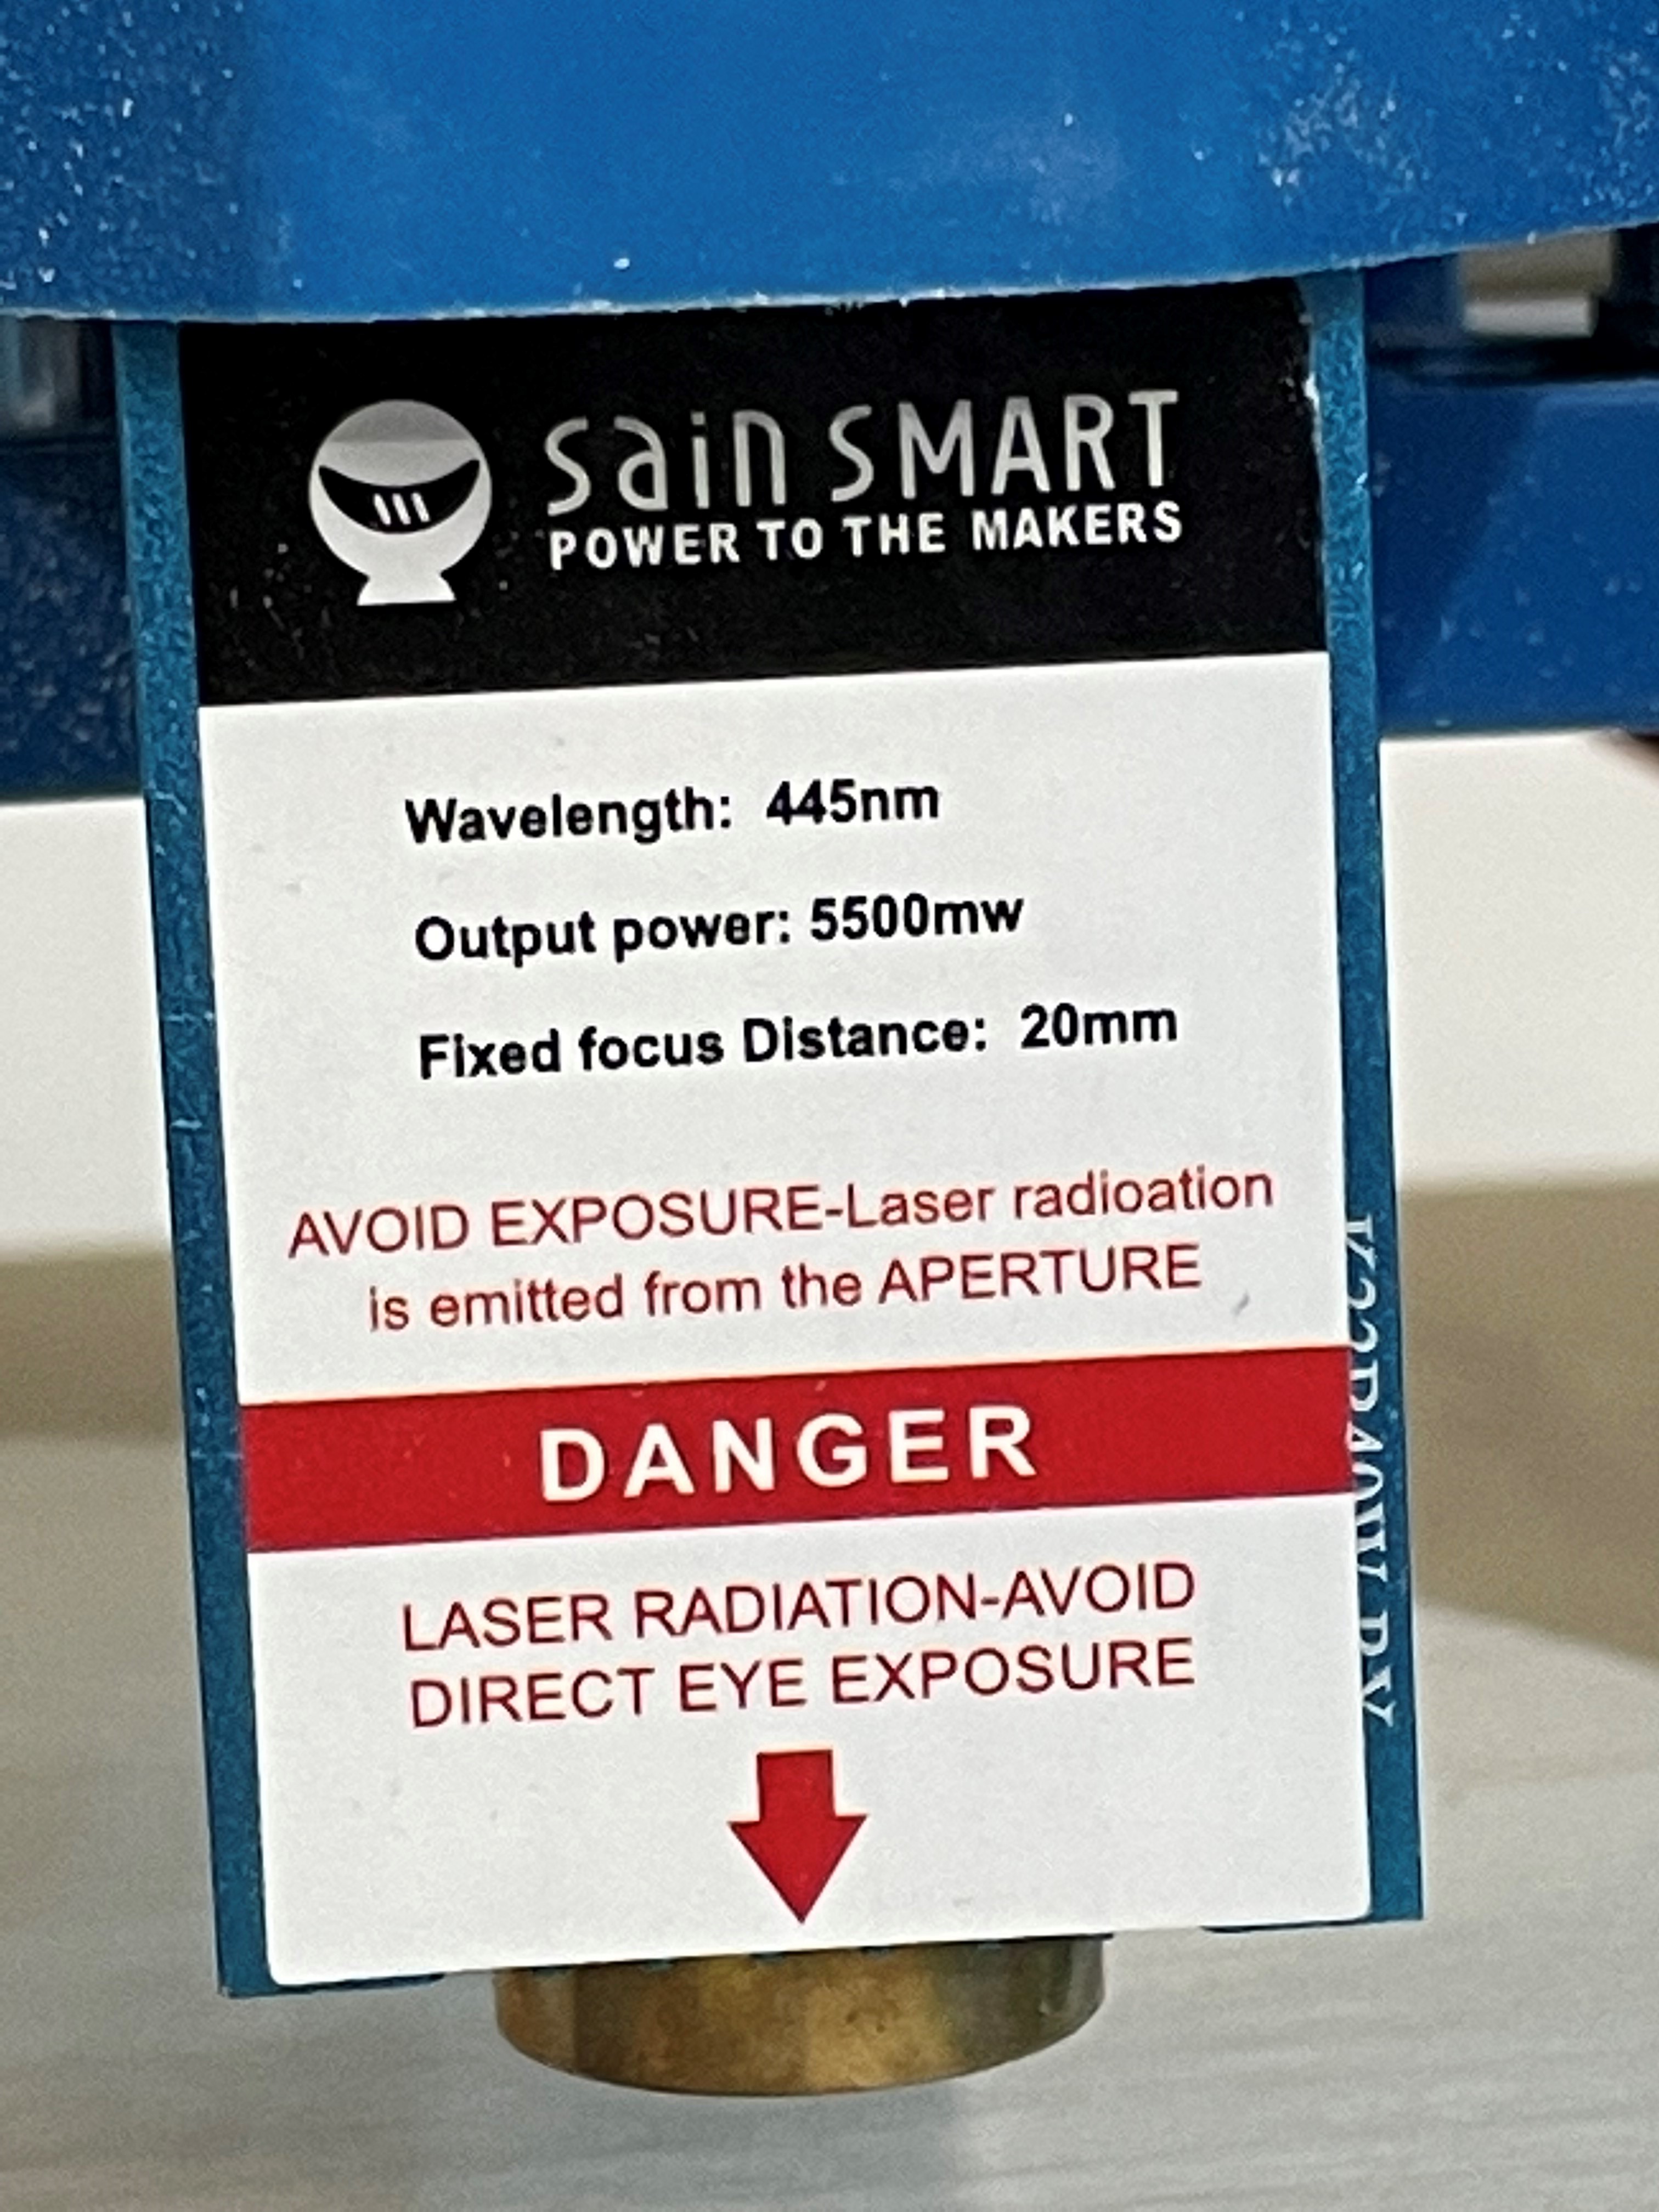
What machine are you using? CO2, or Diode?
-
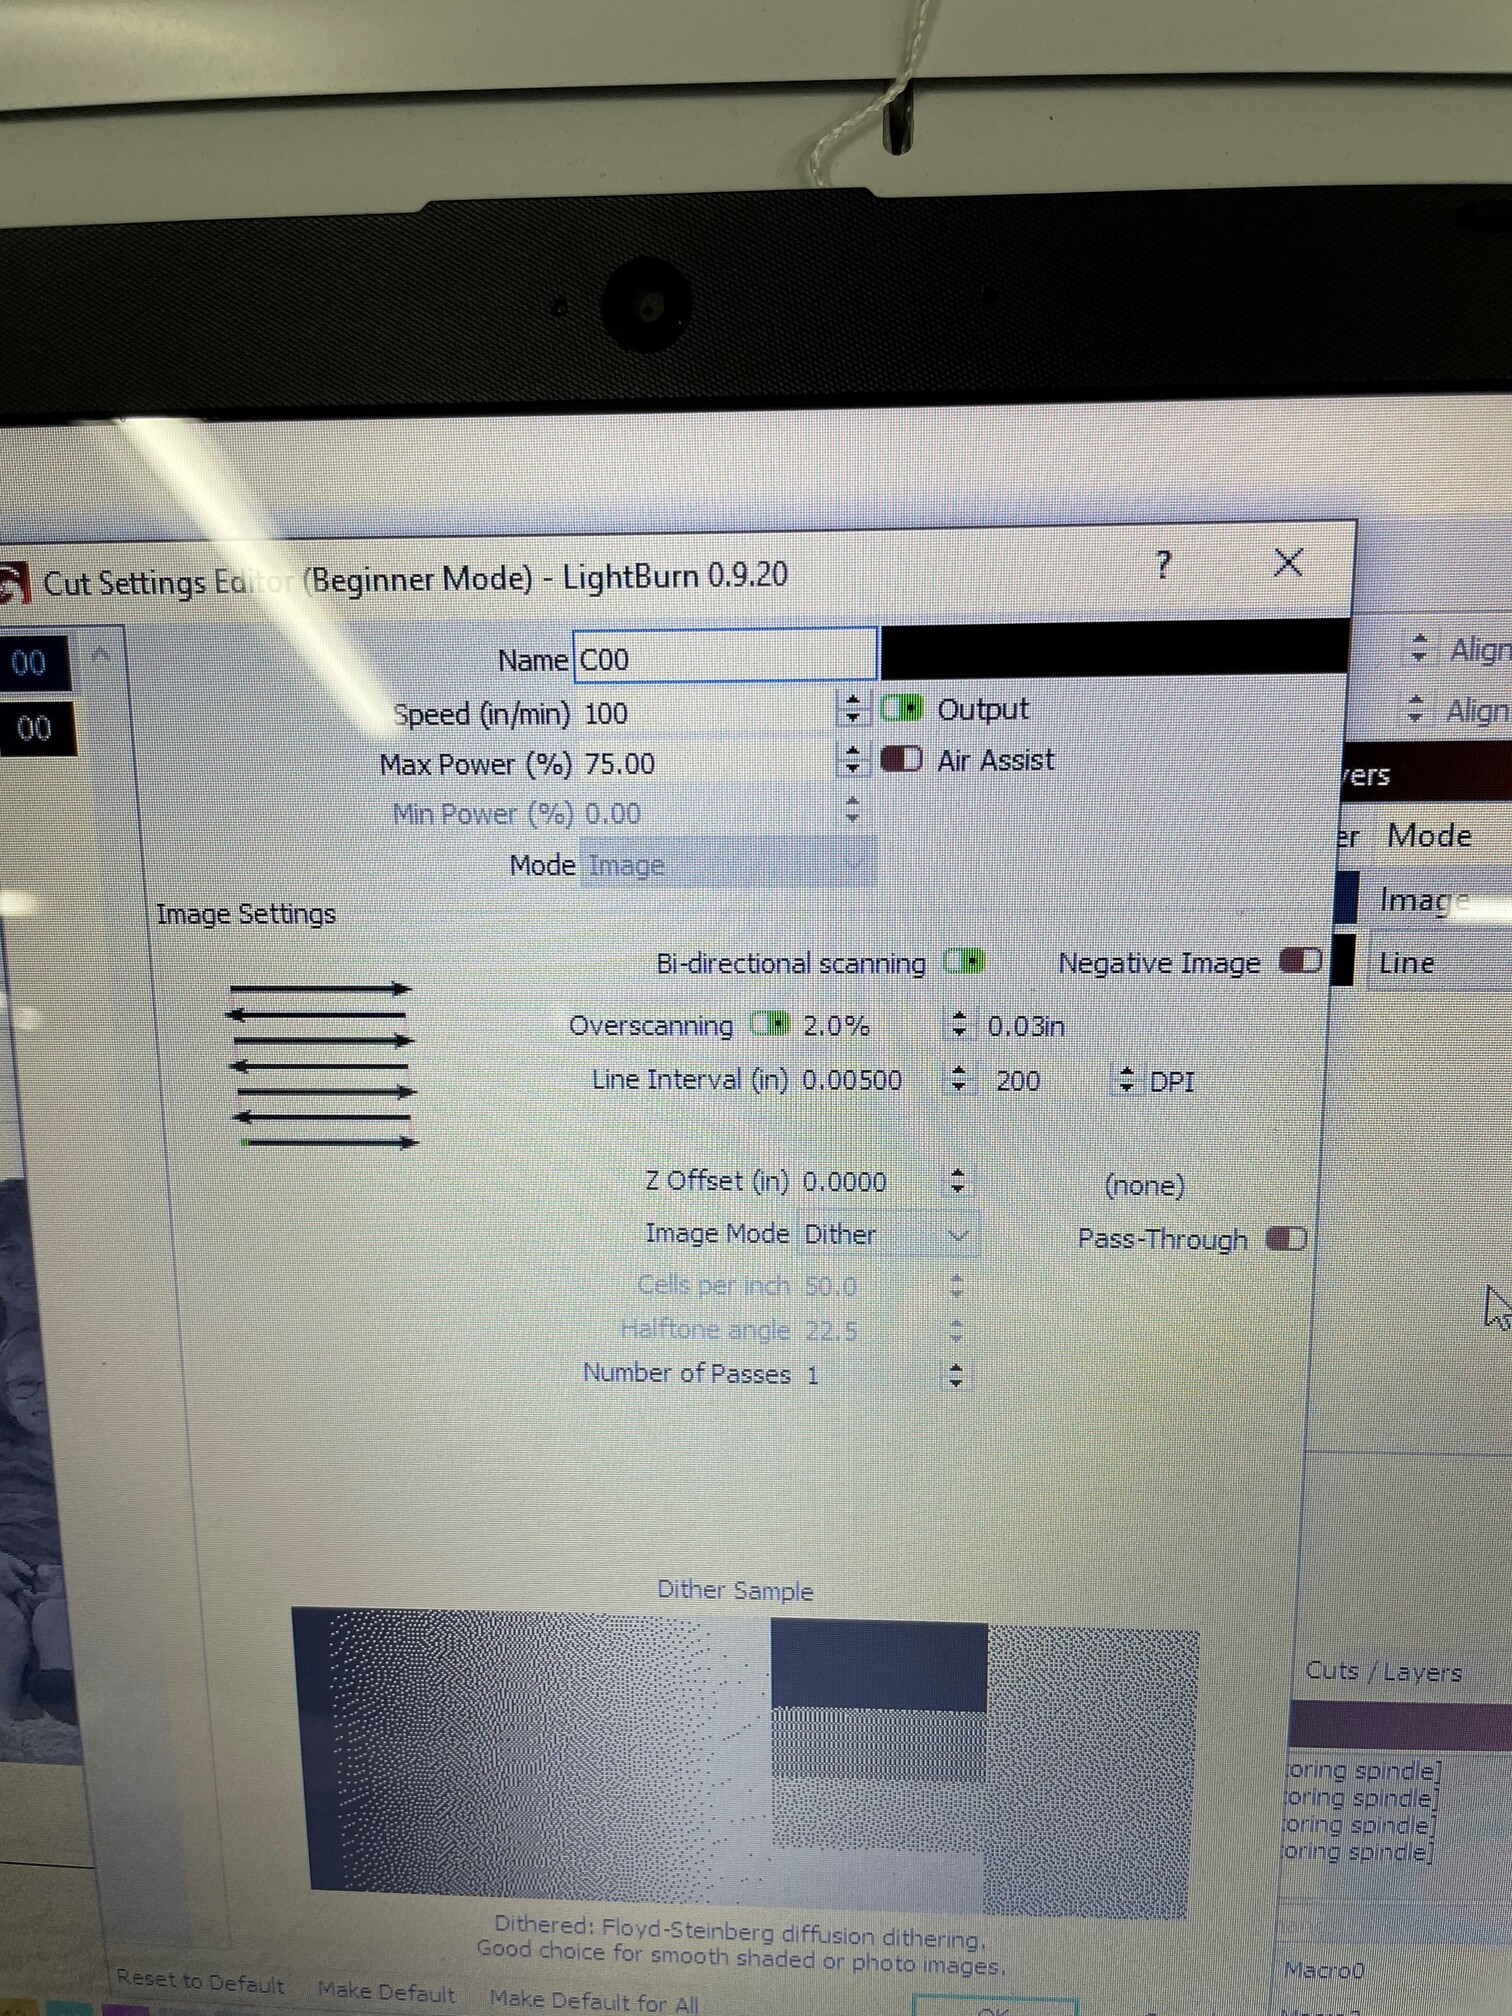
What are your settings?
-
What image are you trying to engrave?
-
What wood are you trying to engrave?
-
Is your focus set correctly?
-
Have you done the ramp test?
-
Show us some already engraved images, tell us your settings.
If those questions are answered we might can help you.
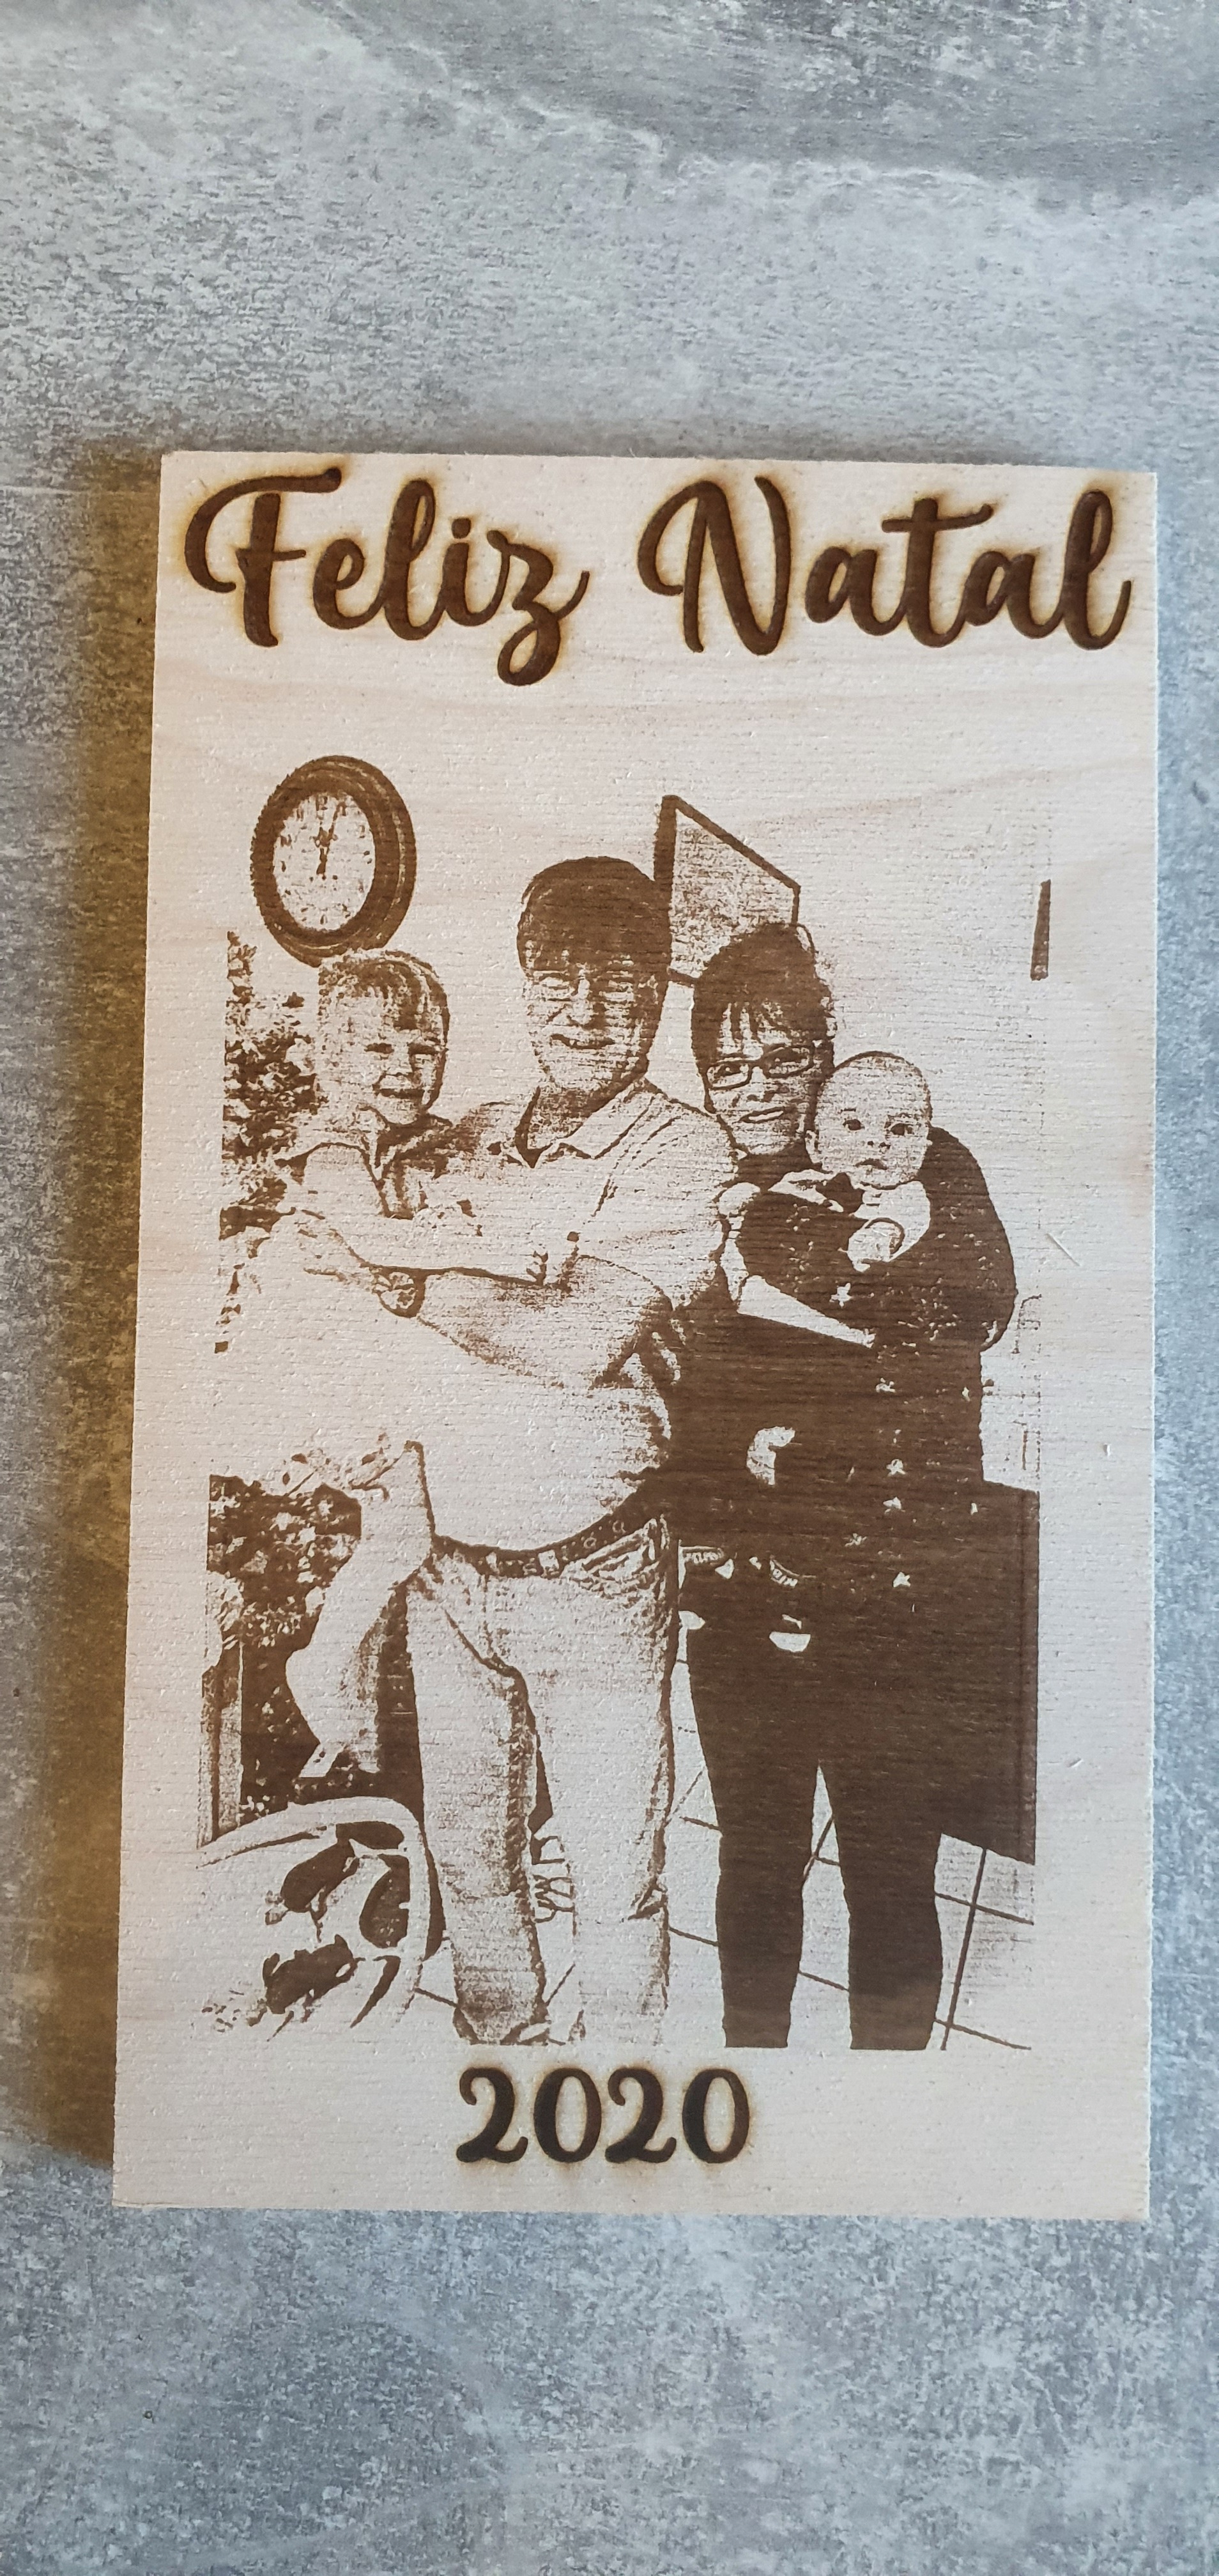
Here’s an example what I do.
Depends if customers want it sketchy or reality-based.
1 Like
This is the best video I have found Assuming it is not an untuned machine.

1 Like
ill check it out Thanks!!!
1 Like
that looks great to me. if i could get close to that i would be happy.
i will attempt another one and record all the settings you are asking and send results
Thanks!!!
This might help as well:
1 Like
makes sense i think ill give it a shot
thank you !!
any type of wood you think would be better or easier to lean on ?
1 Like
Alder and Maple both hold a nice dark burn, and have very pale grain, so they work well. Birch is a common choice, but it’s hard to get good contrast with it unless you are using a diode, or pre-treating the wood. A little baking soda mixed in water, sprayed on the wood and left to dry is a good trick for that.
1 Like
ok everyone, tried again last night and results below
maybe my laser cant do photos?
this took 5-1/2 Hrs. and looks like this. thoughts?

I do not have this type laser, but from what I see I would suggest. Change in/mm to 235 ( on my co2 machine I use 100 mm/sec) and lower max power to about 20. try it and see if that helps. Your result looks way over burnt to me.
when I first started it i had max power on 25 and let it run about 5 lines and there were no marks on the wood. In the picture they are sitting in the sand which is white so maybe I stopped it too soon? I just didn’t want to let it run for hours when it looked like it wasn’t doing anything
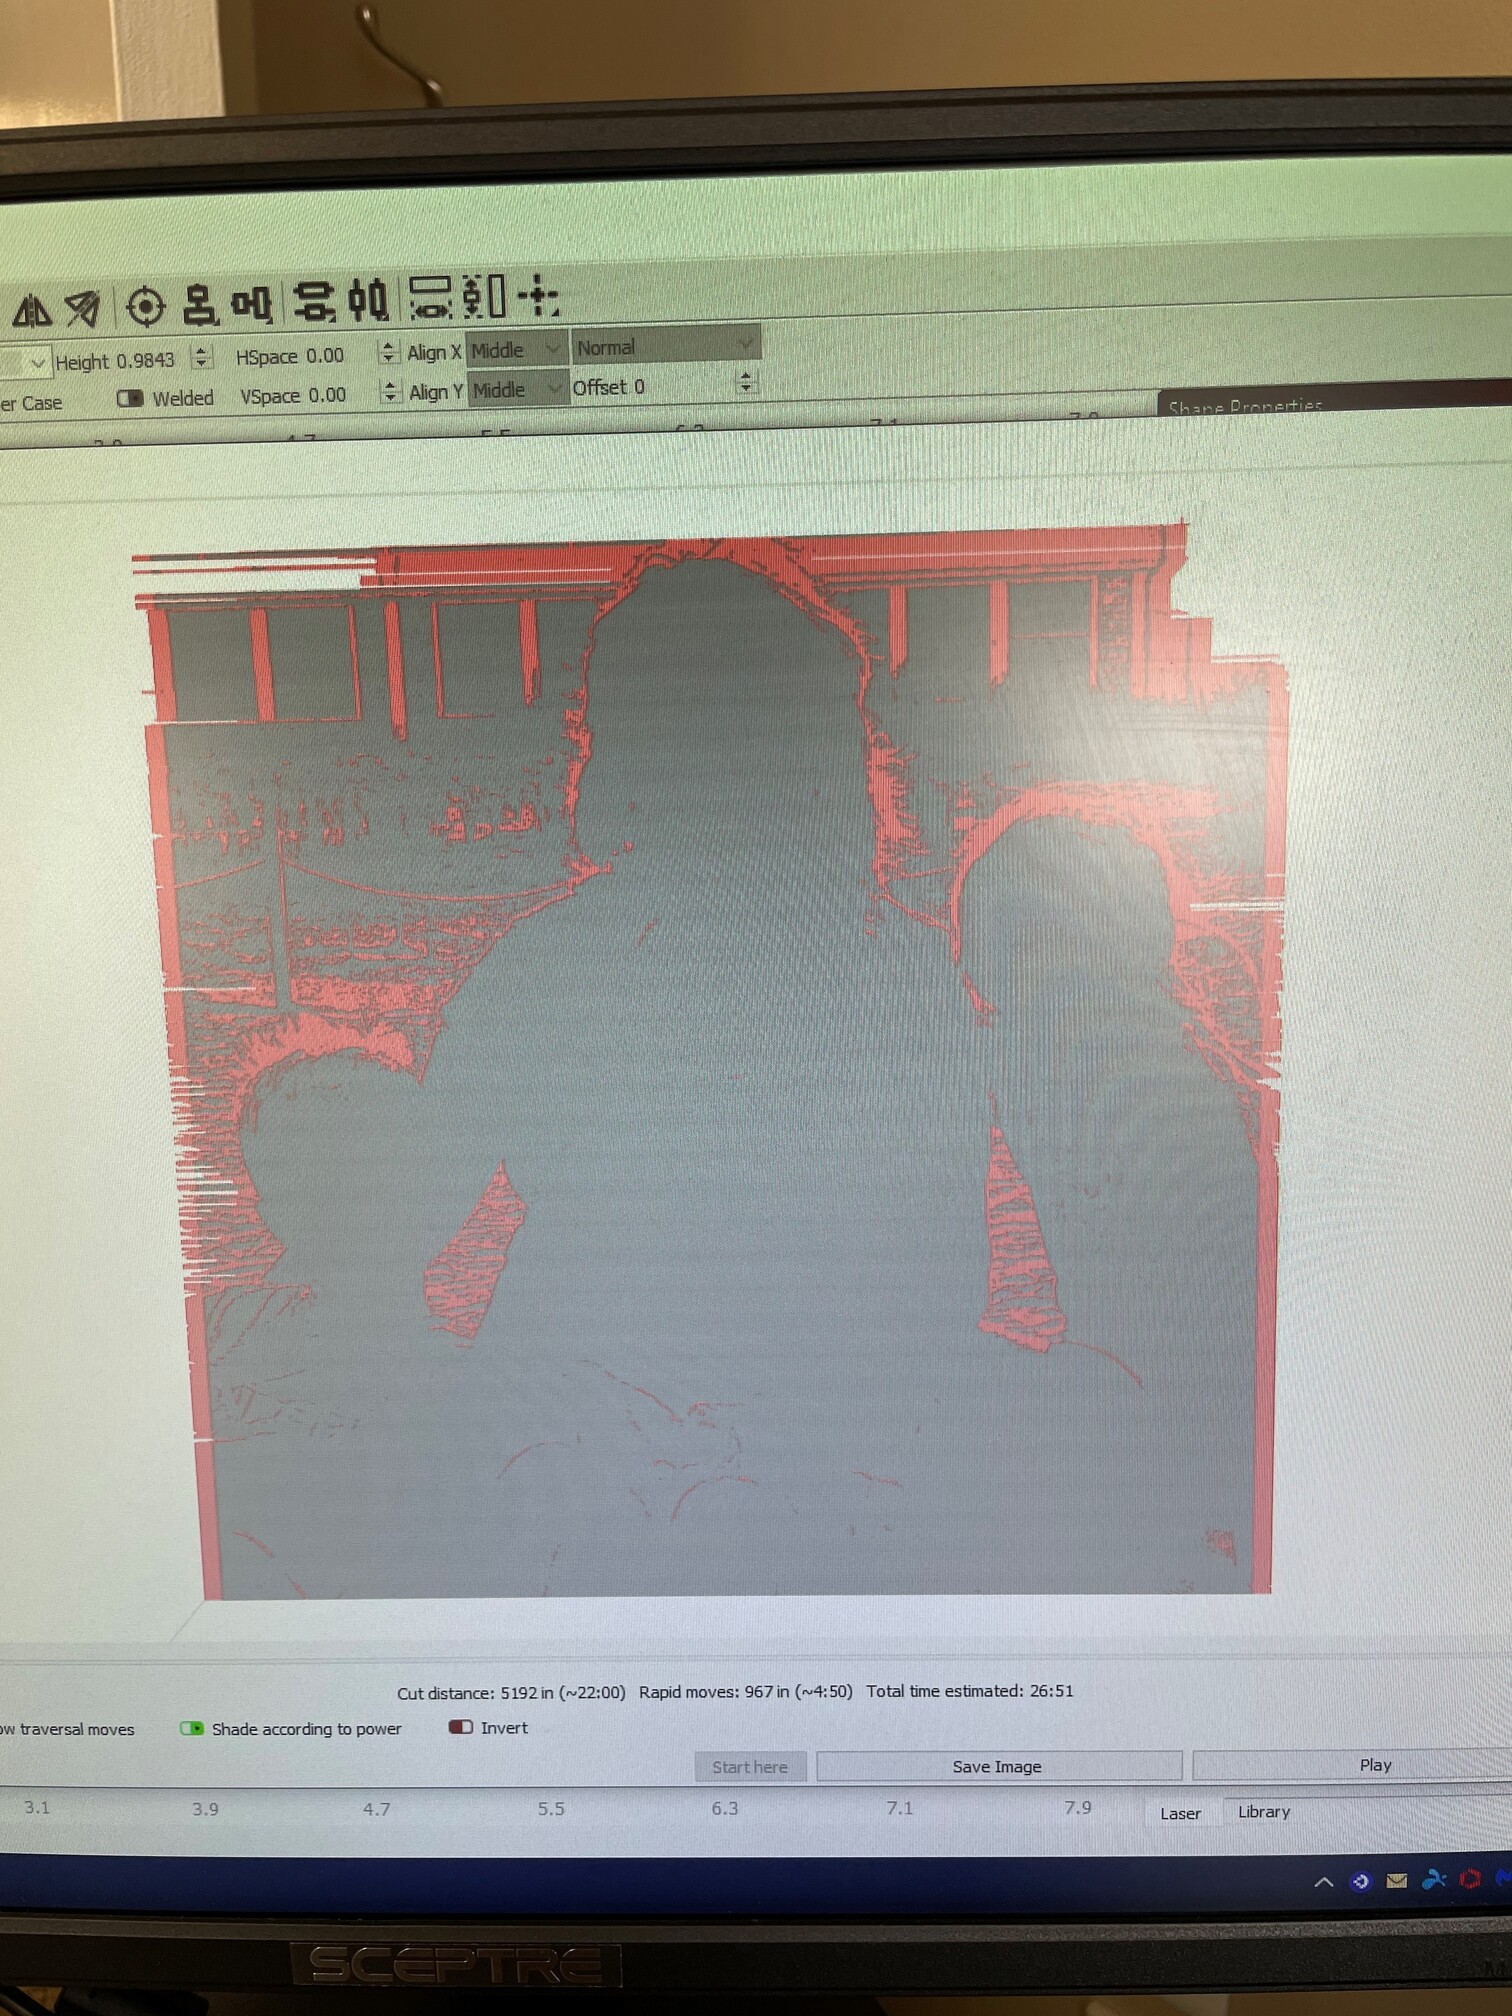
when i get the picture looking like what i think it should and click preview in lightburn, all the outlines look good but faces and clothing are black even if i zoom in
The diagonal lines through the image are the lighter parts in the wood grain. They reflect more of the diode light, and take longer to burn, so you will be fighting that as long as you’re using very light colored wood. Try selecting your image, then right-click, Show Properties, and set these values:
- Gamma : 0.8
- Contrast : 5
- Brightness : -5
- Enhance Radius : 5
- Enhance Amount : 200
Run a smaller test, like a 3" square, and see how that looks. The detail won’t be great because of the size, but it won’t take 5 hours, and will give you a good idea of whether a larger version would work.
Hi, don’t get down-hearted, had mine a month or so, been through a small forest of timber and still not getting great pictures but loving the learning 
im trying not to 
Can you attach your file here, or email to support@lightburnsoftware.com if you’d rather not post it publicly. That doesn’t look right, and it’d be easier just to check your file.
1 Like
Yes i will send to support. Sorry to be a Thorn but i appreciate your help
files were sent to support